Furniture
How To Reset A Panasonic TV Lamp
Modified: December 7, 2023
Learn how to reset the lamp on your Panasonic TV for optimal performance. Discover useful tips and tricks for maintaining furniture and prolonging its lifespan.
(Many of the links in this article redirect to a specific reviewed product. Your purchase of these products through affiliate links helps to generate commission for Storables.com, at no extra cost. Learn more)
Introduction
Welcome to our comprehensive guide on how to reset a Panasonic TV lamp. Over time, the lamp on your Panasonic TV may start to dim or flicker, affecting the overall image quality. Replacing the lamp can help restore optimal brightness and clarity to your television. In this article, we will walk you through the step-by-step process of resetting the lamp on your Panasonic TV, ensuring that you can enjoy your favorite shows and movies with vibrant colors and sharp details.
Before we begin, it is important to note that different Panasonic TV models may have slight variations in their lamp reset procedures. Therefore, it is advisable to consult the user manual specific to your TV model for precise instructions. However, the general steps outlined in this guide should give you a good starting point for resetting the lamp on your Panasonic TV.
Now, let’s dive into the process and get your Panasonic TV lamp reset!
Key Takeaways:
- Easily reset your Panasonic TV lamp by following simple step-by-step instructions, ensuring optimal brightness and clarity for an enhanced viewing experience.
- Gather the necessary tools, handle the lamp with care, and enjoy vibrant colors and sharp details with your newly reset Panasonic TV lamp.
Step 1: Gather the necessary tools and materials
Before you begin the process of resetting the lamp on your Panasonic TV, it’s essential to gather the necessary tools and materials. Here’s a list of what you’ll need:
- Screwdriver (check the user manual for the specific type required)
- Replacement lamp (make sure it is compatible with your Panasonic TV model)
- Lint-free cloth or microfiber cloth
Having these tools and materials ready will ensure a smooth and efficient lamp reset process without any unnecessary interruptions.
Once you have gathered all the necessary items, you are now ready to proceed to the next step.
Step 2: Turn off and unplug the Panasonic TV
Before working on any electronic device, it is crucial to turn it off and unplug it from the power source. This ensures your safety and prevents any damage to the TV or yourself during the lamp reset process.
Start by using the TV remote or the power button on the TV itself to turn off the Panasonic TV. Wait for the screen to go completely dark and ensure that the indicator lights on the TV are also turned off.
Next, locate the power cord at the back of the TV and carefully unplug it from the wall outlet. Double-check that the TV is no longer receiving power by attempting to turn it on again.
Taking the precaution of turning off and unplugging the TV not only ensures your safety but also prevents any potential electrical surges or short circuits while performing the lamp reset.
Once you have confirmed that the TV is turned off and unplugged, you can proceed to the next step with confidence.
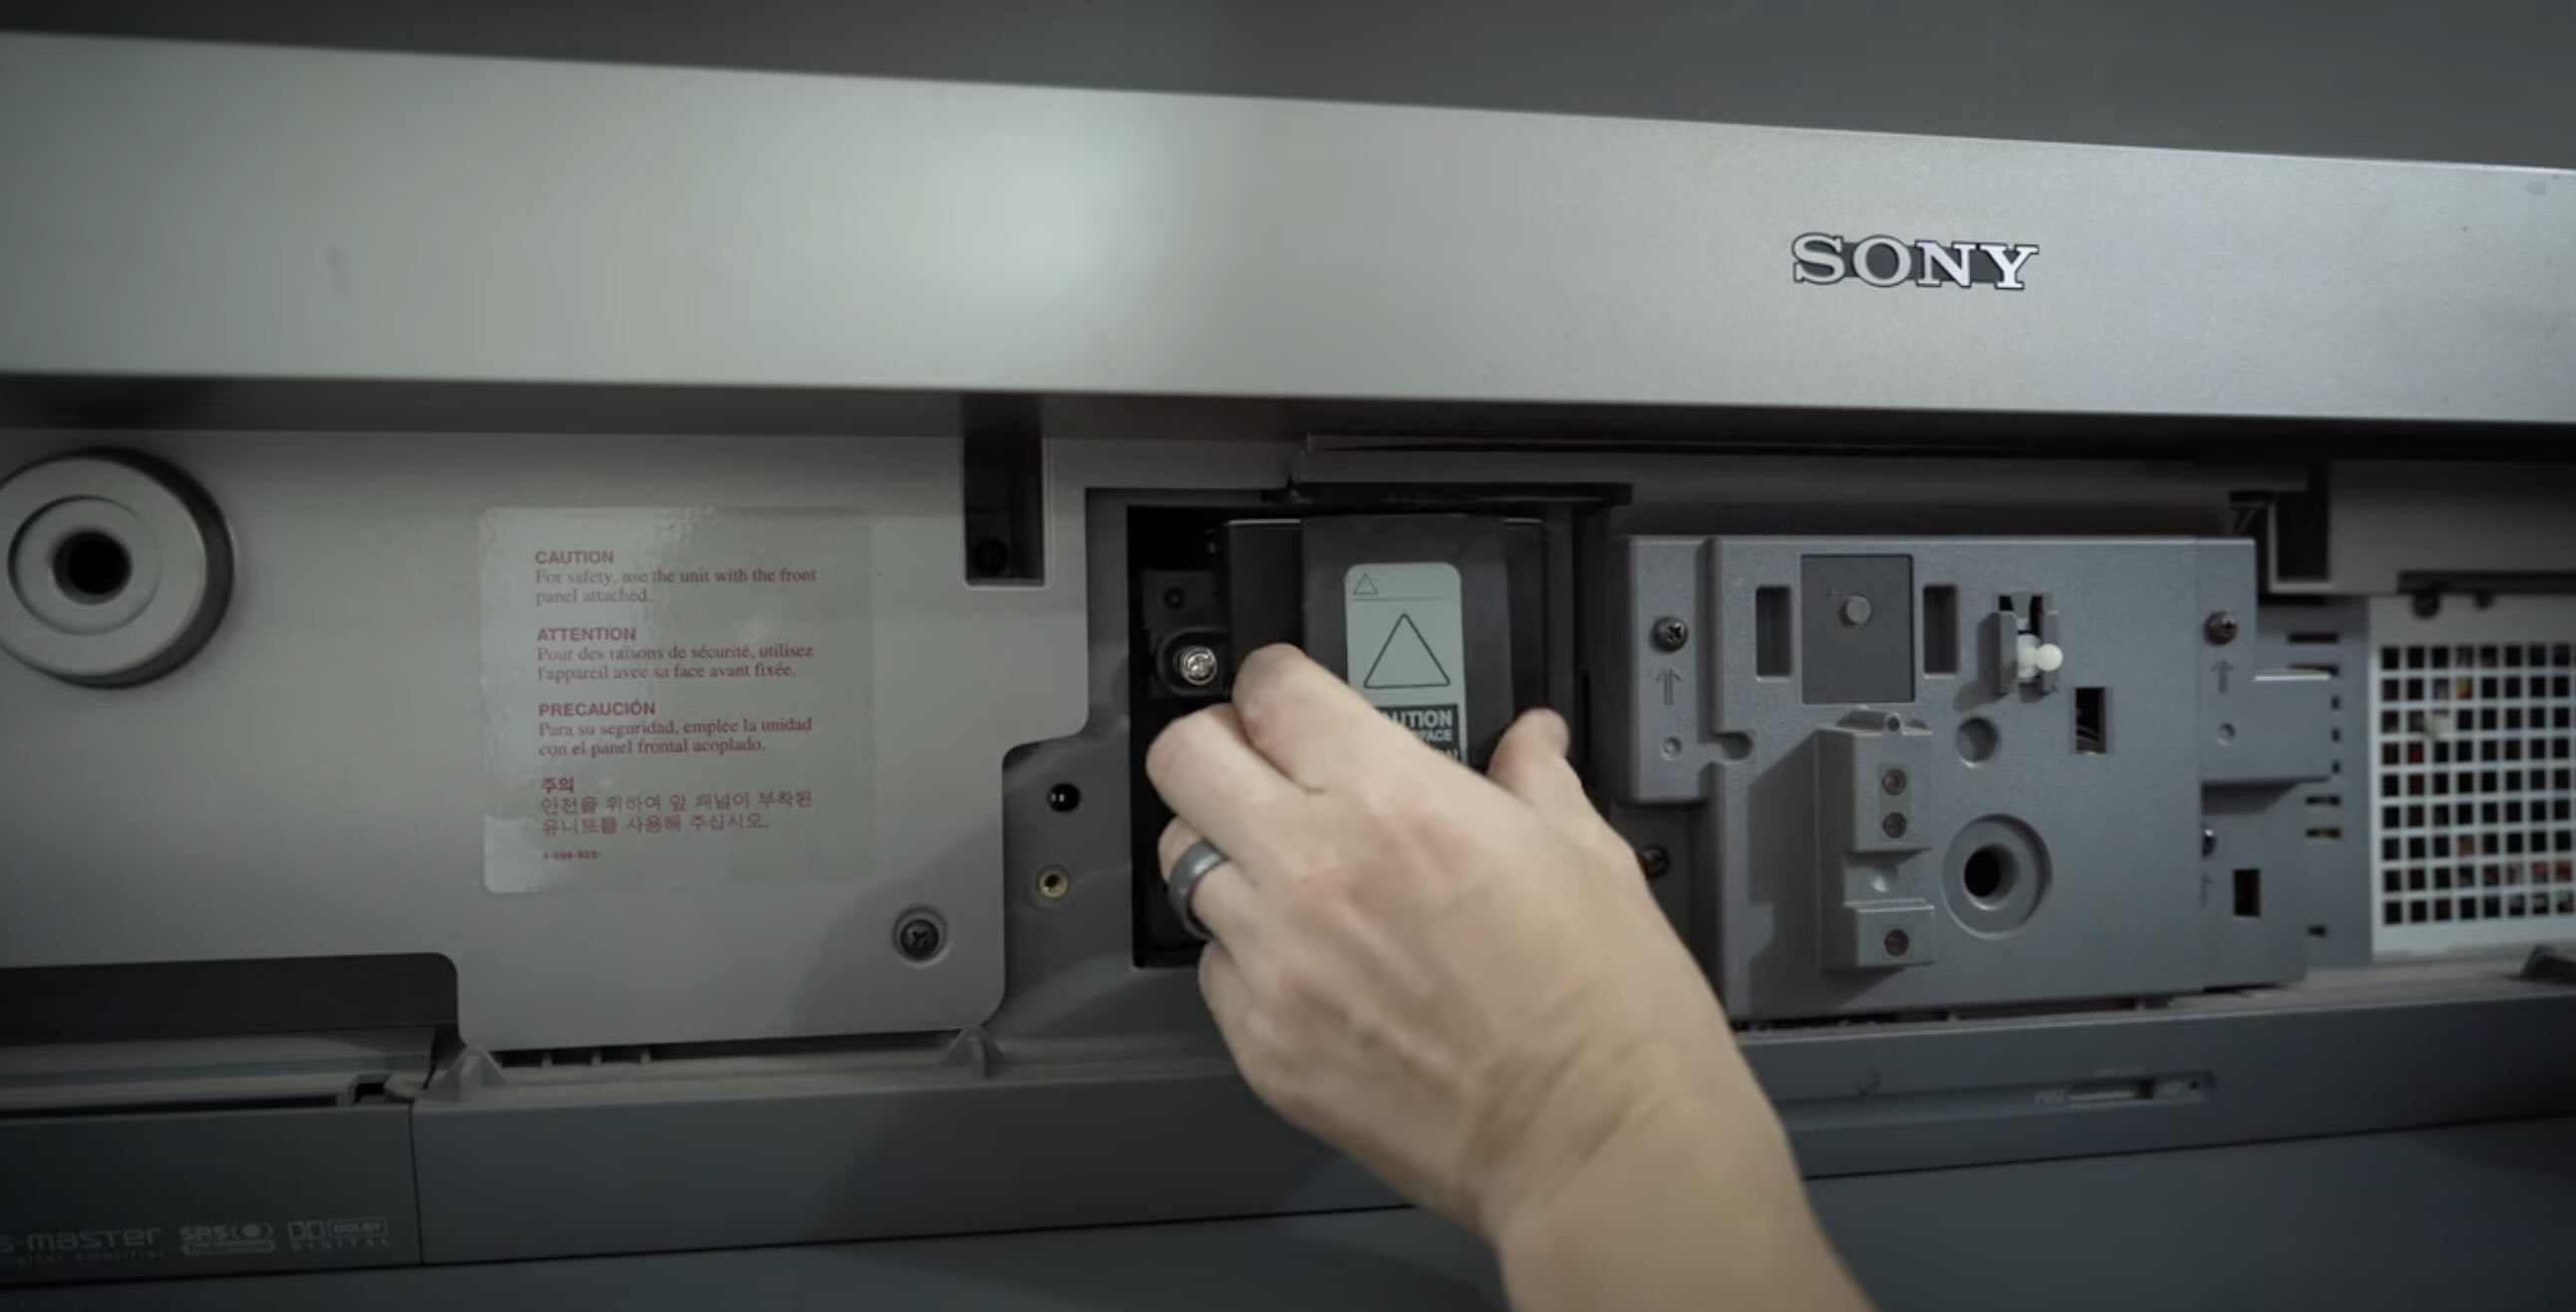
Step 3: Locate and access the lamp compartment
To reset the lamp on your Panasonic TV, you will need to locate and access the lamp compartment. The exact location of the lamp compartment may vary depending on your TV model, so it is essential to consult your user manual for specific instructions. However, here are some general guidelines to help you find the lamp compartment:
- Inspect the back or side panels of your Panasonic TV. Look for any markings, labels, or indications that point to the location of the lamp compartment.
- Once you have identified the lamp compartment, use the appropriate tool (such as a screwdriver) to remove any screws or fastenings that secure the panel.
- Gently remove the panel covering the lamp compartment to reveal the internal components of your TV.
It’s important to exercise caution and handle the TV with care as you remove the panel. Avoid using excessive force or damaging any delicate parts inside the TV.
If you are unsure about the location or access to the lamp compartment, refer to your user manual or contact Panasonic customer support for assistance. They will be able to provide you with detailed instructions specific to your TV model.
Once you have successfully located and accessed the lamp compartment, you can move on to the next step in resetting the lamp of your Panasonic TV.
Step 4: Remove the lamp cover
With the lamp compartment accessed, the next step is to remove the lamp cover. The lamp cover is designed to protect the lamp and ensure its proper functioning. Here’s how you can remove the lamp cover:
- Inspect the lamp compartment and locate the lamp cover. It is typically a small plastic or metal panel that is secured by screws or fasteners.
- Using the appropriate tool, carefully unscrew or unfasten the screws holding the lamp cover in place. Set aside the screws in a safe place to prevent losing them.
- Gently lift off the lamp cover, taking care not to touch the lamp or any other components inside the compartment.
When removing the lamp cover, be cautious of any wires or cables that may be connected to it. Take note of their positions and make a mental or physical reference to help with reassembly later.
It’s also worth mentioning that some Panasonic TV models may have a separate cover for the lamp itself. If this is the case for your TV, you will need to remove the additional cover to access the lamp.
Once the lamp cover is safely removed, you can proceed to the next step, which involves taking out the old lamp.
To reset a Panasonic TV lamp, press and hold the “Volume Down” button on the TV and the “Split” button on the remote control simultaneously for 5 seconds. This will reset the lamp timer.
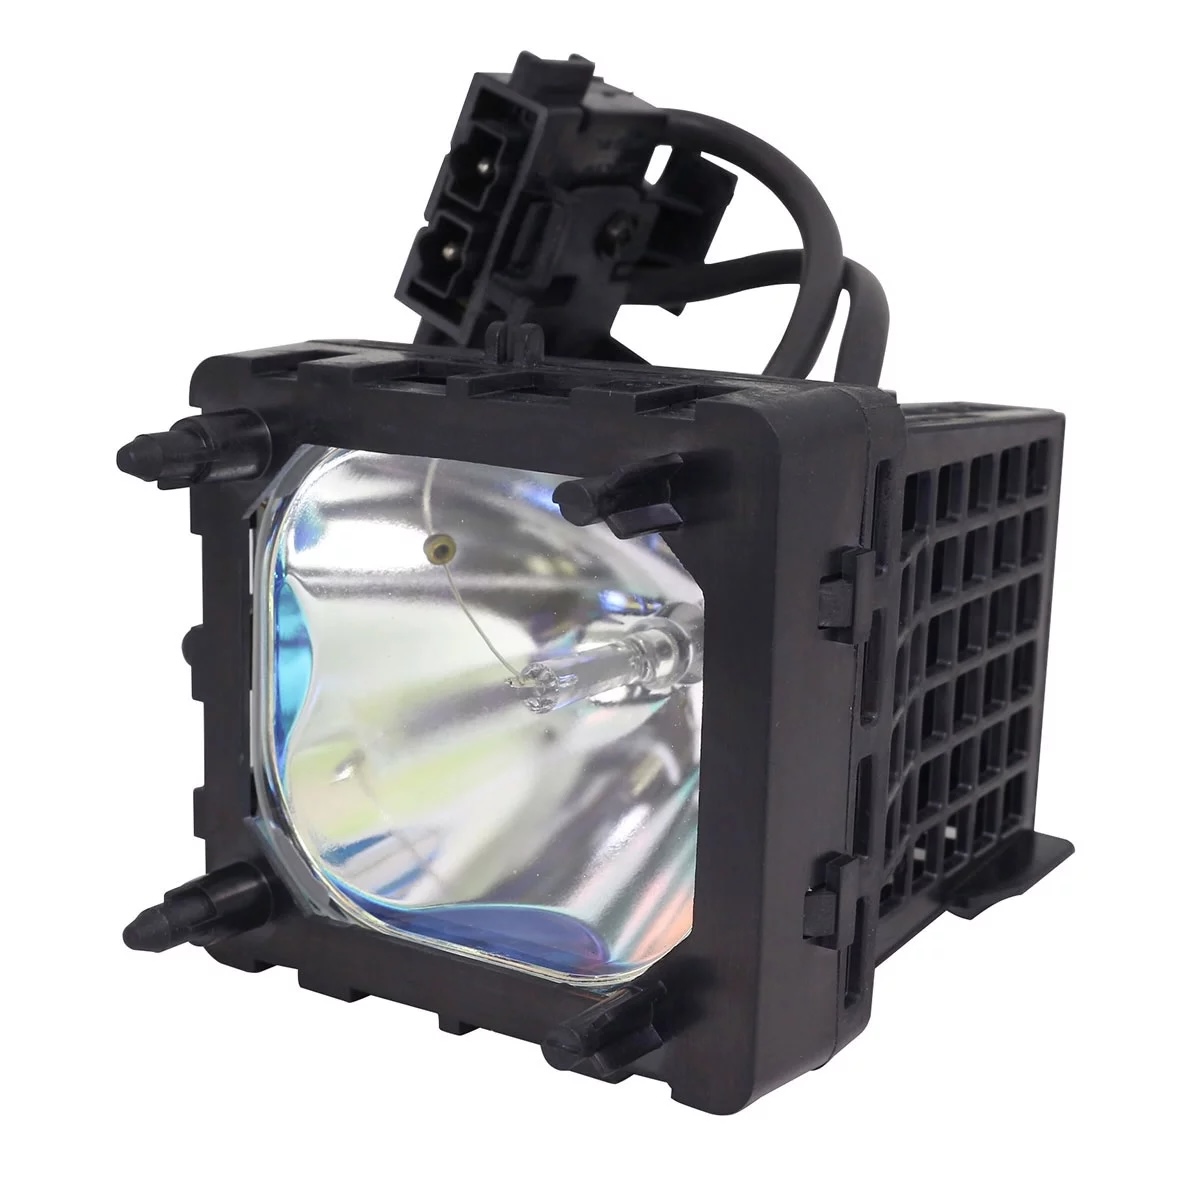
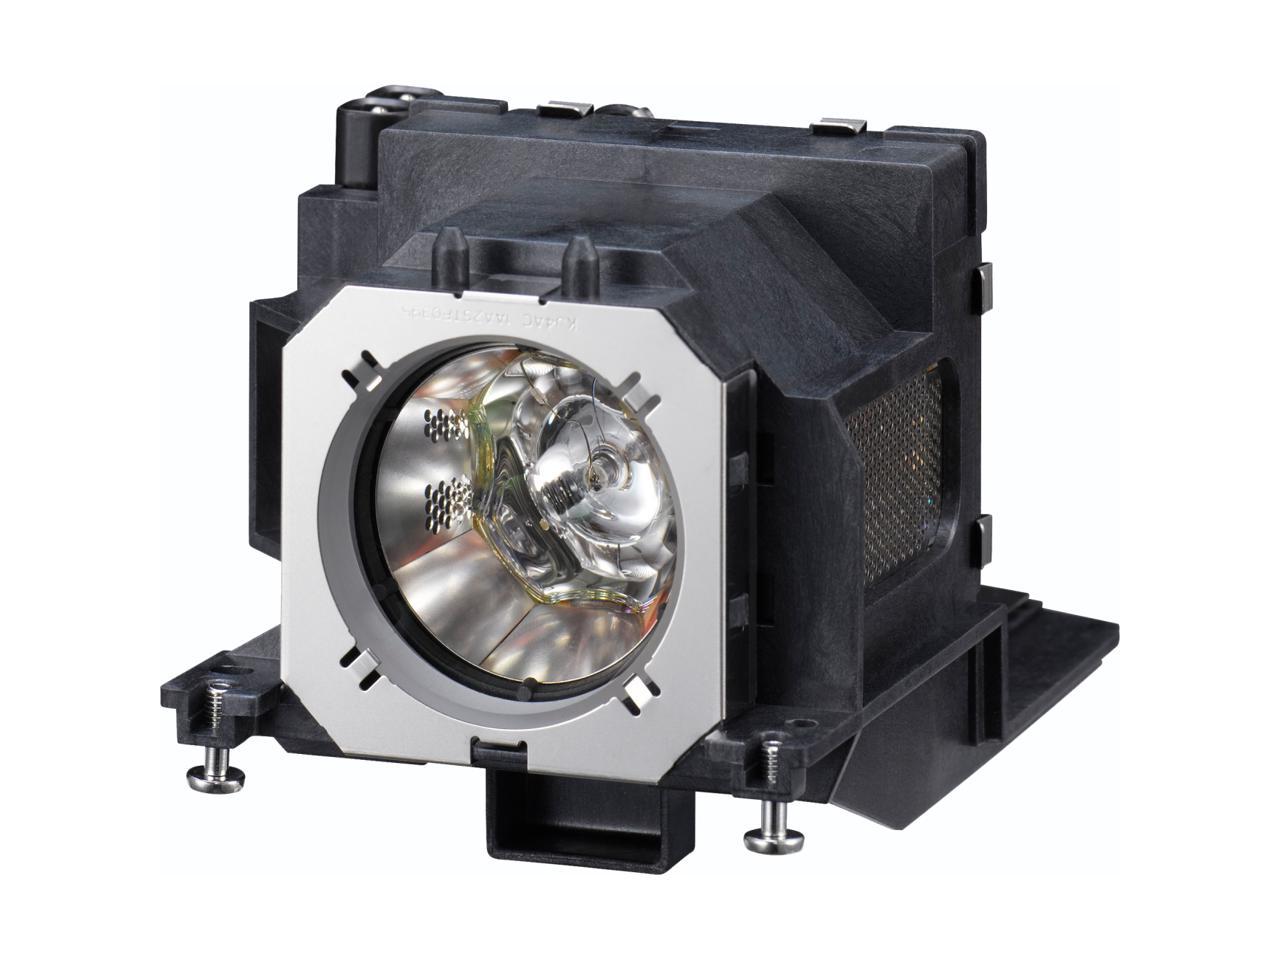
Step 5: Take out the old lamp
Now that the lamp cover has been removed, it’s time to take out the old lamp from your Panasonic TV. Follow these steps to safely remove the old lamp:
- Locate the lamp within the lamp compartment. It should be easily identifiable as a large, bulb-like structure.
- Check for any screws or fasteners that hold the lamp in place. If present, carefully unscrew or unfasten them using the appropriate tool.
- Gently grasp the lamp from its base or handle and carefully pull it straight out of the TV.
When handling the old lamp, it’s crucial to avoid touching the glass surface. Fingerprints or oily residue can affect the performance and longevity of the new lamp. Therefore, it’s advisable to use a lint-free cloth or microfiber cloth to handle the lamp, if necessary.
Set the old lamp aside in a safe place, as some recycling programs may accept used TV lamps for proper disposal.
With the old lamp removed, you’re now ready to proceed to the next step of inserting the new lamp into your Panasonic TV.
Step 6: Insert the new lamp
With the old lamp safely removed, it’s time to insert the new lamp into your Panasonic TV. Follow these steps to properly insert the new lamp:
- Take the new lamp out of its packaging and inspect it for any visible damage or defects. Ensure that it is the correct replacement lamp for your specific Panasonic TV model.
- Hold the new lamp by its base or handle, aligning it with the empty slot in the lamp compartment.
- Gently slide the new lamp into place, making sure it is securely seated in the compartment. It should fit snugly and align properly with any screw holes or connectors.
- If there are screws or fasteners that secure the lamp in place, use the appropriate tool to reattach them. Make sure they are tightened firmly but not overly tightened, as this can cause damage to the lamp or TV.
When inserting the new lamp, be cautious of any cables or wires that may need to be reconnected. Refer to your user manual or the markings inside the lamp compartment to ensure proper reconnection.
It’s important to handle the new lamp with care and avoid touching the glass surface, as this can affect its performance and lifespan. If you accidentally touch the glass, use a lint-free cloth or microfiber cloth to wipe away any fingerprints or residue.
Once the new lamp is securely inserted and any necessary connections are made, you can move on to the next step, which involves replacing the lamp cover.
Step 7: Replace the lamp cover
Now that the new lamp is securely inserted into your Panasonic TV, it’s time to replace the lamp cover. Follow these steps to ensure the lamp cover is properly reinstalled:
- Take the lamp cover that you previously removed and position it over the lamp compartment.
- Align the screw holes or fastener slots on the lamp cover with the corresponding openings on the TV.
- Using the appropriate tool, screw in or fasten the screws to secure the lamp cover in place. Ensure they are tightened sufficiently to hold the cover securely, but avoid over-tightening, as this may cause damage.
During this step, be mindful of any cables or wires that may need to be routed through the lamp cover. Make sure they are properly positioned before securing the cover.
It’s important to note that some Panasonic TV models may have multiple covers or panels that need to be reinstalled. If this is the case for your TV, repeat the same process for each cover until all the compartments are securely closed.
With the lamp cover in place, you’re almost ready to power up your TV and enjoy the benefits of the new lamp. However, before doing so, proceed to the next step to ensure a smooth restart of your Panasonic TV.
Step 8: Plug in and turn on the TV
Now that the lamp cover is securely replaced, it’s time to plug in and turn on your Panasonic TV. Follow these steps to ensure a successful restart:
- Locate the power cord that you previously unplugged from the wall outlet.
- Insert the power cord back into the wall outlet, ensuring it is fully connected.
- Take a moment to double-check that all the cables and connections are properly reconnected and secured.
- Using the TV remote or the power button on the TV itself, turn on the Panasonic TV.
Allow the TV a few moments to power up and initialize. During this time, you may see some on-screen prompts or indicators as the TV performs system checks and recognizes the new lamp.
Once the TV is fully powered on, check the screen for any abnormalities or issues. Observe the image quality, brightness, and clarity to ensure that the new lamp is functioning as expected.
If you notice any persistent issues such as flickering, dimness, or unusual colors, consult the user manual or contact Panasonic customer support for further assistance. They will be able to provide guidance and troubleshooting steps specific to your TV model.
With the TV plugged in and turned on, you can now sit back, relax, and enjoy your favorite shows and movies with the renewed brightness and clarity provided by the new lamp.
Conclusion
Congratulations! You have successfully learned how to reset the lamp on your Panasonic TV. By following the step-by-step guide outlined in this article, you were able to gather the necessary tools, turn off and unplug the TV, locate and access the lamp compartment, remove the lamp cover, take out the old lamp, insert the new lamp, replace the lamp cover, and plug in and turn on the TV.
Resetting the lamp on your Panasonic TV is a simple procedure that can greatly improve the image quality and overall viewing experience. With the new lamp in place, you should notice enhanced brightness, vibrant colors, and sharper details while enjoying your favorite content.
Remember, it is always important to consult your specific Panasonic TV model’s user manual for accurate and detailed instructions. However, the general steps provided in this guide should serve as a good foundation for resetting your Panasonic TV lamp.
If you encounter any issues or have further questions regarding the lamp reset process, do not hesitate to reach out to Panasonic customer support or consult a professional technician for assistance.
Now, sit back, relax, and enjoy your Panasonic TV with its newly reset lamp, and immerse yourself in a world of high-quality entertainment!
Frequently Asked Questions about How To Reset A Panasonic TV Lamp
Was this page helpful?
At Storables.com, we guarantee accurate and reliable information. Our content, validated by Expert Board Contributors, is crafted following stringent Editorial Policies. We're committed to providing you with well-researched, expert-backed insights for all your informational needs.