Home>Furniture>Outdoor Furniture>How To Build A Round Patio Table
Outdoor Furniture
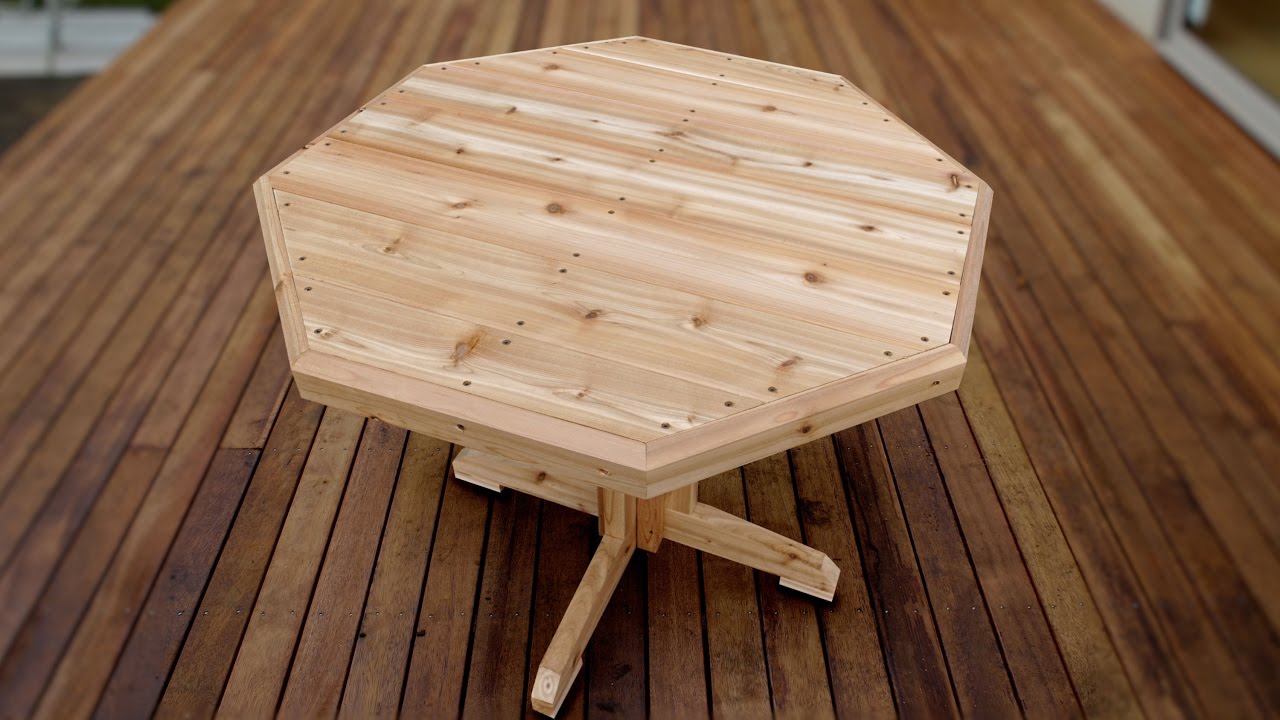
How To Build A Round Patio Table
Modified: March 7, 2024
Learn how to build a stunning round patio table for your outdoor furniture collection. Enhance your backyard space with this DIY project.
(Many of the links in this article redirect to a specific reviewed product. Your purchase of these products through affiliate links helps to generate commission for Storables.com, at no extra cost. Learn more)
Introduction
Welcome to this step-by-step guide on how to build your very own round patio table! A patio table serves as a centerpiece for outdoor gatherings, providing a space for dining, entertaining, and enjoying the great outdoors. Building your own table not only allows you to customize its size, style, and materials to suit your needs and preferences but also gives you the satisfaction of crafting a functional piece of furniture with your own hands.
Before diving into the construction process, it’s important to gather the necessary tools and materials. This ensures that you have everything at hand to complete the project smoothly. Additionally, preparing the work area is essential for a safe and efficient build. Taking the time to organize your tools and clear the space of any obstacles will make the construction process much more enjoyable.
Next, we’ll move on to cutting the tabletop and base materials. This step requires precision and accuracy to ensure that the table pieces fit together perfectly. Proper measurement and careful cutting are crucial for achieving a well-crafted final product.
Once the materials are cut, we’ll proceed to assemble the base of the table. This step involves piecing together the legs and support structures to create a sturdy foundation for the tabletop. Ensuring proper alignment and secure connections is key to the table’s stability and longevity.
With the base complete, it’s time to attach the tabletop. This step requires careful positioning and secure fastening to ensure that the tabletop is level and securely attached to the base. We’ll explore various methods of attaching the tabletop, such as using screws, brackets, or dowels, depending on your chosen design.
Once the table is assembled, we’ll move on to sanding and finishing. This step is crucial for achieving a smooth and polished surface. Sanding removes any rough edges or imperfections while finishing protects the wood from weathering and enhances its appearance.
Finally, if desired, we’ll explore optional embellishments or decorations to personalize your table and add unique flair to your outdoor space. Whether it’s adding a decorative trim, staining the wood, or applying a weather-resistant paint, these finishing touches will make your patio table stand out.
Building your own round patio table is not only a fulfilling project but also a cost-effective alternative to purchasing a pre-made table. It allows you to unleash your creativity and create a piece that perfectly suits your outdoor space. So, let’s gather our tools and materials and get ready for an enjoyable and rewarding building experience!
Key Takeaways:
- Building a round patio table allows you to customize its size, style, and materials to suit your outdoor space. It’s a fulfilling and cost-effective project that unleashes your creativity and craftsmanship.
- Proper preparation, precision in cutting and assembly, and optional embellishments personalize your patio table. Enjoy the satisfaction of creating a functional and visually appealing centerpiece for outdoor gatherings.
Read more: How To Build A Round Coffee Table
Step 1: Gather the necessary tools and materials
Before starting the construction of your round patio table, it’s important to gather all the tools and materials you’ll need. Having everything ready and within reach will make the building process more efficient and enjoyable. Here’s a list of the essential tools and materials:
1. Wood: Choose a sturdy and weather-resistant wood species such as cedar, teak, or redwood for the tabletop and base. Make sure the wood is kiln-dried or properly treated to withstand outdoor conditions.
2. Measuring Tape: Accurate measurements are crucial for cutting the materials to the correct size. A measuring tape with clear markings will be your go-to tool for this project.
3. Circular Saw: A circular saw is essential for cutting the wood to the desired dimensions. Ensure that the saw blade is suitable for cutting wood and that you have extra blades on hand.
4. Drill: A power drill equipped with drill bits of various sizes is necessary for drilling holes and screwing in fasteners.
5. Screws: Choose corrosion-resistant screws that are appropriate in length for securing the tabletop and attaching the base components. Galvanized screws or stainless steel screws are ideal for outdoor use.
6. Screwdriver or Screwdriver Bits: Make sure you have the appropriate screwdriver or screwdriver bits that fit the screws you’ve chosen. This will make driving the screws into the wood much easier.
7. Clamps: Clamps are invaluable for securing the wood pieces together during assembly and gluing. Choose clamps of various sizes to accommodate different parts of the table.
8. Sandpaper: Sandpaper in various grits, such as coarse, medium, and fine, will be used for sanding the wood surfaces to achieve a smooth finish. It’s recommended to have a sanding block or electric sander for easier sanding.
9. Safety Equipment: Safety should be a priority. Make sure to have safety goggles, ear protection, and a dust mask to protect your eyes, ears, and lungs during the construction process.
10. Wood Glue: A strong wood glue is essential for securing joints and adding strength to the table. Look for a waterproof wood glue that dries clear.
11. Level: A level ensures that the table is balanced and stable. Make sure you have a level on hand to check the tabletop and base alignment.
12. Paint or Stain (optional): If you plan to paint or stain your patio table, gather the appropriate paint or stain and brushes. Ensure that the products are designed for exterior use and can withstand the elements.
Take some time to gather all the necessary tools and materials before you begin the construction process. This will save you time and frustration later on. Once you’ve gathered everything, you’re ready to move on to the next step: preparing the work area.
Step 2: Prepare the work area
Before diving into the construction of your round patio table, it’s essential to prepare your work area properly. A well-organized and clear space will ensure safety, efficiency, and a more enjoyable building experience. Here are some steps to follow to get your work area ready:
1. Clear the space: Start by clearing the area where you plan to build your patio table. Remove any clutter, obstacles, or debris that might hinder your movement or pose a safety hazard. This includes furniture, planters, tools, and any other items that may be in the way.
2. Level the ground: It’s important to have a level and stable surface to work on. If your work area is on an uneven surface, use a shovel or a rake to level the ground. This will help ensure that your table is balanced and stable once it’s assembled.
3. Provide adequate ventilation: If you’re working in an enclosed space such as a garage or workshop, make sure to open windows or use fans to provide proper ventilation. This will help dissipate any fumes from paints, stains, or adhesive products you might be using.
4. Set up a workbench: If you have a suitable workbench, set it up in your work area. A workbench provides a stable surface for measuring, cutting, and assembling the table components. If you don’t have a workbench, consider using sawhorses or a sturdy table to support your materials.
5. Organize your tools: Arrange your tools in a systematic and easily accessible manner. Use tool racks, pegboards, or toolboxes to keep everything organized and within reach. This will save you time and frustration when you need a specific tool during the construction process.
6. Lay out the materials: Lay out your wood materials in the work area, making sure you have enough space to work on each component of the table. This will give you a clear visual of the materials you have and help you plan the cutting and assembly process more efficiently.
7. Set up a dust collection system: Woodworking can create a lot of dust, especially when cutting and sanding. Consider setting up a dust collection system or using a shop vacuum to minimize the amount of dust in the air and maintain a cleaner work environment.
8. Ensure proper lighting: Good lighting is crucial for accurate measurements, cuts, and assembly. Make sure your work area is well-lit, either with natural light or by using adequate artificial lighting, such as work lights or overhead lights.
9. Put on safety gear: Before you start working, put on the necessary safety gear, including safety goggles, ear protection, and a dust mask. This will protect your eyes, ears, and respiratory system from any potential hazards.
By preparing your work area properly, you create an environment that promotes safety, organization, and efficiency. Taking the time to clear the space, set up a workbench, organize your tools, and ensure adequate ventilation will set you up for a successful construction process. Once your work area is ready, you’re all set to move on to the next step: cutting the tabletop and base materials.
Step 3: Cut the tabletop and base materials
Now that you have your work area prepared, it’s time to move on to the next step: cutting the tabletop and base materials for your round patio table. This step requires precision and accuracy to ensure that the pieces fit together seamlessly. Here’s how to proceed:
1. Measure and mark: Take accurate measurements of the wood materials for the tabletop and base using a measuring tape. Use a pencil to mark the dimensions directly on the wood, making sure to mark the top surface to avoid confusion during the cutting process.
2. Set up the saw: If you’re using a circular saw, adjust the depth of the blade according to the thickness of the wood to avoid cutting too deep. Ensure that the saw blade is sharp and in good condition for clean and precise cuts.
3. Cut the tabletop: Begin by cutting the tabletop material according to the measurements and markings you made earlier. It’s best to cut slightly larger than the desired dimensions to allow for sanding and fine-tuning later on. Take your time and make steady, controlled cuts to ensure clean and straight edges.
4. Cut the base components: Once the tabletop is cut, move on to cutting the base components. The base may consist of legs, support beams, and any additional structural elements. Again, refer to your measurements and markings to guide your cuts.
5. Double-check the cuts: After completing the cuts, double-check the dimensions of each piece to ensure accuracy. Use a measuring tape to verify that the lengths and widths of the tabletop and base components match your intended design.
6. Sand the cut edges: After cutting the wood pieces, it’s essential to sand the cut edges to remove any roughness or splinters. Use sandpaper with a medium or fine grit to smooth out the surfaces and create a clean and polished appearance.
7. Label the pieces: To avoid confusion during the assembly process, label each cut piece with a pencil or painter’s tape. Mark each piece with a corresponding number or letter to indicate its position in the final assembly.
Remember to take your time during the cutting process and prioritize accuracy over speed. Measure twice and cut once to ensure that your wood pieces fit together perfectly. It’s also a good idea to have spare wood available in case any mistakes are made or if adjustments need to be made later on.
With the tabletop and base materials cut and prepared, you’re ready to move on to the next step: assembling the base of your round patio table.
Step 4: Assemble the base of the table
With the tabletop and base materials cut to the proper dimensions, it’s time to move on to assembling the base of your round patio table. Proper assembly ensures a sturdy and stable foundation for the tabletop. Follow these steps to assemble the base:
1. Lay out the base components: Begin by laying out all the base components in the correct order according to your design plan. This will give you a visual reference and help you organize the assembly process.
2. Attach the legs: Start by attaching the legs to the support beams. Apply a small amount of wood glue to the joints and use clamps to hold the pieces together securely. Then, drill pilot holes through the legs into the support beams and fasten them with screws. Repeat this step for each leg of the table.
3. Attach the additional support beams: If your design includes additional support beams, attach them to the legs using the same process as step 2. These support beams provide added stability and strength to the base structure.
4. Check for levelness: Once the legs and support beams are attached, use a level to ensure that the base is level in all directions. Adjust the leg lengths as necessary to achieve a level base. This step is crucial for the overall stability of the patio table.
5. Reinforce the joints: To further strengthen the joints, you can add additional screws or brackets at the connection points of the legs and support beams. This will provide extra stability and prevent wobbling or wiggling of the table base.
6. Allow the glue to dry: If you’ve used wood glue in the assembly, allow sufficient time for the glue to dry and bond the joints properly. Follow the manufacturer’s instructions for the recommended drying time. This step ensures the strongest possible connection between the wooden components.
7. Remove clamps: Once the glue has dried, remove the clamps from the base. Make sure that all connections are secure and tight. If any screws appear loose, tighten them as needed.
8. Test stability: Test the stability of the base by gently pushing and wiggling the table. It should feel solid and stable, with no wobbling or shaking. If any adjustments are needed, make them before proceeding.
By following these steps, you’ll assemble a sturdy and stable base for your round patio table. Take your time to ensure that all connections are secure and level. Once the base is assembled, you’re ready to move on to the next step: attaching the tabletop.
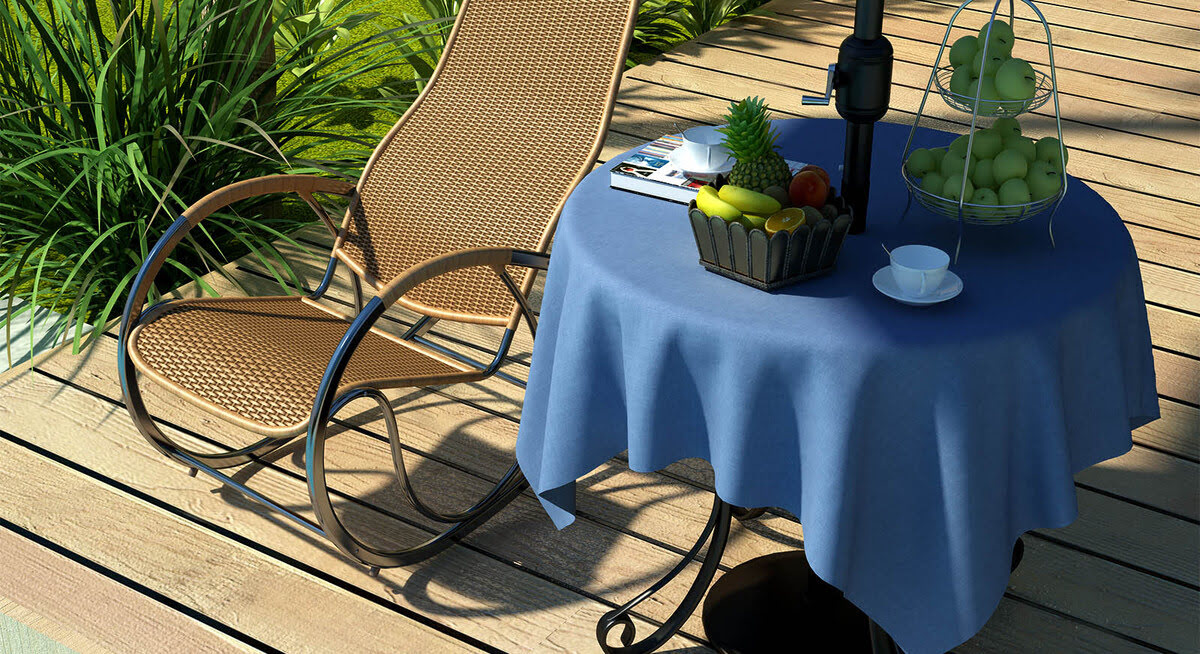
When building a round patio table, make sure to use weather-resistant materials like cedar or teak. Also, consider adding an umbrella hole for shade on sunny days.
Read more: How To Make A Round Stone Patio
Step 5: Attach the tabletop to the base
With the base of your round patio table assembled, it’s time to move on to attaching the tabletop. This step requires careful positioning and secure fastening to ensure that the tabletop is level and securely attached to the base. Follow these steps to attach the tabletop:
1. Position the tabletop: Place the tabletop upside down on a clean and flat surface. Position it in the desired location on top of the base. Make sure it is centered and aligns properly with the edges of the base.
2. Mark the attachment points: Use a pencil or a marker to mark the attachment points on the base where the screws will be placed. Mark at least four points, evenly spaced around the perimeter of the tabletop, to ensure a secure attachment.
3. Pre-drill pilot holes: Using a drill with a drill bit slightly smaller than the screws you’ll be using, pre-drill pilot holes on the marked attachment points. This will prevent the wood from splitting when you drive in the screws.
4. Attach the tabletop: Align the pre-drilled holes on the base with the pilot holes on the underside of the tabletop. Start by driving screws into the holes, securing the tabletop to the base. Work your way around, alternating between opposite sides to ensure an even and balanced attachment.
5. Check for levelness: Once the screws are in place, use a level to double-check that the tabletop is level and balanced. Adjust the screws as needed to achieve a level surface. This step is important for the functionality and aesthetics of the table.
6. Secure all screws: After ensuring the tabletop is level, continue driving in all the screws until they are fully secured. Take care not to over-tighten, as this may cause the wood to split or warp.
7. Test stability: Test the stability of the table by gently pushing and applying light pressure on the tabletop from various angles. It should feel solid and secure, with no wobbling or movement. If any adjustments are needed, tighten the screws accordingly.
8. Trim or sand excess: If necessary, trim or sand any excess wood or uneven edges to ensure a clean and polished appearance. Pay attention to any rough spots that may cause splinters and make sure to smooth them out.
By following these steps, you’ll successfully attach the tabletop to the base of your round patio table. Ensure that the attachment is secure and level, as this will contribute to the overall stability and functionality of the table. With the tabletop securely attached, you’re now ready to move on to the next step: sanding and finishing the table.
Step 6: Sand and finish the table
After attaching the tabletop to the base of your round patio table, it’s time to focus on sanding and finishing the table. This step is crucial for achieving a smooth and polished surface while protecting the wood from weathering. Follow these steps to sand and finish your table:
1. Prepare the workspace: Set up a clean and well-ventilated area for sanding and finishing. Lay down protective sheets or plastic to prevent any damage to your work surface.
2. Start with coarse-grit sandpaper: Begin by using a medium or coarse-grit sandpaper to remove any roughness or imperfections on the tabletop and base. Sand in the direction of the grain, applying even pressure. This will help smooth out the wood and prepare it for a finer finish.
3. Gradually move to finer-grit sandpaper: Progressively switch to finer-grit sandpaper, such as medium and then fine, to achieve a smoother surface. Repeat the sanding process, always following the direction of the wood grain, until the wood feels smooth to the touch.
4. Round the edges (optional): If desired, use sandpaper or a router to round off the edges of the tabletop and base. This step can give a more finished and polished look to the table.
5. Remove dust: After sanding, use a clean cloth or a vacuum with a brush attachment to remove any dust or debris from the wood surface. It’s crucial to have a clean surface before applying any finish.
6. Choose a finish: Decide on the type of finish you want for your round patio table. Options include wood stain, varnish, paint, or a natural oil-based finish. Consider a finish that is suitable for outdoor use and provides protection against the elements.
7. Apply the finish: Follow the manufacturer’s instructions for applying the chosen finish. Use a brush, sponge, or cloth to evenly apply the finish to the tabletop and base. Apply multiple coats if necessary, allowing each coat to dry fully before applying the next. This helps achieve a more durable and long-lasting finish.
8. Let it cure: After applying the finish, let the table cure in a well-ventilated area for the recommended drying time. This ensures that the finish properly sets and enhances the beauty of the wood.
9. Final sanding (optional): If desired, perform a final sanding with a very fine-grit sandpaper after the finish has completely dried. This will help achieve an even smoother and more polished surface.
10. Enjoy your finished table: Once the table is fully dry, it’s ready to be showcased in your outdoor space. Place it in the desired location and take pride in your handcrafted round patio table.
By following these steps, you’ll achieve a beautifully sanded and finished round patio table. The sanding process not only enhances the appearance of the wood but also ensures a more comfortable and enjoyable experience when using the table. With the table fully sanded and finished, you’ve completed a significant milestone in the construction process. The final step, which is optional, involves adding embellishments or decorations to further personalize your patio table.
Step 7: Optional: Add embellishments or decorations
Once you’ve completed the construction, sanding, and finishing of your round patio table, you have the option to further personalize it by adding embellishments or decorations. This step allows you to showcase your creativity and add unique flair to your outdoor furniture. Here are some ideas to consider:
1. Decorative trim: Enhance the edges of the tabletop or base by adding decorative trim. You can choose from a variety of trim styles, such as beveled, routed, or carved designs. Secure the trim using wood glue and small finish nails to create an aesthetically pleasing detail.
2. Paint or stain: If you haven’t already applied a finish during the previous step, you can now consider painting or staining your table to add color and protection. Choose a paint or stain that is suitable for exterior use and complements your overall outdoor aesthetic.
3. Woodburning or engraving: Add a personalized touch to your table by using a woodburning tool or engraving techniques. Create intricate designs, patterns, or even your family name or initials on the tabletop or base. This adds a unique and personalized element to your patio table.
4. Mosaic or tile inlays: For a more intricate and decorative look, consider adding mosaic or tile inlays to the tabletop. You can create patterns or designs using various colored tiles, glass, or even ceramic pieces. This adds a vibrant and eye-catching element to your outdoor furniture.
5. Custom artwork: If you have artistic skills or know someone who does, consider painting or creating a custom piece of artwork directly onto the tabletop. This allows you to showcase your personal style and create a one-of-a-kind piece of outdoor furniture.
6. Seating cushions or pillows: To enhance the comfort and visual appeal of your patio table, consider adding seating cushions or pillows to the chairs. Choose weather-resistant fabrics that match your outdoor decor and provide extra comfort for your guests.
Remember, the goal is to add embellishments or decorations that reflect your personal style and preferences while enhancing the overall look of your round patio table. Be sure to choose materials and finishes that are designed for outdoor use, as they will withstand weather conditions and ensure the longevity of your table’s appearance.
Once you’ve added the desired embellishments or decorations to your table, take a step back and admire your handiwork. Your round patio table is now a unique and personalized piece of outdoor furniture that will be the envy of your friends and family.
With this final optional step completed, your round patio table is ready to be enjoyed in your outdoor space. Whether it’s for dining, entertaining, or simply relaxing, your handcrafted table will create an inviting atmosphere where memories are made. Congratulations on completing your round patio table-building journey!
Conclusion
Building a round patio table is a rewarding project that allows you to have a custom piece of outdoor furniture tailored to your preferences. By following the step-by-step guide outlined in this article, you’ve learned how to gather the necessary tools and materials, prepare the work area, cut the tabletop and base materials, assemble the base, attach the tabletop, sand and finish the table, and even add optional embellishments or decorations. This comprehensive process ensures that your patio table is not only functional but also visually appealing.
Throughout the construction process, precision and attention to detail were key. Taking the time to accurately measure and cut the materials, assemble the base securely, and attach the tabletop evenly ensures the stability and durability of your patio table. Sanding and finishing the table further enhances its beauty while protecting it from the effects of outdoor exposure.
Moreover, the optional step of adding embellishments or decorations allows you to personalize your patio table, transforming it into a unique and eye-catching piece of outdoor furniture. Whether you choose to add decorative trim, paint or stain, woodburn or engrave, create mosaic or tile inlays, or even incorporate custom artwork, this step allows you to unleash your creativity and make the table truly yours.
Now, with your round patio table complete, it’s time to enjoy the fruits of your labor. Gather your family and friends around your handcrafted table and create lasting memories in your outdoor space. Whether it’s for al fresco dining, lively conversations, or simply taking a moment to unwind, your patio table will serve as a beautiful and functional centerpiece.
Remember to take proper care of your table to ensure its longevity. Regularly clean it, protect it from harsh weather conditions, and refresh the finish as needed. By maintaining your patio table, you can continue to enjoy its beauty and function for years to come.
Building your own round patio table is not only a testament to your craftsmanship but also a source of pride and satisfaction. You’ve created a piece of outdoor furniture that reflects your personal style and enhances your outdoor living space. So, gather your tools, unleash your creativity, and embark on the journey of building your own round patio table. It’s a project that will bring joy and fulfillment for years to come.
Frequently Asked Questions about How To Build A Round Patio Table
Was this page helpful?
At Storables.com, we guarantee accurate and reliable information. Our content, validated by Expert Board Contributors, is crafted following stringent Editorial Policies. We're committed to providing you with well-researched, expert-backed insights for all your informational needs.


0 thoughts on “How To Build A Round Patio Table”