Home>Furniture>Outdoor Furniture>How To Fit Decking Balustrade
Outdoor Furniture
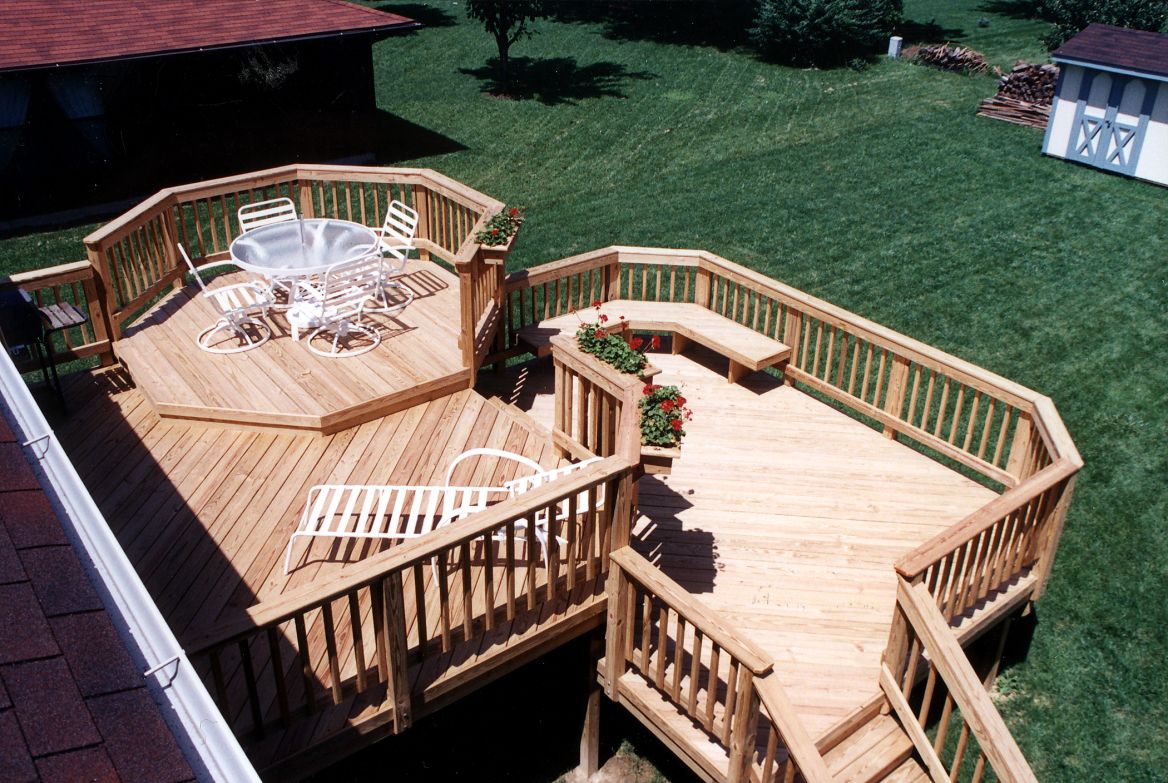
How To Fit Decking Balustrade
Modified: March 7, 2024
Learn how to fit a stunning decking balustrade to enhance your outdoor furniture. Step-by-step guide and expert tips for a seamless installation.
(Many of the links in this article redirect to a specific reviewed product. Your purchase of these products through affiliate links helps to generate commission for Storables.com, at no extra cost. Learn more)
Introduction
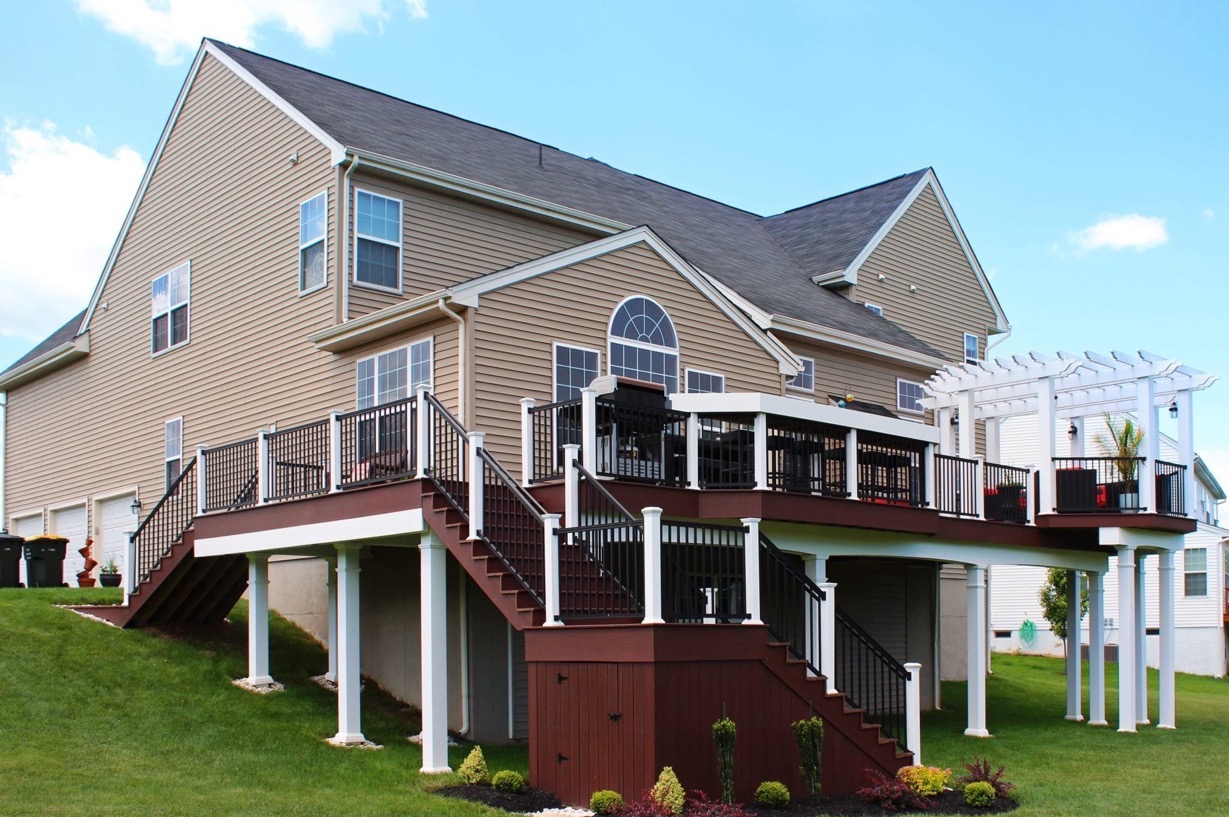
Welcome to our comprehensive guide on how to fit decking balustrade. Whether you’re a DIY enthusiast or a professional, this article will provide you with all the information you need to successfully install a decking balustrade.
A decking balustrade not only adds a stylish touch to your outdoor space but also serves as an essential safety feature, preventing falls and providing support. With a wide range of options available, including different materials, styles, and designs, it’s important to choose the right balustrade that complements your deck and meets your specific requirements.
In this guide, we’ll walk you through the process of choosing the right balustrade, taking accurate measurements, gathering the necessary tools and materials, and step-by-step installation instructions. Additionally, we’ll provide some maintenance tips to ensure your balustrade stands the test of time.
Before we dive into the installation process, it’s important to note that safety should always be a priority. Make sure to follow all safety guidelines and consult with a professional if needed.
Now, let’s get started on creating a stunning and secure decking balustrade!
Key Takeaways:
- Choose the right decking balustrade by considering material, style, regulations, budget, and maintenance. This ensures a safe and visually appealing addition to your outdoor space.
- Follow precise measurements and step-by-step installation for a secure and stylish decking balustrade. Regular maintenance preserves its beauty and functionality for years to come.
Read more: How To Fit Composite Decking Edge Trim
Choosing the Right Decking Balustrade
When it comes to choosing a decking balustrade, there are several factors to consider. Here are some important considerations to help you make the right choice:
- Material: Decking balustrades are available in a variety of materials, including wood, metal, glass, and composite. Each material has its own unique characteristics and advantages. Wood offers a natural and traditional look, while metal provides a modern and sleek appearance. Glass balustrades can create an open and contemporary feel, while composite materials offer low maintenance and durability. Consider the aesthetic appeal, durability, and maintenance requirements of each material before making your decision.
- Style and Design: Balustrades come in various styles and designs to suit different preferences and architectural styles. From intricate and ornate designs to simple and minimalist options, consider the overall style of your deck and choose a balustrade that complements it. Take into account the spacing between balusters, the shape of the handrail, and any decorative elements that will enhance the visual appeal of your deck.
- Building Codes and Regulations: Check your local building codes and regulations to ensure compliance with any specific requirements for balustrade height, spacing between balusters, and load-bearing capacity. It’s important to meet these safety standards to ensure the well-being of everyone using the deck.
- Budget: Determine your budget for the balustrade installation. Balustrades come in a wide price range, depending on the material, design, and complexity. Consider your budget and choose a balustrade that offers the desired combination of aesthetics, functionality, and affordability.
- Maintenance: Consider the maintenance requirements of each type of balustrade material. Wood balustrades may require regular staining or sealing to maintain their beauty, while metal or composite balustrades may require minimal upkeep. Choose a balustrade that fits your maintenance preferences and capabilities.
By taking these factors into account, you can make an informed decision and choose a decking balustrade that not only enhances the visual appeal of your outdoor space but also meets your practical needs.
Measuring and Planning
Accurate measurements and careful planning are crucial when it comes to fitting a decking balustrade. Here are the steps to follow:
- Measure the Deck Area: Start by measuring the perimeter of your deck where the balustrade will be installed. Measure each side separately to ensure accuracy. Take note of any obstructions, such as stairs or posts, that may require special attention during installation.
- Decide Baluster Spacing: Baluster spacing is an important consideration for both safety and aesthetics. The spacing should comply with local building codes, which typically require spacing of no more than 4 inches apart to prevent small children from getting stuck. However, you may choose a closer spacing for added safety or a wider spacing for a more open and airy look. Consider the style and design of the balustrade when deciding on the spacing.
- Calculate the Number of Balusters: Once you’ve determined the baluster spacing, calculate the number of balusters needed for each section of the balustrade. Divide the length of each section by the desired spacing to get an approximate count. Round up to the nearest whole number for accuracy.
- Determine Post Placement: Baluster posts provide support and stability to the balustrade. Determine the placement of the posts, ensuring they are evenly spaced and secure. Place posts at the corners of the deck and at regular intervals along straight sections. Take into account the length of the handrail and the number of balusters between each post.
- Consider Handrail Length: Measure the length of each straight section of the balustrade where a handrail will be installed. Add a few extra inches at each end for a secure fit and ease of installation. If your balustrade will have curves or corners, measure the length of each curved or angled section separately.
- Double-Check Measurements: Before proceeding with the installation, double-check all your measurements to ensure accuracy. Take into account any adjustments needed for obstructions or irregularities on the deck surface.
By carefully measuring and planning your balustrade installation, you can ensure a seamless and secure fit that enhances the safety and aesthetics of your deck.
Tools and Materials Needed
Before you begin the installation process, it’s important to gather all the necessary tools and materials. Here’s a list of the commonly needed items:
Tools:
- Tape measure
- Pencil
- Level
- Hammer
- Screwdriver (or drill with appropriate bits)
- Hacksaw or reciprocating saw
- Miter saw (for cutting handrail and balusters if needed)
- Clamps
- String or chalk line
- Safety goggles
- Gloves
Read more: How To Build A Deck With Composite Decking
Materials:
- Decking balusters
- Baluster connectors or brackets
- Baluster posts
- Handrail
- Bottom rail
- Screws or nails
- Wood or metal fasteners
- Concrete or post anchors (if attaching posts to the ground)
- Finishing nails or screws
- Stain, paint, or sealant (if desired)
- Touch-up paint or sealant (to match the deck)
Make sure to check the specific requirements and recommendations of the balustrade manufacturer to ensure you have the appropriate tools and materials for your particular installation.
Having all the necessary tools and materials at hand will save you time and ensure a smooth installation process. Take the time to gather everything before you begin, and keep them organized and easily accessible throughout the installation.
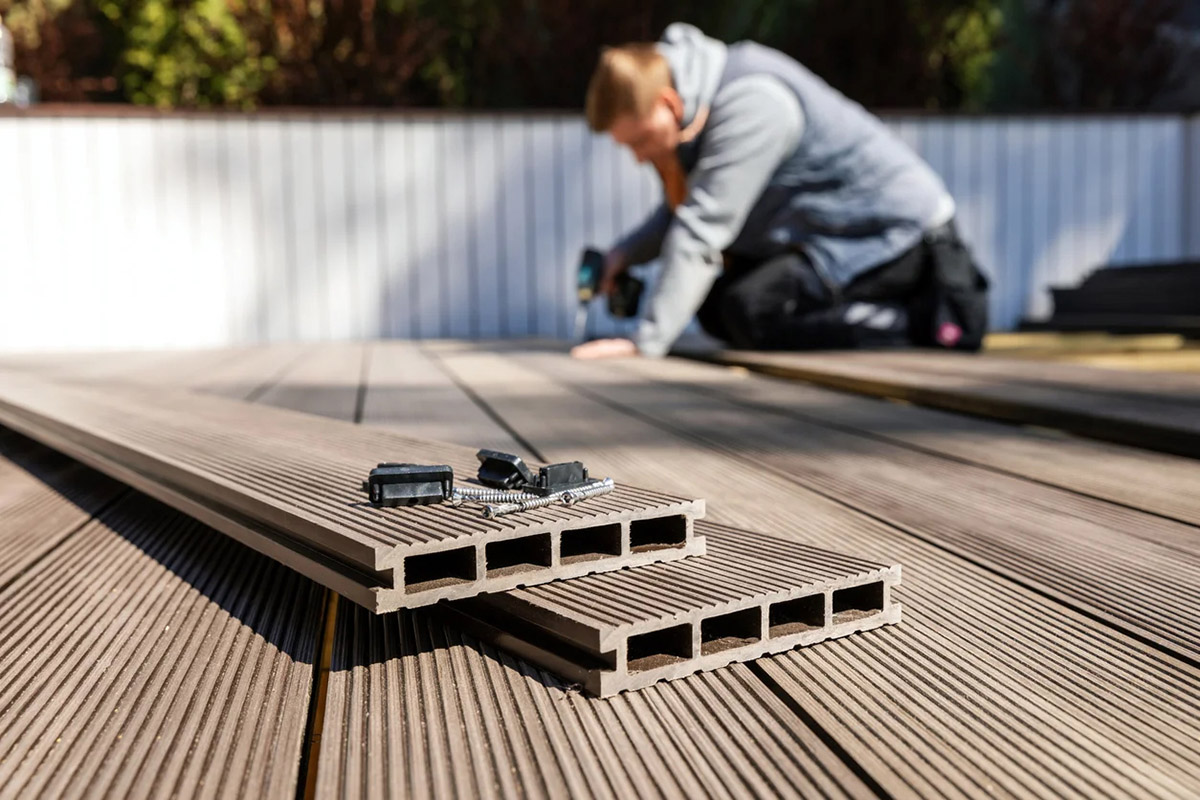
Step-by-Step Installation Process
Now that you have gathered all the tools and materials, let’s dive into the step-by-step installation process for fitting a decking balustrade. Follow these instructions carefully for a successful installation:
- Installing the Posts: Begin by installing the baluster posts. If your deck has existing posts, check their condition and stability. If necessary, reinforce or replace any damaged posts. For new installations, use post anchors or concrete footings to secure the posts. Make sure the posts are plumb and evenly spaced. Attach them securely to the deck surface.
- Attaching the Handrail: Once the posts are installed, attach the handrail. Cut the handrail to the appropriate length and secure it to the posts using screws or brackets, following the manufacturer’s instructions. Make sure the handrail is level and aligned with the top of the posts.
- Fitting and Securing the Balusters: Place the balusters in the desired pattern and spacing between the handrail and bottom rail. Use baluster connectors or brackets to attach the balusters securely to the rails. Follow the manufacturer’s instructions for proper placement and attachment methods. Ensure that the balusters are plumb and level.
- Installing the Bottom Rail: Cut the bottom rail to the appropriate length and attach it to the baluster posts or decking surface using screws or brackets. Make sure the bottom rail is level and aligned with the bottom of the balusters. Reinforce the attachment points for added stability.
- Adding Finishing Touches: Once all the main components are assembled, double-check the alignment and stability of the balustrade. Make any necessary adjustments or tighten any loose connections. Fill any visible screw or nail holes with wood filler or putty. If desired, apply stain, paint, or sealant to the balustrade for added protection and aesthetics.
Throughout the installation process, pay attention to details and ensure everything is properly aligned, level, and secure. Take the time to step back and assess the overall appearance and functionality of the balustrade.
Remember, if you’re unsure about any step or encounter challenges during the installation, consult with a professional or contact the manufacturer for guidance.
By following these steps, you’ll be able to successfully fit a decking balustrade that enhances the safety and beauty of your outdoor space.
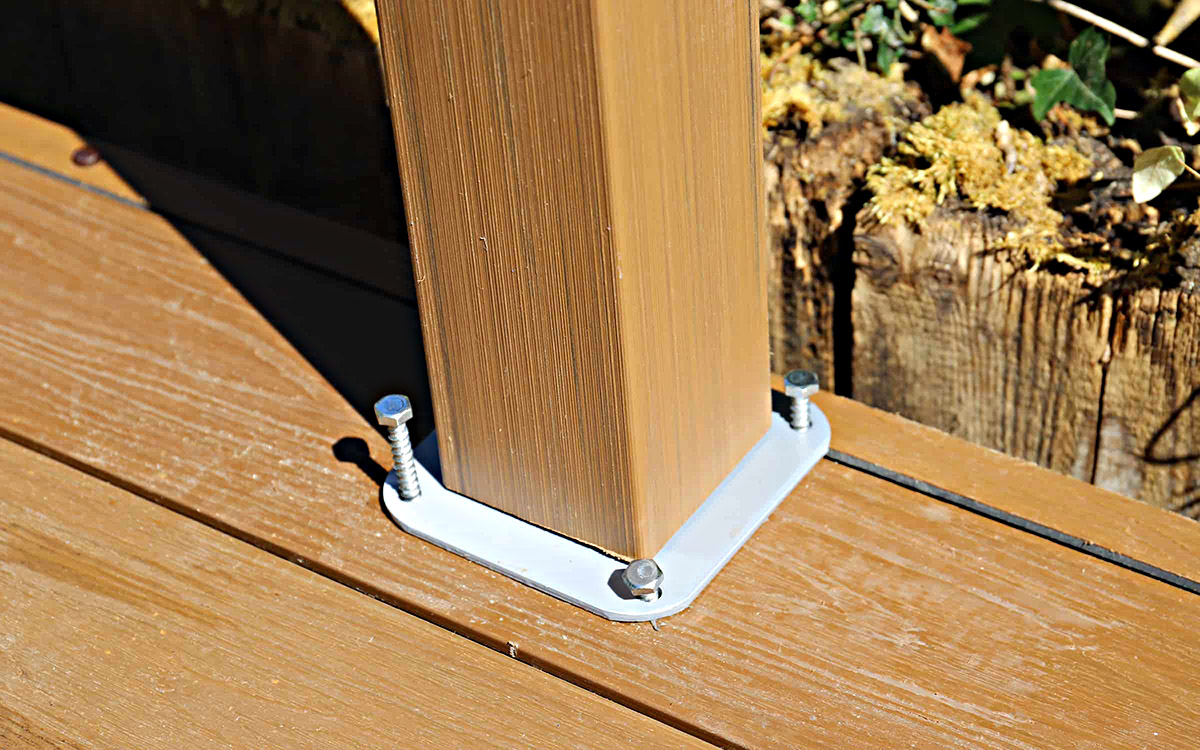
Installing the Posts
Installing the posts is an essential first step in fitting a decking balustrade. The posts provide the framework and support for the entire balustrade system. Follow these steps to ensure a secure and stable installation:
- Prepare the Deck: Before installing the posts, ensure that the deck surface is clean and free of debris. Remove any obstacles or obstructions that may interfere with the installation process.
- Determine Post Placement: Plan the placement of the baluster posts, keeping in mind stability, spacing, and aesthetics. Typically, posts are installed at the corners of the deck and at regular intervals along straight sections.
- Mark the Post Locations: Use a tape measure and pencil to mark the locations where the posts will be installed. Make sure the markings are precise and evenly spaced. If your deck has existing posts, check their condition and ensure they are positioned correctly.
- Attach Post Anchors: If you are attaching the posts to the deck surface, use post anchors for added stability. Position the post anchors according to the marked locations and secure them using appropriate screws or nails. Ensure that the post anchors are level and securely attached to the deck.
- Insert and Level the Posts: Place the posts into the post anchors or onto the deck surface, depending on the installation method chosen. Use a level to ensure each post is perfectly vertical (plumb) and adjust as needed. This step is critical to achieving a stable and visually appealing balustrade.
- Secure and Fasten the Posts: Once the posts are properly leveled, secure them in place. If using post anchors, tighten the screws or nails to firmly attach the posts. If attaching the posts directly to the deck surface, use appropriate screws or bolts to ensure a strong connection.
- Check for Stability: Give the posts a gentle shake to ensure they are securely in place and stable. Make any necessary adjustments to ensure the posts are solid and immobile.
Remember, it’s important to follow local building codes and regulations during the installation process. Ensure that the baluster posts meet the necessary height and spacing requirements for safety purposes.
By following these steps and ensuring the stability of the posts, you will lay the foundation for a strong and reliable balustrade.
Attaching the Handrail
Attaching the handrail is the next step in fitting a decking balustrade. The handrail provides support and adds a finishing touch to the overall appearance of the balustrade. Follow these steps to securely attach the handrail:
- Measure and Cut the Handrail: Measure the length of each straight section of the balustrade where the handrail will be installed. Add a few extra inches at each end for a secure fit and ease of installation. If your balustrade has curves or corners, measure each curved or angled section separately and cut the handrail accordingly.
- Position the Handrail: Place the handrail on top of the balusters, aligning it with the top of the posts. Make sure it is centered and evenly positioned along the length of the balustrade.
- Secure the Handrail to the Posts: Depending on the design and materials of your balustrade, you may use brackets or screws to attach the handrail to the posts. Follow the manufacturer’s instructions for the recommended attachment method. Ensure that the handrail is level and securely fastened to provide stability.
- Check for Levelness: Use a level to ensure that the handrail is perfectly horizontal. Make any necessary adjustments to ensure it is level throughout its entire length. A level handrail not only provides structural integrity but also enhances the overall appearance of the balustrade.
- Secure Loose Ends: If the handrail has open ends, such as at corners or terminations, ensure they are properly secured and fastened. Use appropriate connectors or brackets to join and reinforce the ends of the handrail.
- Test the Stability: Give the handrail a gentle push or shake to test its stability. It should be firmly attached to the posts and balusters with no wobbling or movement. Make any necessary adjustments or tighten any loose connections to ensure a solid and secure handrail.
Remember, the handrail serves both functional and aesthetic purposes. It should provide adequate support and meet local building codes for safety. Additionally, its alignment and levelness contribute to the overall visual appeal of the balustrade.
By following these steps and ensuring a secure attachment, you will have a sturdy handrail that enhances the safety and beauty of your decking balustrade.
When fitting decking balustrade, make sure to measure and mark the correct spacing for the balusters to ensure they are evenly spaced and secure. Use a level to ensure the balustrade is straight and secure it properly to the deck to prevent any wobbling or movement.
Read more: How To Fit A Carpet
Fitting and Securing the Balusters
Fitting and securing the balusters is a critical step in the installation process of a decking balustrade. Balusters not only enhance the appearance of the balustrade but also provide safety by preventing falls. Follow these steps to properly fit and secure the balusters:
- Determine Baluster Pattern: Before fitting the balusters, decide on the desired pattern and spacing. This will depend on the style of your balustrade and any local building codes that specify spacing requirements for safety. Common patterns include evenly spaced balusters or alternating widths to create a decorative effect.
- Mark the Baluster Locations: Use a tape measure, pencil, and level to mark the precise locations for each baluster along the handrail and bottom rail. Ensure that the markings are accurately and evenly spaced to achieve a balanced and visually pleasing look.
- Fit the Balusters: Place each baluster into its designated location, aligning it with the marked positions. Ensure that each baluster fits snugly and vertically between the handrail and bottom rail. Double-check the alignment and adjust if necessary.
- Attach Baluster Connectors: Use baluster connectors or brackets to secure the balusters to the handrail and bottom rail. Follow the manufacturer’s instructions for the recommended attachment method. Depending on the design, you may need to slide the connectors onto the balusters or affix them to the balusters and rails using screws or fasteners.
- Check for Plumbness and Levelness: Use a level to verify that each baluster is plumb (vertically straight) and level. Adjust the balusters as needed to ensure consistency throughout the balustrade. Proper alignment is crucial for both appearance and safety.
- Secure the Balusters: Once the balusters are properly fitted and aligned, secure them firmly to the handrail and bottom rail using the appropriate connectors or brackets. Ensure that each baluster is securely attached to provide stability and prevent any movement.
- Recheck Baluster Spacing: After securing the balusters, double-check the spacing between them. Ensure that the gaps between balusters comply with local building codes and safety standards.
Remember, the fitting and securing of the balusters require precision and attention to detail. Take your time to ensure that each baluster is positioned correctly and securely fastened. The quality of the baluster installation will directly impact the functionality and aesthetics of your decking balustrade.
By following these steps, you will achieve a visually appealing and well-secured balustrade that enhances the safety and beauty of your outdoor space.
Installing the Bottom Rail
Installing the bottom rail is an important step in the process of fitting a decking balustrade. The bottom rail provides stability to the balusters and adds structural support to the overall balustrade system. Follow these steps to properly install the bottom rail:
- Measure and Cut the Bottom Rail: Measure the length of each straight section where the bottom rail will be installed. Depending on the design of your balustrade, you may need to cut the bottom rail at the appropriate length using a saw. Ensure that the bottom rail fits precisely between the posts or connectors.
- Position the Bottom Rail: Place the bottom rail at the desired location, typically beneath the balusters and above the deck surface. Align the bottom rail with the bottom of the balusters to create a uniform appearance. Make sure it is centered and evenly positioned along the length of the balustrade.
- Secure the Bottom Rail: Attach the bottom rail to the balusters or baluster connectors using screws or brackets. Follow the manufacturer’s instructions for the recommended attachment method. Ensure that the bottom rail is securely fastened to provide stability and prevent any movement.
- Check for Levelness and Alignment: Use a level to make sure the bottom rail is perfectly horizontal and aligned with the top of the balusters. Make any necessary adjustments to ensure a level and visually pleasing balustrade. The bottom rail should be parallel to the handrail and provide a cohesive look to the overall balustrade.
- Reinforce the Attachment Points: For added stability, reinforce the attachment points between the bottom rail and the balusters or connectors. Use additional screws or brackets to strengthen the connection and ensure a secure fit. This step is crucial to prevent any wobbling or sagging of the balustrade over time.
- Inspect the Bottom Rail: After installation, inspect the bottom rail for any defects or imperfections. Check for proper alignment, stability, and overall appearance. Make any necessary adjustments or refinements to ensure a high-quality and visually appealing bottom rail installation.
Remember, the bottom rail plays a key role in providing support and stability to the balusters. A properly installed bottom rail not only enhances the overall strength of the balustrade but also contributes to the safety of the deck.
By following these steps, you will achieve a well-secured and visually pleasing bottom rail installation as part of your decking balustrade.
Adding Finishing Touches
After completing the main installation of your decking balustrade, it’s time to add the finishing touches. These final steps will ensure that your balustrade looks polished and complements the overall design of your outdoor space. Follow these guidelines to add those final details:
- Fill Screw or Nail Holes: If you used screws or nails to attach the balusters, handrail, or bottom rail, fill any visible holes with wood filler or putty. Smooth out the filler and allow it to dry according to the manufacturer’s instructions. Sand the filled areas lightly to create a seamless look.
- Apply Stain, Paint, or Sealant: Consider staining, painting, or applying a protective sealant to the balustrade. This step not only enhances the appearance of your balustrade but also helps to protect it from the elements. Choose a product that is suitable for the material of your balustrade and follow the manufacturer’s instructions for application.
- Touch-Up Paint or Sealant: If your deck has an existing finish or color, use touch-up paint or sealant to cover any scratches or marks that may have occurred during the installation process. This will help maintain consistency in the overall appearance of your deck and balustrade.
- Inspect and Tighten: Once the finishing touches are complete, carefully inspect the entire balustrade for any loose connections or components. Tighten any screws or brackets that may have become loose during the installation process. This will ensure the stability and longevity of your balustrade.
- Clean Up: Remove any debris, tools, or materials that may be left over from the installation. Take care to properly dispose of any waste in accordance with local regulations. Clean the balustrade with a mild detergent and water to remove any dirt or dust that may have accumulated during the installation process.
- Final Inspection: Step back and take a final look at your decking balustrade. Ensure that everything is aligned, secure, and visually appealing. Make any last-minute adjustments or refinements if necessary. Admire your completed balustrade and the enhanced beauty it brings to your outdoor space!
By following these steps, you will achieve a professionally finished decking balustrade that adds a touch of elegance and safety to your deck.
Remember, regular maintenance is key to preserving the appearance and functionality of your balustrade. Follow the manufacturer’s recommendations for cleaning, maintenance, and periodic inspections to ensure its long-term durability and performance.
Congratulations on completing your decking balustrade installation!
Maintenance Tips
To keep your decking balustrade looking beautiful and in optimal condition, regular maintenance is important. Following these maintenance tips will help prolong the lifespan and attractiveness of your balustrade:
- Inspect Regularly: Perform routine inspections of your balustrade to identify any signs of wear, damage, or loose connections. Pay particular attention to the attachment points, handrail, balusters, and bottom rail. Promptly address any issues to prevent further damage or safety hazards.
- Clean Regularly: Regularly clean your balustrade to remove dirt, dust, and debris that can accumulate over time. Use a mild detergent and water solution to gently scrub the surface and rinse thoroughly with clean water. Avoid using harsh cleaning agents or abrasive materials that can damage the finish or material of your balustrade.
- Repair or Replace Damaged Components: If any balusters, handrail, bottom rail, or connectors become damaged, repair or replace them promptly. This not only maintains the integrity of your balustrade but also ensures the safety of those using your deck.
- Refinish the Balustrade: Depending on the material of your balustrade, periodic refinishing may be necessary to preserve its appearance and protect it from the elements. This may involve applying a fresh coat of stain, paint, or sealant, following the manufacturer’s instructions.
- Keep the Balustrade Clear of Debris: Regularly remove leaves, twigs, and other debris that may accumulate on your balustrade. Not only does this debris detract from the aesthetics of your balustrade, but it can also lead to mold or decay if left for an extended period of time.
- Trim Overhanging Vegetation: If you have plants or vegetation near your balustrade, regularly trim them to prevent branches or foliage from touching and damaging the balustrade. Overhanging vegetation can also cause water buildup and increase the risk of moisture-related issues.
- Protect against Corrosion: If your balustrade includes metal components, protect them from corrosion by applying a protective coating or using stainless steel screws and fasteners. Regularly inspect metal components for signs of rust or corrosion and promptly address any issues.
- Follow Manufacturer’s Recommendations: Refer to the manufacturer’s guidelines and recommendations for specific maintenance instructions pertaining to your balustrade. Different materials may require different care and maintenance procedures, so it’s important to follow their instructions for optimal results.
By following these maintenance tips, you can ensure that your decking balustrade remains in top condition, enhancing both the safety and beauty of your outdoor space for years to come.
Regular maintenance not only extends the lifespan of your balustrade but also ensures that it continues to meet safety standards and provides a visually appealing addition to your deck area.
Remember, if you have any concerns or uncertainties about proper maintenance or repairs, consult with a professional to ensure the longevity and integrity of your balustrade.
Read more: How To Build A Decking
Conclusion
Congratulations on successfully completing the installation of your decking balustrade! By following the steps outlined in this guide, you have created a visually appealing and secure addition to your outdoor space. Your balustrade not only enhances the aesthetics of your deck but also provides important safety features.
Remember, choosing the right material, measuring accurately, and planning ahead are crucial steps in the installation process. Taking the time to gather the necessary tools and materials ensures a smooth process, and performing regular maintenance will help preserve the integrity and appearance of your balustrade for years to come.
Whether you are a DIY enthusiast or a professional, understanding the steps and techniques involved in fitting a decking balustrade allows you to confidently tackle this project. Observing safety guidelines and local building codes is always important to ensure a secure and compliant installation.
Enjoy your newly installed balustrade and take pride in knowing that you have added both style and safety to your outdoor space. Whether you’re hosting gatherings, relaxing, or simply enjoying the view, your balustrade will create a beautiful and inviting atmosphere.
Should you have any questions or encounter any difficulties during the installation or maintenance processes, don’t hesitate to consult with professionals or refer to the manufacturer’s guidelines for assistance.
Thank you for using this comprehensive guide on how to fit a decking balustrade. We hope it has been helpful and informative. Best of luck with your decking balustrade, and may you enjoy many years of comfort and enjoyment in your outdoor oasis!
Frequently Asked Questions about How To Fit Decking Balustrade
Was this page helpful?
At Storables.com, we guarantee accurate and reliable information. Our content, validated by Expert Board Contributors, is crafted following stringent Editorial Policies. We're committed to providing you with well-researched, expert-backed insights for all your informational needs.


0 thoughts on “How To Fit Decking Balustrade”