Home>Furniture>Outdoor Furniture>How To Build A Decking
Outdoor Furniture
How To Build A Decking
Modified: August 27, 2024
Discover the best tips and techniques for building a stunning outdoor furniture deck. Transform your outdoor space with our step-by-step guide.
(Many of the links in this article redirect to a specific reviewed product. Your purchase of these products through affiliate links helps to generate commission for Storables.com, at no extra cost. Learn more)
Introduction
Welcome to our comprehensive guide on how to build a decking! If you’re looking to create a beautiful outdoor space to relax and entertain, building a deck is a fantastic option. Whether you want a cozy spot to sip your morning coffee or a spacious area for hosting barbecues, a decking can transform your outdoor living experience.
In this article, we will walk you through the step-by-step process of building a decking, from planning and preparation to adding the finishing touches. We’ll cover all the essential tips and techniques to ensure your deck is not only visually appealing but also structurally sound and durable.
Building a decking may seem like a daunting task, but with the right guidance and a little bit of patience, you can easily accomplish it. Before you know it, you’ll be enjoying the fruits of your labor, lounging on your new deck and making lasting memories with family and friends.
Before we dive into the nitty-gritty details, let’s talk about why building a decking is a great investment for your outdoor space. A deck not only enhances the aesthetics of your home but also adds value to your property. It extends your living space, giving you an additional area to enjoy nature and the outdoors without having to leave the comfort of your home.
Furthermore, a decking offers flexibility and versatility in terms of design and functionality. You can choose from a wide range of materials, styles, and finishes to create a deck that perfectly suits your personal taste and complements your existing landscaping. Whether you prefer the classic charm of wood or the low maintenance of composite decking, there’s an option for every preference and budget.
So, if you’re ready to embark on this exciting journey of building a decking, grab your tools and let’s get started with the planning and preparation phase. With careful attention to detail and a little bit of creativity, you’ll soon have a stunning deck that will be the envy of the neighborhood.
Key Takeaways:
- Planning and preparation are crucial for building a deck. Consider the purpose, local regulations, home architecture, site assessment, size, material, design plan, and budget to ensure a successful project.
- Building a deck involves clearing and leveling the area, installing the foundation, setting support posts, attaching joists, installing decking boards, adding railings, and applying finishes. Each step contributes to creating a beautiful and durable outdoor space.
Read more: How To Build A Deck With Composite Decking
Step 1: Planning and Preparing
The key to a successful decking project starts with thorough planning and preparation. This step is crucial as it sets the foundation for the rest of the construction process. Follow these guidelines to ensure that you have a clear vision and are well-prepared before you begin:
- Define the Purpose: Determine how you plan to use your decking. Will it be primarily for lounging and relaxation, or do you envision hosting social gatherings and outdoor dining? Identifying the purpose will help you determine the size, shape, and layout of your deck.
- Check Local Regulations: Before you start your decking project, research local building codes and obtain necessary permits. Regulations may vary based on location, so it’s important to comply with any requirements to ensure your deck is safe and up to code.
- Consider Your Home’s Architecture: Take a look at the architectural style of your home. Aim to create a decking that complements the design and aesthetics of your house. Consider factors such as color scheme, textures, and overall visual appeal.
- Assess the Site: Examine the area where you plan to construct your decking. Take note of any obstacles, such as trees, utility lines, or uneven ground. Consider the natural elements like sun exposure, wind patterns, and drainage when determining the location and orientation of your deck.
- Determine the Size: Based on your purpose and available space, determine the size of your decking. Consider factors such as furniture placement, traffic flow, and future expansion possibilities. Measure the area accurately, taking into account any existing structures or boundaries.
- Choose the Material: Select the decking material that suits your preferences, budget, and maintenance requirements. Traditional options such as wood decking offer a natural and timeless look, while composite decking provides durability and low maintenance. Research the pros and cons of each material before making a decision.
- Create a Design Plan: Sketch out a design plan for your decking. Consider elements such as the shape, layout, and any additional features you want to incorporate, such as built-in seating or planters. This plan will serve as a visual guide throughout the construction process.
- Set a Budget: Determine your budget for the project and allocate funds for materials, tools, and any professional assistance you may require. Factor in potential additional expenses for permits, lighting, railing, and finishing touches.
By following these planning and preparation steps, you will have a solid foundation for your decking project. Taking the time to carefully consider all aspects will save you time, money, and headaches down the line.
Step 2: Obtaining Materials and Tools
Once you have planned and prepared for your decking project, it’s time to gather all the necessary materials and tools. Having everything you need at hand will not only streamline the construction process but also prevent unnecessary delays. Follow these steps to ensure you have everything ready:
- Make a Materials List: Refer to your design plan and create a comprehensive list of all the materials required for your decking. This may include deck boards, joists, posts, concrete or gravel for the foundation, screws or nails, railing components, and any additional features or accessories you have planned.
- Source the Materials: Research reputable suppliers in your area and start sourcing the required materials. Compare prices, quality, and availability to ensure you get the best value for your money. Consider factors such as durability, resistance to weather and wear, and compatibility with your chosen decking material.
- Consider Tools Needed: Identify the tools necessary for the construction process. This may include a circular saw, drill, hammer, tape measure, level, square, post hole digger, and safety equipment such as gloves and safety goggles. If you don’t already have these tools, consider borrowing or renting them.
- Estimate Quantities: Based on your materials list, estimate the quantities required for each item. This will help you determine how much of each material to purchase, ensuring you have enough to complete the project without excess waste or shortage. Consider factors such as deck size, spacing between boards, and any additional features or areas that need to be covered.
- Order or Purchase Materials: Once you have a clear understanding of your material requirements, place an order or make a purchase. It’s recommended to order a little extra material to account for any unexpected variations or mistakes during the construction process.
- Organize and Store: Upon receiving the materials, organize them in a designated area, keeping them protected from the elements. Sort them according to type and size for easy access during construction. Store any excess materials securely for future use or potential repairs.
By obtaining all the necessary materials and tools upfront, you ensure a smooth construction process without any unexpected delays. Having everything readily available will save you time and frustration as you progress through the steps of building your decking.
Step 3: Clearing and Leveling the Area
Once you have gathered all the materials and tools, it’s time to prepare the area where your decking will be constructed. This involves clearing the space of any vegetation, debris, or obstacles and ensuring that the ground is level and stable. Follow these steps to effectively clear and level the area:
- Remove Vegetation: Begin by removing any grass, weeds, or plants within the designated area. Use a shovel or a garden fork to dig up the vegetation, making sure to remove the roots as well. Dispose of the green waste responsibly.
- Clear Debris and Obstacles: Inspect the area for any debris, rocks, or large objects that could interfere with the construction process. Remove these obstacles and clear the space to create a clean and even surface for your decking.
- Excavate the Ground: If the ground is uneven or inconsistent, you may need to excavate the area to create a level base. Use a shovel or a mechanical excavator to remove excess soil or build up lower areas, ensuring a flat and stable surface for your decking.
- Compact the Soil: After excavating, compact the soil using a plate compactor or a hand tamper. This will help to increase the stability and load-bearing capacity of the ground, ensuring that your decking remains level and structurally reliable.
- Address Drainage: Check the area for proper drainage. Ensure that there is a slight slope away from your house to allow water to drain effectively. If necessary, make adjustments to the ground or consider installing a drainage system to prevent water from pooling or causing damage to your decking.
- Install Landscape Fabric: Once the area is cleared and leveled, consider installing a landscape fabric or weed barrier to prevent weed growth and minimize maintenance. This will help to keep your decking area clean and tidy.
Clearing and leveling the area is an essential step in the construction process as it provides a solid and stable foundation for your decking. By taking the time to complete this step thoroughly, you ensure that your deck will be visually appealing, safe, and long-lasting.
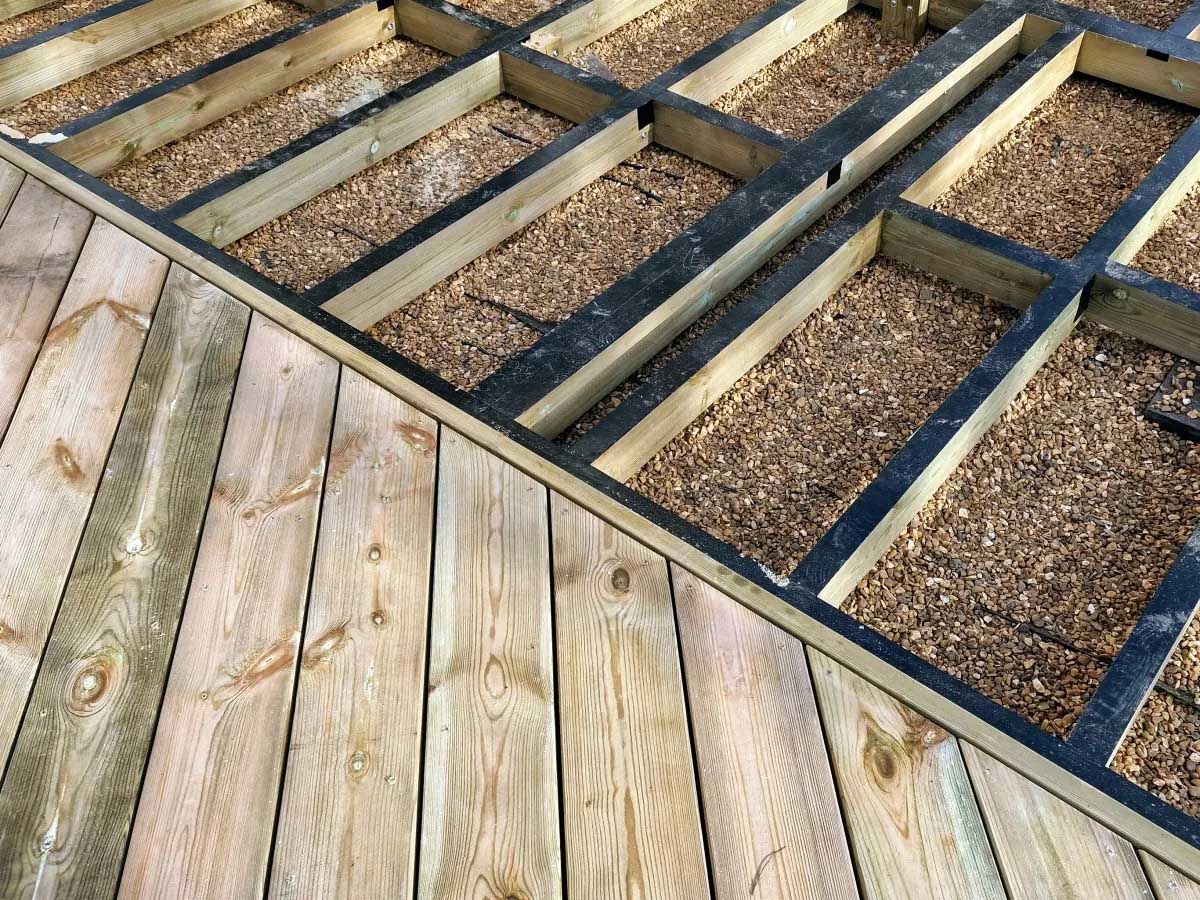
Step 4: Installing the Foundation
With the area cleared and leveled, it’s time to move onto installing the foundation for your decking. The foundation provides the structural support and stability necessary for a durable and long-lasting deck. Follow these steps to properly install the foundation:
- Determine the Foundation Type: There are different types of foundations for decks, including concrete footings, concrete piers, or a precast concrete foundation system. Choose the foundation type that best suits your soil conditions, local building codes, and the size and design of your deck.
- Mark the Locations: Using stakes and string, mark the exact locations where the foundation supports will be installed. Ensure that the markings are accurate and aligned with your deck’s design plan.
- Prepare the Footings: If you’re using concrete footings, you’ll need to dig holes at each marked location. The size and depth of the holes will depend on your local building codes and the size of your deck. Typically, the footing holes should be at least 18 inches deep and wider than the post dimensions.
- Set the Footings: Once the holes are dug, place cardboard footing tubes or concrete forms into the holes. Ensure that they are level and provide a solid base for the support posts. Follow the manufacturer’s instructions for securing the forms in place and mixing and pouring the concrete.
- Install Support Posts: After the concrete footings have cured, it’s time to install the support posts. Position the post anchors on top of the footings and secure them in place. Use a level to ensure that the posts are standing straight and plumb. Depending on your design and local building codes, you may need to cut the posts to the correct height.
- Secure the Support Posts: Once the support posts are in position, secure them to the post anchors or attach them using galvanized structural fasteners. Ensure that all connections are sturdy and secure, providing ample support for the weight of your decking.
- Double Check the Alignment: Before proceeding to the next step, double check the alignment and positioning of the support posts. Use a level and string to ensure that they are all at the correct height and properly aligned with your deck’s design plan.
Installing a solid and stable foundation is crucial for the structural integrity of your decking. Taking the time to properly install the foundation ensures that your deck will withstand the test of time, supporting the weight and load it will carry. With the foundation in place, you’re ready to move on to the next step of building your deck.
Read more: The ABCs Of Deck Building
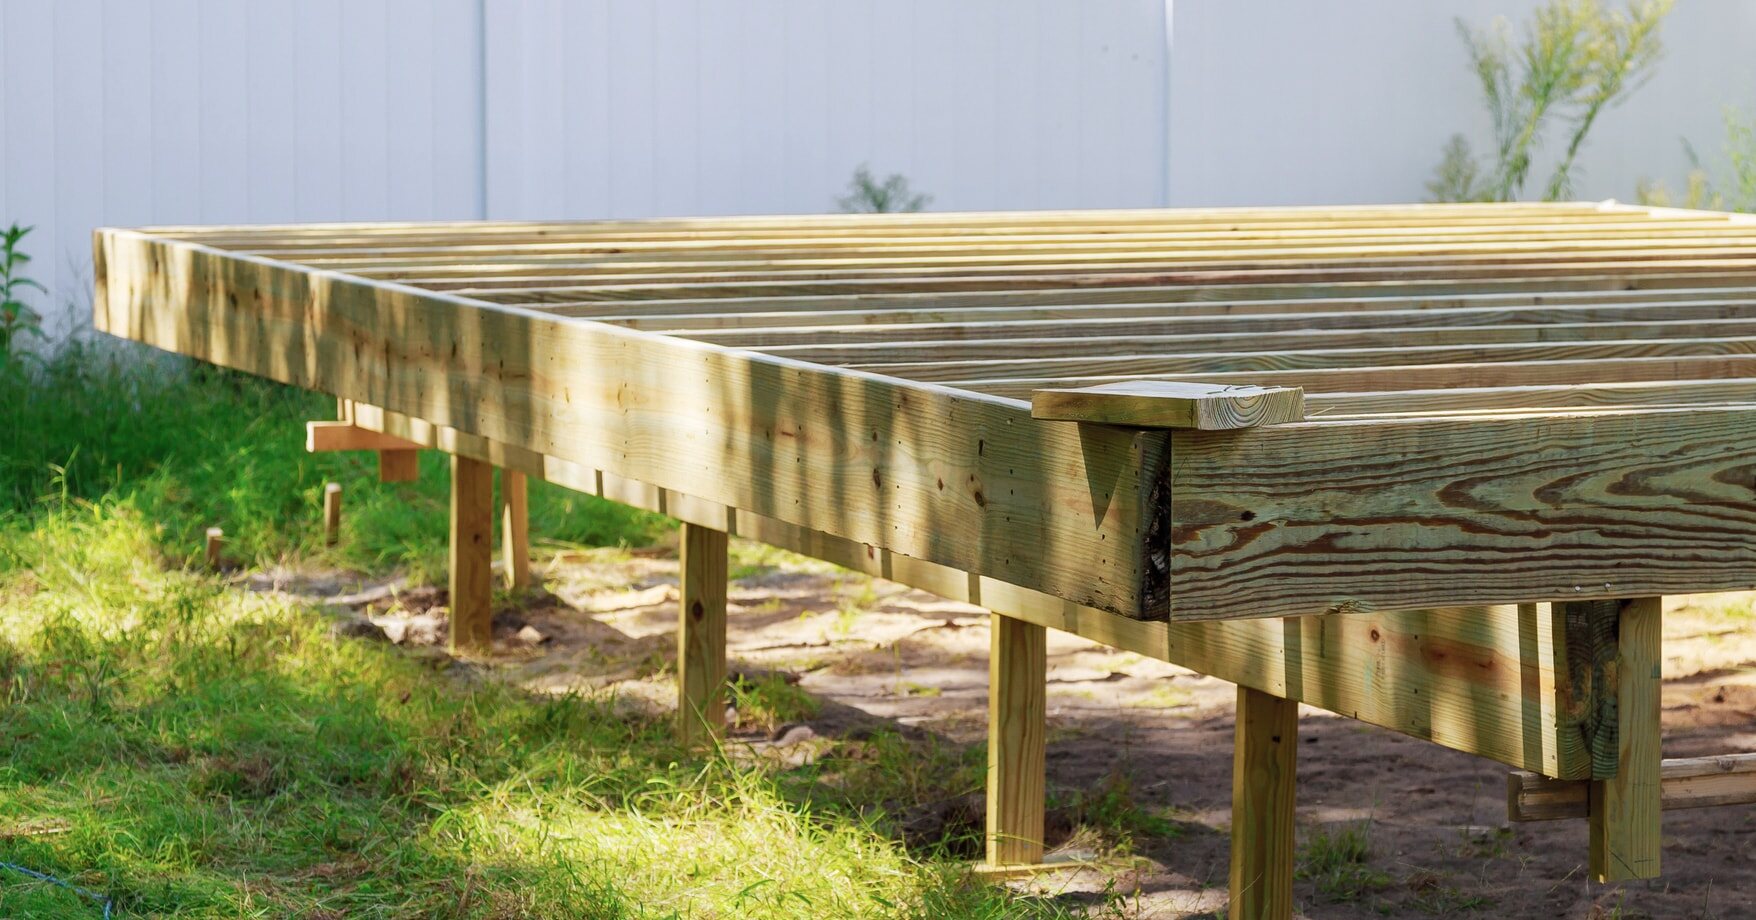
Step 5: Setting the Support Posts
With the foundation in place, it’s time to set the support posts for your decking. The support posts play a crucial role in providing stability and strength to your deck structure. Follow these steps to properly set the support posts:
- Position the Posts: Based on your deck’s design plan, position the support posts on top of the footings or post anchors. Ensure that the posts are evenly spaced and aligned with the layout of your deck.
- Level and Plumb the Posts: Use a level and a plumb line to ensure that the support posts are both level and perfectly vertical. Adjust the position of the posts as necessary to achieve proper alignment.
- Anchor the Posts: Secure the support posts to the footings or post anchors using galvanized structural fasteners or anchor brackets. Make sure the connections are secure and capable of bearing the weight of your decking.
- Trim the Posts: If the support posts extend above the desired height for your decking, trim them to the correct height using a saw. Ensure that all the posts are trimmed evenly for a uniform and professional appearance.
- Connect the Beams: Next, connect the beams to the support posts. This will provide additional structural support for your decking. Attach the beams using structural connectors or through-bolting, ensuring a secure and stable connection.
- Check for Level and Alignment: Once the support posts and beams are securely attached, double check the levelness and alignment of all the components. Use a level and string to ensure that they are all at the correct height and properly aligned.
- Brace the Posts: During the construction process, it’s important to brace the support posts to prevent them from moving or shifting. This can be done by temporarily attaching diagonal bracing to the posts until the framing phase is complete.
Setting the support posts correctly is crucial to ensure the structural integrity and stability of your decking. Take the time to properly position, level, and secure the posts, and double check their alignment before proceeding to the next step of constructing your deck. With the support posts in place, your deck is beginning to take shape!
When building a decking, make sure to use pressure-treated lumber to prevent rot and decay. It’s also important to properly space the boards to allow for drainage and expansion.
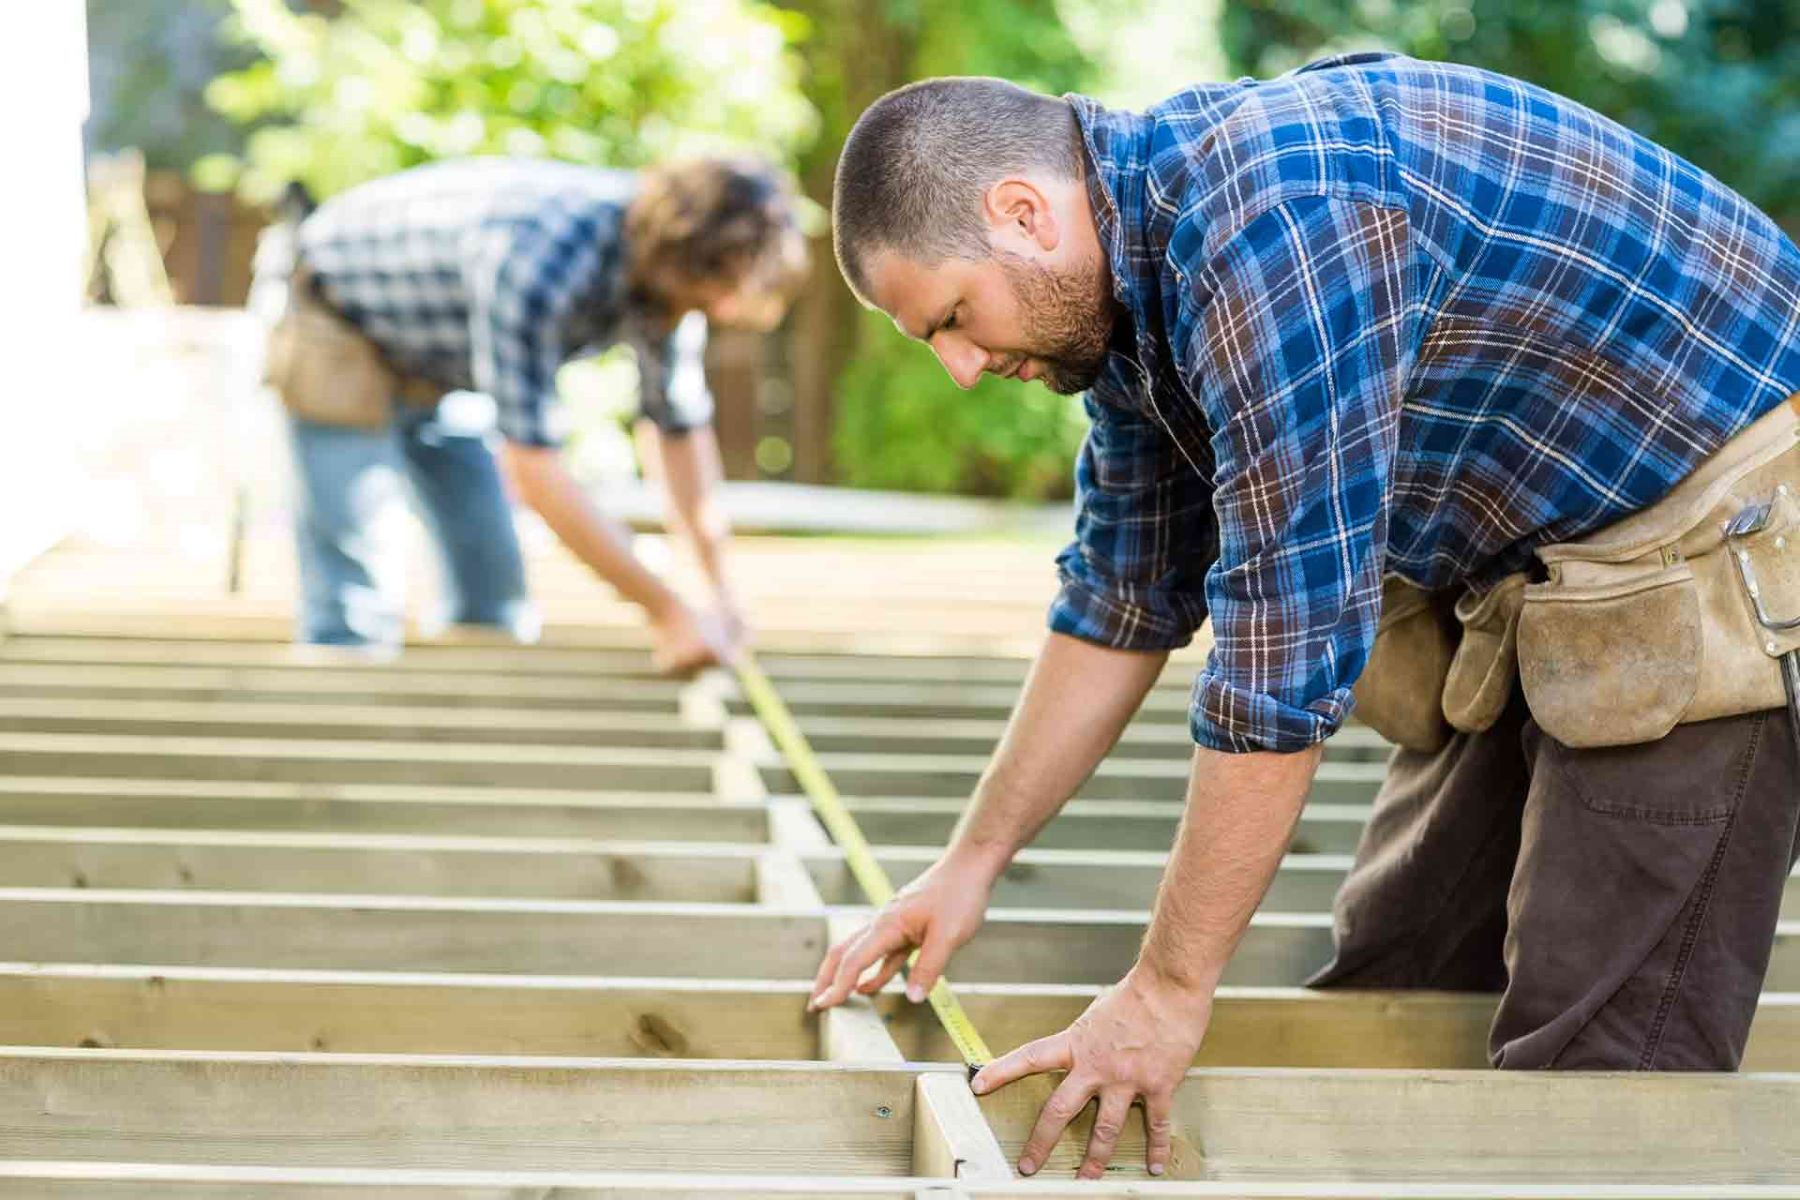
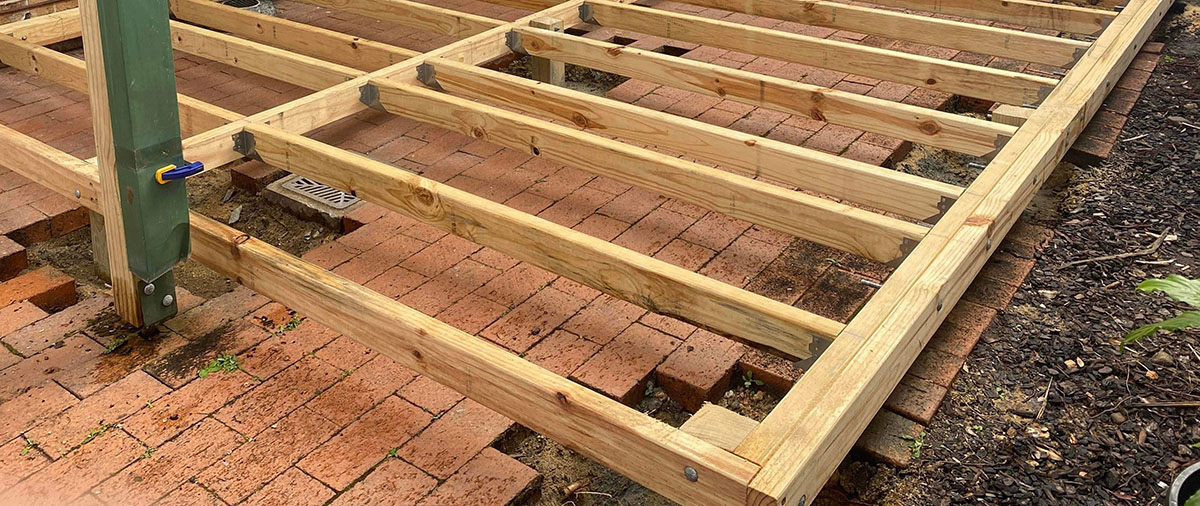
Step 6: Attaching the Joists
With the support posts set and secured, it’s time to move on to attaching the joists to create the framework for your decking. The joists provide additional structural support and serve as the base for the decking boards. Follow these steps to properly attach the joists:
- Determine Spacing and Orientation: Refer to your deck’s design plan and determine the spacing and orientation of the joists. The spacing between the joists will depend on the size and thickness of your decking boards. Typically, a spacing of 16 inches on center is a common recommendation.
- Mark the Joist Positions: Using a pencil or a chalk line, mark the positions of the joists on the support beams. Ensure that the markings are accurate and align with your design plan. Make sure to mark the joist positions on both ends of the support beams.
- Cut the Joists: If necessary, cut the joists to the desired length using a saw. Ensure that all the joists are cut to the same length for a uniform and level framework.
- Attach the Joist Hangers: Install joist hangers on the support beams according to the marked positions. Ensure that the joist hangers are properly aligned and securely attached using galvanized nails or structural screws.
- Place the Joists: Position the cut joists into the joist hangers, ensuring that they are seated properly and level. Use a level to double-check the levelness of the joists and make any adjustments if necessary.
- Secure the Joists: Attach the joists to the joist hangers using galvanized nails or structural screws. Make sure that each joist is securely fastened to the hanger to provide a stable and strong framework for your decking.
- Check for Level and Alignment: After securing the joists, double-check the levelness and alignment of the entire framework. Make any necessary adjustments to ensure that the joists are all level and properly aligned.
Attaching the joists forms the framework of your decking, providing the necessary support for the decking boards and ensuring the overall stability and strength of your deck. Take the time to accurately mark and cut the joists, properly install the joist hangers, and securely fasten the joists to create a solid foundation for your decking.
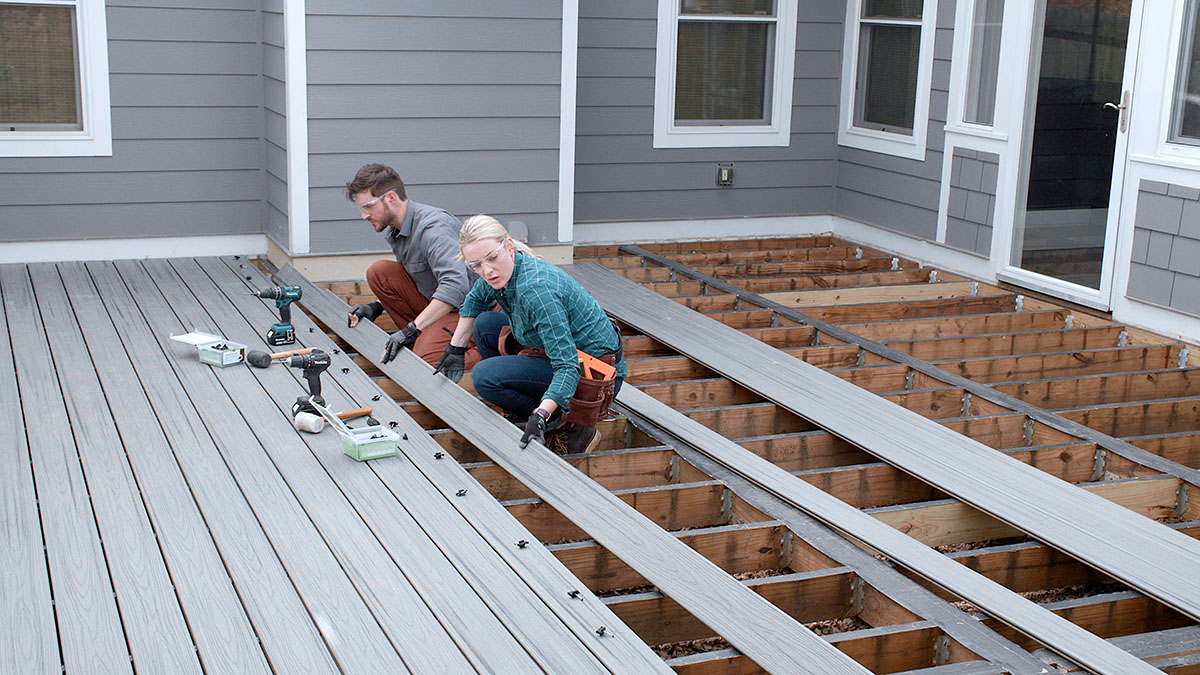
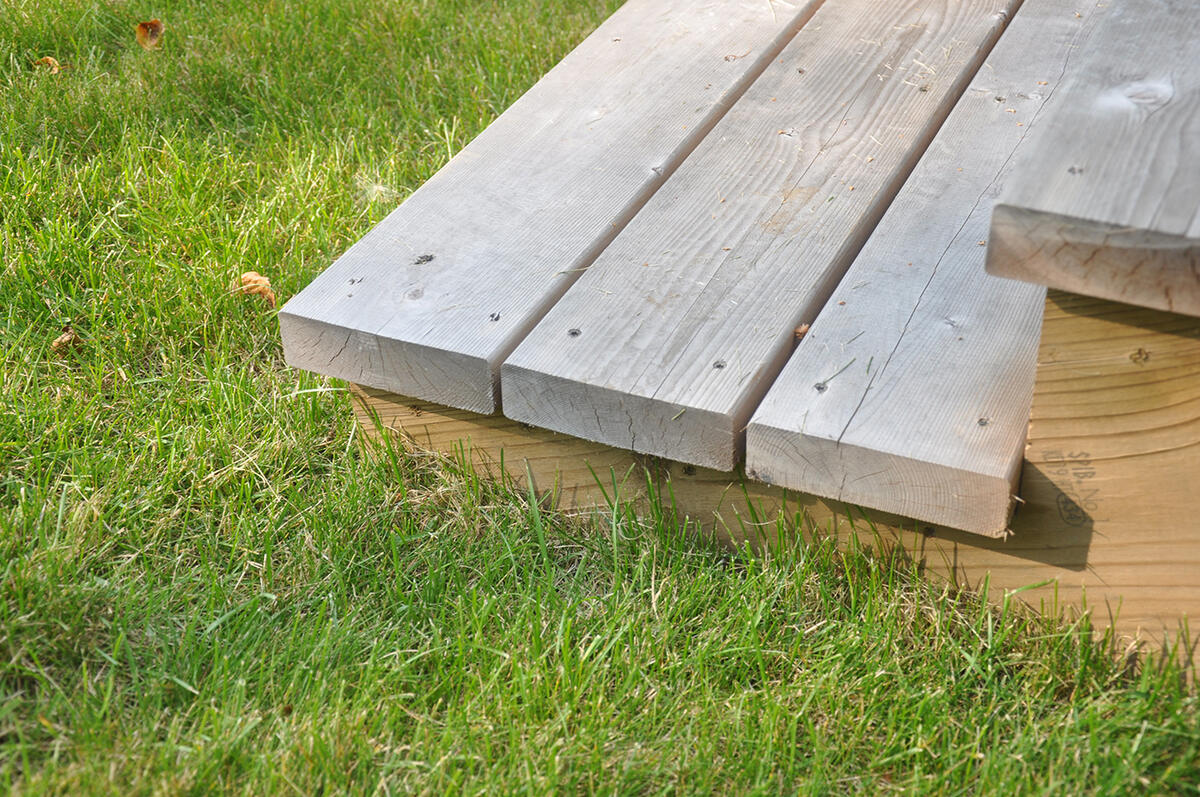
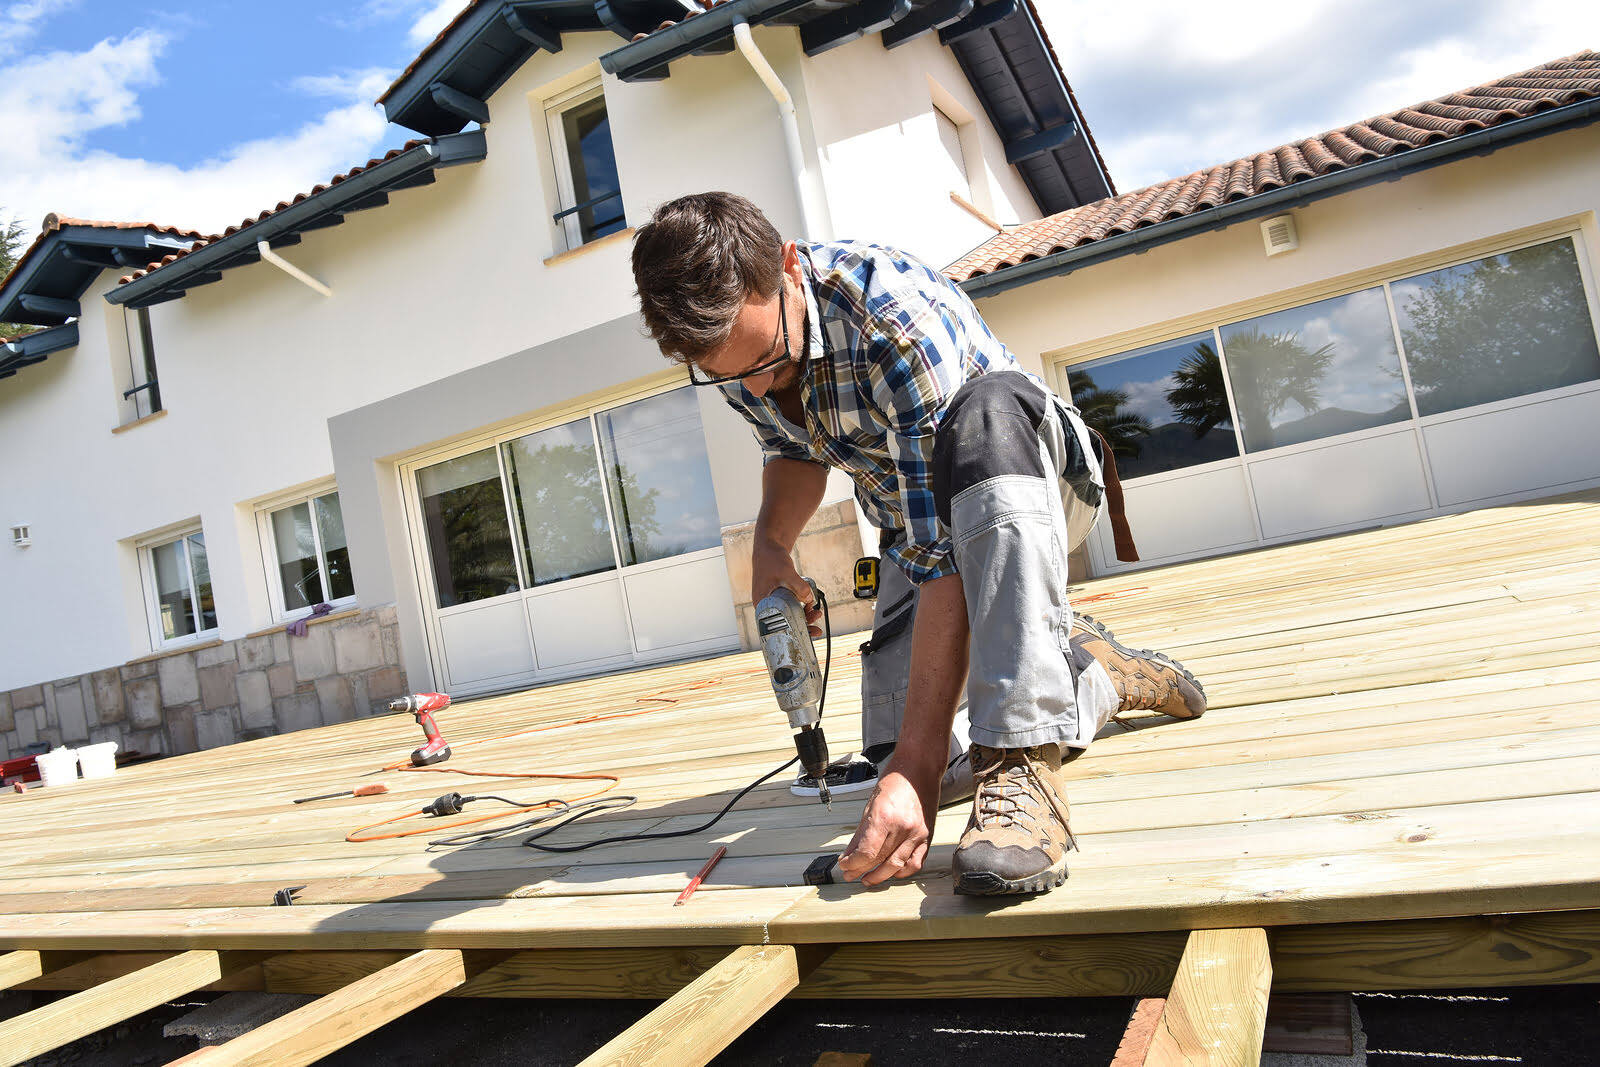
Step 7: Installing Decking Boards
With the framework of the deck in place, it’s time to move on to the exciting step of installing the decking boards. This is where you’ll see your deck come to life and start to take shape. Follow these steps to properly install the decking boards:
- Prepare the First Decking Board: Start by preparing the first decking board. Trim the board to the required size and ensure that it fits snugly against the house or any existing structures. Use a saw or a router to make any necessary cuts or adjustments.
- Attach the First Board: Position the first decking board, making sure it is flush with the outer edge of the framework. Use corrosion-resistant screws or nails to attach the board to the joists. Ensure that the spacing between the boards is consistent, typically achieved by using spacers.
- Continue Installing Boards: Working across the deck, continue installing the remaining decking boards. Ensure that each board is straight, level, and properly aligned with the previous board. Use a rubber mallet or a hammer with a scrap piece of wood to gently tap the boards into place.
- Trimming and Finishing: If necessary, trim the last board to fit the desired space. Remember to leave a small gap between the last board and any structures or walls to allow for expansion. Use a jigsaw or a circular saw to make clean and accurate cuts.
- Secure the Boards: Secure each decking board to the joists using corrosion-resistant screws or nails. Depending on your preference, you can choose to use hidden fasteners for a sleek and uninterrupted finish. Follow the manufacturer’s instructions for installation.
- Check for Level and Alignment: As you install each board, make sure to check for levelness and alignment. Use a level and string to ensure that the boards are straight and properly aligned with the framework. Make any necessary adjustments during the installation process.
- Apply Protective Finish: Once all the decking boards are installed, consider applying a protective finish to enhance the longevity and appearance of your deck. This can be a stain, paint, or a sealant specifically designed for your chosen decking material. Follow the manufacturer’s instructions for application.
Installing the decking boards is where your deck truly comes to life. Take your time to align and attach each board properly, ensuring a level and visually appealing surface for your deck. Don’t forget to leave room for expansion, and consider applying a protective finish to prolong the life of your decking.
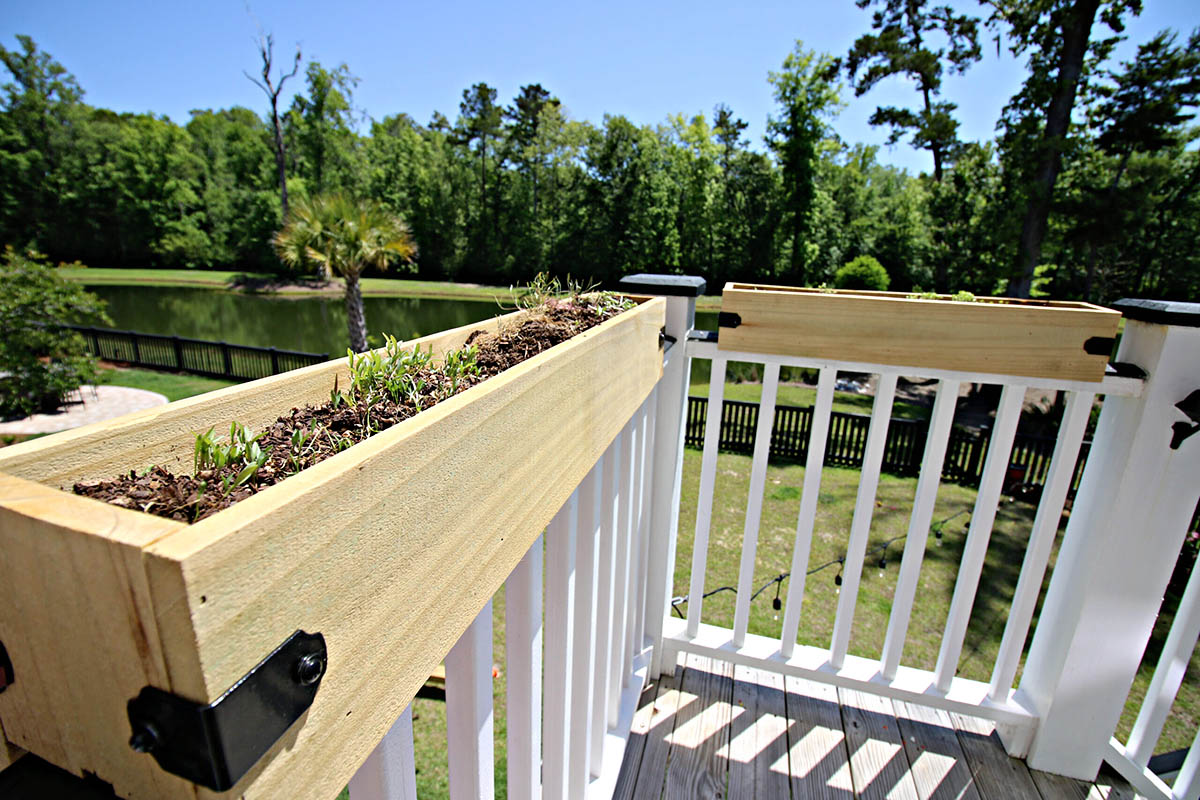
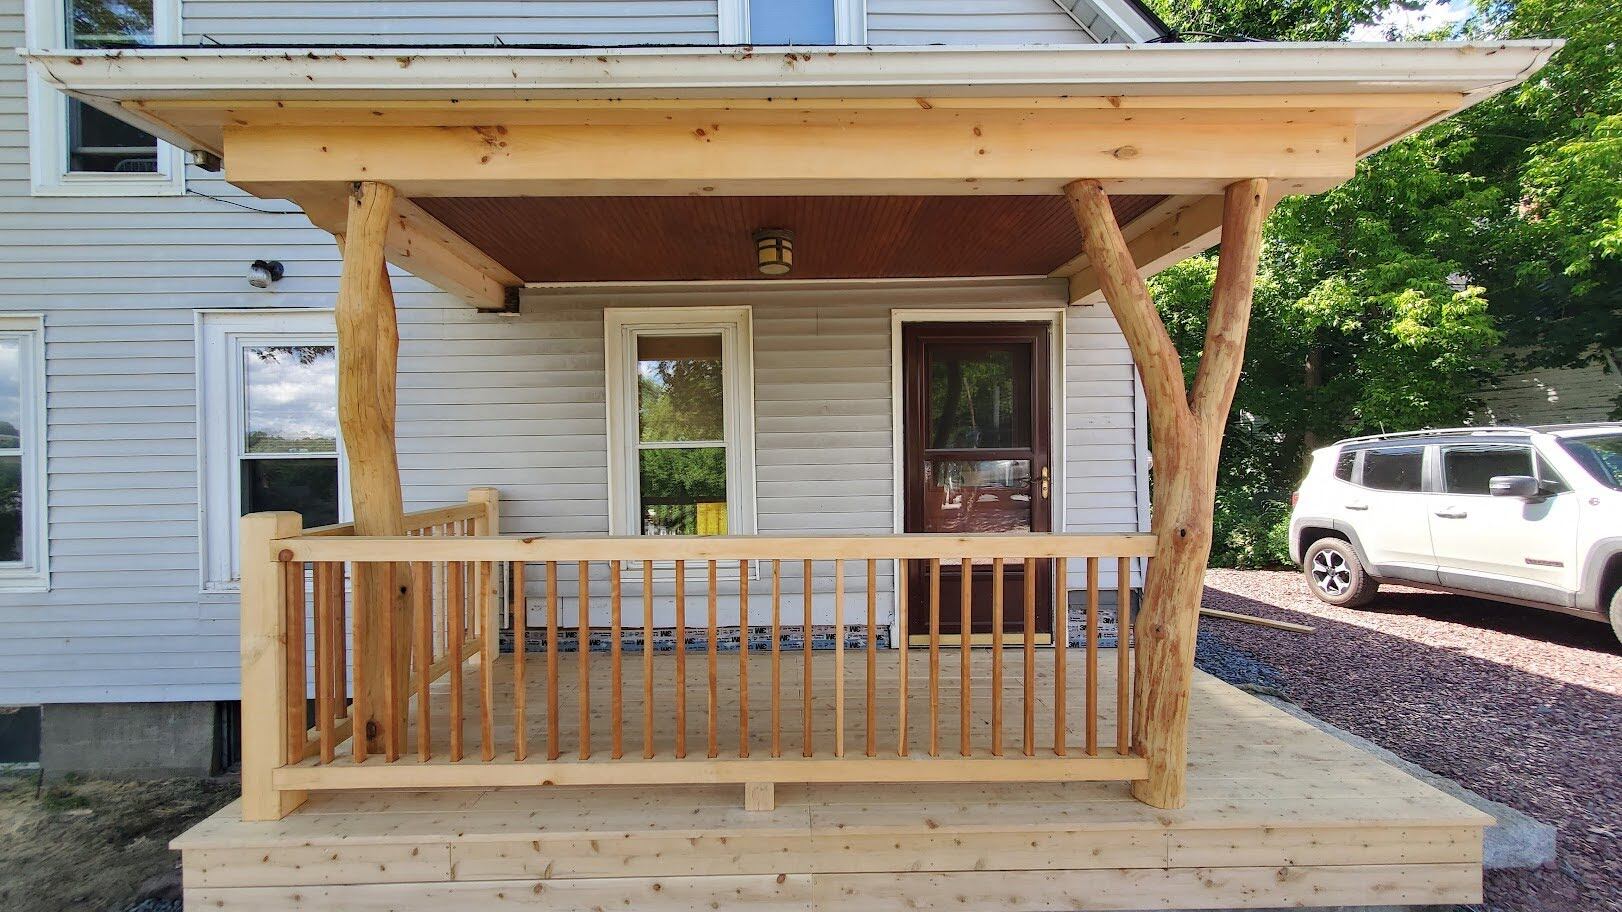
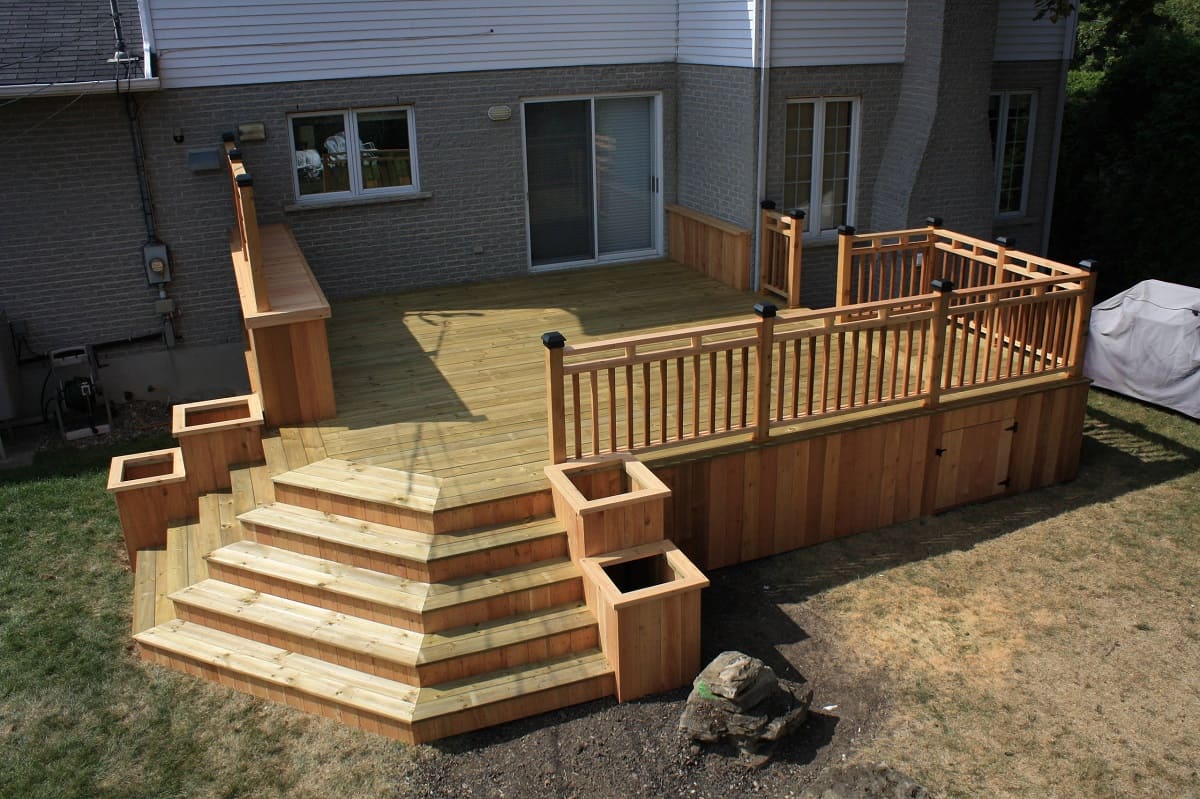
Step 8: Adding Railings and Balustrades
Adding railings and balustrades to your deck not only enhances its safety but also adds a decorative element to the overall design. Follow these steps to properly install railings and balustrades:
- Check Local Building Codes: Before proceeding, familiarize yourself with local building codes and regulations regarding deck railings. Ensure that you meet the required height and spacing requirements to ensure the safety of your deck.
- Choose the Railing Material: Select a railing material that matches the style and aesthetic of your deck. Common options include wood, metal, and composite. Consider the durability, maintenance requirements, and cost of each material.
- Measure the Posts and Cut Railings: Measure the distance between the support posts to determine the length of the railing sections. Use a saw to cut the railings to the appropriate length, making sure they fit securely between the posts.
- Install Post Anchors: If your deck does not have built-in posts, install post anchors on the deck surface to provide support for the railings. Secure the post anchors to the deck using appropriate fasteners.
- Attach the Top Rail: Begin by attaching the top rail to the support posts or the post anchors. Make sure the rail is level and properly aligned. Use brackets or screws to secure the top rail to the posts.
- Install Balusters: Measure and mark the spacing for the balusters along the railing. Attach the balusters to the top rail and the bottom rail, ensuring they are evenly spaced and secure. Use screws or brackets for the attachment.
- Add the Bottom Rail: If desired, attach a bottom rail between the support posts, securing it to the balusters. This adds additional support and a finished look to the railing. Use brackets or screws to secure the bottom rail.
- Finishing Touches: Once the railings and balustrades are installed, double-check the alignment, stability, and levelness. Make any necessary adjustments. Consider adding decorative caps or finials to the tops of the support posts for added aesthetic appeal.
Adding railings and balustrades not only provides safety and security but also adds beauty and style to your deck. Carefully choose the railing material and ensure that it complements the overall design of your outdoor space. By following these steps, you’ll create a secure and visually appealing railing system for your deck.
Read more: How To Build A Deck Patio
Step 9: Applying Finishes and Sealants
After completing the construction of your deck, the final step is to apply finishes and sealants. Finishes and sealants not only enhance the appearance of your deck but also provide protection against weathering, UV damage, and moisture. Follow these steps to properly apply finishes and sealants:
- Clean the Deck: Before applying any finishes or sealants, thoroughly clean the deck surface. Remove any dirt, debris, or stains using a deck cleaner or a mild detergent. Rinse the surface with water and allow it to dry completely.
- Sand the Surface: If the deck surface is rough or has any splintered areas, sand it lightly to create a smoother finish. Use sandpaper or a power sander to sand the wood, following the direction of the grain.
- Select the Finish: Choose a finish that suits your deck material and desired look. Common options include stains, paints, or oil-based finishes. Consider the color, transparency level, and durability of the finish.
- Apply the Finish: Using a paintbrush, roller, or sprayer, apply the finish to the deck surface according to the manufacturer’s instructions. Start from one end and work your way to the other, ensuring even coverage and avoiding overlapping or pooling.
- Protect the Surrounding Areas: To prevent any drips or stains on adjacent surfaces, cover or protect any nearby furniture, plants, or fixtures. Use drop cloths or plastic sheets as necessary.
- Allow Drying Time: After applying the finish, allow ample drying time as specified by the manufacturer. Avoid walking on the deck or placing furniture on it until the finish is fully cured.
- Apply Sealant: Once the finish is dry, consider applying a sealant to further protect the deck and enhance its longevity. A sealant creates a protective barrier against moisture, preventing rot, mold, and mildew growth.
- Regular Maintenance: To keep your deck looking its best, perform regular maintenance such as cleaning, reapplying finishes as needed, and inspecting for any damage or wear.
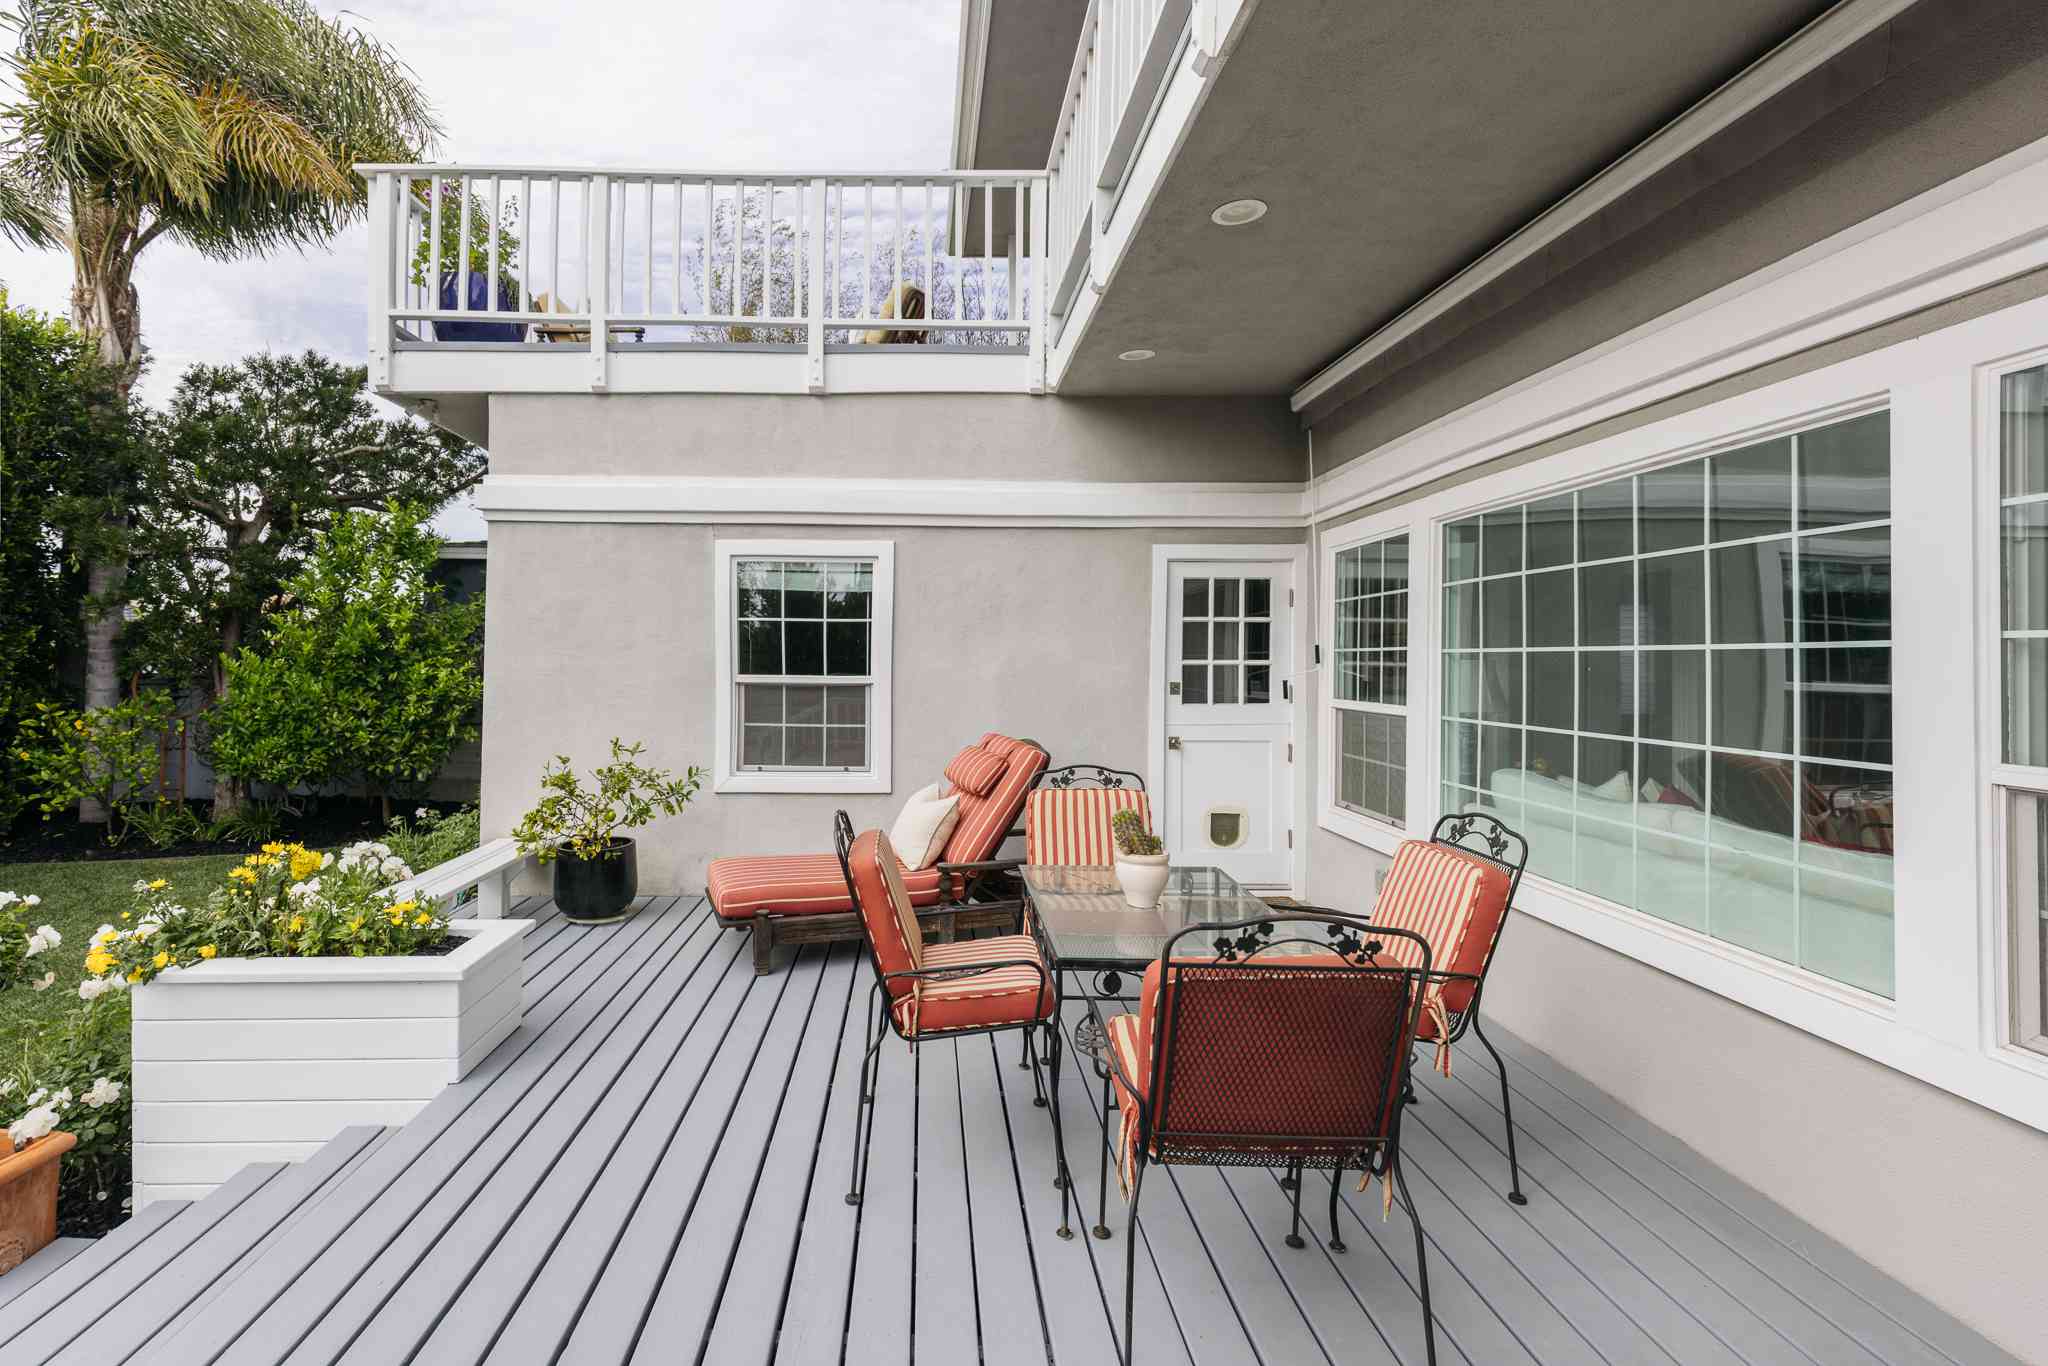
- Enjoy Your Deck: With the finishes and sealants applied, your deck is now ready to be enjoyed. Furnish it with outdoor furniture, add some plants, and create a cozy and inviting space to relax, entertain, and enjoy the outdoors.
Applying finishes and sealants is a crucial step in maintaining the beauty and longevity of your deck. By following these steps and regularly maintaining your deck, you can ensure that it remains a stunning outdoor space for years to come.
Conclusion
Congratulations! You have successfully completed the steps to build your own decking. By following this comprehensive guide, you have gained the knowledge and skills needed to create a beautiful and functional outdoor space that you can enjoy for years to come.
From planning and preparation to installing decking boards and adding finishes, each step plays a crucial role in the construction process. By taking the time to carefully plan, gather materials, clear and level the area, and properly install the foundation, you have created a strong and stable base for your deck.
Attaching the joists, installing decking boards, and adding railings and balustrades not only provide structural support but also enhance the safety and aesthetic appeal of your deck. By applying finishes and sealants, you have further protected your deck from the elements and added a touch of personal style.
Remember, maintaining your deck is just as important as building it. Regular cleaning, reapplying finishes as needed, and inspecting for any damage or wear will help extend the life and beauty of your deck.
Now it’s time to sit back, relax, and enjoy your newly built deck. Whether you’re hosting outdoor gatherings, unwinding after a long day, or simply basking in the beauty of nature, your deck will provide the perfect setting for creating lasting memories with family and friends.
Thank you for choosing this guide as your go-to resource for building a decking. We hope that you find joy and satisfaction in your outdoor oasis. Happy decking!
Frequently Asked Questions about How To Build A Decking
Was this page helpful?
At Storables.com, we guarantee accurate and reliable information. Our content, validated by Expert Board Contributors, is crafted following stringent Editorial Policies. We're committed to providing you with well-researched, expert-backed insights for all your informational needs.

0 thoughts on “How To Build A Decking”