Home>Furniture>Outdoor Furniture>How To Fix Cracks In A Concrete Patio
Outdoor Furniture
How To Fix Cracks In A Concrete Patio
Modified: March 7, 2024
Learn how to fix cracks in your concrete patio and protect your outdoor furniture with these easy step-by-step instructions.
(Many of the links in this article redirect to a specific reviewed product. Your purchase of these products through affiliate links helps to generate commission for Storables.com, at no extra cost. Learn more)
Introduction
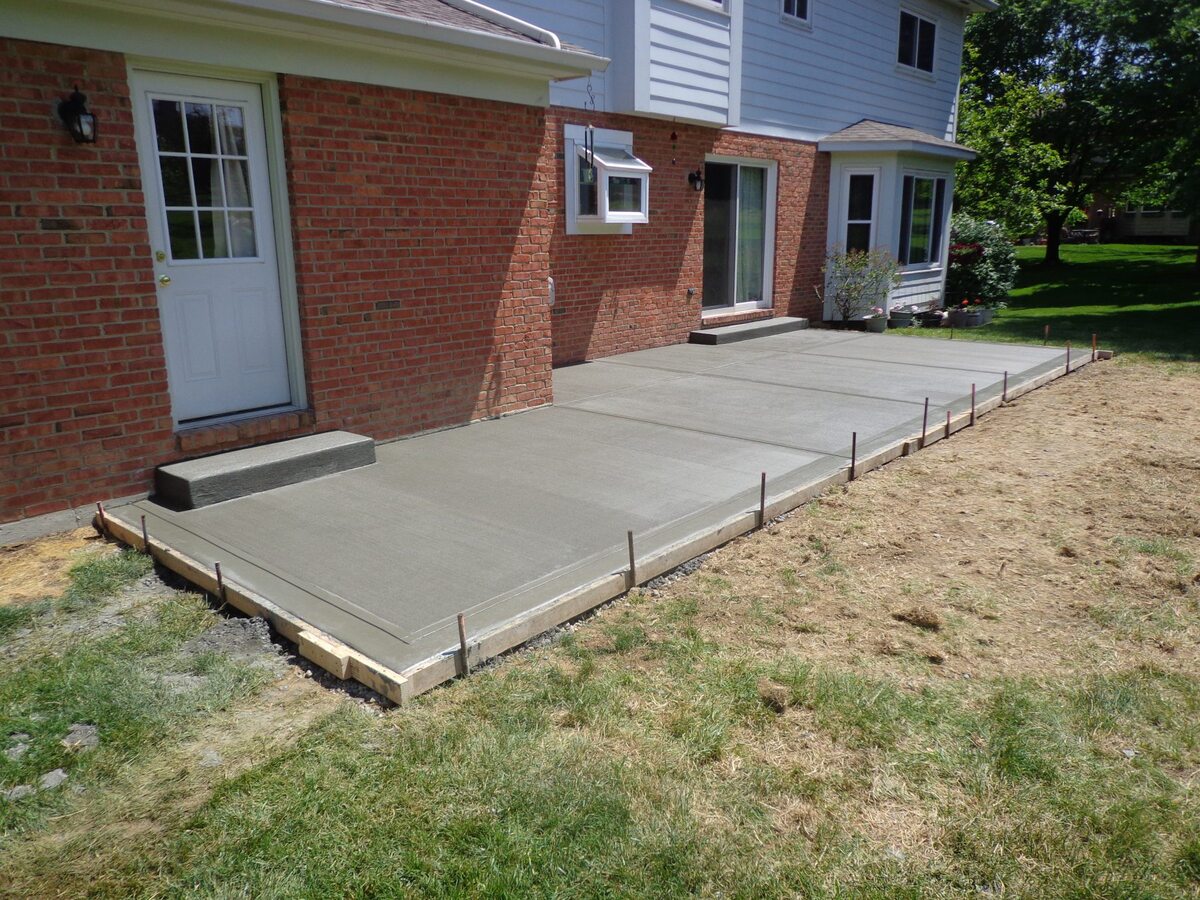
Welcome to the world of outdoor living! If you’re fortunate enough to have a concrete patio, you know how enjoyable it can be to spend time outdoors, whether it’s hosting a barbecue, lounging in the sun, or simply enjoying the fresh air. However, over time, your beloved patio may develop cracks that can not only detract from its appearance but also pose safety hazards. But don’t worry – with a little know-how and the right tools, you can easily fix those cracks and restore your patio to its former glory.
Before we delve into the process of repairing cracks in a concrete patio, it’s important to have a basic understanding of what causes these cracks to appear. Concrete, while a durable material, is not impervious to the elements. Over time, it can be subjected to various factors that contribute to cracking, such as:
- Freeze-thaw cycles: In colder climates, water can seep into the pores of the concrete, freeze, and expand, causing the material to crack.
- Settling: As the ground underneath the patio shifts or settles, it can create stress on the concrete, leading to cracks.
- Excessive weight: If heavy objects are placed on the patio or if it is subjected to frequent foot traffic or vehicle loads, it can cause the concrete to crack under the pressure.
- Improper installation: If the initial installation of the patio was not done correctly, such as inadequate reinforcement or improper curing, it can result in cracks over time.
Now that you understand some of the causes behind concrete patio cracks, the next step is to assess the severity of the cracks. This will help determine the appropriate repair method. In the following sections, we will guide you through the necessary tools and materials, as well as the step-by-step process of repairing different types of cracks in your concrete patio. So, let’s roll up our sleeves and get started on bringing your patio back to life!
Key Takeaways:
- Repairing cracks in a concrete patio requires understanding the causes, assessing severity, and using the right tools and materials. Proper preparation, patching, filling, and sealing are essential for a successful repair.
- Prevent future cracks by reinforcing the patio, controlling water drainage, avoiding heavy loads, and regular maintenance. With the right care, your patio can remain beautiful and functional for years.
Read more: How To Fix A Cracked Concrete Patio
Understanding the Causes of Cracks
Cracks in a concrete patio can be unsightly and problematic, but before you can effectively repair them, it’s important to understand the causes behind their formation. By identifying the root causes, you can take preventative measures to minimize future cracking.
One of the primary culprits behind concrete patio cracks is the natural expansion and contraction of the material due to temperature changes. This is particularly pronounced in regions with extreme temperature variations. When concrete is exposed to heat, it expands, and when temperatures drop, it contracts. Over time, this repeated expansion and contraction can lead to cracking.
Another common cause of patio cracks is the freeze-thaw cycle. In colder climates, water can seep into the pores of the concrete, especially if the patio is not properly sealed, and then freeze when temperatures drop. Water expands as it freezes, exerting pressure on the concrete and leading to cracks.
Settling is another factor that can contribute to the formation of cracks in a patio. As the ground beneath the concrete shifts or settles, it can create stress on the patio slab, causing it to crack. This can be exacerbated by factors such as soil erosion, tree roots, or improper compaction during installation.
Excessive weight or load-bearing pressure can also lead to cracking. If heavy objects like furniture, grills, or even vehicles are placed directly on the patio, it can put too much strain on the concrete, causing it to crack. Additionally, frequent foot traffic in the same area can weaken the concrete and make it more prone to cracking.
Finally, improper installation techniques or poor workmanship can be a significant factor in patio cracks. If the concrete was not adequately reinforced or if the curing process was not done correctly, the concrete patio may develop cracks over time. It’s essential to ensure proper procedures are followed during installation to minimize the risk of future cracking.
By understanding the causes of concrete patio cracks, you can address the underlying issues and take preventative measures to protect your patio. Proper maintenance, such as routine sealing and regular inspection for signs of cracking, can help extend the lifespan of your patio and mitigate potential damages. In the next section, we will discuss how to assess the severity of cracks in your patio to determine the appropriate repair method.
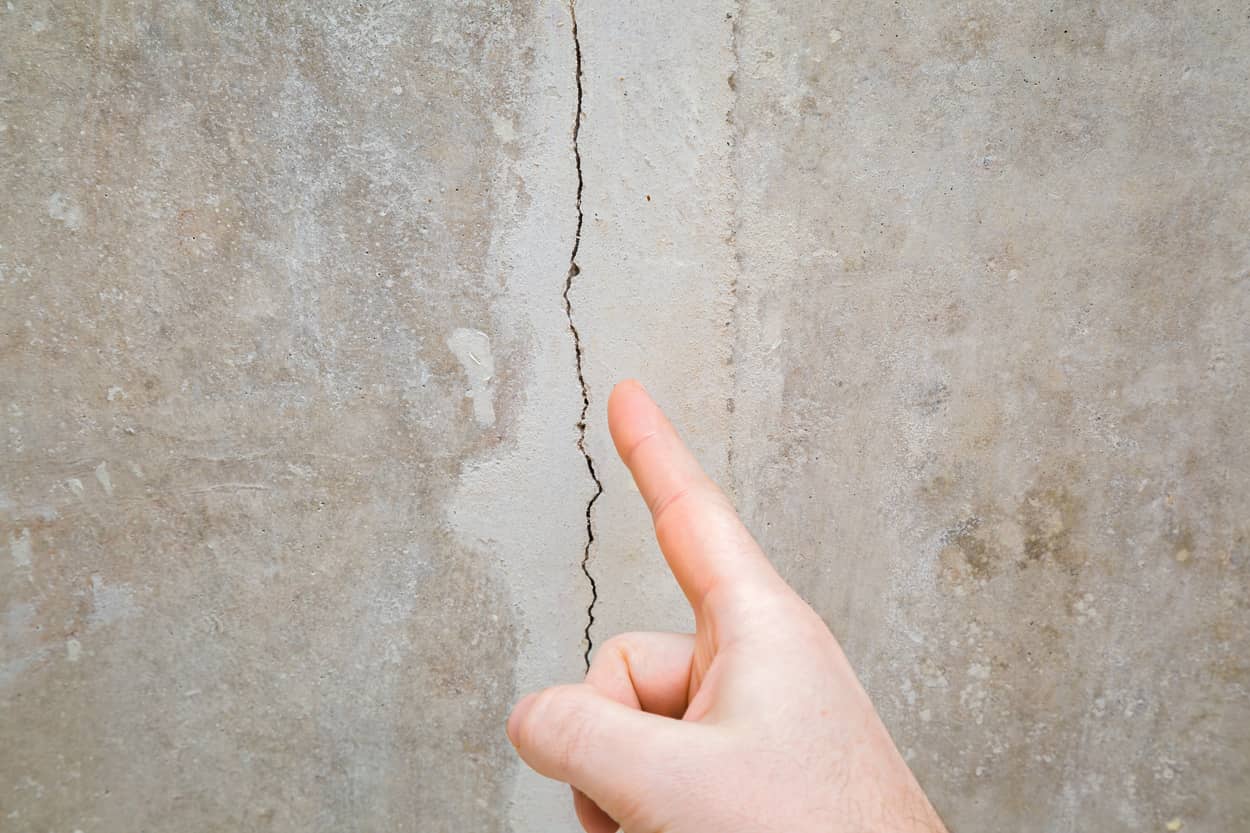
Assessing the Severity of Cracks
When it comes to repairing cracks in a concrete patio, it’s essential to assess the severity of the cracks before proceeding with any repairs. This assessment will help determine the appropriate repair method and ensure that you address the underlying issues effectively. Let’s look at how you can assess the severity of cracks in your patio.
The first step is to visually inspect the cracks. Look for the following characteristics:
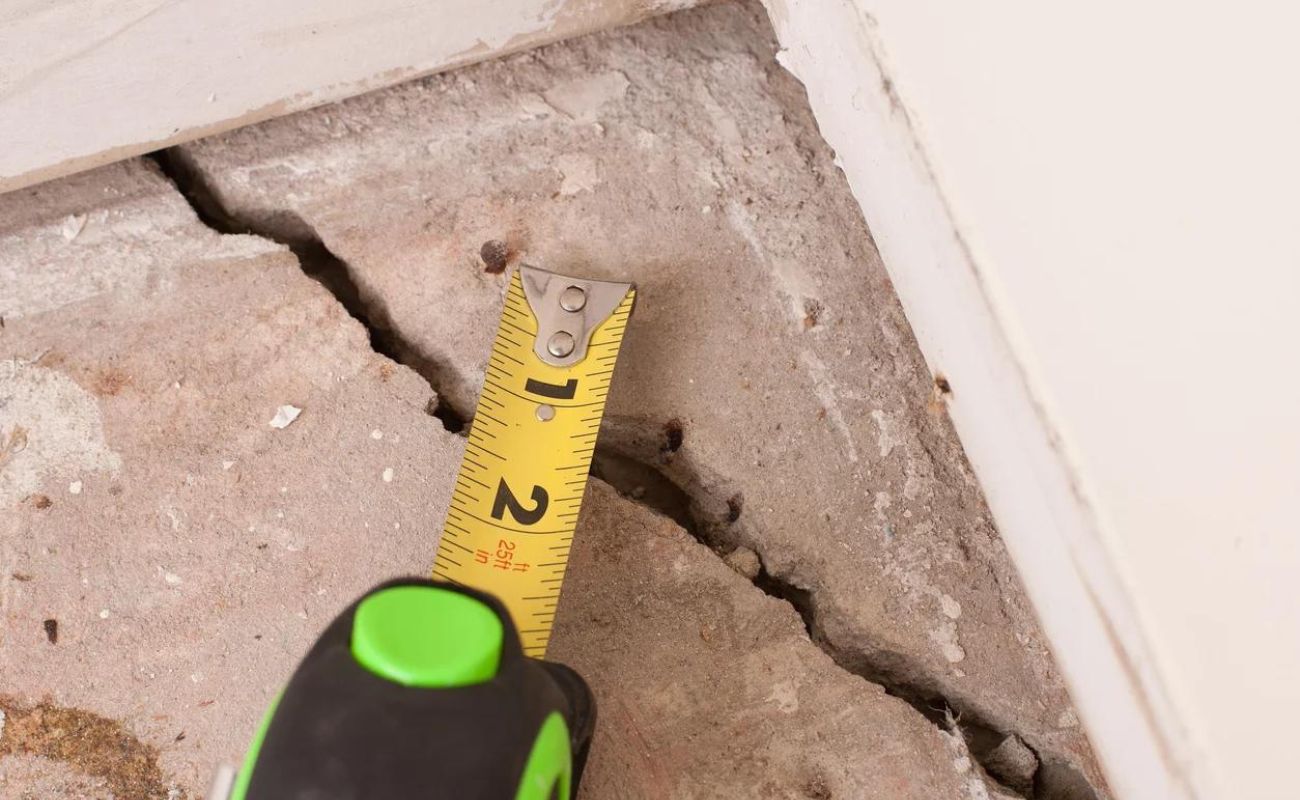
- Size: Measure the width and length of the cracks. Small hairline cracks, typically less than 1/8 inch in width, are generally superficial and not a cause for major concern. Cracks wider than that may indicate more significant issues.
- Depth: Determine how deep the cracks are. Superficial cracks that don’t penetrate the full thickness of the concrete may be less severe than cracks that extend through the entire depth.
- Pattern: Take note of the pattern or direction of the cracks. Cracks that follow a straight line or are in a radial pattern may be caused by settling, while cracks in a spiderweb or diagonal pattern could be due to ongoing movement or structural issues.
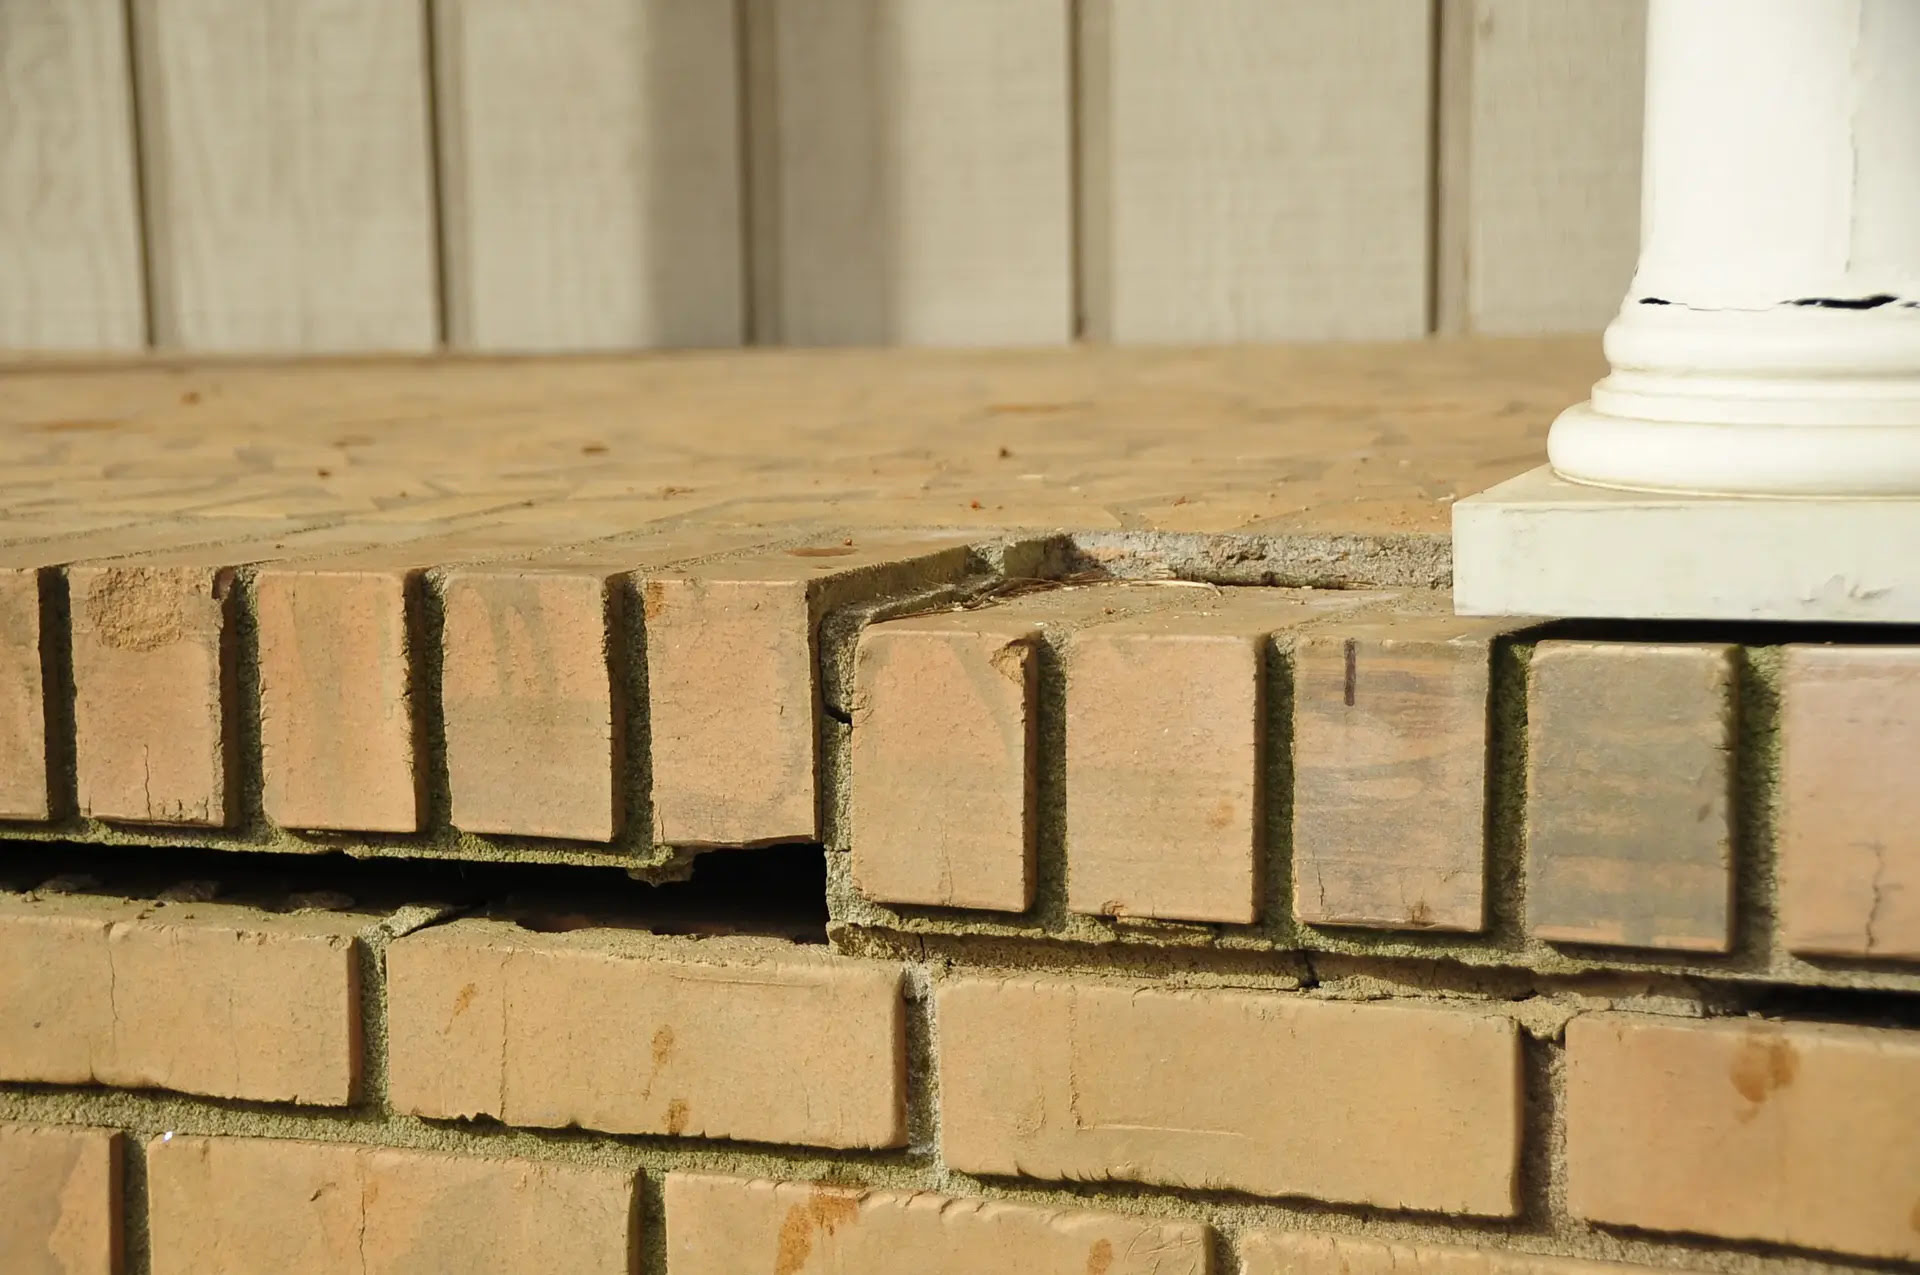
- Location: Consider the location of the cracks on your patio. Cracks near edges or corners may pose a greater risk of spreading or weakening the patio’s structural integrity.
Next, evaluate the stability of the cracks. Use a screwdriver or similar tool to gently probe the cracks. If the crack edges crumble or the cracks widen easily, it could indicate more significant structural issues. On the other hand, if the cracks are stable and the edges remain intact, the severity may be less significant.
Finally, consider the overall condition of your patio. Are there multiple cracks throughout the surface? Are there signs of sinking or uneven settling? These factors can help you gauge the overall health of your patio and determine whether professional assessment or repair is necessary.
Based on your assessment, you can categorize the cracks into three main levels of severity:
- Minor Cracks: Hairline cracks that are shallow and stable typically fall into this category. They are more of an aesthetic concern and can be easily repaired using simple patching methods.
- Moderate Cracks: Cracks that are wider, deeper, or exhibit some signs of instability fall into this category. They may require more involved repair techniques, such as filling with a specialized crack filler or using injection methods.
- Severe Cracks: Cracks that are wide, deep, and show signs of ongoing movement or structural issues fall into this category. These cracks might require professional assessment and repair, as they may indicate more significant problems with the patio’s foundation or structural stability.
By assessing the severity of cracks in your concrete patio, you can determine the appropriate repair approach and take the necessary steps to address the issues effectively. In the next section, we will explore the necessary tools and materials you will need to repair your patio cracks.
Necessary Tools and Materials
Before you embark on repairing the cracks in your concrete patio, it’s essential to gather all the necessary tools and materials. Having the right equipment at hand will make the repair process smooth and ensure a long-lasting and effective solution. Let’s take a look at the tools and materials you’ll need:
Tools:
- Protective Gear: Safety should always be a priority. Wear safety glasses, work gloves, and a dust mask to protect yourself from any potential hazards.
- Hammer and Chisel: These tools will be useful for chipping away any loose or damaged concrete around the cracks.
- Wire Brush: Use a wire brush to clean the cracks and remove any debris, dirt, or loose particles. This ensures better adhesion for the repair materials.
- Vacuum or Broom: After using the wire brush, clean the area thoroughly with a vacuum or broom to remove any remaining dust or debris.
- Crack Repair Tools: Depending on the size and severity of the cracks, you may need specialized tools, such as a crack injection kit or a caulking gun for crack sealants.
- Trowel or Putty Knife: These tools are essential for applying and smoothing the repair materials, such as patching compound or crack sealants.
- Concrete Mix: If you’re dealing with larger cracks or deep repairs, you may need to mix your own concrete using a concrete mixer or bucket.
- Spatula or Margin Trowel: These tools are helpful for precise application and finishing touches when working with concrete mixes.
- Caulking Gun: If you’re using a crack sealant or concrete repair caulk, a caulking gun will make the application easier and more controlled.
- Concrete Sealer: Once the repairs are complete, a concrete sealer will protect your patio from further damage and extend its lifespan.
Materials:
- Patching Compound: Use a high-quality patching compound suitable for external repairs to fill small cracks and shallow depressions in your patio.
- Concrete Crack Sealant: For moderate cracks, you can use a specialized crack sealant designed for concrete repairs. Look for a product that is flexible, durable, and resistant to weather and UV exposure.
- Concrete Mix: If you’re filling larger cracks or deep repairs, you’ll need a bagged concrete mix that matches the composition of your existing patio.
- Bonding Agent or Concrete Adhesive: This adhesive will enhance the bond between the existing concrete and the new patching material.
- Concrete Bonding Agent or Primer: If you’re using a crack injection system, you may need a bonding agent or primer specific to the type of injection material.
- Concrete Sealer: Finally, apply a high-quality concrete sealer to protect the repaired areas and prevent future cracks.
When gathering your tools and materials, ensure that you choose products that are compatible with the specific repairs needed for your patio. Following the manufacturer’s instructions and guidelines will ensure the best results.
Now that you have all the necessary tools and materials, it’s time to prepare your patio for repair. In the next section, we will guide you through the process of preparing the patio to ensure a successful repair job.
Preparing the Patio for Repair
Before you can start repairing the cracks in your concrete patio, it’s crucial to prepare the area properly. Proper preparation will ensure that the repairs adhere well and provide long-lasting results. Here are the steps to prepare your patio for repair:
Step 1: Clean the Surface
Begin by thoroughly cleaning the surface of your patio. Use a wire brush to remove any loose debris, dirt, or vegetation that may have accumulated in the cracks. Sweep or vacuum the entire patio to ensure there is no remaining dust or loose particles. Cleaning the surface will promote better adhesion of the repair materials.
Step 2: Clear Out Loose Concrete
If there are any areas with loose or damaged concrete around the cracks, use a hammer and chisel to carefully chip away the weak sections. Be sure to wear protective eyewear and gloves while doing this. Remove all the loose pieces until you reach stable, solid concrete. Sweep or vacuum again to remove any debris resulting from this process.
Step 3: Rinse the Patio
After removing the loose concrete pieces, it’s a good idea to give your patio a thorough rinse. Use a hose or a pressure washer to wash away any remaining dirt or dust. This will help create a clean surface for the repair materials to adhere to.
Step 4: Allow for Drying Time
Once you have cleaned and rinsed the patio, allow it to dry completely before applying any repair materials. The amount of time needed for drying will depend on the weather conditions, but typically it takes a day or two. Make sure the surface is dry to the touch before proceeding.
Step 5: Apply Bonding Agent or Primer (If Necessary)
Depending on the type of repair method you’re using, you may need to apply a bonding agent or primer to the prepared cracks. This will enhance the bond between the existing concrete and the repair materials, ensuring a strong and durable repair. Follow the manufacturer’s instructions for applying the bonding agent or primer, and allow it to dry as indicated.
By properly preparing your patio for repair, you are setting the stage for a successful outcome. The cleaned and cleared surface will allow the repair materials to adhere well and provide a seamless finish. With your patio prepped, you can now move on to repairing the cracks. In the next sections, we will guide you through the process of patching small cracks, filling larger cracks, and repairing deep cracks with injection methods.
Read more: How To Fix A Crack In Concrete Floor
Patching Small Cracks
If your concrete patio has small cracks, typically less than 1/8 inch in width, you can easily patch them using a suitable patching compound. Patching small cracks is a straightforward process that can be done with a few simple steps. Here’s how you can patch small cracks in your patio:
Step 1: Select the Patching Compound
Choose a high-quality patching compound specifically designed for repairing exterior concrete. Look for a product that is easy to work with, has good adhesion properties, and is suitable for outdoor use. Read the instructions on the packaging for the recommended application method and drying time.
Step 2: Prepare the Crack
Using a wire brush, clean the crack and remove any loose debris or particles. Ensure that the crack is free of dust and dirt, as this will help the patching compound adhere well. You can also use a vacuum or broom to clean the area thoroughly.
Step 3: Dampen the Crack
Moisten the crack with water using a spray bottle or a damp cloth. This will help create a better bond between the patching compound and the existing concrete.
Step 4: Apply the Patching Compound
Using a putty knife or a trowel, apply the patching compound into the crack. Fill the crack completely, slightly overfilling it to ensure that it is well-sealed. Smooth the surface of the patching compound with the putty knife or trowel, blending it with the surrounding concrete. Follow the manufacturer’s instructions for the appropriate application thickness.
Step 5: Allow for Drying and Finishing
Allow the patched area to dry according to the instructions provided with the patching compound. This typically takes a few hours. During the drying process, mist the patch with water to keep it moist, as this will aid in curing. Once the patch is dry, use a sanding block to smooth any rough edges, if necessary.
Step 6: Seal the Patched Area
To protect the repaired area and ensure its longevity, apply a concrete sealer. Choose a sealer that is suitable for outdoor use and follow the manufacturer’s instructions for application. Applying a sealer will help prevent future water infiltration and minimize the chances of new cracks forming.
Patching small cracks in your concrete patio can significantly improve its appearance and prevent further damage. With the proper tools, materials, and techniques, you can complete this repair in no time. However, if you are dealing with larger cracks or deep damage, you will need to employ different methods, which we will explore in the following sections.
Use a concrete patching compound to fill in the cracks in your patio. Clean the area thoroughly, apply the compound, and smooth it out with a trowel. Allow it to dry completely before walking on it.
Filling Larger Cracks
If your concrete patio has larger cracks, typically wider than 1/8 inch, a different approach is needed to effectively repair them. Filling larger cracks requires a durable and flexible material that can withstand the movement and stress that may occur in the concrete. Here’s a step-by-step guide on how to fill larger cracks in your patio:
Step 1: Clean and Prepare the Crack
Start by cleaning the crack and removing any loose debris, dirt, or vegetation using a wire brush. Ensure that the crack is clear of any loose particles, as this will help the repair material adhere properly. You can also use a vacuum or broom to clean the area thoroughly.
Step 2: Choose a Suitable Crack Filler
Select a high-quality concrete crack filler that is designed for outdoor use and can withstand exposure to the elements. Look for a filler that is flexible, durable, and resistant to weather and UV exposure. Read the instructions on the packaging for the recommended application method and drying time.
Step 3: Dampen the Crack
Moisten the crack with water using a spray bottle or a damp cloth. This will help create a better bond between the crack filler and the existing concrete.
Step 4: Apply the Crack Filler
Using a caulking gun, carefully fill the crack with the chosen crack filler. Start from the deepest part of the crack and work your way up, slightly overfilling the crack. Make sure the filler completely fills the crack and leaves no gaps or voids. Smooth the surface of the crack filler with a putty knife or a trowel, blending it with the surrounding concrete.
Step 5: Allow for Curing and Settling
Give ample time for the crack filler to cure and settle. Follow the manufacturer’s instructions for the recommended drying and curing time. During the curing process, mist the crack filler with water to keep it moist, as this will aid in proper curing.
Step 6: Finishing Touches
Once the crack filler is fully cured, inspect the repaired area for any unevenness or rough edges. If needed, use a sanding block to smooth the surface of the crack filler and create a seamless finish. This will help the repair blend in with the rest of the patio and improve its aesthetic appearance.
Step 7: Seal the Repaired Area
To protect the repaired area and ensure its longevity, apply a concrete sealer over the filled crack. Choose a sealer specifically formulated for outdoor use and follow the manufacturer’s instructions for application. Applying a sealer will help prevent future water infiltration and minimize the risk of new cracks forming.
By following these steps, you can effectively fill larger cracks in your concrete patio and restore its functionality and appearance. However, if you are dealing with deep cracks that require a more comprehensive repair approach, such as injection methods, we will explore those in the following section.
Repairing Deep Cracks with Injection
If your concrete patio has deep cracks that extend through the entire thickness of the slab, repairing them with injection methods is an effective way to restore the integrity of the structure. Injecting a specialized repair material into deep cracks helps to stabilize the concrete and prevent further damage. Here’s a step-by-step guide on how to repair deep cracks using injection:
Step 1: Assess the Crack
Before proceeding with the injection, assess the crack to ensure it is suitable for this repair method. Deep cracks that are wider than 1/8 inch and exhibit signs of ongoing movement or structural issues are good candidates for injection repairs. If unsure, consult a professional for a proper evaluation.
Step 2: Clean and Prepare the Crack
Thoroughly clean the crack using a wire brush to remove any loose debris or particles. Vacuum or use a broom to clear away any remaining dust or dirt. It’s crucial to have a clean and dry crack to allow the injection material to adhere effectively.
Step 3: Choose an Injection Material
Select a specialized injection material designed for concrete crack repairs. Common injection materials include epoxy or polyurethane-based compounds. Each material has its advantages and might be more suitable depending on the crack type and its specific requirements.
Step 4: Follow the Manufacturer’s Instructions
Read the manufacturer’s instructions for the selected injection material carefully. Follow their guidelines regarding mixing, application technique, and curing time to achieve the best results. Some injection materials may require the use of specialized tools or equipment, so be sure to acquire any necessary items.
Step 5: Prepare the Crack for Injection
Use duct tape or a similar material to cover the outer surface of the crack, leaving only the actual crack exposed for injection. This will prevent the injected material from leaking or spreading beyond the crack.
Step 6: Inject the Repair Material
Using an injection gun or applicator, carefully inject the repair material into the crack. Start from the lowest point of the crack and work your way up, filling the crack from the bottom to ensure that no air pockets are trapped. Continue injecting the material until it fills the entire length of the crack.
Step 7: Allow for Curing and Settling
Once the injection is complete, allow the repair material to cure and settle. Follow the manufacturer’s instructions for the recommended drying and curing time. Be patient during this process, as proper curing is essential for optimal results.
Step 8: Remove Excess Material and Finish
Once the injection material has fully cured, carefully remove any excess material from the surface of the patio using a chisel or scraper. Smooth out the area with a sanding block, blending the repaired section with the rest of the patio. This will create a seamless finish and improve the overall appearance of the repair.
Step 9: Seal the Repaired Area
To protect the repaired area and ensure its longevity, apply a concrete sealer over the injected crack. Choose a sealer that is compatible with the injection material and follow the manufacturer’s instructions for application. A sealer will help prevent water penetration and minimize the risk of future cracks.
By following these steps, you can effectively repair deep cracks in your concrete patio using injection methods. It’s important to note that deep cracks or significant structural issues may require professional evaluation and intervention. Now that your patio cracks are repaired, you can focus on finishing touches and sealing the entire surface, which we will explore in the next section.
Finishing and Sealing the Repaired Patio
After repairing the cracks in your concrete patio, it’s important to give the surface a finished look and apply a protective sealant to enhance its durability and longevity. Here are the steps to complete the finishing and sealing process:
Step 1: Inspect the Repaired Areas
Before proceeding with the finishing and sealing, inspect the repaired areas to ensure that they are smooth and blend seamlessly with the rest of the patio. Use a sanding block or a grinder, if necessary, to smooth out any rough edges or uneven patches.
Step 2: Clean the Entire Patio Surface
Thoroughly clean the entire patio surface, not just the repaired areas. Remove any dust, dirt, or debris using a broom, vacuum, or pressure washer. It’s essential to start with a clean surface to ensure proper adhesion of the sealant.
Step 3: Select a Concrete Sealer
Choose a concrete sealer that is suitable for outdoor use and compatible with the type of repair materials used on your patio. There are various sealant options available, such as acrylic sealers, epoxy sealers, or penetrating sealers. Consider factors like weather exposure, desired finish, and maintenance requirements when selecting a sealer.
Step 4: Apply the Concrete Sealer
Follow the manufacturer’s instructions for applying the concrete sealer. Start by pouring the sealer into a paint tray or bucket. Use a paint roller or a sprayer to evenly apply the sealer onto the patio surface, working in small sections at a time. Be sure to apply a thin and even coat to avoid puddling or uneven drying.
Step 5: Allow for Drying and Curing
Once the sealer is applied, allow it to dry and cure according to the manufacturer’s instructions. The drying time can vary depending on the type of sealer and weather conditions. Avoid stepping or placing any objects on the patio until the sealer is fully cured to prevent any damage or markings on the surface.
Step 6: Apply Additional Coats (Optional)
If desired, you can apply additional coats of sealer for added protection or to achieve the desired finish. Follow the manufacturer’s recommended wait time between coats and ensure proper drying and curing between applications.
Step 7: Maintain and Reapply Sealer as Needed
Once the initial sealer has dried and cured, it’s important to regularly maintain your patio and reapply the sealer as needed. Regular cleaning, sweeping, and removing any stains or spills promptly will help extend the life of the sealer. Reapply the sealer as recommended by the manufacturer to ensure continuous protection against moisture, UV rays, and wear-and-tear.
By completing the finishing and sealing process, you not only enhance the appearance of your repaired patio but also protect it from future damage. Regular maintenance and reapplication of the sealer will help keep your patio in excellent condition for years to come.
With your patio fully repaired, finished, and sealed, you can confidently enjoy outdoor gatherings, relax in the sun, and make lasting memories on your beautiful and functional outdoor space.
Read more: How To Repair Cracks In Concrete Driveway
Prevention Tips for Future Cracks
Now that you have repaired and sealed your concrete patio, you want to ensure that it remains in excellent condition for years to come. Implementing preventative measures can help minimize the risk of future cracks and extend the lifespan of your patio. Here are some tips to prevent future cracks:
1. Proper Installation: When constructing or installing a new concrete patio, ensure proper preparation, mixing, and curing techniques are followed. Hire a professional if needed to ensure the patio is properly reinforced and compacted.
2. Reinforce the Patio: Consider reinforcing the concrete patio with steel mesh or rebar during construction. This can help distribute the weight and stress evenly, making the patio more resistant to cracking.
3. Control Water Drainage: Ensure proper water drainage by sloping the patio away from your home’s foundation. This helps prevent water from pooling on the surface, which can lead to freeze-thaw cycles and eventual cracking.
4. Use Expansion Joints: Incorporate expansion joints in your patio design. These joints allow the concrete to expand and contract with temperature changes, reducing the likelihood of cracks occurring.
5. Maintain Proper Drainage: Keep gutters and downspouts clear to prevent water from overflowing onto the patio surface. Prolonged exposure to standing water can weaken the concrete and lead to cracks over time.
6. Avoid Heavy Loads: Avoid placing heavy objects directly on the patio surface. If you need to position large items, such as furniture or grills, consider using protective padding or placing them on stable platforms to distribute the weight evenly.
7. Use Mats or Rugs: Place mats or rugs in high-traffic areas or under furniture to provide additional cushioning and protection against impact. This can help reduce stress on the concrete and minimize the risk of cracks forming.
8. Regular Maintenance: Keep your patio clean by regularly sweeping away debris and removing stains promptly. Clean up spills and avoid using harsh chemicals or abrasive cleaners that can damage the sealer and weaken the concrete surface.
9. Seasonal Maintenance: Perform seasonal maintenance to ensure the patio is prepared for the changing weather conditions. Before winter, remove any leaves, snow, or ice from the surface. Use a plastic or rubber shovel instead of metal to prevent potential damage.
10. Reapply Sealer: Regularly monitor the condition of the sealer on your patio. As it wears down over time, reapply the sealer according to the manufacturer’s recommendations. This will help maintain the protective barrier and prevent moisture penetration.
By following these preventative measures, you can significantly reduce the risk of future cracks in your concrete patio. Regular maintenance, proper drainage, and careful use of the patio will contribute to its long-term durability and appearance.
Remember, while cracks may still occur despite preventive measures, addressing them promptly and using the appropriate repair methods will help maintain the integrity of your patio. With proper care and attention, you can continue to enjoy your outdoor space for years to come.
Thank you for reading our comprehensive guide on repairing, finishing, and preventing cracks in a concrete patio. We hope these tips have been helpful, and we wish you many enjoyable moments in your beautiful outdoor living area!
Conclusion
Having a concrete patio offers a fantastic outdoor space for relaxation, entertainment, and creating memories with family and friends. However, over time, cracks may appear and jeopardize both the aesthetic appeal and structural integrity of your patio. With the knowledge and tools provided in this guide, you now have the expertise to effectively repair cracks in your concrete patio and restore its beauty.
We started by understanding the causes of cracks, including temperature changes, freeze-thaw cycles, settling, excessive weight, and improper installation. Assessing the severity of cracks allowed us to determine the appropriate repair methods. From there, we discussed the necessary tools and materials needed for the repair process, including protective gear, hammers and chisels, wire brushes, crack fillers, and concrete sealers.
Preparing the patio for repair involved cleaning the surface, clearing out loose concrete, and ensuring a clean and dry environment. Patching small cracks required selecting the right patching compound, while filling larger cracks involved using specialized crack fillers and ensuring proper application techniques. Repairing deep cracks with injection methods provided a more comprehensive approach, stabilizing the concrete and preventing further damage.
After successfully repairing the cracks, we highlighted the importance of finishing and sealing the repaired patio. This step gives the surface a polished look and protects against future damage. Finally, we provided prevention tips to minimize the risk of future cracks, such as proper installation, reinforcing the patio, controlling water drainage, and regular maintenance.
We hope that this comprehensive guide has empowered you with the knowledge and confidence to repair cracks in your concrete patio. Remember, vigilance and regular maintenance are key to prolonging the life of your patio and ensuring its continued enjoyment for years to come.
Now, armed with the right techniques and insights, it’s time to roll up your sleeves and revive your concrete patio. Get ready to create lasting memories in your outdoor oasis!
Frequently Asked Questions about How To Fix Cracks In A Concrete Patio
Was this page helpful?
At Storables.com, we guarantee accurate and reliable information. Our content, validated by Expert Board Contributors, is crafted following stringent Editorial Policies. We're committed to providing you with well-researched, expert-backed insights for all your informational needs.


0 thoughts on “How To Fix Cracks In A Concrete Patio”