Home>Furniture>Outdoor Furniture>How To Fix A Cracked Concrete Patio
Outdoor Furniture
How To Fix A Cracked Concrete Patio
Modified: August 23, 2024
Learn how to fix a cracked concrete patio and ensure it's safe for your outdoor furniture. Our step-by-step guide will help you restore your patio's durability and aesthetics.
(Many of the links in this article redirect to a specific reviewed product. Your purchase of these products through affiliate links helps to generate commission for Storables.com, at no extra cost. Learn more)
Introduction
Welcome to our guide on how to fix a cracked concrete patio. Over time, concrete patios can develop cracks due to various factors such as weather conditions, heavy foot traffic, or poor installation. These cracks not only affect the aesthetic appeal of your outdoor space but can also lead to further damage if left untreated.
Repairing a cracked concrete patio may seem like a daunting task, but with the right materials, tools, and techniques, you can restore its functionality and beauty. In this article, we will walk you through the step-by-step process of assessing the damage, gathering the necessary materials and tools, cleaning the cracked area, preparing the concrete repair mix, applying the mix, smoothing and finishing the surface, and finally, curing and sealing the repaired patio.
Whether you’re a seasoned DIY enthusiast or a beginner, this guide will equip you with the knowledge and confidence to tackle this project effectively. So, let’s get started and transform your cracked concrete patio into a pristine outdoor oasis!
Key Takeaways:
- Assess the damage and gather materials before fixing a cracked concrete patio. Look for different crack types and gather essential tools and materials for a successful repair.
- Clean, prepare, and apply the concrete repair mix carefully. Thoroughly clean the cracked area, prepare the repair mix, and apply it accurately for a seamless and durable repair.
Read more: How To Fix Cracks In A Concrete Patio
Assessing the Damage
Before you begin the repair process, it’s essential to assess the extent and type of damage on your concrete patio. This will help you determine the appropriate repair method and ensure long-lasting results.
Start by thoroughly inspecting the cracked area. Look for any signs of underlying issues such as underlying soil erosion, tree roots pushing through the concrete, or water damage. These issues may require additional steps and professional assistance to address.
Next, identify the type of crack you’re dealing with. Common types of cracks include:
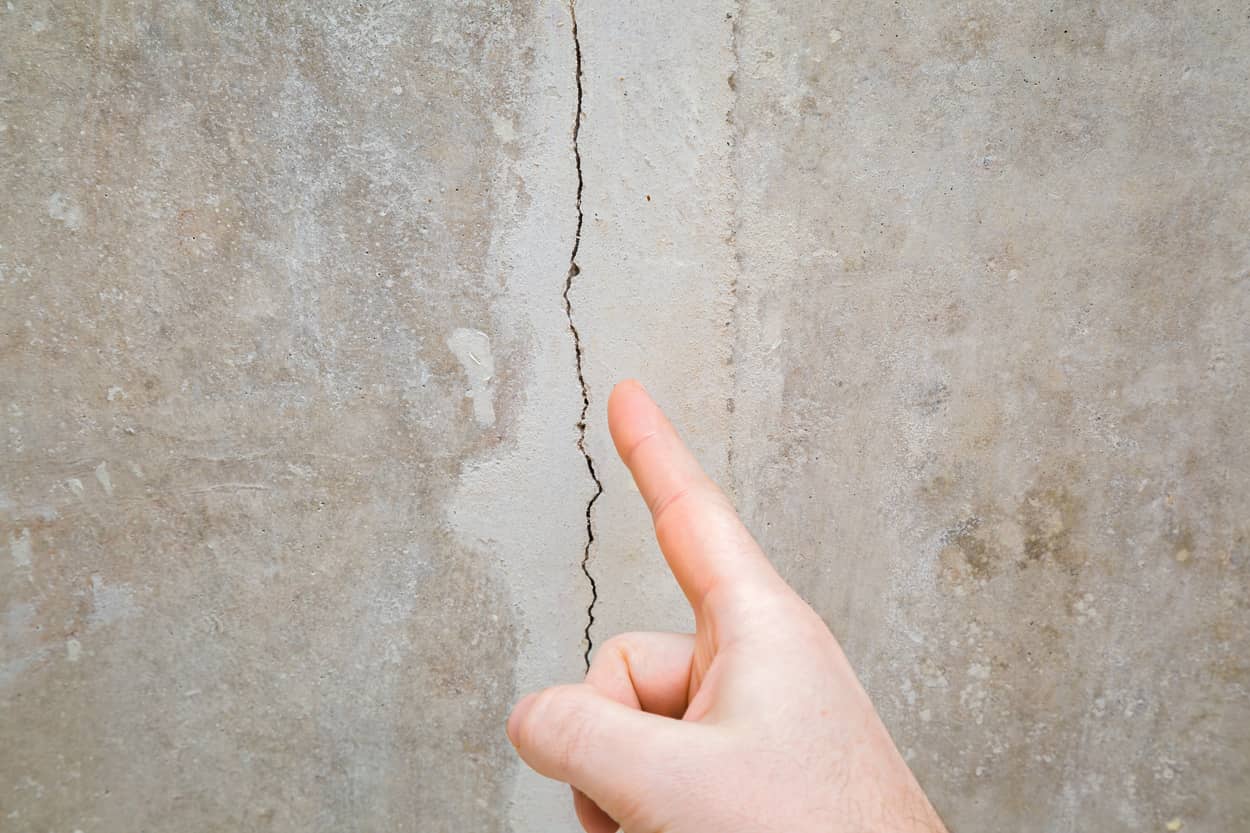
- Hairline cracks: These are small, shallow cracks that are typically less than 1/8 inch in width. They are common and can be caused by temperature changes or underlying structural stress.
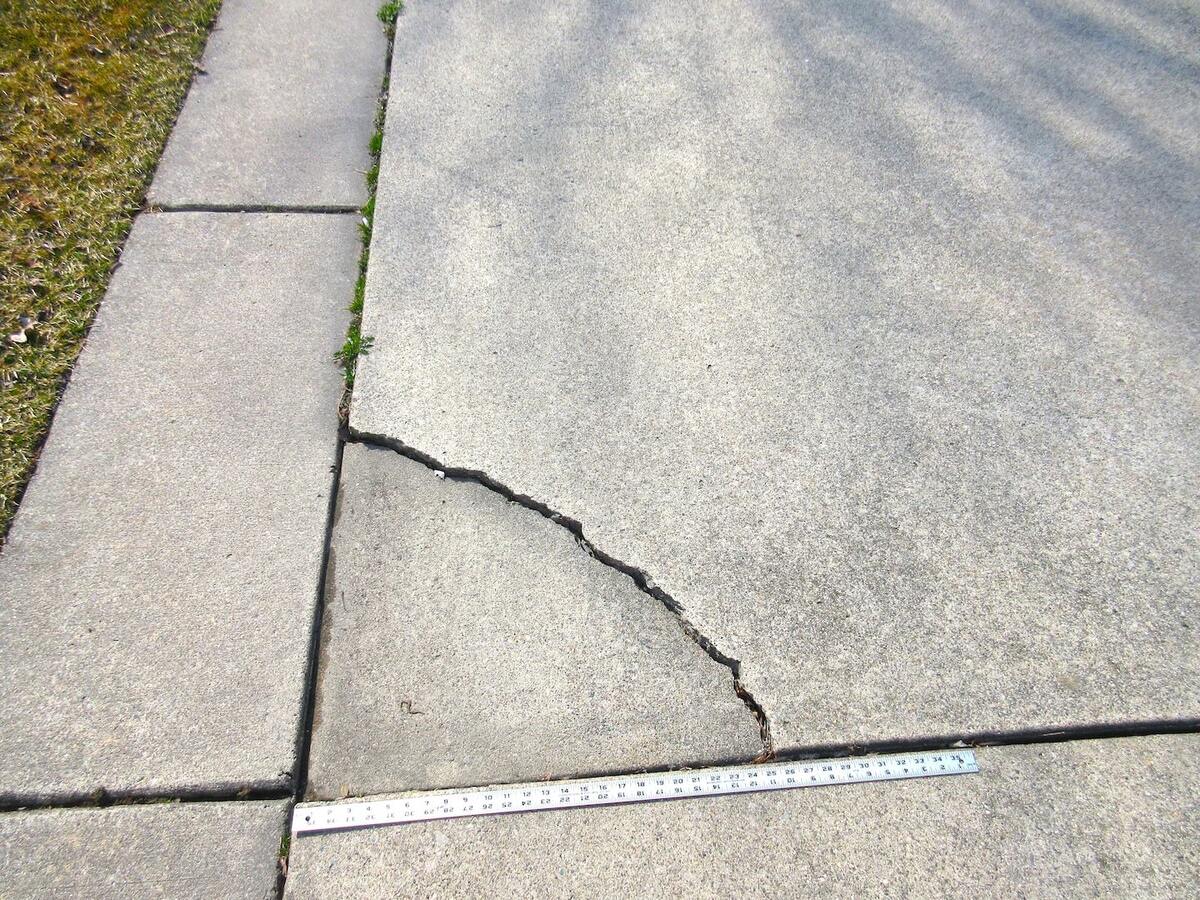
- Surface cracks: These cracks are slightly wider and deeper than hairline cracks and may extend up to 1/4 inch in width. They can be caused by freeze-thaw cycles or heavy foot traffic.
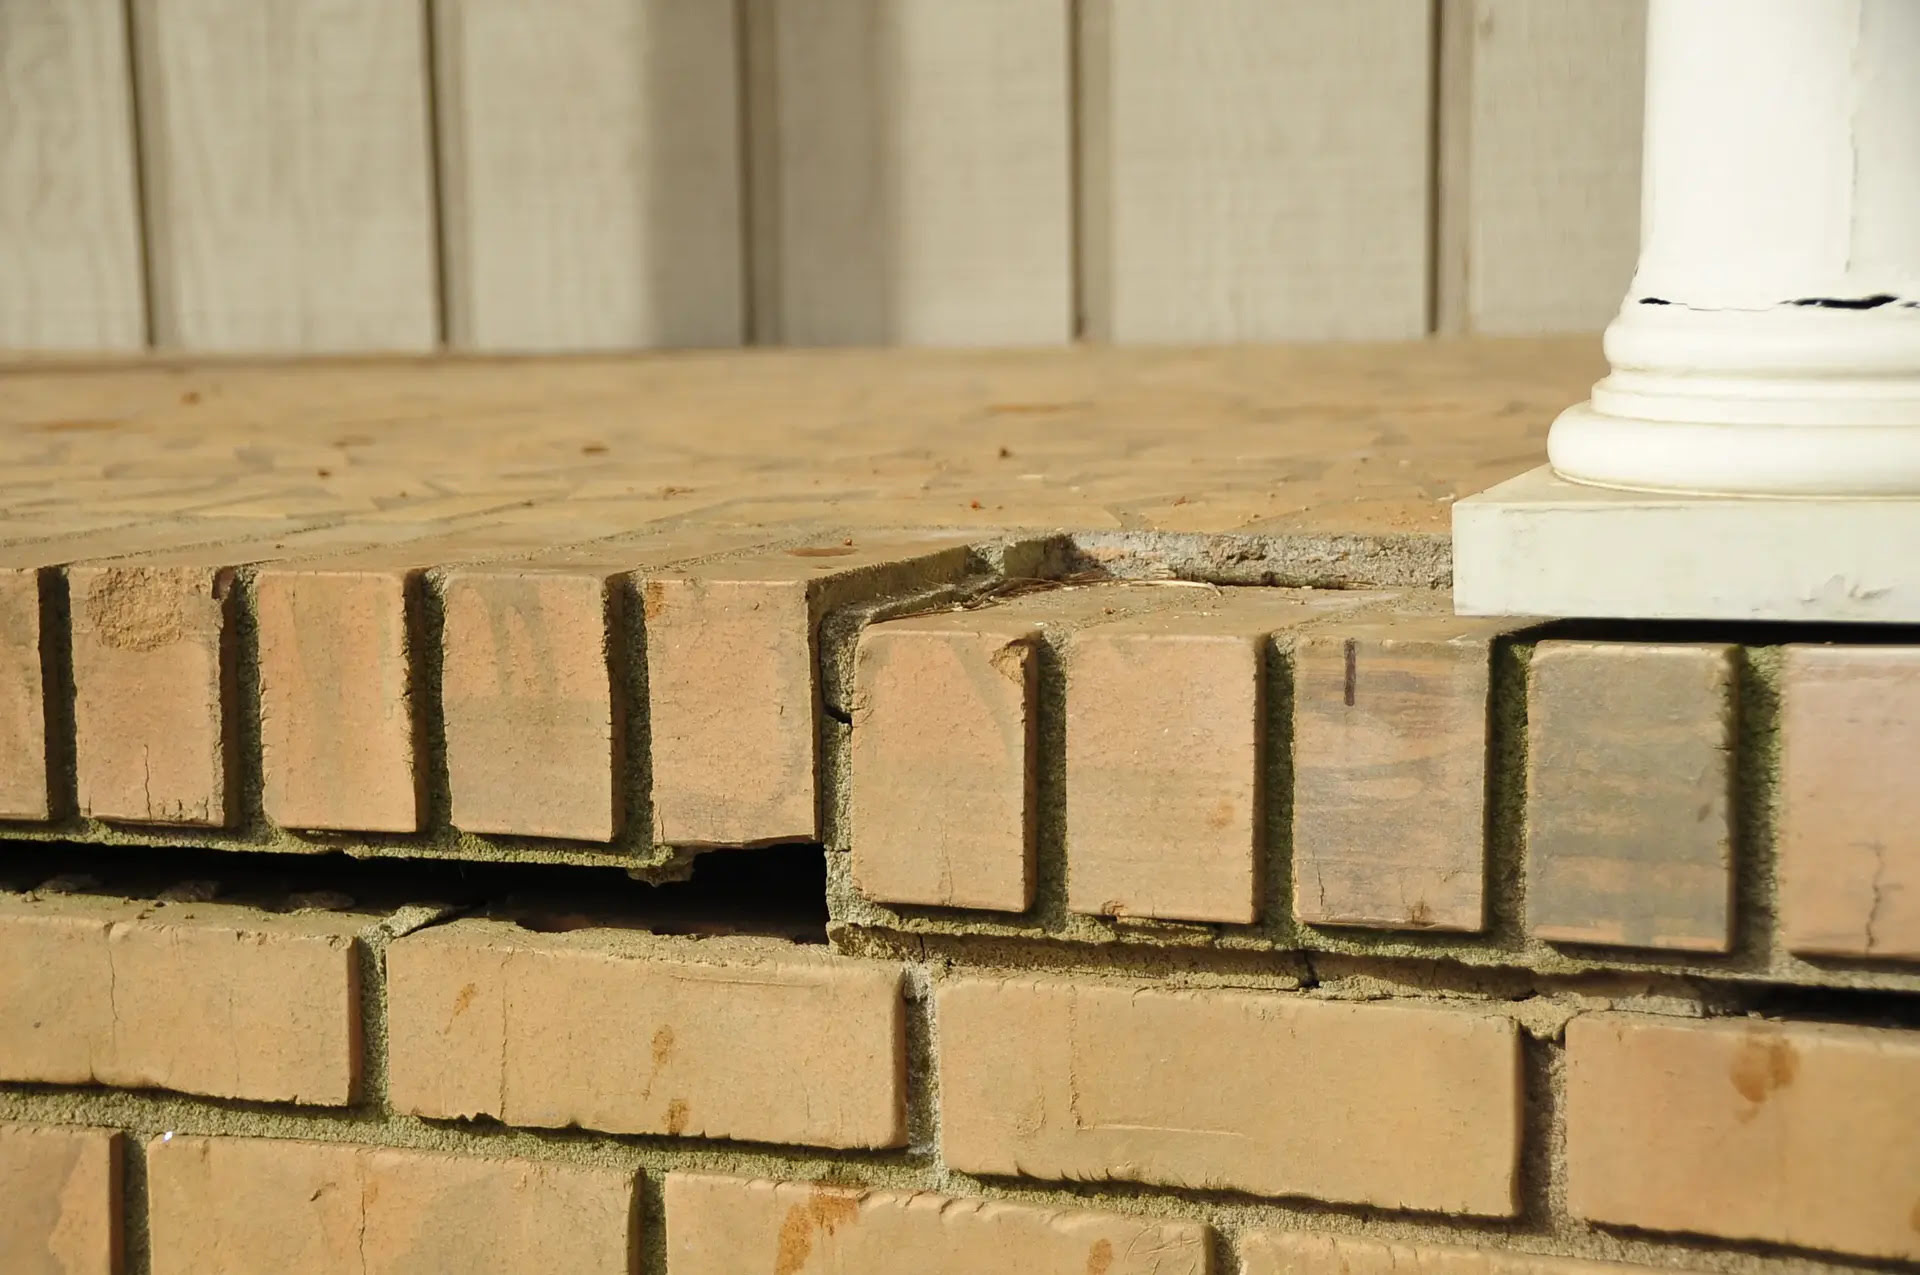
- Settlement cracks: These cracks are wider and deeper than surface cracks and can be caused by soil movement or inadequate foundation preparation. They may require additional steps to fix the underlying issue before repairing the concrete.
Additionally, consider the location and pattern of the cracks. Cracks that are concentrated in a specific area or follow a particular pattern may indicate an underlying problem. It’s important to address these issues to prevent further damage and ensure the longevity of the repair.
By thoroughly assessing the damage, you’ll have a clear understanding of the repair required and can plan the necessary steps accordingly. If you are uncertain about the severity of the damage or the appropriate repair approach, consulting with a professional contractor or structural engineer is recommended.
Gathering Materials and Tools
Once you have assessed the damage and determined the appropriate repair method, it’s time to gather the materials and tools you’ll need for the job. Having everything prepared ahead of time will make the repair process smoother and more efficient.
Here are the essential materials and tools you’ll need:
- Concrete repair mix: Choose a high-quality concrete repair mix that is suitable for the size and depth of the cracks on your patio. You can find various options at your local home improvement store.
- Crack filler: If the cracks on your patio are larger than 1/4 inch, you may need to use a crack filler before applying the concrete repair mix. Make sure to choose a filler that is compatible with your repair mix.
- Cleaner and degreaser: Cleaning the cracked area is crucial for proper adhesion of the repair materials. Use a cleaner and degreaser specifically designed for concrete surfaces. Follow the manufacturer’s instructions for application.
- Chisel and hammer: If there are loose or crumbling concrete around the cracks, a chisel and hammer will help remove the damaged portions and create clean edges for the repair.
- Trowel or putty knife: These tools will be used to apply and smooth the concrete repair mix.
- Wire brush: Use a wire brush to remove any loose debris or old paint from the cracked area.
- Protective gear: Wear safety goggles, gloves, and a dust mask to protect yourself from dust, debris, and fumes during the repair process.
Ensure that you have all the necessary materials and tools before you start the repair. This will save you time and prevent any interruptions during the process. Additionally, consider the weather conditions and plan your repair accordingly. Avoid undertaking the repair on a hot, windy day or when rain is expected, as it can affect the curing process of the repair materials.
With the materials and tools gathered, you’re now ready to move on to the next step: cleaning the cracked area.
Cleaning the Cracked Area
Before applying any repair materials, it’s crucial to clean the cracked area thoroughly. Proper cleaning will remove any dirt, debris, or loose particles that can hinder the adhesion of the concrete repair mix.
Here’s a step-by-step guide to clean the cracked area:
- Clear the area: Remove any furniture, plants, or obstacles from the patio to create a clear workspace.
- Sweep the area: Use a broom or brush to sweep away loose dirt, leaves, or debris from the cracks. Pay attention to the corners and edges where debris may accumulate.
- Use a wire brush: Scrub the cracked area with a wire brush to remove any stubborn dirt, old paint, or loose concrete. Make sure to brush in all directions to ensure a thorough cleaning.
- Apply a concrete cleaner: Prepare a concrete cleaner or degreaser according to the manufacturer’s instructions. Apply the cleaner to the cracked area and scrub with a brush or broom. This will help remove any grease, oil, or stains that may affect the repair.
- Rinse with water: Once you have scrubbed the cracked area, rinse it thoroughly with water. Use a hose or bucket to remove any remaining cleaner or debris. Let the area dry completely before moving on to the next step.
It’s important to note that if your patio has been sealed or coated with a protective layer, you may need to remove the sealant or coating before cleaning the cracked area. Follow the manufacturer’s instructions for proper removal.
By thoroughly cleaning the cracked area, you’ll ensure better adhesion of the repair materials and improve the overall longevity of the repair. Once the area is clean and dry, you’re ready to prepare the concrete repair mix.
Preparing the Concrete Repair Mix
Now that you have cleaned the cracked area of your patio, it’s time to prepare the concrete repair mix. The repair mix is a crucial component that will fill in the cracks and restore the strength and integrity of the concrete.
Follow these steps to prepare the concrete repair mix:
- Read the instructions: Carefully read and understand the manufacturer’s instructions on the packaging of the concrete repair mix. Different products may have varying mixing ratios and application techniques.
- Wear protective gear: Put on your safety goggles, gloves, and dust mask before handling the repair mix. Take precautions to protect yourself from any potential skin irritation or inhalation of dust.
- Measure the mix: Measure the appropriate amount of repair mix according to the instructions. Use a clean container or bucket to ensure accurate measurements. Add the repair mix to the container.
- Add water: Gradually add water to the repair mix while continuously mixing. Follow the specified water-to-mix ratio provided by the manufacturer. Use a trowel or putty knife to thoroughly mix the water and repair mix until you achieve a homogenous consistency.
- Check the consistency: The repair mix should have a consistency similar to pancake batter or peanut butter. It should be easy to work with and not too runny or dry. Adjust the water as needed to achieve the desired consistency.
It’s important to note that different repair mixes may have different curing times. Some may require additional curing agents or steps, such as adding water after the initial application. Refer to the manufacturer’s instructions for specific details on the curing process.
By properly preparing the concrete repair mix, you’ll ensure that it is ready for application and will provide effective results. Now that the mix is ready, you can proceed to the next step: applying the repair mix to the cracked area.
Fill the cracks with a concrete patching compound, then smooth it out with a trowel. For larger cracks, use a concrete resurfacer to create a smooth, even surface.
Read more: How To Fix A Crack In Concrete Floor
Applying the Concrete Repair Mix
With the concrete repair mix prepared, it’s time to apply it to the cracked area of your patio. This step is crucial for filling in the cracks and restoring the structural integrity of the concrete.
Follow these steps to apply the concrete repair mix:
- Moisten the cracked area: Before applying the repair mix, lightly mist the cleaned and dried cracked area with water. This will help create a better bond between the existing concrete and the repair mix.
- Fill the cracks: Use a trowel or putty knife to fill the cracks with the prepared repair mix. Press the mix firmly into the cracks, ensuring that it fully fills the voids. Smooth the surface of the mix with the trowel or putty knife, making it level with the surrounding concrete.
- Build up the mix: If the cracks are deeper or wider, you may need to apply the repair mix in layers. Fill the cracks partially, allow the mix to set for a few minutes, then add another layer to achieve the desired fill level. Build up the mix until it is slightly higher than the surface of the patio to allow for the finishing process.
- Smooth the surface: Use a trowel or putty knife to smooth and level the surface of the repair mix. Gently feather the edges to blend them into the surrounding concrete for a seamless finish. Ensure that the surface is smooth and even, without any visible cracks or unevenness.
It’s important to work efficiently while applying the repair mix, as it may begin to set and harden quickly. If needed, work in small sections and focus on one area at a time to ensure proper application.
Once you have applied the concrete repair mix to all the cracks, allow it to cure and dry according to the manufacturer’s instructions. This process may take a few hours or days, depending on the product used. Avoid walking or placing any weight on the repaired area during the curing period.
After the repair mix has fully cured, you can proceed to the next step: smoothing and finishing the surface.
Smoothing and Finishing the Surface
Now that the concrete repair mix has cured and dried, it’s time to smooth and finish the surface of your repaired patio. This step will ensure a visually appealing and seamless appearance that blends in with the surrounding concrete.
Follow these steps to smooth and finish the surface:
- Inspect the repair: Take a close look at the repaired area to check for any imperfections or unevenness. Use your fingers or a trowel to gently feel for any rough spots or inconsistencies.
- Smooth the surface: Use a concrete finishing tool, such as a hand float or trowel, to smooth the surface of the repaired area. Move the tool back and forth in a sweeping motion, applying even pressure. This will help level out any minor depressions or ridges.
- Blend with the surrounding area: Feather the edges of the repaired area to blend it seamlessly with the surrounding concrete. This can be done by lightly tapering the edges with a trowel or by using a concrete edging tool to create a neat and rounded transition.
- Texture the surface (optional): If you want to match the texture of the surrounding concrete, you can use a texture roller or a broom to create the desired pattern. Roll or sweep lightly over the surface to achieve a consistent texture.
- Remove excess material: Once you have completed the smoothing and texturing process, carefully remove any excess repair mix or debris from the surface. Use a brush or broom to sweep away loose particles, ensuring a clean and polished appearance.
It’s important to be meticulous during the smoothing and finishing process to achieve the desired aesthetic outcome. Take your time and pay attention to detail to ensure a professional-looking repair.
Once you are satisfied with the surface appearance and texture, allow the repaired area to fully dry and cure according to the manufacturer’s instructions. This may take a few more hours or days, depending on the product used.
After the surface has completely dried, you can move on to the final steps: curing and sealing the repaired patio.
Curing and Sealing the Repaired Patio
After the repaired area has dried and achieved its final finish, it’s important to properly cure and seal the patio. Curing and sealing will enhance the durability, longevity, and appearance of the concrete, protecting it from moisture, stains, and other potential damage.
Follow these steps to effectively cure and seal your repaired patio:
- Curing the repair: Curing is the process of allowing the repaired area to fully dry and strengthen. It ensures optimal bonding and durability of the concrete. Depending on the repair mix you used, the curing time may vary. Follow the manufacturer’s instructions regarding the recommended curing period.
- Protect the repaired area: During the curing process, it’s important to protect the repaired area from heavy foot traffic, direct sunlight, and excessive moisture. Place caution signs or barriers around the repaired section, and avoid placing heavy objects or furniture on it.
- Applying a concrete sealer: Once the repair has fully cured, you can apply a concrete sealer to enhance its protection and appearance. Choose a sealer specifically formulated for outdoor concrete surfaces. Follow the manufacturer’s instructions for proper application techniques and drying times.
- Prepare the surface: Before applying the sealer, ensure that the repaired area is clean and free of any debris or dust. Sweep or brush away any loose particles, and use a gentle cleanser if needed. Rinse the area with water and let it dry completely.
- Apply the sealer: Use a brush, roller, or sprayer to apply the concrete sealer evenly over the repaired area. Start from one end and work your way across, overlapping the strokes slightly. Follow the recommended number of coats and drying times specified by the manufacturer.
- Allow for proper drying: After applying the sealer, allow it to dry thoroughly before using the patio. This may take anywhere from a few hours to a couple of days, depending on the sealer type and weather conditions. Avoid any foot traffic or exposure to moisture during this time.
By properly curing and sealing the repaired patio, you will enhance its longevity, protect it from potential damage, and maintain its aesthetic appeal.
Once the sealer has dried completely, you can start enjoying your newly repaired and revitalized concrete patio. However, it’s important to continue regular maintenance and care to prevent future cracks and damage.
Let’s explore some tips for maintaining your repaired patio and preventing future cracks.
Maintaining and Preventing Future Cracks
After investing time and effort into repairing your concrete patio, it’s important to implement proper maintenance practices to ensure its longevity and prevent future cracks. By following these tips, you can keep your patio in excellent condition:
- Regular cleaning: Routinely clean your patio by sweeping away debris, leaves, and dirt. You can also use a mild detergent and water solution to remove stains or grime. Avoid using harsh chemicals or abrasive cleaners that can damage the surface.
- Protective measures: Take precautionary measures to protect your patio from potential damage. Use furniture pads or coasters to prevent scratches and distribute weight evenly. Place rugs or mats in high-traffic areas to minimize wear and tear.
- Seal regularly: Every couple of years, reapply a concrete sealer to your patio. This will provide an additional layer of protection against moisture, UV rays, and staining agents. Follow the manufacturer’s instructions and choose a sealer suitable for outdoor use.
- Address small cracks promptly: Don’t ignore small hairline cracks that may develop over time. Repair them as soon as possible to prevent them from expanding and causing further damage. Use a concrete crack filler or repair mix designed for smaller cracks.
- Monitor drainage: Ensure that water is properly draining away from your patio. Poor drainage can lead to water pooling and seeping into the concrete, potentially causing cracks. Install or maintain gutters, downspouts, and proper slope away from the patio to manage water flow.
- Prevent freeze-thaw damage: If you live in an area with freezing temperatures, take precautions to prevent freeze-thaw damage. Avoid using deicing salts directly on the patio, as they can deteriorate the concrete. Instead, use sand or a calcium chloride-based alternative for traction.
- Professional inspections: Periodically have your patio inspected by a professional. They can assess any underlying issues, such as soil erosion or inadequate drainage, that may contribute to cracking. Addressing these problems early on can prevent further damage.
By implementing these maintenance practices and taking proactive measures, you can significantly reduce the risk of future cracks and keep your repaired patio in excellent condition.
Remember, prevention is key when it comes to maintaining the integrity and longevity of your concrete patio. With regular maintenance and early intervention, you can enjoy a beautiful and crack-free outdoor space for years to come.
Now that you have a comprehensive understanding of how to fix a cracked concrete patio and maintain its condition, you’re equipped to tackle this project and enjoy the benefits of a revitalized outdoor living area.
Read more: How To Repair Cracks In Concrete Driveway
Conclusion
Repairing a cracked concrete patio may initially seem like a daunting task, but with the right knowledge, materials, and techniques, you can restore its functionality and beauty. By following the steps outlined in this guide, you can confidently assess the damage, gather the necessary materials and tools, clean the cracked area, prepare the concrete repair mix, apply the mix, smooth and finish the surface, and finally, cure and seal the repaired patio.
Remember, proper assessment and preparation are crucial before embarking on the repair process. Identifying the type and extent of the cracks will help you determine the appropriate repair method and address any underlying issues. Gathering the necessary materials and tools ahead of time will streamline the repair process and ensure its efficiency.
Cleaning the cracked area thoroughly is essential to achieve proper adhesion of the repair materials. Removing any dirt, debris, or loose particles will create a clean slate for the repair process. Preparing the concrete repair mix according to the manufacturer’s instructions and applying it accurately will fill the cracks and restore the concrete’s strength and integrity.
Smoothing and finishing the surface will create a visually appealing and seamless appearance that blends in with the surrounding concrete. Properly curing and sealing the repaired patio is essential for enhanced durability, protection against moisture and stains, and overall maintenance.
Maintaining your repaired patio and implementing preventive measures will help prolong its lifespan and prevent future cracks. Regular cleaning, protective measures, periodic resealing, addressing small cracks promptly, monitoring drainage, preventing freeze-thaw damage, and seeking professional inspections are all important components of maintaining a crack-free patio.
By following these steps and tips, you can transform your cracked concrete patio into a pristine outdoor oasis that you can enjoy for years to come. Remember, taking the time and effort to repair and maintain your patio will not only enhance its aesthetic appeal but also extend its lifespan and value.
So, roll up your sleeves, gather your materials and tools, and embark on the journey of repairing and revitalizing your cracked concrete patio. With this comprehensive guide as your companion, you’re well-equipped to tackle this project and create a beautiful outdoor space that you can be proud of.
Frequently Asked Questions about How To Fix A Cracked Concrete Patio
Was this page helpful?
At Storables.com, we guarantee accurate and reliable information. Our content, validated by Expert Board Contributors, is crafted following stringent Editorial Policies. We're committed to providing you with well-researched, expert-backed insights for all your informational needs.


0 thoughts on “How To Fix A Cracked Concrete Patio”