Home>Furniture>Outdoor Furniture>How To Make A Macrame Stuffed Animal Hammock
Outdoor Furniture
How To Make A Macrame Stuffed Animal Hammock
Modified: March 16, 2024
Learn how to make a macrame stuffed animal hammock for your outdoor furniture. Create a stylish and functional storage solution to keep toys organized and off the ground.
(Many of the links in this article redirect to a specific reviewed product. Your purchase of these products through affiliate links helps to generate commission for Storables.com, at no extra cost. Learn more)
Introduction
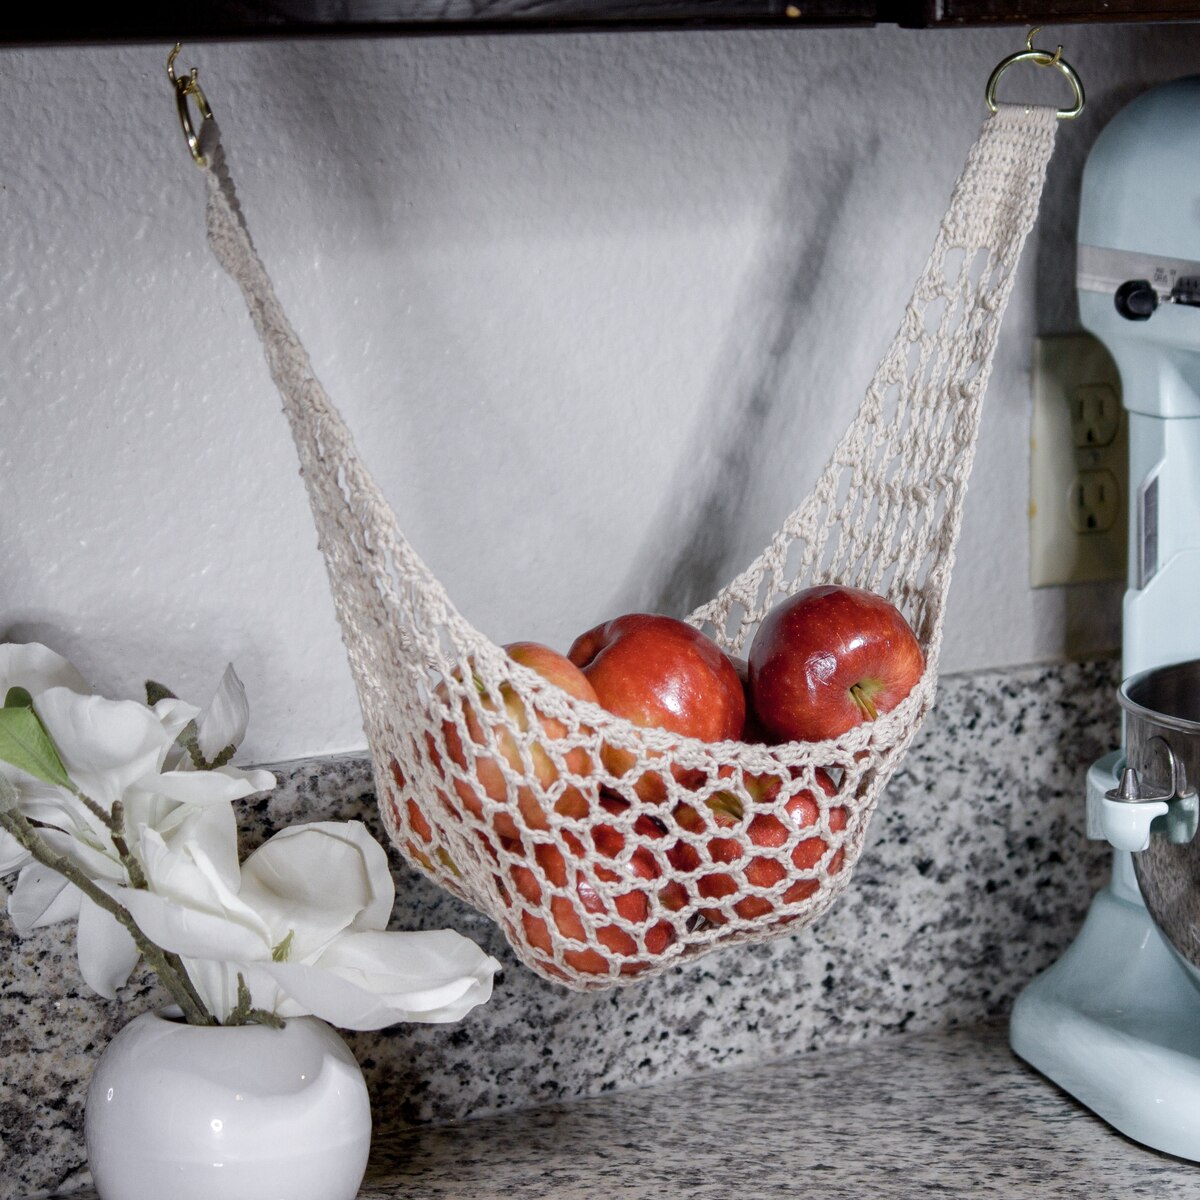
Welcome to this step-by-step guide on how to make a macrame stuffed animal hammock. If you’re tired of your kid’s stuffed animals taking over their room, this DIY project is just what you need. A macrame stuffed animal hammock is not only a practical storage solution but also adds a touch of boho charm to any space.
Macrame is an ancient art form that involves knotting cords together to create beautiful patterns. It’s a versatile technique that can be used to make various home decor items, including plant hangers, wall hangings, and, of course, hammocks.
In this tutorial, we will walk you through the process of creating your own macrame stuffed animal hammock. We will cover everything from choosing the right rope to hanging the finished hammock. So grab your supplies and let’s get started!
Key Takeaways:
- Create a boho-chic macrame stuffed animal hammock to keep toys organized and add style to any room. Choose the right rope, make the mesh, and hang it securely for a fun DIY project!
- Transform simple materials into a functional and visually appealing storage solution. Macrame adds a unique and stylish look, while fringe adds a decorative touch. Enjoy crafting and organizing with a touch of boho charm!
Read more: How To Crochet A Stuffed Animal Hammock
Materials Needed
Before we delve into the step-by-step process, let’s gather all the materials you’ll need to make a macrame stuffed animal hammock:
- Macrame rope: Choose a sturdy rope that is suitable for macrame projects. Cotton or nylon ropes are excellent options.
- Scissors: You’ll need a sharp pair of scissors to cut the rope to the desired lengths.
- Measuring tape: To ensure accurate measurements, have a measuring tape handy.
- Wooden dowel or curtain rod: This will serve as the base for your hammock. Make sure it’s long enough to accommodate the desired width of your hammock.
- S-hook or eye bolt: You’ll need a hook or bolt to hang your macrame hammock from the wall or ceiling.
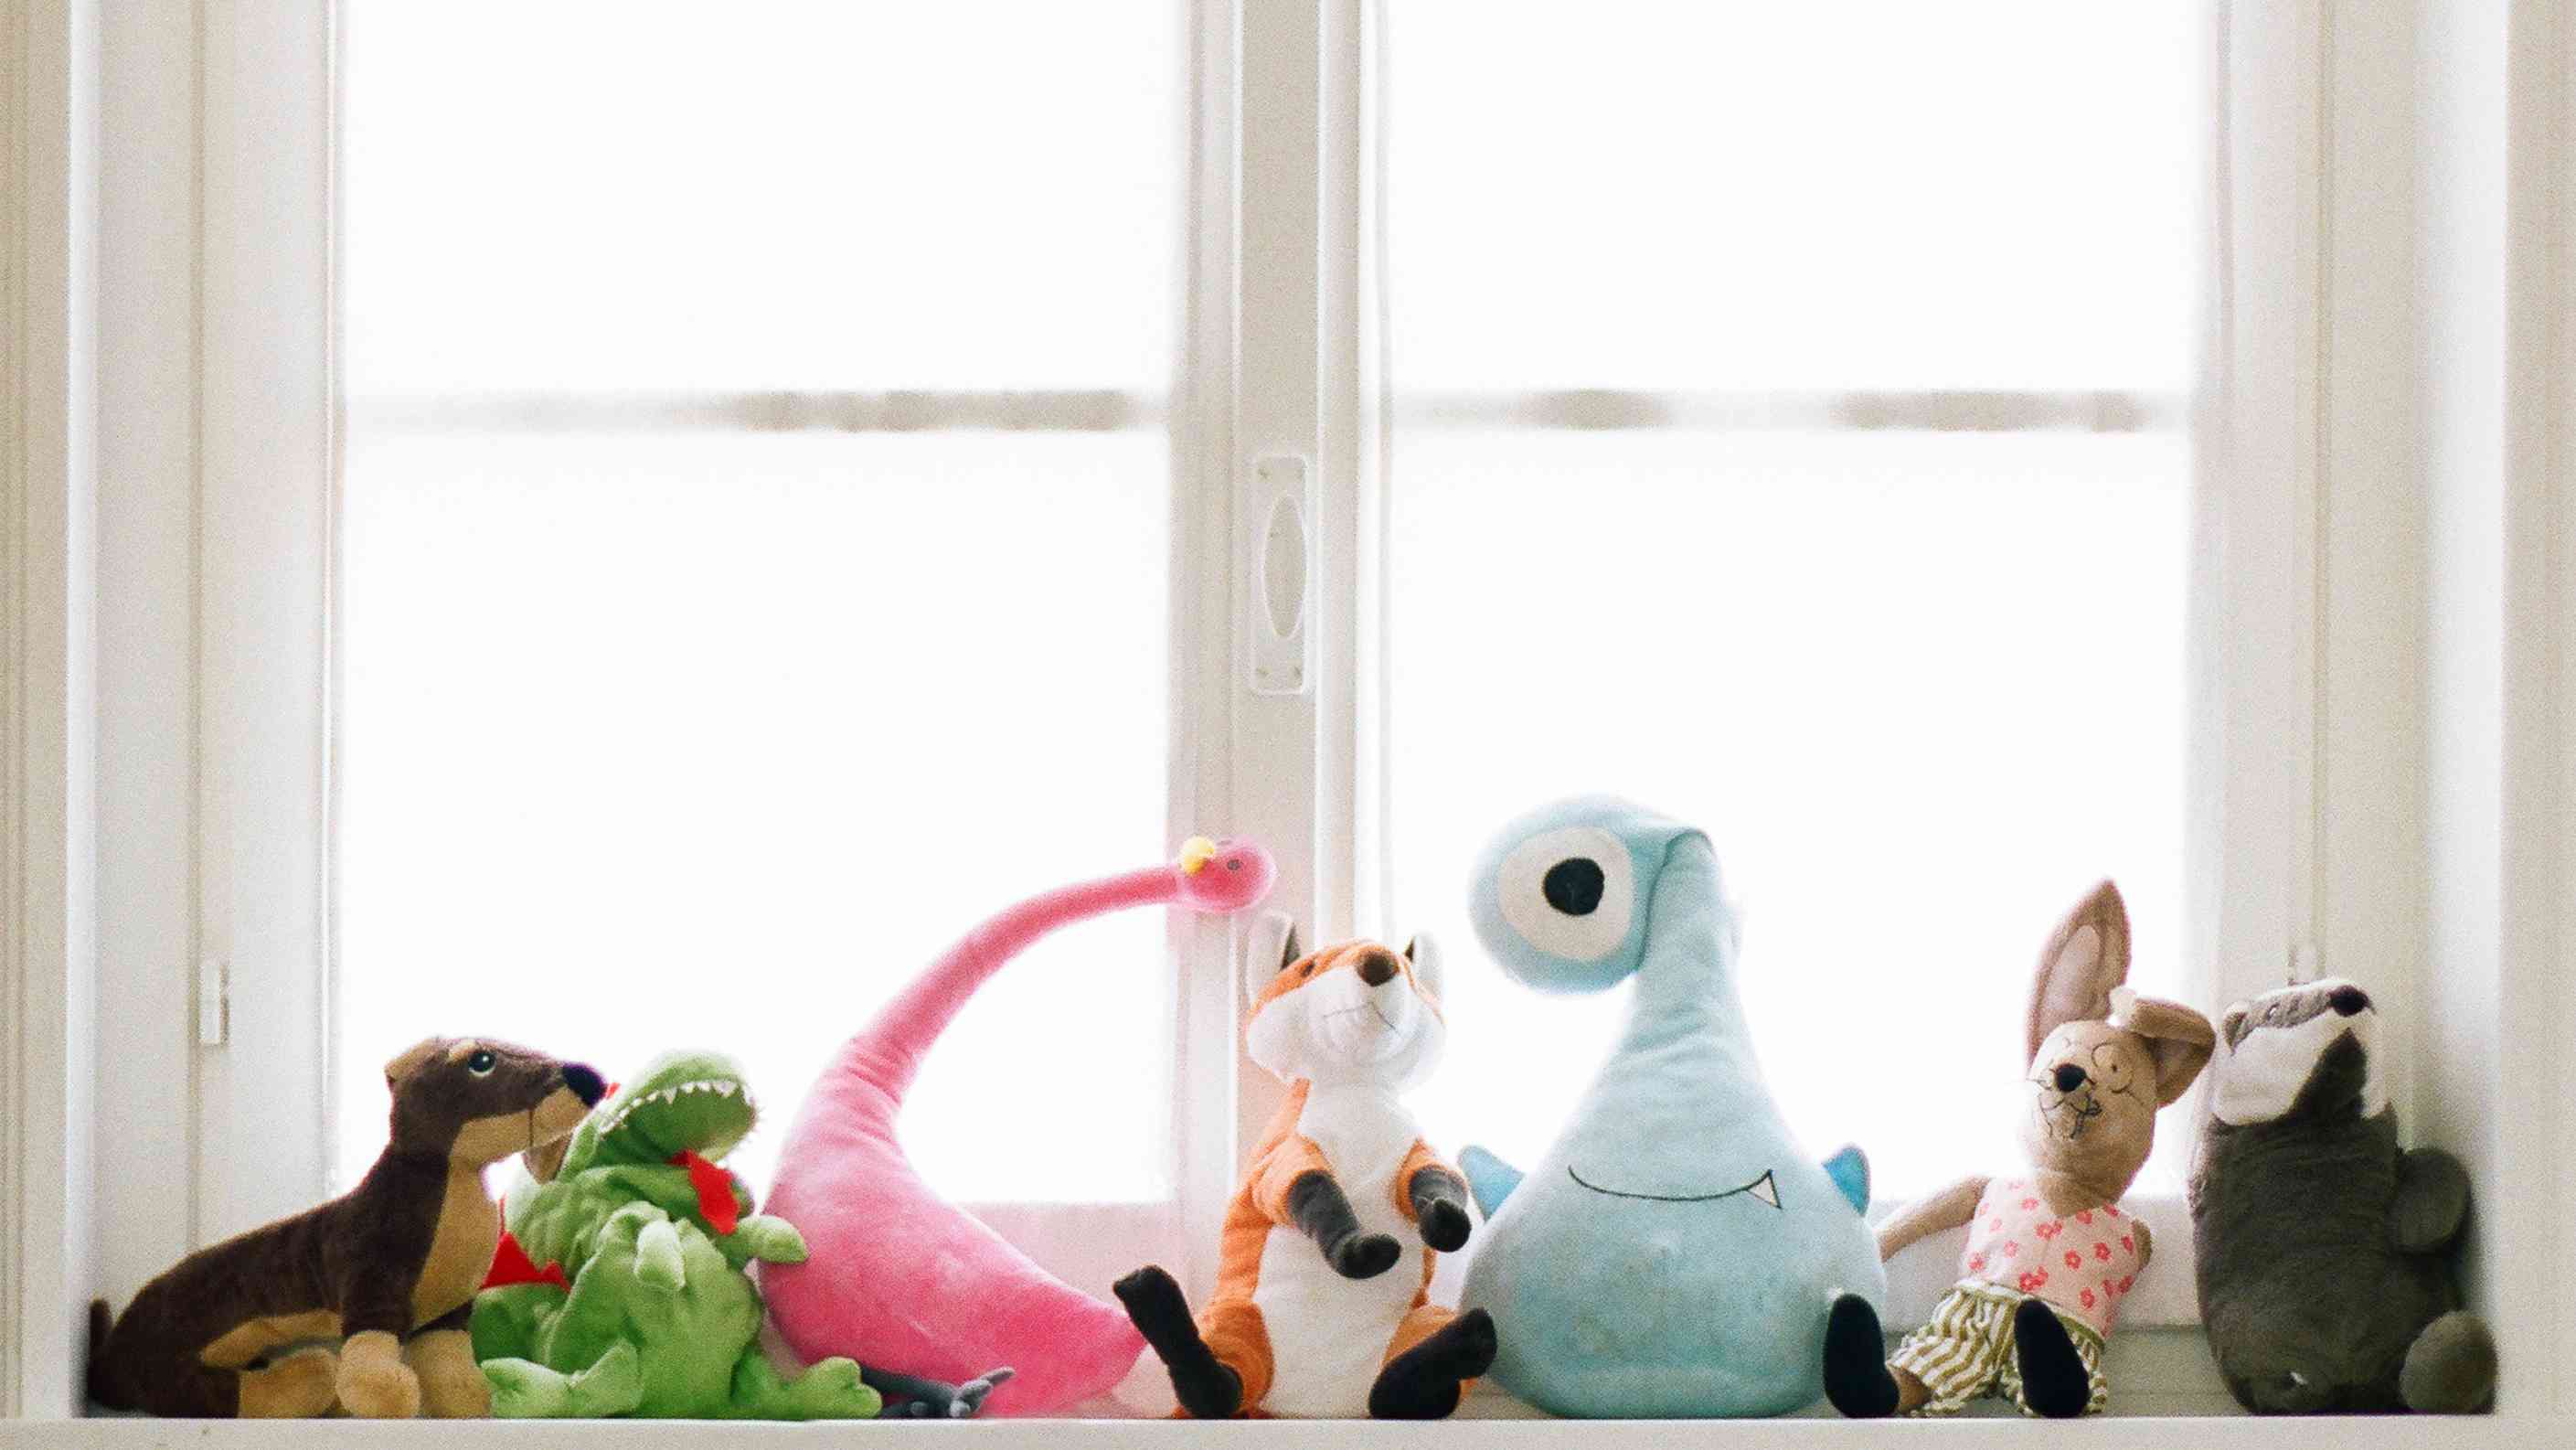
- Stuffed animals: Of course, you’ll need a collection of stuffed animals to fill your hammock and put on display!
Once you have gathered all the materials, you’re ready to move on to the next step: choosing the right rope.
Step 1: Choosing the Right Rope
The first step in making a macrame stuffed animal hammock is selecting the right rope. The type of rope you choose will determine the overall look and feel of your hammock. Here are a few factors to consider when choosing your rope:
- Material: Macrame ropes are typically made from natural materials such as cotton or jute, or synthetic materials like nylon. Cotton ropes provide a soft and natural look, while nylon ropes offer durability and strength.
- Thickness: The thickness of the rope will impact the size and strength of your hammock. Thicker ropes will create a more substantial and sturdy hammock, while thinner ropes will result in a daintier and more delicate look.
- Color: Think about the color scheme of your room or the area where you plan to hang the hammock. You can choose a rope that complements the existing decor or opt for a bold and vibrant color to make a statement.
Once you have decided on the type of rope you want to use, it’s time to move on to the next step: cutting the rope.
Step 2: Cutting the Rope
Now that you have chosen the perfect rope for your macrame stuffed animal hammock, it’s time to cut it to the desired lengths. Here’s how:
- Measurements: Determine the length and number of ropes you’ll need based on the size of your hammock. Each rope will be folded in half to create a loop, so keep that in mind while measuring.
- Cutting: Use a sharp pair of scissors to carefully cut the ropes to the desired lengths. Make sure each rope is the same length to ensure a uniform look.
- Tip: It’s always better to cut the ropes longer than you think you’ll need. You can always trim them later if necessary.
Once you have cut all the ropes, it’s time to move on to the next step: creating the base of the hammock.
Step 3: Creating the Base
With your ropes cut to the desired lengths, it’s time to create the base of your macrame stuffed animal hammock. The base will be made using a wooden dowel or a curtain rod. Follow these steps:
- Locate a suitable spot: Choose a spot on your wall or ceiling where you want to hang your hammock. Make sure it’s secure and able to support the weight of the stuffed animals.
- Install the S-hook or eye bolt: Depending on the type of mounting hardware you have chosen, install it on the wall or ceiling at the desired location.
- Attach the ropes: Take one end of each rope and pass it through the wooden dowel or curtain rod, creating a loop. Pull the loose ends of the rope through the loop, creating a knot. Repeat this process for each rope, spacing them out evenly along the dowel or rod.
- Adjust the lengths: Once all the ropes are attached, adjust their lengths as necessary to create a level base. Ensure that the hammock is balanced and the ropes are taut.
With the base of your hammock complete, it’s time to move on to the next step: making the mesh.
When making a macrame stuffed animal hammock, use a sturdy rope or cord to ensure it can hold the weight of the stuffed animals. Be sure to measure the space where you plan to hang the hammock to ensure it will fit.
Read more: How To Hang A Stuffed Animal Hammock
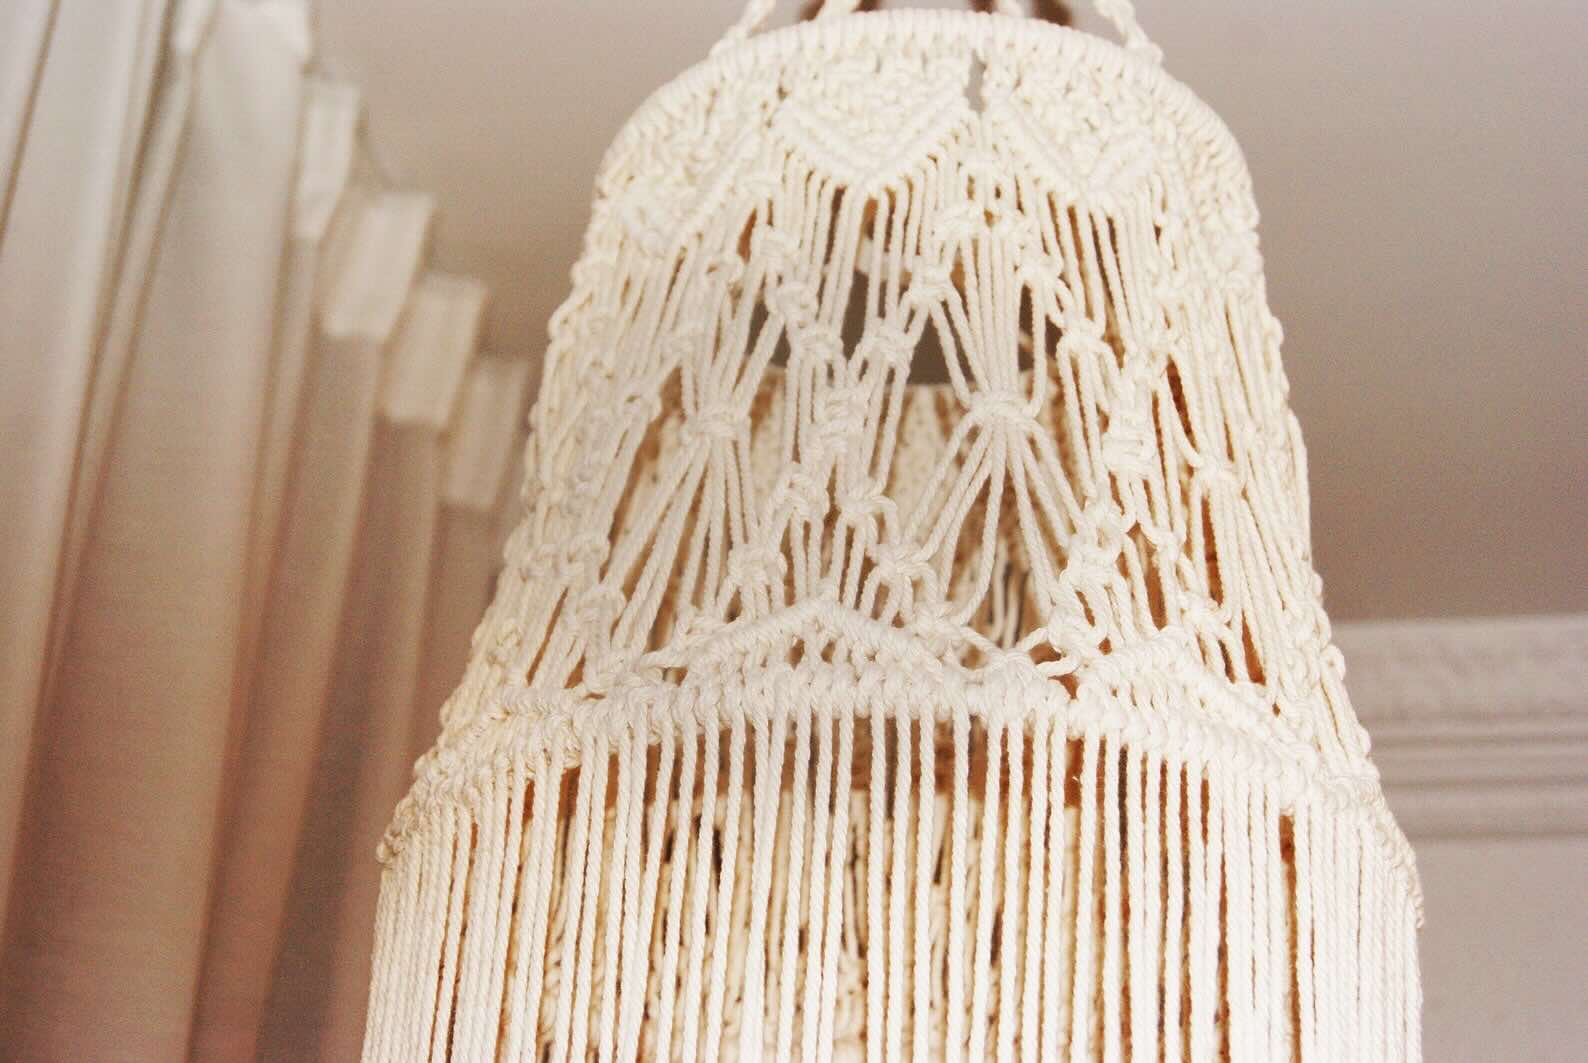
Step 4: Making the Mesh
Now that you have the base of your macrame stuffed animal hammock ready, it’s time to create the mesh. The mesh is what will hold the stuffed animals and give the hammock its characteristic look. Follow these steps to make the mesh:
- Divide the ropes: Divide the ropes into groups of two. Each group will consist of two neighboring ropes.
- Create square knots: Take the left rope of one group and cross it over the right rope. Pass it under the right rope and through the loop created. Pull it tight to create a square knot. Repeat this process for each group of ropes along the base.
- Continue knotting: Repeat the square knotting process for the entire length of the base. Make sure to keep the knots aligned and evenly spaced.
- Tip: To achieve a tighter mesh, you can alternate the starting rope of each square knot. This will create a diagonal pattern.
Keep repeating the square knotting process until you have reached the desired length for your hammock’s mesh. The number of knots will depend on the size of your hammock and the amount of space you want between each row of knots. Now, it’s time to move on to the next step: adding the fringe.
Step 5: Adding the Fringe
Adding fringe to your macrame stuffed animal hammock adds a decorative touch and gives it a bohemian vibe. Here’s how to add the fringe:
- Measure the desired length: Decide on the length of the fringe you want to have. This will determine the length of the ropes you use for the fringe.
- Cut the fringe ropes: Cut the ropes to the desired length, making sure they are all uniform.
- Attach the fringe: Take one fringe rope and fold it in half. Place the folded end under the base of the hammock, creating a loop. Pull the loose ends of the fringe rope through the loop, creating a knot. Repeat this process for each fringe rope, spacing them out evenly along the base.
- Trim the fringe: Once all the fringe ropes are attached, trim them to your desired length. You can opt for a layered effect by cutting some of the fringe ropes shorter than others.
With the fringe added, your macrame stuffed animal hammock is almost complete. The final step is hanging the hammock.
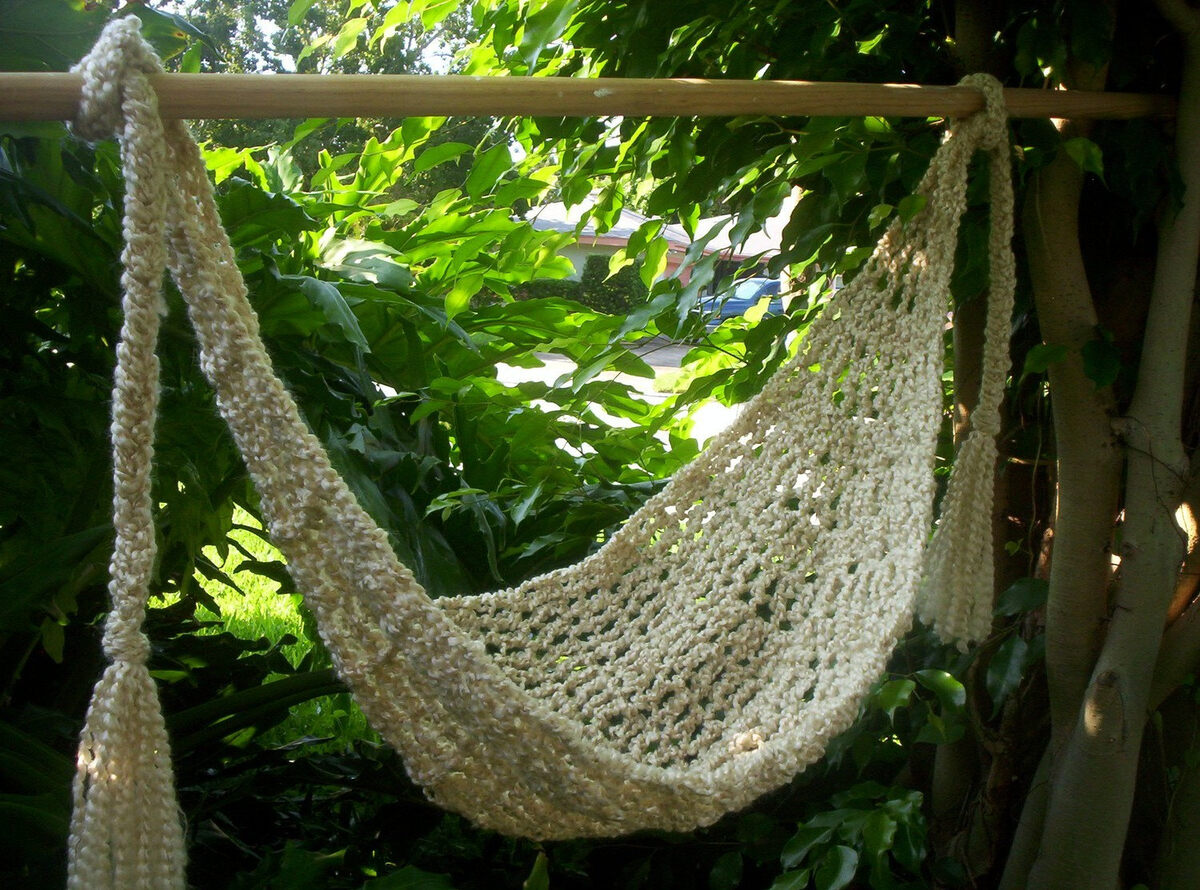
Step 6: Hanging the Hammock
Congratulations! You’ve reached the final step of creating your macrame stuffed animal hammock. Now it’s time to hang it and showcase your beautiful creation. Follow these steps to hang the hammock:
- Choose a spot: Decide where you want to hang your hammock. Make sure it’s a sturdy and secure area, such as a wall or ceiling beam, that can support the weight of the hammock and the stuffed animals.
- Attach the hammock: Take the S-hook or eye bolt that you installed in Step 3 and securely attach it to the base of the hammock. Ensure that the attachment is firm and stable.
- Hang the hammock: Lift the attached end of the hammock and hook it onto the S-hook or eye bolt. Ensure that the hammock is level and balanced.
- Test the stability: Gently tug on the hammock to ensure it is securely attached and can support the weight of the stuffed animals.
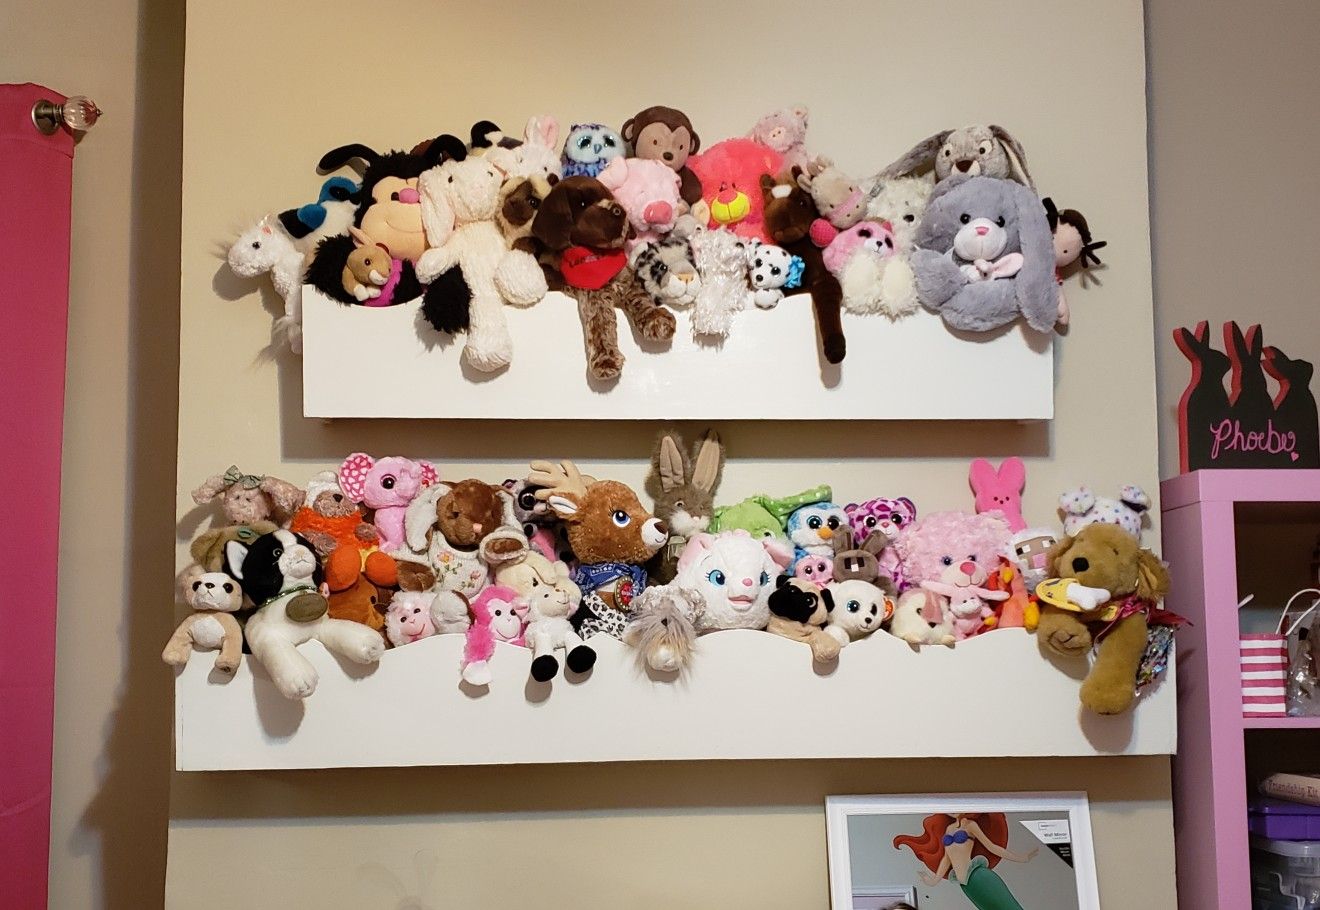
Once you’ve hung the hammock, it’s time to gather your stuffed animals and arrange them on the hammock. Be creative and have fun arranging them in a visually pleasing way.
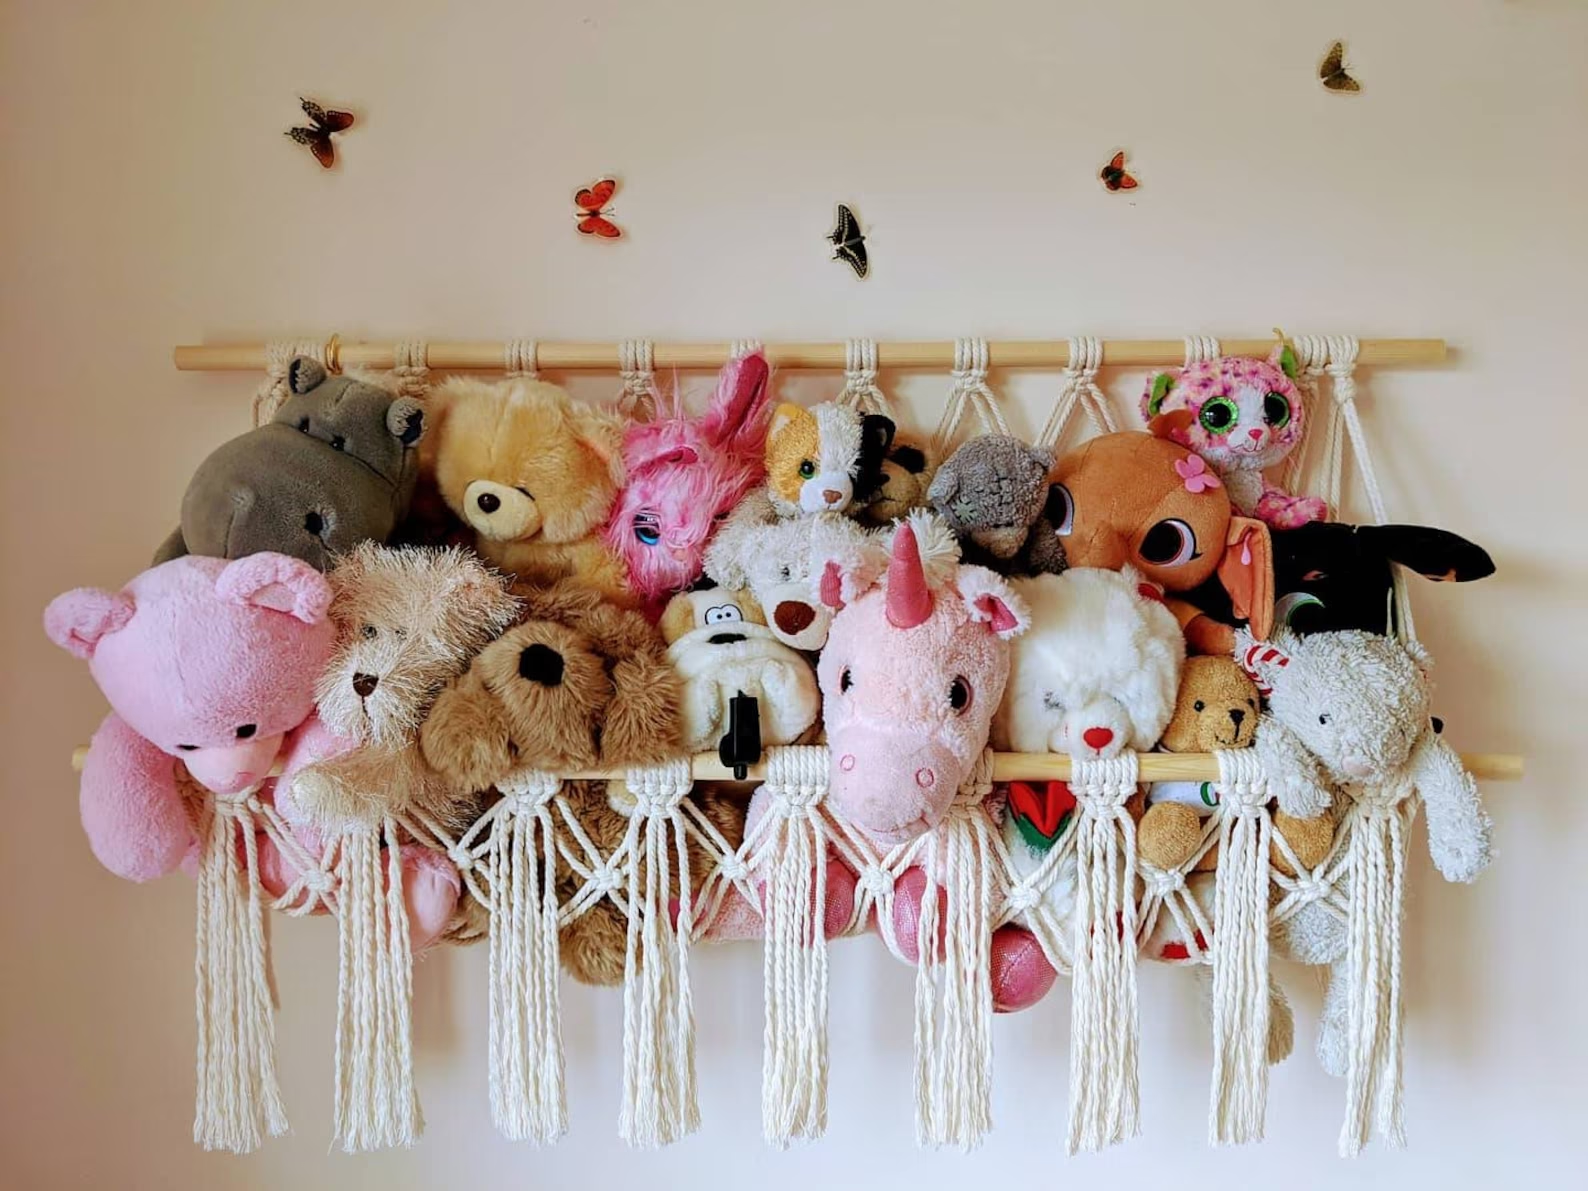
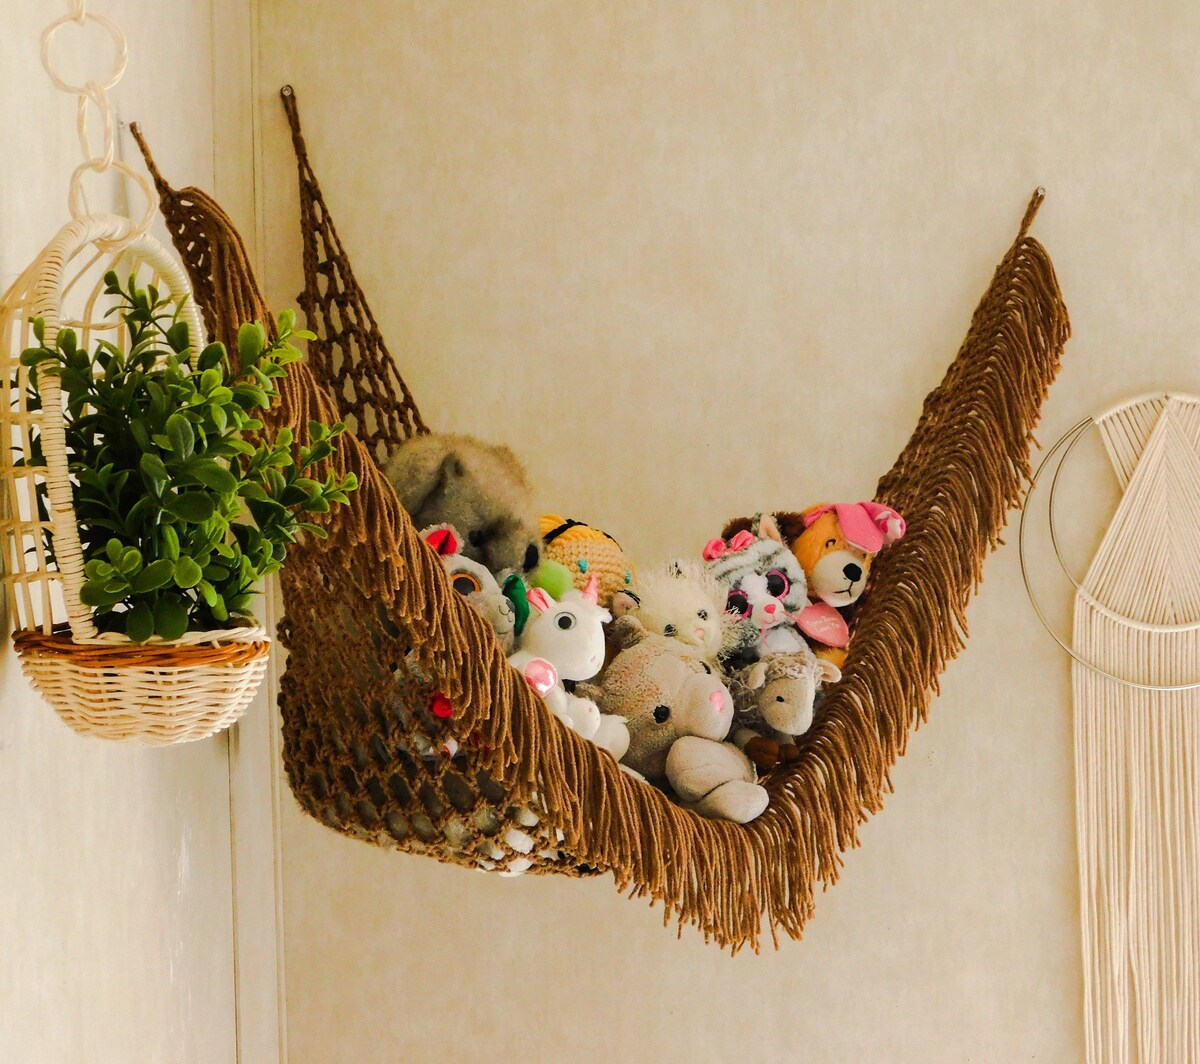
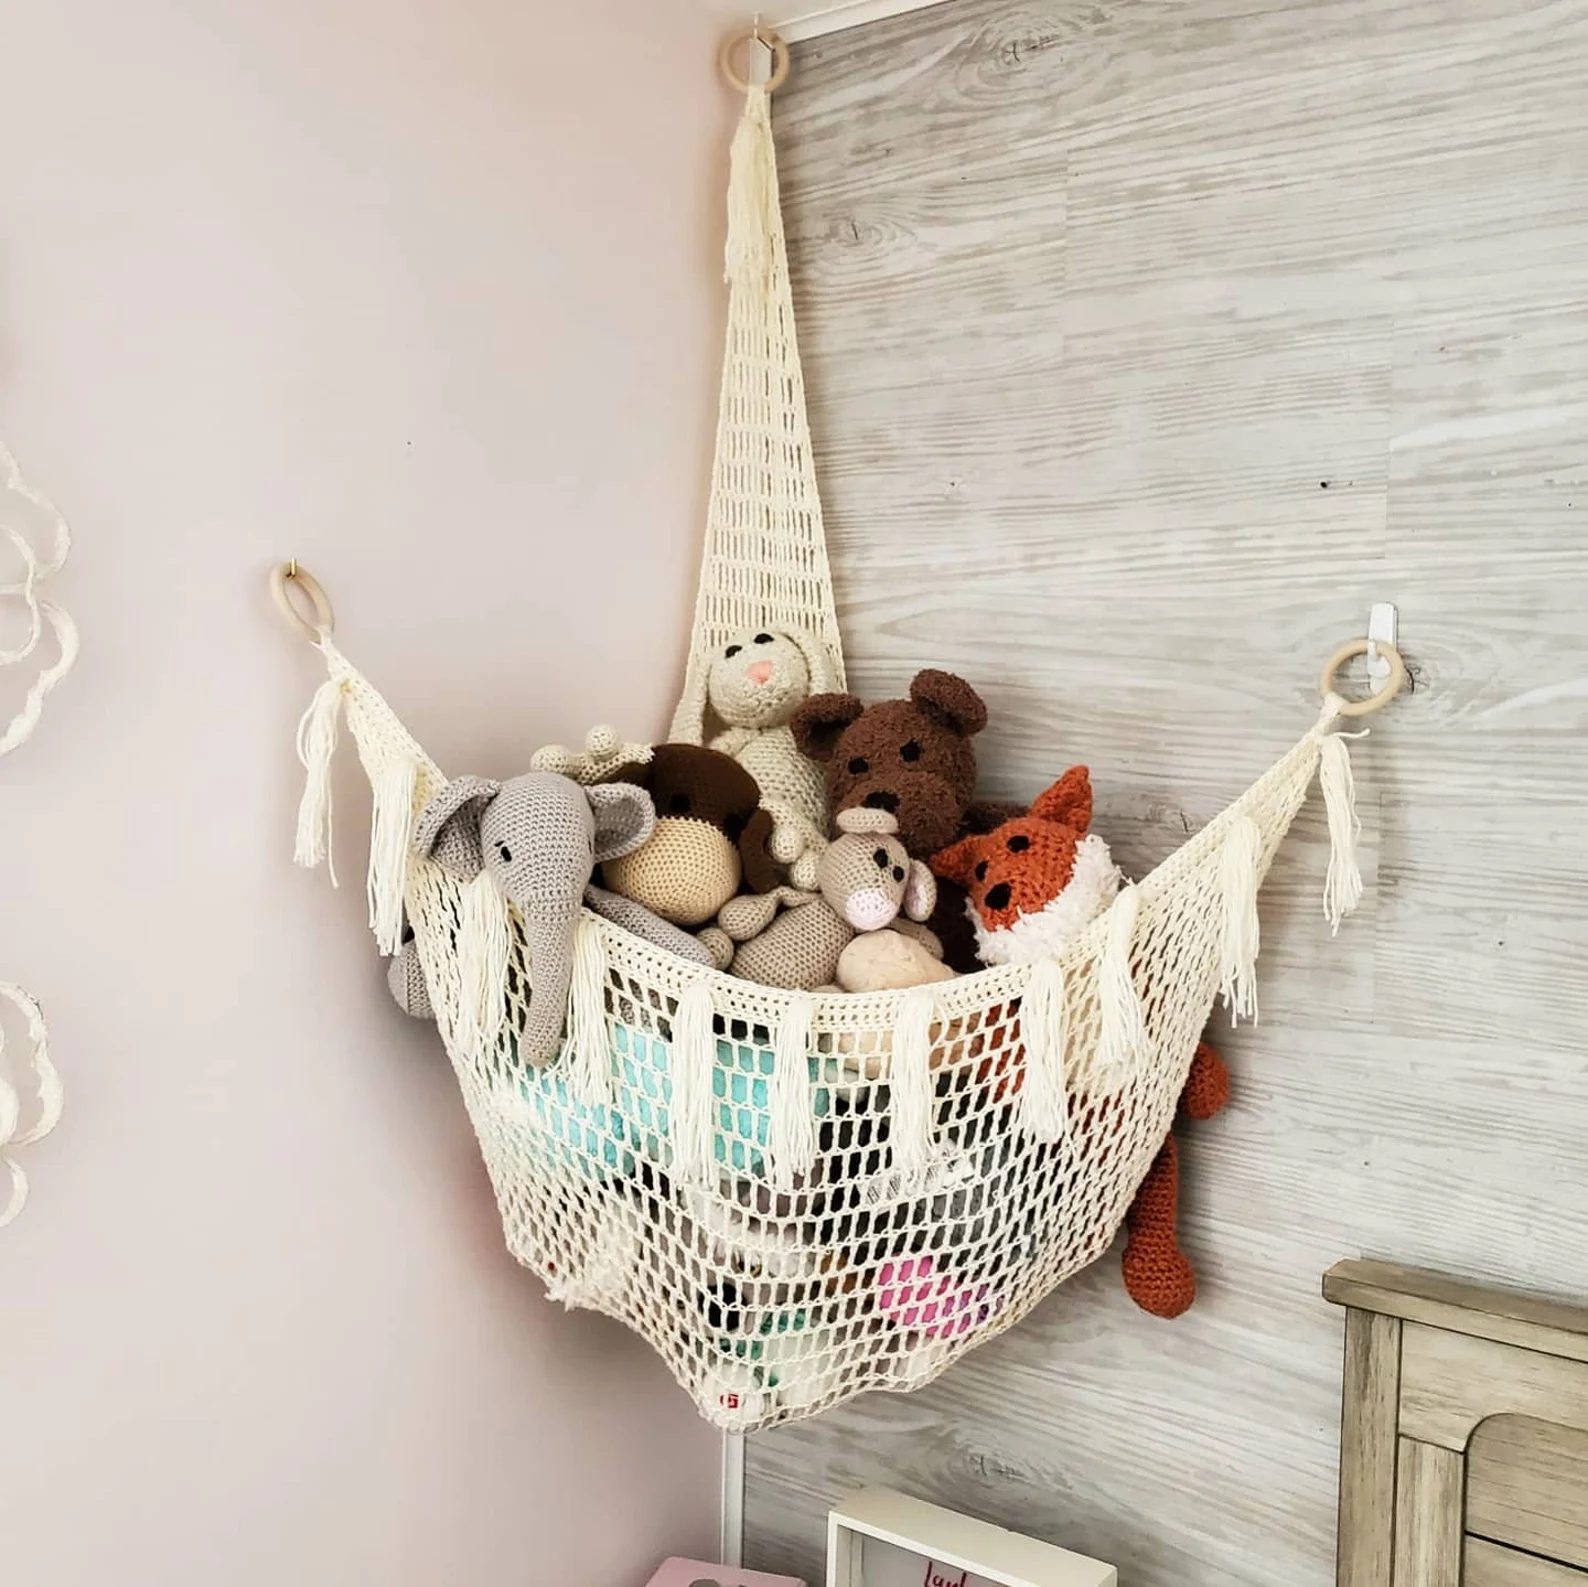
Now you have your very own macrame stuffed animal hammock, providing a practical and stylish storage solution for your children’s toys. It’s not only functional but also a beautiful addition to any room, adding a touch of boho charm.
Enjoy the satisfaction of completing this DIY project and the joy it brings to your child’s room. Happy crafting!
Conclusion
Congratulations on successfully creating a macrame stuffed animal hammock! Through the process of choosing the right rope, cutting the rope, creating the base, making the mesh, adding the fringe, and finally hanging the hammock, you have transformed a few simple materials into a functional and visually appealing storage solution for your child’s stuffed animals.
A macrame stuffed animal hammock not only helps keep the toys organized and off the floor but also adds a touch of boho charm to any space. The intricate knotting technique of macrame gives the hammock a unique and stylish look. Plus, the addition of fringe adds an extra decorative touch.
Remember, when choosing the rope, consider factors like material, thickness, and color to create the desired look. Taking accurate measurements and cutting the ropes to the proper lengths is essential for achieving a well-balanced and aesthetically pleasing hammock.
Creating the base and making the mesh require some patience and attention to detail, but the result is well worth the effort. The square knotting technique used in macrame creates a sturdy and beautiful mesh that will securely hold the stuffed animals in place.
Once you’ve added the fringe, it’s time to hang the hammock in a secure spot. Make sure the attachment is firm and stable, and test the stability by gently tugging on the hammock.
With your macrame stuffed animal hammock proudly hanging on the wall or ceiling, you can now gather your child’s stuffed animals and arrange them in a visually pleasing way. Not only will the hammock keep the toys organized, but it will also serve as a charming and eye-catching piece of decor.
Thank you for following this step-by-step guide. We hope that you enjoyed the process of creating your macrame stuffed animal hammock and that it brings joy and functionality to your child’s room for years to come. Happy crafting!
Frequently Asked Questions about How To Make A Macrame Stuffed Animal Hammock
Was this page helpful?
At Storables.com, we guarantee accurate and reliable information. Our content, validated by Expert Board Contributors, is crafted following stringent Editorial Policies. We're committed to providing you with well-researched, expert-backed insights for all your informational needs.

0 thoughts on “How To Make A Macrame Stuffed Animal Hammock”