Home>Furniture>Outdoor Furniture>How To Rig Aerial Hammock
Outdoor Furniture
How To Rig Aerial Hammock
Modified: March 16, 2024
Learn how to rig your outdoor furniture with this comprehensive guide on how to set up and use an aerial hammock. Create a cozy and relaxing space in your backyard with these easy-to-follow instructions.
(Many of the links in this article redirect to a specific reviewed product. Your purchase of these products through affiliate links helps to generate commission for Storables.com, at no extra cost. Learn more)
Introduction
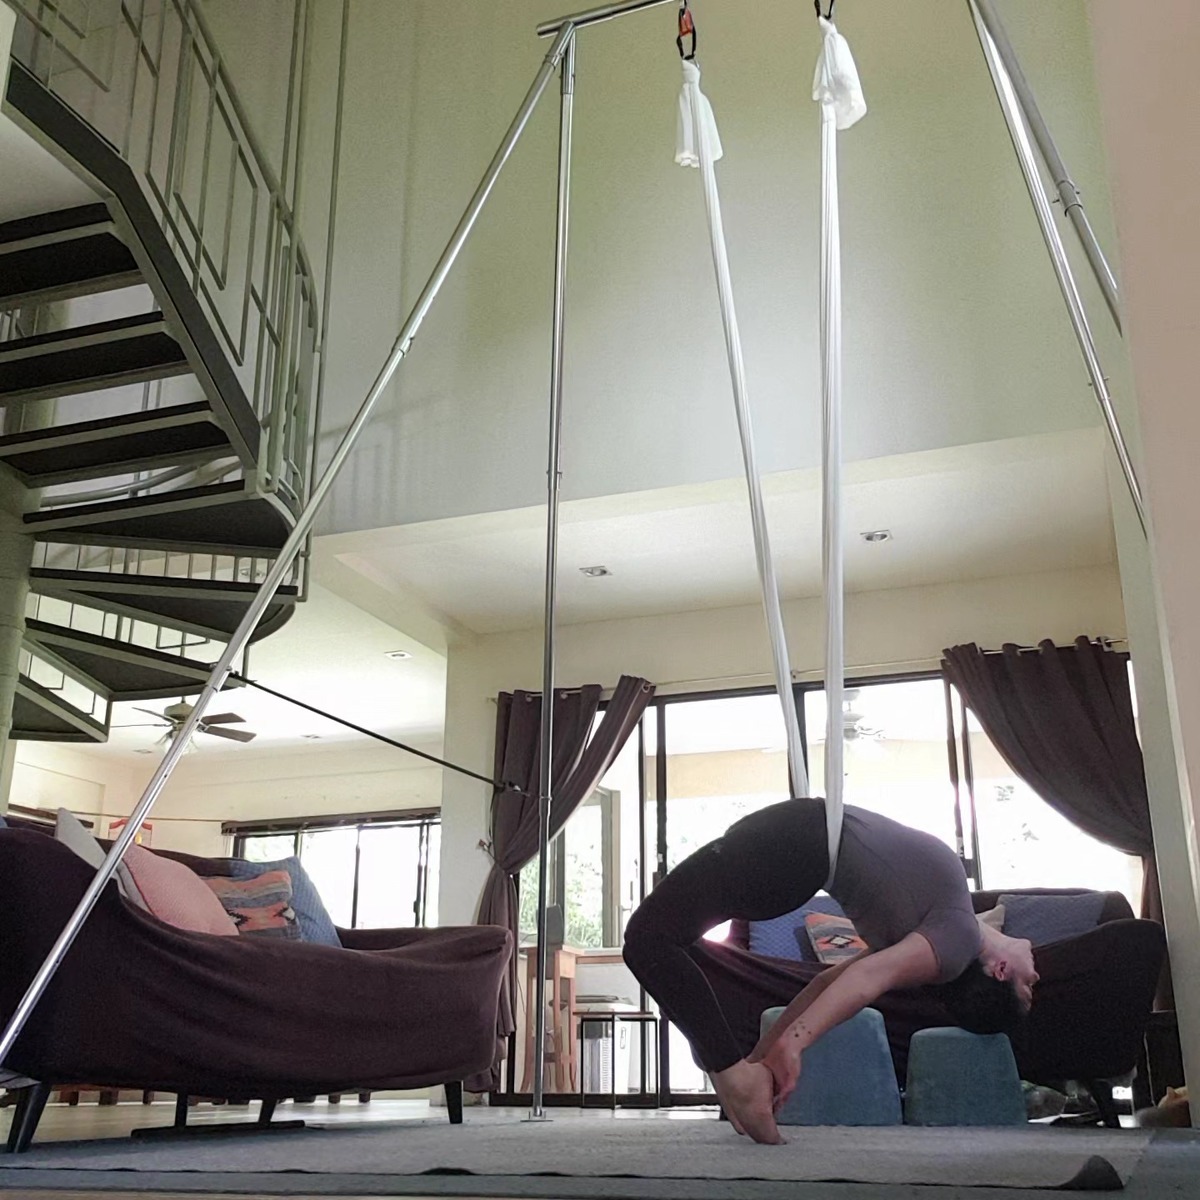
Welcome to the wonderful world of aerial hammocks! If you’re a fan of outdoor relaxation and adventure, then you’re in for a treat. An aerial hammock, also known as an aerial sling or aerial fabric, is a piece of equipment that allows you to hang and enjoy the great outdoors in a unique and exciting way.
Whether you’re looking to set up a hammock in your backyard or take it on your next camping trip, this comprehensive guide will provide you with all the information you need to rig your aerial hammock safely and securely.
But before we dive into the step-by-step process, let’s talk about why aerial hammocks are so popular. One of the main reasons people love using aerial hammocks is that they offer a completely different perspective on relaxation. Instead of lying flat on a traditional hammock, an aerial hammock allows you to suspend yourself in mid-air, creating a light and airy feeling.
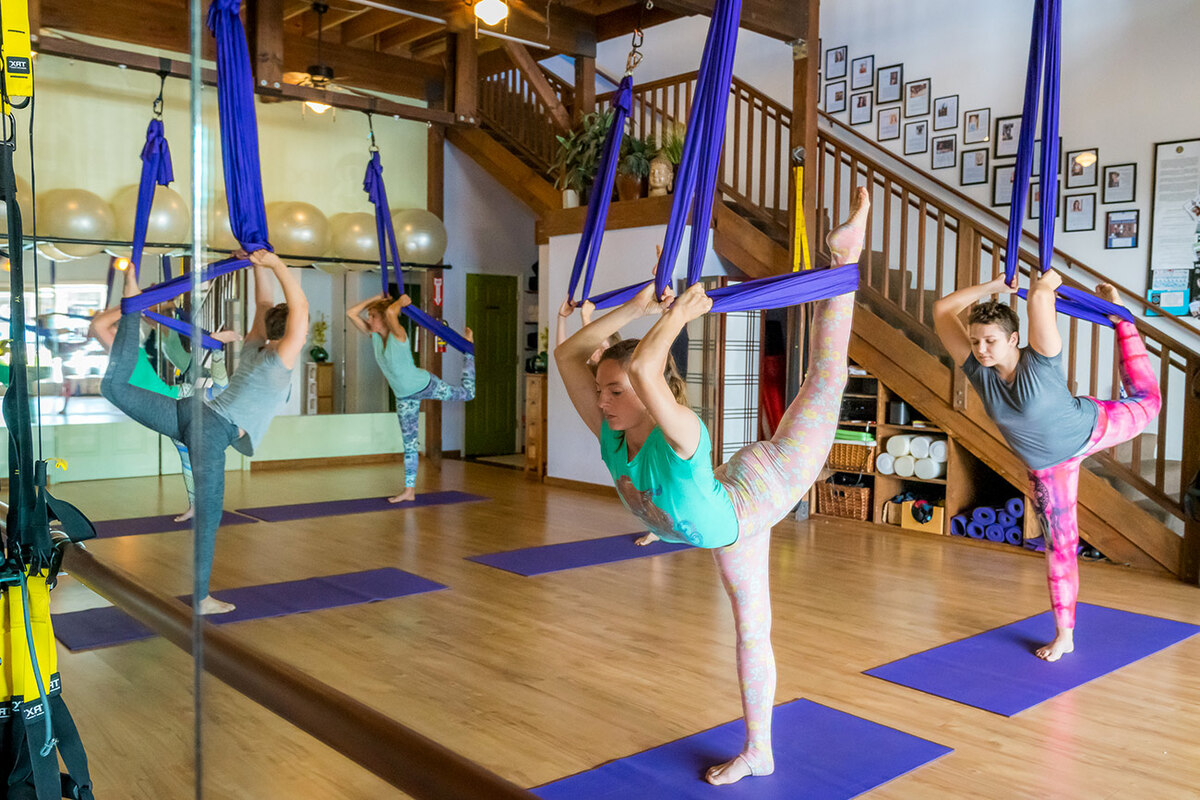
Another reason aerial hammocks are popular is that they provide a wide range of movement possibilities. From gentle rocking to exciting acrobatic moves, aerial hammocks offer a versatile and dynamic way to exercise and have fun.
Now that you’re excited about aerial hammocks, it’s time to dive into the steps to set them up properly. Let’s get started with step one: choosing the right hammock!
Key Takeaways:
- Rigging an aerial hammock involves choosing the right material, setting up secure anchors, and adjusting the height and tension for a safe and enjoyable hanging experience.
- Proper maintenance and care, along with learning how to enter and exit the hammock safely, are essential for maximizing the lifespan and safety of your aerial hammock.
Read more: How To Tie Aerial Hammock
Step 1: Choosing the Right Hammock
When it comes to choosing the right hammock for aerial rigging, there are a few key factors to consider. The first and most important factor is the material of the hammock itself. It’s crucial to choose a hammock made from durable, high-quality fabric that can withstand the rigors of aerial use.
Many aerial enthusiasts prefer hammocks made from a blend of nylon and spandex or nylon and polyester. These materials provide the perfect combination of strength, flexibility, and stretch, allowing for comfortable and safe aerial activities.
It’s also important to consider the size of the hammock. Aerial hammocks typically come in different sizes, so be sure to choose a size that suits your needs. If you plan on using your hammock for static poses and relaxation, a longer hammock with more fabric will be ideal. However, if you’re interested in more dynamic moves and acrobatics, a shorter hammock with less fabric may be more suitable.
In addition to material and size, you’ll also want to consider the color and design of your hammock. While the aesthetics may not affect the functionality of the hammock, choosing a color or pattern that you love can enhance your overall experience and make your outdoor adventures even more enjoyable.
Lastly, it’s crucial to purchase your hammock from a reputable retailer or manufacturer. Investing in a high-quality hammock will not only ensure your safety but also prolong the lifespan of your equipment.
Now that you have the basics covered, it’s time to move on to step two: setting up the anchors for your aerial hammock.
Step 2: Setting up the Anchors
Setting up strong and secure anchors is crucial to ensure the safety and stability of your aerial hammock. The anchors are the points from which your hammock will be suspended, so it’s important to choose an appropriate location and use reliable hardware.
The first step in setting up the anchors is to identify suitable structures or supports. This could be strong tree branches, sturdy beams, or metal posts that are capable of supporting your body weight. It’s important to select anchors that are sturdy and can withstand the tension and stress placed on them during use.
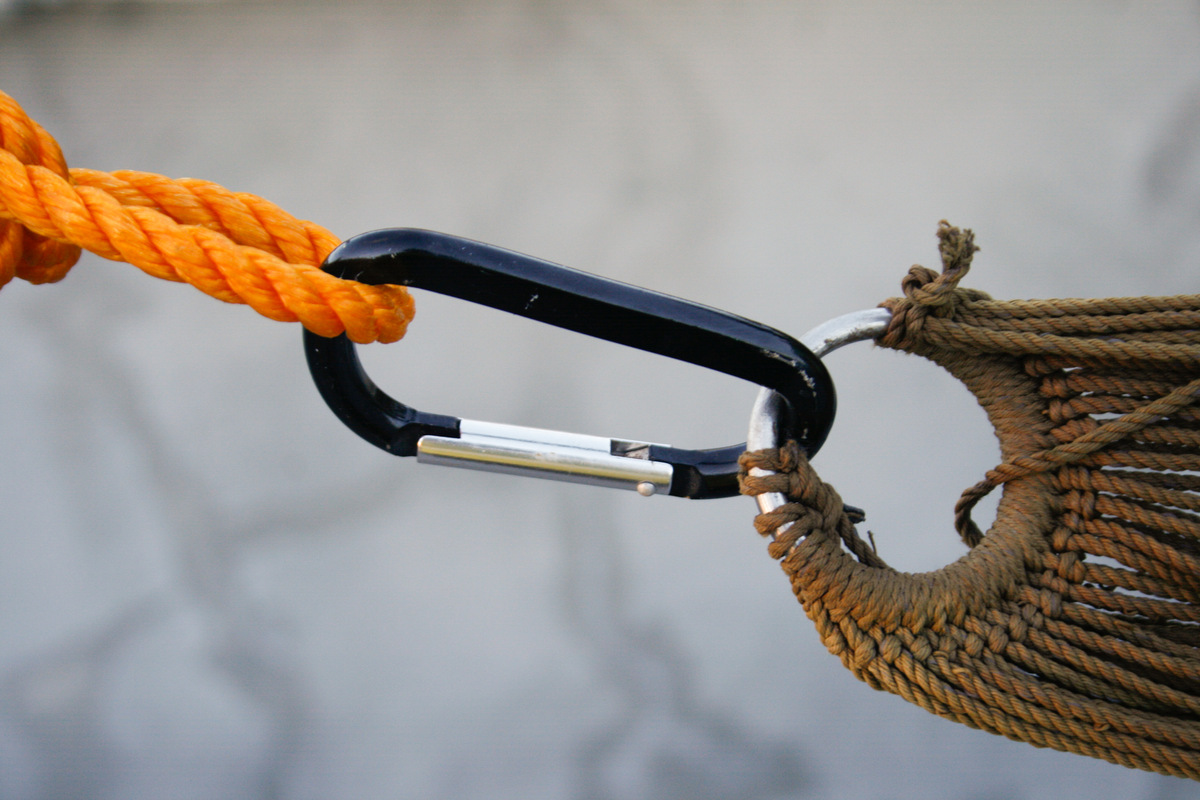
Once you’ve identified the anchors, you’ll need to attach the hardware. You can use various options such as carabiners, daisy chains, or specialized hardware designed specifically for aerial hammocks. It’s important to choose hardware that is rated for the load and ensure that it is properly secured and closed.
When attaching the hardware to the anchors, make sure to follow the manufacturer’s instructions and take proper safety precautions. Inspect the anchors and hardware for any signs of damage or wear and replace any faulty components.
It’s essential to test the anchors and hardware by applying pressure and ensuring that they can support your weight. Give the hammock a gentle tug to ensure that the anchors are secure and the hardware is properly fastened.
It’s always a good idea to have a backup plan in case your primary anchors fail. This might involve having additional anchors or a spotter assist you during your hammock setup.
Now that you’ve set up your anchors, you’re ready to move on to the next step: attaching the suspension points.
Step 3: Attaching the Suspension Points
Attaching the suspension points is a crucial step in rigging your aerial hammock. The suspension points are the points on the hammock where it will be connected to the anchors, allowing it to hang securely and support your weight.
The most common method for attaching the suspension points is by using carabiners and daisy chains. Begin by attaching the carabiner to the hardware on your anchor point. Then, loop the daisy chain through the carabiner and adjust the length to your desired height. Make sure to leave enough length in the daisy chain for adjustments and tensioning.
It’s important to ensure that the suspension points are evenly spaced and level to keep the hammock balanced. Take the time to adjust the length of the daisy chains on each side to achieve the desired levelness.
Once you have attached the suspension points, double-check that all connections are secure and closed properly. Give the hammock a gentle shake to ensure that it is stable and secure before moving on to the next step.
Keep in mind that the stability of your aerial hammock relies on the quality of your attachment points and the strength of the hardware used. Regularly inspect the suspension points and hardware for any signs of wear or damage, and replace or repair as necessary.
Now that your suspension points are securely in place, it’s time to move on to step four: adjusting the height and tension of your aerial hammock.
Step 4: Adjusting the Height and Tension
Adjusting the height and tension of your aerial hammock plays a crucial role in ensuring your comfort and safety during your hanging experience. Finding the right balance is important to achieve optimal support and stability.
To start, stand in front of your hammock and grab onto the fabric near the suspension point on one side. Slowly step back while maintaining a firm grip to gradually increase the tension. Take small steps and pay attention to how the hammock feels as you create tension.
As you adjust the tension, it’s important to maintain an equal amount of fabric on both sides to ensure balance. The fabric should hang straight down without any twists or unevenness. Adjust the tension on both sides simultaneously to achieve symmetrical alignment.
The height of your hammock is a personal preference, but it’s generally recommended to hang it at a height that allows you to comfortably sit or lie down without touching the ground. Take into consideration the length of the fabric, your own height, and the type of activities you plan to do in the hammock.
If you plan to practice aerial poses or acrobatics, you may want to hang your hammock higher to allow for more movement. On the other hand, if you’re simply looking for a relaxing spot to lounge and unwind, a lower height may be more suitable.
Once you have adjusted the height and tension, take a moment to test the stability and comfort of your hammock. Gently sit, lay down, and shift your weight to ensure everything feels secure and balanced. Make any necessary adjustments to the tension or height until you’re satisfied with the feel and stability.
Remember to regularly check and readjust the tension and height of your hammock, as the fabric may stretch or the conditions may change over time. Ensuring the proper height and tension will not only provide a better experience but also help maintain the longevity of your hammock.
Now that you have your hammock at the desired height and tension, let’s move on to step five: organizing the fabric into loops.
When rigging an aerial hammock, always make sure to use strong and secure rigging points, such as a sturdy beam or a professionally installed rigging system. Safety should always be the top priority when setting up aerial equipment.
Read more: How To Hang Aerial Yoga Hammock
Step 5: Organizing the Fabric into Loops
Organizing the fabric of your aerial hammock into loops is an important step to ensure ease of use and proper alignment during your hanging experience. Creating loops in the fabric allows for better grip and control, especially when transitioning between different poses or movements.
To begin organizing the fabric into loops, stand facing the hammock and grab the fabric with both hands near one of the suspension points. Walk back towards the other suspension point, allowing the fabric to gather in your hands.
Next, create a loop by wrapping the gathered fabric around your hands or forearm. The size of the loop will depend on your personal preference and the specific activities you plan to do in the hammock.
Continue this process, creating additional loops along the length of the fabric until you reach the other suspension point. Make sure to create an equal number of loops on both sides to maintain balance and symmetry.
Keep in mind that the size of the loops can affect your reach and range of motion during your aerial practice. Smaller loops provide a tighter grip and greater control, while larger loops allow for more freedom and flexibility.
Once you have organized the fabric into loops, take a moment to ensure that they are evenly spaced and free of any twists or tangles. Adjust the loops as needed to achieve a neat and organized appearance.
Organizing the fabric into loops not only makes it easier to grip and maneuver but also helps prevent excessive twisting or tangling during use. This can enhance your overall experience and promote a safer and more enjoyable hanging experience.
Now that your fabric is neatly organized into loops, it’s time to move on to step six: learning how to get in and out of the hammock safely.
Step 6: Getting in and Out of the Hammock Safely
Learning how to get in and out of your aerial hammock safely is essential to avoid accidents and injuries. By following proper techniques, you can ensure a smooth and controlled entry and exit from your hammock.
To get into the hammock, stand facing the hammock with your back towards the fabric. Take hold of the fabric near the opening and step one foot inside the loop, followed by the other foot. Slowly sit down into the hammock while maintaining a firm grip on the fabric.
As you lower yourself into the hammock, be cautious of your weight distribution to maintain balance. Avoid sudden movements or jerking motions that can destabilize the hammock.
Once you’re comfortably seated, slowly recline back into a lying position, ensuring that your weight is evenly distributed across the fabric. Take a moment to adjust your position and settle into a comfortable resting position.
To exit the hammock, reverse the steps. Roll onto your side and pull yourself up, using your arms for support. Place one foot on the ground followed by the other foot, and carefully stand up while maintaining a firm grip on the fabric.
While getting in and out of the hammock, it’s important to always maintain control and be mindful of your movements. Avoid jumping or swinging into the hammock, as this can cause it to swing uncontrollably or become unbalanced.
When practicing more advanced moves or poses, always follow proper technique and consult with experienced aerialists or instructors. They can provide guidance on the best ways to enter and exit the hammock for specific moves.
Remember, safety should always be a top priority when using your aerial hammock. Take your time, practice proper technique, and be aware of your surroundings to ensure a safe and enjoyable experience.
Now that you know how to enter and exit the hammock safely, let’s move on to the final step: proper maintenance and care.
Step 7: Proper Maintenance and Care
Proper maintenance and care are essential for ensuring the longevity and safety of your aerial hammock. By following some simple guidelines, you can keep your hammock in good condition and maximize its lifespan.
First and foremost, regularly inspect your hammock for any signs of wear and tear. Check the fabric for fraying, stretched threads, or weak spots. Pay particular attention to the areas near the suspension points, as they tend to experience the most stress.
If you notice any damage, it’s important to address it immediately. Small tears or fraying can be repaired using a heavy-duty sewing thread or a patch kit specifically designed for hammock repair. However, if the damage is extensive or compromises the integrity of the fabric, it may be necessary to replace the hammock.
In addition to inspecting the fabric, regularly check the hardware and suspension points for any signs of rust, corrosion, or weakened components. Replace any damaged or worn-out carabiners, daisy chains, or other hardware to ensure your safety during use.
When not in use, store your hammock in a cool, dry place to prevent damage from moisture or excessive exposure to sunlight. Avoid storing it in a damp or humid environment, as this can lead to mold or mildew growth.
Cleaning your aerial hammock is also necessary to maintain hygiene and prevent the buildup of dirt and sweat. Follow the manufacturer’s instructions when cleaning your hammock, as different materials may require specific care methods.
In general, hand washing or using a gentle machine cycle with mild detergent is recommended. Avoid using harsh chemicals or bleach, as they can weaken the fabric fibers. After washing, allow the hammock to air dry completely before storing it to prevent moisture damage.
Lastly, always practice safe and responsible use of your aerial hammock. Avoid exceeding the weight limit specified by the manufacturer, as this can compromise the integrity of the fabric and the safety of the equipment.
Regularly reviewing and following these maintenance and care practices will help extend the lifespan of your aerial hammock and ensure a safe and enjoyable experience for years to come.
Congratulations! You’ve completed all the steps to rig your aerial hammock. Now, it’s time to enjoy the outdoors and have a fantastic time hanging in your comfortable and secure hammock!
Conclusion
Congratulations on becoming a pro at rigging your aerial hammock! By following the steps outlined in this comprehensive guide, you have gained the knowledge and skills to set up your hammock safely and securely, ensuring a phenomenal outdoor experience.
From choosing the right hammock and setting up the anchors to attaching the suspension points and adjusting the height and tension, each step plays a vital role in creating a comfortable and stable hanging environment. Organizing the fabric into loops and learning how to enter and exit the hammock safely further enhance your overall experience of aerial relaxation and fun.
Remember, safety should always be a top priority when rigging and using your aerial hammock. Regularly inspect and maintain your equipment, and follow proper techniques and guidelines to prevent accidents or injuries.
Whether you’re seeking a tranquil spot to unwind or looking to explore thrilling aerial maneuvers, your aerial hammock provides endless possibilities for outdoor enjoyment, exercise, and relaxation. Take advantage of its versatility and experience the joy of suspended bliss, whether in your backyard, at the beach, or on your camping adventures.
Now that you’re equipped with the knowledge and skills to rig your aerial hammock, it’s time to grab your gear, head outdoors, and embark on an unforgettable journey of aerial hammocking.
Remember to soak in the beauty of nature, embrace the freedom of movement, and savor the serenity of hanging suspended in your aerial hammock. Happy hammocking!
Frequently Asked Questions about How To Rig Aerial Hammock
Was this page helpful?
At Storables.com, we guarantee accurate and reliable information. Our content, validated by Expert Board Contributors, is crafted following stringent Editorial Policies. We're committed to providing you with well-researched, expert-backed insights for all your informational needs.


0 thoughts on “How To Rig Aerial Hammock”