Tableware
How To Make Macrame Coasters
Modified: October 20, 2024
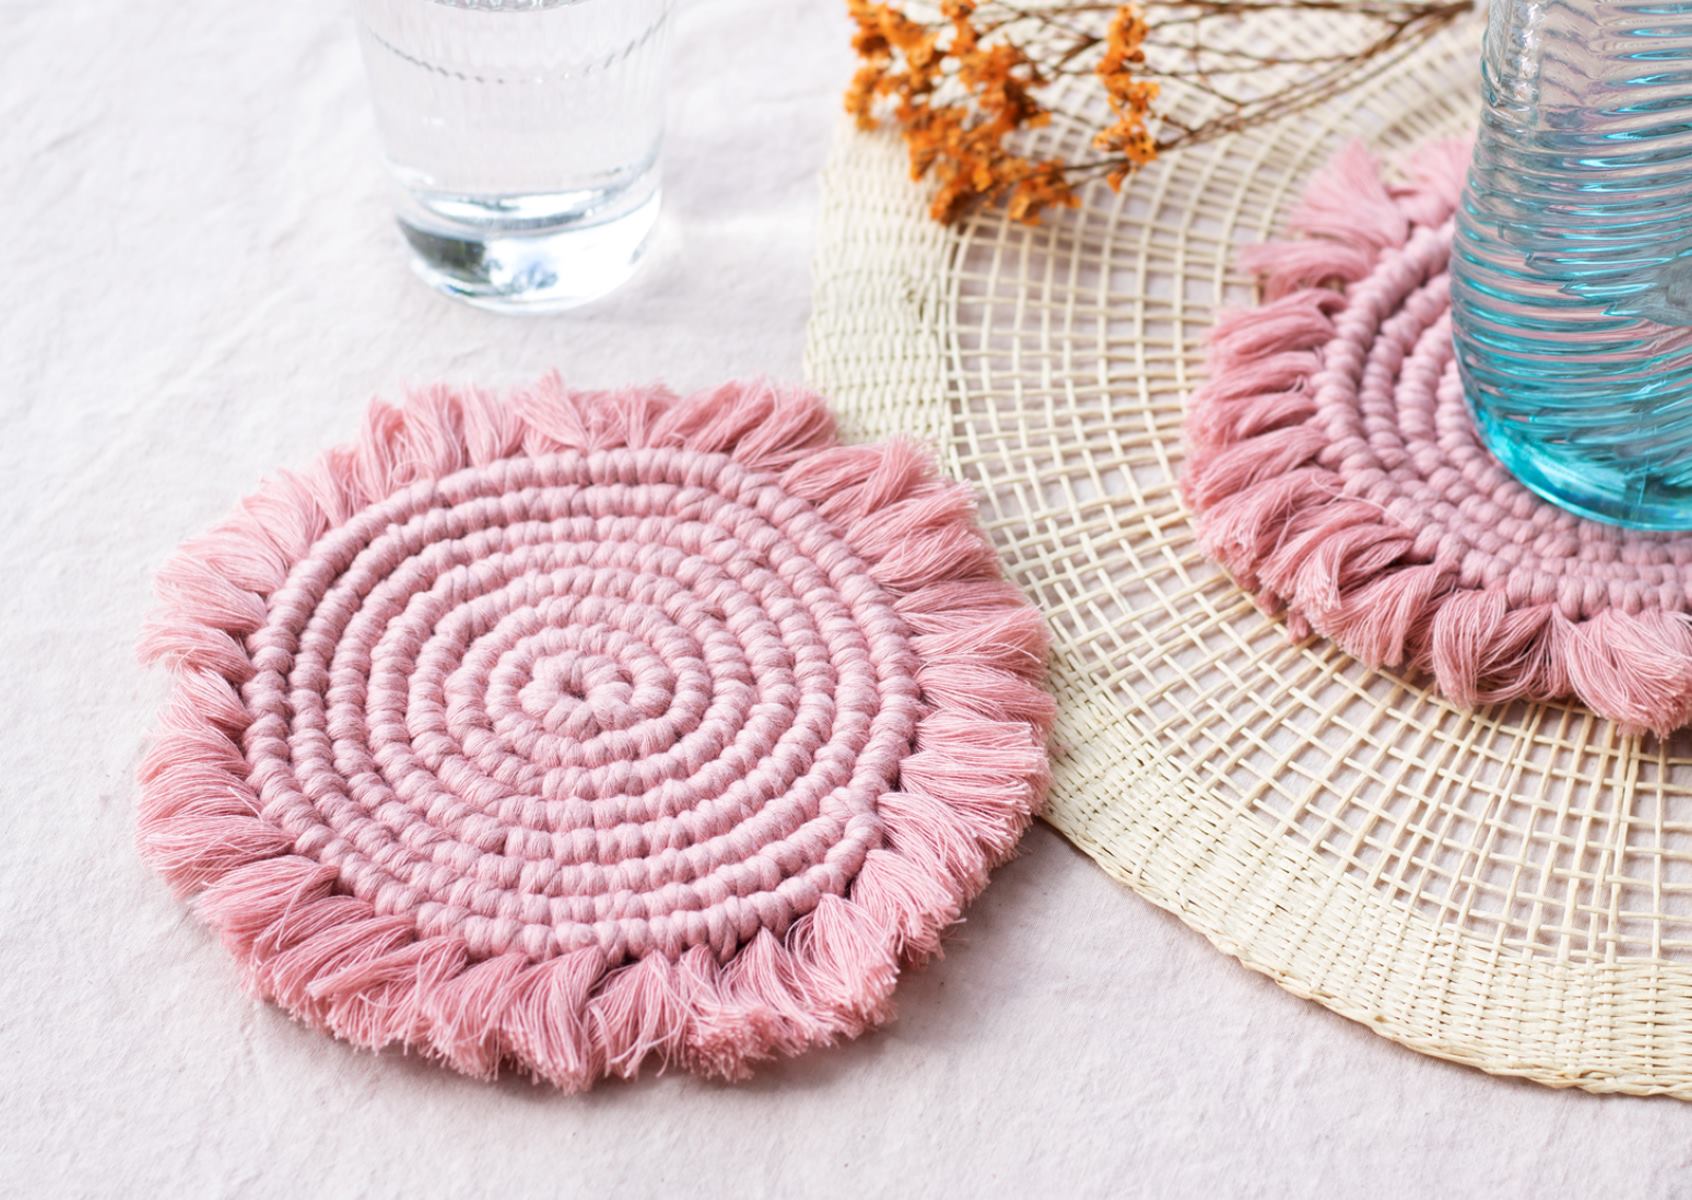
Learn how to create stunning macrame coasters for your tableware collection. Follow our step-by-step guide and add a touch of boho chic to your home decor.
(Many of the links in this article redirect to a specific reviewed product. Your purchase of these products through affiliate links helps to generate commission for Storables.com, at no extra cost. Learn more)
Introduction
Welcome to the wonderful world of macrame! If you’re looking for a creative and practical way to add a touch of handmade charm to your tableware, macrame coasters are a perfect choice. These beautifully woven creations not only protect your surfaces from heat and cold, but also serve as stylish décor pieces.
Macrame is an ancient craft that involves the artful intertwining of cords to create intricate patterns and designs. With its popularity resurgence, macrame has become a trendy and sought-after skill among craft enthusiasts. Making macrame coasters is a fun and rewarding project that allows you to explore your creativity while enhancing your tabletop.
In this step-by-step guide, we’ll walk you through the process of creating your own macrame coasters. From selecting the right cord to mastering the essential knots, you’ll learn all the techniques needed to make stunning, personalized coasters that are sure to impress.
Whether you’re a beginner or an experienced macrame artist, this tutorial is designed to be accessible and enjoyable for all skill levels. So, let’s gather our materials and get ready to embark on this macrame adventure!
Key Takeaways:
- Dive into the world of macrame and create stunning, personalized coasters that protect surfaces and serve as stylish decor pieces. Enjoy the accessible and enjoyable process, whether you’re a beginner or experienced macrame artist.
- Master the art of macrame knots to bring your coaster to life, and consider adding fringe for a playful and whimsical touch. Embrace the versatility of macrame and continue exploring larger projects beyond coasters.
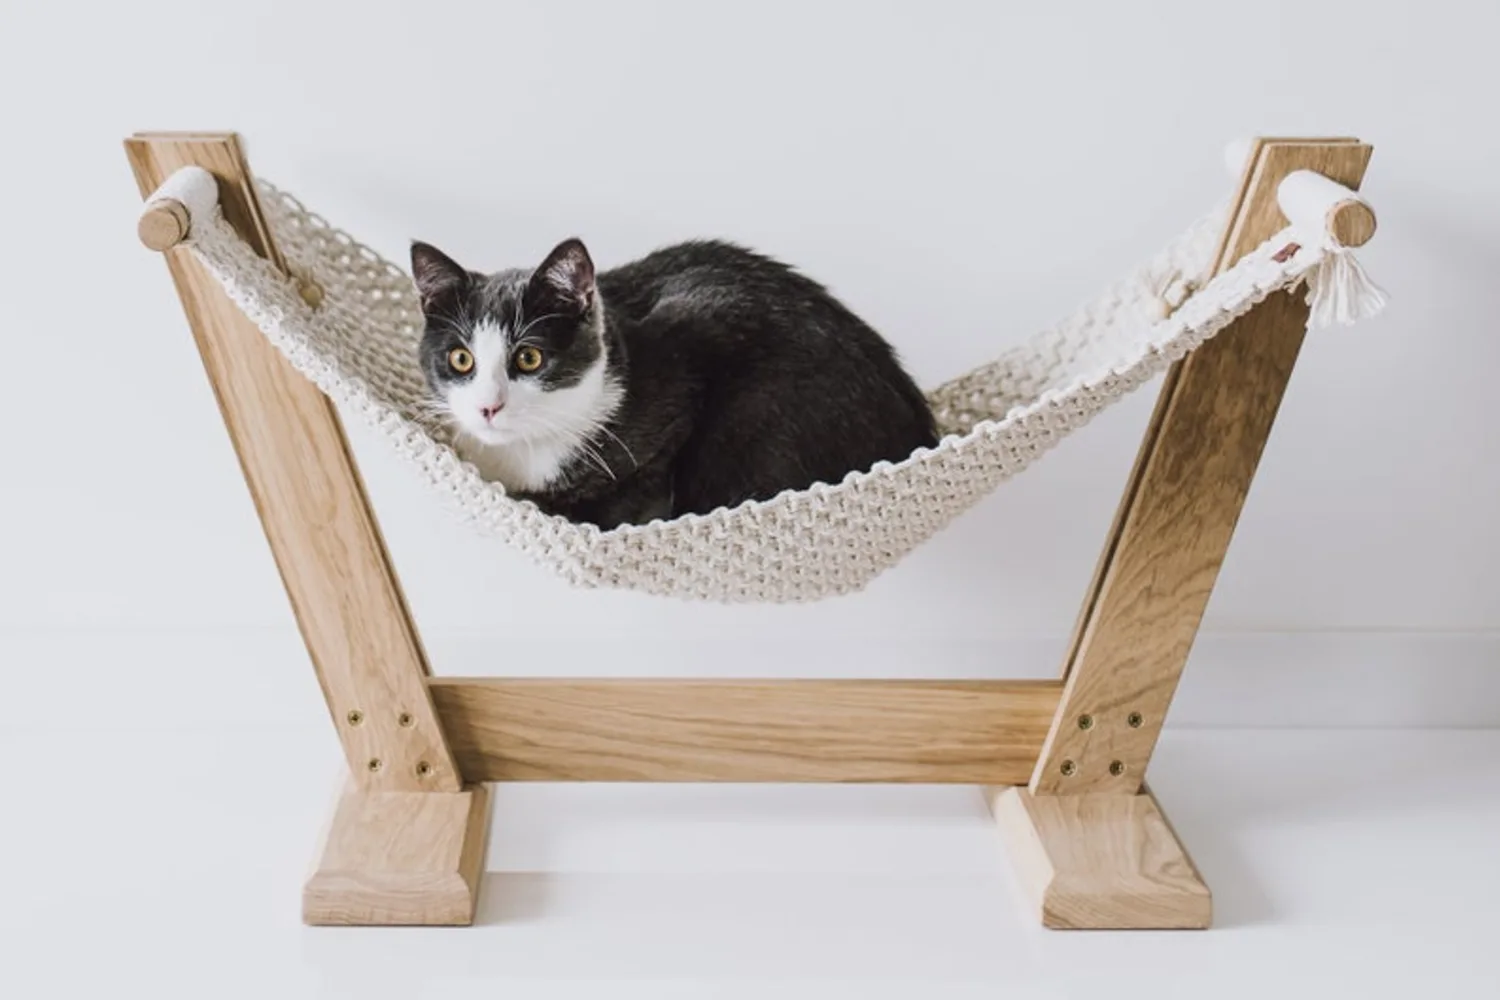
Read more: How To Make A Macrame Hammock
Materials Needed
Before we dive into the world of macrame, let’s gather all the materials you’ll need to create your own stunning coasters. Don’t worry, these supplies are easily accessible and affordable, making it a budget-friendly craft project.
Here’s what you’ll need:
- Macrame Cord: Choose a cord that is suitable for coasters. A cotton cord with a thickness of 3-4mm is ideal for this project. You can find a variety of macrame cords in craft stores or online.
- Scissors: Essential for cutting the cord and trimming any excess.
- Tape Measure or Ruler: Helpful for measuring the length of cord you need.
- Craft Glue: Optional, but useful for securing the knots and preventing them from unraveling.
- Clipboard or Macrame Board: This is handy for holding your work in place as you create the knots. It ensures that your coaster remains taut and well-shaped.
- Decorative Beads (optional): If you want to add a touch of flair to your coasters, choose some beads in colors that complement your macrame cord.
Remember, these are just the basic materials needed to get started. As you gain more experience and explore different macrame techniques, you may want to experiment with additional materials or embellishments.
Now that you have everything you need, let’s move on to the next step: choosing the right macrame cord.
Step 1: Choosing your Macrame Cord
Choosing the right macrame cord is crucial for creating beautiful and sturdy coasters. The thickness and material of the cord will determine the overall look and durability of your finished project. Here are a few factors to consider when selecting your cord:
- Thickness: For coasters, it’s best to choose a cord with a thickness of around 3-4mm. This thickness provides enough stability and structure for the coasters while still allowing flexibility for creating intricate knots.
- Material: Macrame cords are available in a variety of materials, including cotton, jute, nylon, and synthetic fibers. Cotton cords are popular for macrame projects due to their softness, durability, and ease of knotting. Cotton cords also come in various colors, allowing you to customize your coasters to match your personal style and home decor.
- Color: Think about the color scheme you want for your coasters. You can choose cords in vibrant hues to make a statement or opt for neutral tones for a more subtle look. Consider the colors of your dining or coffee table and select cords that complement the existing decor.
- Length: Estimating the length of cord you’ll need can be a bit tricky, as it depends on the size and design of your coaster. A general rule of thumb is to multiply the desired diameter of your coaster by 3.14 (π) to get the approximate length. It’s always better to have a little extra cord than to run out in the middle of your project.
Once you have chosen your macrame cord, it’s time to move on to the next step: preparing the cord for weaving.
Remember, the cord you choose will greatly influence the final appearance of your macrame coasters, so take your time to select the perfect one that matches your aesthetic preferences. Now, let’s get ready to prepare the cord for your macrame masterpiece!
Step 2: Preparing the Cord
Before you can start creating your macrame coasters, it’s important to prepare the cord for weaving. This step involves cutting and sealing the ends of the cord to prevent fraying and ensure a neat and professional finish.
Follow these steps to prepare your macrame cord:
- Measure and cut the cord: Use your tape measure or ruler to measure the desired length of cord for your coaster. Add a few extra inches to account for any knots or fringe you may want to add at the end. Once you have the measurement, use your scissors to carefully cut the cord.
- Seal the ends: To prevent the ends of the cord from fraying, it’s important to seal them. You can do this by using a lighter or a small flame. Gently pass the flame along the cut ends of the cord, being careful not to burn or melt the cord. The heat will melt the fibers and create a sealed edge, preventing fraying.
Once you have prepared your cord, you’re ready to start weaving your macrame coaster. The prepared ends of the cord will make it easier to create the knots and ensure a clean and polished appearance.
Now that your macrame cord is ready, let’s move on to the exciting part: starting the coaster! Get ready to unleash your creativity and create a beautiful piece of tableware.
Step 3: Starting the Coaster
With your prepared macrame cord in hand, it’s time to begin weaving your coaster. This step involves creating the foundation of your coaster, which will serve as the base for the decorative knots to come.
- To start, fold your cord in half and locate the center point. This center point will be the top of your coaster.
- Secure the folded end of the cord to your clipboard or macrame board with a clip or pin. This will hold the cord in place as you work.
- Take the two loose ends of the cord and thread them through the loop created at the top. Pull the cord tight to create a snug and secure loop at the top of your coaster.
- Straighten out the four loose ends of the cord so that they hang vertically downwards. These will be used to create the knots in the next step.
By following these steps, you have set the foundation for your macrame coaster. The loop at the top will allow you to hang your coaster if desired, while the four vertical cords will form the base for the decorative knots.
With the coaster’s foundation in place, we can now move on to the next step: creating the macrame knots that will give your coaster its unique texture and design.
Are you excited? Let’s dive into the world of macrame knots and bring your coaster to life!
When making macrame coasters, be sure to use a sturdy and thick cord to ensure the coaster can hold the weight of a drink. Thinner cords may not provide enough support.
Read more: How To Make A Macrame Lamp Shade
Step 4: Creating the Macrame Knots
Now that your coaster’s foundation is set, it’s time to unleash your creativity and start creating the macrame knots that will give your coaster its beautiful texture and design. There are several popular macrame knots you can incorporate into your coaster, and we’ll cover a few of them here.
Here are three commonly used macrame knots you can try:
- Square Knot: The square knot is a classic macrame knot that creates a tight and structured pattern. To make a square knot, take the two outer cords and cross them over the two inner cords. Then, bring the outer cords under the center cords and through the loop created. Pull the cords tight to complete the knot. Repeat this process multiple times to create a row of square knots.
- Half Hitch Knot: The half hitch knot adds a lovely diagonal texture to your coaster. Start by taking one of the outer cords and bring it over the two center cords. Then, loop it under the two center cords and through the resulting loop. Pull the cord tight to create the knot. Repeat this process with the other outer cord, alternating between the two sides.
- Alternating Square Knots: To create a decorative pattern, you can alternate between square knots and half hitch knots. Start with a row of square knots, then follow it with a row of half hitch knots. Continue alternating between these two knots to create a unique and visually appealing design for your coaster.
Feel free to experiment with different combinations of knots and patterns to create a coaster that reflects your personal style and creativity. Remember to keep your tension consistent throughout to ensure a neat and even appearance.
As you progress, you’ll see your coaster taking shape and the intricate knots forming a beautiful design. Just keep knotting until you reach your desired size for the coaster.
Now that you’ve mastered the art of macrame knots, it’s time to move on to the final step: finishing your coaster.
Stay excited, we’re almost there!
Step 5: Finishing the Coaster
Congratulations! You’ve put in the time and effort to create a stunning macrame coaster. Now, it’s time to finish it off and give it that polished, professional look.
- Take a moment to step back and assess the size of your coaster. If you’re happy with its current diameter, proceed to the next step. If you want it to be larger, continue adding knots until you achieve your desired size.
- Once you’re satisfied with the size, it’s time to tie off the loose ends. Take the four loose ends of your cord and gather them together.
- Tie a tight knot at the base of the coaster, ensuring that all the cords are securely held together. You can also add a dab of craft glue to further secure the knot and prevent it from coming undone.
- Trim the excess cord close to the knot, being careful not to cut the knot itself or any of the remaining cords.
With these final steps, your macrame coaster is complete! Take a moment to admire your handiwork and enjoy the satisfaction of creating something beautiful with your own two hands.
Feel free to make multiple coasters using different colors or patterns to add variety to your table setting. They also make excellent gifts for friends and family, showcasing your talent and thoughtfulness.
Now that you’ve mastered the art of making macrame coasters, the possibilities are endless. You can explore more complex patterns, experiment with different types of knots, or even combine multiple coasters to create a larger piece of macrame art.
Remember, macrame is a versatile craft that allows you to express your creativity, and coasters are just the beginning. So go ahead, continue your macrame journey and let your imagination run wild.
Thank you for joining us in this macrame adventure. We hope you enjoy using your handmade coasters and find inspiration in the art of macrame!
Happy knotting!
Step 6: Adding Fringe (optional)
If you want to add an extra touch of flair to your macrame coaster, you can consider adding fringe. Adding fringe is an optional step that can enhance the visual appeal of your coaster and give it a more decorative and bohemian look.
- Once you’ve finished tying off the loose ends and trimming them, take a few extra strands of cord, approximately double the length you want the fringe to be.
- Fold each of these strands in half, creating a loop at the top.
- Use your crochet hook or a small tool to thread the looped end through the knot at the base of your coaster.
- Gently pull the loose ends of the strand through the loop, creating a knot that secures the fringe in place.
- Repeat this process along the base of your coaster, spacing the fringe strands evenly to achieve a balanced and visually pleasing look.
- Trim the loose ends of the fringe to your desired length, ensuring that they’re all even and tidy.
Adding fringe can give your coaster a playful and whimsical look, allowing it to stand out as a unique piece of tableware. Experiment with different lengths and textures of fringe to achieve the desired effect.
Remember, fringe is optional, and if you prefer a cleaner and more minimalist look, you can skip this step and leave your coaster as it is.
With the addition of fringe, your macrame coaster is now complete! Stand back and admire the intricate knots, the beautiful design, and the personalized touch you’ve added to your home decor.
Now it’s time to show off your handiwork and enjoy using your macrame coaster for your favorite beverages or as decorative accents around your home.
We hope you’ve enjoyed this journey into the world of macrame and that it has inspired you to continue exploring this ancient craft. Your newfound skills can be applied to larger macrame projects, such as wall hangings, plant hangers, or even macrame jewelry.
Remember to have fun, experiment with different patterns and techniques, and let your creative spirit guide you as you continue to create beautiful macrame creations.
Thank you for joining us in this macrame coaster adventure, and we hope you’ve found inspiration and joy in the art of macrame!
Happy crafting!
Conclusion
Congratulations on completing your macrame coaster! Through this step-by-step guide, you’ve learned how to choose the right cord, prepare it for weaving, start the coaster, create beautiful macrame knots, finish off the coaster, and even add fringe for an extra touch of style. You’re now equipped with the knowledge and skills to make stunning macrame coasters that will impress both yourself and others.
Macrame is a wonderful craft that combines creativity, patience, and attention to detail. It allows you to express your individuality and add a personal touch to your tableware. In addition to being functional, macrame coasters add a unique aesthetic to your home decor – whether it’s a cozy rustic theme or a modern bohemian vibe.
As you continue your macrame journey, don’t be afraid to experiment with different patterns, knot combinations, and color schemes. Each coaster you create can be a work of art, displaying your growing expertise and unique style.
Remember, macrame is a versatile craft that can be applied to various projects beyond coasters. You can explore larger wall hangings, plant hangers, curtains, or even fashionable accessories like bracelets and earrings. The possibilities are endless!
Now that you’ve completed this macrame coaster project, take a moment to appreciate the time and effort you’ve dedicated. Share your creations with family and friends, or even consider selling them online or at craft fairs. Your handmade macrame coasters will undoubtedly be cherished and admired by others.
Thank you for joining us on this macrame adventure. We hope you’ve found inspiration, enjoyment, and a new passion for this ancient art form. So gather your materials, get creative, and continue exploring the art of macrame!
Happy knotting!
Frequently Asked Questions about How To Make Macrame Coasters
Was this page helpful?
At Storables.com, we guarantee accurate and reliable information. Our content, validated by Expert Board Contributors, is crafted following stringent Editorial Policies. We're committed to providing you with well-researched, expert-backed insights for all your informational needs.

0 thoughts on “How To Make Macrame Coasters”