Home>Furniture>Outdoor Furniture>How To Replace Slings On Patio Chairs
Outdoor Furniture
How To Replace Slings On Patio Chairs
Modified: March 7, 2024
Learn how to replace slings on your outdoor furniture with this comprehensive guide. Save money and extend the life of your patio chairs.
(Many of the links in this article redirect to a specific reviewed product. Your purchase of these products through affiliate links helps to generate commission for Storables.com, at no extra cost. Learn more)
Introduction
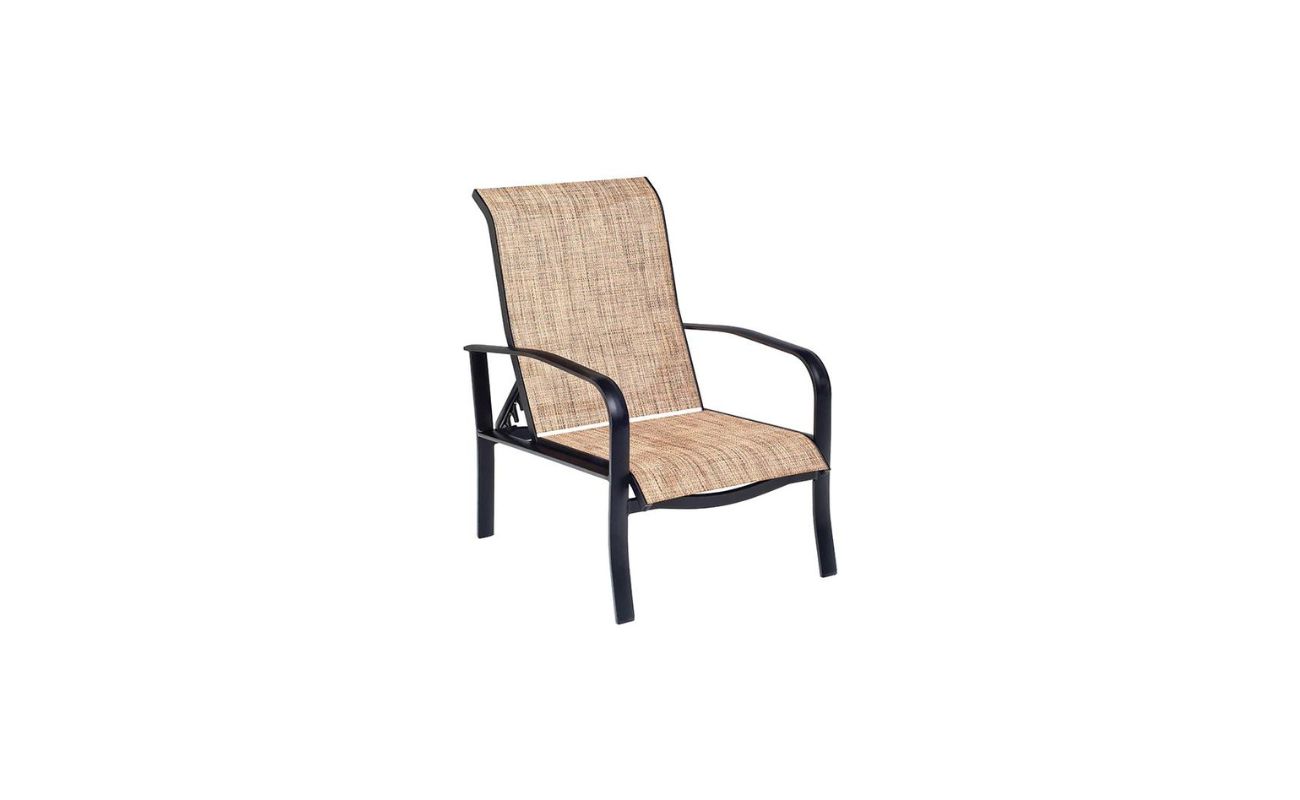
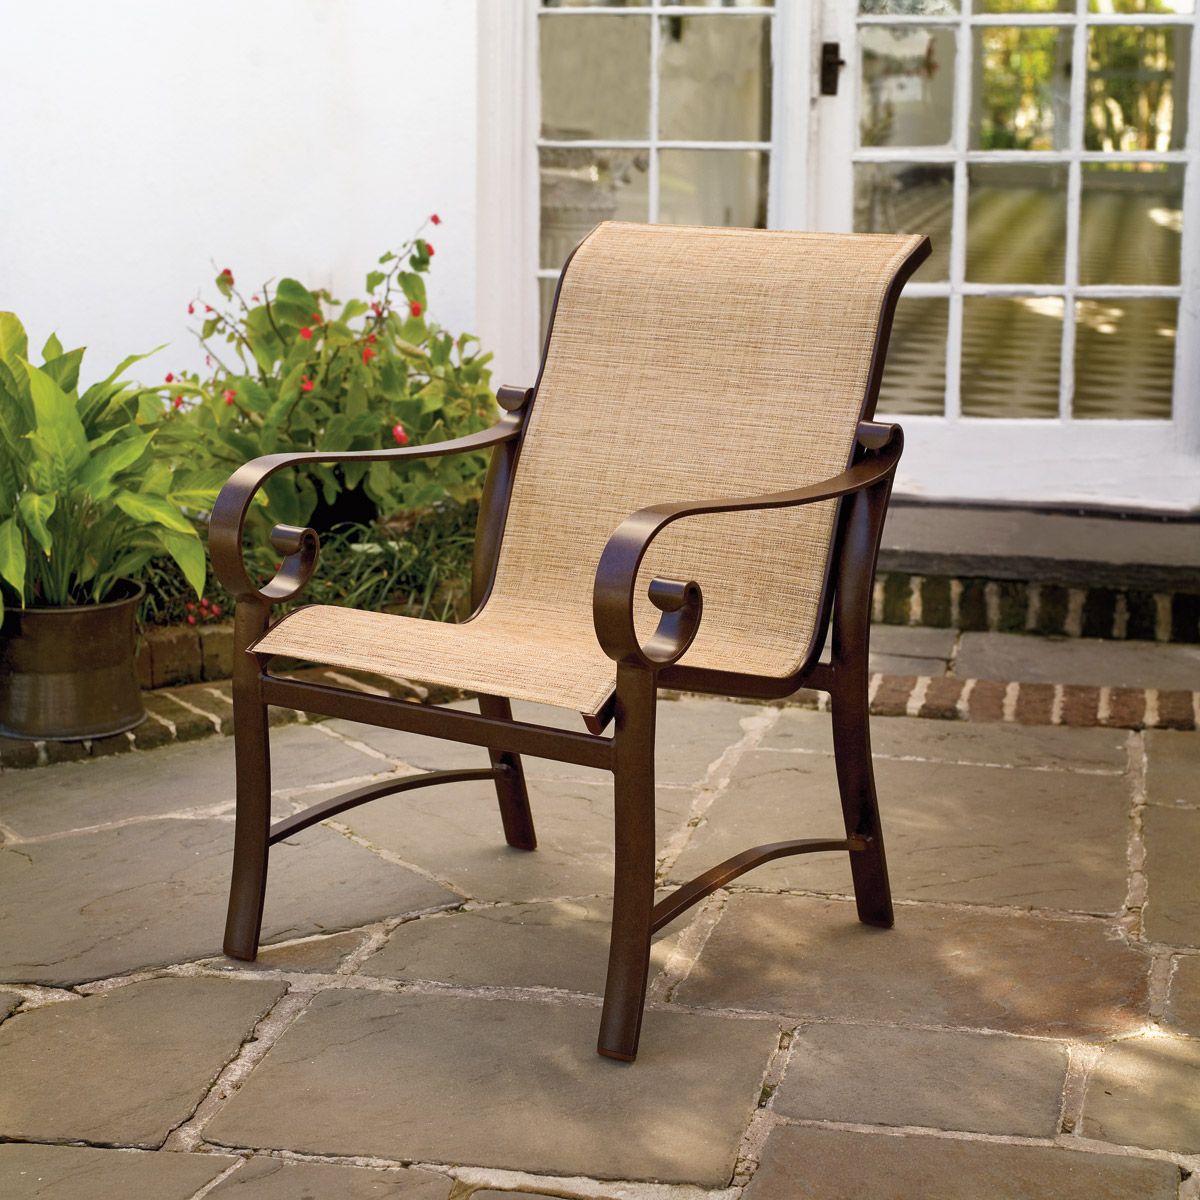
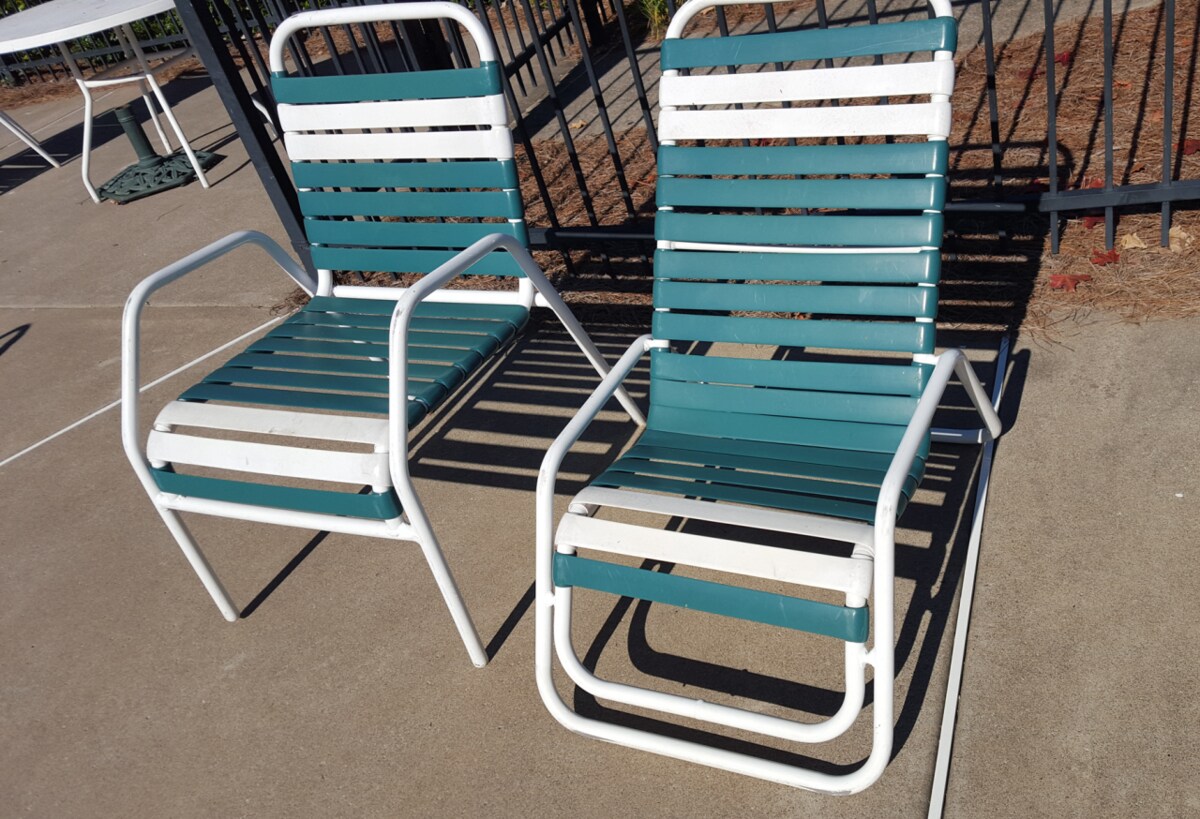
Welcome to our guide on how to replace slings on patio chairs! If you have outdoor furniture with worn or damaged slings, there’s no need to worry – with a few simple steps, you can have your chairs looking as good as new. Slings are an essential component of patio chairs, providing comfort and support while also contributing to the overall aesthetic appeal of your outdoor space. Over time, however, slings can become worn, torn, or faded due to exposure to the elements.
In this article, we will walk you through the process of replacing the slings on your patio chairs. Whether you’re a seasoned DIY enthusiast or a novice looking to take on your first outdoor furniture project, we’ve got you covered. With the right tools and materials, along with some patience and attention to detail, you’ll be able to restore your chairs to their former glory and enjoy many more seasons of comfortable outdoor lounging.
Before we dive into the steps, it’s important to note that the specific process may vary depending on the design and construction of your patio chairs. Be sure to read through the manufacturer’s instructions or consult their website for any model-specific information. Additionally, always prioritize safety when working with tools and materials, and make sure to follow proper safety precautions.
Now that we’ve covered the basics, let’s gather the necessary tools and materials to get started on replacing the slings of your patio chairs.
Key Takeaways:
- Revitalize your outdoor chairs by replacing worn slings with a few simple steps. Prioritize safety, measure accurately, and ensure proper tension for a comfortable seating experience.
- Gather tools, measure, cut, attach, and adjust for a successful sling replacement. Enjoy your refreshed patio chairs and extend their lifespan with proper maintenance.
Read more: How To Fix Sling Patio Chairs
Necessary Tools and Materials
Before you begin the sling replacement process, it’s essential to gather all the necessary tools and materials. Having everything prepared in advance will make the process smoother and more efficient. Here’s what you’ll need:
- Screwdriver or Allen wrench: You may need these tools to remove any screws or bolts holding the sling in place on the chair frame.
- Scissors or utility knife: These tools will be used to cut the new sling fabric to the appropriate size.
- Tape measure: You’ll need a tape measure to accurately measure the dimensions of the sling and ensure a proper fit.
- Sling fabric: Choose a high-quality outdoor fabric that is durable, weather-resistant, and available in the desired color or pattern. Consult with your local outdoor furniture store or search online for replacement sling fabric options.
- Fasteners: Depending on your specific chair design, you may need fasteners such as bolts, screws, or rivets to secure the new sling fabric to the chair frame.
- Pliers: Pliers will come in handy for any gripping or pulling tasks that may be required during the sling replacement process.
- Safety goggles and gloves: These protective accessories will help keep you safe from any potential injuries while working with tools and materials.
These are the basic tools and materials you’ll need to replace the slings on your patio chairs. However, depending on the specific design of your chairs, you may require additional tools or materials. It’s always a good idea to review the manufacturer’s instructions or seek professional advice if you’re unsure about any specific requirements.
Now that you have everything you need, let’s move on to the first step of the sling replacement process: removing the old sling.
Step 1: Remove the Old Sling
The first step in replacing the slings on your patio chairs is to remove the old sling. This process may vary depending on the design of your chairs, so it’s important to take note of any screws, bolts, or attachment points holding the sling in place. Follow these general steps to remove the old sling:
- Position the chair on a stable surface: Place the chair on a flat, sturdy surface such as a workbench or an even area of the floor. This will provide you with a comfortable and safe working space.
- Inspect the chair frame: Take a close look at the chair frame and identify any screws, bolts, or attachment points securing the sling. Use a screwdriver or Allen wrench to remove them as necessary. Keep track of the hardware and set it aside in a safe place.
- Separate the sling from the frame: Once the screws or bolts are removed, carefully separate the sling fabric from the chair frame. Slowly and gently pull the fabric away from the frame, taking care not to tear or damage it in the process. If the sling is held in place by rivets, use pliers to loosen and remove them.
- Repeat the process for all sides of the chair: Depending on the design of your chair, you may need to repeat the removal process for each side of the chair. Take your time and ensure that all attachment points are detached before moving on.
By following these steps, you should be able to successfully remove the old sling from your patio chair frame. Remember to be cautious and take your time to avoid any accidental damage. Once the old sling is removed, you can proceed to the next step: measuring and cutting the new sling fabric.
Step 2: Measure and Cut the New Sling Fabric
After removing the old sling, it’s time to measure and cut the new sling fabric for your patio chair. This step is crucial to ensure a proper fit and a neat appearance. Follow these steps to measure and cut the new sling fabric:
- Lay out the old sling fabric: Lay the old sling fabric flat on a clean surface. Smooth out any wrinkles or creases to get an accurate measurement.
- Measure the dimensions: Use a tape measure to measure the length and width of the old sling fabric. Ensure that you measure from edge to edge, including any hemmed or finished edges.
- Add extra fabric for seam allowance: When cutting the new sling fabric, it’s important to add some extra fabric to account for seam allowance. Typically, adding an additional 1-2 inches on each side is sufficient, but this may vary depending on the specific instructions provided by the fabric manufacturer.
- Transfer measurements to the new fabric: Using the measurements from the old sling fabric as a guide, transfer the dimensions onto the new sling fabric. Use a pencil or fabric marker to mark the cutting lines.
- Cut the fabric: Using a pair of scissors or a utility knife, carefully cut along the marked cutting lines to create the new sling fabric pieces. Take your time and make smooth, straight cuts to ensure a clean finish.
- Double-check the fit: Once the fabric is cut, place it on the chair frame to double-check the fit. Make any necessary adjustments or trim excess fabric if needed to achieve the desired fit.
By following these steps, you’ll be able to accurately measure and cut the new sling fabric for your patio chair. Take your time during this process to ensure precision and accuracy. With the new fabric ready, you can now move on to the next step: attaching the new sling to the chair frame.
When replacing slings on patio chairs, make sure to measure the length and width of the old sling to ensure the new one will fit properly. Also, consider the material and color of the new sling to match your patio decor.
Step 3: Attach the New Sling to the Chair Frame
With the new sling fabric cut and ready, it’s time to attach it to the chair frame. This step requires attention to detail and proper alignment to achieve a secure and visually appealing result. Follow these steps to attach the new sling to the chair frame:
- Position the chair frame: Place the chair frame on a stable surface, ensuring it is steady and won’t wobble or tip over during the attachment process.
- Align the sling fabric: Lay the new sling fabric over the chair frame, aligning it based on the holes or attachment points where the old sling was previously secured. Make sure the fabric is evenly positioned with no wrinkles or folds.
- Insert the fasteners: Depending on your chair’s design, you may use screws, bolts, or rivets as your chosen fasteners. Insert them through the holes in the sling fabric and into the corresponding attachment points on the chair frame.
- Secure the fasteners: Use a screwdriver, Allen wrench, or pliers to tighten the fasteners and secure the new sling fabric to the chair frame. Ensure they are tightened enough to hold the fabric securely, but be careful not to overtighten and damage the fabric or frame.
- Repeat the process for all sides: Move around the chair frame, attaching the new sling fabric to all sides using the same method. Make sure the fabric remains taut and properly aligned throughout the process.
Throughout this step, pay close attention to the alignment and tension of the sling fabric. Double-check that it is centered and evenly stretched across the chair frame. This will not only ensure a professional-looking finish but also provide optimal comfort and support when using the chair.
Once you have attached the new sling fabric to the chair frame, you can proceed to the next step: securing the sling with fasteners.
Step 4: Secure the Sling with Fasteners
After attaching the new sling fabric to the chair frame, the next step is to secure it in place using fasteners. The type of fasteners you use will depend on the design of your patio chair, so refer to the manufacturer’s instructions or consult with a professional if needed. Here’s how to securely fasten the sling:
- Double-check alignment: Before proceeding with the fasteners, ensure that the sling fabric is still properly aligned on the chair frame. Adjust it if necessary, making sure there are no creases or sagging.
- Position the fasteners: Place the fasteners in the designated holes or attachment points on the sling fabric and the chair frame. Make sure they are positioned securely and aligned with each other.
- Tighten the fasteners: Using the appropriate tool, such as a screwdriver, Allen wrench, or pliers, tighten the fasteners to firmly secure the sling fabric. Be careful not to overtighten, as this could result in damage or distortion of the fabric or frame.
- Test the security: Once all fasteners are tightened, give the sling fabric a gentle tug to ensure it is securely in place. It should be taut without any sagging or looseness.
- Inspect the fasteners: Take a final look at all the fasteners to ensure they are properly tightened and securely holding the sling fabric. Make any necessary adjustments if you notice any loose or protruding fasteners.
By following these steps, you will ensure that your new sling fabric is securely fastened to the chair frame, providing stability and support while also enhancing the aesthetic appeal of your patio chairs. With the sling properly secured, you can move on to the final step: adjusting and ensuring proper tension.
Step 5: Adjust and Ensure Proper Tension
Once the new sling fabric is securely fastened to the chair frame, it’s important to adjust and ensure proper tension for optimal comfort and functionality. This step will help ensure that the sling is neither too loose nor too tight, providing a comfortable seating experience. Here’s how to adjust and ensure proper tension for the sling fabric:
- Sit on the chair: Sit on the chair and get a feel for the tension of the sling fabric. Pay attention to any areas that feel overly loose or tight.
- Adjust the tension: If the sling fabric feels too loose, you can tighten it by tightening the fasteners slightly. Conversely, if the fabric feels too tight and is putting excessive pressure on certain areas, you can loosen the fasteners slightly.
- Even out the tension: Walk around the chair, applying pressure to different areas of the sling fabric to ensure an even distribution of tension. The sling fabric should provide adequate support without any areas sagging or feeling too compressed.
- Recheck the alignment: While adjusting the tension, also double-check the alignment of the sling fabric. Make sure it is still centered, even, and free from wrinkles or folds.
- Test the comfort: Sit on the chair again after making any necessary tension adjustments. Ensure that the fabric provides a comfortable seating experience with proper support and tension.
- Make final adjustments: If needed, make any final tension adjustments until you are satisfied with the comfort and appearance of the sling fabric.
By following these steps, you will be able to achieve the proper tension for the sling fabric, ensuring a comfortable and enjoyable seating experience. Take your time during this step to make the necessary adjustments, as proper tension is key to maximizing the longevity and usability of the sling.
Congratulations! You have successfully replaced the slings on your patio chairs. With the new slings in place, you can now sit back, relax, and enjoy your refreshed outdoor furniture.
Remember, proper maintenance and care of your patio chairs, including regular cleaning and protection from harsh weather conditions, will help extend the lifespan of the slings and keep them looking their best.
We hope this guide has been helpful in your sling replacement project. If you have any additional questions or require further assistance, feel free to consult with a professional or reach out to the manufacturer for support. Happy lounging!
Conclusion
Replacing the slings on your patio chairs is a worthwhile project that can rejuvenate your outdoor furniture and extend its lifespan. With the step-by-step guide we’ve provided, you should feel confident and equipped to tackle this DIY endeavor. By following the proper techniques and utilizing the necessary tools and materials, you can restore your chairs to their former glory and enjoy many more seasons of comfortable outdoor lounging.
Throughout the process, remember to prioritize safety and take your time to ensure precision and accuracy. Double-check the alignment, tension, and security of the new sling fabric to achieve optimal results. Maintaining proper tension is crucial for both comfort and longevity, so make any necessary adjustments until you achieve the desired fit.
Additionally, don’t forget to consult the manufacturer’s instructions or seek professional advice if you encounter any specific requirements or challenges along the way. Each patio chair design may have its own nuances and considerations, so it’s important to tailor your approach accordingly.
Lastly, as you enjoy your newly replaced slings, be sure to care for your patio furniture properly. Regular cleaning, protection from the elements, and appropriate maintenance will help prolong the lifespan of the slings and keep them looking their best for years to come.
We hope this comprehensive guide has provided you with the knowledge and confidence to successfully replace the slings on your patio chairs. Should you require further assistance or have any questions, don’t hesitate to reach out to professionals or the manufacturer. Now, gather your tools, prep your materials, and embark on this exciting outdoor furniture project. Happy sling replacement!
Frequently Asked Questions about How To Replace Slings On Patio Chairs
Was this page helpful?
At Storables.com, we guarantee accurate and reliable information. Our content, validated by Expert Board Contributors, is crafted following stringent Editorial Policies. We're committed to providing you with well-researched, expert-backed insights for all your informational needs.


0 thoughts on “How To Replace Slings On Patio Chairs”