Home>Furniture>Outdoor Furniture>How To Fix Webbing On A Patio Chair
Outdoor Furniture
How To Fix Webbing On A Patio Chair
Modified: August 17, 2024
Learn how to fix the worn out webbing on your outdoor furniture with this step-by-step guide. Revive your patio chair and enjoy comfortable seating once again!
(Many of the links in this article redirect to a specific reviewed product. Your purchase of these products through affiliate links helps to generate commission for Storables.com, at no extra cost. Learn more)
Introduction
Welcome to our guide on how to fix webbing on a patio chair. Over time, the webbing on outdoor patio chairs can become worn, torn, or loose, compromising both the comfort and the appearance of the furniture. Instead of replacing the entire chair, you can save money and restore the functionality of the chair by replacing the webbing.
In this article, we will provide you with a step-by-step guide on how to fix webbing on a patio chair. We will walk you through the process, providing you with the tools and materials needed, as well as helpful tips along the way. Let’s get started!
Key Takeaways:
- Revive your worn-out patio chair by replacing the webbing instead of buying a new one. Save money and enjoy a refreshed look with a simple DIY repair project.
- With the right tools and materials, you can easily fix the webbing on your patio chair. Follow the step-by-step guide to ensure a comfortable and durable seating surface.
Read more: How To Fix Sling Patio Chairs
Tools and Materials Needed
Before you begin repairing the webbing on your patio chair, gather the following tools and materials:
- Scissors or utility knife: You will need these to cut the old webbing and trim the new webbing.
- Webbing stretcher: This tool is used to tighten the webbing once it’s attached to the chair frame.
- Measuring tape: Use a measuring tape to measure and cut the new webbing to the correct length.
- Screwdriver: Depending on the type of chair, you may need a screwdriver to remove any screws or fasteners.
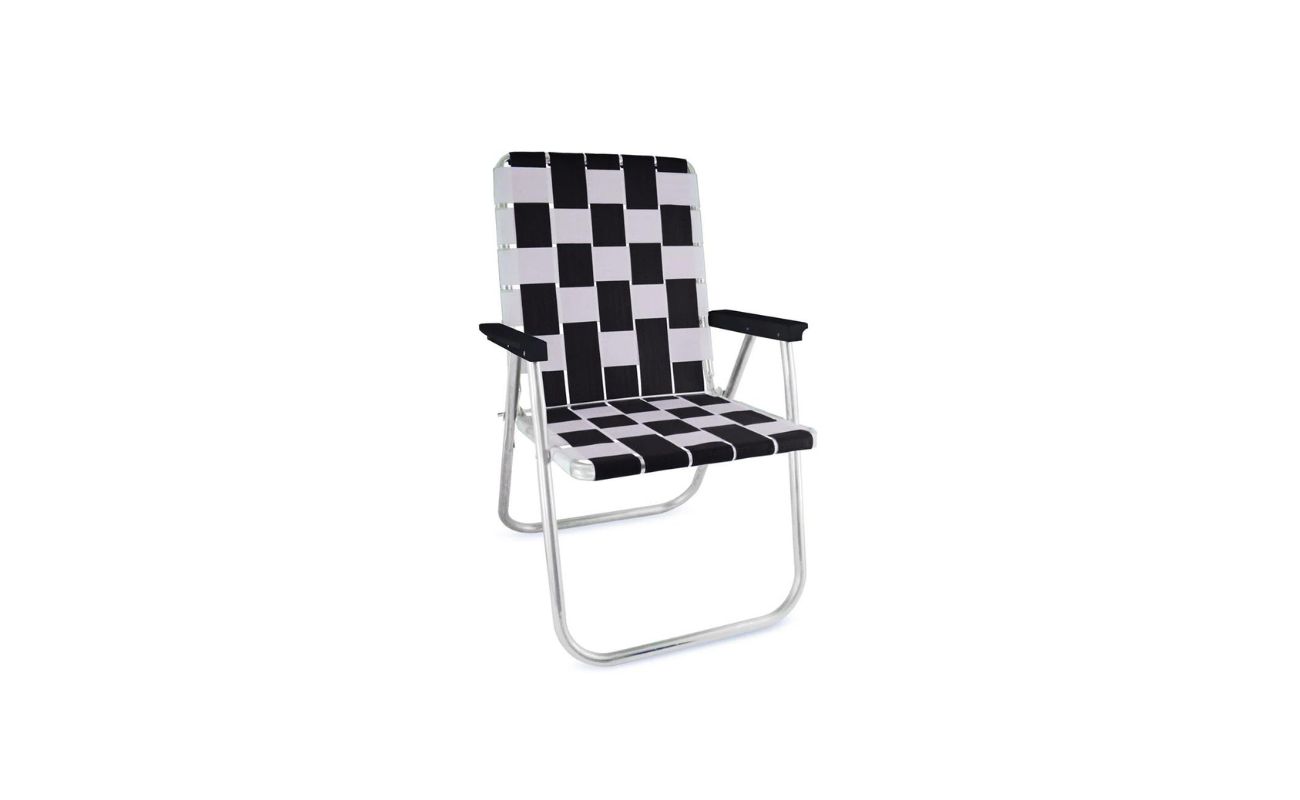
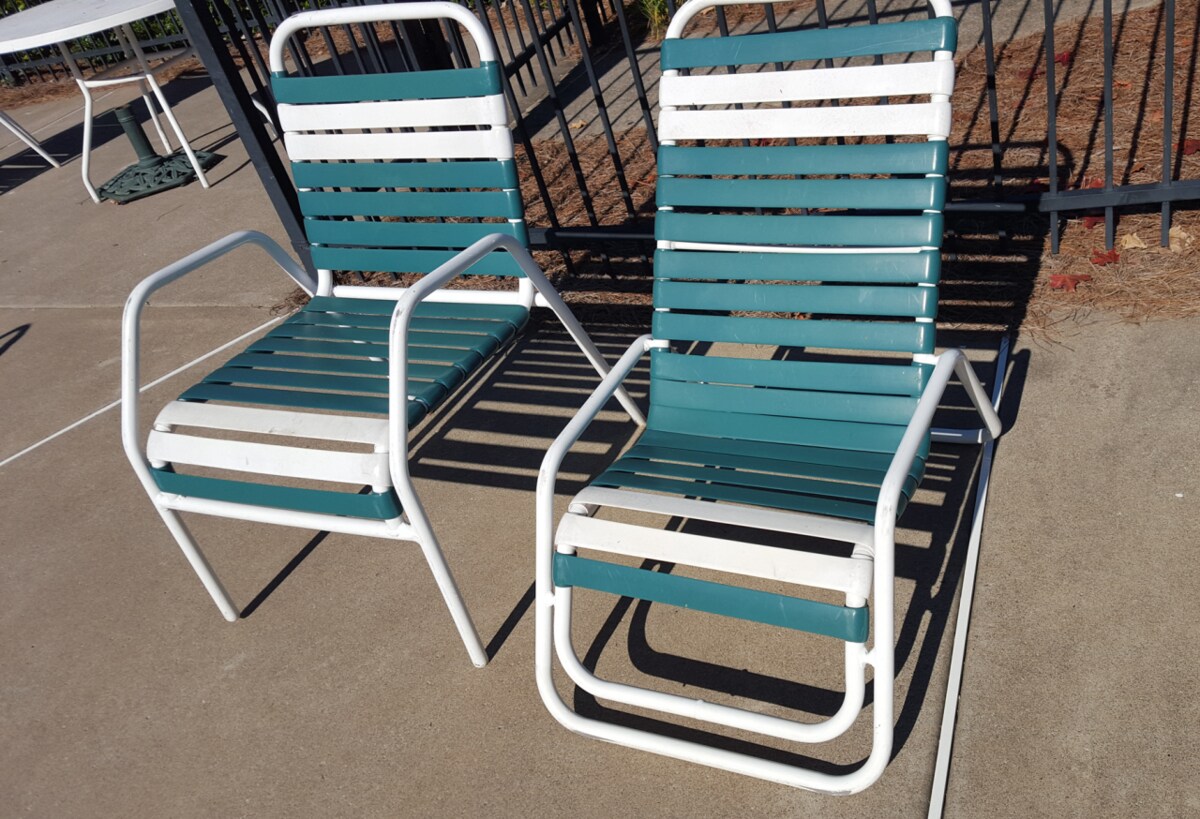
- Patio chair webbing: Purchase new webbing that matches the style and color of your existing chair or choose a new design to refresh the look.
- Masking tape: This will be helpful to keep the webbing in place as you work.
- Staple gun and staples: You will use these to secure the webbing to the chair frame.
Make sure you have all the necessary tools and materials ready before you start repairing the webbing on your patio chair. This will help ensure a smooth and efficient process.
Step 1: Remove Old Webbing
The first step in fixing the webbing on your patio chair is to remove the old, damaged webbing. Follow these steps:
- Turn the chair upside down or lay it on its side to access the underside of the seat.
- Inspect the webbing to identify any screws, staples, or other fasteners holding it in place. Use a screwdriver or pliers to remove these fasteners.
- Carefully cut any remaining webbing with scissors or a utility knife. Take care not to damage the chair frame or any other components.
- Remove any remaining staples or fasteners from the chair frame. A flathead screwdriver or staple remover can be helpful for this task.
- Clean the chair frame by removing any dirt or debris with a brush or cloth.
By removing the old webbing, you create a clean slate to work with and ensure that the new webbing will be securely attached to the chair frame.
Step 2: Prepare the Chair Frame
After removing the old webbing, it’s important to prepare the chair frame before attaching the new webbing. Follow these steps:
- Inspect the chair frame for any loose screws or damaged parts. Tighten any loose screws and replace any damaged components to ensure the chair is sturdy and stable.
- If the chair frame has slots or grooves for the webbing, clean them with a brush or cloth to remove any dirt or debris that could interfere with the webbing’s attachment.
- Apply a layer of adhesive or glue to the chair frame’s surface if necessary. This can help improve the adhesion of the new webbing to the frame.
- Allow the adhesive or glue to dry completely before moving on to the next step. Refer to the instructions provided with the adhesive for the recommended drying time.
Preparing the chair frame ensures that it is in optimal condition for the new webbing to be securely attached. Taking these steps will help prolong the lifespan of the repaired chair and ensure a comfortable seating experience.
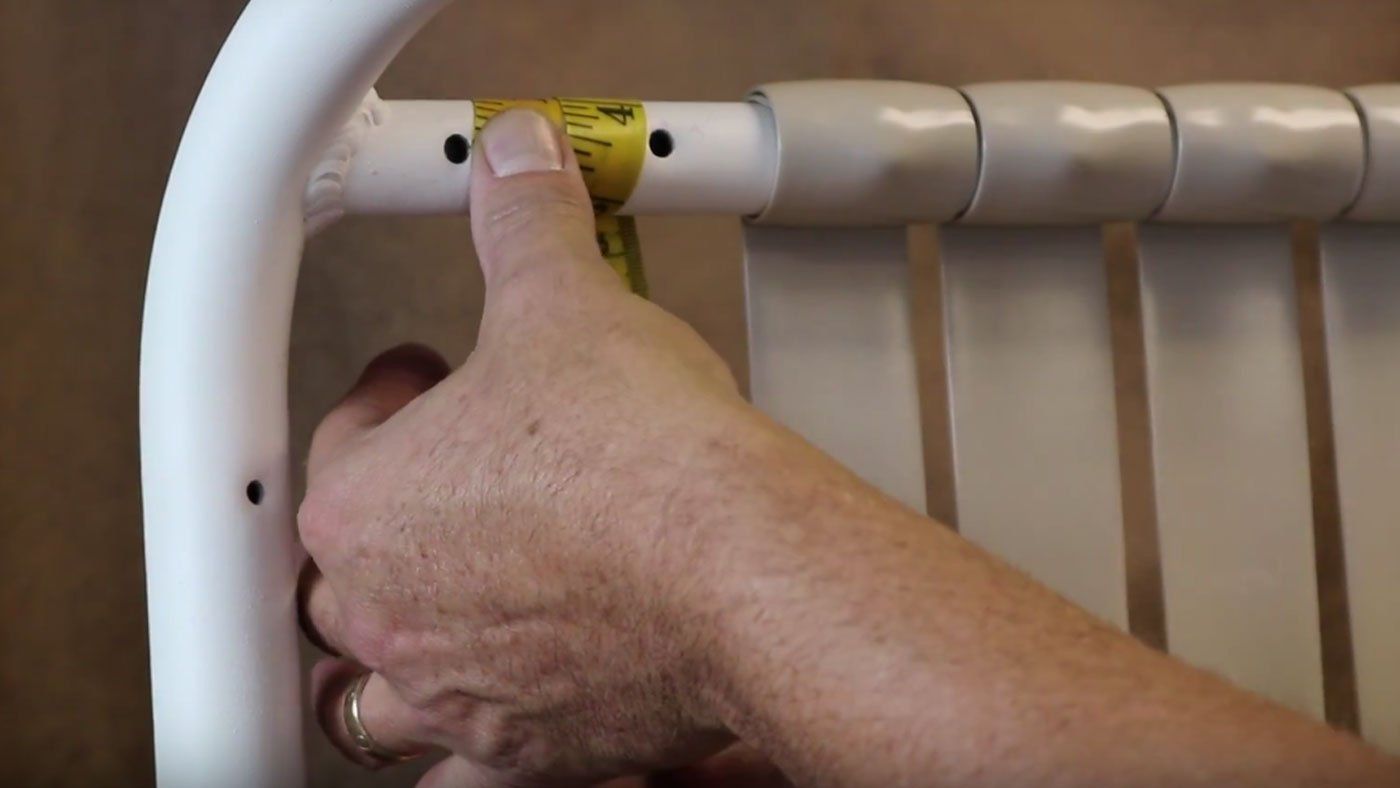
Step 3: Measure and Cut New Webbing
Now that the chair frame is prepared, it’s time to measure and cut the new webbing. Follow these steps:
- Start by measuring the length and width of the chair frame where the webbing will be attached. Use a measuring tape to ensure accurate measurements.
- Add a few inches to the length measurement to allow for securing the webbing to the chair frame.
- Using the measurements, cut the new webbing to the appropriate size using scissors or a utility knife. Make clean, straight cuts to ensure a professional-looking result.
- Consider using a template or pattern to ensure consistency if you have multiple pieces of webbing to cut.
- If the chair has slots or grooves for the webbing, cut notches on the ends of the webbing to help it fit securely in place.
Be sure to double-check your measurements and take your time when cutting the new webbing. Accuracy is key to ensuring a proper fit and a visually pleasing result in the final repair.
To fix webbing on a patio chair, remove the old webbing, measure and cut new webbing to size, and weave it through the chair frame. Secure the ends tightly with screws or clips.
Read more: How To Fix Outdoor Furniture Webbing
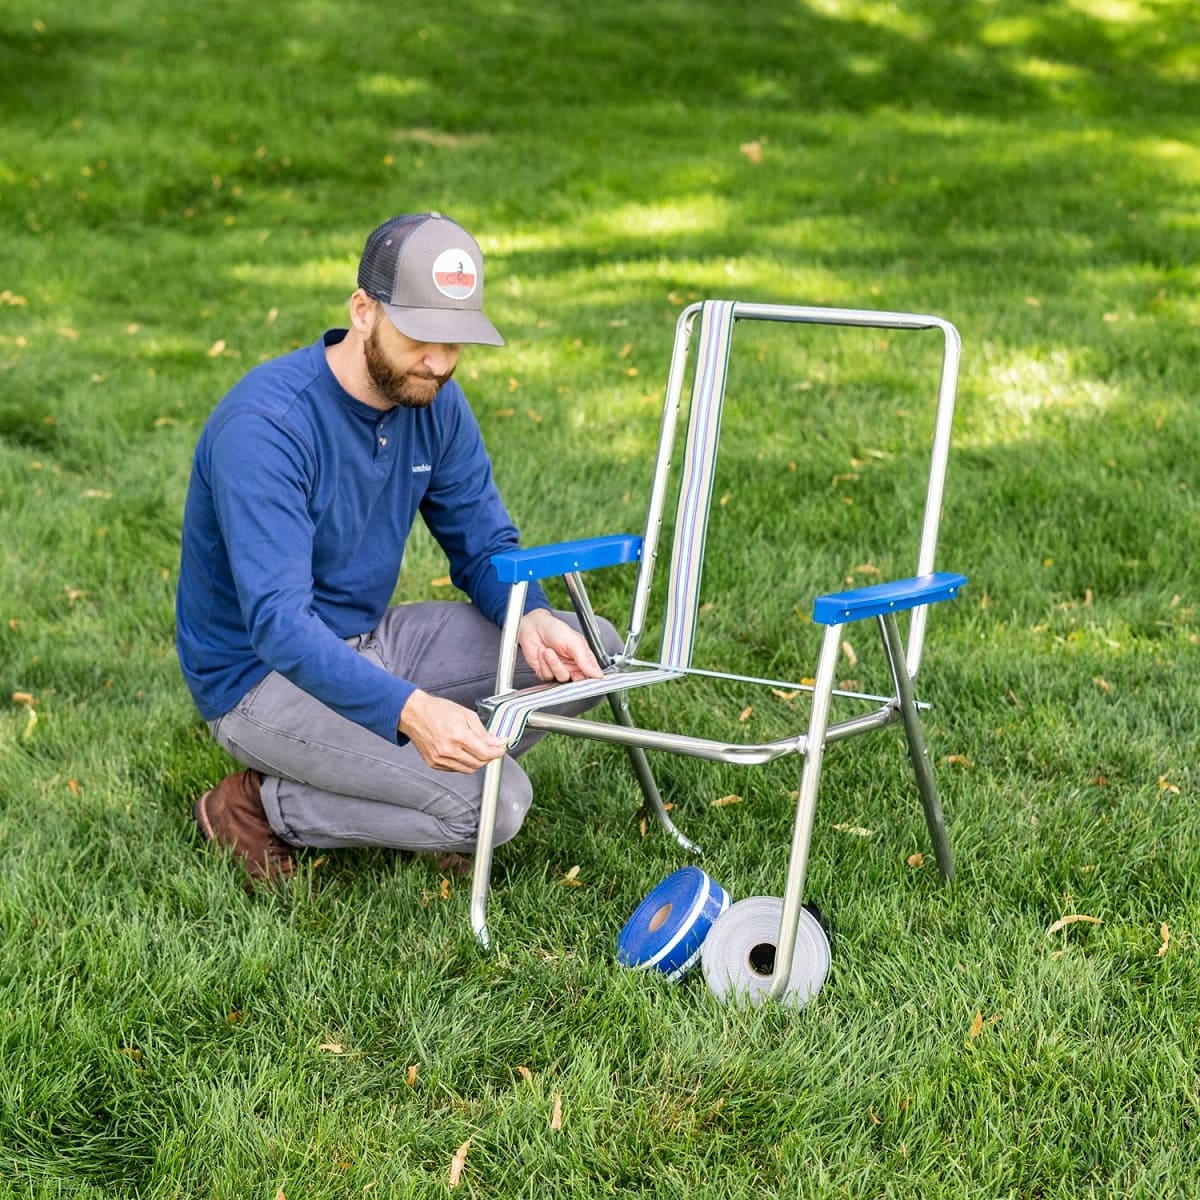
Step 4: Attach the New Webbing to the Chair Frame
With the new webbing cut to the appropriate size, it’s time to attach it to the chair frame. Follow these steps:
- Position the first piece of webbing on one side of the chair frame. Use masking tape to secure it in place temporarily, if needed.
- Beginning at one end of the chair frame, use a staple gun to secure the webbing to the frame. Start with one staple in the center of the webbing, then continue stapling every few inches along the length of the webbing, ensuring it is taut and securely attached.
- Repeat this process with the remaining pieces of webbing, working your way across the chair frame. Make sure there is an even amount of tension in the webbing to ensure a balanced and comfortable seat.
- If the chair has slots or grooves for the webbing, feed the webbing through the slots and secure it with staples or fasteners as necessary.
Take care to align the webbing evenly and maintain consistent tension throughout the attachment process. This will result in a visually appealing and comfortable seating surface.
Step 5: Tighten and Secure the Webbing
After attaching the new webbing to the chair frame, it’s important to tighten and secure it properly for optimal comfort and longevity. Follow these steps:
- Using a webbing stretcher, apply tension to the webbing by pulling it firmly towards the opposite side of the chair frame. This will remove any slack and ensure a taut and supportive seat.
- Continue to stretch and adjust the webbing as needed, working your way across the chair frame. Make sure the tension is consistent across all the webbing pieces.
- Secure the webbing in place by adding additional staples or fasteners, especially at the ends where the tension is greatest. Space them evenly a few inches apart to ensure the webbing is securely held.
- Trim any excess webbing using scissors or a utility knife, making sure to leave a small amount for a neat and clean appearance.
Tightening and securing the webbing properly is crucial for a comfortable and durable result. Taking the time to ensure optimal tension and secure attachment will help prevent sagging and prolong the lifespan of your patio chair.
Step 6: Test the Chair for Stability
After completing the webbing repair, it is essential to test the stability and durability of the chair. Follow these steps:
- Carefully turn the chair back to its upright position.
- Gently sit on the chair and test its stability. Pay attention to any wobbling, shifting, or unusual movements.
- Rock back and forth slightly to evaluate if the webbing holds securely and provides adequate support.
- If you notice any instability or discomfort, inspect the webbing and chair frame for any loose or improperly attached sections.
- Make the necessary adjustments, such as tightening the webbing or reinforcing any weak areas, to ensure the chair is stable and safe to use.
Testing the chair for stability is crucial to ensure that your repair work is successful and that the chair is safe for use. Taking the time to evaluate and make any necessary adjustments will give you peace of mind and ensure a comfortable seating experience.
Conclusion
Repairing the webbing on your patio chair is a cost-effective and rewarding way to revive your outdoor furniture. By following our step-by-step guide, you can easily fix the webbing and restore the comfort and functionality of your chair.
Throughout the process, we covered important steps such as removing the old webbing, preparing the chair frame, measuring and cutting the new webbing, attaching the webbing, tightening and securing it, and finally testing the chair for stability.
With the right tools, materials, and a little bit of patience, you can complete this repair project and enjoy the fruits of your labor. Fixing the webbing allows you to extend the lifespan of your patio chair, saving you money in the long run.
Remember to take your time and ensure that the webbing is properly attached, tight, and secure. This will provide you with a comfortable and durable seating surface that can withstand the elements and regular use.
So gather your tools, get ready to rejuvenate your patio chair, and experience the satisfaction of breathing new life into your outdoor furniture!
Frequently Asked Questions about How To Fix Webbing On A Patio Chair
Was this page helpful?
At Storables.com, we guarantee accurate and reliable information. Our content, validated by Expert Board Contributors, is crafted following stringent Editorial Policies. We're committed to providing you with well-researched, expert-backed insights for all your informational needs.
0 thoughts on “How To Fix Webbing On A Patio Chair”