Home>Furniture>Outdoor Furniture>How To Extend An Existing Patio Roof
Outdoor Furniture
How To Extend An Existing Patio Roof
Modified: October 18, 2024
Learn how to extend your existing patio roof and create a comfortable outdoor space for your outdoor furniture. Transform your patio into the ultimate relaxation spot.
(Many of the links in this article redirect to a specific reviewed product. Your purchase of these products through affiliate links helps to generate commission for Storables.com, at no extra cost. Learn more)
Introduction
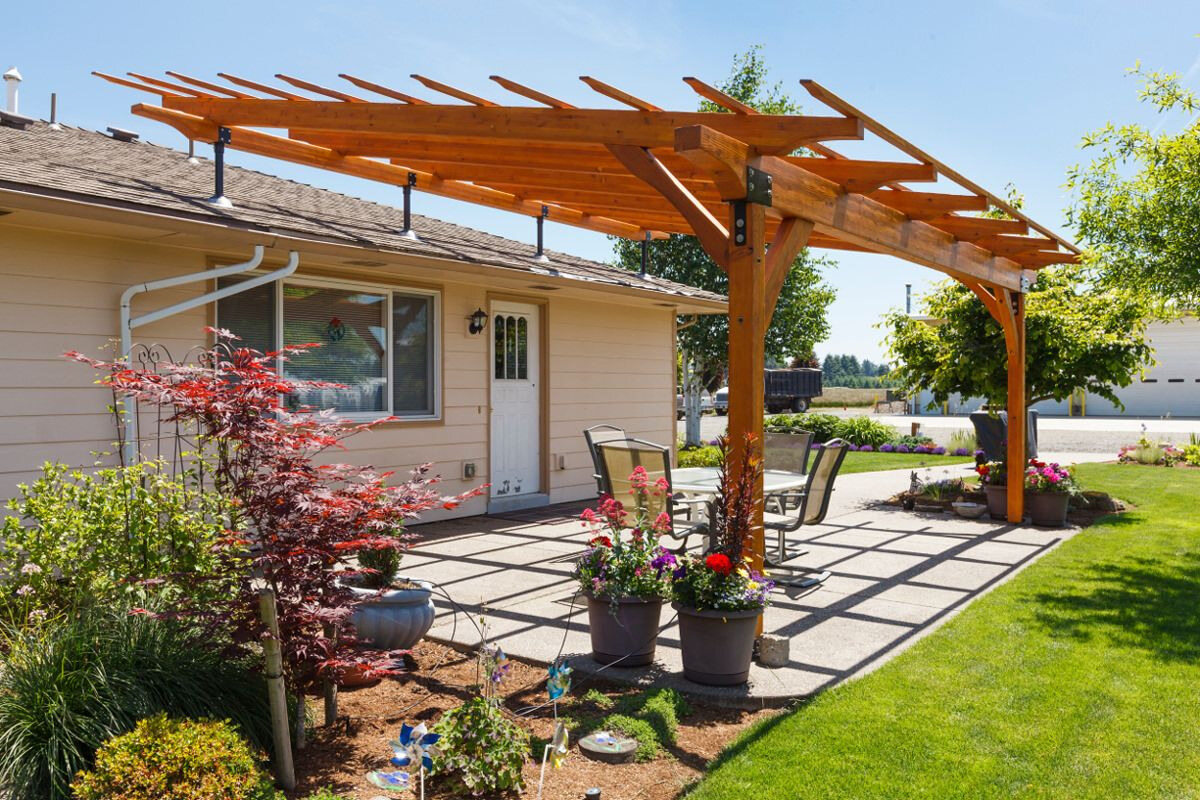
When it comes to outdoor living spaces, a patio is a highly coveted area that provides a seamless transition from indoor to outdoor living. It offers a place to relax, entertain, and enjoy the beauty of nature. However, sometimes the existing patio roof may not provide enough coverage, leaving you exposed to the elements. But fret not! You can easily extend your patio roof to create a larger, more sheltered space. In this article, we will guide you through the process of extending an existing patio roof.
Before you embark on this project, it’s important to assess the current patio roof, determine the desired extension, consider building regulations and permits, select appropriate materials, and ensure proper installation and drainage. So, let’s dive into the details and get started on extending your patio roof!
Key Takeaways:
- Assess your current patio roof’s condition, size, and structural integrity before extending it. Consider aesthetics and consult a professional to ensure a solid foundation for the extension.
- Obtain necessary permits, select durable and weather-resistant materials, and ensure proper drainage and secure installation to successfully extend and protect your patio roof.
Read more: How To Extend A Roof Over A Patio
Assessing the Current Patio Roof
The first step in extending your patio roof is to assess the current structure. Take a close look at the existing roof to determine its condition, strength, and feasibility for extension.
Start by checking the material of the current roof. Is it made of shingles, metal, or another type of material? Assess the overall condition of the roof and look for any signs of damage such as leaks, rot, or structural issues. It’s important to address any existing problems before extending the roof to ensure a solid foundation.
Next, measure the size and dimensions of your current patio roof. This will help you determine how much additional space you can add and where the extension will fit. Consider the height and pitch of the existing roof and take note of any obstacles such as vents, chimneys, or electrical fixtures that may impact the design and placement of the extension.
Assess the structural integrity of the existing roof. Does it have enough support to handle the additional weight of the extension? Consult with a professional if needed to ensure that the current structure can safely accommodate the extension without compromising its stability.
Finally, consider the aesthetics of your current patio roof. Ideally, the extension should seamlessly blend with the existing design and style. Take note of any architectural features or unique elements that you want to maintain or replicate in the extended roof.
By thoroughly assessing the current patio roof, you will have a better understanding of its condition, limitations, and opportunities for extension. This information will guide you in planning and executing the next steps of the project.
Determining the Desired Extension
Once you have assessed the current patio roof, the next step is to determine the desired extension. This involves deciding how much additional coverage you want and how you intend to utilize the extended space.
Start by considering your needs and preferences. Do you want a larger area to accommodate more guests? Are you looking to create a shaded area for outdoor dining or lounging? Do you want to incorporate additional features like an outdoor kitchen or seating area? Understanding your desired outcome will help you plan the extension accordingly.
Next, take into account the available space and limitations of your property. Measure the area where you intend to extend the roof and consider any architectural or landscaping features that may impact the design. Keep in mind that local building codes and regulations may impose restrictions on the size and shape of the extension, so it’s essential to research and comply with these guidelines.
Consider the overall design and style of your home and existing patio. The extension should complement the architectural aesthetics and blend seamlessly with the current structure. Take into account factors such as materials, colors, and roof pitch to ensure a cohesive look.
Furthermore, think about the practical aspects of the extension. How will the extended roof affect natural light and ventilation in the patio area? Will it obstruct any views or create shadows? Consider these factors to ensure that the extended roof enhances the functionality and livability of your outdoor space.
Remember, the desired extension should not only meet your functional needs but also enhance the overall beauty and value of your home. Take your time to carefully plan and visualize the extension, keeping in mind the aesthetics, functionality, and practicality of the project.
Getting Necessary Permits
Before you start the process of extending your patio roof, it’s crucial to check local building codes and regulations to determine if you need any permits or approvals for the project. Obtaining the necessary permits ensures that your extension is compliant with safety standards and guidelines set by your local authorities.
Start by contacting your local building department to inquire about the specific requirements for extending a patio roof. They will provide you with the information regarding the permits needed, the application process, and any associated fees.
Typically, you will be required to submit detailed plans and drawings of the proposed extension along with your permit application. These documents should clearly show the dimensions, materials, and structural details of the extended roof. In some cases, you may need to hire a licensed professional architect or engineer to prepare these plans.
It’s important to note that regulations and requirements vary depending on your location. Some areas may have specific restrictions on the size, height, and placement of patio roof extensions. Others may require you to follow certain design guidelines or obtain neighbor or HOA approvals.
Once you have gathered all the necessary documentation and information, submit your permit application to the local building department. They will review your plans and assess if the extension meets their requirements. If any modifications or clarifications are needed, they will communicate these to you.
Be prepared for the permit process to take time. It’s advisable to start early and allow for any potential delays. Remember that working without the required permits can result in fines or even the need to remove the extension, so it’s important to follow the proper procedures.
By ensuring that you have all the necessary permits, you can proceed with the extension project confidently, knowing that you are complying with local regulations and building codes.
Selecting Materials for the Extension
Once you have determined the desired extension and obtained the necessary permits, the next step in extending your patio roof is selecting the materials. The choice of materials will impact the aesthetics, durability, and overall functionality of your extended roof.
Start by considering the existing materials used in your current patio roof. Ideally, you want to choose materials that match or complement the ones already in place. This will create a cohesive look and maintain the continuity of the design. However, if you’re looking to create a distinct visual element, you can opt for contrasting materials.
When selecting materials, consider the weather conditions in your area. If your region experiences heavy rainfall or strong winds, you’ll want to choose materials that can withstand these elements. Look for options that are durable, water-resistant, and have good wind resistance.
Here are some popular materials used for patio roof extensions:
- Metal: Metal roofs, such as aluminum or steel, are durable, low maintenance, and provide good protection against the elements. They come in a variety of styles and colors to suit different design preferences.
- Shingles: Asphalt or composite shingles can be a cost-effective option for extending your patio roof. They are available in different styles and colors, allowing you to achieve the desired look.
- Polycarbonate panels: These lightweight panels are durable, UV-resistant, and provide excellent protection against the sun’s rays. They allow natural light to filter through while offering shade and protection.
- Wood: If you prefer a natural and rustic look, wood can be a great choice. Cedar, redwood, or treated lumber are popular options for patio roofs. Keep in mind that wood requires regular maintenance to protect against rot and termites.
Consider the cost of the materials and your budget when making your selection. It’s essential to strike a balance between quality, longevity, and affordability.
Lastly, consult with a professional or a reputable supplier for advice and recommendations on the best materials for your specific project. They can provide valuable insights based on their expertise and knowledge of local climate conditions.
By carefully selecting the materials for your patio roof extension, you can create a visually appealing, durable, and functional space that enhances your outdoor living experience.
Read more: How To Tie A Shed Roof Into An Existing Roof
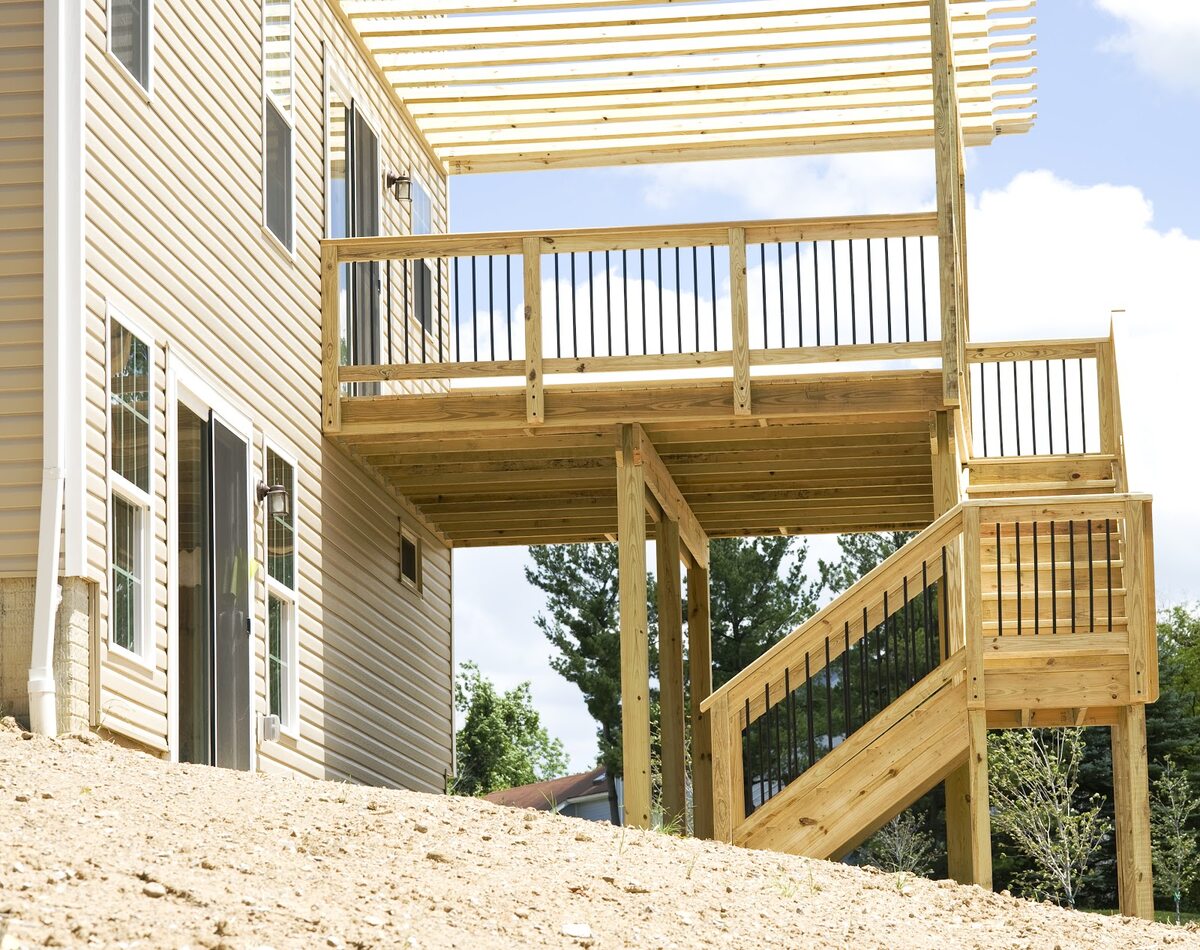
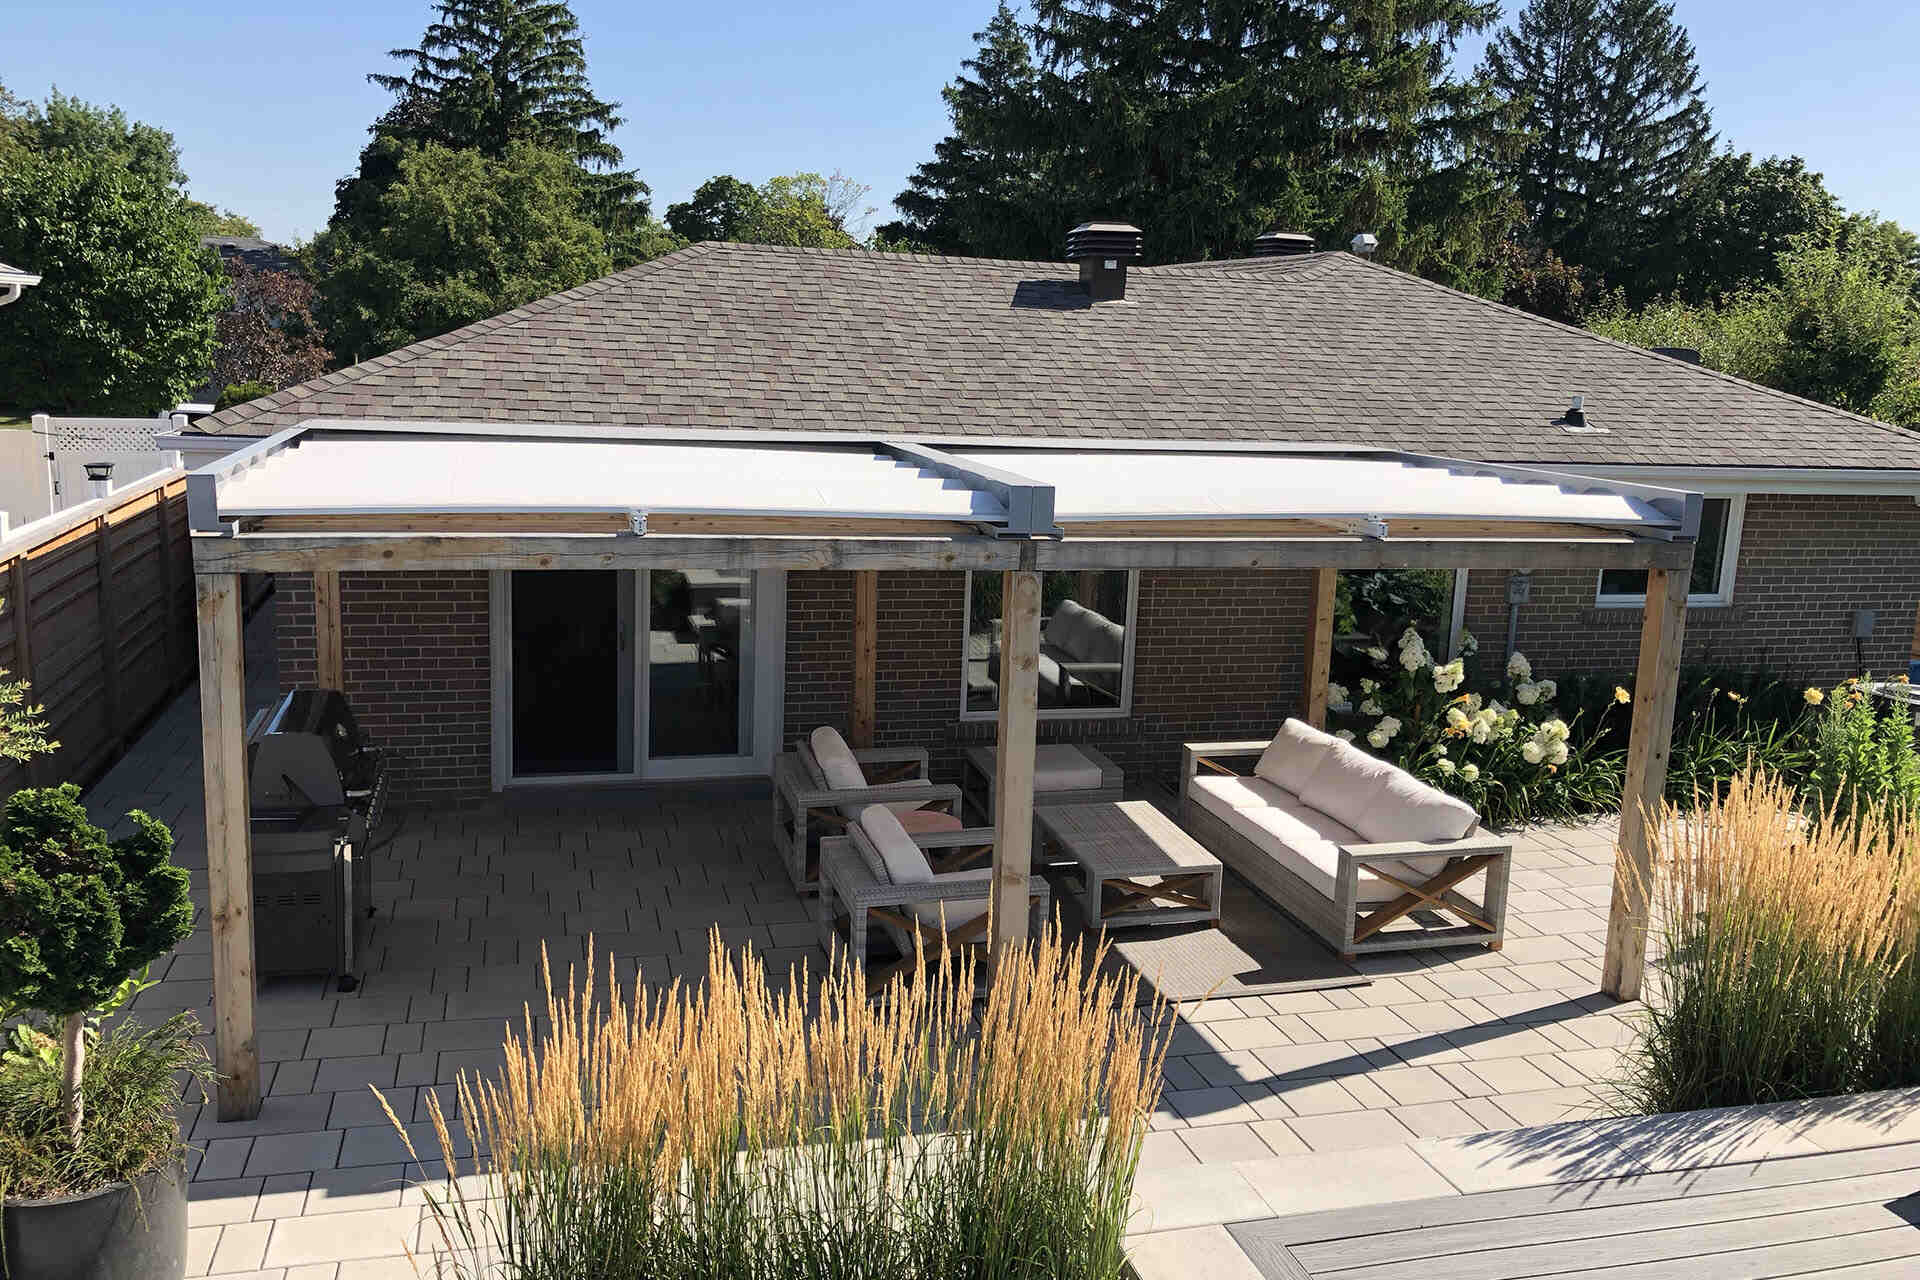
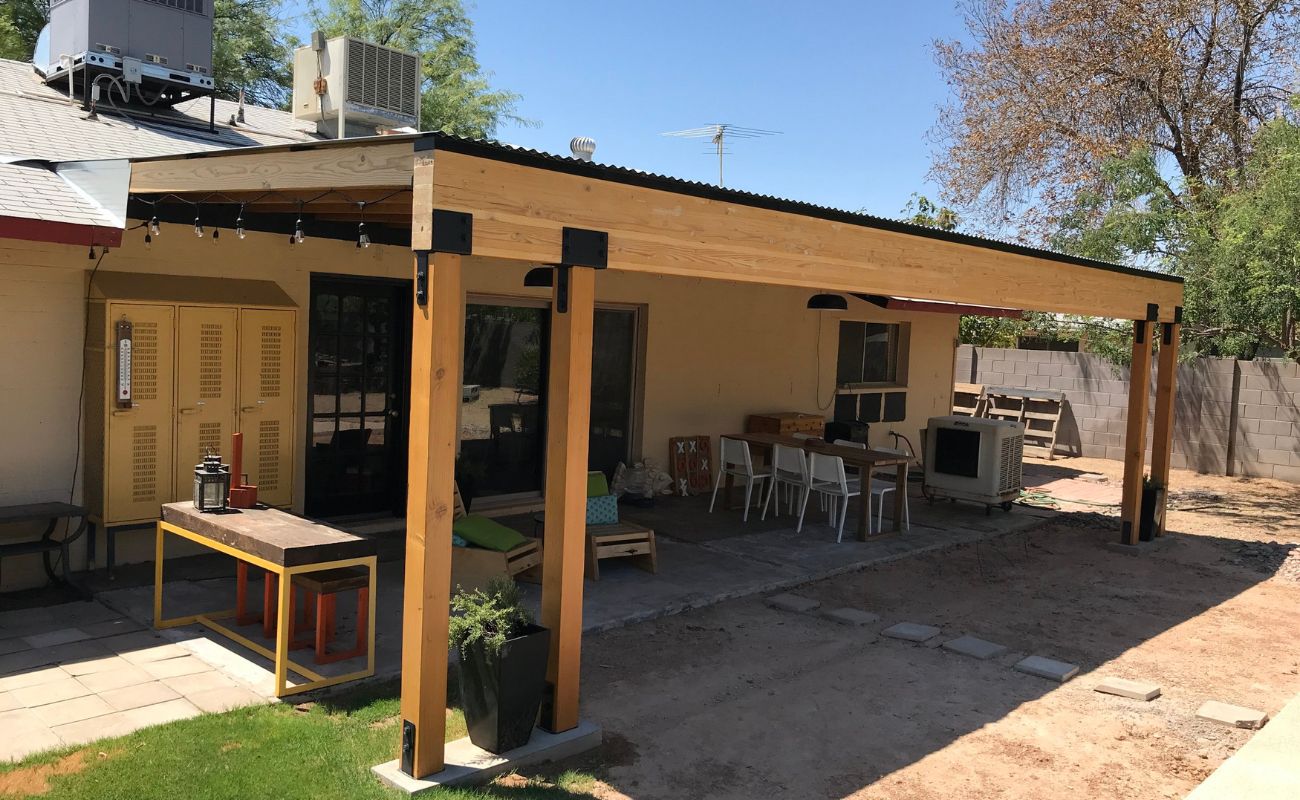
Extending the Roof Structure
Once you have determined the desired extension and selected the materials for your patio roof, it’s time to start extending the roof structure. This step involves building the framework for the extension, ensuring that it aligns with the existing roof and maintains structural integrity.
Start by carefully measuring and marking the areas where the extension will be attached. You will need to create a sturdy connection between the existing roof and the extension to ensure stability and prevent any gaps or leaks.
Next, determine the type of roof frame you will use for the extension. Common options include trusses, rafters, or joists. The choice will depend on the design of your existing roof and the planned extension. Consult with a professional if you’re unsure about the best option for your specific project.
If you are extending a gable roof, you will need to add new gables to match the existing ones. This will help maintain a cohesive look and ensure proper drainage. Measure and cut the new gables to the appropriate size and securely attach them to the existing structure.
For a shed roof extension, you can extend the existing roofline by adding additional supports and framing. Ensure that the new roof structure aligns with the slope of the existing roof and provides adequate support for the roofing material.
During the process of extending the roof structure, it’s important to maintain a level and straight alignment to ensure a seamless transition between the existing roof and the extension. Use a level and plumb line to ensure accuracy throughout the installation process.
As you build the roof structure, periodically check for any signs of misalignment or gaps. It’s crucial to address these issues promptly to prevent water leakage and structural problems in the future.
Depending on the complexity of the extension and your skill level, you may choose to hire a professional contractor to handle the roof structure extension. They will have the expertise and experience to ensure a proper and secure installation.
By carefully extending the roof structure, you will create a solid foundation for the rest of your patio roof extension project. This step is crucial in ensuring that the extended roof maintains structural integrity and withstands the elements for years to come.
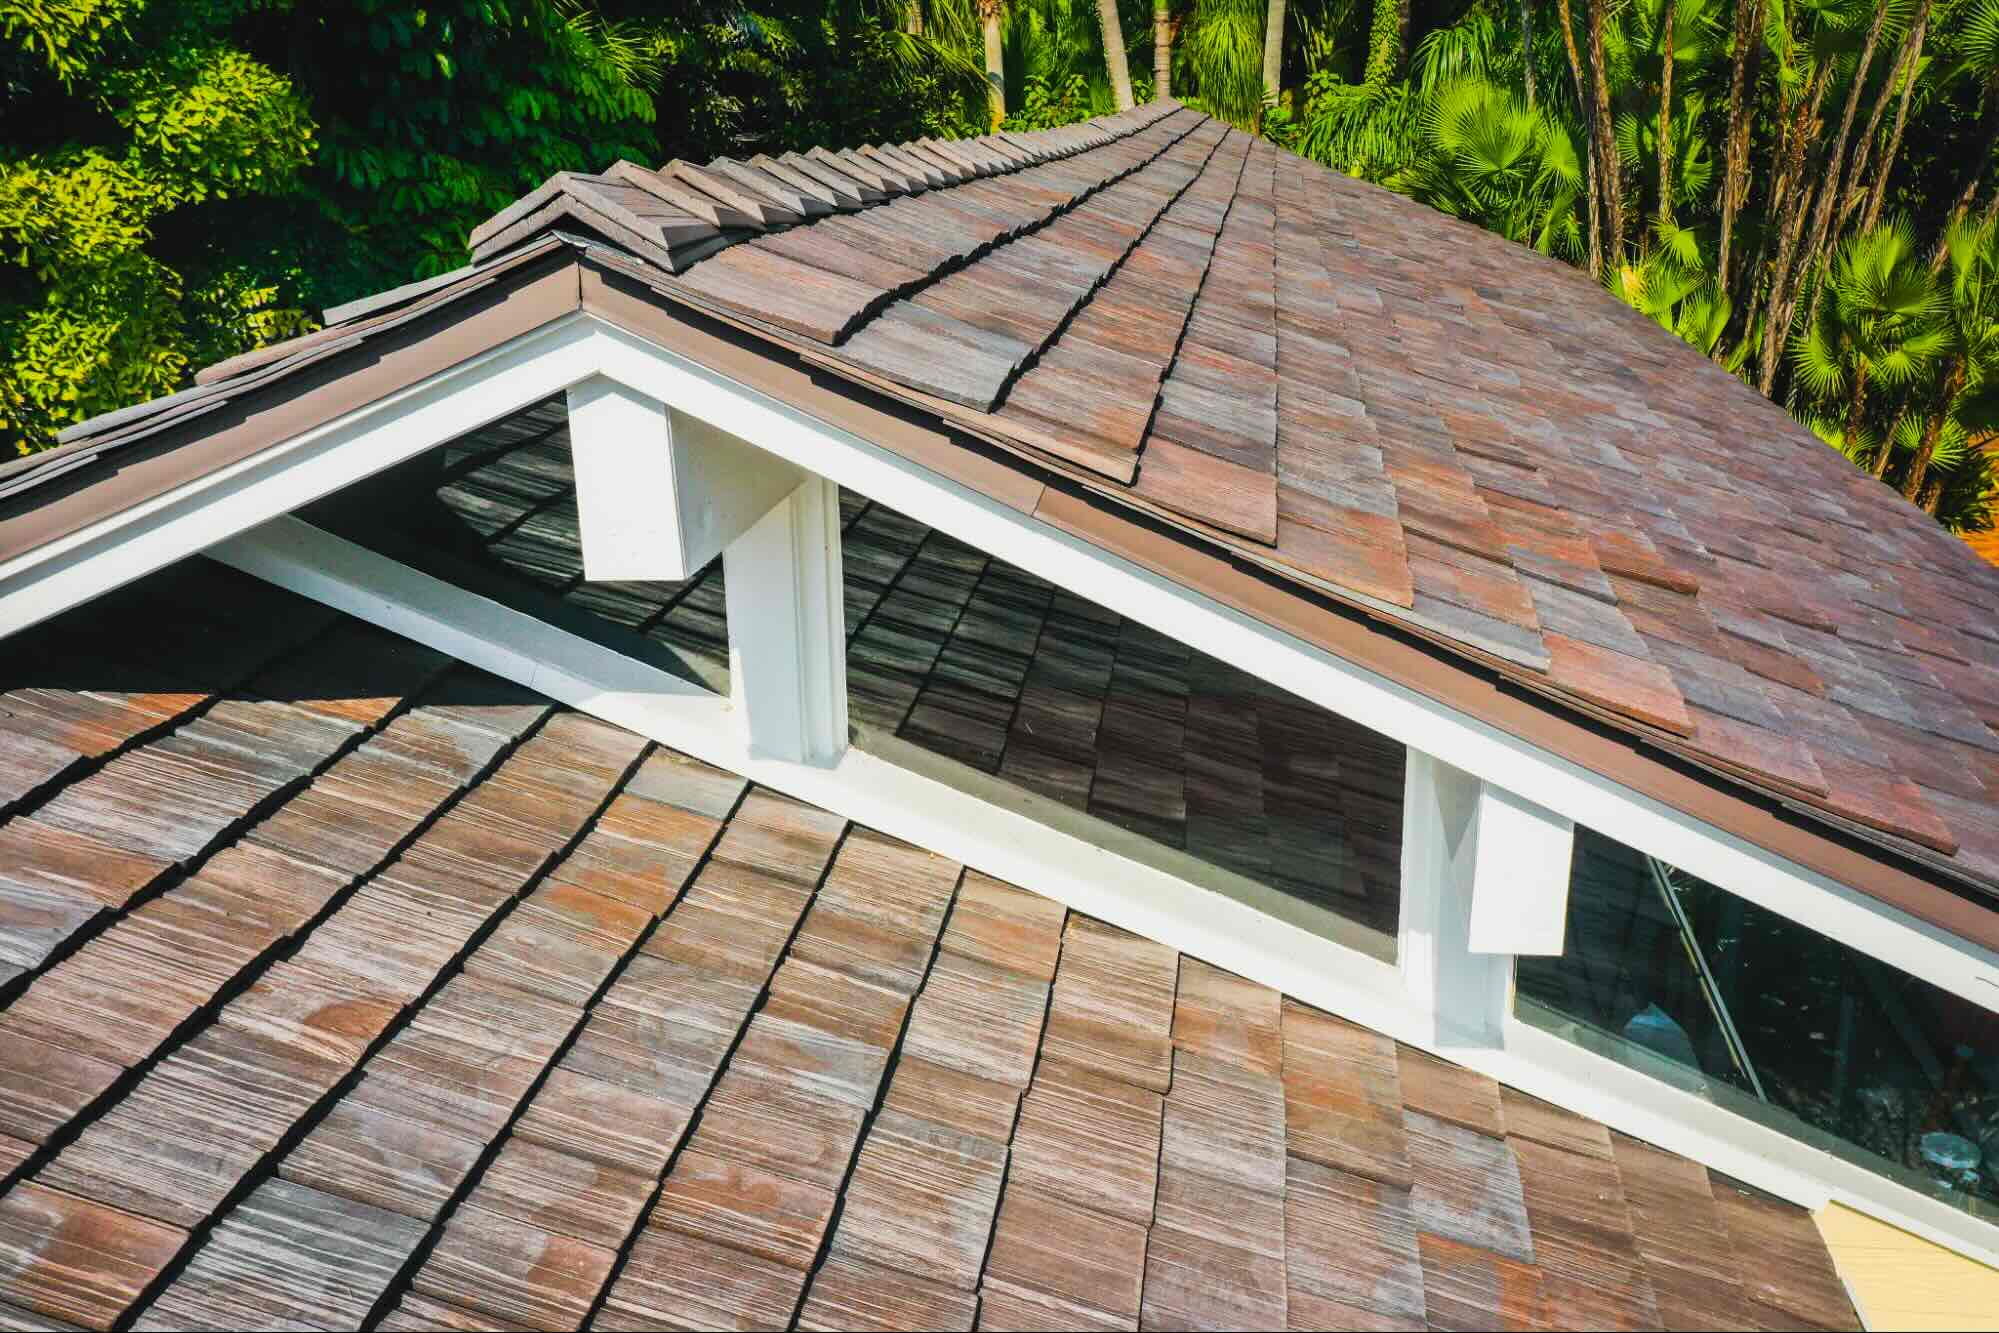
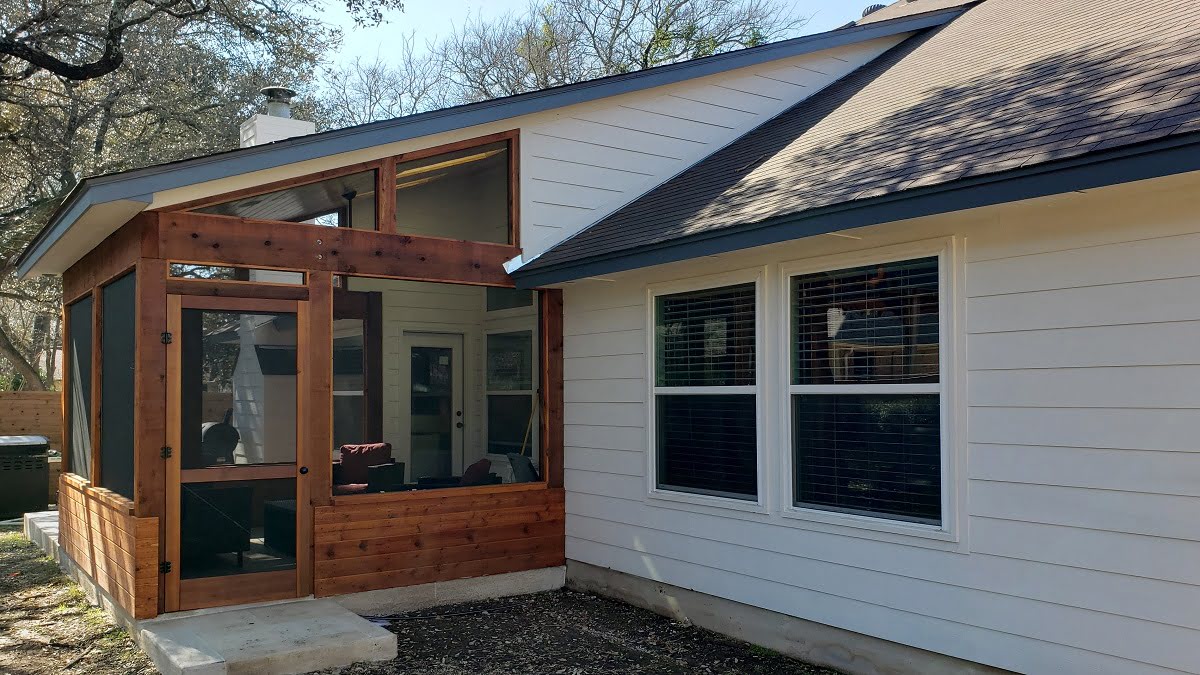
Matching the Existing Roofing
When extending your patio roof, one important aspect to consider is the matching of the existing roofing. It’s crucial to ensure that the new roofing material seamlessly blends with the old, creating a unified and aesthetically pleasing appearance.
The first step is to identify the type of roofing material used in your current patio roof. This could be asphalt shingles, metal panels, clay tiles, or any other type of roofing material. Understanding the characteristics and properties of the existing roofing will help you find a suitable match for the extension.
If possible, try to source the exact same roofing material for the extension. This way, you can maintain a consistent look and avoid any noticeable differences between the old and new sections of the roof. Check with local suppliers or contact the manufacturer to find out if the material is still available.
If an exact match is not possible, look for comparable options that closely resemble the existing roofing material in color, texture, and overall appearance. Consult with roofing professionals or suppliers who can provide samples or recommendations for suitable alternatives.
In some cases, you may consider replacing the entire roof to ensure a seamless match. While this may add additional cost and time to the project, it can result in a more cohesive and visually appealing overall appearance.
When installing the new roofing material, pay attention to details such as the alignment of the shingles, the direction of the ridges, and the placement of any patterned elements. Take care to match these details with the existing roof to create a harmonious and well-blended transition.
If you’re working with a metal roof, choose a color and finish that closely matches the existing roof. Pay attention to the gauge and thickness of the metal to ensure uniformity in appearance and durability.
Remember to consider the weathering and aging of the existing roofing material. If the original roof has undergone significant weathering over time, you may need to use weathered or aged versions of the new roofing material to achieve a closer match.
Matching the existing roofing is crucial in maintaining the visual appeal and integrity of your patio roof extension. By investing time and effort into finding the right match, you can ensure a seamless and cohesive look that enhances the overall aesthetics of your outdoor space.
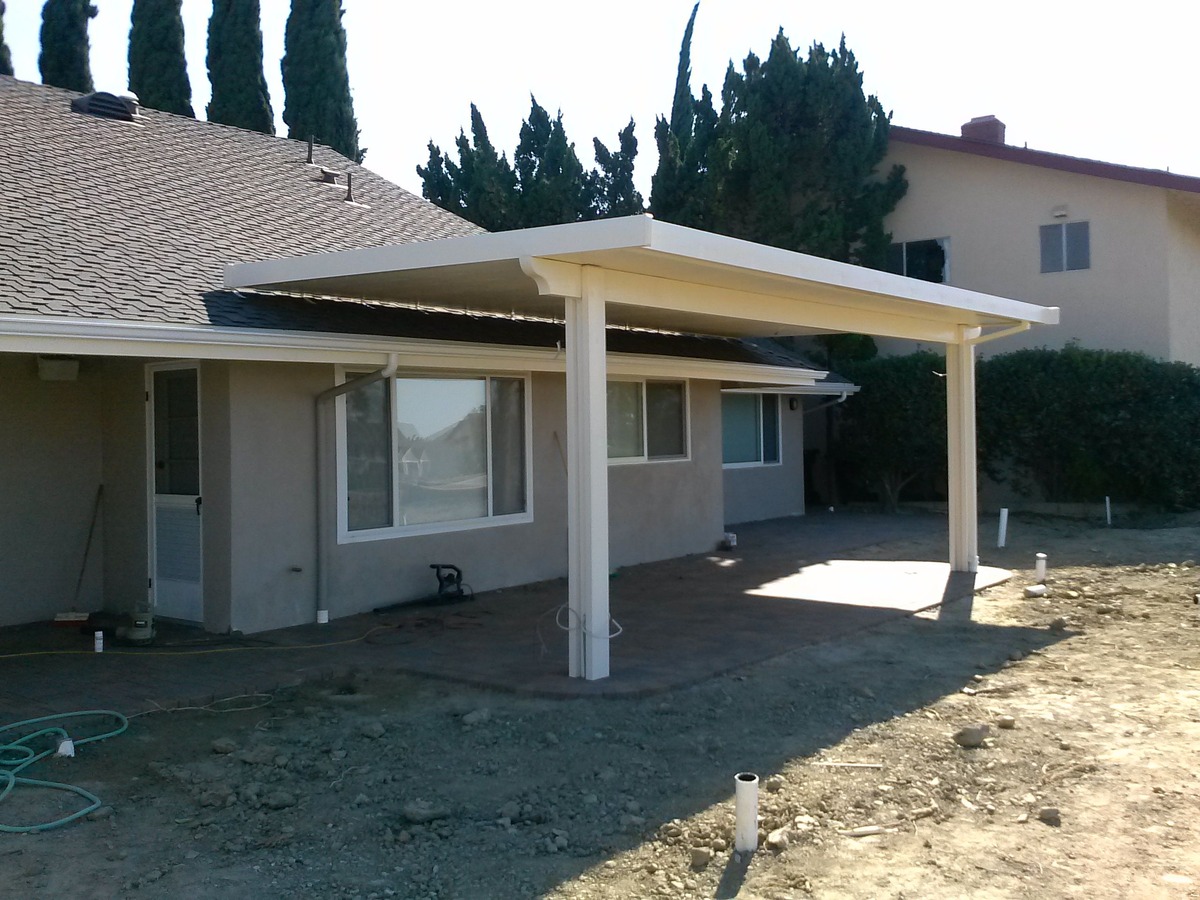
Consider adding additional support beams and columns to the existing patio roof to extend its coverage. Ensure that the new structure is properly anchored and meets local building codes for safety.
Framing the Extended Roof
Once you have assessed the existing patio roof, determined the desired extension, and selected the materials, the next step in extending your patio roof is framing the structure. Framing is crucial as it provides the support and stability for the extended roof, ensuring its durability and longevity.
Start by creating a detailed framing plan based on your desired extension and the existing roof structure. Consult with a professional if needed to ensure that the framing plan meets all safety and building code requirements.
When framing the extended roof, you will typically use either trusses or rafters. Trusses are pre-assembled triangular structures that provide support and stability to the roof, while rafters are individual beams that span the length of the roof and support the roofing material.
Measure and cut the trusses or rafters according to your framing plan, taking into account any necessary adjustments for the extension. Ensure that the measurements are accurate and the angles are properly aligned.
Position the trusses or rafters at designated intervals, ensuring they are properly spaced and perpendicular to the existing roof structure. Use framing connectors, such as hurricane ties or joist hangers, to secure the trusses or rafters in place and provide additional stability.
Attach the trusses or rafters to the existing roof structure using strong, durable fasteners. It’s important to create a secure connection to prevent any shifting or movement over time.
During the framing process, continuously check for plumb and level to ensure the structural integrity of the extended roof. Use a level and plumb line to check the vertical and horizontal alignment of each truss or rafter.
Once all the trusses or rafters are in place and properly secured, it’s time to add additional framing elements such as ridge beams, collar ties, and purlins. These elements provide further support and stability to the extended roof, reinforcing its structural integrity.
Consult with a professional or a structural engineer if you have any doubts or concerns during the framing process. They can provide guidance on specific framing techniques and ensure that your extended roof meets all safety requirements.
By framing the extended roof accurately and securely, you lay the foundation for a strong and stable structure. This step is crucial in ensuring the longevity and performance of your patio roof extension.
Adding Supporting Posts or Columns
As part of extending your patio roof, adding supporting posts or columns is an essential step to ensure the stability and strength of the extended structure. These supports bear the weight of the extended roof and distribute it evenly, preventing sagging or collapse.
Start by determining the optimal placement and number of supporting posts or columns for your extension. This will depend on factors such as the size of the extension, the type of roof structure, and any specific design requirements.
Consult with a professional or a structural engineer to determine the appropriate size and type of posts or columns for your specific project. They can provide expert guidance on load-bearing capacities and adherence to local building codes.
When selecting the materials for the supporting posts or columns, consider their durability, strength, and aesthetic appeal. Common options include wood, metal, or composite materials. Ensure that the chosen materials are treated or designed to withstand outdoor elements and resist decay, insect infestation, and weather damage.
Measure and cut the supporting posts or columns to the desired height and size, taking into account the necessary allowances for the foundation and any connections to the existing structure.
Next, you’ll need to create a solid foundation for the supporting posts or columns. This may involve digging holes where the posts will be located and pouring concrete footings for added stability. Ensure that the footings are deep enough to reach below the frost line for your area, as this helps prevent shifting or movement due to frost heave.
Position the supporting posts or columns on top of the concrete footings, ensuring they are plumb and level. Use a level and plumb line to check for accuracy and make any necessary adjustments before securing the posts.
Fasten the supporting posts or columns securely to the footings using heavy-duty anchors or brackets. Ensure that the connections are strong and stable, providing a solid base for the extended roof.
If your extension requires multiple supporting posts or columns, repeat the process for each one, ensuring consistency in placement and alignment.
By adding supporting posts or columns, you provide the necessary structural support to your patio roof extension, ensuring its stability and longevity. This step is crucial in maintaining the overall integrity of the extended structure, providing you with a safe and secure outdoor space.
Read more: How To Attach Shed Roof To Existing Roof
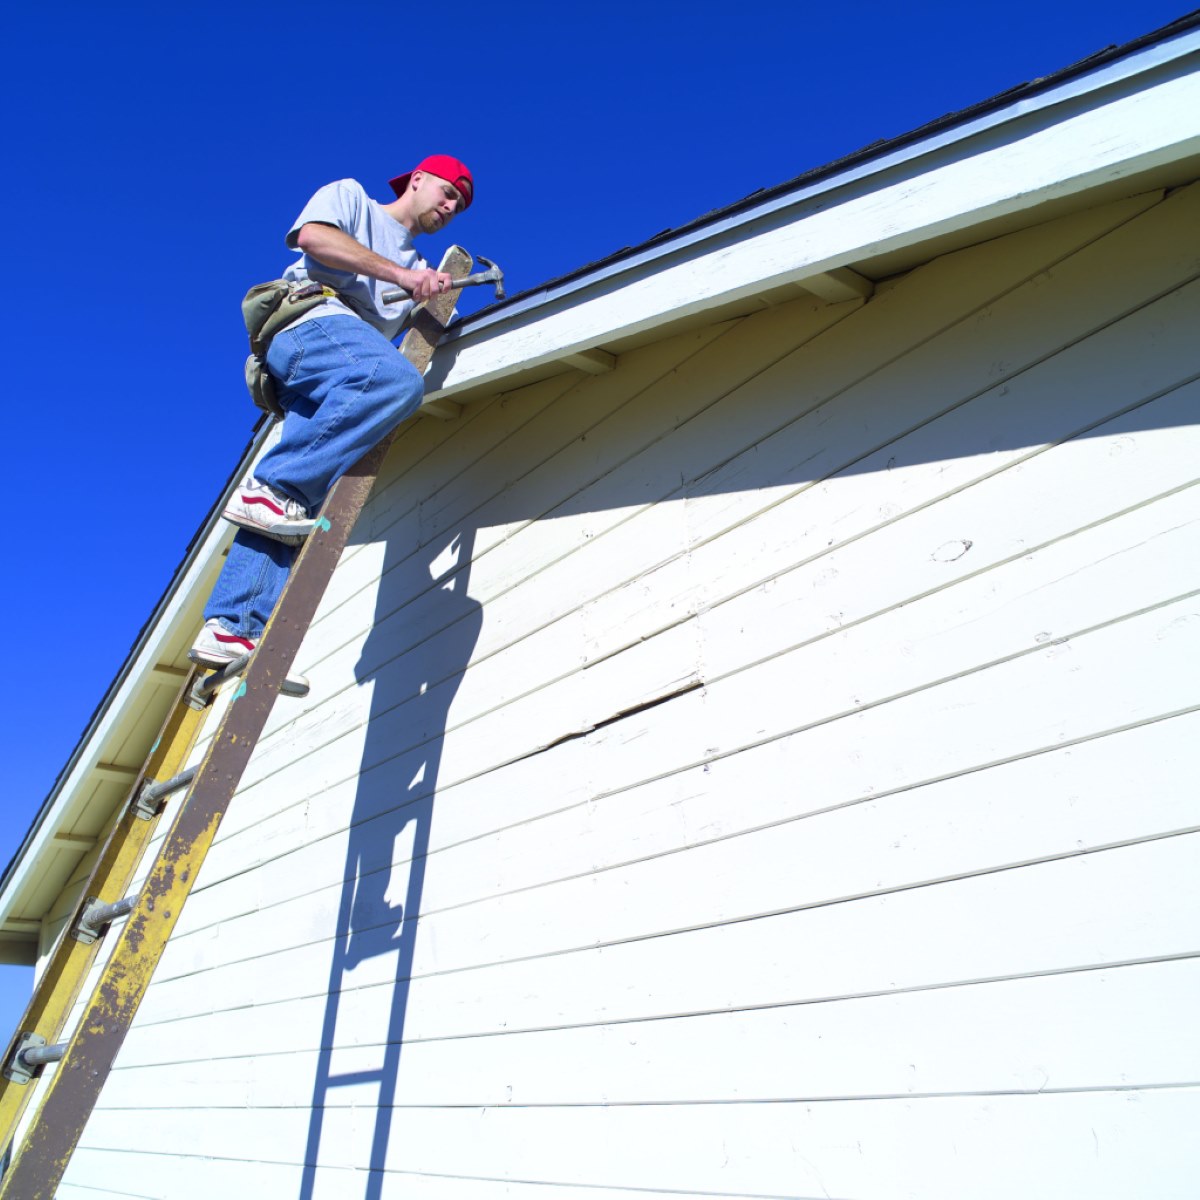
Attaching the New Roofing Material
Once you have framed the extended roof and added the necessary supporting posts or columns, it’s time to attach the new roofing material. Proper installation of the roofing material is crucial to ensure proper protection from the elements and to maintain the integrity of your patio roof extension.
Start by preparing the surface of the roof for installation. Ensure it is clean, dry, and free of debris. Remove any old roofing material or nails that may interfere with the installation of the new roofing.
Begin by laying a layer of underlayment over the roof surface. This provides an additional layer of waterproofing and helps to protect the roof from moisture. Choose an underlayment material that is appropriate for your roofing type and follow the manufacturer’s instructions for installation.
Next, it’s time to install the new roofing material. The specific installation process will depend on the type of material you have chosen, such as asphalt shingles, metal panels, or clay tiles.
If you are installing asphalt shingles, start by aligning the first row of shingles along the bottom edge of the roof, making sure they are properly positioned and level. Use roofing nails to secure the shingles in place, following the manufacturer’s guidelines for spacing and placement. Continue working your way up the roof, overlapping each row of shingles and ensuring a tight seal.
For metal roofing panels, carefully position the first panel at the bottom edge of the roof, ensuring it is aligned and level. Secure the panel with appropriate fasteners, such as screws or nails, as recommended by the manufacturer. Repeat this process for each subsequent panel, ensuring they overlap and interlock properly.
If you have chosen clay tiles, carefully lay each tile in its designated position, ensuring they are properly aligned and spaced. Use appropriate fasteners or adhesives to secure the tiles in place, following the manufacturer’s instructions.
Throughout the installation process, periodically check for any signs of misalignment or gaps. Adjust as necessary to ensure a tight and secure fit.
Ensure that all seams, edges, and penetrations are properly sealed to prevent any water leakage or damage. Use appropriate sealants or flashing materials to create a watertight barrier.
Finally, clean up the area and dispose of any waste material properly. Inspect the newly installed roofing for any visible defects or issues and make any necessary adjustments or repairs.
Properly attaching the new roofing material is essential to ensure a weather-resistant and durable patio roof extension. Take your time to carefully follow the manufacturer’s instructions and seek professional assistance if needed to ensure a successful installation.
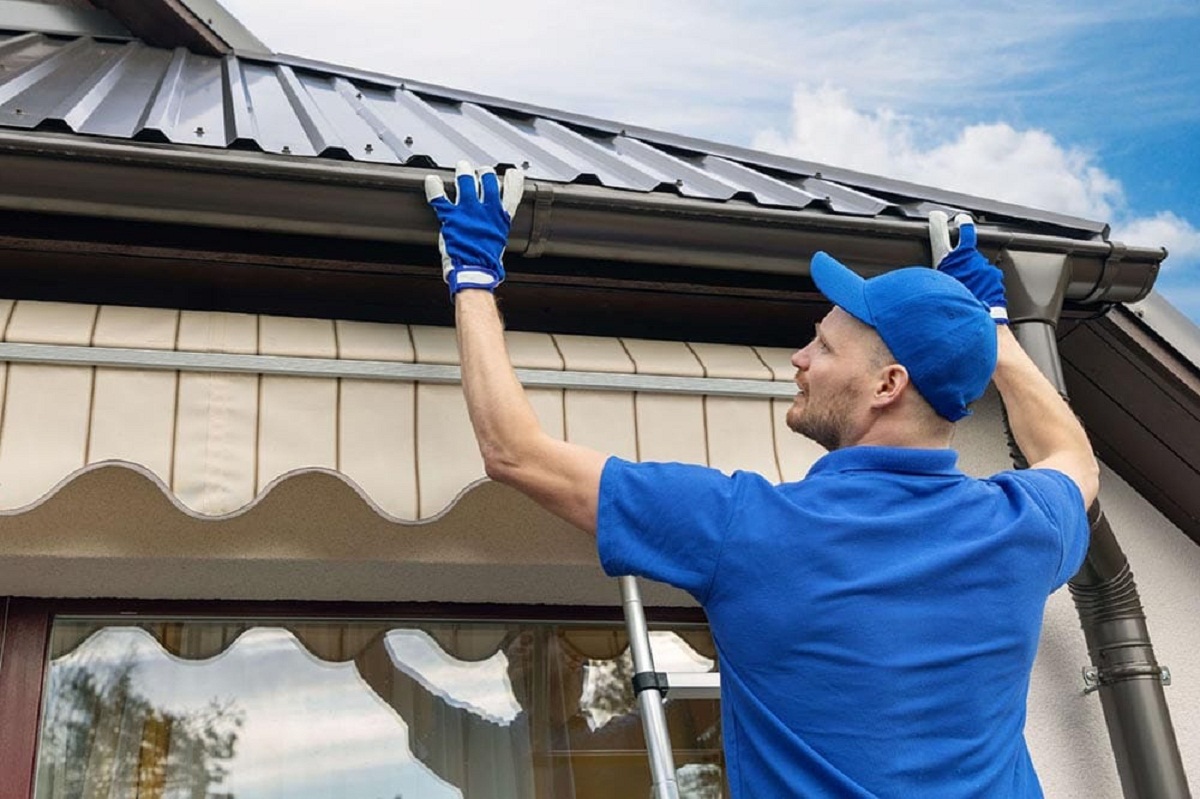
Ensuring Proper Drainage
Proper drainage is a critical aspect of any patio roof extension project. Without adequate drainage, water can accumulate on the roof and lead to leaks, rot, or structural damage. Ensuring proper drainage will help protect your patio roof and preserve its longevity.
Start by assessing the current drainage system of your existing patio roof. Evaluate how well it handles water runoff and identify any areas where improvements may be needed.
To promote effective drainage, your patio roof should have a slight slope or pitch. This will allow water to flow away from the roof and towards the gutters or downspouts. The recommended slope is typically ¼ inch per foot, but this may vary depending on local building codes and requirements.
Check the condition of your gutters and downspouts. Clear any debris such as leaves or sticks that may obstruct the flow of water. Ensure that the gutters are securely attached to the roof and there are no leaks or damage. Consider installing gutter guards to prevent debris buildup in the future.
If your patio roof extension is significant in size, you may need to install additional gutters or downspouts to handle the increased water runoff. Consult with a professional to determine the appropriate placement and sizing of these additional components.
Consider adding splash blocks or extensions at the bottom of downspouts to direct water away from the foundation of your home. This helps prevent erosion and water damage to the surrounding landscaping or structures.
If your patio roof extension incorporates a flat roof design, it’s crucial to have a properly designed and installed membrane or roofing system that allows for effective water drainage. Consult with a professional roofer or contractor who specializes in flat roofs to ensure proper installation and maintenance of the drainage system.
Regularly inspect your patio roof and gutters for any signs of clogs, leaks, or drainage issues. Address any problems promptly to prevent water damage to the structure and to maintain the functionality of the drainage system.
By ensuring proper drainage, you can effectively manage water runoff and protect your patio roof extension from potential damage. Adequate drainage will help maintain the integrity and longevity of your patio roof, ensuring it continues to provide the desired shelter and protection for your outdoor space.
Securing the Extended Roof
After completing the extension and installation of the roofing material, it is crucial to properly secure the extended roof to ensure its stability and longevity. Properly securing the roof will help protect it from high winds, storms, and other potential hazards.
Start by inspecting all the connections between the existing roof and the extension. Check for any loose or weak points that may compromise the overall strength of the structure. Secure any loose fasteners or connections, and reinforce them if necessary.
Ensure that all trusses, rafters, and supporting posts or columns are securely attached and properly aligned. Use appropriate connectors and fasteners to reinforce these connections and prevent any movement or shifting.
If your extended roof includes additional structural elements such as gables, ridge beams, or collar ties, make sure they are securely fastened and structurally sound. These elements provide extra support and stability to the roof.
Inspect the roofing material itself to ensure it is properly nailed, screwed, or adhered according to the manufacturer’s instructions. Check for any loose or damaged sections and repair or replace them as needed.
Verify that the flashing around chimneys, skylights, vents, or other roof penetrations is installed correctly and securely. This will help prevent leaks and water damage in these vulnerable areas.
Consider adding hurricane straps or braces for additional reinforcement, especially if you live in an area prone to high winds or severe weather. These structural reinforcements can help anchor the extended roof and protect it during storms.
Regularly inspect the extended roof for any signs of damage, deterioration, or wear and tear. Address any issues promptly to prevent further damage and maintain the integrity of the roof over time.
It is advisable to have a professional roofer or contractor perform a thorough inspection of the extended roof to ensure it meets all safety and building code requirements. They can provide expert guidance and make any necessary adjustments or repairs.
By securing the extended roof properly, you can have peace of mind knowing that it is well-supported and protected. A secure roof will provide long-lasting protection and functionality for your patio, allowing you to enjoy your outdoor space with confidence.
Conclusion
Extending your patio roof can greatly enhance your outdoor living experience, providing a larger and more sheltered space to enjoy year-round. By following the steps outlined in this article, you can successfully extend your patio roof while ensuring its stability, durability, and aesthetic appeal.
Assessing the current patio roof is the first step, as it gives you a baseline understanding of its condition and limitations. Determining the desired extension allows you to envision the end result and plan accordingly.
Obtaining necessary permits ensures that your project aligns with local building codes and regulations. Taking the time to research and comply with these requirements will save you potential headaches and ensure a smooth and successful project.
Selecting the right materials for your patio roof extension is crucial. Consider durability, weather resistance, and aesthetic compatibility with the existing roof. Matching the existing roofing ensures a seamless transition and creates a cohesive look.
Properly framing the extended roof and adding supporting posts or columns ensure structural integrity and stability. Attaching the roofing material correctly and ensuring proper drainage will protect your roof from leaks and damage.
Finally, securing the extended roof provides the necessary reinforcement to withstand various weather conditions and maintain its structural integrity over time.
In conclusion, extending your patio roof requires careful planning, attention to detail, and adherence to safety regulations. By following the steps outlined in this article, you can successfully extend your patio roof and create a beautiful, functional, and lasting outdoor space for you and your loved ones to enjoy.
Frequently Asked Questions about How To Extend An Existing Patio Roof
Was this page helpful?
At Storables.com, we guarantee accurate and reliable information. Our content, validated by Expert Board Contributors, is crafted following stringent Editorial Policies. We're committed to providing you with well-researched, expert-backed insights for all your informational needs.


0 thoughts on “How To Extend An Existing Patio Roof”