Home>Furniture>Outdoor Furniture>How To Restore Iron Patio Furniture
Outdoor Furniture
How To Restore Iron Patio Furniture
Modified: August 28, 2024
Learn how to restore your outdoor furniture with our step-by-step guide. Revive the beauty of your iron patio furniture and enjoy a stunning outdoor space that lasts.
(Many of the links in this article redirect to a specific reviewed product. Your purchase of these products through affiliate links helps to generate commission for Storables.com, at no extra cost. Learn more)
Introduction
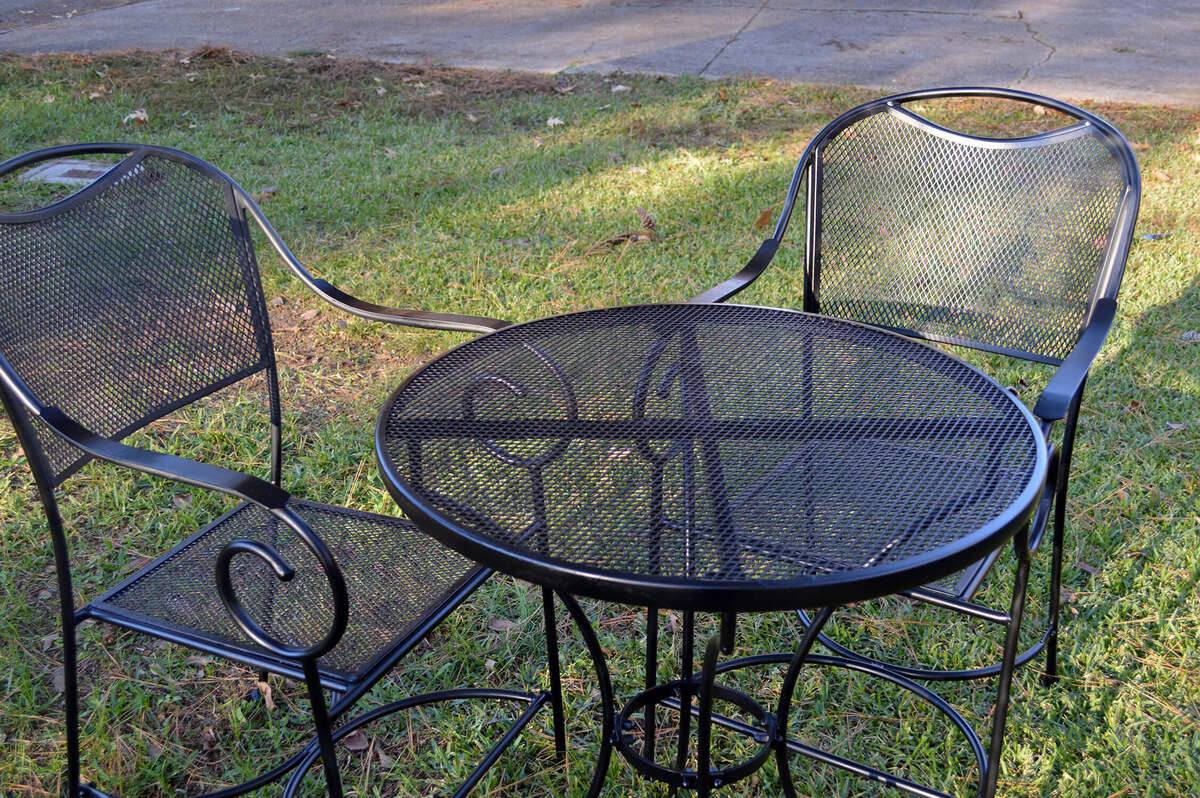
Welcome to our comprehensive guide on how to restore iron patio furniture! Iron patio furniture is a popular choice for outdoor spaces due to its durability and classic style. However, over time, exposure to the elements can cause the furniture to rust, fade, and lose its luster.
But don’t worry! With proper restoration techniques, you can bring your iron patio furniture back to life and enjoy its beauty for years to come. In this article, we will walk you through the step-by-step process of restoring iron patio furniture, from assessing its condition to giving it a fresh coat of paint.
So, whether you’ve found a vintage piece at a flea market or want to revitalize your existing patio set, read on to discover how to restore your iron patio furniture and make it look brand new!
Before diving into the restoration process, it’s important to gather the necessary tools and materials. Here’s a list of what you’ll need:
Read more: How To Restore Teak Patio Furniture
Tools:
- Safety goggles
- Gloves
- Wire brush or steel wool
- Sandpaper (medium and fine grit)
- Paintbrushes (for cleaning and painting)
- Drop cloth or tarp
Materials:
- Soap or detergent
- Rust remover or vinegar
- Primer
- Paint suitable for outdoor use
- Clear coat or sealant
Now that you have everything you need, let’s get started with assessing the condition of your iron patio furniture.
Key Takeaways:
- Revive your iron patio furniture by cleaning, removing rust, and applying a fresh coat of paint. Regular maintenance and protective finishes will ensure its longevity and keep your outdoor space looking brand new!
- Restoring iron patio furniture is a rewarding project that allows you to personalize your outdoor space while saving money. With the right tools and techniques, you can transform worn-out furniture into a stunning centerpiece for relaxation and entertainment.
Assessing the Condition
Before you begin the restoration process, it’s important to assess the condition of your iron patio furniture. This will help you determine the extent of the repairs and restoration needed. Here’s how to assess your furniture:
1. Check for Rust: Inspect the furniture for any signs of rust. Look for areas where the paint has chipped or cracked, exposing the metal underneath. Pay close attention to joints and crevices, as these areas are more prone to rust formation.
2. Evaluate Structural Integrity: Examine the overall structure of the furniture. Look for any loose or wobbly joints, missing screws or bolts, or signs of damage. Ensure that the furniture is sturdy and safe to use.
3. Check for Fading or Peeling Paint: Take note of any fading or peeling paint. This could indicate that the furniture has been exposed to harsh elements for an extended period. Faded or peeling paint can affect the overall appearance of the furniture.
4. Determine the Level of Cleaning Required: Assess the amount of cleaning needed for your furniture. If the surface is covered in dirt, grime, or mildew, you will need to thoroughly clean it before proceeding with the restoration process.
Based on your assessment, you can determine the level of restoration required. If your furniture only needs a fresh coat of paint, the restoration process will be relatively simple. However, if there is extensive rust or structural damage, additional steps may be necessary.
Keep in mind that the level of restoration will also depend on your personal preferences. Some individuals may prefer a more pristine and polished look, while others may embrace a slightly weathered aesthetic. Decide on the outcome you desire for your furniture to inform your restoration decisions.
Once you have thoroughly assessed the condition of your iron patio furniture, you can move on to the next step: cleaning the furniture.
Cleaning the Furniture
Now that you have assessed the condition of your iron patio furniture, it’s time to give it a thorough cleaning. Cleaning the furniture will remove dirt, grime, and any surface contaminants, preparing it for the restoration process.
Here’s how to clean your iron patio furniture:
Read more: How To Restore Patio Furniture Cushions
1. Prepare the Cleaning Solution:
Fill a bucket with warm water and add a small amount of mild soap or detergent. Stir the solution to create suds.
2. Scrub the Furniture:
Put on your gloves and dip a soft bristle brush or sponge into the soapy solution. Scrub the entire surface of the furniture, paying special attention to areas with built-up dirt or stains. Use a toothbrush or small brush to clean hard-to-reach crevices and intricate details.
3. Rinse with Water:
After scrubbing, rinse the furniture thoroughly with water to remove any soap residue. You can use a hose or a bucket of clean water for rinsing.
4. Remove Stubborn Stains:
If there are any stubborn stains or marks remaining, you can try using a mild abrasive cleaner or a mixture of vinegar and water. Apply the cleaner or vinegar solution to a soft cloth and gently rub the affected areas. Rinse with water afterward.
Read more: How To Clean Iron Patio Furniture
5. Check for Mold or Mildew:
If you notice any signs of mold or mildew on your furniture, mix equal parts vinegar and water in a spray bottle. Spray the affected areas and let the solution sit for a few minutes. Then, scrub the mold or mildew with a brush, rinse with water, and dry thoroughly.
6. Dry the Furniture:
After cleaning, allow the furniture to air dry completely. You can place it in direct sunlight to speed up the drying process.
Once your iron patio furniture is clean and dry, you are now ready to move on to the next step: removing rust.
Removing Rust
Rust is a common issue with iron patio furniture, especially when exposed to moisture and the elements. Removing rust is an essential step in the restoration process, as it prevents further damage and ensures a smooth surface for painting.
Here are some methods to effectively remove rust from your iron patio furniture:
1. Wire Brush or Steel Wool:
For light rust and surface-level corrosion, a wire brush or steel wool can be effective. Use the brush or steel wool to scrub the affected areas, applying moderate pressure. This will help loosen and remove the rust particles. Be sure to wear gloves and safety goggles during this process to protect yourself.
2. Rust Remover:
If the rust is more extensive or stubborn, you may need to use a rust remover product. There are various rust removers available on the market, such as commercial rust removers or homemade remedies like vinegar or lemon juice. Follow the instructions on the rust remover product or soak the affected areas in the vinegar or lemon juice for a few hours. Afterward, scrub the rusted areas with a brush or steel wool to remove the loosened rust.
3. Sanding:
If the rusted areas are still visible after using a wire brush or rust remover, sanding can help further remove the rust and smooth the surface. Start with medium-grit sandpaper to remove the remaining rust, and then switch to fine-grit sandpaper to achieve a smooth finish. Sand in the direction of the grain to avoid creating scratches on the metal.
4. Rinse and Dry:
After removing the rust, rinse the furniture with water to remove any residue from the rust removal process. Ensure that the furniture is completely dry before proceeding to the next step of the restoration process. You can use a clean cloth or allow it to air dry.
Once the rust has been successfully removed, you can move on to the next step: sanding and priming the furniture.
Sanding and Priming
After removing the rust from your iron patio furniture, the next step in the restoration process is sanding and priming. Sanding helps smoothen the surface and prepares it for painting, while priming creates a strong bond between the metal surface and the paint, ensuring better adhesion and longevity of the finish.
Here’s how to sand and prime your iron patio furniture:
Read more: How To Repaint Wrought Iron Patio Furniture
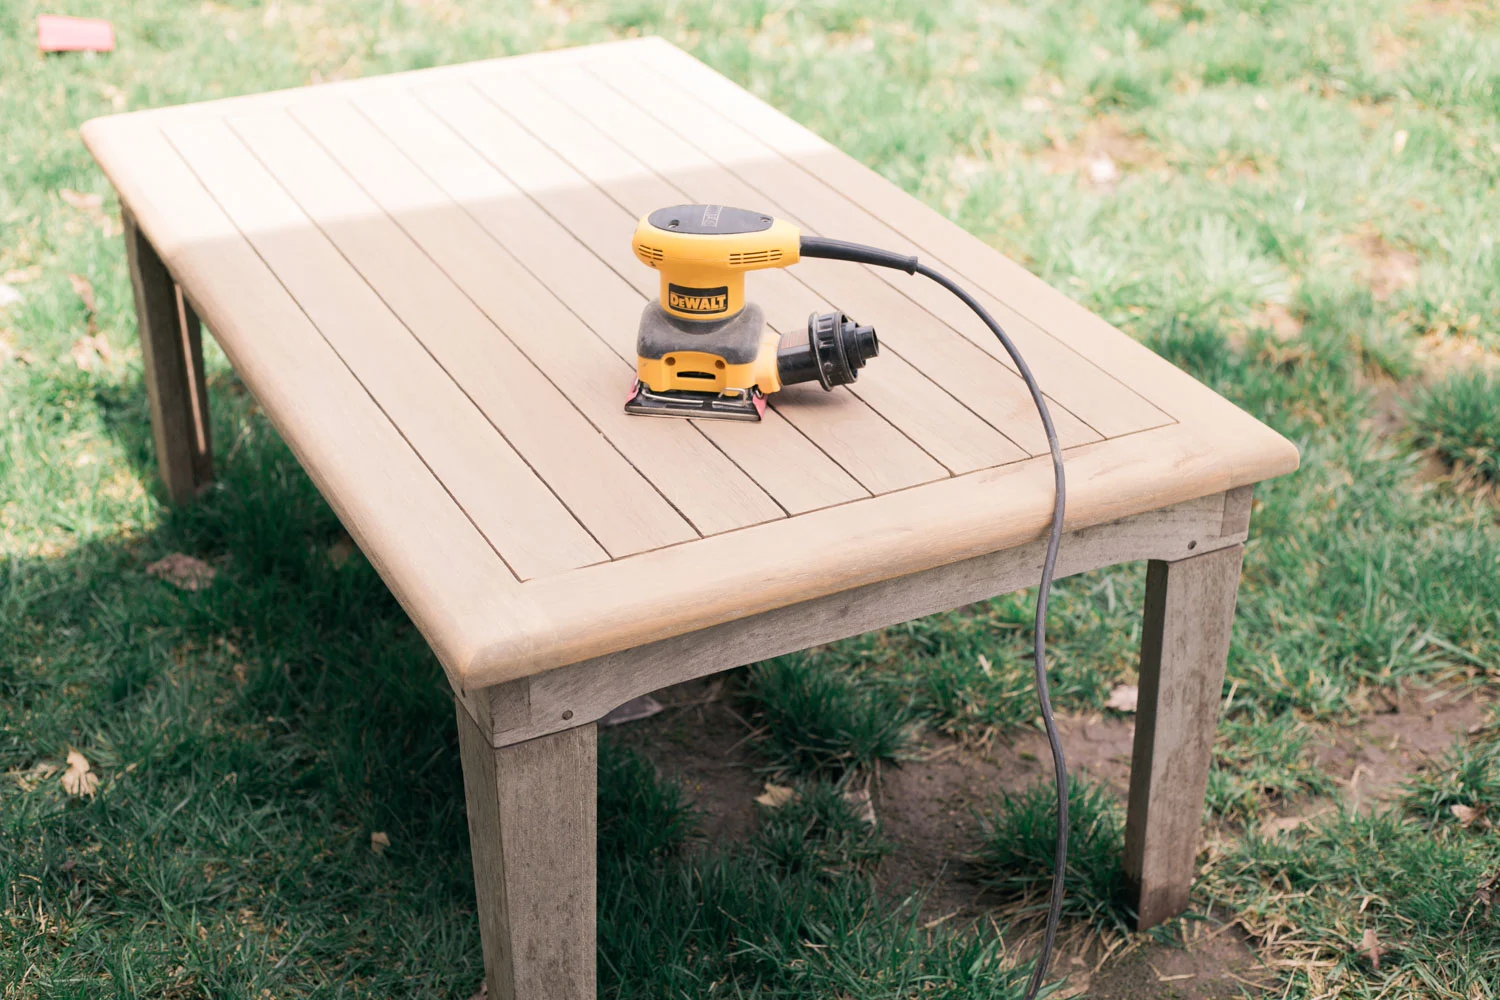
1. Sanding the Surface:
Start by sanding the entire surface of the furniture using medium-grit sandpaper. This will help remove any remaining rust particles and smooth out any rough spots. Sand in the direction of the grain for a more even finish. For hard-to-reach areas or intricate patterns, you can use a sanding sponge or small sanding tool.
2. Smooth Out Imperfections:
If there are any dents, scratches, or imperfections on the furniture, take the opportunity to fill them in with an appropriate filler or putty. Follow the instructions on the product and allow it to dry completely. Once dry, use fine-grit sandpaper to smooth out the filled areas.
3. Clean the Surface:
After sanding, clean the furniture thoroughly to remove any dust or debris. Use a damp cloth or sponge to wipe down the entire surface and let it dry completely.
4. Apply a Primer:
Priming is crucial for ensuring the longevity and adhesion of the paint. Apply a coat of rust-inhibiting metal primer to the entire furniture using a paintbrush. Ensure even coverage, including hard-to-reach areas and intricate details. Allow the primer to dry according to the manufacturer’s instructions.
5. Lightly Sand the Primer:
Once the primer is dry, lightly sand the surface with fine-grit sandpaper. This helps ensure a smooth, even surface for painting and improves the adherence of the paint to the primer.
Now that your iron patio furniture is sanded and primed, it’s time to move on to the next step: applying the paint.
Applying Paint
With your iron patio furniture sanded and primed, it’s time to give it a fresh coat of paint. Painting not only enhances the appearance of your furniture but also provides a protective barrier to prevent further rusting and damage.
Follow these steps to apply paint to your iron patio furniture:
1. Choose the Right Paint:
Select a paint specifically formulated for outdoor use and suitable for metal surfaces. Look for a paint that provides rust protection and durability. Consider using a spray paint for a smooth and even finish. Choose a color that complements your outdoor space and personal style.
2. Prepare the Painting Area:
Set up a well-ventilated and well-protected area for painting. Lay down a drop cloth or tarp to catch any paint drips or overspray. Make sure the area is clean and free from debris that could affect the finish.
Read more: How To Restore Wood Outdoor Furniture
3. Apply the Paint:
Shake the spray paint can vigorously for a few minutes to ensure proper mixing of the paint. Hold the can about 6 to 8 inches away from the furniture and apply an even coat of paint. Start with light, sweeping motions from side to side. Avoid spraying too close or applying heavy coats, as this can result in drips or uneven application.
4. Allow the Paint to Dry:
Follow the drying time indicated on the paint can. It is usually recommended to allow the first coat to dry completely before applying additional coats. This will help achieve a smoother and more professional-looking finish.
5. Apply Multiple Coats (Optional):
If necessary, apply additional coats of paint to achieve the desired color and coverage. Allow each coat to dry before applying the next one. This will ensure a more durable and long-lasting finish.
6. Touch Up Any Missed Spots:
After the final coat of paint has dried, carefully inspect the furniture for any missed spots or uneven areas. Use a small brush or touch-up brush to correct any imperfections.
Once the paint has dried and any touch-ups are completed, you’re ready to move on to the next step: applying a protective finish.
Read more: How To Restore Outdoor Vinyl Furniture
Applying a Protective Finish
After applying a fresh coat of paint to your iron patio furniture, it’s important to apply a protective finish. A protective finish adds an extra layer of protection against the elements, helping to prevent rust, fading, and other damage over time. It also enhances the longevity and durability of your newly painted furniture.
Here’s how to apply a protective finish to your iron patio furniture:
1. Choose the Right Finish:
Select a clear coat or sealant specifically designed for outdoor use and suitable for metal surfaces. Look for a product that provides UV protection and resistance to moisture and fading. Consider using a spray-on clear coat for easier application.
2. Prep the Surface:
Before applying the protective finish, ensure that the painted surface is clean and dry. Use a soft cloth or brush to remove any dust or debris that may have accumulated during the painting process.
3. Apply the Protective Finish:
Read and follow the instructions provided by the manufacturer of the clear coat or sealant. Shake the can or mix the product if required. Hold the can about 6 to 8 inches away from the furniture and apply an even coat of the finish. Use smooth, sweeping motions to avoid drips or pooling of the product. Apply thin layers and allow each coat to dry completely before applying the next one, following the recommended drying times.
4. Apply Multiple Coats (Optional):
Depending on the specific product, you may need to apply multiple coats of the protective finish. This will provide better overall protection and ensure a more robust barrier against the elements. Be sure to follow the manufacturer’s guidelines for the recommended number of coats and drying times.
5. Allow the Finish to Cure:
After the final coat of the protective finish is applied, allow it to cure fully. Check the product label for curing times, as this can vary depending on the specific product used. Avoid placing any objects on the furniture or exposing it to harsh conditions until the finish is fully cured.
Once the protective finish is dry and cured, your iron patio furniture is now ready to be reassembled and enjoyed in your outdoor space!
Reassembling the Furniture
After completing the restoration process for your iron patio furniture, it’s time to reassemble the pieces and prepare them for use. Reassembling the furniture requires careful attention to detail to ensure that all components fit together properly and securely.
Follow these steps to reassemble your iron patio furniture:
1. Gather the Parts:
Collect all the components of your furniture, including screws, bolts, and any other necessary hardware. Ensure that you have all the required pieces before starting the reassembly process.
Read more: How To Restore Faded Patio Umbrella
2. Clean the Hardware:
Take a moment to clean the hardware, such as screws and bolts, using a mild soap and water solution. This will help remove any dirt, rust, or debris that may have accumulated during the restoration process.
3. Match the Pieces:
Refer to any assembly instructions or diagrams you may have for your furniture. Match the corresponding pieces together based on the instructions. Ensure that the parts fit correctly and align properly.
4. Secure the Joints:
Using the appropriate tools, such as a screwdriver or wrench, secure the joints by tightening the screws or bolts. Ensure that each connection is secure but avoid overtightening, as it may damage the furniture.
5. Check Stability and Alignment:
Once the furniture is reassembled, check its stability and alignment. Sit on chairs or benches and verify that they are stable and level. Wiggle or gently shake the furniture to ensure that all joints are secure and there is no wobbling or looseness.
Read more: How To Restore Faded Metal Outdoor Furniture
6. Make Necessary Adjustments:
If you notice any issues with stability or alignment, make the necessary adjustments. This may involve tightening screws or bolts further, adjusting the positioning of certain pieces, or applying additional support where needed.
7. Test and Inspect:
Before placing the furniture in its designated outdoor space, thoroughly test and inspect all components. Open and close any folding mechanisms, check the reclining function of chairs, and ensure that all parts are working as intended.
With the furniture reassembled and fully inspected, it’s now time for the final touches and maintenance tips.
Final Touches and Maintenance Tips
Congratulations on successfully restoring and reassembling your iron patio furniture! To complete the process and ensure the longevity of your furniture’s beauty and functionality, there are a few final touches and maintenance tips to keep in mind.
1. Add Cushions or Pillows:
To enhance the comfort and aesthetics of your iron patio furniture, consider adding cushions or pillows. Choose weather-resistant materials that can withstand outdoor conditions. Opt for colors and patterns that complement your outdoor decor and personal style.
2. Arrange Your Furniture:
Once you’ve added cushions or pillows, arrange your furniture in a way that maximizes the use of your outdoor space. Create cozy seating areas, conversation nooks, or a dining set-up depending on your needs and preferences.
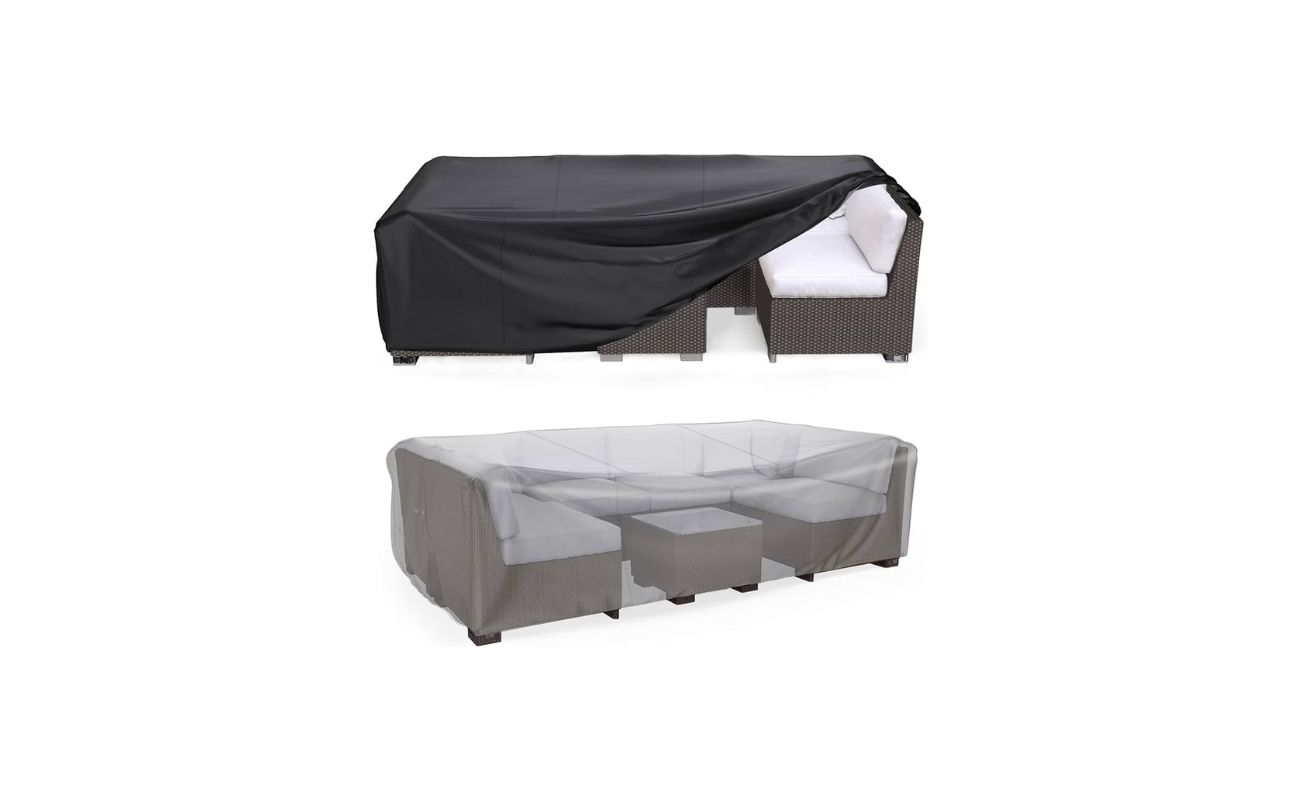
3. Protect Your Furniture:
To protect your restored iron patio furniture, consider investing in furniture covers. Covers provide an extra layer of protection against extreme weather conditions, UV rays, and dust. Covering your furniture when not in use will extend its lifespan and maintain its appearance.
4. Clean Regularly:
Regular cleaning is essential for maintaining the look and durability of your iron patio furniture. Remove any debris, dirt, or leaves that accumulate on the furniture. Use a mild soap and water solution to clean the surfaces as needed.
5. Inspect for Damage:
Periodically inspect your furniture for any signs of damage, such as rust spots or loose joints. Address any issues promptly to prevent further damage. Perform maintenance tasks such as tightening screws, applying touch-up paint, or adding additional protective coatings when necessary.
Read more: How To Clean Iron Outdoor Furniture
6. Store During Harsh Weather:
During harsh weather conditions such as heavy rain, snow, or extreme temperatures, consider storing your iron patio furniture indoors or in a covered area. This will protect it from potential damage and prolong its lifespan.
7. Touch Up Paint as Needed:
Over time, your restored furniture may experience minor scratches or chips in the paint. Keep a matching touch-up paint handy to address these imperfections promptly. Touching up the paint will help maintain the appearance and protect against rust formation.
By following these final touches and maintenance tips, you can enjoy your restored iron patio furniture for many seasons to come. Sit back, relax, and savor the beauty of your outdoor space!
Remember, a little care and attention go a long way in preserving the durability and aesthetics of your furniture.
Conclusion
Restoring iron patio furniture is a rewarding and fulfilling project that allows you to revive the beauty and functionality of your outdoor space. By following the step-by-step process outlined in this guide, you can transform your rusty and worn-out furniture into a stunning centerpiece that enhances the ambiance of your patio or garden.
Starting with assessing the condition of your furniture, you have learned how to clean it thoroughly, remove rust, and sand and prime the surface. Applying a fresh coat of paint and a protective finish adds the final touches that ensure the longevity and durability of your restored furniture.
Reassembling the pieces with care, making necessary adjustments, and adding cushions or pillows offer the finishing touches that elevate the comfort and style of your outdoor seating area. Regular cleaning, maintenance, and protection against harsh weather are essential for preserving the beauty and functionality of your furniture over time.
Restoring iron patio furniture not only saves you money by extending its lifespan but also allows you to personalize your outdoor space with a touch of creativity. You can choose colors and finishes that align with your personal style and create an inviting atmosphere for relaxation, entertaining, and enjoying the outdoors.
So, whether you have a vintage set that needs a revival or want to give your existing furniture a fresh look, take the time to restore and maintain your iron patio furniture. With the right tools, materials, and techniques, you can transform your outdoor space into a haven where you can relax and create lasting memories with family and friends.
Remember, the key to successful restoration is patience, attention to detail, and regular maintenance. With proper care, your restored iron patio furniture will provide years of comfort, style, and enjoyment in the great outdoors.
Frequently Asked Questions about How To Restore Iron Patio Furniture
Was this page helpful?
At Storables.com, we guarantee accurate and reliable information. Our content, validated by Expert Board Contributors, is crafted following stringent Editorial Policies. We're committed to providing you with well-researched, expert-backed insights for all your informational needs.

0 thoughts on “How To Restore Iron Patio Furniture”