Home>Furniture>Outdoor Furniture>How To Reupholster Patio Chairs

Outdoor Furniture
How To Reupholster Patio Chairs
Modified: March 7, 2024
Learn how to reupholster your outdoor furniture with step-by-step instructions. Give your patio chairs a fresh new look and enjoy outdoor comfort all summer long.
(Many of the links in this article redirect to a specific reviewed product. Your purchase of these products through affiliate links helps to generate commission for Storables.com, at no extra cost. Learn more)
Introduction
Welcome to the wonderful world of outdoor furniture! Whether you have a spacious patio, a cozy balcony, or a charming garden, having the right outdoor furniture can transform your outdoor space into a relaxing oasis. One essential piece of outdoor furniture that often requires some upkeep is patio chairs. Over time, the upholstery on your patio chairs may become worn, faded, or damaged, but don’t worry – reupholstering them is easier than you might think!
In this step-by-step guide, we will walk you through the process of reupholstering your patio chairs to give them a fresh new look. Don’t worry if you’re not a DIY expert – with a few basic materials and a little bit of patience, you’ll be able to tackle this project and have your patio chairs looking brand new in no time.
Before we dive into the reupholstering process, let’s gather the materials you’ll need for this project.
Key Takeaways:
- Refresh your outdoor space by reupholstering patio chairs with outdoor fabric, staple gun, and basic tools. Enjoy a personalized and cost-effective furniture upgrade for a relaxing oasis.
- Transform worn-out patio chairs into stylish seating options by following simple steps. Save money, add a personal touch, and prolong the lifespan of your outdoor furniture.
Read more: How To Reupholster Outdoor Chairs
Materials Needed
Before getting started, gather the following materials:
- Outdoor fabric of your choice: Make sure the fabric is suitable for outdoor use, as it needs to withstand exposure to sunlight and moisture.
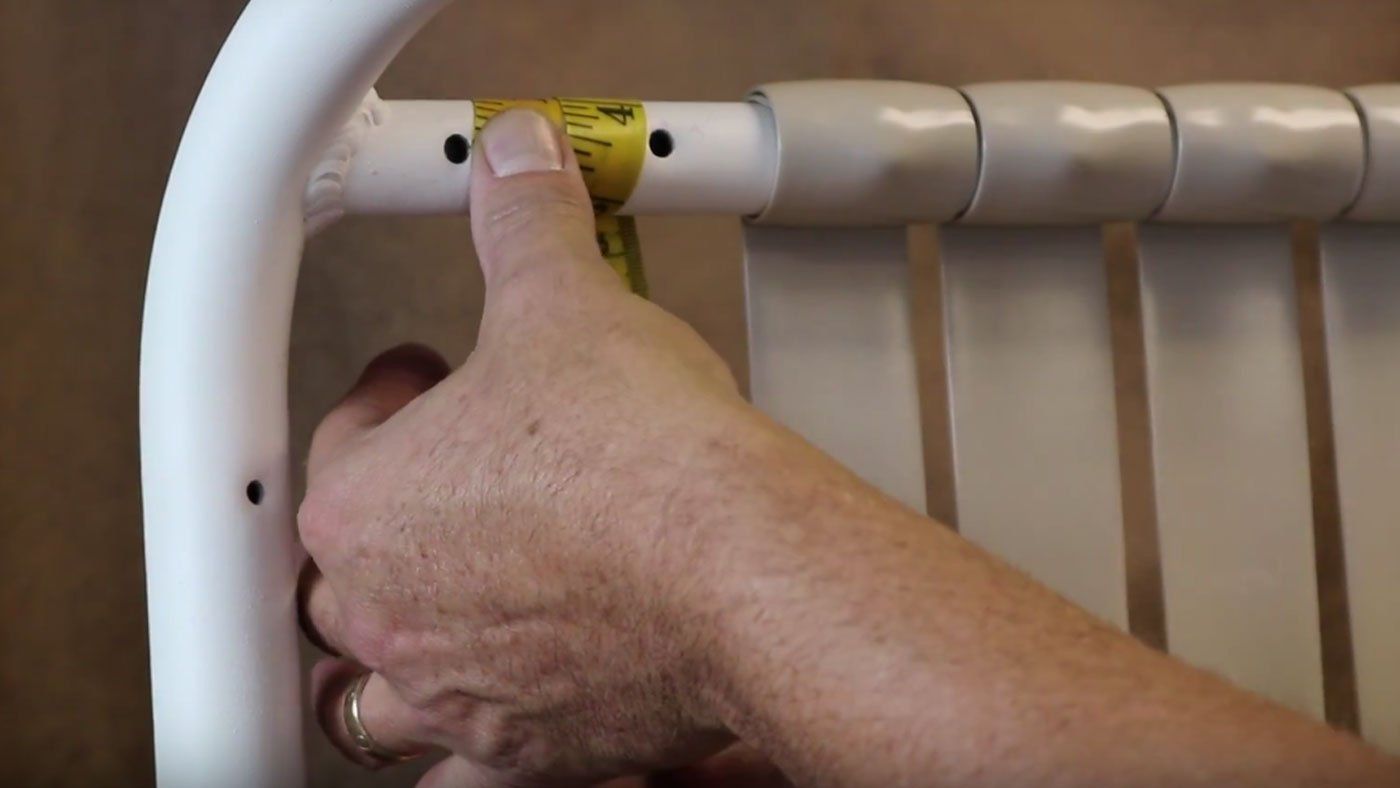
- Measuring tape: This will come in handy for measuring the dimensions of your chair seats and backs.
- Scissors or fabric cutter: You’ll need these to cut the new fabric to the appropriate size.
- Staple gun: A staple gun will be used to secure the fabric to the chair frame. Make sure to have some extra staples on hand.
- Screwdriver or pliers: These tools will be needed to remove the seat and back from the chair frame.
- Foam padding: If your chair cushions are worn or uncomfortable, consider replacing the foam padding as well.
- Trim or decorative accessories (optional): Adding trim or decorative elements can give your chairs a personalized touch.
Once you have gathered all the necessary materials, it’s time to start reupholstering your patio chairs. Follow the step-by-step instructions below to transform your worn-out chairs into stylish and comfortable seating options.
Step 1: Remove Old Upholstery
The first step in reupholstering your patio chairs is to remove the old upholstery. This will give you a clean and blank canvas to work with. Follow these steps:
- Turn the chair upside down to access the underside.
- Using a screwdriver or pliers, remove any screws or nails that are holding the seat or back of the chair in place. Set them aside, as they will be needed later.
- Gently lift and remove the seat and back cushions from the chair frame.
- If there is any existing fabric on the cushions, carefully remove it by pulling out any staples or nails that are holding it in place.
- Inspect the cushions and frames for any damage or wear. This is a good time to replace any worn-out foam padding if needed.
By removing the old upholstery, you are preparing the chairs for a fresh and updated look. Once you have completed this step, move on to the next one.
Step 2: Measure and Cut New Fabric
Now that you have removed the old upholstery, it’s time to measure and cut the new fabric for your patio chairs. Here’s how to do it:
- Lay the seat and back cushions on a flat surface.
- Using a measuring tape, measure the dimensions of each cushion. Be sure to measure from seam to seam to ensure accurate sizing.
- Add an additional 2-3 inches to each measurement to allow for folding and stapling the fabric to the chair frame.
- Once you have the measurements, transfer them to the new outdoor fabric. Use a fabric cutter or scissors to carefully cut out the fabric pieces according to the measurements you took.
- Double-check the dimensions and make any necessary adjustments before moving on to the next step.
Remember, it’s always better to cut the fabric slightly larger than necessary, as you can always trim off any excess later. This will ensure that you have enough fabric to securely attach to the chair frame. Now that you have your fabric pieces ready, let’s move on to the next step.
Step 3: Attach New Fabric to Chair Seat
With the new fabric cut to size, it’s time to start attaching it to the chair seat. Follow these steps:
- Take the fabric piece cut for the chair seat and place it face down on a flat surface.
- Position the chair seat upside down on top of the fabric, ensuring that it is centered.
- Starting with one side, pull the fabric taut over the edge of the chair seat and use a staple gun to secure it in place. Begin stapling in the middle of the side and work your way towards the corners.
- Move to the opposite side and repeat the process, pulling the fabric taut and stapling it securely. Continue to the remaining two sides, stapling with even spacing.
- Once the sides are stapled, move to the corners. Fold and tuck the fabric neatly, creating a clean and professional look. Secure the corners with additional staples.
- Continue to staple the remaining fabric around the seat, ensuring that it is taut and neatly attached.
Take your time while stapling to ensure that the fabric is smooth and free of wrinkles or bunching. The seat should have a snug fit, with the fabric securely fastened. Now, let’s move on to attaching the new fabric to the chair back.
When reupholstering patio chairs, make sure to choose outdoor fabric that is water and UV resistant to ensure durability and longevity.Step 4: Attach New Fabric to Chair Back
Now that the seat fabric is securely attached, it’s time to move on to the chair back. Follow these steps:
- Take the fabric piece cut for the chair back and place it face down on a flat surface.
- Position the chair back upside down on top of the fabric, ensuring that it is centered.
- Starting with one side, pull the fabric taut over the edge of the chair back and use a staple gun to secure it in place. Begin stapling in the middle of the side and work your way towards the corners.
- Move to the opposite side and repeat the process, pulling the fabric taut and stapling it securely. Continue to the remaining two sides, stapling with even spacing.
- Just like with the seat, fold and tuck the fabric neatly at the corners, creating a clean and professional look. Use additional staples to secure the corners.
- Continue to staple the remaining fabric around the chair back, making sure it is smooth and wrinkle-free.
When attaching the fabric to the chair back, pay attention to any design elements or patterns on the fabric to ensure they are properly aligned. This will help create a cohesive and visually appealing look. Once the chair back is complete, let’s move on to the next step and secure the fabric in place.
Step 5: Secure the Fabric
With the new fabric attached to both the chair seat and back, it’s important to secure it properly to ensure it stays in place. Follow these steps:
- Inspect the fabric on both the seat and back to ensure it is tight and free of wrinkles or looseness.
- If you notice any areas where the fabric is not as tight as desired, use the staple gun to add additional staples to secure it in place.
- Double-check the corners and edges to ensure they are neat and properly secured.
- If desired, you can add decorative trim or accessories at this stage to further enhance the appearance of the chairs. Use a hot glue gun or fabric glue to attach the trim, being careful to follow the manufacturer’s instructions.
- Once you are satisfied with the fabric and any additional trim, trim off any excess fabric using scissors or fabric cutter.
Trimming the excess fabric will give your chairs a clean and finished look. Take your time and ensure you are cutting accurately to maintain a professional appearance. Now that the fabric is secure and trimmed, let’s move on to the final step of reassembling the chairs.
Step 6: Trim Excess Fabric
Now that the new fabric is securely attached to both the chair seat and back, it’s time to trim any excess fabric. This step will give your patio chairs a clean and polished appearance. Follow these steps:
- Inspect the edges of the chair seat and back to identify any areas where the fabric extends beyond the frame.
- Using sharp scissors or a fabric cutter, carefully trim the excess fabric along the edges of the chair seat and back. Be sure to cut close to the frame for a neat finish.
- Take your time while trimming to ensure that you are cutting straight and maintaining an even edge.
- After trimming, check the edges again to ensure that all excess fabric has been removed.
By trimming the excess fabric, you will achieve a clean and professional look for your reupholstered patio chairs. This step is essential for creating a polished and finished appearance. Now, let’s move on to the final step of reassembling the chairs.
Step 7: Reattach Seat and Back to Chair Frame
Now that you have reupholstered the seat and back of your patio chairs, it’s time to put everything back together. Follow these steps to reattach the seat and back to the chair frame:
- Flip the chair frame over to its normal position.
- Take the reupholstered seat and align it with the chair frame. Make sure it is properly positioned and that all screw holes align.
- Using a screwdriver or a drill, secure the seat to the frame by screwing in the screws or nails that you had previously removed. Tighten them securely, but be careful not to over-tighten and strip the holes.
- Next, take the reupholstered chair back and align it with its corresponding position on the chair frame.
- Once again, use the screwdriver or drill to attach the back to the frame using the original screws or nails.
- Ensure that both the seat and back are securely attached to the chair frame before moving or sitting on the chairs.
Take a moment to admire your reupholstered patio chairs. They now have a fresh new look that will enhance the beauty of your outdoor space. Make sure to test the chairs and ensure everything feels sturdy and stable before regular use.
With this step-by-step guide, you have successfully reupholstered your patio chairs. By following these instructions and being patient with the process, you have transformed your worn-out chairs into stylish and comfortable seating options. Enjoy the results of your hard work and relax in your newly refreshed outdoor furniture!
Conclusion
Congratulations on successfully reupholstering your patio chairs! By following the step-by-step guide provided, you have breathed new life into your outdoor furniture. Not only have you saved money by avoiding the need to purchase new chairs, but you have also added a personal touch to your outdoor space.
Reupholstering your patio chairs allows you to customize them to your desired style and theme. With a wide range of outdoor fabrics available, you can choose patterns and colors that complement the overall aesthetic of your outdoor area. Whether you prefer a bold and vibrant look or a more subtle and neutral design, the choices are endless.
Remember, reupholstering your patio chairs is not only a cost-effective solution but also an opportunity to prolong their lifespan. By regularly maintaining and updating the upholstery, you can ensure that your chairs remain comfortable and visually appealing for many seasons to come.
Now that you have learned how to reupholster patio chairs, consider applying these skills to other outdoor furniture pieces in your collection. From lounge chairs to dining sets, the same principles can be applied to transform worn-out furniture into stunning focal points in your outdoor space.
Thank you for joining us on this reupholstering journey. We hope you found this guide informative and enjoyable. Kick back, relax, and enjoy your beautifully reupholstered patio chairs!
Frequently Asked Questions about How To Reupholster Patio Chairs
Was this page helpful?
At Storables.com, we guarantee accurate and reliable information. Our content, validated by Expert Board Contributors, is crafted following stringent Editorial Policies. We're committed to providing you with well-researched, expert-backed insights for all your informational needs.

0 thoughts on “How To Reupholster Patio Chairs”