Home>Garden Essentials>How To Build Your Own Water Fountain
Garden Essentials
How To Build Your Own Water Fountain
Modified: March 16, 2024
Learn how to create your own garden water fountain with our step-by-step guide. Enhance your outdoor oasis with this DIY project!
(Many of the links in this article redirect to a specific reviewed product. Your purchase of these products through affiliate links helps to generate commission for Storables.com, at no extra cost. Learn more)
Introduction
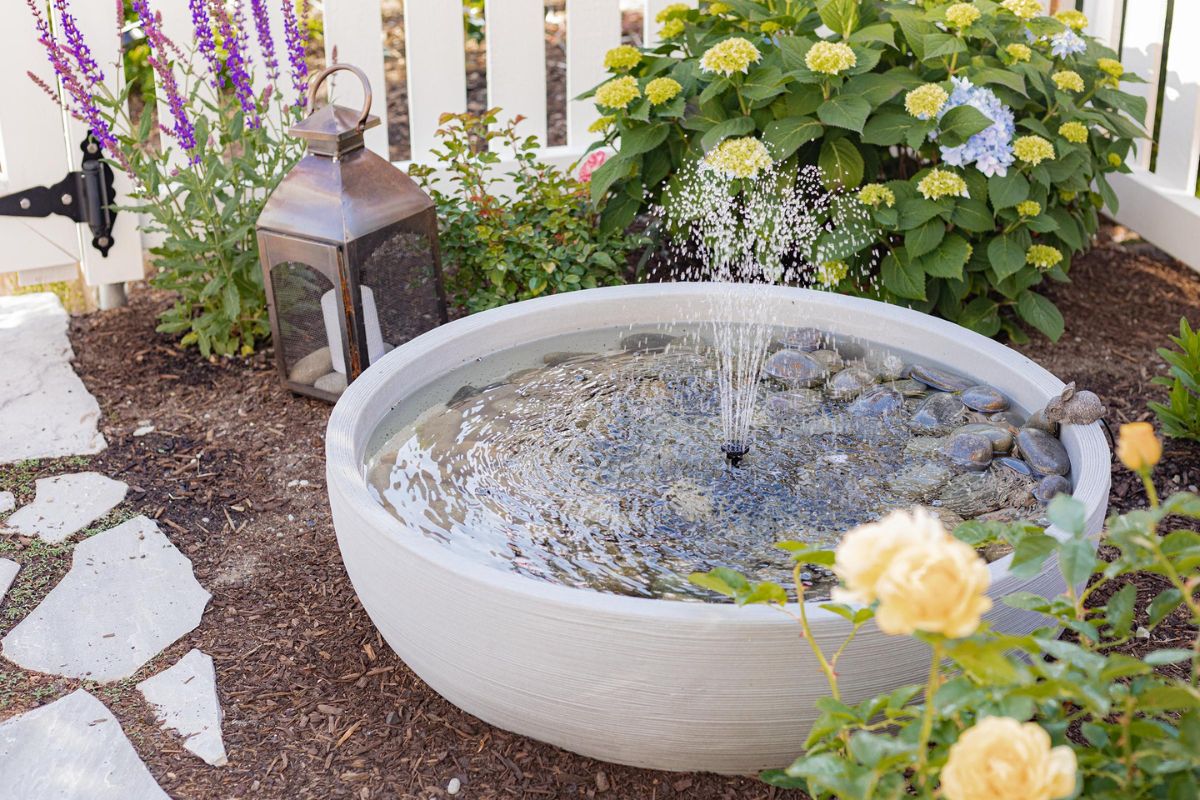
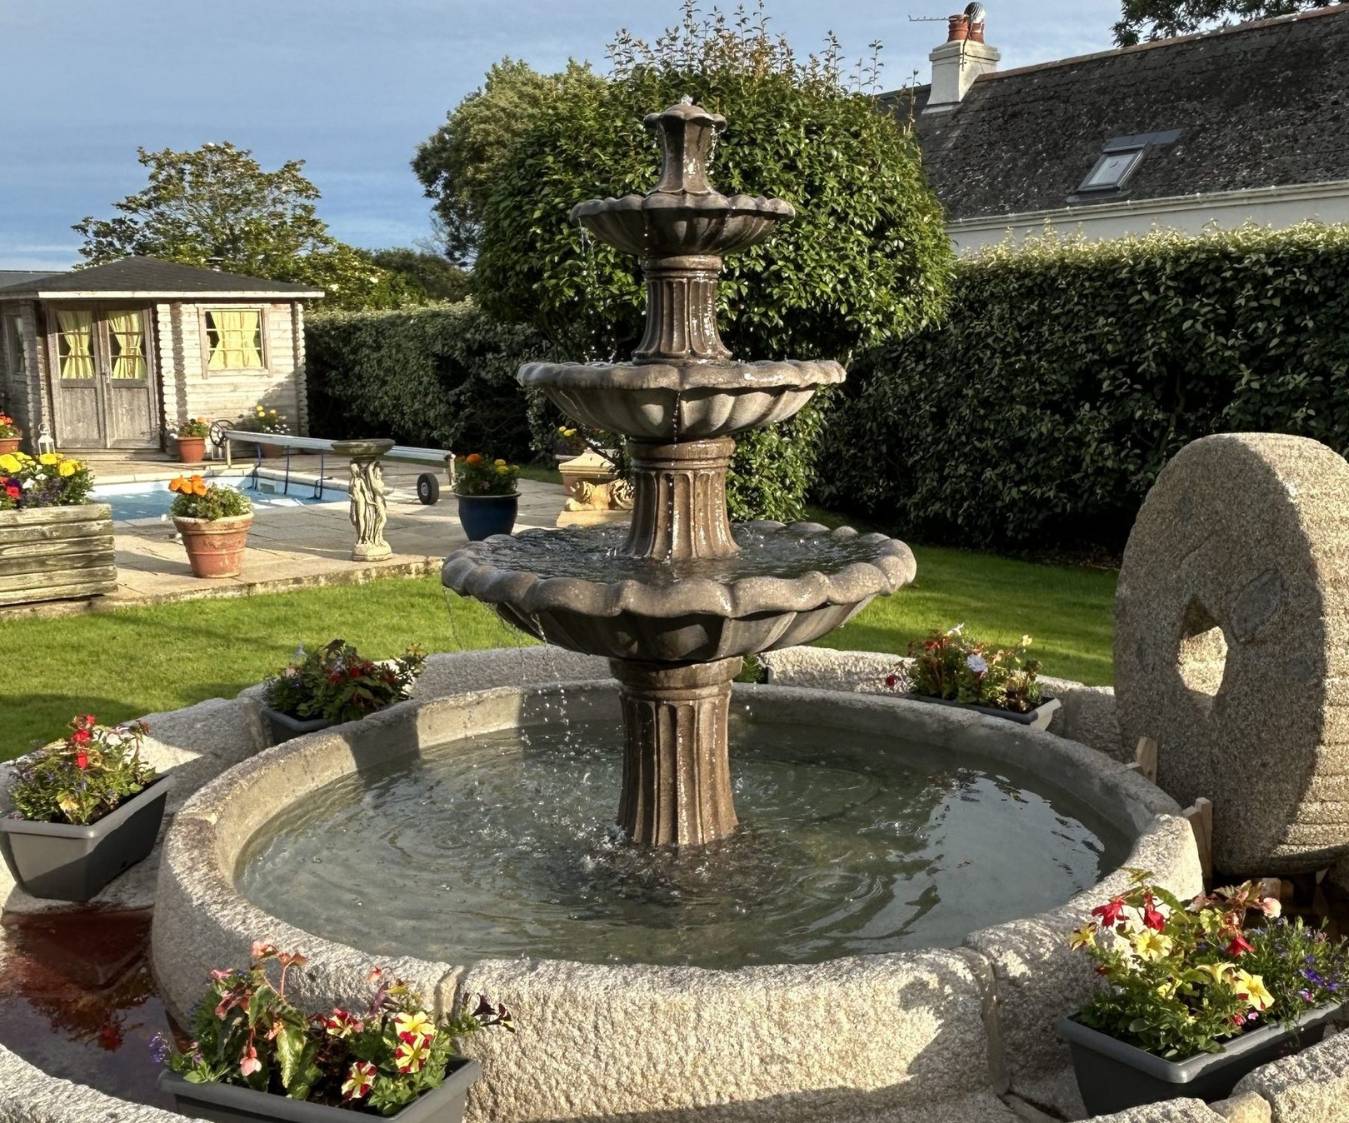
Welcome to the world of garden magic – where the soothing sound of flowing water can transform your outdoor space into a tranquil oasis. Building your own water fountain is not only a rewarding DIY project but also a beautiful addition to any garden or backyard. Whether you have a spacious yard or a small balcony, a water fountain can instantly elevate the ambiance and create a peaceful atmosphere.
In this article, we will guide you through the step-by-step process of building your own water fountain. From gathering the materials to maintaining the fountain, we have you covered. So, put on your gardening gloves and let’s dive into the world of water fountains!
But before we jump into the nitty-gritty of building a water fountain, it’s important to understand the benefits it can bring to your outdoor space. Not only do water fountains add visual appeal, but the sound of flowing water can also have a calming effect, reducing stress and promoting relaxation. The gentle trickle of water can drown out unwanted noise and create a serene environment for unwinding and meditating.
Moreover, a water fountain can attract birds and other wildlife, adding life and movement to your garden. Watching birds splash around and drink from the fountain can bring joy and a sense of connection to nature. Additionally, the sound of moving water can help to mask traffic noise and create a more peaceful ambiance in urban environments.
Now that you understand the benefits, let’s move on to the exciting part – building your own water fountain! But first, let’s gather all the materials you’ll need for this project.
Key Takeaways:
- Building your own water fountain can turn your garden into a peaceful oasis, attracting wildlife and reducing stress with the soothing sound of flowing water.
- Regular maintenance is key to keeping your water fountain in top condition. Keep the water clean, check for leaks, and adjust the flow for a serene ambiance.
Step 1: Gathering Materials
Before you begin building your water fountain, it’s important to gather all the necessary materials. Having everything on hand will ensure a smooth and efficient construction process. Here’s a list of the materials you’ll need:
- A water pump: This is the heart of your water fountain. Choose a pump that suits the size and flow rate you desire. Make sure it’s suitable for outdoor use and has a long enough power cord to reach your electrical outlet.
- A water basin: This will hold the water for your fountain. It can be an existing container like a ceramic pot or a specially designed water basin. Ensure it’s sturdy and watertight.
- A water hose or tubing: This will connect the pump to the water feature and allow water to flow. Choose a hose or tubing that is flexible, durable, and the appropriate size for your pump.
- A water feature: This is the centerpiece of your fountain and can come in various forms, such as a decorative stone, a sculpture, or a cascading waterfall feature. Select a feature that suits your aesthetic preferences and complements your garden design.
- Decorative rocks or pebbles: These will be used to create a visually appealing base for your fountain. Choose rocks or pebbles that match the style of your water feature and the overall theme of your garden.
- A waterproof sealant: This is essential for ensuring that your water basin remains watertight and doesn’t leak. Look for a sealant specifically designed for outdoor use and suitable for your chosen basin material.
- Electrical supplies: Depending on the location of your fountain, you may need extension cords, surge protectors, and waterproof electrical connections to safely power your water pump.
- Tools: You’ll need basic tools like a drill, screwdriver, wrench, level, and measuring tape to assemble and install your water fountain. Make sure you have these tools readily available.
- Optional accessories: Consider adding additional elements to enhance your water fountain, such as underwater lighting, aquatic plants, or decorative ornaments. These accessories can elevate the visual appeal and create a more personalized touch.
Once you have gathered all the materials, you’ll be ready for the next step – choosing the perfect location for your water fountain. Let’s move on to Step 2!
Step 2: Choosing the Location
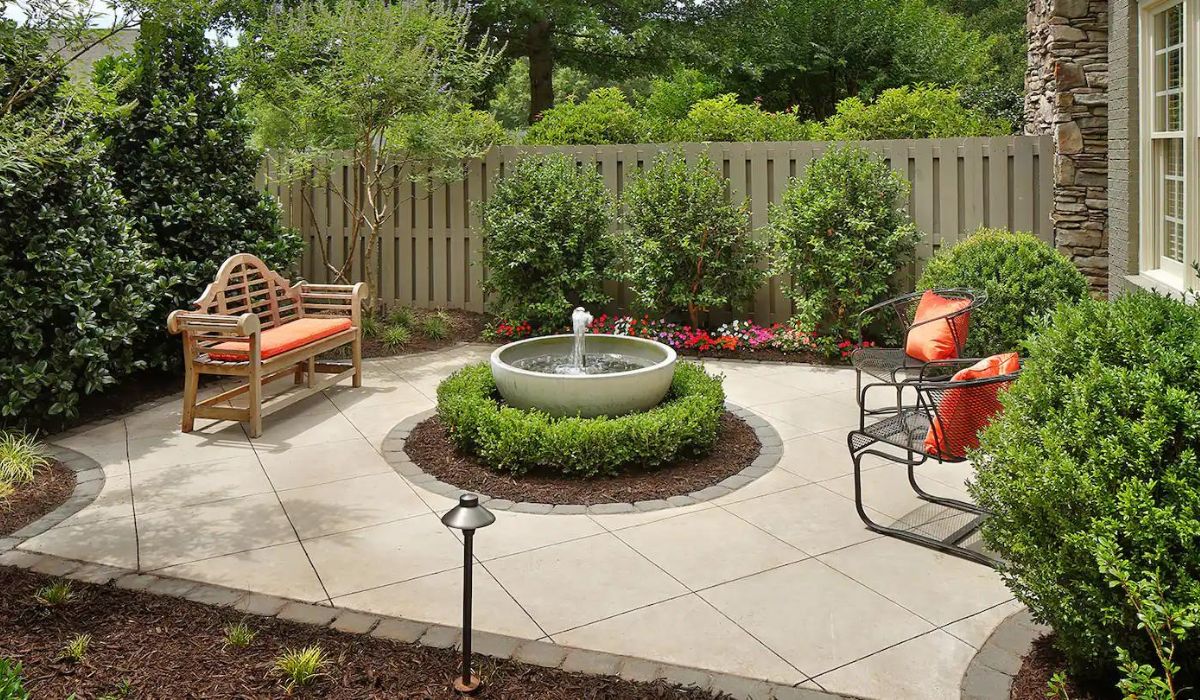
Selecting the right location for your water fountain is crucial to ensure its visual impact and functionality. Here are some factors to consider when choosing the perfect spot:
- Visibility: Place your water fountain in an area where it can be easily seen and appreciated. It could be a focal point in your garden, visible from your patio or main viewing area.
- Proximity to electrical outlets: As you will need to power your water pump, make sure there’s an electrical outlet nearby. If necessary, use outdoor-rated extension cords and ensure proper grounding for safety.
- Sunlight exposure: If you plan to incorporate water plants or aquatic life into your water fountain, consider the amount of sunlight the location receives. Some plants require full sun, while others prefer partial shade.
- Proximity to water source: Depending on the type of water feature you choose, you may need access to a water source for filling or topping up the fountain. Consider placing the fountain near a hose connection or a water supply.
- Ground stability: Ensure that the ground is stable and level to prevent any sinking or leaning of your water fountain over time. Avoid areas with loose or sandy soil and choose a spot that provides a solid foundation.
- Outdoor elements: Take into account the exposure to wind, rain, and other environmental factors. Consider if your chosen location is protected from high winds or heavy rainfall, which could affect the stability and maintenance of your fountain.
- Aesthetics: Your water fountain should complement the overall design and style of your garden. Consider the surrounding landscape, existing features, and how the fountain will fit into the overall aesthetic theme.
- Accessibility: Ensure that the location of your water fountain allows for easy access for maintenance and cleaning. You will need to periodically clean the pump and remove debris, so choose a spot that allows for convenient maintenance.
Once you have carefully considered these factors and chosen the ideal location, you’re ready to move on to the next step: preparing the base for your water fountain. Let’s proceed to Step 3!
Step 3: Preparing the Base
The base of your water fountain plays an essential role in providing stability and visual appeal. Follow these steps to prepare the base for your fountain:
- Clean the area: Clear the designated spot of any debris, plants, or rocks. Ensure the ground is level and free from any uneven patches.
- Mark the outline: Use chalk or a marking tool to outline the shape and size of the base. This will help you visualize the placement and ensure accuracy during the installation process.
- Create a solid foundation: Dig a shallow hole within the marked outline. The depth of the hole will depend on the size of your water basin and the desired height of your water feature. Make sure the hole is slightly larger than the circumference of the base to allow for easy installation.
- Add a layer of sand: Place a thin layer of sand at the bottom of the hole. This will act as a cushion and help level the base. Use a level to ensure that the sand is evenly spread and adjust as needed.
- Position the water basin: Carefully place the water basin into the hole, ensuring that it sits evenly and level with the ground. Adjust the position as necessary until it is perfectly aligned with your desired layout.
- Check for stability: Once the water basin is in place, step back and assess its stability. Gently press on the edges of the basin to ensure it doesn’t wobble or tip. If needed, add more sand or make minor adjustments to achieve a stable foundation.
- Secure the basin: To prevent movement and shifting, use a waterproof sealant to secure the water basin to the ground. Apply the sealant along the edges of the basin, ensuring a tight seal between the basin and the surrounding ground.
- Allow for drying time: Follow the manufacturer’s instructions for the sealant to dry completely. This will ensure a solid bond between the basin and the ground, providing long-term stability.
With the base prepared and securely in place, you’re ready to move on to the exciting part – assembling the fountain components. Let’s proceed to Step 4!
Step 4: Assembling the Fountain Components
Now that you have the solid base in place, it’s time to assemble the components of your water fountain. Follow these steps to bring your fountain to life:
- Place the water feature: Position your chosen water feature on top of the water basin. Ensure it is centered and aligned with your desired aesthetic. Adjust the angle and orientation of the feature until you’re satisfied with its placement.
- Attach the water hose or tubing: Connect one end of the water hose or tubing to the water outlet of the pump. Thread the hose or tubing through the water feature, ensuring a secure fit without any kinks or twists.
- Position the water pump: Carefully lower the water pump into the water basin, making sure it is submerged and sits flat at the bottom. Orient the pump in a way that allows easy access for maintenance and adjustments.
- Connect the other end of the hose/tubing: Attach the other end of the hose or tubing to the water inlet of the water feature. Ensure a tight and secure connection to prevent any leaks.
- Secure the pump and hose: Use rocks or decorative stones to cover the water pump and hose, creating a natural and visually appealing look. This will also help stabilize the components and hide any exposed parts.
- Check for water flow: Fill the water basin with water, ensuring it covers the pump completely. Plug in the pump and test the water flow. Adjust the water flow rate as desired using the pump’s control settings.
- Inspect for leaks: Observe the entire system for any signs of leaks. Check the connections, hoses, and the water basin for any water seepage. Make any necessary adjustments or tighten connections to resolve any leaks.
- Make final adjustments: Step back and evaluate the overall appearance of your water fountain. Make any final adjustments to the positioning of the water feature, rocks, or decorations to achieve your desired aesthetic.
Once you’re satisfied with the assembly and the water is flowing smoothly, it’s time to move on to the next step – adding water and conducting a test run. Let’s proceed to Step 5!
When building your own water fountain, make sure to use a waterproof container as the base to prevent leaks and water damage. This will help ensure the longevity and functionality of your fountain.
Read more: How To Build Your Own Bathroom Vanity
Step 5: Adding Water and Testing
Now that your fountain components are assembled, it’s time to add water and conduct a test run. Follow these steps to complete this stage:
- Fill the water basin: Using a hose or bucket, carefully fill the water basin with water until it reaches the desired level. Avoid overfilling, as the water may overflow when the pump is running.
- Check water level and circulation: Observe the water level and the flow of water through the fountain components. Ensure that the water circulates properly and is evenly distributed across the water feature.
- Adjust water flow and sound: Depending on your preference, adjust the water flow rate using the control settings on the pump. Increase or decrease the flow until you are satisfied with the sound of the water and overall water movement.
- Listen for any abnormal sounds: Listen closely for any unusual noises coming from the pump or water feature. Whirring, grinding, or rattling sounds may indicate a problem with the pump or a loose component. Address any issues accordingly.
- Inspect for splashing or splattering: Monitor the water flow to ensure that it doesn’t cause excessive splashing or splattering outside the water basin. Adjust the angle or position of the water feature if necessary to minimize any water wastage or mess.
- Check for water evaporation: Take note of the water level in the basin after a few hours of running the fountain. Some evaporation is natural, but if the water level drops significantly, check for any leaks or seepage and address the issue promptly.
- Make final adjustments: After observing the fountain in action, make any final adjustments to the water flow, water level, or positioning of the components to ensure optimal functionality and aesthetic appeal.
With the water added and the fountain running smoothly, you can now enjoy the tranquil ambiance and visual delight of your self-built water fountain. But remember, regular maintenance and care are essential to keep your fountain in pristine condition. In the next step, we will discuss the importance of regular maintenance and how to care for your water fountain. Let’s proceed to Step 6!
Step 6: Adjusting Water Flow and Sound
After setting up your water fountain, it’s time to fine-tune the water flow and sound to achieve the desired effect. Here’s how you can adjust the water flow and sound:
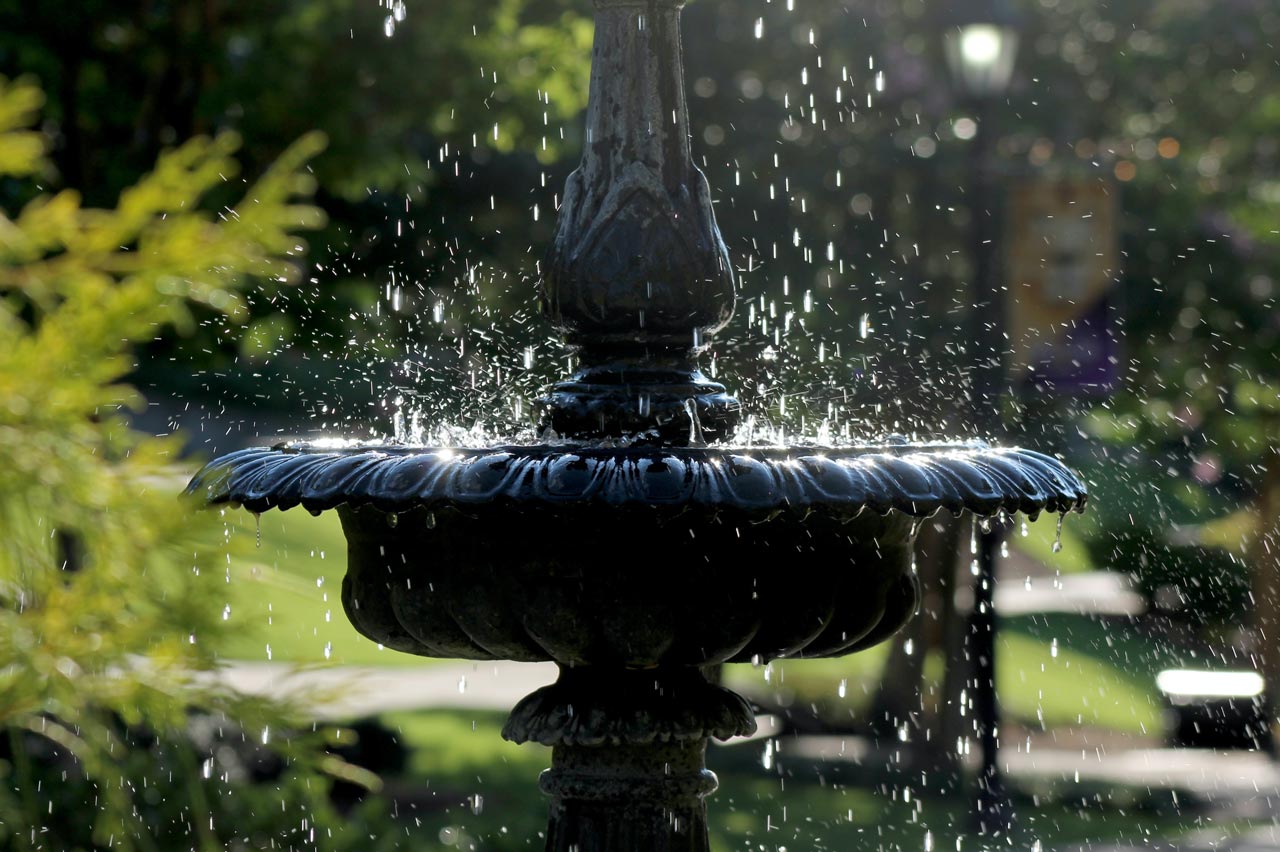
- Flow rate adjustment: Most water pumps have controls that allow you to adjust the flow rate. Experiment with different settings to find the flow rate that suits your preference. A gentle, trickling flow can create a calm and soothing atmosphere, while a more vigorous flow may add energy and movement to the fountain.
- Noise reduction techniques: If your water fountain produces excessive noise that is distracting or undesirable, there are a few ways to mitigate it. Firstly, ensure that all components, such as hoses and fittings, are securely tightened to minimize vibrations. Secondly, add a small amount of water to the basin to dampen water splashes and reduce noise. Lastly, consider using rocks or pebbles strategically placed to redirect water flow and minimize splashing.
- Adding water accessories: To enhance the visual appeal and sound of your water fountain, you can consider adding certain accessories. For instance, placing decorative stones or pebbles in the basin can create a softer sound as the water flows over them. Floating plants or water lilies can also add beauty and a natural aesthetic while muffling the sound of splashing water.
- Altering the water feature: If you find that the water flow or sound is not to your liking, you can make adjustments to the water feature itself. For example, altering the angle or position of the water outlet can change the direction and sound of the water flow. Experiment and make gradual adjustments until you achieve the desired effect.
- Consulting an expert: If you encounter challenges in adjusting the water flow or sound, or if you want professional advice, consider consulting a water feature specialist or a garden professional. They can provide guidance and suggest techniques to optimize the performance and aesthetics of your water fountain.
Remember, adjusting the water flow and sound is a personal preference. Take the time to experiment and fine-tune the settings according to your taste and the desired ambiance in your garden or outdoor space. With Step 6 completed, you’re now ready to move on to Step 7, which covers regular maintenance and care for your water fountain.
Step 7: Regular Maintenance and Care
Maintaining your water fountain is essential to keep it running smoothly and looking its best. Regular care and maintenance will ensure longevity and prevent any issues from arising. Here’s how you can maintain and care for your water fountain:
- Keep the water clean: Regularly remove any debris, leaves, or twigs that may accumulate in the water basin. This will prevent clogging and maintain water clarity. Consider adding a fine mesh screen or a skimmer to catch larger debris before they reach the pump.
- Clean the pump: Every few months, turn off the pump and disconnect it from the power source. Remove any built-up debris or algae from the pump using a soft brush or cloth. Check the intake and outlet for any blockages and clean them as necessary.
- Inspect for leaks: Periodically check all connections, hoses, and the water basin for any leaks or signs of water loss. If you notice any leaks, address them promptly to prevent further damage and ensure the proper functioning of the fountain.
- Monitor water level: Regularly check the water level in the basin and add water as needed to compensate for evaporation. It’s important to maintain the proper water level to ensure the pump remains fully submerged and the fountain operates effectively.
- Prevent freezing in winter: If you live in a colder climate, take precautions to prevent freezing during winter months. Drain the water from the basin and remove the pump to avoid damage from freezing temperatures. Store the pump in a dry and sheltered place until spring.
- Clean and maintain the water feature: Depending on the type of water feature you have chosen, you may need to clean and maintain it regularly. Follow the manufacturer’s instructions for cleaning and caring for the specific materials used in your water feature.
- Check the electrical connections: Inspect the electrical connections and cords to ensure they are in good condition. Replace any frayed or damaged cords and secure all connections properly. It’s important to prioritize safety when dealing with electrical components.
- Replace and upgrade as needed: Over time, certain components of your water fountain may wear out or become outdated. Stay vigilant and replace any worn-out parts or upgrade your fountain to keep it functioning optimally and in line with your aesthetic preferences.
By following these tips and implementing regular maintenance practices, your water fountain will remain a stunning focal point in your garden or outdoor space for years to come. Enjoy the peaceful sound of flowing water and the serenity it brings to your surroundings!
With Step 7 completed, you have successfully built and learned how to maintain your own water fountain. Congratulations on your DIY project and the tranquil haven you’ve created in your garden or outdoor space!
As you enjoy the beauty and calming effects of your water fountain, don’t forget to share your oasis with friends and family. Spread the joy and inspiration of creating your own little piece of paradise.
Now sit back, relax, and bask in the soothing ambiance of your very own self-built water fountain!
Conclusion
Congratulations on completing the journey of building your own water fountain! By following the steps outlined in this guide, you have transformed your outdoor space into a tranquil oasis filled with the soothing sounds and sights of flowing water.
Building a water fountain is not only a rewarding DIY project, but it also brings numerous benefits to your garden or outdoor area. The gentle flow of water can create a peaceful and serene atmosphere, providing a getaway from the hustle and bustle of daily life. Plus, the visual appeal and relaxing sound of the fountain can attract birds and other wildlife, adding life and movement to your surroundings.
Remember, the key to maintaining the longevity and optimum performance of your water fountain is regular care and maintenance. Keep the water clean, inspect for leaks, and monitor the water level to ensure a smooth running system. Additionally, conducting routine checks on the pump and electrical connections will help safeguard against any issues.
Continue to enjoy the tranquility and beauty that your water fountain brings to your outdoor space. Experiment with adjusting the water flow and sound to create the perfect ambiance that suits your preferences. Share the joy of your creation with loved ones and inspire them to embark on their own DIY projects.
Thank you for choosing to build your own water fountain and taking the time to follow this comprehensive guide. May your garden become a haven of relaxation and serenity, filled with the magical allure of flowing water. Happy gardening!
Frequently Asked Questions about How To Build Your Own Water Fountain
Was this page helpful?
At Storables.com, we guarantee accurate and reliable information. Our content, validated by Expert Board Contributors, is crafted following stringent Editorial Policies. We're committed to providing you with well-researched, expert-backed insights for all your informational needs.


0 thoughts on “How To Build Your Own Water Fountain”