Home>diy>Building & Construction>How To Start Building Your Own Home
Building & Construction
How To Start Building Your Own Home
Modified: October 18, 2024
Learn the step-by-step process of starting your own home construction project with expert tips and advice. Begin building your dream home today.
(Many of the links in this article redirect to a specific reviewed product. Your purchase of these products through affiliate links helps to generate commission for Storables.com, at no extra cost. Learn more)
Introduction
Building your own home is a dream that many people aspire to. Not only does it offer the opportunity to create a space that perfectly suits your needs and preferences, but it also gives you a sense of accomplishment and pride. However, the process of building a home can be complex and overwhelming, especially if you have no prior experience in the field of construction.
In this article, we will guide you through the essential steps to start building your own home. From finding the right location to putting the final touches on your dream house, we will provide you with valuable insights and expert advice.
Before embarking on this exciting journey, it is important to note that building a home requires careful planning, time, and financial commitment. It is crucial to approach each step with diligence and patience to ensure a successful and rewarding outcome.
So, let’s dive into the world of building construction and learn how to turn your dream home into a reality!
Key Takeaways:
- Building your own home involves essential steps such as finding the right location, obtaining financing, designing the layout, and completing final touches and landscaping, ensuring a personalized and rewarding living space.
- Each stage of home construction, from laying the foundation to installing utilities and adding final touches, contributes to creating a safe, comfortable, and welcoming space where memories will be made with family and friends.
Read more: How To Build Your Own Home Security System
Finding the Right Location
Choosing the right location for your home is a critical first step in the building process. The location will greatly impact your everyday life, as well as the future value of your property. Here are some key factors to consider when finding the perfect location:
- Neighborhood: Consider the character and ambiance of the neighborhood. Are you looking for a quiet suburban area or a bustling urban setting? Research the nearby amenities, such as schools, parks, shopping centers, and healthcare facilities, to ensure they align with your lifestyle.
- Accessibility: Evaluate the accessibility of the location. Check the proximity to major roads, public transportation, and airports. This will impact your daily commute and accessibility for visitors.
- Scenic Views: If you desire picturesque views, such as mountains, lakes, or ocean, make sure the location allows for these stunning sights. Consider the orientation of your house to make the most of nature’s beauty.
- Climate: Take into account the climate of the area. Determine if you prefer a mild or extreme climate and choose a location accordingly. Consider factors such as temperature, rainfall patterns, and seasonal variations.
- Future Development: Research any planned or potential future developments in the area. This will help you understand how the surrounding environment might change over time.
- Legal Restrictions: Familiarize yourself with any zoning regulations or building restrictions that may affect your chosen location. Ensure that your plans align with local laws and regulations.
- Budget: Consider the cost of land in the desired location. Determine if it fits within your budget and if there are any potential cost-saving opportunities in nearby areas.
Taking the time to carefully select the right location will ensure that your home is situated in a place that meets your needs and enhances your lifestyle. It is essential to conduct thorough research, visit potential sites, and consult with real estate professionals to make an informed decision.
Obtaining Financing
Once you have found the perfect location for your dream home, the next step is to secure financing. Building a home is a significant financial undertaking, and it is essential to have a solid plan in place before starting the construction process. Here are some key steps to obtain financing:
- Evaluate Your Financial Situation: Take a close look at your finances to determine your budget and how much you can afford to borrow. Consider your income, savings, and any existing debts. It is crucial to have a clear understanding of your financial capabilities.
- Visit Lenders: Research and visit different lenders, including banks, credit unions, and mortgage brokers. Discuss your financial situation and goals with them to explore loan options available to you.
- Get Pre-Approved: Apply for pre-approval for a home construction loan. This process involves providing necessary financial documents and having your creditworthiness assessed by the lender. Pre-approval will give you a clear understanding of how much financing you can secure.
- Choose the Right Loan: Consult with your lender to determine the type of loan that best suits your needs. Options include construction-to-permanent loans, which cover both the construction phase and long-term mortgage, and standalone construction loans, which are specific to the building phase.
- Prepare a Comprehensive Loan Application: Gather all the necessary documents and information required for your loan application. This often includes financial statements, tax returns, employment history, and a detailed construction plan.
- Review Loan Terms: Carefully review the terms and conditions of the loan, including interest rates, repayment period, and any associated fees. Seek clarification on any aspects you are unsure about.
- Finalize the Loan: Once you have chosen the right loan and are satisfied with the terms, work closely with your lender to complete all the necessary paperwork and finalize the loan agreement.
Securing financing is a crucial step in building your own home. It is important to be thorough in your research, compare loan options, and choose a lending institution that offers favorable terms and conditions. Additionally, be prepared to provide all the required information and documents in a timely manner to ensure a smooth loan approval process.
Designing Your Home
Once you have secured financing for your home, the next step is to design the layout and features of your dream house. Designing a home involves careful planning and consideration of your lifestyle, needs, and aesthetic preferences. Here are the key steps in the design process:
- Outline Your Needs: Start by making a list of your requirements and priorities for your home. Consider the number of bedrooms and bathrooms you need, the size of the living spaces, the desired style, and any specific features or amenities you desire.
- Consult with Professionals: Seek the assistance of an architect or a residential designer. They have the expertise and experience to translate your ideas into architectural plans that comply with building codes and regulations. Collaborate with them to develop a design that aligns with your vision.
- Consider the Floor Plan: The floor plan is the blueprint of your home and determines the layout and flow of the interior spaces. Evaluate different floor plan options, ensuring they accommodate your needs for privacy, functionality, and aesthetics.
- Choose the Exterior Style: Consider the architectural style of your home’s exterior. Explore different designs, such as contemporary, traditional, farmhouse, or Mediterranean, and select the style that reflects your personal taste and fits harmoniously with the surrounding environment.
- Select Materials and Finishes: Decide on the materials and finishes for various elements of your home, including flooring, countertops, cabinetry, and fixtures. Research different options, considering factors like durability, maintenance requirements, and aesthetic appeal.
- Plan for Energy Efficiency: Incorporate energy-efficient features into your design to minimize your home’s environmental impact and reduce utility costs. This can include insulation, high-efficiency appliances, solar panels, and well-planned ventilation and lighting systems.
- Consider Future Needs: Anticipate your future needs and plan your home’s design accordingly. Factors to consider include potential expansions, accessibility features, and any specific requirements for aging in place.
Designing your own home allows you to create a space that perfectly suits your lifestyle and aesthetic preferences. Collaborating with professionals and considering important aspects such as the floor plan, exterior style, materials, and future needs will ensure a well-designed and functional home that you will enjoy for years to come.
Hiring a General Contractor
When it comes to building your own home, hiring a reputable general contractor is essential. A general contractor oversees the entire construction process, coordinating various subcontractors and ensuring the project is completed to a high standard. Here are the key steps to hiring a general contractor:
- Research and Recommendations: Start by researching general contractors in your area. Seek recommendations from friends, family, and colleagues who have had positive experiences with building contractors. Online reviews and testimonials can also provide valuable insights.
- Interview Candidates: Narrow down your list of potential contractors and schedule interviews. During the interview process, ask about their experience in home construction, licenses and certifications, insurance coverage, and references from past clients.
- Check References: Contact the references provided by the contractor and inquire about their experience working with them. Ask about the contractor’s professionalism, communication skills, adherence to timelines and budgets, and overall satisfaction with the completed project.
- Review Portfolios: Request to see examples of the contractor’s previous work. Examine their portfolio to assess the quality and style of their construction projects. This will give you an idea of whether their work aligns with your vision for your own home.
- Discuss the Project: Clearly communicate your expectations and project requirements to the potential contractor. Make sure they understand your vision and are capable of delivering the desired results within the agreed-upon timeline and budget.
- Obtain Written Estimates: Ask the contractor for a written estimate that details the scope of work, materials, labor costs, and any additional expenses. This will help you compare and evaluate different contractors before making a final decision.
- Verify Licenses and Insurance: Ensure that the contractor possesses the necessary licenses and permits to conduct construction in your area. Additionally, verify that they have liability insurance and worker’s compensation coverage to protect you from any potential liability.
- Sign a Detailed Contract: Once you have selected a general contractor, carefully review and sign a detailed contract that outlines the scope of work, payment schedule, project timeline, and any other agreed-upon terms and conditions. Consult with a legal professional if needed to ensure the contract is comprehensive and protects your interests.
Hiring a reputable general contractor is crucial for a successful and stress-free home-building experience. Taking the time to research, interview, and verify references will help you find a contractor who fits your project requirements and can deliver high-quality workmanship. Remember, open and clear communication is key throughout the construction process to ensure a smooth and successful collaboration with your chosen contractor.
Read more: A Guide To Starting Your Own Flower Garden
Obtaining Necessary Permits
Before you can begin construction on your new home, it is important to obtain the necessary permits from your local government or building department. Building permits ensure that your project complies with local building codes and regulations, ensuring safety and adherence to standards. Here are the key steps to obtaining the necessary permits:
- Research Permit Requirements: Contact your local building department to determine the specific permits required for your construction project. Different jurisdictions may have varying regulations and requirements, so it is important to understand what is needed for your area.
- Prepare Documents: Gather all the necessary documents and information required for the permit application. This may include architectural plans, engineering drawings, site surveys, and proof of ownership or permission from the property owner.
- Complete the Permit Application: Fill out the permit application form provided by the building department. Be sure to provide accurate and detailed information, and include all required supporting documents.
- Submit the Application: Submit the completed application along with the required documents to the building department. Pay any applicable fees at this time. Some jurisdictions may require multiple copies of the application, so be sure to check the requirements.
- Review and Approval: The building department will review your application and plans to ensure compliance with local codes and regulations. They may request revisions or additional information before granting approval. This process can take several weeks or even months, so it is important to be patient.
- Receive the Permits: Once your application is approved, you will receive the necessary permits to begin construction. These permits may include a building permit, electrical permit, plumbing permit, and other specific permits based on your project requirements.
- Display the Permits: It is typically required to prominently display the permits on the construction site for easy visibility and inspection by the building department. Ensure that the permits are easily accessible and remain visible throughout the construction process.
- Adhere to Inspections: Throughout the construction process, the building department will conduct inspections at various stages to ensure compliance and safety. Cooperate with inspectors and schedule inspections in a timely manner.
Obtaining the necessary permits is a crucial step in the home construction process. Non-compliance with local building codes can result in fines, delays, and potential legal issues. It is important to familiarize yourself with the permit requirements in your area, complete the application accurately, and cooperate with the building department to ensure a smooth and successful construction process.
Clearing and Preparing the Land
Before construction can begin on your new home, it is necessary to clear and prepare the land. This process involves removing any existing vegetation, debris, and obstacles to create a clean and level surface for the construction process. Here are the key steps to clearing and preparing the land:
- Survey the Land: Conduct a land survey to evaluate the boundaries and topography of the property. This will help in the planning and layout of the home and identify any potential challenges or restrictions.
- Obtain Necessary Permits: Check with the local government or building department to determine if any permits or approvals are required for land clearing. Ensure compliance with regulations and obtain the necessary permits before proceeding.
- Remove Vegetation: Clear the land of any trees, shrubs, or other vegetation that may interfere with the construction process or pose a safety hazard. Engage professionals if necessary to properly remove and dispose of large trees or protected plant species.
- Clear Debris: Remove any debris, such as rocks, logs, and old structures, from the land. Clean up the site to create a safe and clean working environment.
- Excavation and Grading: If needed, perform excavation and grading to level the land and create a solid foundation for the construction. This may involve the use of heavy machinery to remove excess soil or reshape the terrain.
- Address Drainage and Erosion: Evaluate the natural drainage patterns of the land. Install proper drainage systems, such as gutters, downspouts, and French drains, to prevent water from accumulating near the foundation of the home. Implement erosion control measures to protect the land from erosion during and after construction.
- Utility Connections: Determine the location of utility connections, such as water, electricity, and sewer lines. Coordinate with utility companies to establish connections or make necessary adjustments.
- Marking Boundaries: Clearly mark the boundaries of your property to avoid any encroachment during the construction process. This can be done through the installation of boundary markers or fencing.
Clearing and preparing the land is the crucial first step in the construction of your new home. It lays the foundation for the entire project and ensures a safe and suitable site for building. By following these steps and addressing any necessary permits or regulations, you can create a clean and well-prepared site for the construction of your dream home.
Laying the Foundation
Once the land has been cleared and prepared, the next step in building your home is laying the foundation. The foundation serves as the structural base of the house, providing stability and support for the entire structure. Here are the key steps involved in laying the foundation:
- Foundation Design: Work with an architect or structural engineer to design the foundation that suits the needs of your home. Factors such as soil conditions, climate, and the size and layout of the house will influence the type of foundation chosen.
- Excavation: Excavate the area where the foundation will be laid. This involves digging trenches to the required depth and dimensions, following the design plans and local building codes.
- Footings: Construct the footings, which are large structural supports that distribute the weight of the house to the soil. Reinforcing steel bars, known as rebar, are often placed within the footings to add strength.
- Formwork: Install formwork, typically made of wood or metal, to create the shape of the foundation walls. The formwork will hold the concrete in place until it sets and hardens.
- Pouring Concrete: Pour the concrete into the formwork, ensuring it is distributed evenly and fills the entire area. Concrete mixers or trucks may be employed to deliver and pour the concrete efficiently.
- Reinforcement: Place rebar reinforcement within the poured concrete to increase its strength and durability. The rebars are strategically positioned according to the design plans and local building requirements.
- Curing: Allow the concrete to cure and harden properly. This process usually takes several days or weeks, during which the concrete gains strength and stability.
- Waterproofing: Apply a waterproofing membrane to the exterior of the foundation walls to protect against water infiltration and moisture damage. This step is crucial for maintaining a dry and structurally sound foundation.
- Backfilling: Once the foundation walls have cured, backfill the excavated area around the foundation with soil or gravel. Proper compaction is essential to ensure stability and prevent settlement.
Laying the foundation is a critical stage in building your home. It provides the solid base upon which the rest of the structure will be constructed. By following these steps and working with experienced professionals, you can ensure a strong and durable foundation that will support your dream home for years to come.
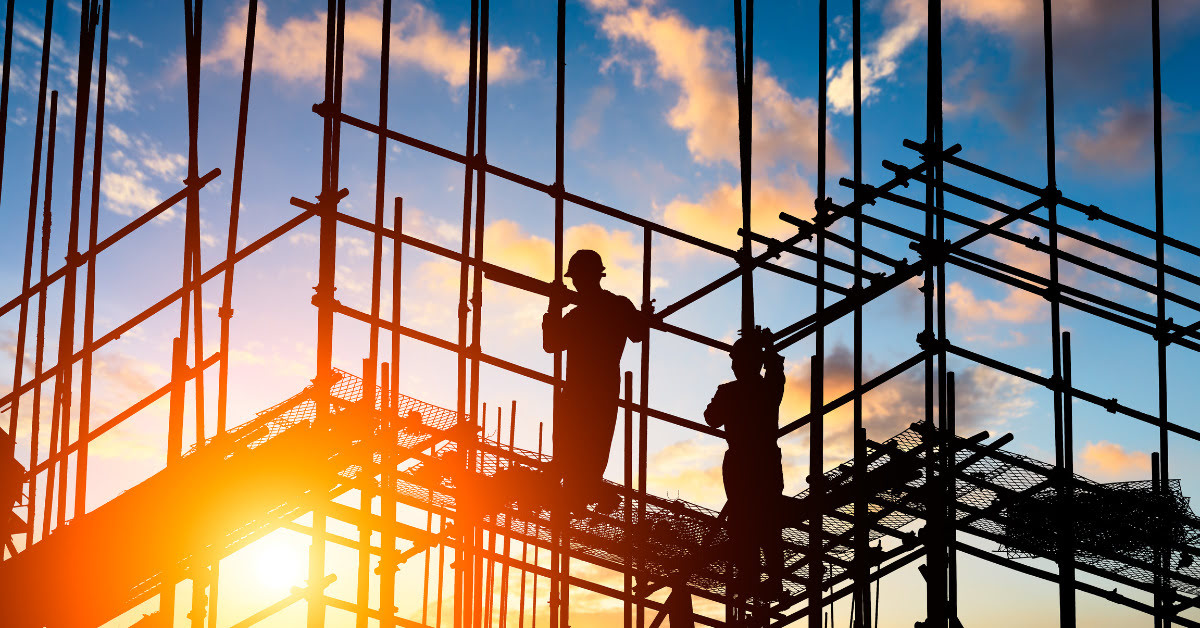
Framing the Structure
After the foundation has been laid, the next step in building your home is to frame the structure. The framing process involves constructing the skeletal framework of the house, which will support the walls, floors, and roof. Here are the key steps involved in framing the structure:
- Consult the Design Plans: Review the architectural plans and design specifications to understand the layout and dimensions of the house. These plans serve as a guide for the framing process.
- Layout and Marking: Use string lines and stakes to mark the layout of the walls on the foundation. This ensures accurate placement and alignment during the framing process.
- Install Sill Plates: Attach pressure-treated sill plates to the top of the foundation. These serve as a base for the wall framing and provide a secure connection between the foundation and the frame.
- Construct Wall Frames: Build the wall frames using lumber and plates according to the design plans. This involves connecting vertical studs, horizontal top plates, and bottom plates through nailing or screwing.
- Install Window and Door Openings: Cut and frame openings for windows and doors within the wall frames. Ensure proper measurements and alignment to accommodate the specific sizes and types of windows and doors.
- Raise and Secure Wall Frames: With the help of a team, lift the wall frames into position and secure them to the sill plates and each other. Use temporary bracing to keep the walls plumb and square during the construction process.
- Add Floor Systems: Install the floor joists and subflooring between the wall frames to create the different levels of the house. This provides stability and a surface for wall and roof assembly.
- Install Roof Trusses or Rafters: Depending on the design, either install prefabricated roof trusses or construct the roof rafters on-site. These form the structural framework for the roof and provide support for the roof covering.
- Sheath and Secure Walls and Roof: Attach exterior sheathing, such as plywood or oriented strand board (OSB), to the outside of the wall frames to provide rigidity and support. Install roof sheathing to create a solid surface for the roof covering.
- Add Structural Support Elements: Install additional structural elements, such as beams, columns, and headers, as necessary to reinforce load-bearing areas and transfer weight to the foundation.
Framing the structure is a significant milestone in the construction of your home. It transforms the layout plans into a visible and tangible skeleton, forming the basis for the walls, floors, and roof. By following these steps and working with qualified professionals, you can ensure a sturdy and well-constructed framework for your dream home.
Read more: How To Build Your Own Bathroom Vanity
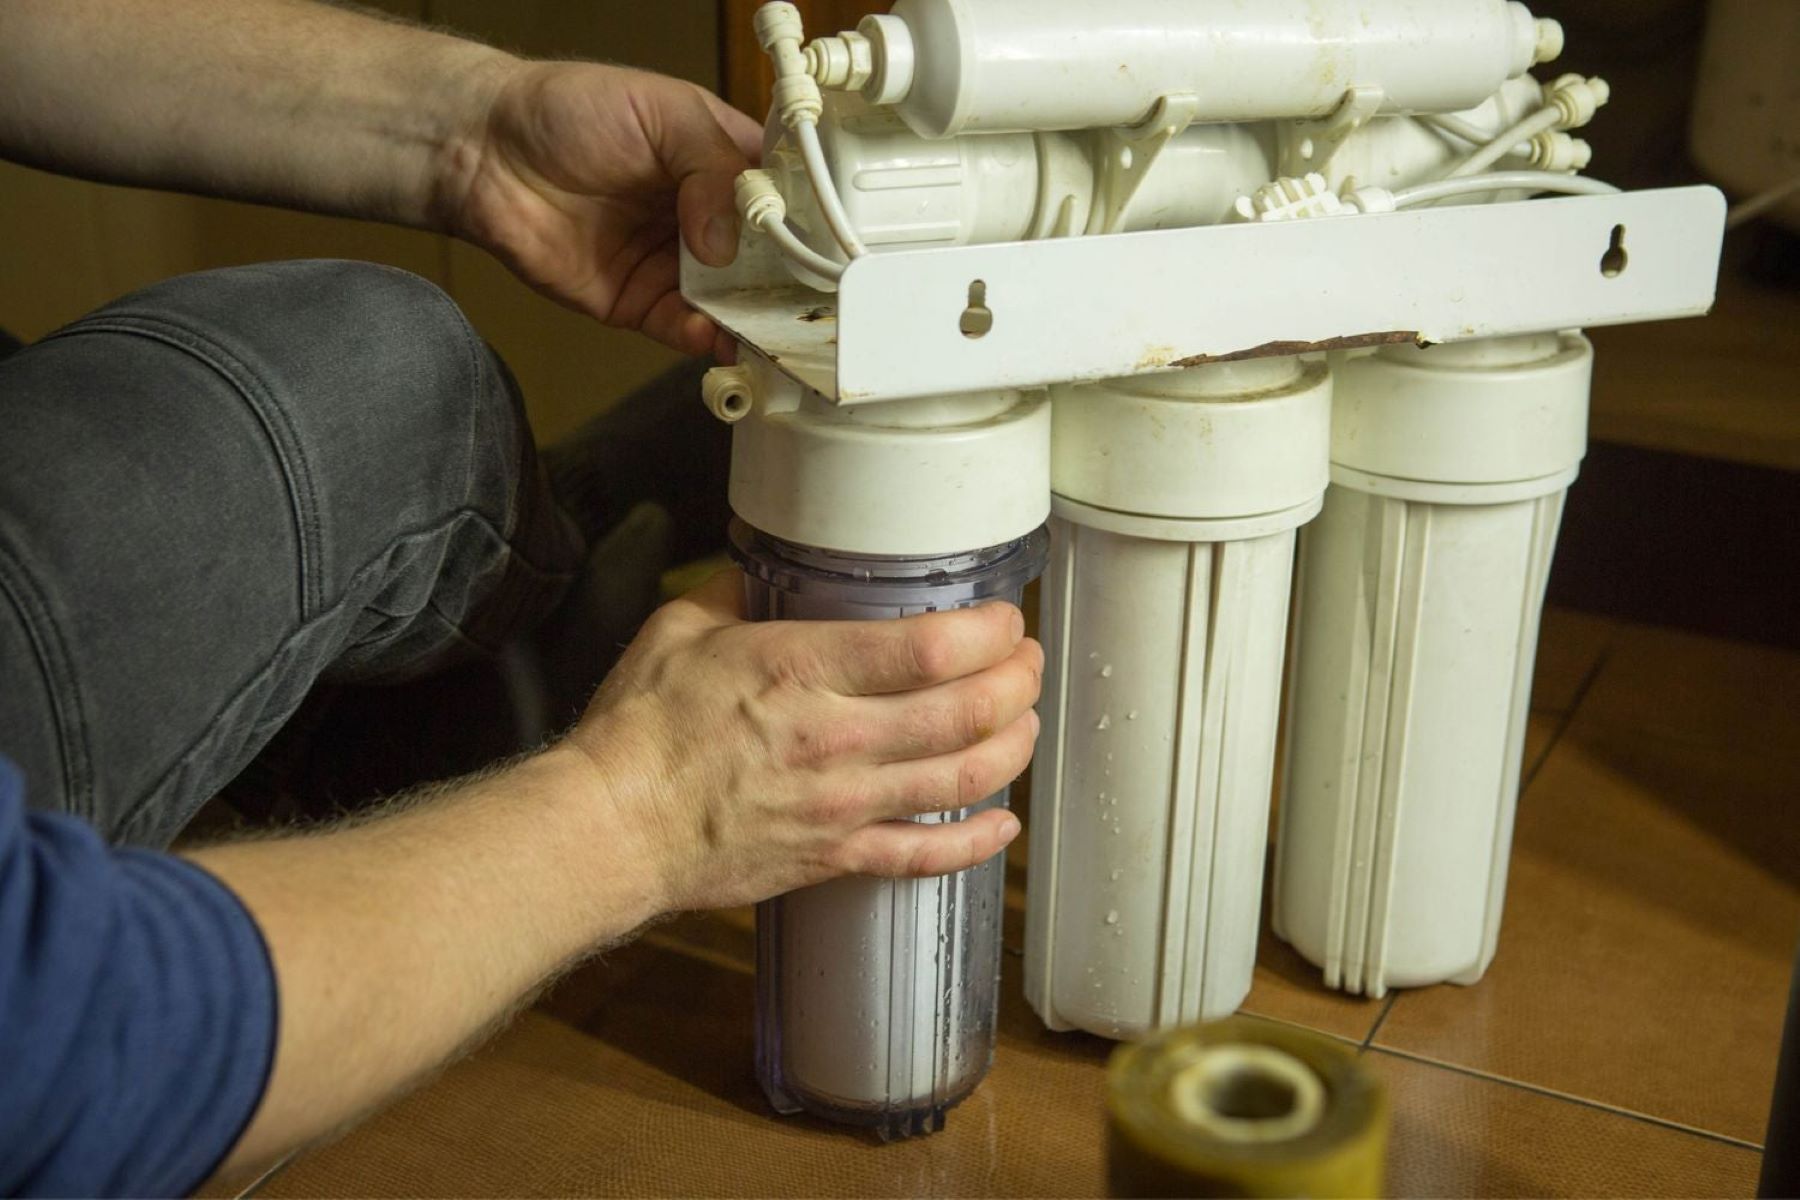
Installing Utilities
Once the basic structure of your home has been framed, the next step is to install the necessary utilities. This includes the electrical system, plumbing system, and HVAC (heating, ventilation, and air conditioning) system. Installing these utilities is crucial for the comfort, functionality, and safety of your home. Here are the key steps involved in installing utilities:
- Electrical System: Work with a licensed electrician to determine the electrical needs of your home. This includes the placement of electrical outlets, light fixtures, switches, and circuit breakers. The electrician will run electrical wiring throughout the walls and ceilings, ensuring proper connections and compliance with local electrical codes.
- Plumbing System: Consult with a licensed plumber to design the plumbing system for your home. This involves the installation of water supply lines, drain pipes, and fixtures such as sinks, toilets, showers, and bathtubs. The plumber will connect the plumbing system to the main water supply and sewer lines, ensuring proper water flow and drainage throughout the house.
- HVAC System: Engage an HVAC contractor to design and install the heating, ventilation, and air conditioning system. This includes the installation of ductwork, HVAC units, thermostats, and vents. The contractor will ensure the proper operation and efficiency of the system, providing heating and cooling solutions for your home.
- Gas Lines (if applicable): If your home requires a gas supply for appliances or heating, consult with a licensed gas fitter to install the necessary gas lines. This includes running gas lines to the appropriate areas and ensuring proper connections and safety measures.
- Inspections: Once the utilities are installed, the appropriate authorities will conduct inspections to ensure compliance with building codes and safety standards. Inspections may include electrical, plumbing, and HVAC inspections. Cooperate with the inspectors, addressing any necessary modifications or corrections.
- Utility Connections: Coordinate with the respective utility companies to connect your home to the main electrical grid, water supply, sewer or septic system, and gas supply if applicable. Ensure all necessary permits and approvals are obtained before the connections are made.
- Testing and Commissioning: After the utilities are installed and connected, the electrician, plumber, and HVAC contractor will conduct thorough testing and commissioning of their respective systems. They will ensure that all systems are functioning properly, addressing any issues or adjustments as needed.
Installing utilities is a vital step in the construction of your home, as it provides the essential services needed for a comfortable and functional living space. Working with licensed professionals, following local regulations, and ensuring proper connections and safety measures will ensure that your home’s utilities operate efficiently and meet all necessary codes and standards.
Before starting to build your own home, make sure to carefully research and plan every aspect of the project, including budget, design, permits, and construction timeline. This will help you avoid costly mistakes and ensure a smooth building process.
Building Interior Walls and Finishes
With utilities in place, the next step in building your home is to construct the interior walls and finishes. This process involves dividing the space into rooms and applying the materials that will create the desired appearance and functionality. Here are the key steps involved in building interior walls and finishes:
- Layout of Interior Walls: Work with your architect or builder to determine the layout and positioning of interior walls based on the design plans. Consider factors such as room sizes, flow, and functionality when determining the placement of walls.
- Frame Interior Walls: Construct interior walls using lumber and framing techniques similar to those used for the exterior walls. Install wall plates, studs, and headers to create a solid framework.
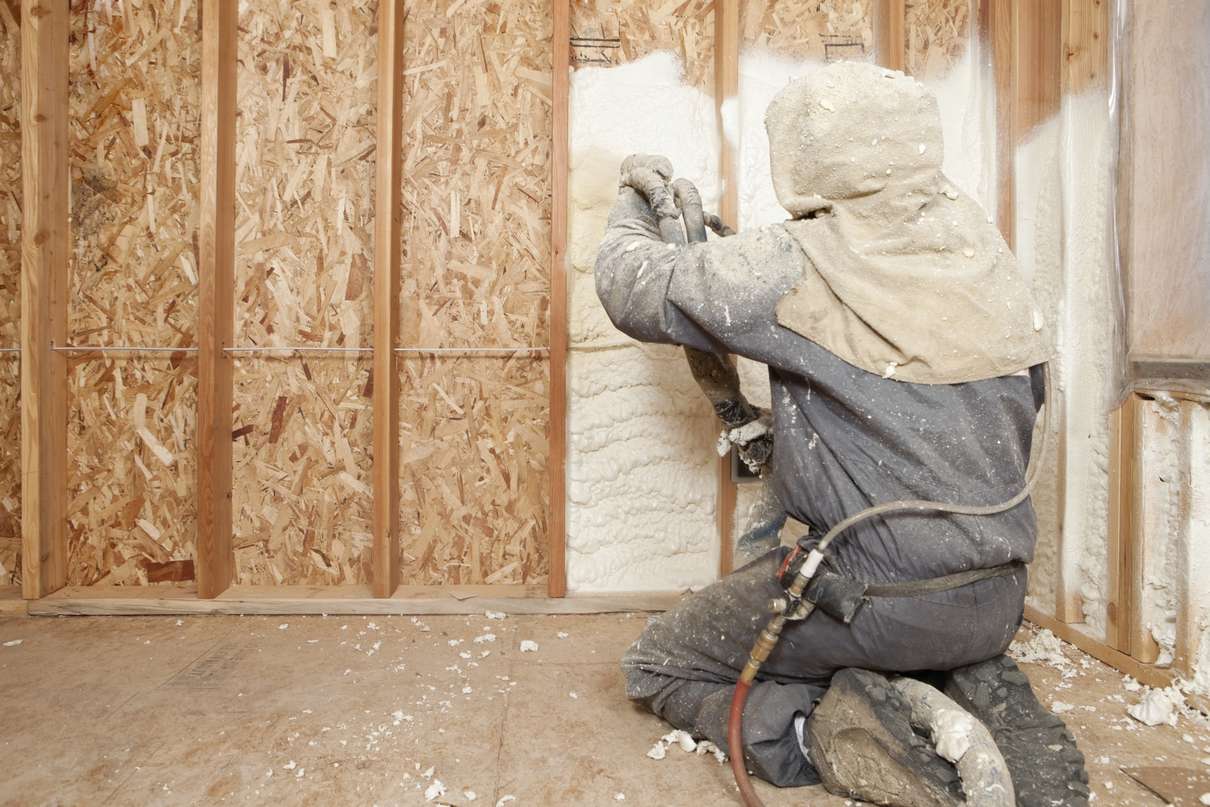
- Insulation: Install insulation within the interior walls to improve energy efficiency and soundproofing. This helps maintain a comfortable indoor environment while reducing noise transfer between rooms.
- Soundproofing: Consider adding additional soundproofing measures, such as resilient channels, soundproof drywall, or acoustic insulation, to minimize noise transmission between rooms or from external sources.
- Hang Drywall: Hang sheets of drywall on the interior walls, covering the insulation and creating a smooth and finished surface. Use appropriate drywall screws or nails to secure the drywall to the wall frames.
- Taping and Mudding: Apply joint compound to cover the seams between sheets of drywall and embed tape to create a seamless appearance. Multiple layers of compound are applied, sanded, and smoothed out to create a level surface.
- Priming and Painting: Prime the drywall surfaces to prepare them for painting. Use paint rollers or sprayers to apply the desired paint color to the walls, giving each room its unique look and ambiance.
- Trim and Molding: Install baseboards, crown molding, and other trim pieces to add elegance and detail to the interior walls. These finishing touches enhance the overall aesthetic appeal of the rooms.
- Interior Doors: Install interior doors, including door frames, hinges, and hardware. Choose doors that complement the style and function of each room, ensuring proper fit and operation.
- Wall Finishes: Consider various wall finishes to add texture and visual interest. Options include wallpaper, textured paint, wainscoting, or decorative finishes like stucco or Venetian plaster.
- Ceiling Finishes: Apply the desired finishes to the ceilings, such as paint, textured treatment, or decorative ceiling tiles. Consider incorporating recessed lighting or other light fixtures during this stage.
- Flooring: Install the chosen flooring materials, such as hardwood, tile, carpet, or laminate. The flooring should complement the overall design scheme and meet the functional needs of each room.
Building interior walls and finishes brings your home to life by dividing the space into distinct rooms and creating the desired atmosphere. Through careful planning, attention to detail, and selection of quality materials, you can transform the interior of your home into a beautiful and functional living space.
Installing Flooring and Cabinetry
As you progress further in the construction of your home, the next crucial steps are installing the flooring and cabinetry. These elements play a significant role in the overall aesthetic and functionality of your living space. Here are the key steps involved in installing flooring and cabinetry:
- Flooring Selection: Choose the flooring material that best suits the style, practicality, and budget of your home. Options include hardwood, laminate, tile, vinyl, and carpet. Consider factors such as durability, maintenance, and aesthetics when making your selection.
- Preparation: Prepare the subfloor as needed before installation. This may involve leveling, moisture-proofing, or repairing any damaged areas to ensure a smooth and stable surface for the flooring material.
- Installation: Follow the manufacturer’s instructions to install the chosen flooring material. This may involve techniques such as gluing, nailing, or floating the flooring, depending on the type of material. Take care to ensure proper alignment and compatibility with adjacent surfaces.
- Cabinetry Design: Work with a designer or kitchen specialist to plan the layout and design of your cabinetry. Consider your storage needs, workflow, and aesthetic preferences. Determine the types of cabinets, countertops, and hardware that will best suit your requirements.
- Cabinetry Fabrication or Purchase: Your cabinetry will be custom-made or sourced from a supplier based on the design specifications. Ensure that the cabinetry meets your desired quality, functionality, and style.
- Installation: Engage a professional carpenter or contractor to install the cabinetry according to the design plans. This may involve precise measurements, leveling, anchoring, and ensuring proper alignment with other elements such as countertops, backsplashes, and appliances.
- Countertop Installation: Coordinate with a countertop specialist to install the desired countertop material, such as granite, quartz, marble, or laminate. The specialist will measure, fabricate, and install the countertops, ensuring a secure and aesthetically pleasing fit.
- Hardware and Accessories: Attach hardware, such as knobs, handles, and hinges, to the cabinetry. Ensure that all elements are correctly aligned and securely fastened. Consider additional accessories, such as drawer organizers and pull-out shelves, to maximize storage efficiency.
- Appliance Installation: Install the appliances, such as stoves, refrigerators, dishwashers, and microwaves, according to the manufacturer’s instructions. Coordinate with specialists or contractors as necessary for specific appliance requirements, such as ventilation or electrical connections.
- Final Touches: Perform any necessary adjustments, such as aligning cabinet doors or adjusting drawer slides, to ensure smooth operation and a polished finish. Clean the cabinetry and flooring, removing any construction debris or marks, to prepare for the final stage of the construction process.
Installing flooring and cabinetry is a crucial step in completing the interior of your home. Paying attention to detail, selecting quality materials, and working with professionals will ensure a functional, visually appealing, and durable finish that complements your overall design vision.
Electrical and Plumbing Work
As the construction of your home nears completion, it’s time to focus on the essential electrical and plumbing work. These two systems play a critical role in the functionality, comfort, and safety of your home. Here are the key steps involved in electrical and plumbing work:
Read more: How To Design And Build Your Own Home
Electrical Work:
- Create a Wiring Plan: Develop an electrical wiring plan in collaboration with a qualified electrician. This plan should include the placement of outlets, switches, light fixtures, and other electrical components throughout your home.
- Rough-In Wiring: During the framing stage, the electrician will run electrical wiring through the walls, floors, and ceilings according to the wiring plan. This includes routing wiring for lighting, power outlets, and electrical panels.
- Install Electrical Panels: Electrical panels, also known as breaker boxes, are installed to control and distribute electricity throughout your home. The electrician will determine the appropriate size and capacity of the panels based on your electrical needs.
- Install Electrical Fixtures: Mount and connect light fixtures, ceiling fans, and other electrical fixtures as per the wiring plan. Ensure that the wiring connections are secure and that all fixtures are properly grounded.
- Install Switches and Outlets: Install switches on the walls for controlling lights and other electrical devices. Install outlets in convenient locations throughout the rooms to provide access to electricity for appliances and electronics.
- Connect Appliances and Devices: The electrician will connect major appliances, such as the refrigerator, stove, dishwasher, and HVAC system, to the electrical system. This includes ensuring proper voltage and wiring connections.
- Ensure Compliance and Safety: All electrical work must comply with local building codes and safety regulations. The electrician will conduct thorough inspections to verify that the wiring, grounding, and electrical connections are up to code.
- Final Testing: After the installation is complete, the electrician will conduct a final testing of the entire electrical system to ensure everything is functioning properly and safely.
Plumbing Work:
- Plan the Plumbing System: Work with a licensed plumber and a plumbing designer to create a plumbing plan that meets your specific needs. This plan includes the placement of pipes, fixtures, and drain lines throughout your home.
- Install Water Supply Lines: The plumber will run water supply lines from the main water source to various areas of your home. This includes connecting pipes, valves, and fittings to ensure a reliable water supply to sinks, showers, toilets, and other fixtures.
- Install Drainage Lines: The plumber will install drain pipes and vent stacks to facilitate proper drainage and prevent sewer gases from entering your home. This involves connecting pipes and fittings to ensure effective waste removal from sinks, toilets, and other fixtures.
- Install Fixtures: Mount and connect plumbing fixtures, such as sinks, toilets, bathtubs, showers, and faucets, according to the plumbing plan. Ensure proper sealing and secure connections to prevent leaks.
- Connect Appliances: The plumber will connect appliances that require water connections, such as dishwashers and washing machines. This involves ensuring proper water supply and drainage connections for these appliances.
- Hot Water System Installation: Install a water heater or other hot water system as per the plumbing plan and your hot water needs. Connect the hot water lines to the fixtures that require hot water, ensuring proper temperature control.
- Pressure Testing and Inspections: The plumber will pressurize the water supply system to check for leaks and perform necessary adjustments. Inspections will be conducted to verify compliance with plumbing codes and regulations.
- Final Testing: Once the entire plumbing system is installed, the plumber will conduct a final testing to ensure that all fixtures have proper water flow and drainage.
Electrical and plumbing work are critical components of your home’s functionality and safety. Working with qualified professionals and ensuring compliance with local codes and regulations will help ensure that your electrical and plumbing systems are properly installed and operate efficiently for years to come.
Painting and Decorating
As your home nears completion, it’s time to add the finishing touches through painting and decorating. This stage allows you to personalize your living space, showcase your style, and create a warm and inviting atmosphere. Here are the key steps involved in painting and decorating:
- Select a Color Scheme: Choose a color palette that reflects your personal taste and complements the overall design of your home. Consider the mood you want to create in each room and how different colors can enhance the space.
- Prepare the Surfaces: Before painting, ensure that the surfaces are clean and smooth. Fill any holes or cracks with putty and sand them down. Take time to properly prepare the walls, ceilings, and other surfaces to ensure a flawless finish.
- Paint the Walls and Ceilings: Use painters’ tape to protect trim, windows, and other areas that should not be painted. Apply primer to create a smooth base and ensure better color coverage. Then, paint the walls and ceilings with your chosen colors, using brushes and rollers as appropriate.
- Add Accent Walls: Consider creating accent walls by painting one wall in a different color or with a textured finish. This adds visual interest and can serve as a focal point in a particular room.
- Decorative Techniques: Explore decorative painting techniques, such as sponging, stenciling, or faux finishes, to add depth and texture to the walls. These techniques can create unique patterns and effects, enhancing the overall aesthetics of your home.
- Paint Trim, Doors, and Windows: Paint the trim, baseboards, casings, doors, and windows in a color that complements the walls. Properly mask these areas with painters’ tape to achieve crisp lines and a professional finish.
- Consider Wallpaper: If desired, incorporate wallpaper to add patterns, textures, or a feature wall in certain areas of your home. Choose designs that coordinate with your overall color scheme and style.
- Window Treatments: Install window treatments such as curtains, blinds, or shades to add privacy, control light, and enhance the overall look of your space. Consider the functionality and aesthetic appeal when selecting the window treatments for each room.
- Lighting Fixtures: Install light fixtures that complement the style of your home. Consider the intended purpose of each room and use lighting to create the desired mood, whether it’s soft and cozy or bright and energizing.
- Decorative Accessories: Finally, add decorative elements such as artwork, mirrors, rugs, and furniture to complete the look. These accessories should enhance the overall design, add personality, and make your home feel welcoming and lived-in.
Painting and decorating provide the opportunity to infuse your personal style into your home. Taking the time to carefully select colors, techniques, and decorative elements will create a space that reflects your unique taste and creates a comfortable environment for you and your loved ones to enjoy.
Final Touches and Landscaping
As you approach the completion of your home construction, it’s time to focus on the final touches and landscaping to give your property a polished and inviting look. These finishing touches will enhance the overall aesthetic appeal and create a welcoming atmosphere both inside and outside your home. Here are the key steps involved in adding the final touches and landscaping:
Read more: How To Build Your Own Steam Shower
Interior Final Touches:
- Install Fixtures and Hardware: Mount and install light fixtures, ceiling fans, door handles, and other hardware throughout your home. Ensure that all fixtures are properly secured and aligned.
- Mirror and Art Installation: Hang mirrors, artwork, and other decorative pieces on the walls. Consider the placement and arrangement to create a visually pleasing and balanced look.
- Window Treatments: Install curtains, blinds, or shades to provide privacy and control the amount of light entering each room. Choose window treatments that complement the interior design and enhance the functionality of the space.
- Final Cleaning and Inspection: Conduct a thorough cleaning of all interior spaces, ensuring that surfaces are free from construction dust and debris. Perform a final inspection to address any remaining touch-ups or adjustments needed.
- Furniture and Décor Placement: Arrange furniture and decorative accessories to create functional and visually pleasing living spaces. Consider the flow and balance of each room, keeping in mind both comfort and aesthetic appeal.
Exterior Landscaping:
- Design the Landscape Plan: Work with a landscape architect or designer to create a landscape plan that complements the style of your home. Consider features such as trees, shrubs, flower beds, pathways, and outdoor living spaces.
- Prepare the Ground: Clear the area of any debris or rocks, ensuring a clean and level surface for landscaping. Make any necessary adjustments to address drainage issues or improve soil quality.
- Install Hardscaping: Begin by installing any desired hardscape features such as pathways, patio areas, retaining walls, or decorative elements like fountains or sculptures. These elements add structure and visual appeal to your outdoor space.
- Plant Trees and Shrubs: Select and plant trees, shrubs, and other plants based on your landscape plan. Consider factors such as local climate, soil conditions, and maintenance requirements. This helps enhance the beauty, provide shade, and add privacy to your property.
- Establish Flower Beds: Create flower beds and plant colorful flowers and perennials. Choose a mix of plants that bloom in different seasons to ensure year-round visual interest.
- Lawn Installation: Lay sod or seed to establish a lush and healthy lawn. Properly prepare the soil, water regularly, and provide adequate fertilization to ensure a vibrant and thriving lawn.
- Outdoor Lighting: Install outdoor lighting fixtures to highlight landscape features, provide safety and security, and create ambiance in the evenings. Consider accent lighting for trees, pathways, and outdoor living areas.
- Final Clean-up and Inspection: Remove any construction debris, prune plants, and tidy up the landscaping. Perform a final inspection to ensure everything is in place and meets your expectations.
Adding the final touches and paying attention to landscaping brings your home construction project to completion. With careful planning and attention to detail, these finishing elements enhance the overall beauty and create a welcoming environment for you and your family to enjoy for years to come.
Conclusion
Building your own home is an exciting and rewarding journey that allows you to create a space that perfectly suits your needs and reflects your personal style. Throughout the construction process, you’ve learned about the essential steps involved in turning your dream into a reality.
From finding the right location to obtaining financing, designing the layout, hiring a general contractor, obtaining necessary permits, clearing and preparing the land, laying the foundation, framing the structure, installing utilities, building interior walls and finishes, and completing the final touches and landscaping, each stage is crucial in creating a home that you can truly call your own.
With careful planning, attention to detail, and the help of qualified professionals, you’ve tackled each step with diligence and perseverance. You’ve made important decisions about the design, materials, and finishes, ensuring that your home represents your unique style and meets your practical needs.
As you add the final touches and bring your landscaping vision to life, you’re on the verge of completing this remarkable journey. Your home now stands as a testament to your vision, hard work, and dedication.
Remember that building a home is not just about the physical structure; it’s about creating a safe, comfortable, and welcoming space where memories will be made with family and friends. Take the time to personalize your home with furniture, décor, and personal touches that make it truly your own.
We hope this comprehensive guide has provided you with valuable insights and guidance throughout your home construction process. Remember to adhere to local building codes, work with qualified professionals, and embrace the challenges and rewards that come with building your own home.
Congratulations on this remarkable achievement, and may your new home bring you joy, comfort, and happiness for years to come!
Frequently Asked Questions about How To Start Building Your Own Home
Was this page helpful?
At Storables.com, we guarantee accurate and reliable information. Our content, validated by Expert Board Contributors, is crafted following stringent Editorial Policies. We're committed to providing you with well-researched, expert-backed insights for all your informational needs.


0 thoughts on “How To Start Building Your Own Home”