Home>Furniture & Design>Living Room Furniture>How To Build A Mid-Century Dining Table
Living Room Furniture
How To Build A Mid-Century Dining Table
Modified: August 28, 2024
Discover how to create a stunning mid-century dining table for your living room with our expert tips and design ideas. Explore the perfect balance of functionality and style. Ideal for those seeking unique living room furniture and design inspiration.
(Many of the links in this article redirect to a specific reviewed product. Your purchase of these products through affiliate links helps to generate commission for Storables.com, at no extra cost. Learn more)
Introduction
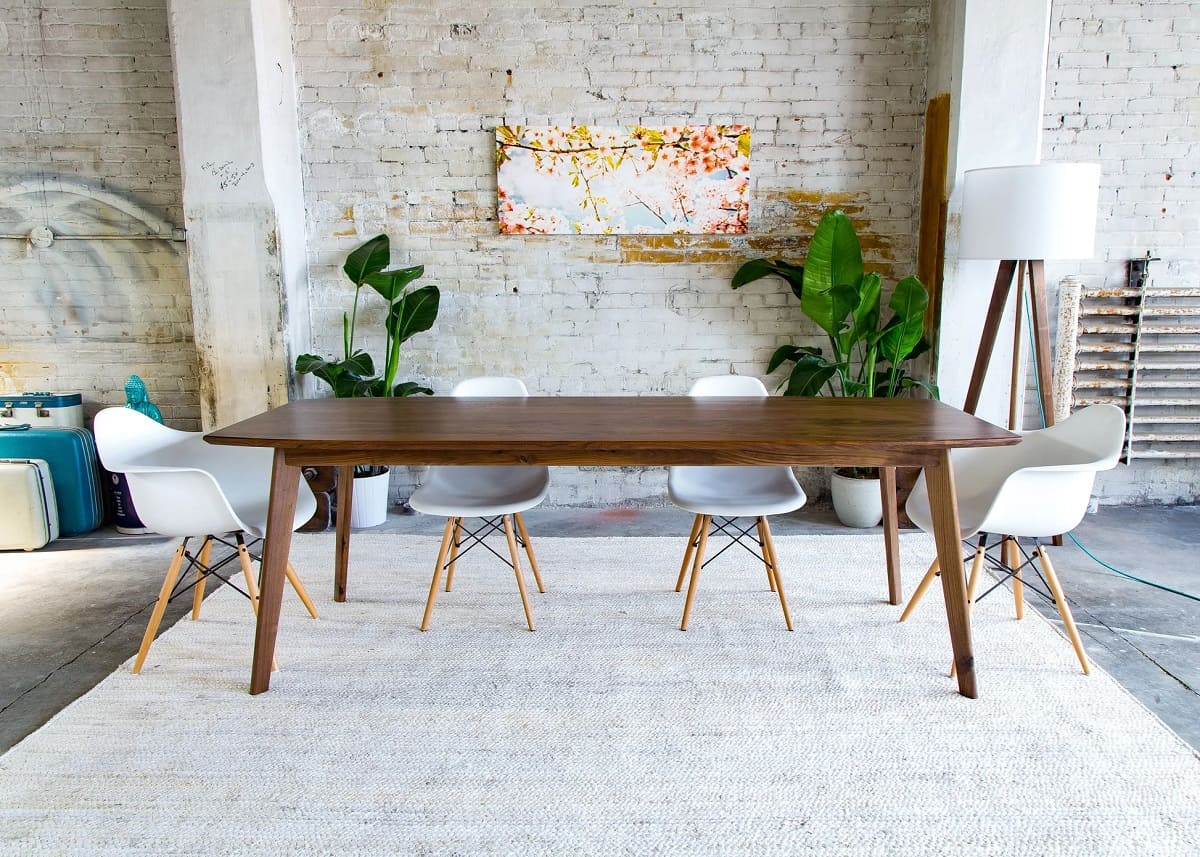
Creating a mid-century dining table is a rewarding and enriching endeavor that allows you to infuse your living space with a touch of timeless elegance. The mid-century modern design aesthetic is characterized by clean lines, organic forms, and a seamless blend of function and style. By crafting your own mid-century dining table, you can tailor it to your specific preferences and dimensions, resulting in a bespoke piece that serves as the focal point of your dining area.
This project requires a blend of woodworking skills, creativity, and attention to detail. Whether you're an experienced woodworker or a novice enthusiast, building a mid-century dining table provides an opportunity to hone your craftsmanship and embark on a fulfilling journey of creation.
In this comprehensive guide, we will delve into the step-by-step process of building a mid-century dining table, from acquiring the necessary materials and tools to executing the construction and finishing touches. By following these detailed instructions, you can embark on a gratifying woodworking venture and bring a stunning mid-century dining table to life in your home. Let's embark on this exciting journey of craftsmanship and design, and create a captivating centerpiece for your dining space.
Key Takeaways:
- Crafting a mid-century dining table is a fulfilling woodworking journey that allows you to personalize your living space with timeless elegance, honing your skills and creativity along the way.
- By meticulously planning, designing, and constructing your dining table, you create a functional and captivating centerpiece that embodies your unique vision and dedication to craftsmanship.
Read more: How To Make A Mid-Century Modern Table
Materials and Tools
Before diving into the construction process, it’s essential to gather all the necessary materials and tools to ensure a smooth and efficient woodworking experience. Here’s a comprehensive list of the items you’ll need:
Materials:
- High-quality hardwood boards for the tabletop and base
- Wood glue for secure and durable bonding
- Biscuit joiners or dowels for joining tabletop planks
- Wood screws for assembling the table base
- Wood filler for filling in gaps and imperfections
- Sandpaper of varying grits for sanding and smoothing the wood surfaces
- Wood finish or stain for enhancing the natural beauty of the wood
- Protective polyurethane for sealing and safeguarding the tabletop
- Measuring tape and carpenter's square for precise measurements and angles
- Clamps for securing wood during assembly
- Safety goggles, ear protection, and dust mask for personal safety
Tools:
- Table saw for cutting the tabletop and base components
- Jointer and planer for flattening and smoothing the wood surfaces
- Biscuit joiner or doweling jig for creating strong joints in the tabletop
- Drill and driver for assembling the table base and attaching the tabletop
- Sander for refining the wood surfaces to a smooth finish
- Router with a chamfer bit for adding decorative edges
- Woodworking clamps for securing components during assembly
- Paintbrushes or applicators for applying wood finish and protective coating
- Workbench with sturdy vise for a stable work surface
By ensuring that you have all the required materials and tools at your disposal, you can streamline the construction process and proceed with confidence, knowing that you’re well-equipped to bring your mid-century dining table to fruition.
Planning and Design
Embarking on the construction of a mid-century dining table necessitates careful planning and thoughtful design considerations. Before diving into the woodworking process, take the time to envision the ideal dimensions, style, and functionality of your dining table. Consider the following aspects to guide your planning and design:
Dimensions:
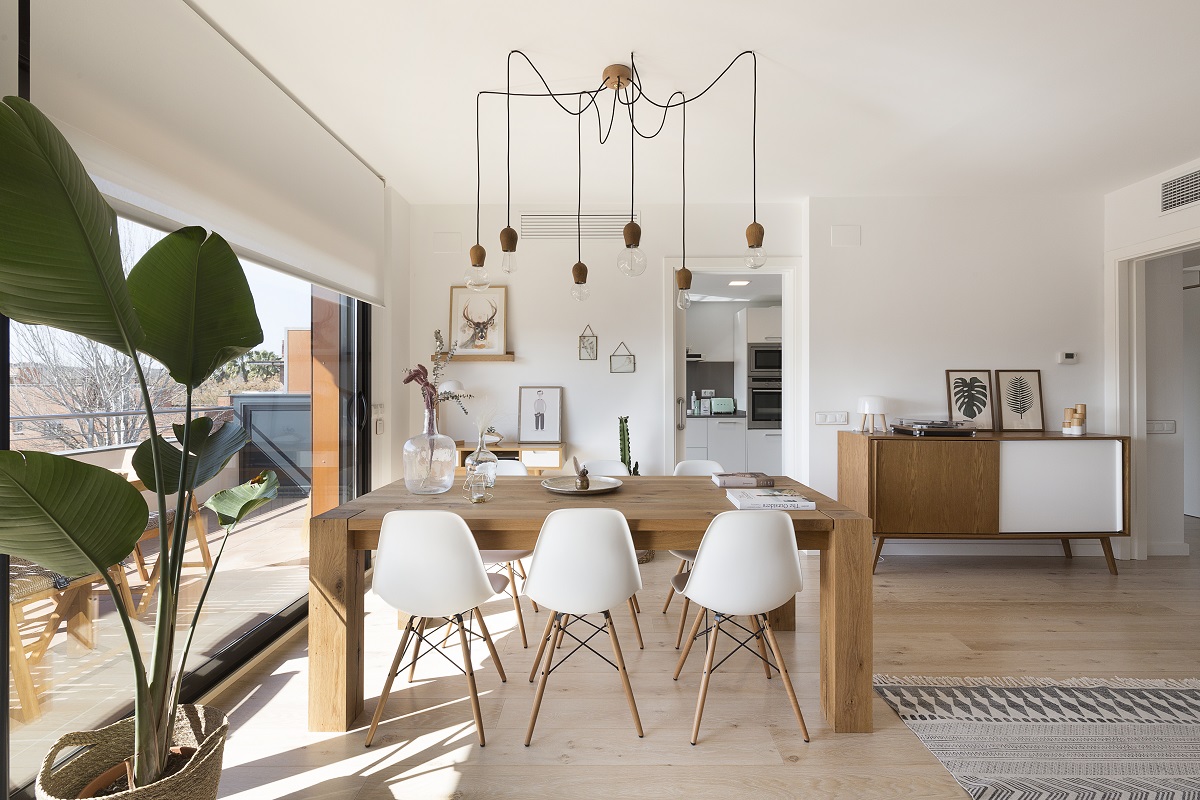
Begin by determining the ideal size of your dining table based on the available space in your dining area. Consider the number of people you intend to accommodate and the layout of the room to ensure that the table harmonizes with its surroundings while allowing ample space for movement and seating.
Style and Aesthetic:
Mid-century modern design emphasizes simplicity, clean lines, and a harmonious blend of form and function. Consider incorporating tapered legs, minimalist silhouettes, and organic shapes to capture the essence of mid-century aesthetics in your table design.
Wood Selection:
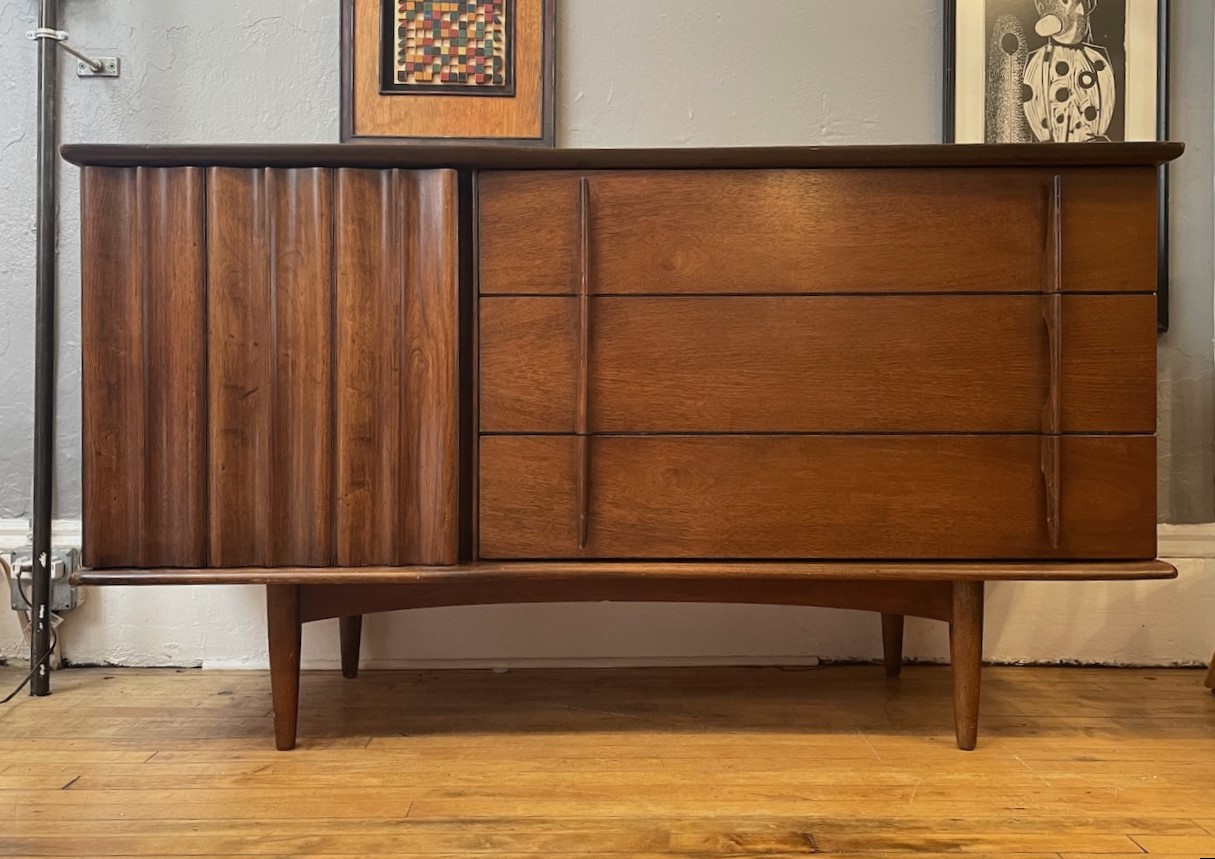
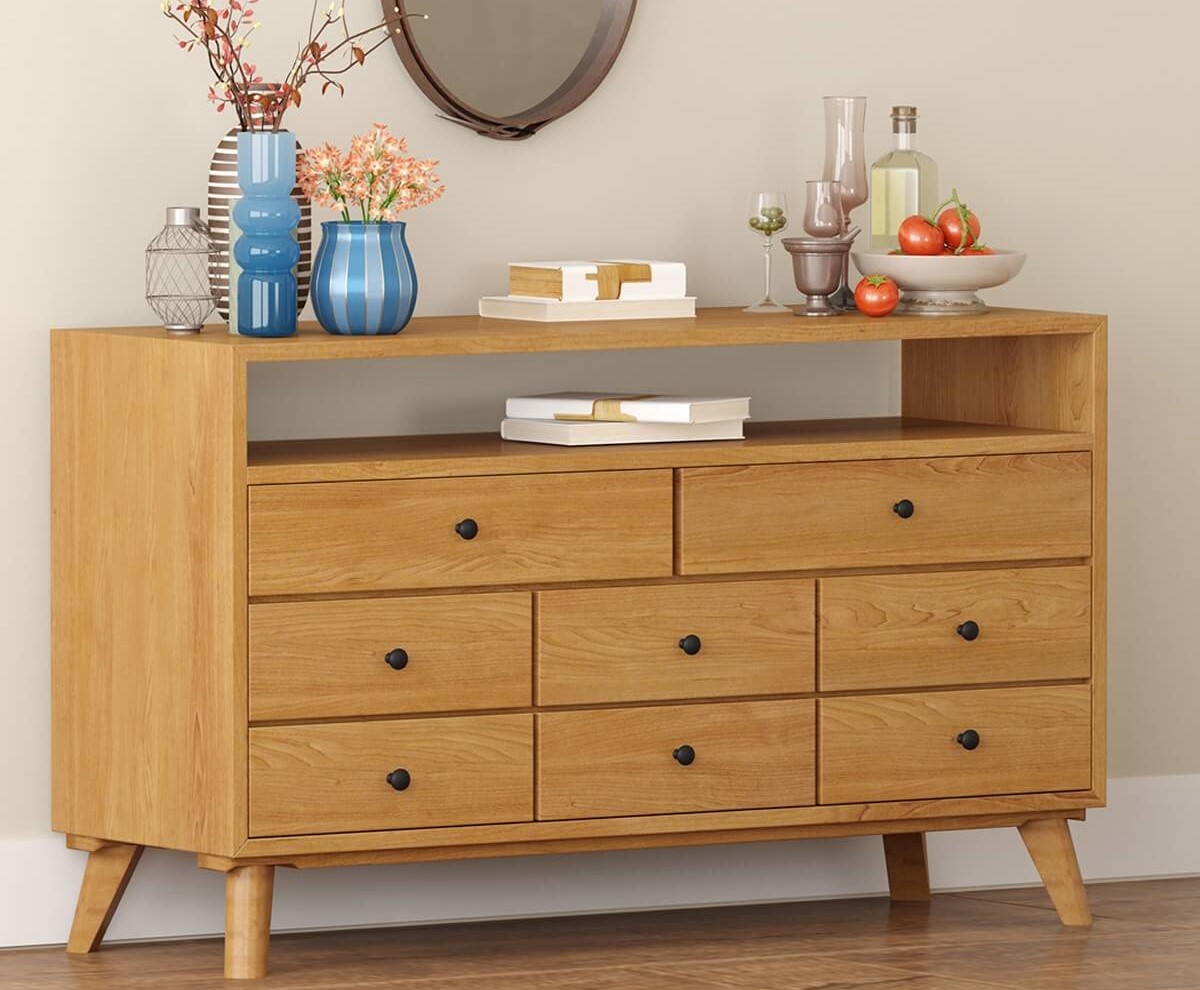
Choose a high-quality hardwood, such as walnut, oak, or teak, known for its durability and visual appeal. The wood’s grain patterns and natural hues will contribute to the table’s overall aesthetic, so select a species that resonates with your design vision.
Joinery and Construction:
Explore various joinery techniques, such as mortise and tenon or dowel joints, to ensure the structural integrity of the table. Carefully plan the construction process, including the assembly of the tabletop planks and the fabrication of the base, to achieve a cohesive and robust final product.
By meticulously planning and designing your mid-century dining table, you can lay the groundwork for a successful woodworking endeavor. Take the time to sketch out your ideas, create detailed measurements, and visualize the finished table to ensure that your construction process unfolds seamlessly, resulting in a stunning and functional centerpiece for your dining space.
Read more: How To Make A Dresser Look Mid-Century
Building the Tabletop
Constructing the tabletop is a pivotal phase in the creation of your mid-century dining table, as it serves as the central surface for dining and gathering. Follow these essential steps to craft a robust and visually appealing tabletop:
Material Preparation:
Begin by selecting high-quality hardwood boards for the tabletop, ensuring that they are straight, free of defects, and possess visually appealing grain patterns. Mill the boards to the desired dimensions, taking care to achieve uniform thickness and smooth surfaces using a jointer and planer.
Joinery Techniques:
Explore joinery methods such as biscuit joinery or dowel joinery to securely connect the tabletop planks. Create corresponding slots or holes in the edges of the boards to accommodate the biscuits or dowels, facilitating precise alignment and robust bonding.
Gluing and Clamping:
Apply a generous amount of wood glue along the edges of the tabletop planks before assembling them. Use woodworking clamps to exert even pressure, ensuring that the planks bond seamlessly while minimizing any gaps between the joints. Wipe off excess glue with a damp cloth to achieve a clean and professional finish.
Flattening and Smoothing:
Once the glue has cured, carefully flatten the tabletop surface using a sander equipped with progressively finer grit sandpaper. This process ensures that the tabletop is level and free of imperfections, creating a smooth and inviting dining surface.
Edge Detailing:
Consider adding decorative edge profiles to the tabletop using a router equipped with a chamfer bit or a round-over bit. These subtle details can enhance the visual appeal of the tabletop while harmonizing with the mid-century modern design aesthetic.
Surface Finishing:
Apply a high-quality wood finish or stain to enrich the natural beauty of the wood, accentuating its grain patterns and hues. Once the finish has dried, protect the tabletop with a durable polyurethane coating, safeguarding it from daily use and enhancing its longevity.
By meticulously executing these steps, you can create a captivating and resilient tabletop that embodies the essence of mid-century design, providing a stunning focal point for your dining area while offering a functional and inviting surface for shared meals and gatherings.
Constructing the Table Base
As the foundational support for your mid-century dining table, the table base plays a crucial role in providing stability and aesthetic cohesion. Follow these essential steps to construct a sturdy and visually striking table base:
Read more: How To Build A Dining Table Bench
Design Considerations:
Begin by conceptualizing the design of the table base, considering elements such as leg style, overall shape, and structural integrity. The mid-century modern aesthetic often features tapered legs and clean, minimalist silhouettes, so strive to incorporate these design elements into your base.
Material Selection:
Choose high-quality hardwood that complements the tabletop and aligns with your design vision. Consider the visual harmony between the tabletop and the base, ensuring that the wood species and finishes cohesively complement each other.
Leg Fabrication:
Cut the selected wood into precise dimensions for the legs, ensuring uniformity and consistency. If tapered legs are part of your design, use a table saw or a bandsaw to create the desired taper, adding a touch of mid-century elegance to the base.
Frame Assembly:
Construct the frame that will support the tabletop, ensuring that it provides ample stability and load-bearing capacity. Use mortise and tenon joints or other robust joinery techniques to securely connect the frame components, reinforcing the base’s structural integrity.
Read more: How To Build An Outdoor Dining Table
Joinery and Attachment:
Employ traditional woodworking joinery methods, such as mortise and tenon or dowel joints, to connect the legs to the frame. These joints ensure that the base components form a cohesive and durable assembly, capable of supporting the tabletop and accommodating daily use.
Surface Preparation:
After assembling the base, meticulously sand the surfaces to achieve a smooth and inviting finish. Pay attention to details such as rounded edges and crisp lines, ensuring that the base embodies the timeless elegance and attention to detail characteristic of mid-century design.
Finish Application:
Apply a complementary wood finish or stain to the base, accentuating its natural beauty and grain patterns. Once the finish has dried, protect the base with a durable polyurethane coating, safeguarding it from wear and tear while enhancing its longevity.
By following these steps, you can create a robust and visually captivating table base that complements the mid-century aesthetic of your dining table, providing a stable and elegant foundation for countless shared meals and cherished gatherings.
Sanding and Finishing
As you near the completion of your mid-century dining table, the sanding and finishing stage plays a pivotal role in enhancing the wood’s natural beauty and ensuring a durable, inviting surface. Follow these essential steps to achieve a smooth and visually appealing finish for your table:
Read more: How To Make Mid-Century Modern Rugs
Sanding Process:
Begin by sanding the tabletop and base components using progressively finer grit sandpaper, starting with a coarse grit to remove any imperfections or irregularities. Gradually transition to finer grits to achieve a smooth and polished surface, paying special attention to edges and corners to ensure a seamless finish.
Edge Detailing:
If your design incorporates decorative edge profiles, use sandpaper or a sanding block to refine and smooth the edges, ensuring that they are consistent and visually pleasing. This step contributes to the overall refinement of the table’s appearance and tactile quality.
Wood Conditioning:
Before applying the chosen wood finish or stain, consider using a wood conditioner to prepare the surface for optimal absorption and uniform coloration. This step is particularly beneficial when working with hardwoods, ensuring an even and lustrous finish.
Finish Application:
Apply the selected wood finish or stain using a brush or cloth, following the wood’s grain patterns for an even and harmonious application. Allow the finish to penetrate and enrich the wood, accentuating its natural hues and grain variations while imbuing it with a warm and inviting luster.
Protective Coating:
Once the finish has dried, apply a protective polyurethane coating to the tabletop and base, safeguarding the wood from spills, scratches, and daily wear. Opt for a satin or matte finish to preserve the natural look of the wood while providing robust protection.
Final Sanding and Buffing:
After the protective coating has cured, lightly sand the surfaces with a fine grit sandpaper to achieve a smooth and tactile finish. Follow this step with buffing using a soft cloth or buffing pad, imparting a subtle sheen and enhancing the overall visual appeal of the table.
By meticulously executing the sanding and finishing process, you can elevate the visual allure and durability of your mid-century dining table, bringing forth its inherent beauty and ensuring that it remains a cherished centerpiece in your home for years to come.
Assembling the Dining Table
As you approach the culmination of your woodworking journey, the assembly of your mid-century dining table brings together all the meticulously crafted components into a cohesive and functional masterpiece. Follow these essential steps to bring your table to life:
Tabletop Attachment:
Position the tabletop on a stable and level surface, ensuring that it aligns perfectly with the table base. Use wood screws to securely attach the tabletop to the base, ensuring that it is evenly supported and that the attachment points are discreetly located beneath the table, preserving the table’s visual appeal.
Read also: 8 Superior Mid Century Chandelier for 2025
Base Stabilization:
Once the tabletop is affixed to the base, verify that the base components are securely connected and that the table stands level and stable. Make any necessary adjustments to ensure that the table rests evenly on the floor, providing a secure and balanced foundation for dining and gatherings.
Final Inspections:
Thoroughly inspect the assembled dining table, scrutinizing the joints, surfaces, and overall stability. Confirm that all components are securely fastened and that the table exhibits the hallmark characteristics of mid-century design, including clean lines, refined edges, and a harmonious blend of form and function.
Functional Testing:
Conduct functional tests by applying gentle pressure to the tabletop and base, ensuring that the table withstands typical usage scenarios without compromising its structural integrity. Verify that the table provides a stable and inviting surface for dining, fostering a sense of confidence in its durability and reliability.
Final Touches:
Apply any additional finishing touches, such as felt pads on the base to protect flooring surfaces or discreet leveling adjustments to ensure that the table rests evenly. These thoughtful details contribute to the table’s functionality and longevity, enhancing its usability and preserving the surrounding environment.
Read more: How To Build Black Dining Chairs
Celebrating Your Achievement:
Once the assembly is complete and the table stands proudly in your dining area, take a moment to revel in the fulfillment of your woodworking endeavor. Your meticulously crafted mid-century dining table now serves as a captivating centerpiece, embodying timeless elegance and your dedication to craftsmanship.
By following these steps, you can seamlessly assemble your mid-century dining table, culminating in a gratifying and enriching woodworking experience that yields a stunning and functional addition to your home.
Conclusion
Congratulations on completing the construction of your bespoke mid-century dining table! This woodworking journey has not only resulted in a stunning and functional centerpiece for your home but has also provided an enriching and rewarding experience that celebrates craftsmanship and creativity. As you admire your meticulously crafted table, consider the following reflections:
Personalized Expression:
Your mid-century dining table is a reflection of your unique vision and dedication to creating a piece that harmonizes with your living space. Its design, dimensions, and meticulous craftsmanship encapsulate your individuality and passion for woodworking, infusing your home with a touch of timeless elegance.
Captivating Aesthetic:
The clean lines, organic forms, and refined details of your dining table epitomize the mid-century modern design aesthetic, evoking a sense of sophistication and understated beauty. Its presence enriches your dining area, serving as a captivating focal point that beckons gatherings and shared moments.
Read more: How To Build A Counter Height Dining Table
Craftsmanship and Skill Development:
Through the process of planning, designing, and constructing your table, you’ve honed your woodworking skills and expanded your craftsmanship repertoire. This journey has provided a platform for growth and learning, allowing you to refine your abilities and embark on a fulfilling creative endeavor.
Functional Elegance:
Beyond its aesthetic allure, your dining table stands as a functional and inviting space for shared meals, conversations, and cherished gatherings. Its robust construction, thoughtful design, and enduring quality ensure that it will serve as a cherished centerpiece for years to come, enriching the daily experiences within your home.
Continued Inspiration:
As you bask in the satisfaction of bringing your woodworking vision to fruition, let this experience inspire future endeavors and creative pursuits. Whether it’s crafting complementary furniture pieces or exploring new design styles, your mid-century dining table stands as a testament to your capacity for innovation and dedication to the art of woodworking.
In the end, your mid-century dining table transcends being a mere piece of furniture; it embodies a narrative of creativity, skill, and personal expression. It stands as a testament to your commitment to craftsmanship and your ability to transform raw materials into a captivating and enduring work of art. As you continue to infuse your living space with your unique touch, let this woodworking journey serve as a source of inspiration and a reminder of the enriching rewards of creative expression.
Frequently Asked Questions about How To Build A Mid-Century Dining Table
Was this page helpful?
At Storables.com, we guarantee accurate and reliable information. Our content, validated by Expert Board Contributors, is crafted following stringent Editorial Policies. We're committed to providing you with well-researched, expert-backed insights for all your informational needs.


0 thoughts on “How To Build A Mid-Century Dining Table”