Home>Garden Essentials>How To Harvest Mullein Seeds
Garden Essentials
How To Harvest Mullein Seeds
Modified: August 27, 2024
Learn how to harvest mullein seeds from your garden. Find step-by-step instructions and tips for a successful seed collection.
(Many of the links in this article redirect to a specific reviewed product. Your purchase of these products through affiliate links helps to generate commission for Storables.com, at no extra cost. Learn more)
Introduction
Welcome to the world of mullein gardening! Mullein, scientifically known as Verbascum thapsus, is a versatile and fascinating plant that has been used for centuries for its medicinal properties, ornamental beauty, and practical uses. One of the most interesting aspects of mullein plant cultivation is the harvest and collection of its seeds. In this article, we will guide you through the process of harvesting mullein seeds, step by step.
Mullein is a biennial plant that is native to Europe and Asia but has found its way into gardens around the world. It is characterized by its tall, erect stem, large fuzzy leaves, and striking yellow flower spikes. While the flowers are the main attraction, the seeds of the mullein plant hold great value and potential.
Whether you are an experienced gardener looking to add mullein seeds to your collection or a beginner wanting to explore the wonders of seed harvesting, this guide will provide you with all the necessary information and guidance to successfully gather mullein seeds.
Before we dive into the details, it is important to note that harvesting mullein seeds requires some patience and careful observation. Timing is crucial, as collecting the seeds too early or too late may result in less viable seeds or missed opportunities. So, let’s get started on this exciting journey of mullein seed harvesting.
Key Takeaways:
- Harvesting mullein seeds requires patience and careful observation. Identifying mature plants, gathering the right tools, and selecting the proper timing are crucial for successful seed collection.
- Approach seed harvesting with respect for nature. Carefully handle the seed pods, extract the seeds gently, and store them in a cool, dark place for future gardening adventures.
Read more: How To Collect Mullein Seeds
Step 1: Identifying a Mature Mullein Plant
The first step in harvesting mullein seeds is to identify a mature plant. Mullein plants typically take two years to complete their life cycle, with the first year primarily dedicated to leaf growth and the second year focused on flowering and seed production. Therefore, it is essential to look for plants that are in their second year of growth.
To identify a mature mullein plant, look for a tall, erect stem that can reach heights of up to 6 feet or more. The stem is covered in soft, fuzzy leaves that give the plant a distinctive appearance. These leaves are often gray-green in color and have a velvety texture, which helps protect the plant from harsh environmental conditions.
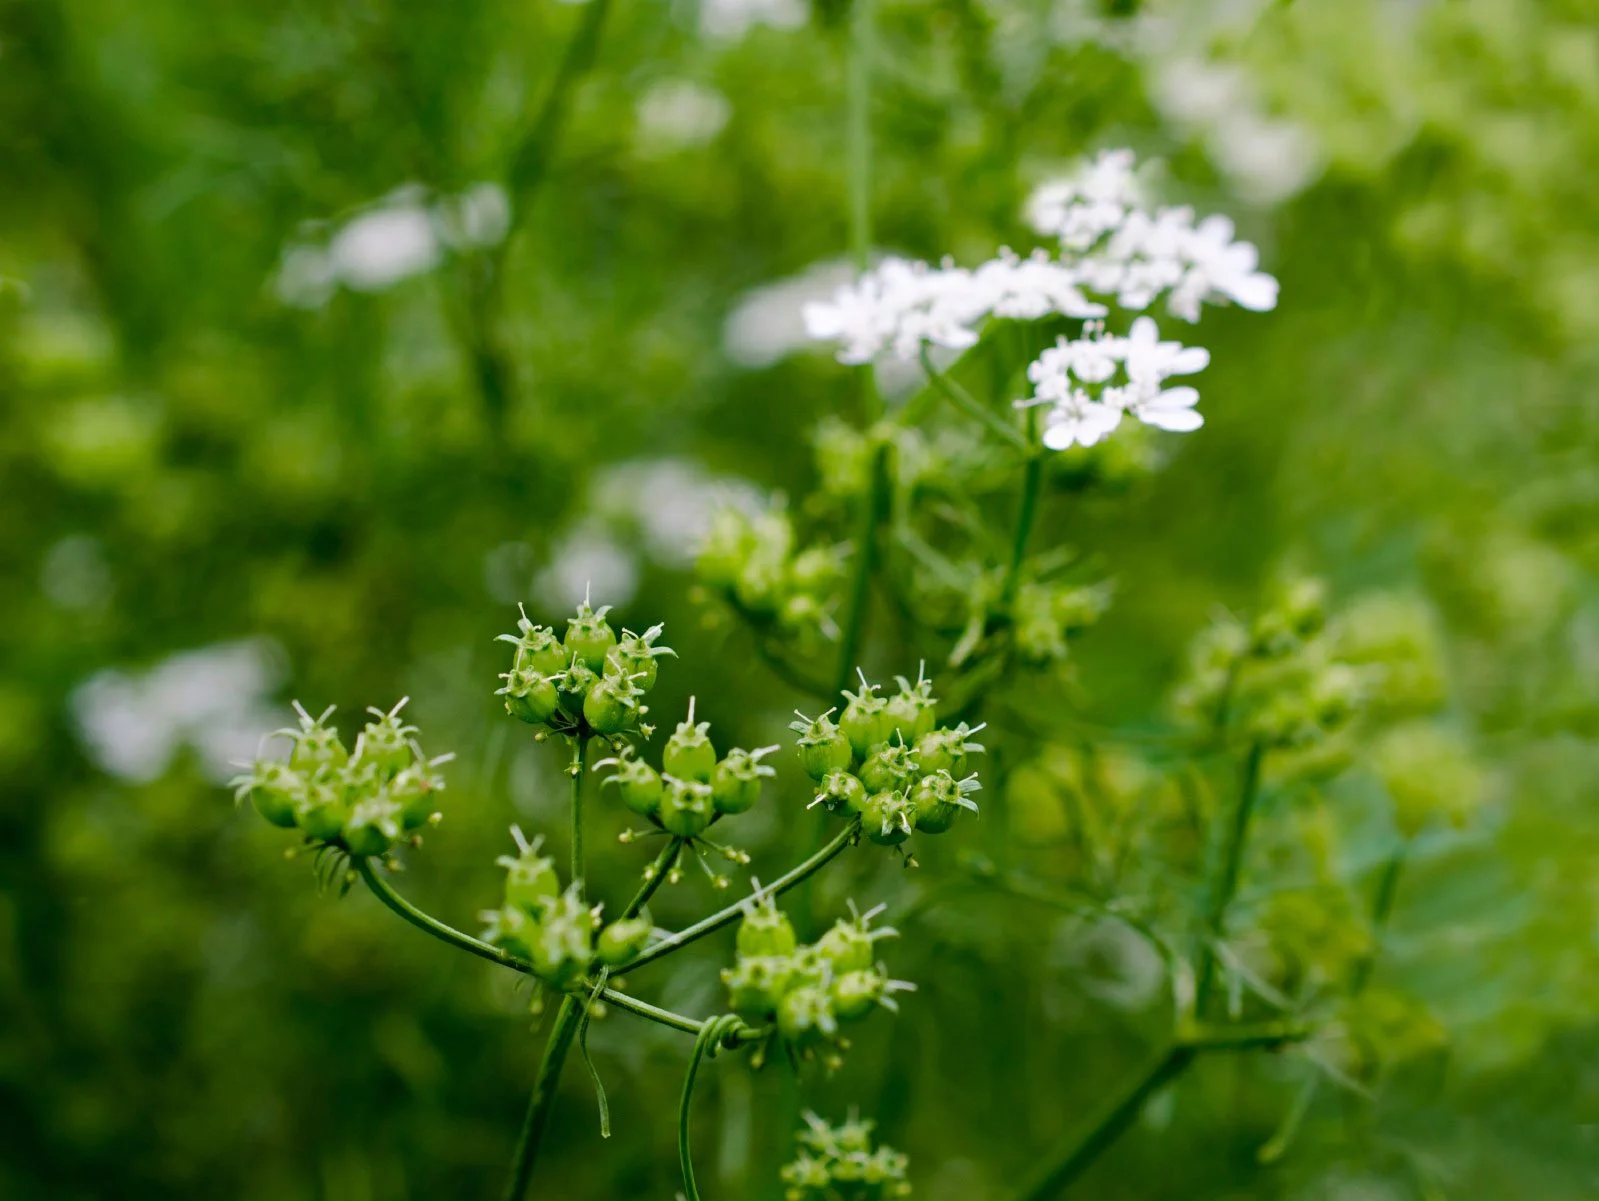
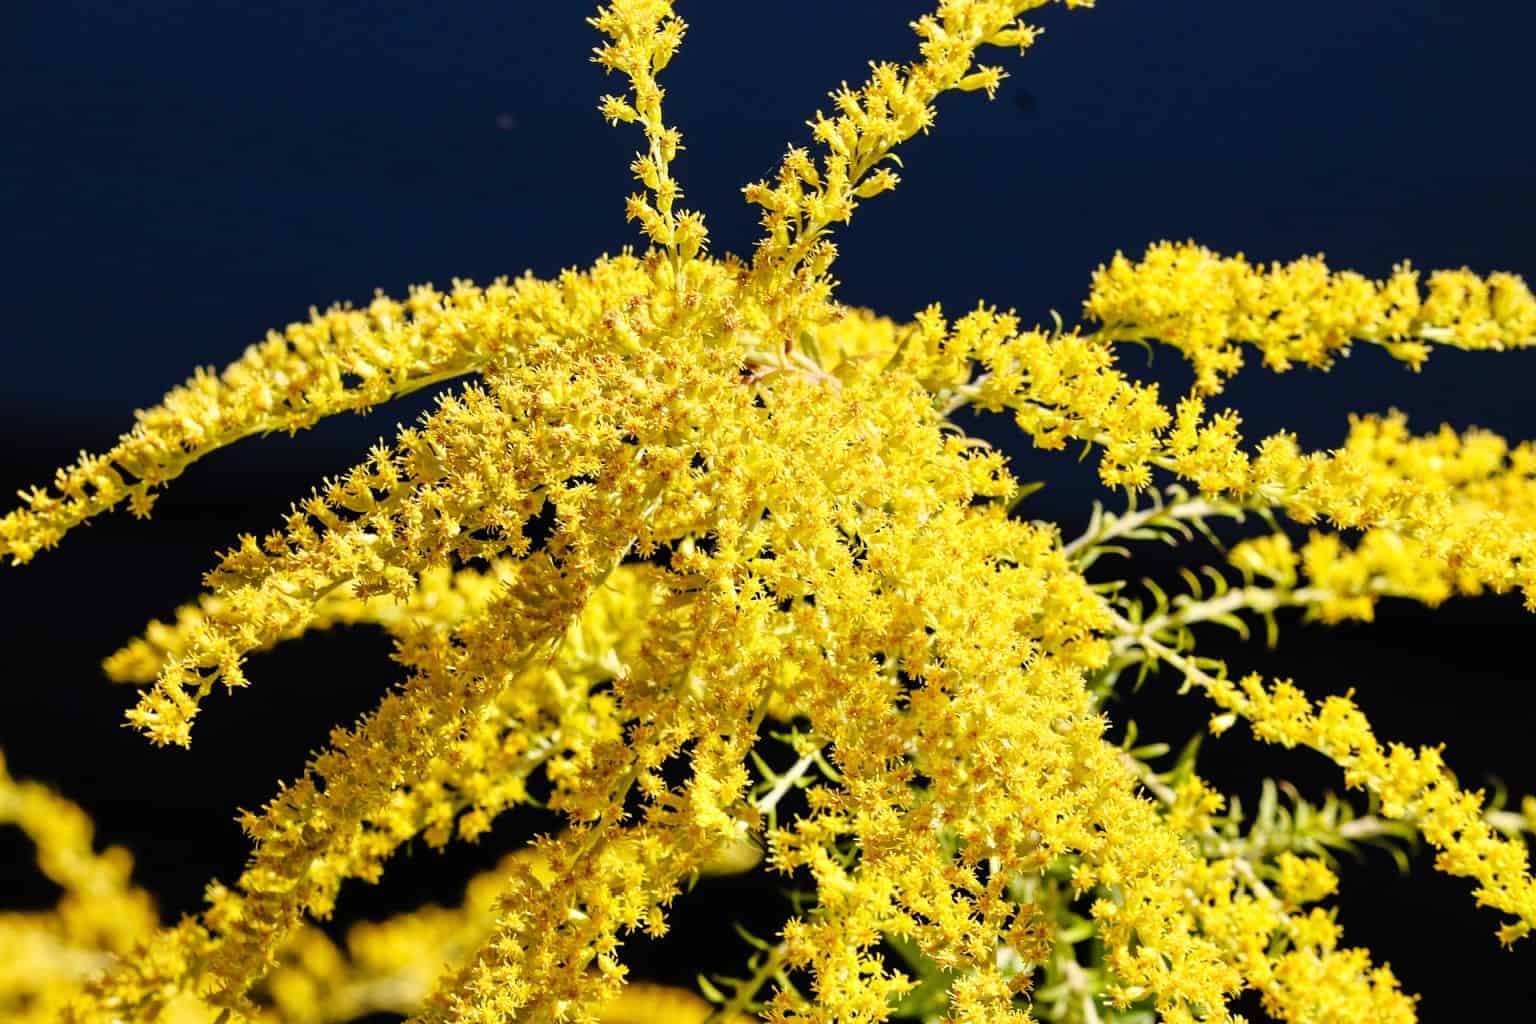
What sets a mature mullein plant apart is the presence of a flowering spike at the top of the stem. Mullein flowers are small, yellow, and densely packed on the spike, creating a stunning visual display. These flowers are not only attractive to the eye but also crucial for seed production.
Keep in mind that mullein plants can vary in size and appearance, but they typically exhibit the aforementioned characteristics. It is always a good idea to consult a plant identification guide or seek advice from a knowledgeable gardener to ensure accurate identification.
Once you have located a mature mullein plant, it’s time to gather the necessary tools for seed harvesting. Let’s move on to the next step.
Step 2: Gathering the Necessary Tools
Before embarking on your mullein seed harvesting journey, it’s important to gather the necessary tools to ensure a successful and efficient process. Here are the tools you will need:
- Gloves: Mullein plants have tiny hairs on their leaves and stems, which may cause mild skin irritation. Wearing a pair of gardening gloves will protect your hands while handling the plants.
- Pruning shears or sharp scissors: You will need a tool with a sharp blade to cut the mullein stalks and remove the seed pods. Pruning shears or sharp scissors work best for this task.
- Container or bag: You will need a container or bag to collect the seed pods. Choose a container that is large enough to hold a considerable number of pods, ensuring that the seeds have enough space and don’t get crushed. A breathable container, such as a paper bag, is ideal for storing the seed pods as it allows air circulation and prevents moisture buildup.
- Marker or labels: It’s always a good practice to label your containers or bags with the date and plant species. This will help you keep track of your harvested seeds and maintain organization in your gardening endeavors.
Having these tools ready will streamline the seed harvesting process, allowing you to focus on collecting the seeds efficiently without any unnecessary delays or obstructions.
Now that you have gathered all the necessary tools, let’s move on to the next step: selecting the proper timing for seed harvesting.
Step 3: Selecting Proper Timing for Seed Harvesting
Timing is crucial when it comes to harvesting mullein seeds. Selecting the right moment ensures that the seeds are fully mature and have the best chance of germination and successful growth. Here are some guidelines to help you determine when to harvest the seeds:
1. Observe the Flowering Stage: Mullein plants typically start flowering in mid to late summer. Pay attention to the flowering stage, as this indicates that the plant is nearing the end of its life cycle. Wait until most of the flowers have withered and dried up, and only a few are left on the stalk. At this point, the plant has likely finished pollination, and the seeds are maturing inside the seed pods.
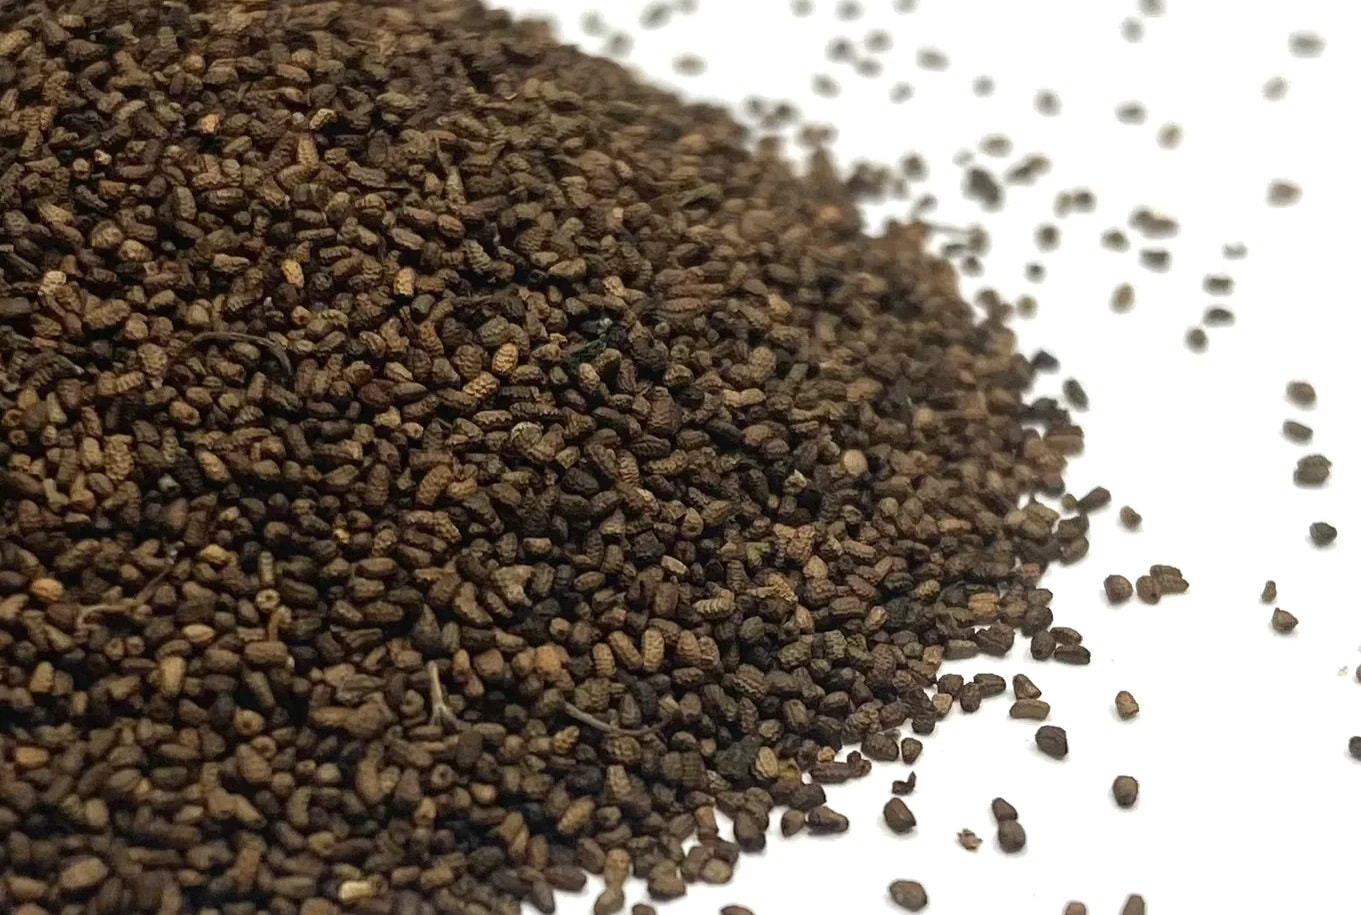
2. Check the Seed Pods: Examine the seed pods closely to determine their readiness for harvest. Mature mullein seed pods are small, round capsules that turn from green to golden brown. The pods should feel papery and dry to the touch. Avoid harvesting the seeds if the pods are still green and plump, as they are not fully developed, and the seeds may not be viable.
3. Be Mindful of Weather Conditions: Consider the weather conditions before harvesting mullein seeds. Ideally, choose a dry, sunny day to collect the seeds. Moisture from rain or dew can cause the seed pods to become damp, which may impact their quality and longevity. Harvesting on a dry day reduces the risk of mold or fungal growth on the seeds.
By carefully observing these factors, you can determine when the mullein seeds are ready to be harvested. Proceeding to the next step at the appropriate time will ensure optimal seed quality and increase the chances of successful seed propagation.
Now that you have learned about the proper timing, let’s move on to the practical aspect of approaching the mullein plant for seed collection.
Step 4: Approaching the Mullein Plant for Seed Collection
Approaching the mullein plant for seed collection requires some care and attention to avoid damaging the plant or disturbing its surrounding environment. Follow these steps to approach the mullein plant effectively:
1. Choose a Sturdy Plant: Look for a mullein plant with a strong and healthy appearance. Avoid plants with signs of disease or wilting, as their seed production may be compromised. Selecting a robust plant will ensure that you obtain high-quality seeds.
2. Maintain Respect for Nature: As you approach the mullein plant, be mindful of your surroundings. Avoid trampling other plants or disturbing the local ecosystem. Treat the garden or natural environment with care and respect.
3. Use Gloves: Before handling the mullein plant, put on your gardening gloves. Remember that the tiny hairs on the leaves and stems can cause skin irritation, especially if you have sensitivities or allergies.
4. Cut the Stalk: Use your pruning shears or sharp scissors to carefully cut the stalk of the mullein plant just below the flower spike. Aim to leave a sufficient length of the stalk attached to the seed pods to make handling easier later on.
5. Handle with Care: Once you have severed the stalk, handle it with care to avoid damaging the seed pods. Hold the stalk gently, ensuring that the seed pods remain intact. Be cautious not to squeeze or crush the pods as you handle them.
6. Inspect for Insects: Before proceeding to the next step, take a moment to inspect the seed pods for any insects or pests that may have taken up residence. Remove any unwanted visitors to avoid bringing them into your seed collection.
By approaching the mullein plant with care and consideration, you can ensure that the seed collection process goes smoothly and that you obtain healthy, intact seed pods. Now that you have the seed pods in your hands, it’s time to move on to the next step: removing the seed pods.
When harvesting mullein seeds, wait until the seed pods turn brown and dry on the plant. Then, gently shake or tap the pods to release the seeds into a container.
Read more: When To Plant Mullein Seeds
Step 5: Removing the Seed Pods
Now that you have the mullein stalk with the seed pods in your hands, it’s time to remove the seed pods from the plant. Here’s how to do it:
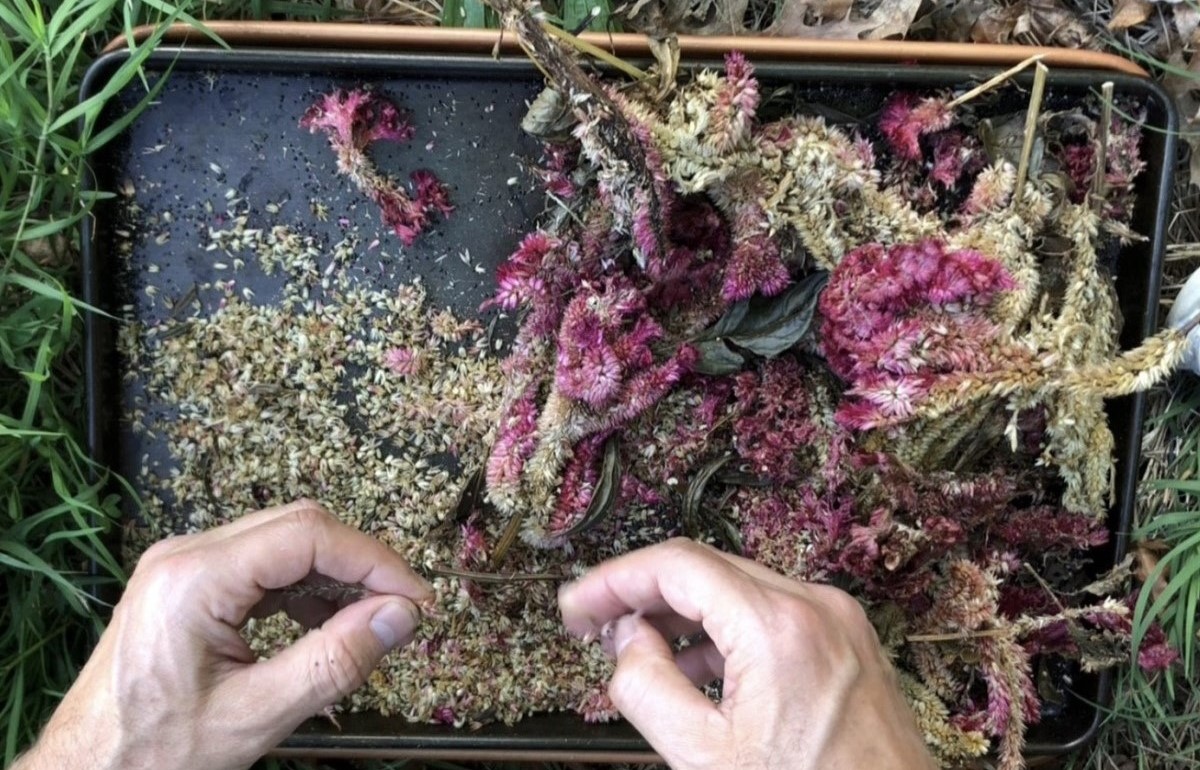
1. Find a Clean, Spacious Area: Choose a designated workspace where you can comfortably remove the seed pods without worrying about losing or damaging them. A clean table or a large tray can be ideal for this purpose.
2. Gently Hold the Seed Pods: Take the mullein stalk and carefully hold the seed pods between your fingertips. Be gentle to avoid crushing the pods or causing any damage.
3. Apply Light Pressure: Use your thumb and fingers to apply light pressure to the seed pods. This will help release the seeds without exerting too much force, which could potentially damage them. Make sure to gradually increase the pressure until the seed pods crack open.
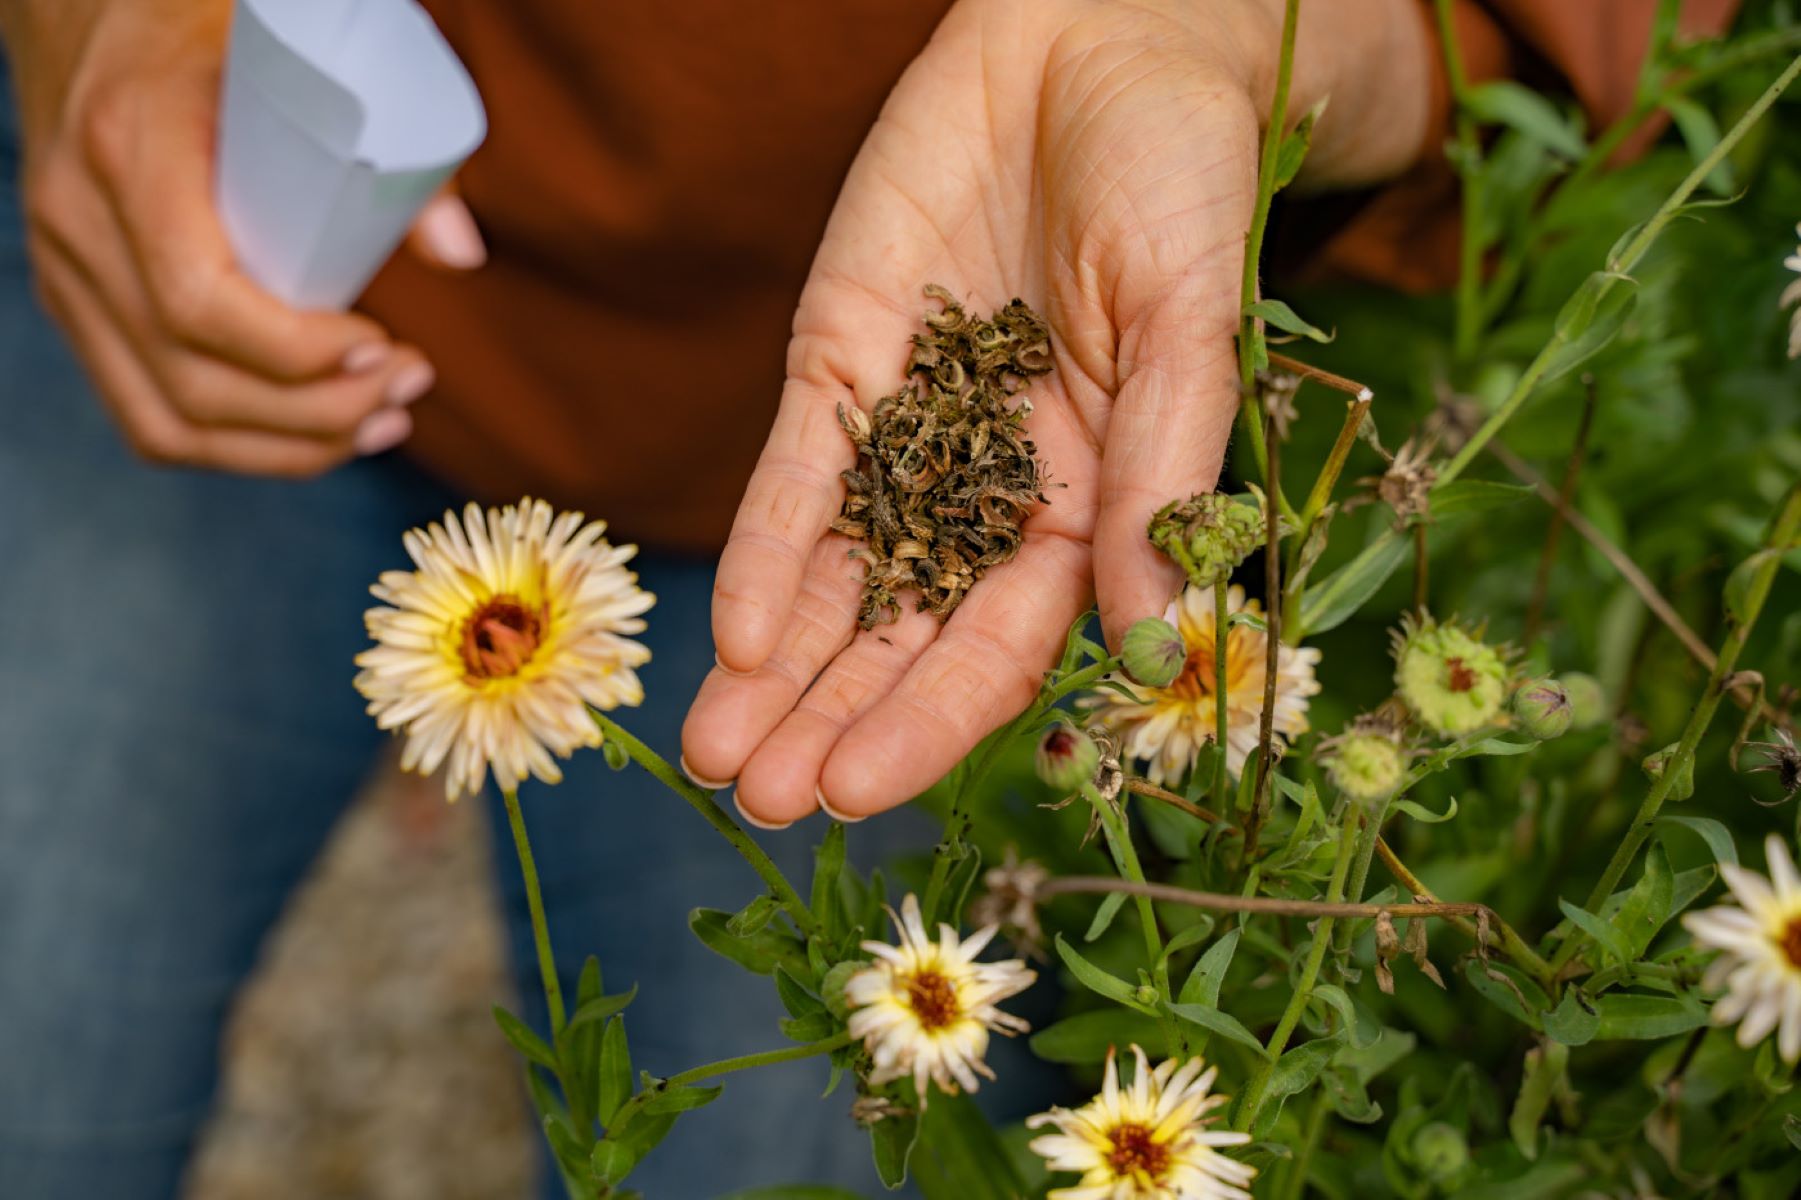
4. Collect the Seeds: As the seed pods crack open, you should be able to see the small, brownish mullein seeds inside. Gently shake or tap the seed pods over your designated workspace to release the seeds. Continue doing this for all the seed pods until you have collected all the seeds.
5. Remove Any Debris: After you have collected the seeds, take a moment to inspect them and remove any debris or unwanted materials. You can use your fingers or a small brush to sweep away any dirt, twigs, or dried flower parts that may have gotten mixed in with the seeds.
6. Transfer the Seeds to a Container: Once you have cleaned the mullein seeds, transfer them to a suitable container for storage. A small, clean jar or an airtight plastic bag works well for keeping the seeds safely stored until you are ready to use or share them.
Remember, it’s essential to handle the seed pods and seeds with care to avoid damaging them. By following these steps, you can remove the seed pods effectively and collect the precious mullein seeds. Now that you have extracted the seeds, let’s move on to the next step: preparing the seed pods for extraction.
Step 6: Preparing the Seed Pods for Extraction
Before extracting the seeds from the mullein seed pods, it’s important to properly prepare them to make the process easier and more efficient. Follow these steps to prepare the seed pods:
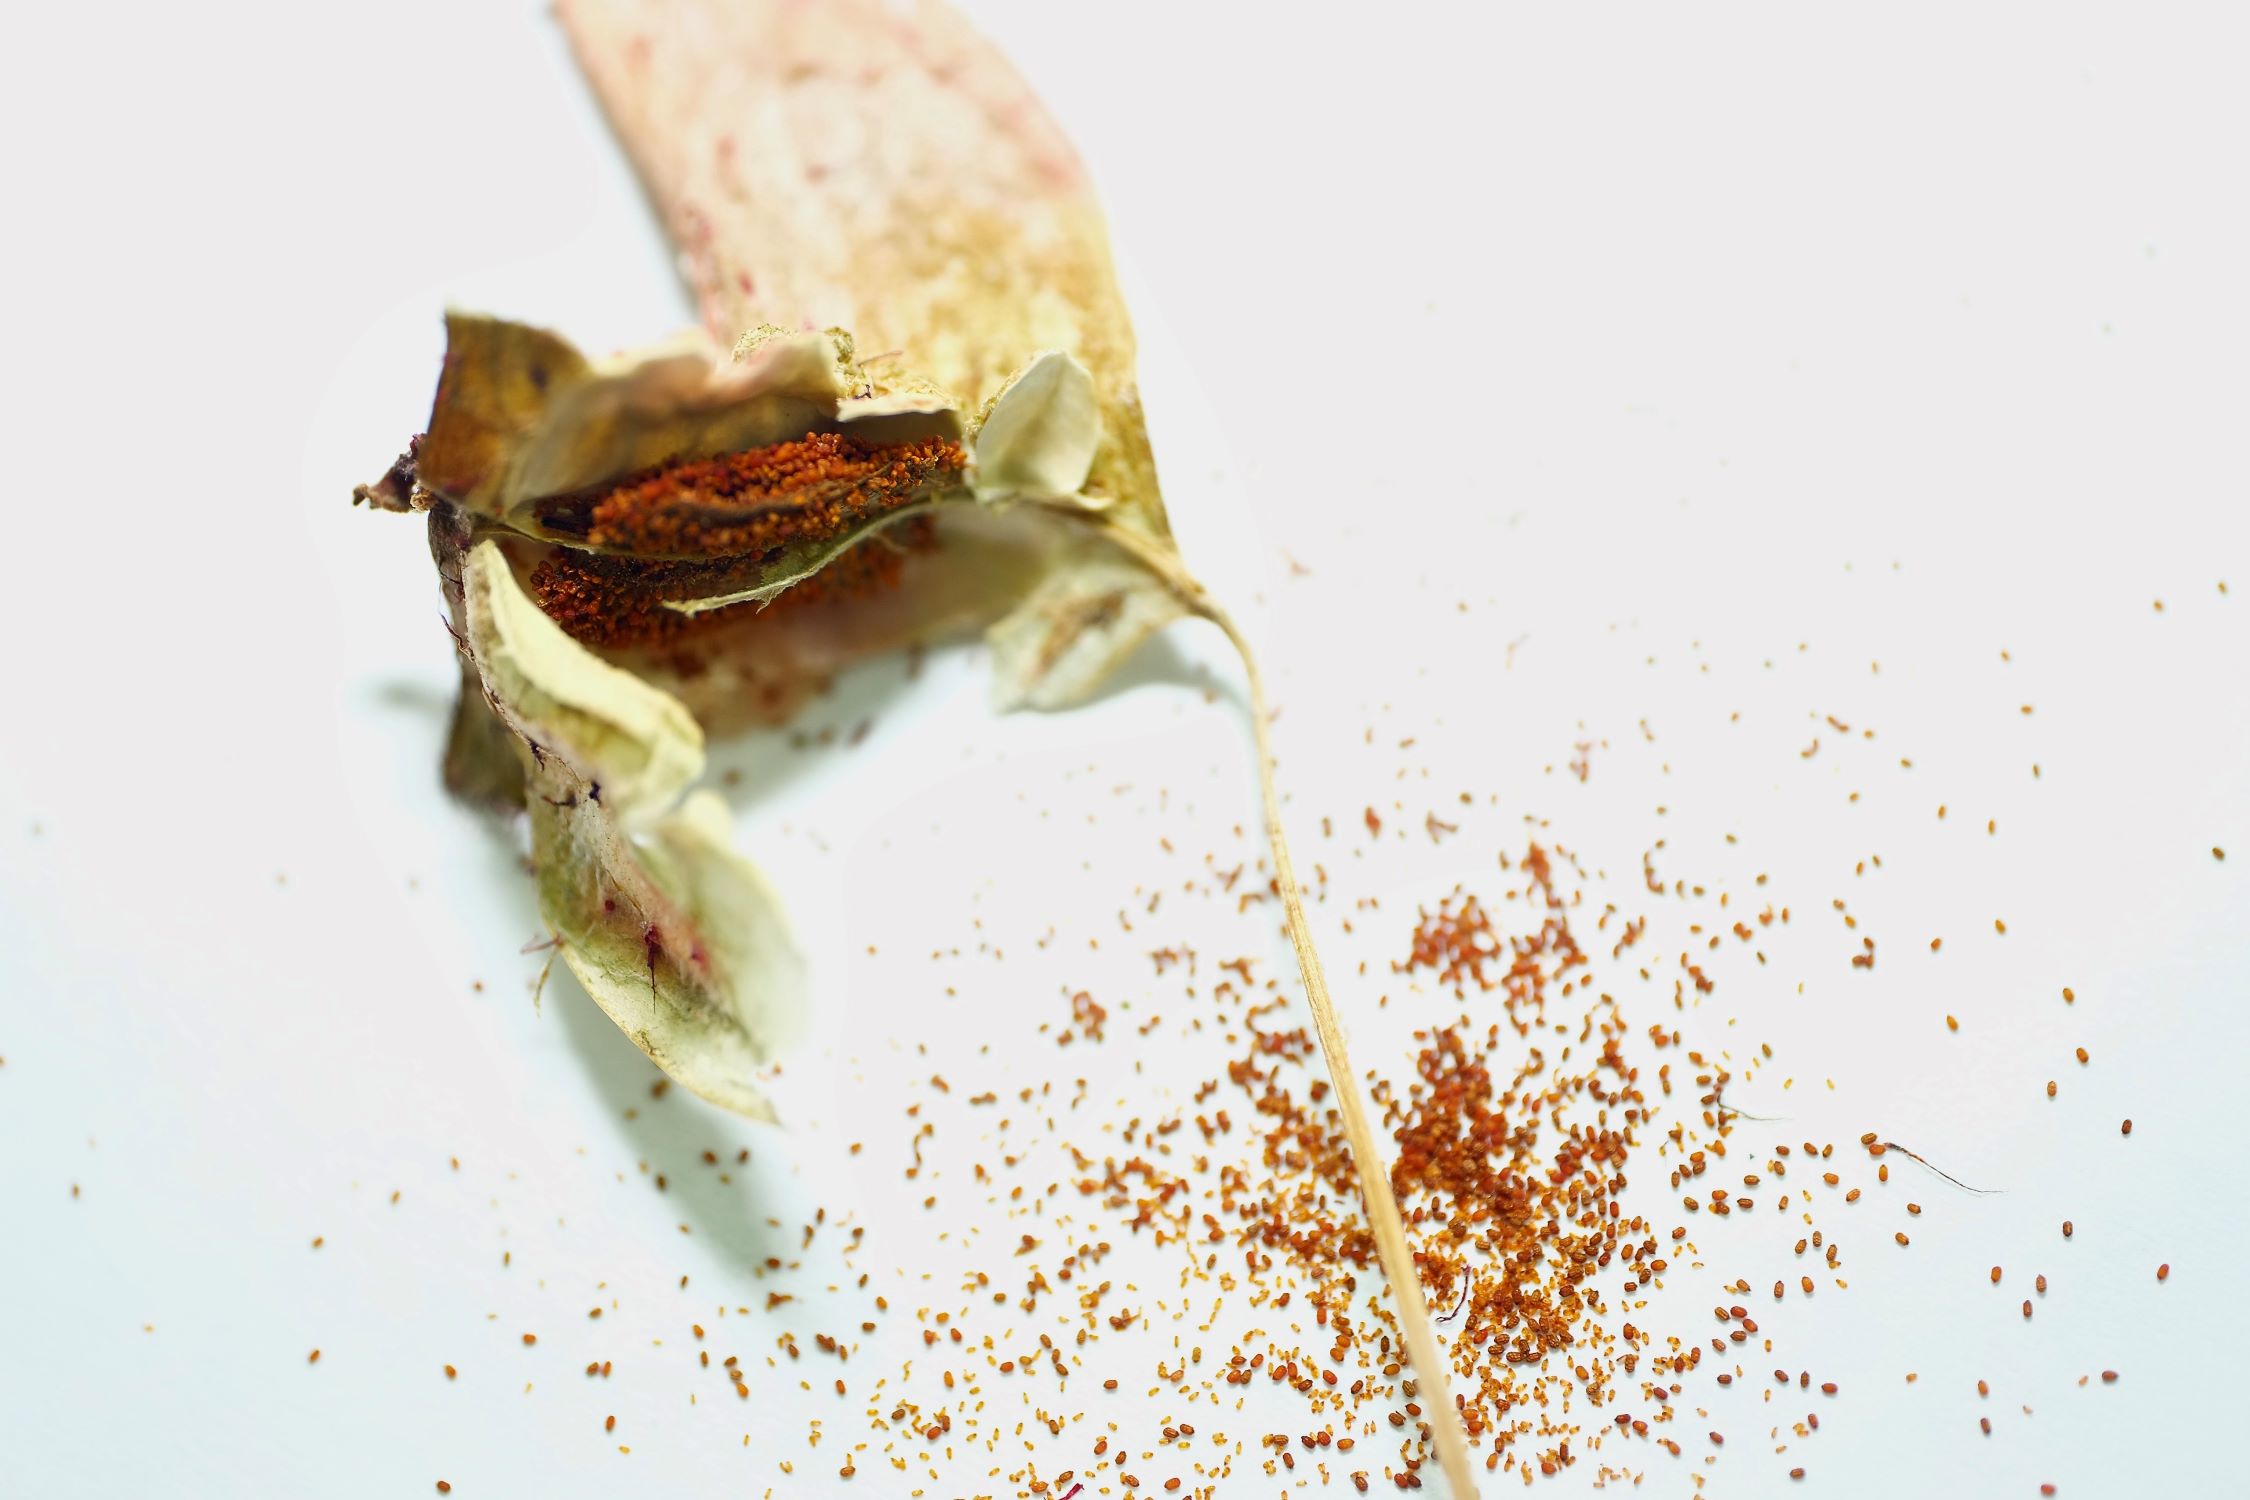
1. Lay the Seed Pods Out to Dry: Place the seed pods in a well-ventilated area, preferably on a clean tray or screen. Allow them to dry for several days until they become brittle and papery. Drying the seed pods makes them easier to handle and ensures that the seeds are fully mature.
2. Remove Any Remaining Flower Parts: Once the seed pods are dry, carefully inspect them for any remaining dried flower parts. These can sometimes get stuck in the seed pods and hinder the extraction process. Gently brush away or remove any debris with your fingers or a soft brush.
3. Break Up the Seed Pods: To make it easier to extract the seeds, break up the dried seed pods into smaller pieces. You can do this by gently crushing them between your fingers or using a mortar and pestle. Be gentle to avoid crushing the seeds, as they are the most valuable part of the pod.
4. Separate the Chaff from the Seeds: After breaking up the seed pods, you will notice that they contain a mixture of seeds and chaff (papery material surrounding the seeds). To separate the seeds from the chaff, use your fingers or a fine sieve. Gently sift or blow on the mixture to allow the lighter chaff to separate and be carried away, leaving behind the heavier seeds.
5. Clean the Seeds: Once you have separated the seeds from the chaff, take a moment to clean them. Inspect the seeds and remove any remaining chaff or debris. You can carefully blow on the seeds or use a soft brush to ensure they are clean and free from impurities.
By following these steps, you will effectively prepare the mullein seed pods for seed extraction. Now that the seed pods are ready, it’s time to move on to the next step: extracting the seeds from the pods.
Step 7: Extracting the Seeds from the Pods
Now that you have prepared the mullein seed pods, it’s time to extract the seeds from them. Here’s how you can go about extracting the seeds:
1. Gather the Prepared Seed Pods: Collect the prepared seed pods that you have dried, broken up, and separated from the chaff. Ensure that you have them all in one place for easy access and extraction.
2. Gently Apply Pressure to the Seed Pods: Take one seed pod at a time and hold it between your thumb and forefinger. Apply gentle pressure to the pod, pressing and rolling it between your fingers. The pressure will cause the seed pod to crack open, revealing the seeds inside.
3. Release the Seeds: As the seed pod cracks open, carefully shake it over a clean, dry surface or container to release the seeds. Lightly tapping the pod can also help the seeds come out more easily. Be patient and thorough, ensuring that you extract all the seeds from each seed pod.
4. Repeat the Process: Continue the process with each prepared seed pod until you have extracted all the seeds. Take your time and handle the seed pods gently to avoid damaging the seeds or losing any during the extraction process.
5. Clean and Inspect the Seeds: Once you have extracted the seeds, take a moment to inspect them for any remaining bits of seed pod or debris. Sort through the seeds and remove any unwanted material. You can use a fine sieve or blow gently on the seeds to separate any remaining debris.
6. Store the Extracted Seeds: After cleaning and inspecting the seeds, transfer them to a suitable storage container, such as a glass jar or an airtight plastic bag. Be sure to label the container with the date and variety of mullein seeds. Store the seeds in a cool, dry place away from direct sunlight until you are ready to sow or share them.
By following these steps, you can effectively extract the mullein seeds from the prepared seed pods. Take your time and be gentle during the extraction process to ensure the best quality seeds. With the seeds now extracted, let’s move on to the final step: storing the mullein seeds.
Step 8: Storing the Mullein Seeds
Proper storage is essential to maintain the viability and longevity of mullein seeds. Follow these steps to store your harvested mullein seeds:
1. Ensure Dryness: Before storing the seeds, make sure they are completely dry. Any moisture left in the seeds can lead to mold or fungal growth, which can damage or kill the seeds. Allow the seeds to air dry for a few days if necessary.
2. Choose a Suitable Container: Select a container that is clean, dry, and airtight. Glass jars or plastic seed storage containers with tight lids work well for this purpose. Avoid using containers that allow light to penetrate, as exposure to light can degrade the seed’s viability.
3. Label the Container: Label the container with the date of harvest and the plant variety to keep track of the seeds. This information will be helpful when you plan your gardening activities or share seeds with others. Consider adding any additional notes or specific instructions for future reference.
4. Store in a Cool, Dark Place: Find a storage location that is cool, dark, and dry. Ideally, the temperature should be around 40-50°F (4-10°C). Avoid storing the seeds in areas prone to temperature fluctuations or direct sunlight, as this can impact their viability.
5. Check for Longevity: Periodically check the stored seeds for any signs of deterioration or mold. If you notice any mold formation or unusual odor, remove the affected seeds immediately to prevent the spread of contamination. Discard any seeds that appear shriveled, discolored, or damaged.
6. Test Germination: To ensure seed viability, you can conduct a germination test before sowing the stored seeds. Place a few seeds on a damp paper towel or in a seed-starting tray and monitor them for signs of germination. This will give you an indication of the seed’s viability and help you plan for successful planting.
By following these steps and ensuring proper storage conditions, you can maintain the viability of mullein seeds for several years. This will allow you to enjoy continuous seed supply and successful germination in your future gardening endeavors.
With the mullein seeds now securely stored, you have successfully completed all the steps of harvesting and storing mullein seeds. Congratulations! You are now equipped with the knowledge and skills to cultivate mullein plants from seed. Happy gardening!
Note: Remember to check and comply with any local regulations or guidelines regarding seed harvesting and storage, especially for native or protected plant species.
Read more: How To Harvest Rosemary Seeds
Conclusion
Harvesting mullein seeds can be a rewarding and enriching experience for any gardener. From identifying mature mullein plants to preparing and extracting the seeds, each step provides an opportunity to connect with nature and gain a deeper understanding of the plant’s life cycle.
By following the step-by-step guide outlined in this article, you have learned how to select a mature mullein plant, gather the necessary tools, choose the proper timing for seed harvesting, approach the plant with care, and extract the seeds from the seed pods. Additionally, you have learned how to prepare and store the seeds to ensure their long-term viability.
Throughout this process, it is important to remain patient, observant, and respectful of the plant and its environment. Timing is crucial when it comes to harvesting mullein seeds, as collecting them at the right moment ensures optimum seed quality and successful germination in future plantings.
Whether you plan to sow the mullein seeds in your garden, share them with fellow gardeners, or simply appreciate the beauty of the plant and its seeds, the knowledge and skills you have acquired through this guide will serve you well.
Remember, each seed holds the potential for new growth and the continuation of the mullein’s legacy. With proper care and attention, these seeds can transform into healthy mullein plants that provide beauty, medicinal benefits, and habitat for beneficial insects in your garden.
Now that you have completed this guide, it’s time to take your newfound knowledge and put it into practice. Embrace the joy of mullein seed harvesting, and may your gardening journey be filled with fulfillment, discovery, and a deep appreciation for the wonders of the natural world.
Frequently Asked Questions about How To Harvest Mullein Seeds
Was this page helpful?
At Storables.com, we guarantee accurate and reliable information. Our content, validated by Expert Board Contributors, is crafted following stringent Editorial Policies. We're committed to providing you with well-researched, expert-backed insights for all your informational needs.

0 thoughts on “How To Harvest Mullein Seeds”