Articles
How To Make A Denim Rag Quilt
Modified: August 22, 2024
Discover helpful articles on how to make a stunning denim rag quilt. Explore step-by-step instructions, creative tips, and inspiring ideas for your next quilting project.
(Many of the links in this article redirect to a specific reviewed product. Your purchase of these products through affiliate links helps to generate commission for Storables.com, at no extra cost. Learn more)
Introduction
Welcome to the world of denim rag quilts! If you’re a fan of denim and looking for a creative and practical way to repurpose old jeans, this article will guide you through the process of making a denim rag quilt. Rag quilts are not only beautiful and cozy, but they also provide a wonderful way to recycle denim that might otherwise end up in a landfill.
In this article, we will walk you through the step-by-step process of creating your own denim rag quilt. From gathering materials and preparing the denim to cutting the fabric squares, sewing the quilt top, and assembling the finished product, we’ll cover it all. Whether you’re a seasoned quilter or a beginner looking for a fun and rewarding project, this guide is for you.
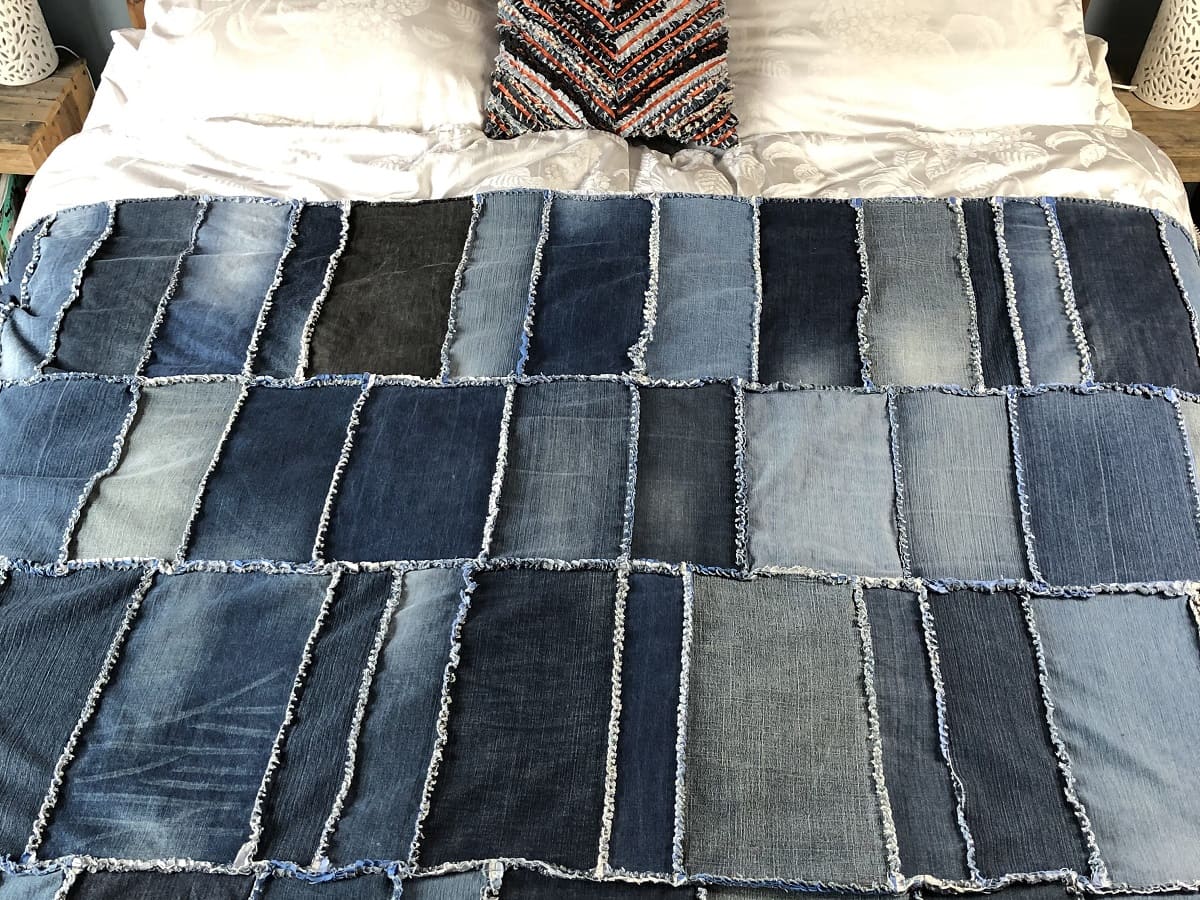
Before we dive into the details, let’s talk about what exactly a rag quilt is. Unlike traditional quilts where the seams are hidden on the inside, rag quilts feature exposed seams on the outside, giving them a unique and textured look. The exposed seams are frayed, creating a cozy and rustic appearance. This fraying effect is achieved by making small cuts along the seams and washing the quilt, which causes the fabric to unravel slightly.
Denim rag quilts are particularly popular due to the durability and versatility of denim fabric. Old denim jeans that may be worn out or no longer fit can be repurposed into quilt squares, giving them a new lease on life. The mix of different denim washes and textures adds visual interest to the quilt, making it a truly unique and personalized creation.
Not only is making a denim rag quilt a sustainable choice, but it’s also a great way to showcase your creativity and create a cherished keepsake. Whether you’re making a quilt for yourself or as a gift for someone special, the process of selecting, cutting, and sewing the fabric squares is both meditative and enjoyable. Plus, once the quilt is complete, you’ll have a cozy and stylish piece of home decor that will keep you warm for years to come.
In the next section, we’ll discuss the materials you’ll need to gather before getting started on your denim rag quilt journey. So grab your denim jeans and let’s dive in!
Key Takeaways:
- Transform old denim jeans into a cozy and sustainable denim rag quilt, showcasing your creativity and contributing to a more eco-friendly future through the art of quilting.
- Enjoy the therapeutic and rewarding process of quilting as you create a one-of-a-kind denim rag quilt, adding a personal touch and bringing comfort and joy to your life and those around you.
Read more: How To Make A Rag Quilt
Gathering Materials
Before you embark on your denim rag quilt project, it’s important to gather all the necessary materials. Here’s a list of what you’ll need:
- Old denim jeans: Look for a variety of denim washes and textures to add visual interest to your quilt. Make sure the jeans are clean and free from any embellishments or buttons.
- Cotton or flannel fabric: This will be used for the backing of your quilt. Choose a fabric that complements the denim and matches your aesthetic preferences.
- Rotary cutter: This handy tool will make cutting precise fabric squares much easier and quicker.
- Self-healing cutting mat: A cutting mat is essential for protecting your work surface and ensuring clean and precise cuts.
- Quilting ruler: A clear quilting ruler with measurement markings will help you accurately cut fabric squares.
- Scissors: You’ll need a pair of scissors for cutting smaller pieces of fabric, as well as for snipping the frayed seams later on.
- Sewing machine: A sewing machine will be used to stitch the fabric squares together and create the quilt top.
- Thread: Choose a thread color that matches or complements your denim fabric. You’ll need both regular thread for sewing and heavier thread for topstitching.
- Pins or clips: These will be used to hold the fabric squares together while sewing.
- Quilt batting: This is the inner layer of the quilt that provides warmth and structure. Choose a batting that suits your desired level of thickness and loft.
- Iron and ironing board: An iron will be used to press the fabric and create crisp seams.
- Optional: Embellishments such as buttons, appliques, or embroidery thread can be used to add a personal touch to your quilt.
Once you’ve gathered all the necessary materials, you’ll be ready to move on to preparing the denim fabric for use in your quilt. In the next section, we’ll guide you through the process of preparing the denim and ensuring it’s in a suitable condition for cutting and sewing.
Preparing the Denim
Before you can start cutting and sewing your denim fabric for the rag quilt, it’s important to properly prepare it. Here are some steps to follow:
- Inspect and Sort: Start by inspecting each pair of denim jeans you plan to use. Look for any stains, holes, or areas of heavy wear. If there are any unusable parts, mark them or set aside those jeans to be used for smaller patches or embellishments.
- Wash and Dry: Once you’ve selected the jeans you’ll be using, give them a thorough wash and dry. This will not only remove any dirt or odors but also pre-shrink the fabric, ensuring that your quilt won’t warp or shrink after its first wash.
- Snip off Seams and Pockets: Using a pair of sharp scissors, carefully snip off the seams and pockets of the jeans. This will make it easier to work with the denim and prevent any bulkiness in your quilt. Be sure to leave a small margin of fabric around the seams to allow for fraying later on.
- Press the Denim: Lay out the denim flat on an ironing board and use a hot iron to press out any wrinkles or creases. Pressing the fabric will make it easier to cut precise squares and sew accurate seams.
- Trim Uneven Edges: If the edges of your denim fabric are uneven or frayed, trim them using a rotary cutter or scissors. Aim for straight, clean edges to ensure that your fabric squares line up neatly.
Once you’ve completed these steps, your denim fabric will be ready for cutting into squares. It’s worth noting that if you’re using denim with different washes or textures, you may want to organize the squares accordingly to achieve a balanced and visually appealing quilt layout.
With the denim prepared and ready to go, it’s time to move on to the next step: cutting the fabric squares. This is where the true creativity and customization of your denim rag quilt begins. In the following section, we’ll guide you through the process of cutting the fabric squares and arranging them to create a beautifully patterned quilt top.
Cutting the Fabric Squares
Now that you have your denim fabric prepared and ready, it’s time to start cutting the fabric squares for your rag quilt. Follow these steps to ensure accurate and precise cuts:
- Measure and Mark: Determine the desired size of your fabric squares. The standard size for a rag quilt square is usually around 5 to 6 inches. Use a quilting ruler and a fabric marker or chalk to measure and mark the dimensions on the denim fabric.
- Cut the Squares: Using a rotary cutter, cut along the marked lines to create your fabric squares. A self-healing cutting mat can be helpful in providing a stable cutting surface and protecting your work surface.
- Check for Accuracy: Double-check the dimensions of each square to ensure they are all the same size. This will help maintain consistency and make the sewing process easier.
- Trim Frayed Seams: As you cut the fabric squares, you may notice areas where the seams are fraying excessively. Use scissors to trim away any loose or frayed threads, keeping the fabric edges clean and tidy.
Remember, the number of fabric squares you cut will depend on the size of your quilt and the desired pattern or layout. Plan accordingly and make sure you have enough fabric squares to achieve the desired design.
As you cut the fabric squares, take a moment to consider how you want to arrange them to create an interesting and visually appealing quilt top. You can opt for a simple pattern, such as alternating light and dark denim squares, or get more creative by incorporating different denim washes and textures. The choice is yours, so let your imagination run wild!
Once you have all the fabric squares cut and ready, it’s time to move on to the exciting part: arranging them to create the quilt top. In the next section, we’ll discuss various options for arranging the fabric squares and guide you through the process of sewing them together to form the quilt top.
Arranging the Squares
Now that you have your fabric squares cut, it’s time to unleash your creativity and arrange them in a way that creates a visually appealing quilt top. Here are a few ideas to consider when arranging your denim rag quilt squares:
- Alternate Light and Dark Denim: For a simple and classic look, you can alternate light and dark denim squares. This creates a timeless design that showcases the contrast between different denim washes.
- Create a Gradient: If you have a variety of denim washes, you can arrange the squares in a gradient pattern, starting with the lightest wash on one end and gradually transitioning to the darkest wash on the other end. This creates a beautiful ombre effect.
- Add a Pop of Color: If you want to incorporate a pop of color into your quilt, you can intersperse fabric squares in a complementary color. This adds visual interest and allows you to personalize your quilt.
- Experiment with Patchwork: If you have denim fabric with different textures, such as distressed or patterned denim, you can create a patchwork effect by arranging them in a random or structured pattern. This adds a unique and eclectic touch to your quilt.
- Consider a Theme or Design: You can also arrange the fabric squares according to a theme or design. For example, you can create a quilt with a nautical theme by arranging squares with anchor or sailboat motifs in a specific pattern.
As you arrange the fabric squares, lay them out on a large flat surface, such as a table or the floor, to get a better sense of the overall design. Rearrange the squares as needed until you’re satisfied with the arrangement. Take a photo or make a quick sketch to remember the layout, especially if you plan to sew the squares together in batches.
Once you’ve settled on the arrangement, it’s time to start sewing the fabric squares together to create the quilt top. In the next section, we’ll guide you through the process of sewing the squares and creating a cohesive and beautiful rag quilt top.
Read more: How To Make A Strip Rag Quilt
Sewing the Quilt Top
Now that you have your fabric squares arranged in a pleasing design, it’s time to sew them together to create the quilt top. Follow these steps to ensure a sturdy and well-constructed top:
- Starting from the top row, take the first two fabric squares and place them right sides together, aligning the edges. Pin or use clips to hold them in place. Repeat this process for the rest of the rows.
- Using a sewing machine, sew a ¼-inch seam along the pinned edges to join the squares together. Backstitch at the beginning and end of each seam to secure the stitches.
- Continue sewing the squares together row by row until the entire quilt top is complete. Press the seam allowances open or to one side to reduce bulkiness.
- If desired, topstitch along the seams to add extra reinforcement and a decorative touch. This step is optional but can enhance the overall look of the quilt.
- Once the quilt top is sewn together, give it a quick press with an iron to flatten any wrinkles or creases.
Throughout the sewing process, it’s important to maintain consistent seam allowances to ensure that the fabric squares align properly. Take your time and double-check each seam before moving on to the next one.
Remember, the beauty of a rag quilt is in its exposed seams. To achieve the signature frayed and textured look, you’ll need to make small cuts along the seams. The cuts should be approximately ¼ inch long and spaced about ½ inch apart. Be careful not to cut through the stitches holding the squares together.
Once you’ve made the cuts, it’s time to move on to creating the quilt backing. In the next section, we’ll discuss how to prepare the backing fabric and assemble the layers of the quilt.
When making a denim rag quilt, pre-wash and dry your denim fabric to prevent shrinkage and bleeding of dye. This will ensure that your quilt maintains its shape and color over time.
Creating the Quilt Backing
After sewing the quilt top, it’s time to create the backing for your denim rag quilt. The backing provides support and adds stability to the quilt. Follow these steps to create the quilt backing:
- Measure and Cut the Backing: Measure the dimensions of your quilt top and add a few inches for seam allowances. This will be the size of your backing fabric. Cut the backing fabric to the desired size, ensuring it is larger than the quilt top.
- Press the Backing: Lay the backing fabric on an ironing board and give it a good press to remove any wrinkles or folds. A well-pressed backing will result in a neater and smoother final quilt.
- Layer the Quilt: Lay the backing fabric flat on a clean surface, right side down. Place the quilt top on top of the backing, right side up. Smooth out any wrinkles or creases, ensuring the quilt top is centered on the backing.
- Pin or Baste the Layers: Starting from the center and working your way outwards, pin or baste the layers together to prevent shifting during the quilting process. You can choose to use safety pins or basting stitches to secure the layers.
Once the layers are secured, take a moment to ensure that the backing fabric extends beyond the quilt top on all sides. This excess fabric will be used for binding the quilt later on.
With the quilt top and backing securely layered, you’re ready to move on to the next step: assembling the quilt. In the following section, we’ll guide you through the process of assembling the layers and preparing for the quilting process.
Assembling the Quilt
Now that you have the quilt top and backing securely layered, it’s time to assemble the quilt and prepare it for the quilting process. Follow these steps to ensure a well-assembled quilt:
- Smooth out any wrinkles or creases in the fabric layers.
- Starting from the center and working your way outwards, carefully flip the quilt top and backing over to expose the wrong side of the quilt top.
- Trim any excess backing fabric to match the size of the quilt top, if necessary.
- Pin or baste around the edges of the quilt, securing the layers together. This will help keep everything in place during the quilting process.
- Double-check that all layers are smooth and aligned, paying extra attention to the corners and edges.
With the quilt assembled, you’re now ready to move on to the quilting process. Quilting is the stitching that holds the layers of the quilt together and adds structure and texture. There are various quilting options to choose from, including hand quilting, machine quilting, or tying. Select the option that best suits your skill level and desired outcome.
Once the quilting is complete, remove any remaining pins or basting stitches. Give the quilt a final press to remove any wrinkles, and admire your beautifully assembled and quilted creation.
Now that the quilt is assembled and quilted, it’s time to add the finishing touches. In the next section, we’ll guide you through the process of adding binding to the quilt edges, giving it a polished and professional look.
Quilting the Layers
Quilting is an essential step in the quilt-making process as it secures the quilt top, batting, and backing layers together and adds texture and visual interest to your denim rag quilt. There are several options for quilting methods, including hand quilting and machine quilting. Follow these steps to quilt your denim rag quilt:
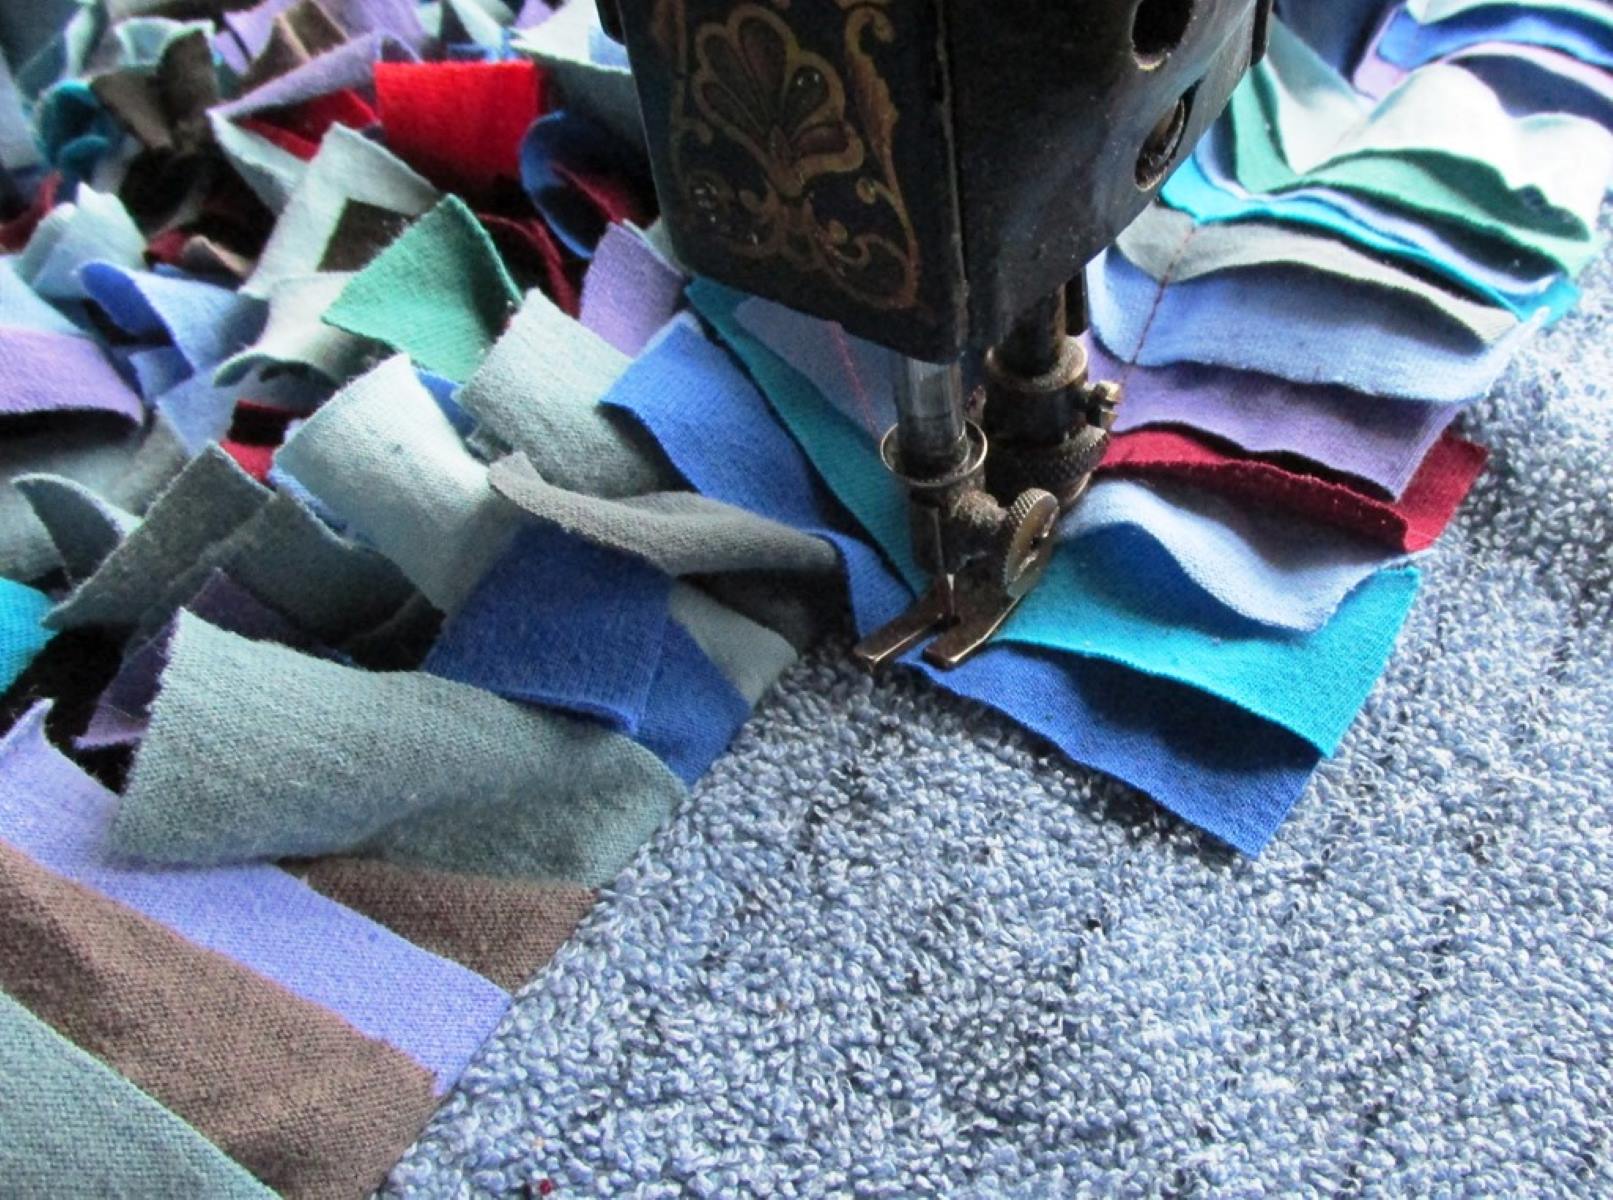
- Choose Your Quilting Method: Decide whether you want to hand quilt or machine quilt your denim rag quilt. Hand quilting involves using a needle and thread to stitch through all layers, while machine quilting uses a sewing machine fitted with a quilting foot to sew through the layers.
- Prepare for Hand Quilting: If you choose to hand quilt, thread a quilting needle with your desired thread, and tie a secure knot at the end of the thread. Use a quilting hoop or a quilting frame to hold the layers taut while you stitch.
- Prepare for Machine Quilting: If you opt for machine quilting, attach a quilting foot to your sewing machine. Select a quilting stitch pattern or adjust your machine’s settings to create the desired quilting design.
- Start Quilting: Begin quilting near the center of the quilt and work your way outward. Depending on your preferred quilting design, stitch along the seam lines, create geometric patterns, or free-motion quilt with curves, spirals, or other motifs.
- Continue Quilting: Keep quilting until you have covered the desired area, making sure to distribute your quilting evenly across the quilt top. Take your time and enjoy the process, as quilting can be meditative and adds a personal touch to your quilt.
- Secure Loose Threads: After quilting each section, remember to secure loose threads by either tying knots or burying them between the layers to prevent unravelling.
Remember, quilting can be as simple or intricate as you desire. Experiment with different quilting patterns to create a unique and eye-catching design that complements your denim rag quilt.
Once you’ve finished quilting, give your quilt a final press to smooth out any wrinkles or creases. You’re now ready to add the final touch to your denim rag quilt: binding. In the next section, we’ll guide you through the process of adding binding to the quilt edges, giving it a polished and professional look.
Read more: How To Make Gypsy Rag Curtains
Adding Binding
Binding is the finishing touch that not only adds a polished look to your denim rag quilt but also serves to secure the raw edges of the quilt layers. Follow these steps to add binding to your quilt:
- Measure and Cut Binding Strips: Measure the perimeter of your quilt to determine the length of the binding strips needed. Generally, binding strips are cut 2.5 inches wide, but you can adjust the width based on personal preference. Cut enough strips to cover the entire perimeter, plus a few extra inches for joining ends.
- Join Binding Strips: If necessary, join the strips together to create one long continuous binding strip. To do this, place two strips at a 90-degree angle with right sides together, and sew diagonally from corner to corner. Trim the excess fabric and press the seam open.
- Press Binding Strips: Fold the binding strip in half lengthwise, wrong sides together, and press the entire length to create a crease. This will help you align the binding evenly on the quilt edges.
- Attach Binding to the Quilt: Starting in the middle of one side of the quilt, align the raw edge of the binding strip with the raw edge of the quilt. Pin or clip in place, and begin sewing with a ¼-inch seam allowance, starting a few inches away from the end of the binding strip.
- Miter Corners: When you approach a corner, stop sewing a ¼ inch before reaching the edge. Fold the binding strip up, then fold it back down over the next edge, creating a mitered corner. Secure with pins or clips, and continue sewing along the next edge, repeating the mitered corner process for each corner.
- Join Binding Ends: When you near the starting point, leave a few inches of excess binding unstitched. Trim the binding strip, leaving a small overlap. Open the ends of the binding strips, align and pin or clip them together, right sides facing. Sew a diagonal seam on the marked line and trim the excess fabric. Press the seam open.
- Finish Sewing Binding: Fold the binding strip over the quilt edge, enclosing the raw edges. Secure it with pins or clips. Hand stitch or use a sewing machine to stitch close to the folded edge of the binding, ensuring the stitches catch the binding on the back side. This is called “stitching in the ditch.”
Once you’ve completed stitching the binding, give your quilt a final press to ensure the binding lays flat and looks neat. Your denim rag quilt is now complete and ready to be enjoyed!
Adding binding not only provides a professional finishing touch but also helps protect the raw edges of the quilt and adds durability and structure to your denim rag quilt.
Congratulations on completing your denim rag quilt! In the next section, we’ll wrap up the article and conclude our journey through the process of making a beautiful and cozy denim rag quilt.
Finishing Touches
With the binding securely attached, your denim rag quilt is almost complete. However, there are a few finishing touches you can add to make your quilt even more special:
- Label Your Quilt: Personalize your quilt by adding a label with your name, the date it was made, and any other meaningful information. This adds a personal touch and ensures your quilt becomes a treasured heirloom.
- Embellishments: If you’d like to add extra embellishments to your quilt, such as buttons, appliques, or embroidery, now is the time to do so. These decorative elements can enhance the overall design and make your quilt truly unique.
- Wash and Dry: Before using or gifting your quilt, it’s a good idea to give it a gentle wash and dry. This will fluff up the frayed seams and add a cozy and lived-in feel to the quilt.
- Enjoy and Share: Once your quilt is all finished, it’s time to enjoy its warmth and beauty. Curl up under your quilt with a good book or share it with loved ones. Quilts are meant to be used and cherished, so let it bring joy to your life.
Remember, a denim rag quilt is a versatile and durable creation. It can be used as a cozy blanket on a chilly evening, a decorative throw on the couch, or even as a picnic blanket on sunny days. As you use your quilt, you may notice the frayed seams continue to add character and charm, making it even more special over time.
Creating a denim rag quilt is not only a fun and creative project, but it’s also an eco-friendly way to repurpose old jeans and create something beautiful and practical out of them. By recycling materials and using sustainable practices, you’re not just making a quilt but also contributing to a more sustainable future.
With the completion of your denim rag quilt, your journey through the process comes to an end. Hopefully, this guide has provided you with the knowledge and inspiration to create a quilt that reflects your style and creativity.
So go ahead, snuggle up with your denim rag quilt, and take pride in your handmade creation. Happy quilting!
Disclaimer: This article is for informational purposes only. Always exercise caution and use proper tools and techniques when working with fabric and sewing machines.
Conclusion
Congratulations on completing your denim rag quilt! By repurposing old denim jeans and turning them into a cozy and beautiful quilt, you’ve not only created a functional piece of home decor but also contributed to sustainable practices by reducing fabric waste.
Throughout this guide, we’ve covered the step-by-step process of making a denim rag quilt, from gathering materials and preparing the denim to cutting the fabric squares, arranging them, sewing the quilt top, creating the quilt backing, assembling the quilt, quilting the layers, adding binding, and the finishing touches.
Each step of this journey allowed you to exercise your creativity and transformation skills while enjoying the therapeutic and rewarding process of quilting. The exposed seams and frayed edges of your denim quilt give it a unique and rustic charm, making it a true one-of-a-kind creation.
Whether you’re a seasoned quilter or a beginner, the denim rag quilt project provides an opportunity to create a cherished keepsake that can be enjoyed for many years to come. The beauty of this quilt lies in its imperfections and the stories it tells through the recycled denim fabric.
Remember, quilting is an art form that allows you to express your creativity and personal style. Feel free to experiment with different patterns, colors, and textures to create a quilt that reflects your unique vision and personality.
Now that your denim rag quilt is complete, take the time to enjoy its warmth and beauty. Curl up under it with a cup of tea, or share it as a thoughtful gift with someone special. Quilts have a way of bringing comfort and joy to our lives, reminding us of the love and care put into each stitch.
Thank you for joining us on this quilting journey. We hope this guide has inspired and empowered you to embark on more creative sewing projects in the future. Remember, the possibilities are endless, and with the right tools and your imagination, you can bring any fabric to life.
So go ahead, embrace your creativity, and continue to explore the world of quilting. Your next handmade masterpiece awaits!
Disclaimer: This article is for informational purposes only. Always exercise caution and use proper tools and techniques when working with fabric and sewing machines.
Frequently Asked Questions about How To Make A Denim Rag Quilt
Was this page helpful?
At Storables.com, we guarantee accurate and reliable information. Our content, validated by Expert Board Contributors, is crafted following stringent Editorial Policies. We're committed to providing you with well-researched, expert-backed insights for all your informational needs.


0 thoughts on “How To Make A Denim Rag Quilt”