Home>Garden Essentials>How To Lay Astro Turf On Plywood
Garden Essentials
How To Lay Astro Turf On Plywood
Modified: August 17, 2024
Learn how to lay astro turf on plywood in your garden with our step-by-step guide. Achieve a lush and low-maintenance lawn for your outdoor space.
(Many of the links in this article redirect to a specific reviewed product. Your purchase of these products through affiliate links helps to generate commission for Storables.com, at no extra cost. Learn more)
Introduction
Welcome to the world of astro turf! Whether you’re tired of the constant maintenance of natural grass or simply don’t have the space for a traditional lawn, laying astro turf on plywood can be a fantastic solution. This versatile and durable alternative provides a lush, green surface that requires minimal upkeep and stays vibrant all year round.
In this comprehensive guide, we will take you through the step-by-step process of laying astro turf on plywood. From preparing the plywood surface to securing the turf and adding infill material, we’ll cover all the necessary steps to ensure a successful installation.
But first, let’s briefly explore the benefits of using astro turf. Unlike natural grass, which demands constant watering, mowing, and fertilizing to maintain its appearance, astro turf requires minimal care. This makes it an excellent option for those with limited time or accessibility issues.
Another advantage of astro turf is its potential to transform any space into a lush green oasis. Whether you have a small balcony or a large backyard, laying astro turf on plywood provides a clean and vibrant surface that is enjoyable to walk, play, or relax on.
Now, let’s dive into the step-by-step process of laying astro turf on plywood and create the perfect hassle-free lawn of your dreams.
Key Takeaways:
- Transform your outdoor space with astro turf on plywood! Enjoy a vibrant, low-maintenance lawn that’s perfect for play and relaxation, without the hassle of traditional grass.
- Keep your astro turf looking its best with regular cleaning, brushing, and infill maintenance. Say goodbye to watering and mowing, and hello to a beautiful, hassle-free lawn!
Read more: How To Lay Astro Turf On Concrete
Step 1: Preparing the Plywood
The first step in laying astro turf on plywood is to ensure that the plywood surface is clean, level, and properly prepared. This will create a solid foundation for the turf and help to extend its lifespan.
Start by inspecting the plywood surface for any cracks, uneven spots, or damage. If you come across any issues, make the necessary repairs or consider replacing the damaged plywood sections.
Next, ensure that the plywood is dry. Moisture can lead to mold or mildew growth, which can damage both the plywood and the astro turf. If the plywood is damp, allow it to dry completely before proceeding.
Before applying any materials directly to the plywood, it’s recommended to use a primer or sealer. This will help to protect the plywood from moisture and extend its durability. Apply the primer or sealer according to the manufacturer’s instructions and allow it to dry completely.
Once the primer or sealer has dried, you can move on to the next step of preparing the plywood for the astro turf installation.
If the plywood surface is not smooth and level, it’s essential to sand it down to create a uniform surface. Use sandpaper or a power sander to smooth out any rough spots or uneven areas. This will help the astro turf lay flat and prevent any bumps or wrinkles.
After sanding, remove any dust or debris from the plywood surface. You can use a broom or a vacuum cleaner to ensure that the surface is completely clean.
With the plywood surface smooth and clean, it’s now time to move on to the next step of the installation process. Cleaning the plywood surface will help to create a strong bond between the plywood and the base layer.
Step 2: Cleaning the Plywood Surface
Now that the plywood surface is prepared, the next step is to thoroughly clean it to ensure a strong and secure bond between the plywood and the base layer. Cleaning the plywood surface will remove any dirt, dust, or debris that could prevent proper adhesion.
Start by sweeping the plywood surface with a broom to remove any loose dirt or debris. Pay close attention to the corners and edges, as these areas tend to accumulate more particles.
Once the loose debris is removed, use a damp cloth or sponge and a mild detergent to clean the plywood surface. Gently scrub the surface in a circular motion, focusing on any areas that appear to be stained or dirty. Avoid using harsh chemicals or abrasive cleaners, as these can damage the plywood.
After cleaning with the detergent, rinse the plywood surface thoroughly with clean water to remove any soapy residue. Ensure that all traces of the detergent are washed away before moving on to the next step.
Allow the plywood surface to air dry completely before proceeding. Avoid using any heat sources or fans to speed up the drying process, as this can result in uneven drying and potentially affect the adhesion of the base layer.
Once the plywood surface is dry, it’s time to move on to the next step in the installation process: applying the base layer. The base layer serves as a cushioning and stabilizing layer for the astro turf, ensuring a comfortable and long-lasting surface.
By properly cleaning the plywood surface, you’re creating the ideal conditions for the base layer to adhere securely. This will help to prevent any shifting or movement of the astro turf once it’s installed.
With the plywood surface clean and dry, let’s move on to the next step and apply the base layer for the astro turf installation.
Step 3: Applying the Base Layer
Now that the plywood surface is clean and dry, it’s time to apply the base layer. The base layer serves as a foundation for the astro turf, providing cushioning, stability, and drainage.
There are different options for the base layer, but one common choice is to use a layer of crushed stone or gravel. This material allows for proper drainage and prevents water from pooling on the surface of the turf.
To apply the base layer, start by spreading a thin layer of crushed stone or gravel evenly across the plywood surface. Use a rake or a shovel to level and distribute the material. Aim for a layer that is around 1 to 2 inches thick, but adjust the depth according to your specific needs and preferences.
After spreading the base layer, use a compactor or a tamper to compact the crushed stone or gravel. This will help to create a firm and stable surface for the astro turf to sit on. Walk over the entire area and apply firm pressure to ensure proper compaction.
Continue adding and compacting the base layer until you have achieved the desired thickness and a level surface. Take your time with this step to ensure a solid and even foundation.
Once the base layer is in place and properly compacted, it’s important to check the levelness of the surface. Use a level tool to ensure that the base layer is even and there are no noticeable slopes or uneven areas. Adjust the base layer as needed to achieve a smooth and level surface.
With the base layer successfully applied and leveled, it’s time to move on to the next step: cutting and fitting the astro turf onto the plywood surface. This step requires careful measuring and precise cutting to ensure a seamless and professional-looking installation.
But before we move on, take a moment to appreciate your progress! You’ve already laid the foundation for a beautiful astro turf surface. So let’s keep going and make sure the astro turf fits perfectly onto the plywood.
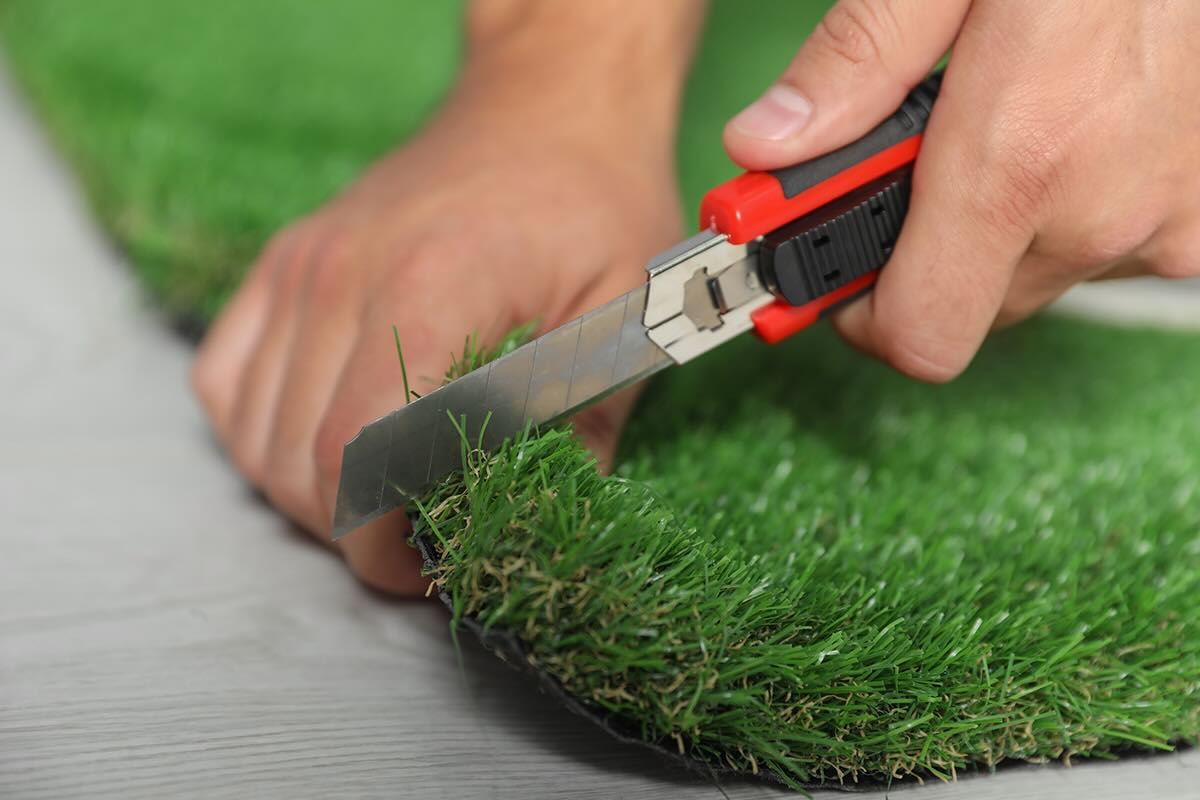
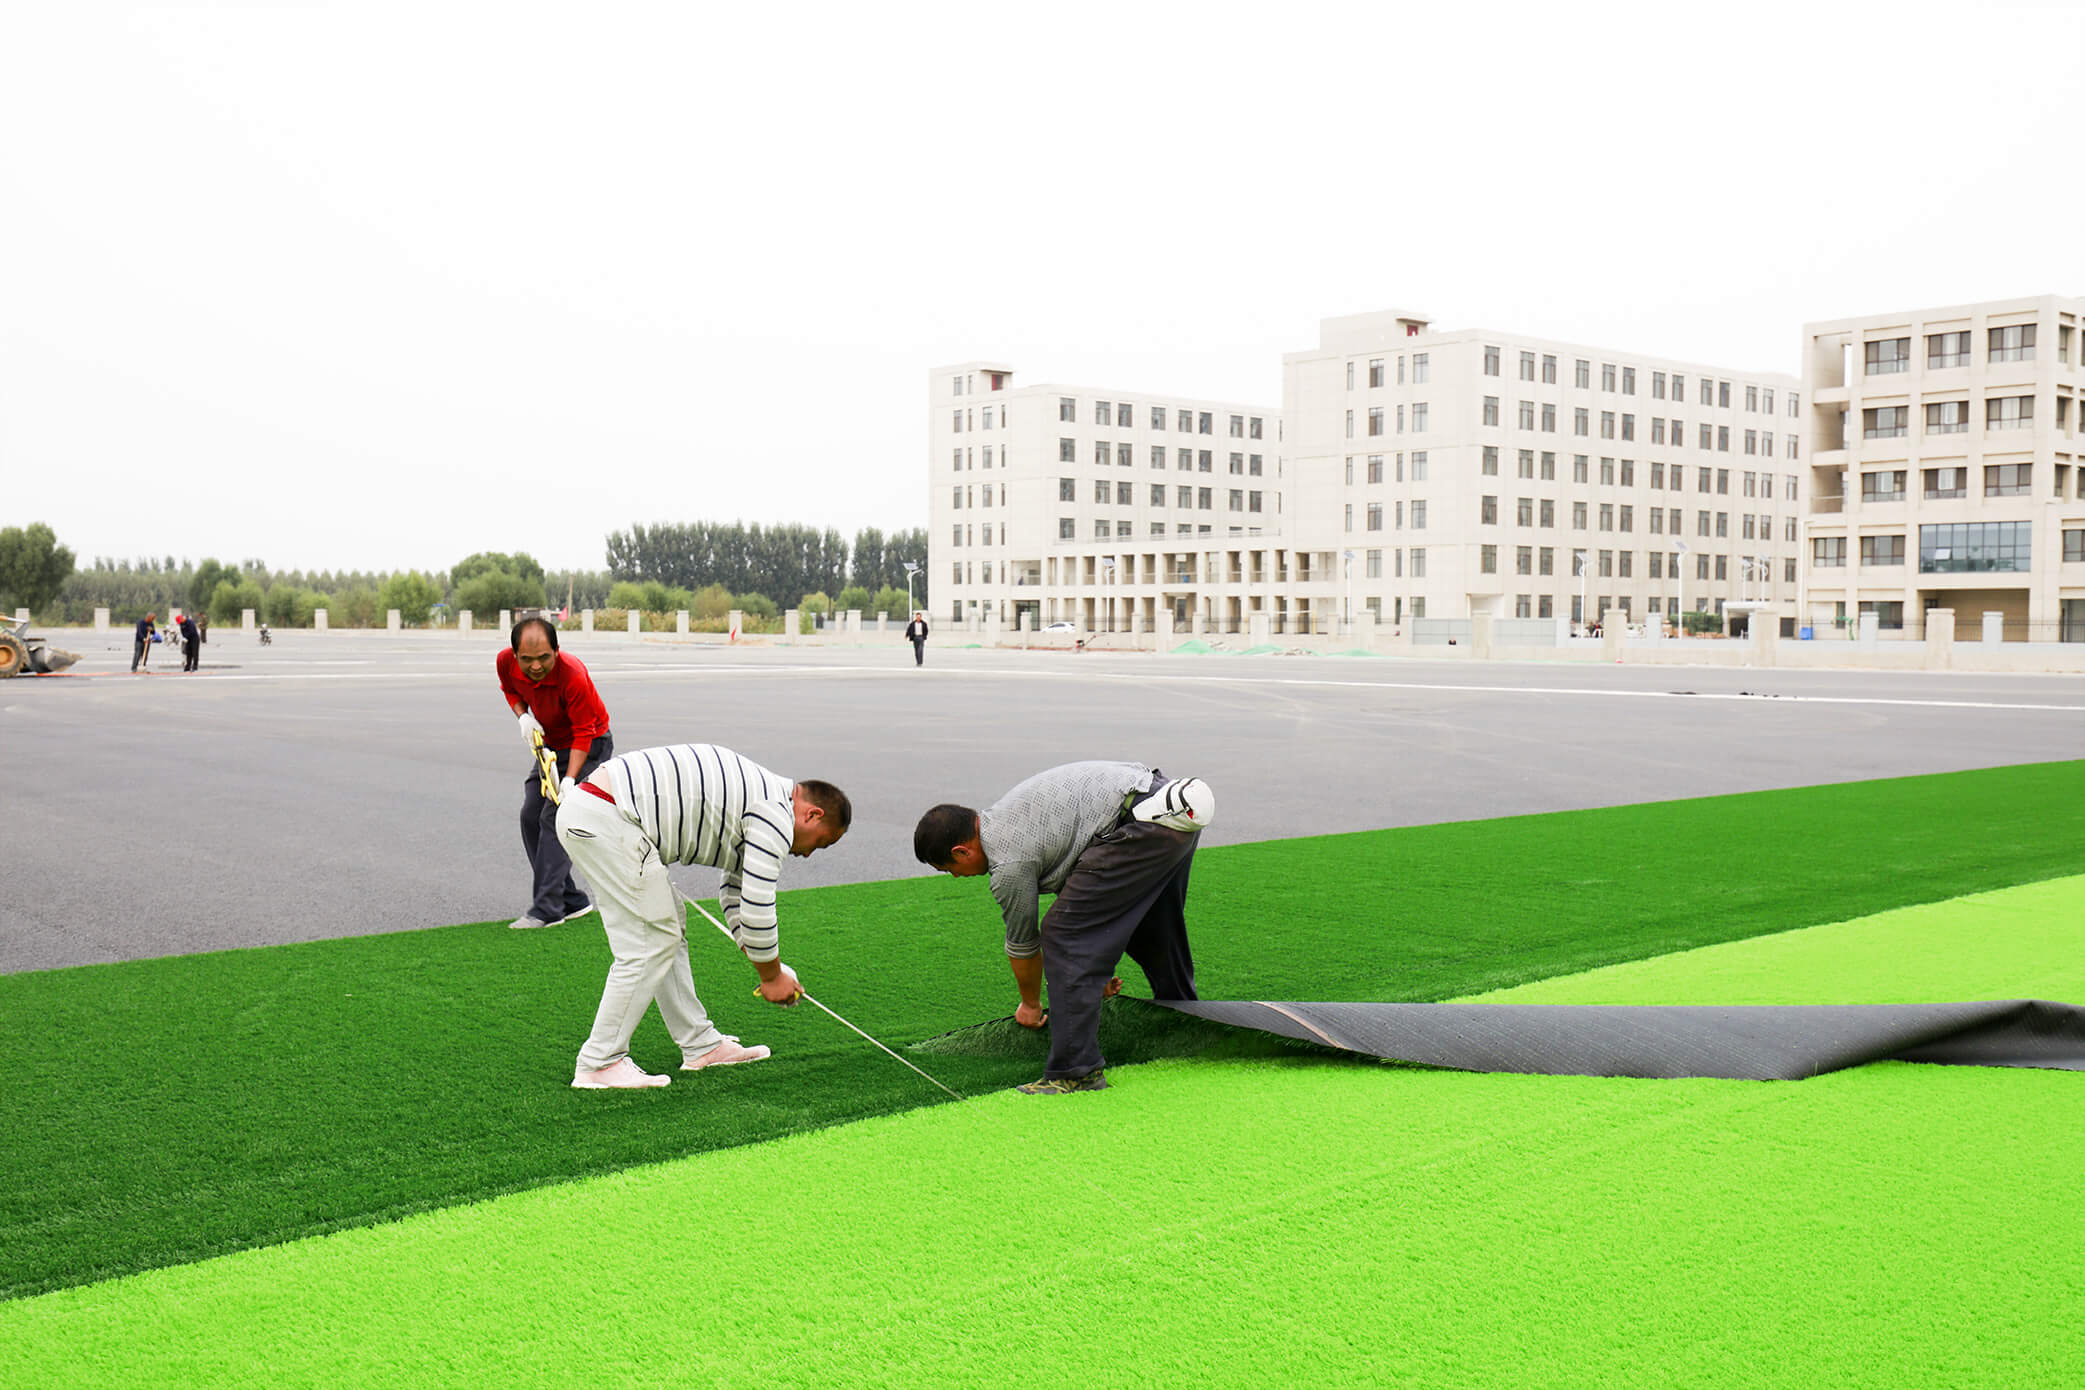
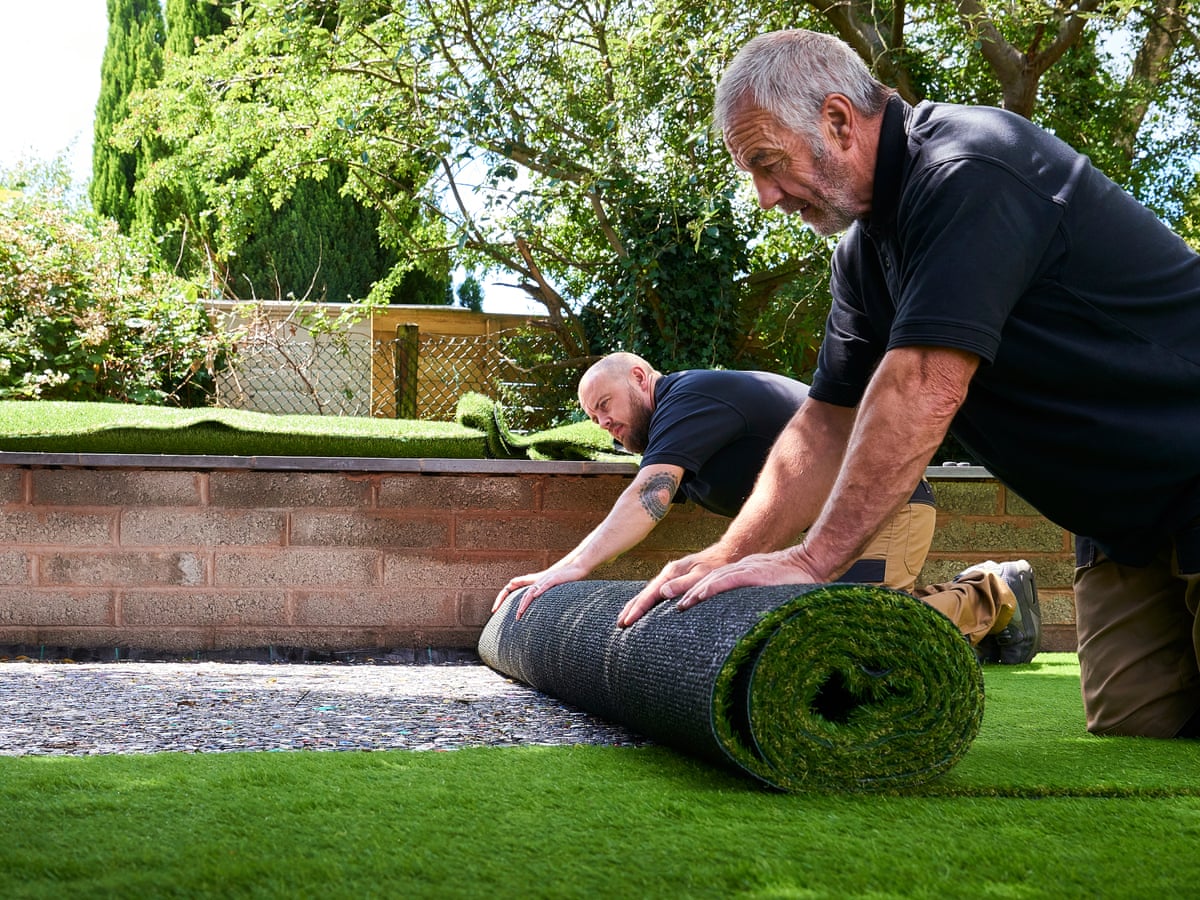
Step 4: Cutting and Fitting Astro Turf
Now that the base layer is in place, it’s time to cut and fit the astro turf onto the plywood surface. This step requires careful measuring, precise cutting, and attention to detail to ensure a seamless and professional-looking installation.
Start by unrolling the astro turf over the base layer. Allow the turf to relax and adjust to the surrounding environment for at least 1 hour. This will help to eliminate any wrinkles or creases that may have formed during transportation and storage.
Once the astro turf has relaxed, position it on the plywood surface. Ensure that the edges of the turf align with the edges of the area you want to cover. Use stakes or pins to temporarily secure the edges of the astro turf in place, preventing it from shifting during the cutting and fitting process.
Next, carefully measure the dimensions of the area you want to cover with the astro turf. Use a tape measure to take accurate measurements of the length and width. It’s important to leave a small margin of extra turf around the edges to ensure a proper fit.
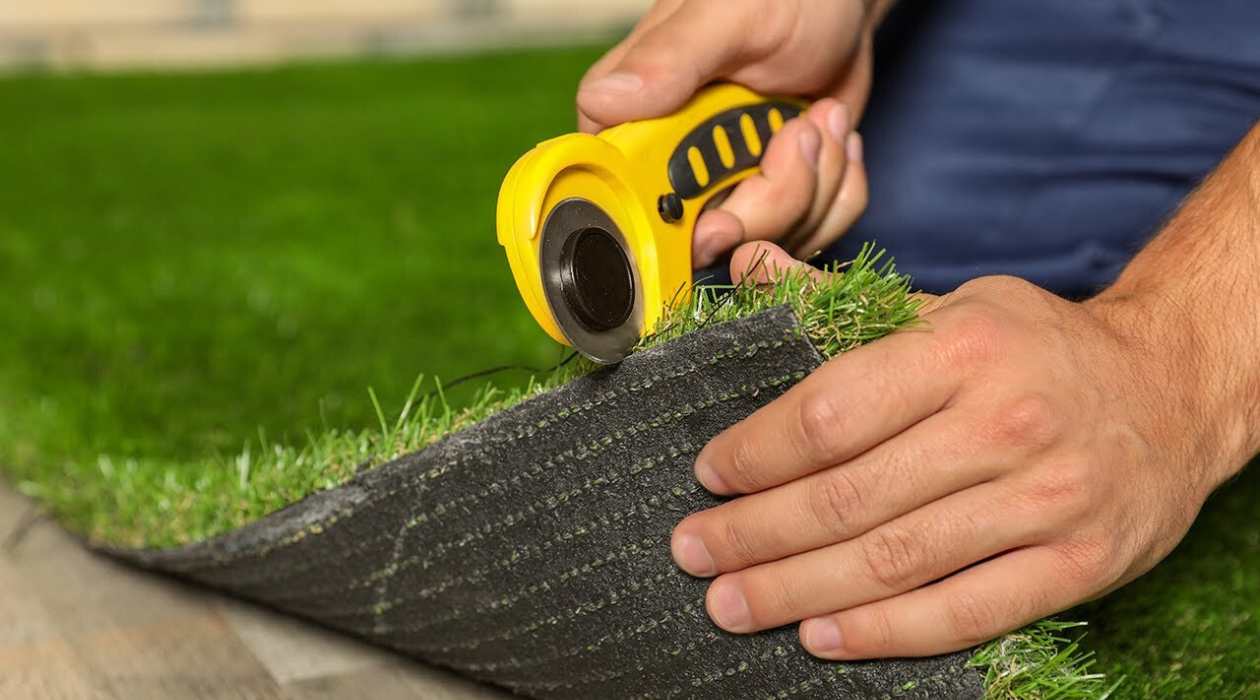
Using a straight edge or a utility knife, cut the astro turf along the measured lines. Make slow, controlled cuts, ensuring that the blade goes through the turf and doesn’t leave any uneven or jagged edges. Take your time with this step to achieve clean and precise cuts.
As you cut the turf, make sure to avoid cutting through the base layer or the plywood surface. Take extra care around corners and edges to maintain a smooth and consistent shape.
After cutting the astro turf to the desired size, carefully fit it onto the plywood surface. Make any necessary adjustments to ensure a tight and even fit. Double-check the edges and corners to ensure they are aligned properly.
Once the astro turf is securely in place, remove the temporary stakes or pins that were used to hold it down. Gradually smooth out the turf, starting from the center and working your way towards the edges. This will help to eliminate any wrinkles or uneven areas.
With the astro turf successfully cut and fitted onto the plywood surface, it’s time to move on to the next step: securing the astro turf to ensure it stays in place. This will ensure the longevity and stability of the astro turf installation.
Take a moment to appreciate your progress so far! You’re one step closer to enjoying a beautiful and low-maintenance astro turf surface. Keep up the great work!
Before laying astro turf on plywood, make sure the surface is clean and smooth. Use adhesive specifically designed for outdoor use to secure the turf to the plywood, and ensure the edges are properly secured to prevent lifting.
Read more: How To Lay Astro Turf On Decking
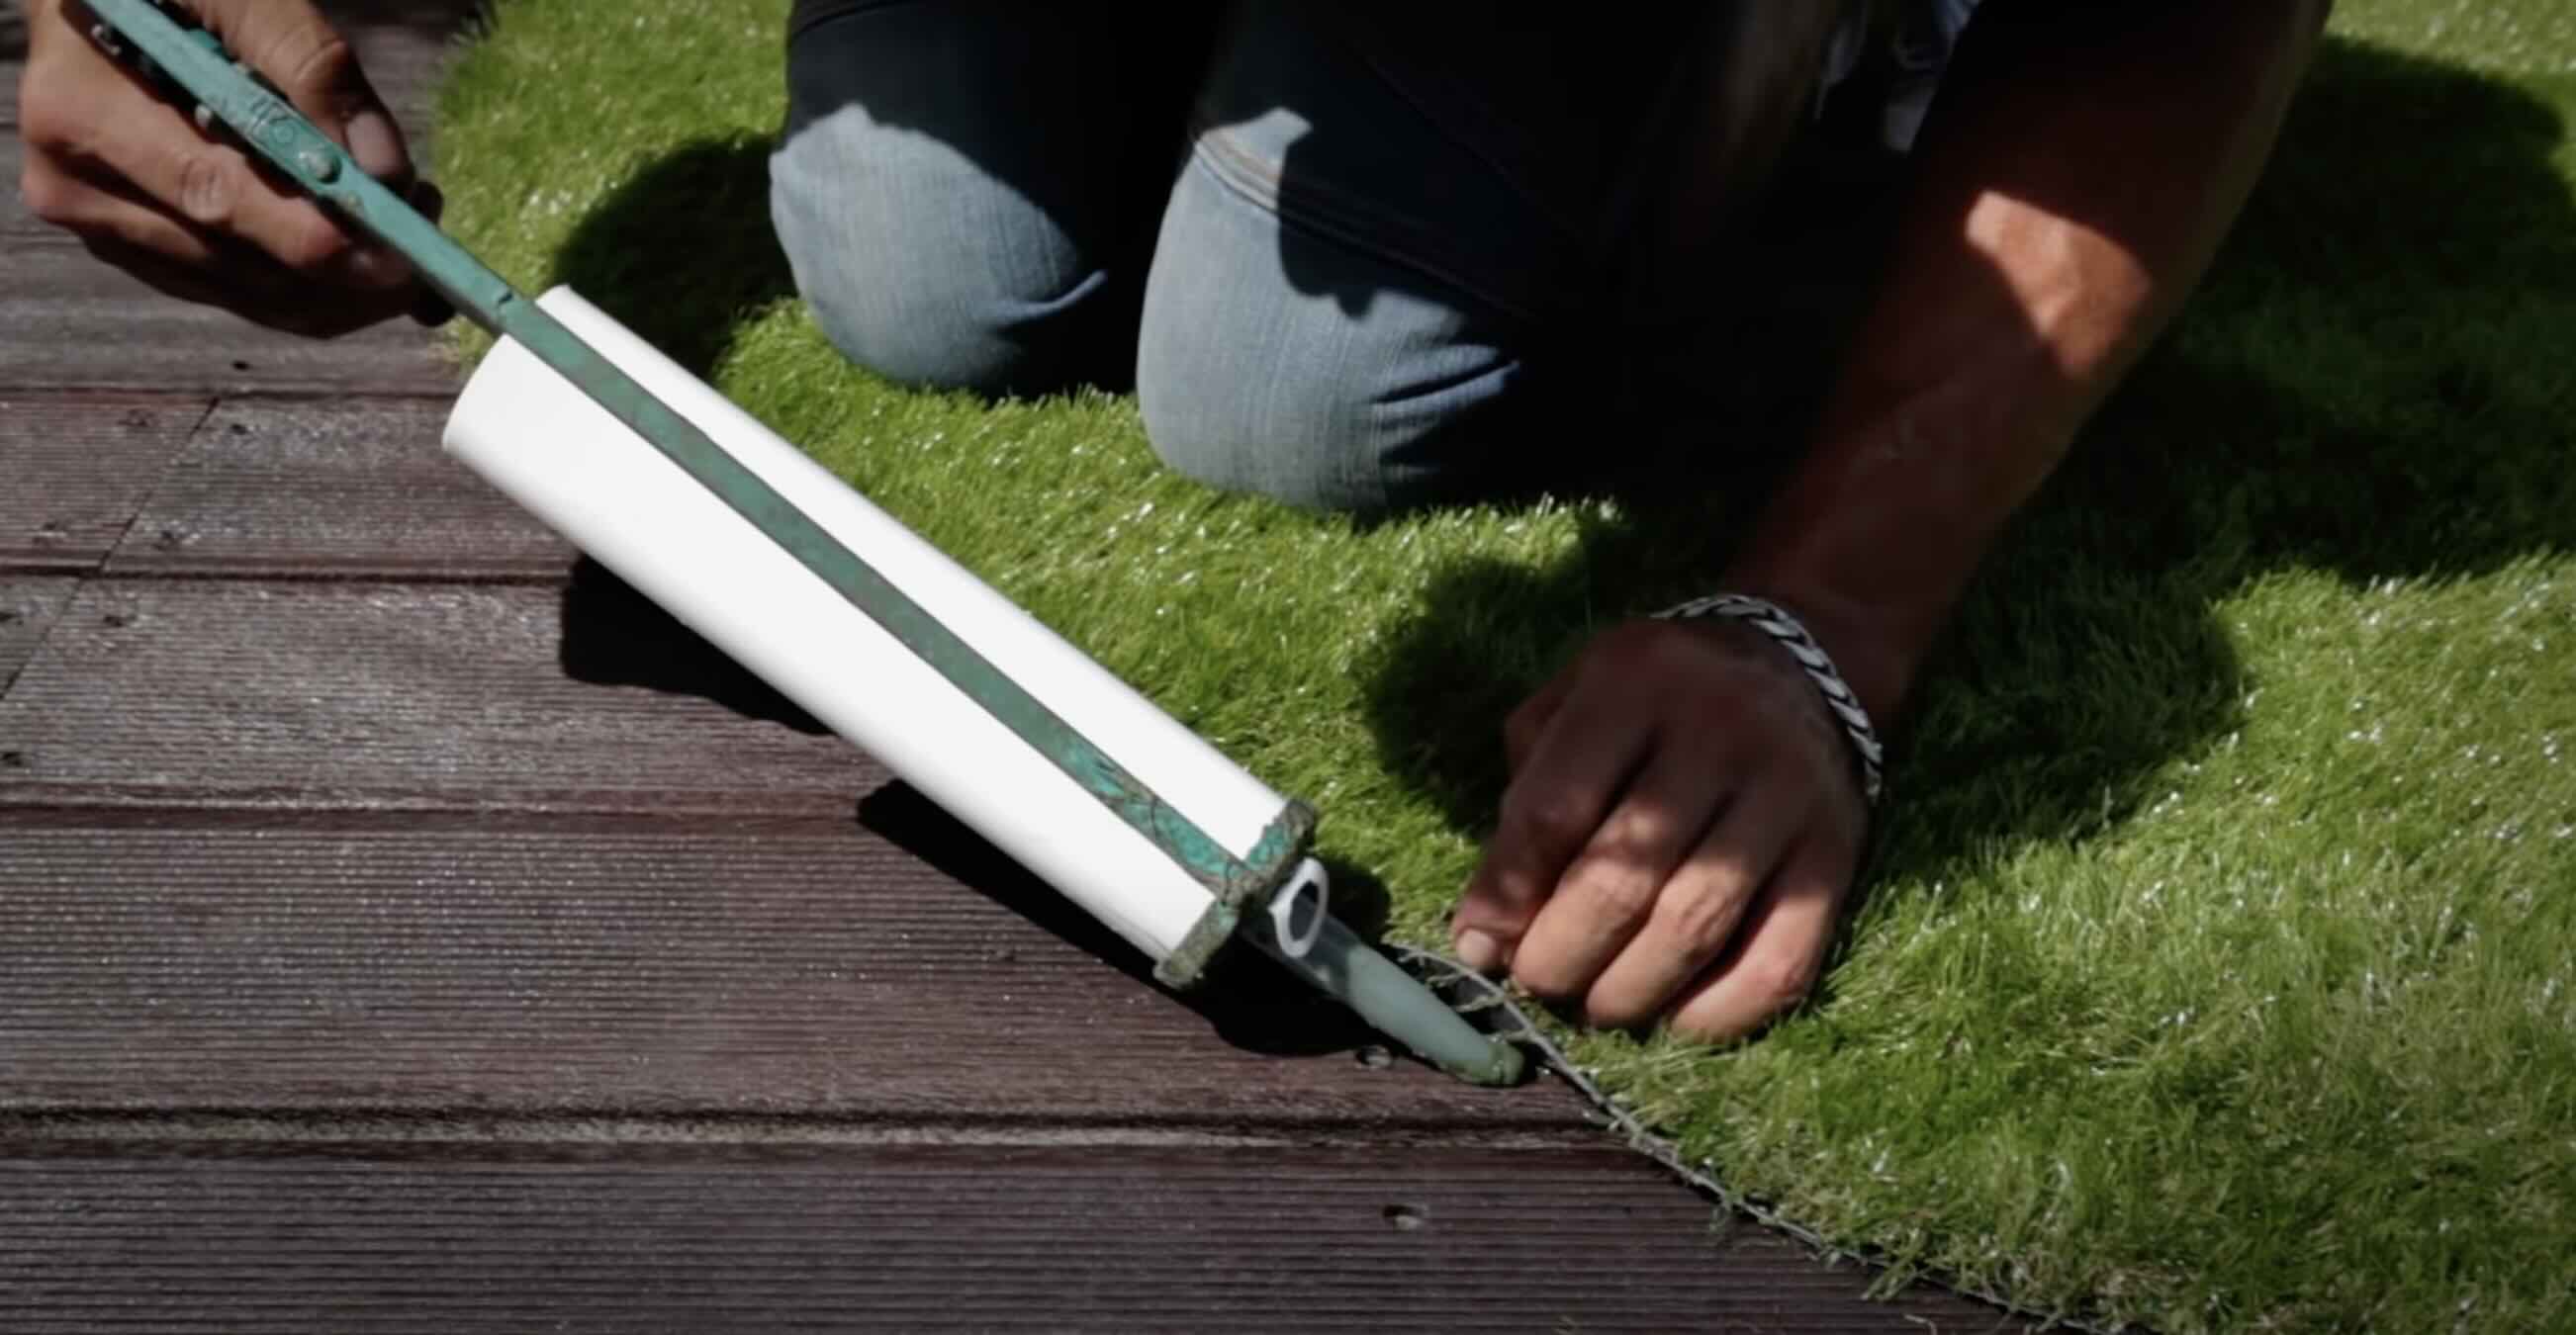
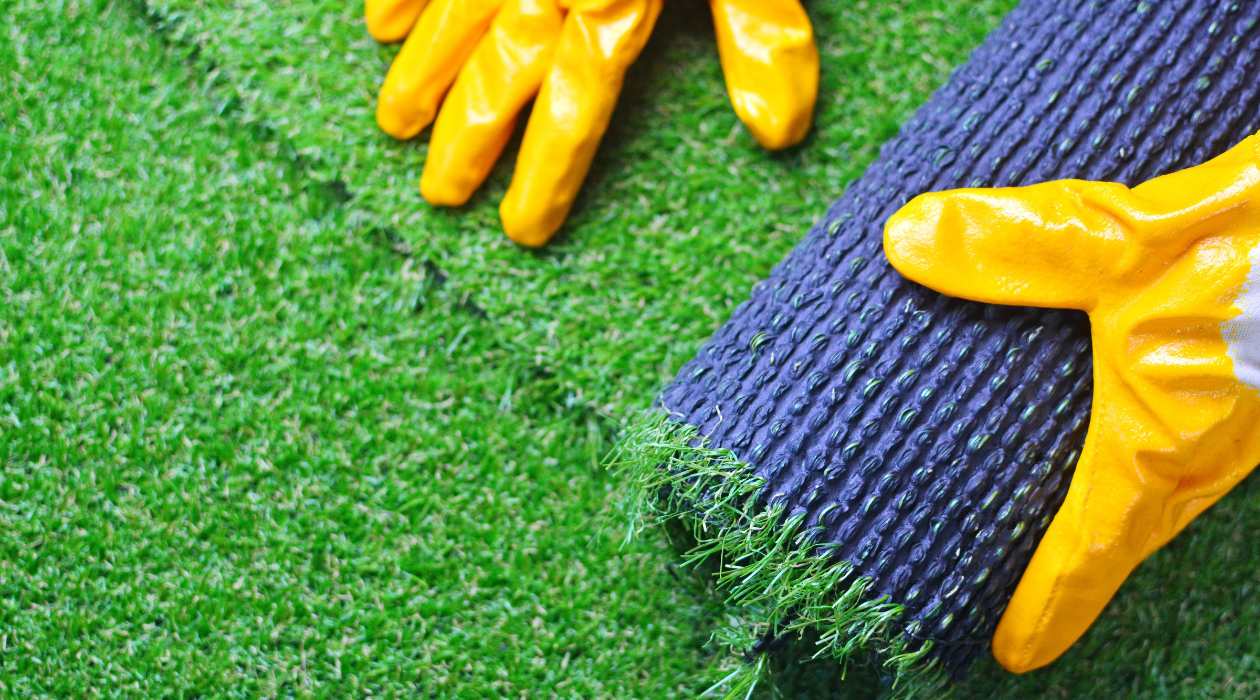
Step 5: Securing the Astro Turf
Now that the astro turf is cut and fitted onto the plywood surface, it’s important to secure it to ensure it stays in place. Properly securing the astro turf will prevent shifting, wrinkling, or lifting, especially in high-traffic areas.
Begin by rolling back half of the astro turf, exposing the plywood surface underneath. Apply an adhesive specifically designed for astro turf installations to the exposed area. Make sure to follow the manufacturer’s instructions for the adhesive application.
Use a notched trowel to evenly spread the adhesive on the plywood surface. Create a thin and even layer, ensuring that the adhesive covers the entire area where the astro turf will be placed. Avoid applying too much adhesive, as it can seep through the turf and create lumps or unevenness.
Carefully roll the astro turf back onto the adhesive, starting from one end and gradually working towards the other. Gently press down on the turf to ensure proper adhesion to the plywood surface. Smooth out any wrinkles or air bubbles, working from the center towards the edges.
Repeat the process for the other half of the astro turf, ensuring that the adhesive is evenly applied and the turf is securely attached to the plywood surface. Take your time during this step to ensure a thorough and secure bond between the astro turf and the plywood.
Once the astro turf is in place and adhered to the plywood, use a carpet kicker or a broom to stretch and tighten any loose areas. Apply firm pressure to the edges and corners to ensure they are properly secured. This will help to eliminate any potential tripping hazards and create a smooth and seamless surface.
If necessary, trim any excess astro turf around the edges using a utility knife or a carpet cutter. Make clean and precise cuts, ensuring that the edges are smooth and flush with the surrounding surfaces.
With the astro turf securely in place, take a moment to inspect the installation. Check for any visible seams or uneven areas. Smooth out any imperfections or bumps, and make any necessary adjustments to ensure a flawless and professional-looking installation.
With the astro turf properly secured and looking fantastic, it’s time to move on to the next step: adding infill material. This will enhance the performance and aesthetics of the astro turf surface, providing additional cushioning and support.
Congratulations on successfully securing the astro turf! The end result is within reach, so let’s keep going!
Step 6: Adding Infill Material
Adding infill material to the astro turf is an essential step that enhances its performance and appearance. Infill material provides additional cushioning, stability, and support to the turf fibers, creating a more natural and comfortable surface.
There are various types of infill materials available, including silica sand, rubber granules, or a combination of both. The choice of infill material depends on factors such as the intended use of the astro turf and personal preferences.
To add infill material, start by evenly spreading it across the astro turf using a spreader, a broom, or your hands. Apply the infill material in multiple directions to ensure it reaches all areas of the turf and helps to fill any gaps between the fibers.
The amount of infill material to use depends on the specific product and manufacturer’s recommendations. Generally, it is recommended to apply around 1-2 pounds of infill material per square foot of astro turf. This amount may vary, so be sure to check the guidelines provided by the manufacturer.
Once the infill material is spread across the turf, use a stiff brush or a power broom to work the infill material into the turf fibers. This helps to distribute the infill evenly and ensure that it reaches the bottom of the fibers, providing stability and support.
Continue brushing or sweeping the infill material into the astro turf until the fibers are standing upright and the infill is evenly distributed. This can help to prevent the turf from matting and create a more natural and aesthetically pleasing appearance.
After applying the infill material, inspect the astro turf surface to ensure that it is evenly covered and there are no clumps or irregularities. Make any necessary adjustments or additions to achieve the desired amount and distribution of infill.
Adding infill material not only enhances the performance and durability of the astro turf but also helps to promote proper drainage and reduce the risk of odors or bacteria buildup. It contributes to the overall longevity and maintenance of the astro turf surface.
With the infill material added, it’s time to move on to the next step: brushing and fluffing the astro turf to achieve a pristine and lush appearance. Take a moment to appreciate the progress you’ve made so far. You’re almost done with the installation process!
Step 7: Brushing and Fluffing the Astro Turf
After adding the infill material, it’s time to brush and fluff the astro turf to ensure its fibers stand upright and create a full and lush appearance. This step helps to distribute the infill material evenly, prevent matting, and maintain the aesthetic appeal of the turf.
Start by using a stiff bristle broom or a power broom to brush the astro turf. Brush against the direction of the turf fibers, allowing the bristles to penetrate the turf and lift the fibers. This action helps to separate any clumps or irregularities in the infill material and encourages the turf fibers to stand upright.
Pay special attention to high-traffic areas, as they may require more brushing to maintain their resilience and appearance. Take your time and make sure to cover the entire surface area of the astro turf.
Continue brushing the astro turf in various directions, ensuring that the fibers are lifted and the infill material is evenly distributed. This process helps to create a natural and well-maintained look.
If you notice any areas that appear flattened or matted, gently rake or brush those areas more vigorously to restore their volume and bounce. Take care not to over-brush, as this can damage the turf fibers or displace the infill material.
Once you have brushed the astro turf thoroughly, use a leaf blower or a garden hose to remove any loose debris or dust that may have accumulated during the process. Start from one end of the turf and work your way towards the other, ensuring that all debris is cleared.
By properly brushing and fluffing the astro turf, you’re helping to maintain its appearance and performance. Regular brushing, especially in high-traffic areas, will keep the turf fibers upright and the infill material evenly distributed.
With the astro turf beautifully brushed and fluffed, it’s time for the final inspection and some maintenance tips. You’re almost finished with the installation process, so let’s keep up the momentum!
Step 8: Final Inspection and Maintenance Tips
Congratulations on reaching the final step of the astro turf installation process! Now it’s time for a thorough final inspection and to learn some essential maintenance tips to keep your astro turf looking its best for years to come.
Start by carefully inspecting the entire astro turf surface. Look for any visible seams, uneven areas, or loose edges. Smooth out any imperfections or bumps, and make any necessary adjustments to ensure a seamless and professional-looking installation.
Check the infill material to ensure that it is evenly distributed and there are no clumps or bare spots. Rake or brush the infill as needed to maintain its evenness and prevent matting or displacement.
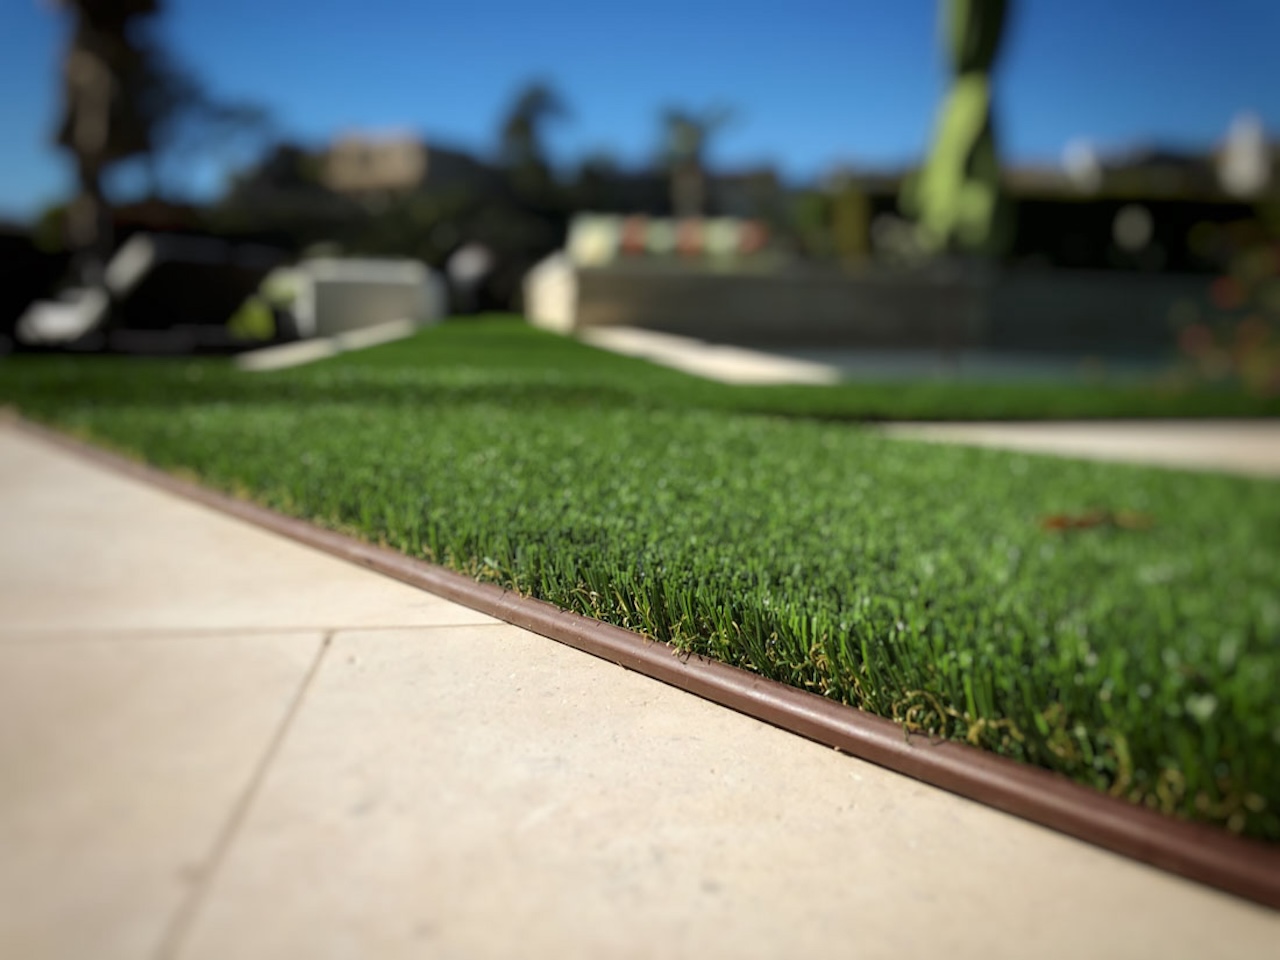
Inspect the edges of the astro turf to ensure they are properly secured and there are no loose areas. If necessary, use landscaping staples or adhesive to reinforce the edges and prevent any lifting or shifting.
Once your final inspection is complete, it’s time to learn some maintenance tips to keep your astro turf in top condition:
- Regularly remove debris, leaves, and organic matter from the surface of the astro turf. Use a leaf blower, rake, or a gentle spray of water to clear away any accumulated debris.
- Periodically rinse the astro turf with water to remove dirt, dust, and any potential odors. This can be done with a garden hose or a pressure washer set to a gentle setting.
- Address any spills, stains, or pet messes promptly. Blot the affected area with a clean cloth or use a mild detergent mixed with water to clean the spot. Avoid using harsh chemicals or solvents that can damage the turf fibers.
- Gently brush the astro turf regularly, especially in high-traffic areas, to maintain the upright position of the turf fibers. This helps prevent matting and keeps the turf looking fresh and vibrant.
- Inspect the infill material regularly to ensure it is evenly distributed and at the appropriate level. Add more infill as needed to maintain the desired cushioning and support.
- Periodically check the edges of the astro turf to ensure they are secure and intact. Repair any loose edges promptly to prevent any tripping hazards or potential damage to the installation.
By following these maintenance tips and performing routine upkeep, you can ensure that your astro turf remains in excellent condition for years to come. Enjoy your beautiful and low-maintenance lawn!
With that, you have completed the installation of astro turf on plywood. Pat yourself on the back for a job well done! Sit back, relax, and enjoy your vibrant and hassle-free artificial lawn.
Read more: How To Lay Astro Turf For Dogs On Dirt
Conclusion
Congratulations on successfully laying astro turf on plywood! You have transformed your outdoor space into a lush and low-maintenance oasis that will provide countless hours of enjoyment. By following the step-by-step guide outlined in this article, you have created a solid and durable foundation for your astro turf installation.
Astro turf offers numerous benefits, including minimal maintenance, vibrant appearance, and year-round usability. With proper care and maintenance, your astro turf will stay looking beautiful and inviting for years to come.
Remember to regularly clean and brush the astro turf, remove debris, and address any stains or spills promptly. Additionally, keep an eye on the infill material and ensure it remains evenly distributed to maintain the cushioning and stability of your artificial lawn.
By following the maintenance tips provided, you can enjoy the benefits of astro turf without the hassle of traditional grass. Spend more time relaxing and less time worrying about watering, mowing, or fertilizing.
Whether you’ve laid astro turf on plywood in a backyard, a balcony, or any other outdoor space, you’ve made a smart choice by opting for this versatile and durable alternative. Not only does it provide a beautiful and functional surface, but it also helps conserve water and reduce your impact on the environment.
Thank you for joining us on this adventure of laying astro turf on plywood. We hope that this guide has been informative and helpful in creating your dream outdoor space. Sit back, relax, and enjoy your maintenance-free astro turf lawn!
Frequently Asked Questions about How To Lay Astro Turf On Plywood
Was this page helpful?
At Storables.com, we guarantee accurate and reliable information. Our content, validated by Expert Board Contributors, is crafted following stringent Editorial Policies. We're committed to providing you with well-researched, expert-backed insights for all your informational needs.


0 thoughts on “How To Lay Astro Turf On Plywood”