Home>Garden Essentials>How To Save Squash Seeds
Garden Essentials
How To Save Squash Seeds
Modified: September 1, 2024
Learn how to save squash seeds in your garden and ensure a bountiful harvest. Discover expert tips and tricks to preserve and cultivate your favorite varieties.
(Many of the links in this article redirect to a specific reviewed product. Your purchase of these products through affiliate links helps to generate commission for Storables.com, at no extra cost. Learn more)
Introduction
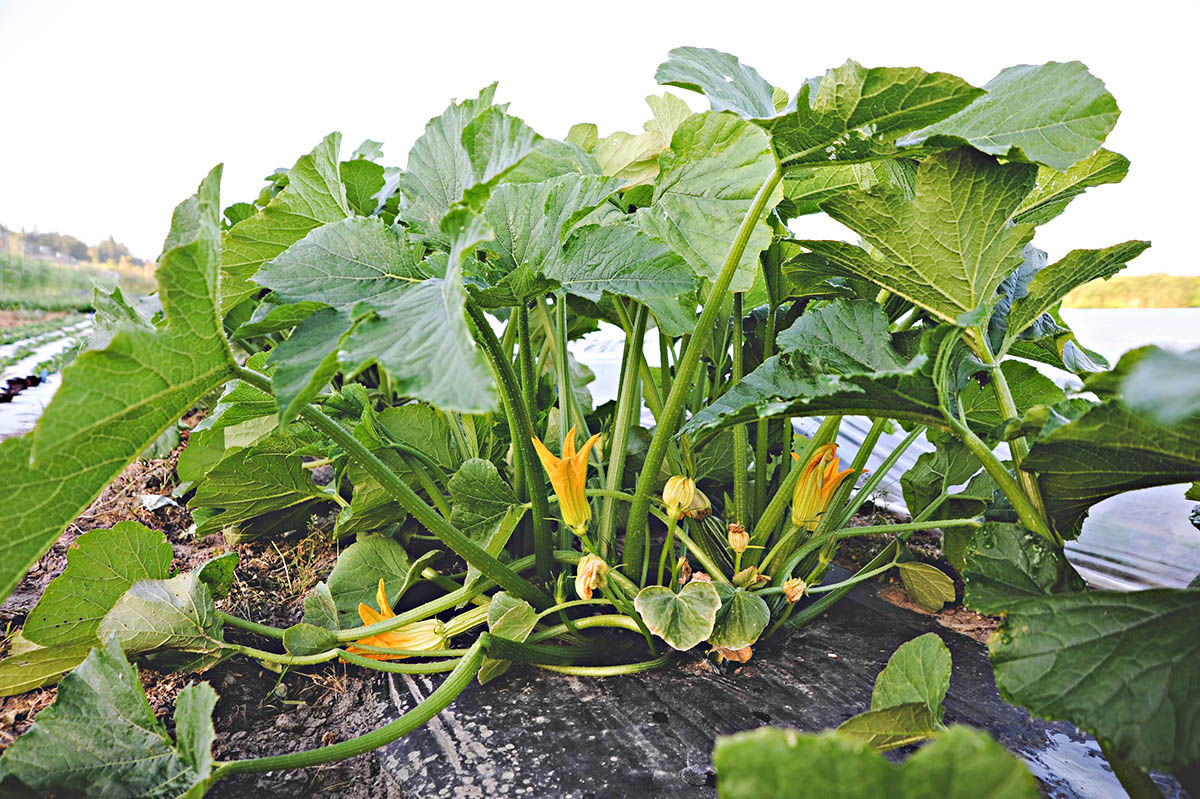
Welcome to our comprehensive guide on how to save squash seeds! Squash plants are a fantastic addition to any garden, providing delicious fruits and vibrant foliage. By saving the seeds from your squash plants, you can continue to enjoy their bountiful harvest year after year. Not only is seed-saving a cost-effective way to grow your own squash, but it also gives you the opportunity to preserve heirloom varieties and ensure a sustainable garden ecosystem.
In this article, we will take you through a step-by-step process of harvesting, cleaning, drying, and storing squash seeds. We will also touch upon how to test the viability of the seeds to ensure successful germination in the future.
Before we dive into the details, it’s important to note that while the basic methods for saving squash seeds apply to most varieties, there may be slight variations depending on the specific type of squash you have. Be sure to consult the seed packet or do some research to understand any unique requirements for the particular squash variety you are growing.
Now, let’s get started with the first step: harvesting the squash seeds!
Key Takeaways:
- Save squash seeds by harvesting, cleaning, drying, and storing them properly. Test their viability before planting to ensure successful germination and enjoy growing your own delicious squash in the garden!
- Preserving squash seeds allows you to continue enjoying their bountiful harvest year after year. It’s a rewarding experience that contributes to the sustainability of your garden ecosystem.
Read more: How To Plant Squash Seeds
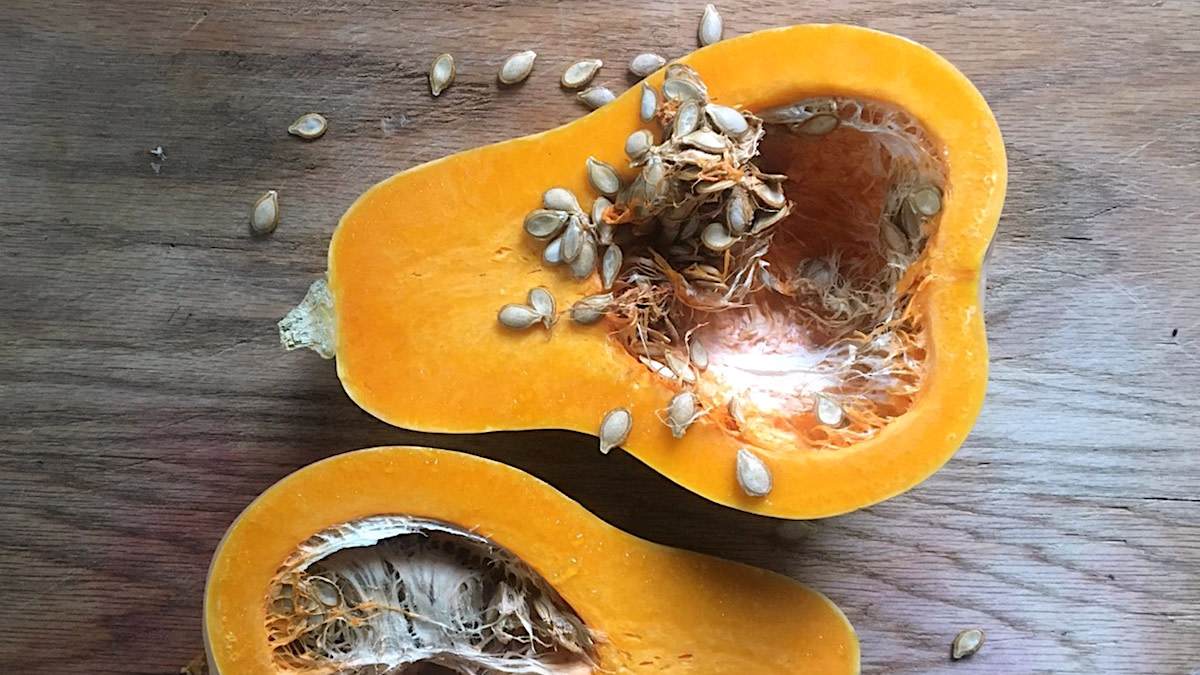
Step 1: Harvesting the Squash Seeds
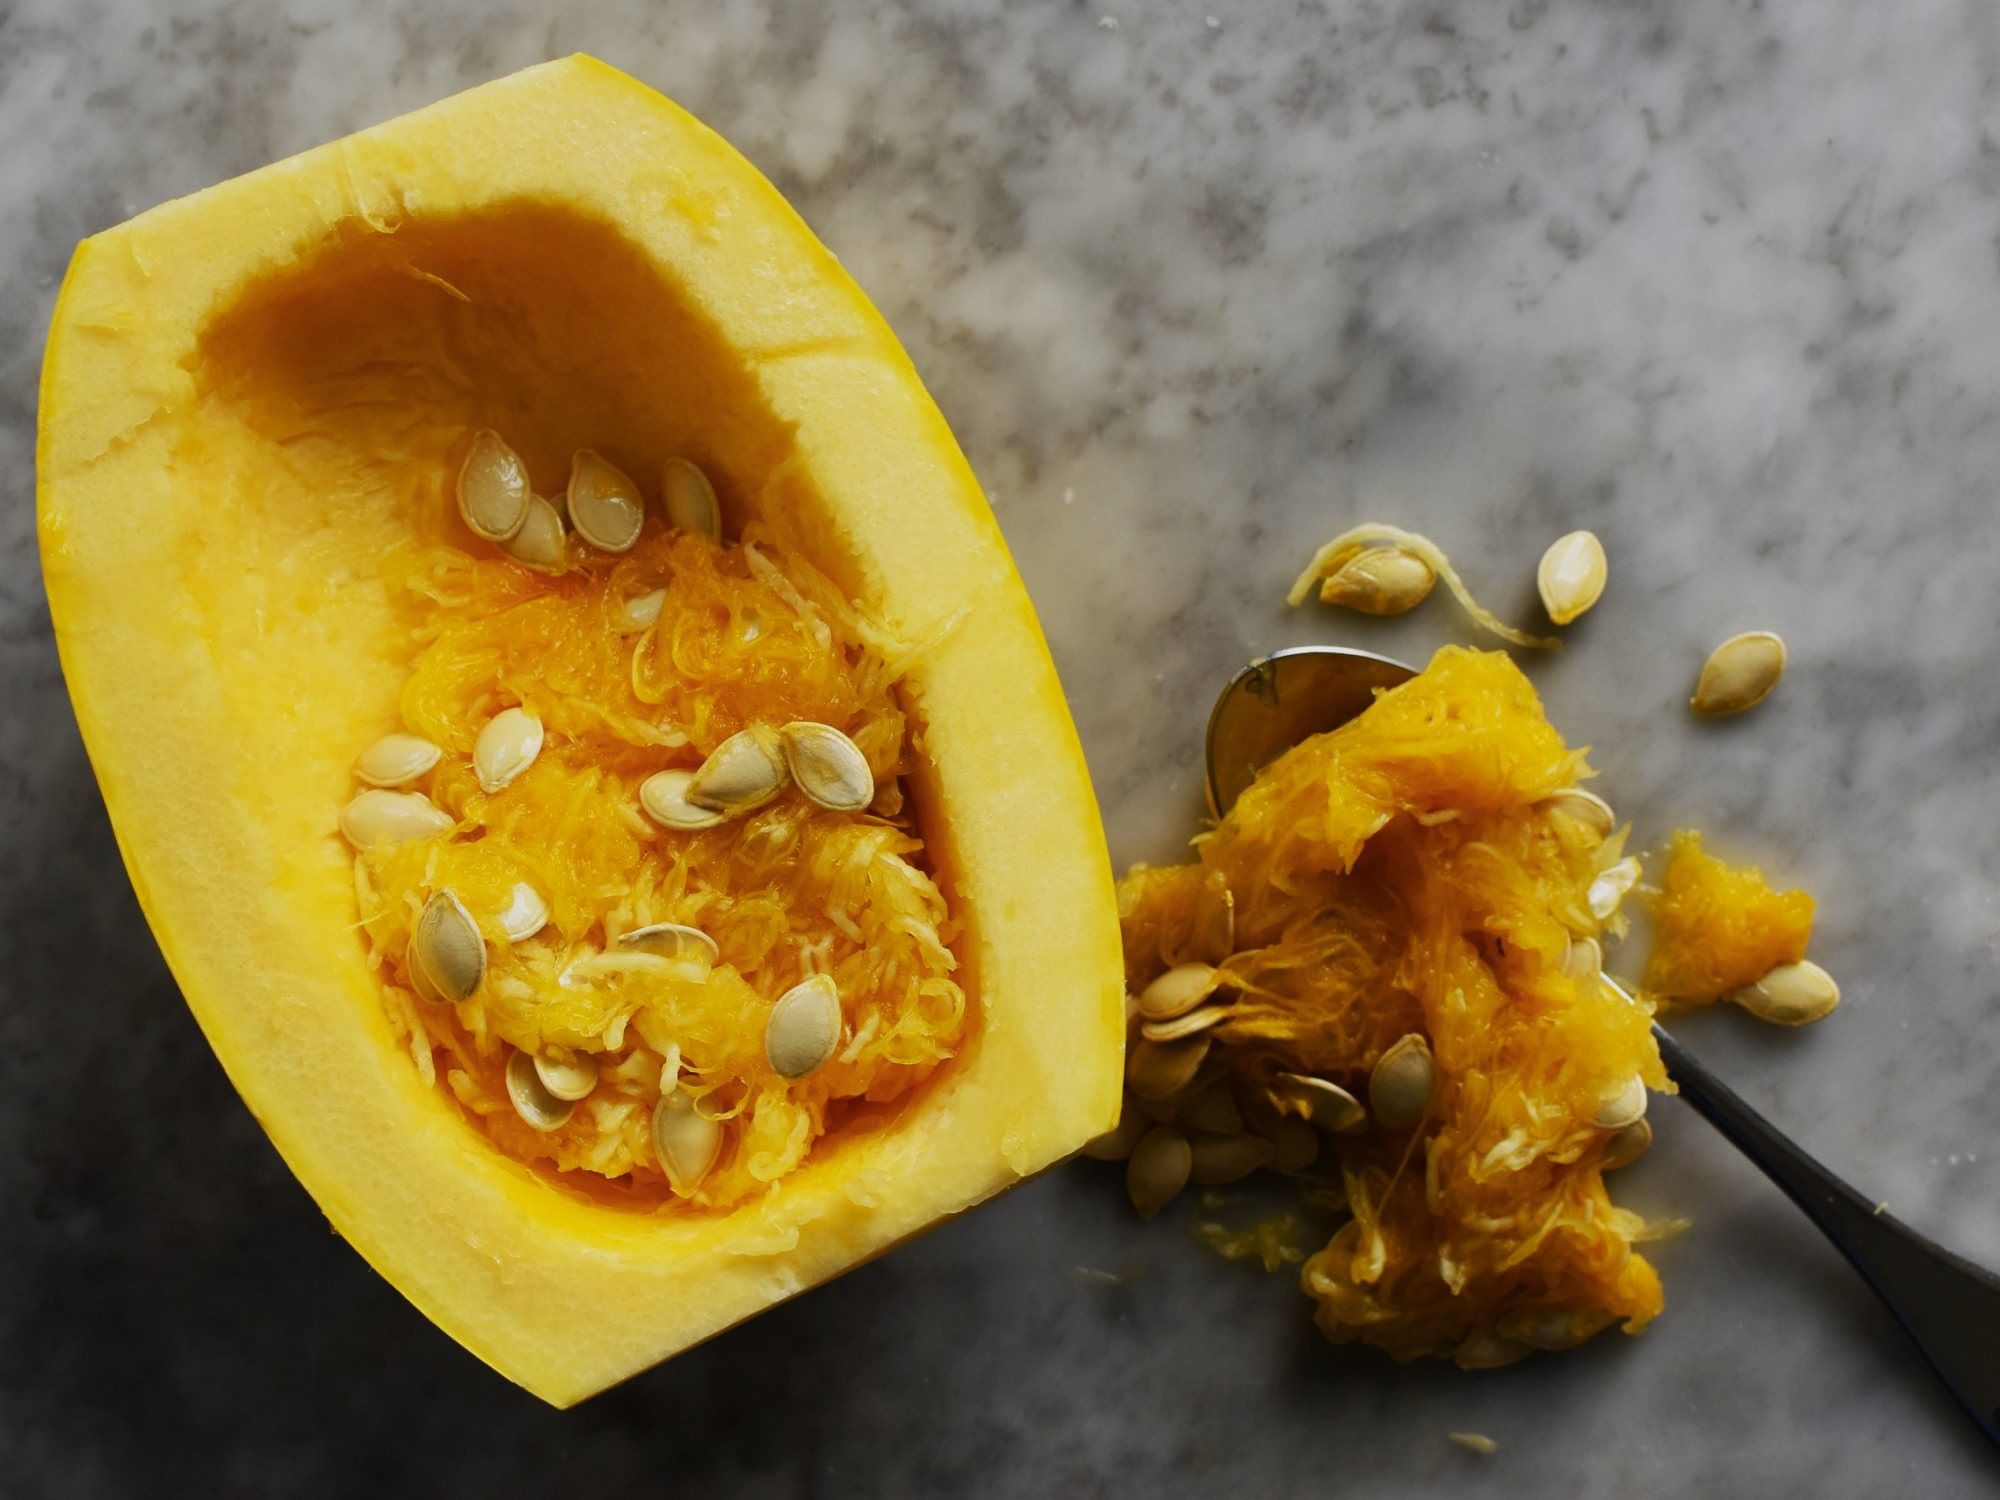
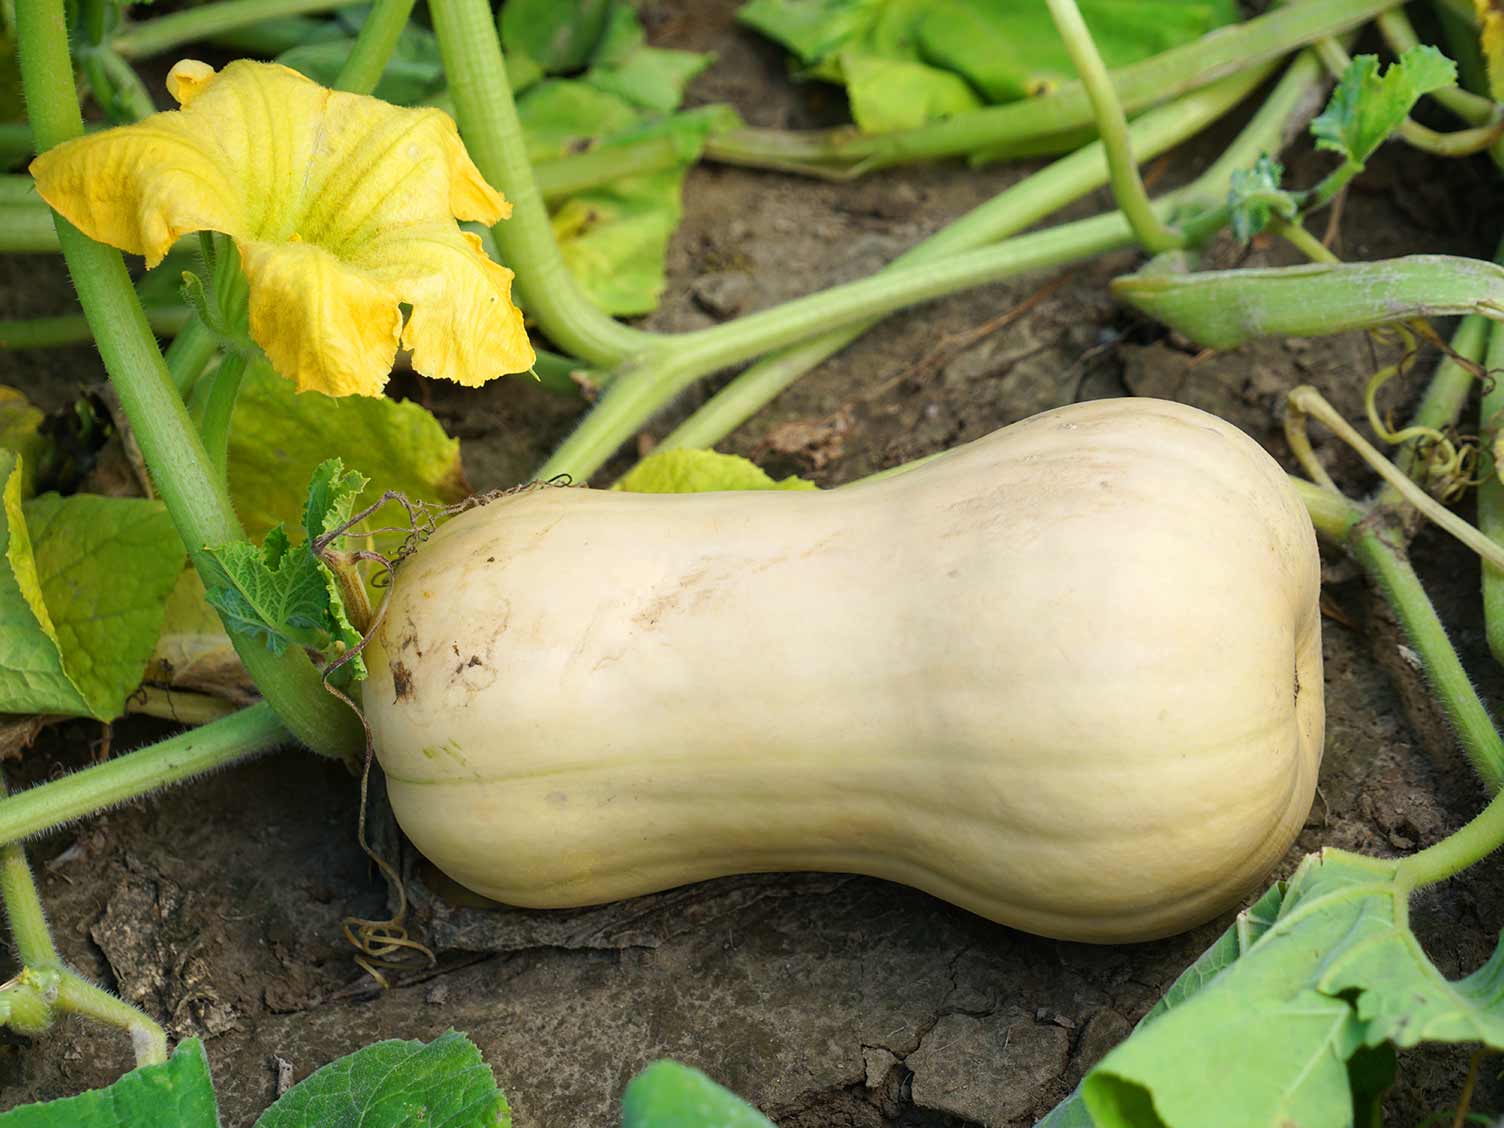
The first step in saving squash seeds is to harvest them from mature, ripe squash fruits. To ensure the seeds are fully developed and viable, it’s important to allow the squash to reach optimal maturity on the vine.
Here’s how to do it:
- Select a mature squash: Choose a squash that has fully ripened on the vine. Look for a hard rind, deep color, and the characteristic signs of maturity for the specific variety you are growing.
- Prepare the squash: Carefully cut the squash open with a clean knife. When cutting, be gentle to avoid damaging the seeds inside.
- Remove the seeds: Once the squash is open, scoop out the seeds and the surrounding pulp with a spoon. Place them in a clean container.
- Separate the seeds from the pulp: Fill the container with water and let it sit for a few minutes. This will help to separate the seeds from the surrounding pulp. The viable seeds will sink to the bottom, while the floating pulp can be skimmed off the top.
It’s important to note that some squash varieties have a gelatinous coating on the seeds. This coating can inhibit germination if not removed. To remove the coating, simply wash the seeds in a fine-mesh sieve under running water, gently rubbing them with your fingers to remove any remaining pulp or coating. Once the seeds are clean, spread them out on a paper towel or a clean cloth and pat them dry.
Now that you have successfully harvested the squash seeds, it’s time to move on to the next step: cleaning and preparing the seeds for storage.
Step 2: Cleaning and Preparing the Seeds
After harvesting the squash seeds, it’s crucial to clean and prepare them before storing. This step helps remove any debris, pathogens, or excess moisture that could potentially harm the seeds and reduce their viability.
Follow these steps for cleaning and preparing squash seeds:
- Separate any remaining pulp: If there are still small bits of pulp clinging to the seeds, rinse them under running water and gently rub the seeds to remove the remaining debris.
- Sanitize the seeds (optional): To further eliminate any potential pathogens, you can soak the seeds in a dilute bleach solution. Mix one part bleach with nine parts water, and let the seeds soak for 10-15 minutes. After soaking, thoroughly rinse the seeds with clean water to remove any traces of bleach.
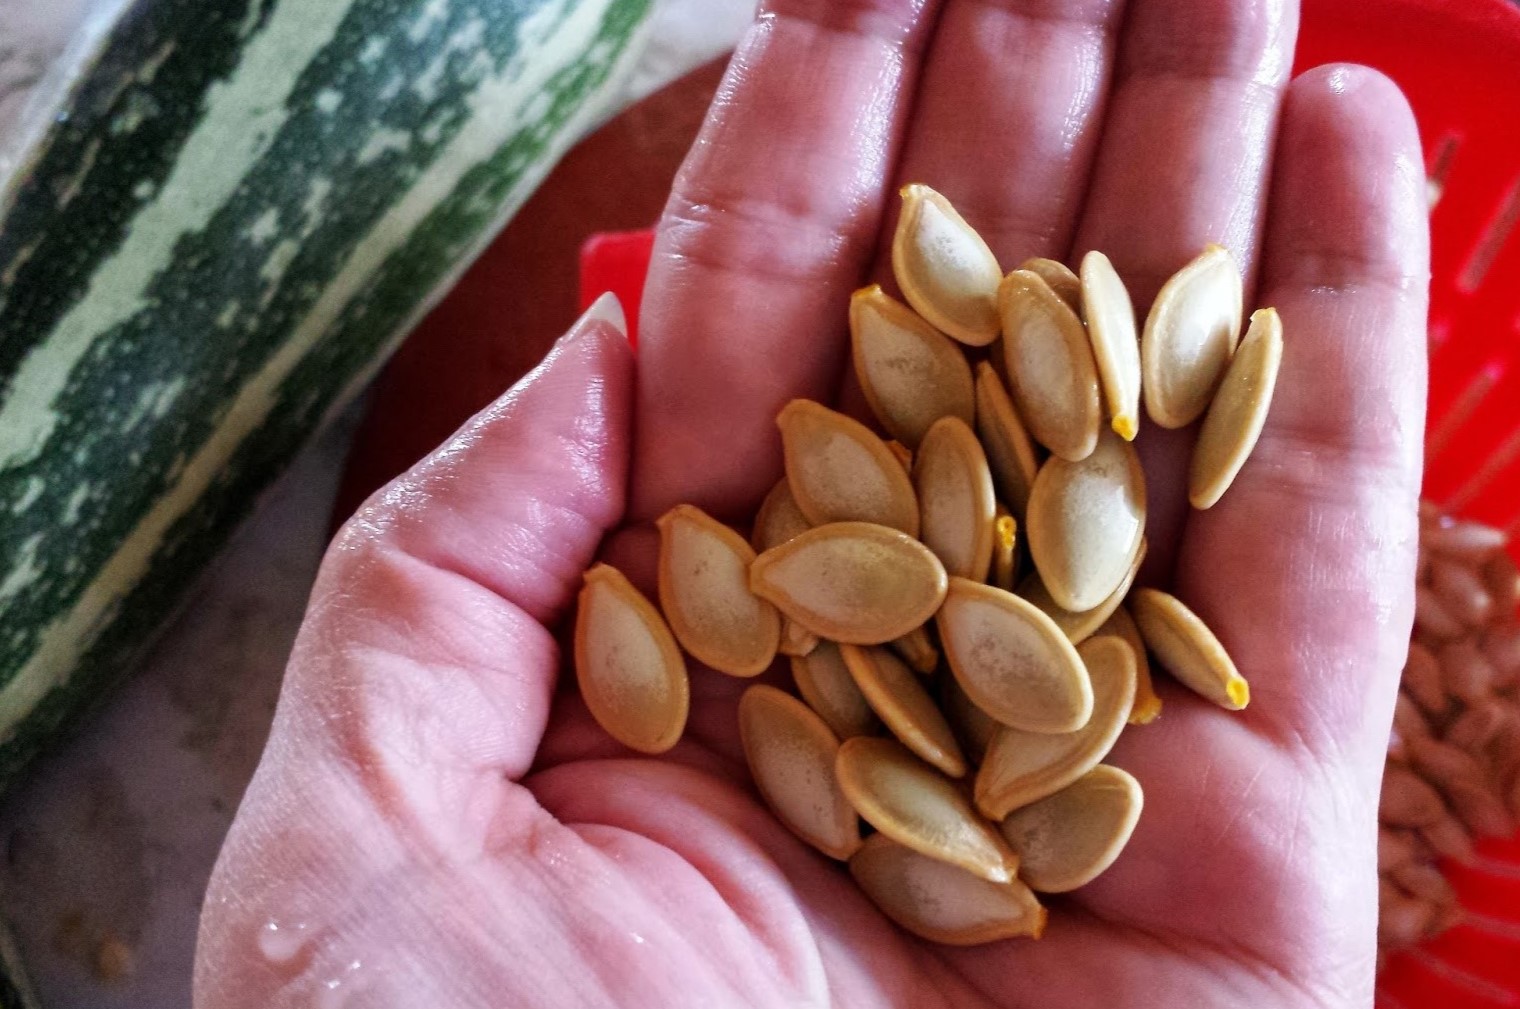
- Inspect and discard damaged seeds: Take a close look at the seeds and discard any that appear discolored, deformed, or damaged. These seeds are unlikely to germinate, so it’s best to focus on saving the healthy ones.
- Air dry the seeds: Once the seeds are clean and free from pulp, lay them out on a paper towel or a clean, dry surface. Allow them to air dry completely for about 1-2 weeks. Make sure to place them in a well-ventilated area away from direct sunlight to prevent any potential heat damage.
During the drying process, it’s important to check the seeds regularly and ensure they are completely dry before moving on to the next step. Damp or moisture-laden seeds can lead to mold and decrease the seed longevity.
Now that the squash seeds are cleaned and dried, they are ready for the next step: storing them properly to maintain their viability over time.
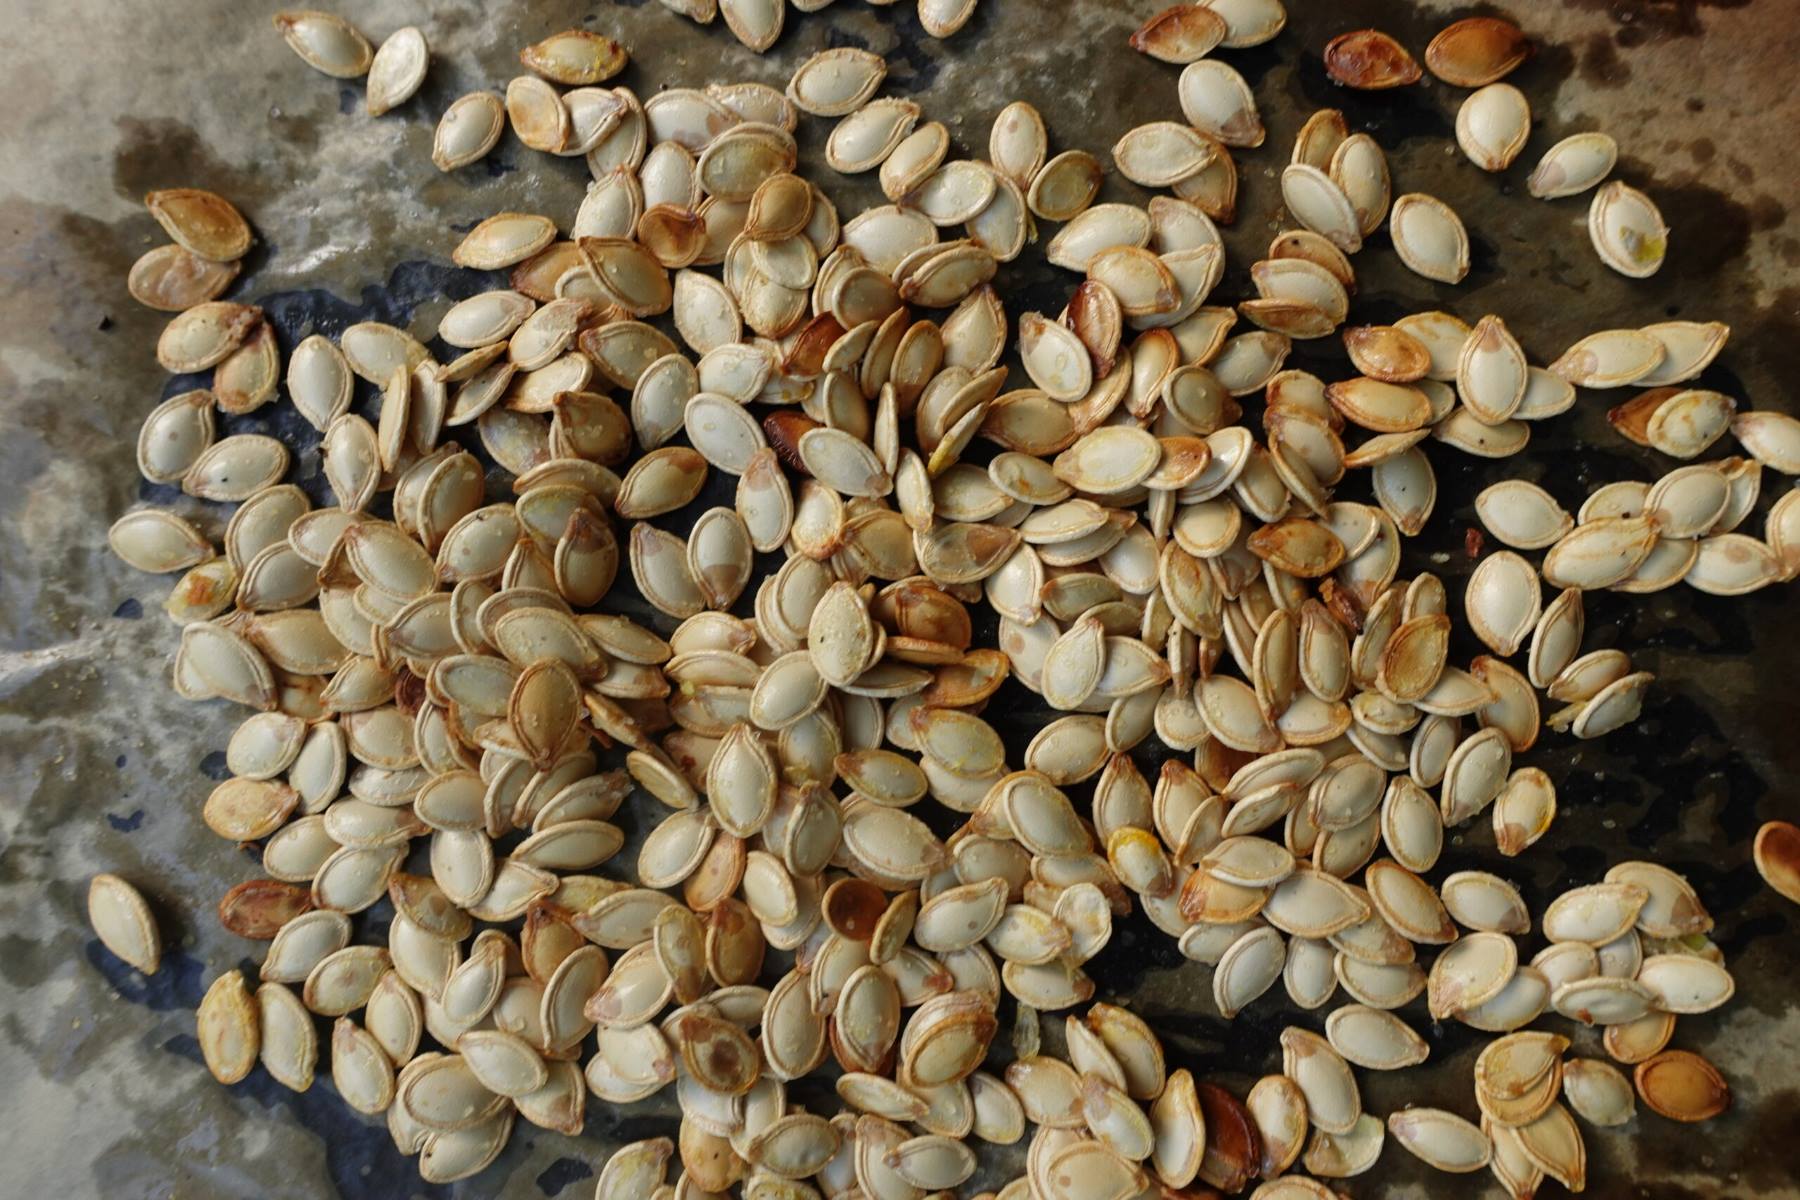
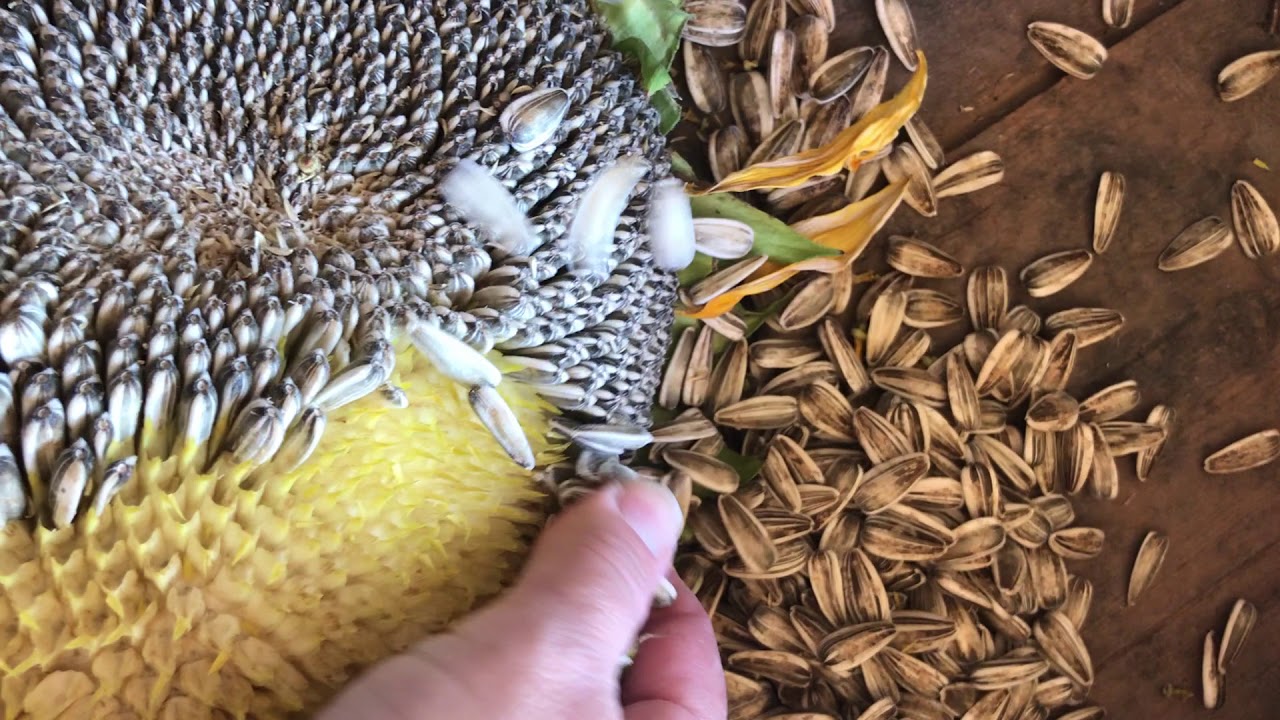
Step 3: Drying the Seeds
Properly drying the squash seeds is essential for their long-term viability and storage. Drying helps remove any remaining moisture, which can lead to mold or seed deterioration if not addressed. It also helps to prevent the seeds from sticking together, allowing for easier storage and handling.
Follow these steps to ensure optimal drying of squash seeds:
- Spread the seeds: Once the seeds are cleaned and free from excess moisture, spread them out in a single layer on a clean, dry surface. You can use a paper towel, a baking sheet lined with parchment paper, or a mesh drying screen.
- Avoid direct sunlight: Place the seeds in a well-ventilated area that is away from direct sunlight. Direct sunlight can cause excessive heat, which may damage the seeds or hinder the drying process.
- Rotate and stir: Every few days, gently rotate and stir the seeds to ensure even drying. This will help prevent any moisture buildup and ensure thorough drying.
- Patience is key: Allow the seeds to air dry completely for about 2-3 weeks. The drying time may vary depending on the humidity levels in your environment. To test if the seeds are dry enough, do a “snap test” – a properly dried seed should snap and not bend.
Be sure to monitor the drying process regularly and check for any signs of mold or moisture retention. If you notice any issues, remove any affected seeds promptly to prevent them from contaminating the rest.
Once the squash seeds are fully dried, it’s time to move on to the next step: proper storage to maintain their viability for future use.
To save squash seeds, let the fruit fully ripen on the vine, then scoop out the seeds and rinse off the pulp. Dry the seeds thoroughly before storing in a cool, dry place.
Step 4: Storing the Seeds
Proper storage is crucial to maintain the viability of squash seeds and ensure successful germination in the future. When stored under the right conditions, squash seeds can remain viable for several years. Follow these steps to store your saved squash seeds:
- Choose appropriate containers: Select airtight containers that are moisture-proof to prevent any moisture from entering and compromising the seeds. Good options include glass jars with tight-fitting lids, seed storage envelopes, or small zip-top plastic bags.
- Label the containers: Label each container with the variety of squash seeds and the date of collection. This helps you keep track of the seeds and ensures you know their age when planting them in the future.
- Prevent moisture: To further safeguard against moisture, you can add a desiccant packet or a small amount of silica gel to the container. These will help absorb any excess moisture and keep the seeds dry.
- Store in a cool, dry place: Find a cool, dark, and dry place to store your squash seeds. The ideal storage temperature is around 50°F (10°C), with low humidity. Avoid storing the seeds in areas prone to temperature fluctuations, such as near windows or heaters.
- Avoid freezing: While you might think freezing the seeds will preserve their viability, it’s generally not recommended for squash seeds. Freezing can damage the delicate seed tissues, reducing the chances of successful germination.
Regularly check your stored seeds for any signs of moisture, mold, or insect infestation. If you notice any issues, promptly remove any affected seeds and adjust the storage conditions if necessary.
Remember to keep in mind that the viability of squash seeds can vary from one variety to another. Some varieties may remain viable for several years, while others may have a shorter shelf life. Be sure to check the recommended longevity of the specific squash variety that you are saving seeds from and prioritize using the older seeds first.
Now that you have successfully stored your squash seeds, you can look forward to planting them in the future and enjoying an abundant harvest of delicious squash!
Read more: How To Toast Squash Seeds
Step 5: Testing the Viability of the Seeds
Before planting your saved squash seeds, it’s a good idea to test their viability to ensure successful germination. Performing a simple seed viability test can help you determine if the seeds are still capable of sprouting and growing into healthy plants.
Here’s how to test the viability of squash seeds:
- Select a representative sample: Choose a small number of seeds from your stored collection to test. It’s best to select seeds that are a few years old to get an accurate assessment of their viability.
- Pre-moisten a paper towel: Dampen a paper towel or a piece of filter paper with water. Make sure it is not soaking wet, but uniformly moist throughout.
- Place the seeds: Lay the selected seeds on the moistened paper towel, ensuring they are evenly spaced and not touching each other.
- Fold and seal: Carefully fold the paper towel to cover the seeds and place it inside a plastic bag or airtight container. Seal the container to create a mini greenhouse environment.
- Provide warmth and monitor: Place the container in a warm location, such as on top of a refrigerator or near a heat source. Keep an eye on the seeds and check for any signs of germination every few days.
- Observe germination rates: After about 7-10 days, check to see how many seeds have sprouted. Record the germination rate, which is the percentage of seeds that have successfully germinated. If a large majority of the seeds have sprouted, it indicates a high viability rate. If only a few seeds have sprouted, the viability might be low, and you may need to consider purchasing fresh seeds for better results.
By performing this simple seed viability test, you can assess the quality of your saved squash seeds and adjust your planting plans accordingly. Remember to record the results for future reference.
It’s worth mentioning that even if the germination rate is low, it doesn’t necessarily mean that all hope is lost. Some seeds may still sprout, albeit at a lower rate. You can employ techniques like seed scarification or warm water soaking to improve germination for any seeds that show lower viability.
Now that you have tested the viability of your squash seeds, you can confidently move forward with planting the healthy ones and watching them grow into vibrant squash plants.
Conclusion
Congratulations on learning how to save squash seeds! By following the step-by-step process of harvesting, cleaning, drying, storing, and testing the viability of the seeds, you have taken an important step towards preserving the diversity of squash varieties and ensuring a sustainable garden ecosystem.
Saving squash seeds not only allows you to grow your own delicious squash year after year but also gives you the opportunity to preserve heirloom varieties and participate in the age-old tradition of seed-saving. It’s a rewarding experience to see the entire cycle of plant growth, from seed to harvest, and to have a hand in the continuation of these wonderful plants.
Remember, each squash variety may have specific requirements for seed-saving, so be sure to consult the seed packet or conduct research specific to the variety you are growing. Additionally, always label and date your stored seeds to keep track of their age and prioritize using older seeds first.
Don’t forget to periodically check your seed storage for any signs of moisture or contamination, as maintaining the proper storage conditions is crucial for preserving seed viability. A cool, dark, and dry environment will help extend the longevity of your stored squash seeds.
Finally, testing the viability of your saved squash seeds before planting ensures that you are using seeds that have the highest probability of successful germination. The seed viability test gives you a clear idea of which seeds are still viable and helps you plan your planting accordingly.
Now that you have gained the knowledge and skills to save squash seeds, you can continue to enjoy the benefits of growing squash in your garden for years to come. Happy gardening!
Frequently Asked Questions about How To Save Squash Seeds
Was this page helpful?
At Storables.com, we guarantee accurate and reliable information. Our content, validated by Expert Board Contributors, is crafted following stringent Editorial Policies. We're committed to providing you with well-researched, expert-backed insights for all your informational needs.


0 thoughts on “How To Save Squash Seeds”