Home>Garden Essentials>How To Save Seeds From Vegetables
Garden Essentials
How To Save Seeds From Vegetables
Modified: September 1, 2024
Learn the essential steps on how to save seeds from vegetables in your garden. Discover the art of seed preservation and ensure a bountiful harvest year after year.
(Many of the links in this article redirect to a specific reviewed product. Your purchase of these products through affiliate links helps to generate commission for Storables.com, at no extra cost. Learn more)
Introduction
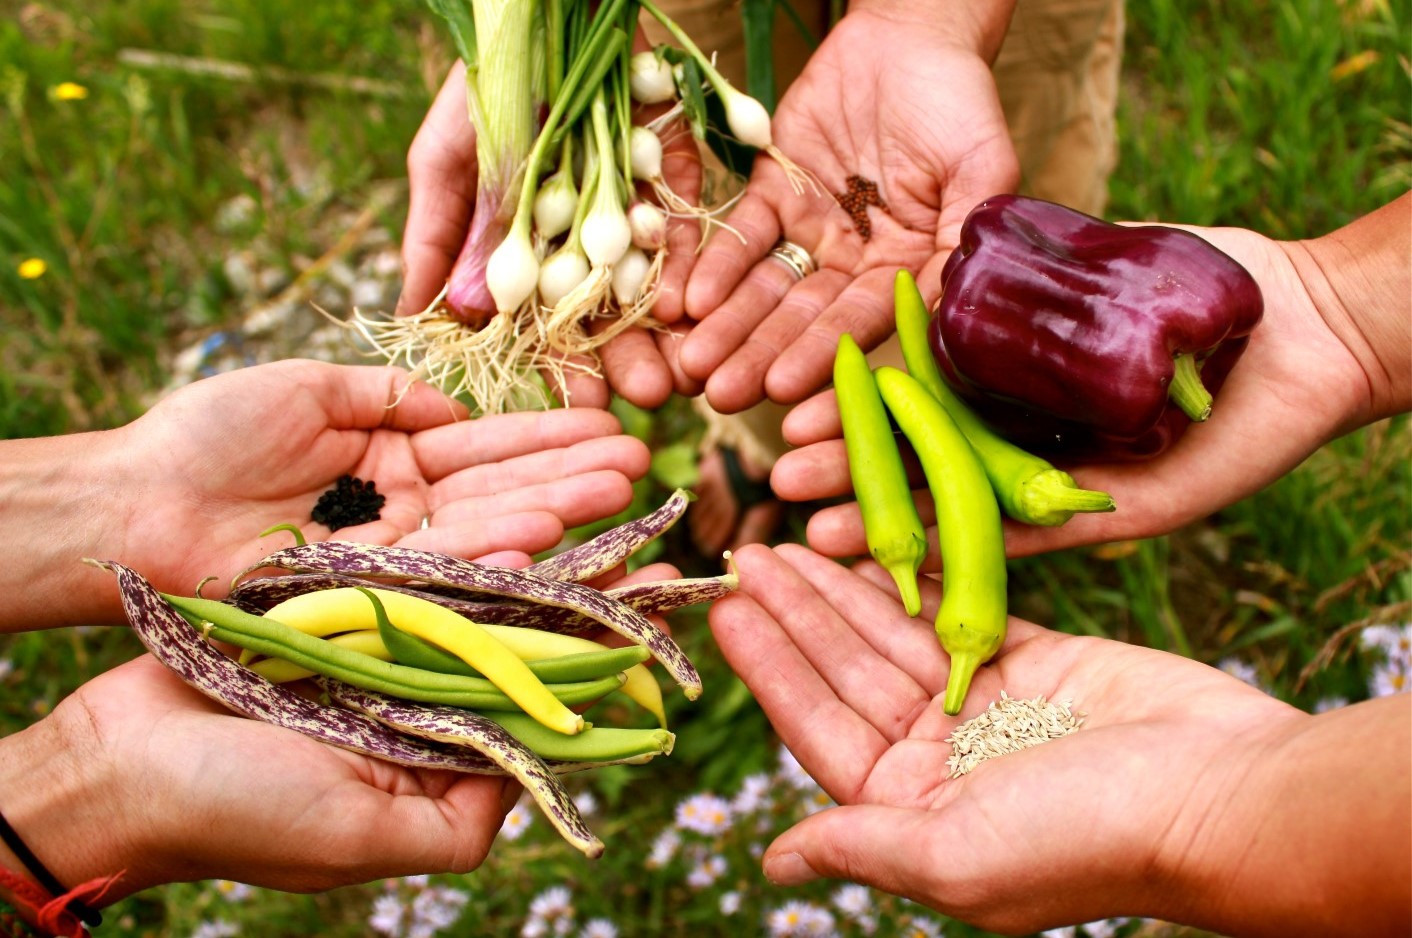
Welcome to the wonderful world of seed saving! There’s nothing quite like the satisfaction of growing your own vegetables, and taking it a step further by saving seeds from your harvests can truly deepen your connection to the plant world. Seed saving is not only a rewarding practice, but it also plays a crucial role in preserving biodiversity and ensuring the availability of heirloom varieties for future generations.
In this article, we’ll explore the reasons why you should consider saving seeds from vegetables, how to choose the right vegetables for seed saving, and the step-by-step process of harvesting and storing seeds. Whether you’re a seasoned gardener or just starting out, this guide will equip you with the knowledge and skills to successfully save seeds and continue the cycle of life in your garden.
So, get ready to embark on a journey of discovery, conservation, and the joys of self-sufficiency. Grab your gardening gloves, sharpen your gardening shears, and let’s dive into the art of saving seeds from vegetables!
Key Takeaways:
- Seed saving preserves unique plant traits, saves money, and adapts plants to your garden. It’s a fun, sustainable, and rewarding practice for all gardeners.
- Choose open-pollinated vegetables, harvest and store seeds properly, and test their viability for successful seed saving. Embrace the journey of preserving biodiversity!
Read more: How To Save Seeds From Sunflowers
Why Save Seeds from Vegetables
Saving seeds from vegetables is not just a fun and rewarding activity, but it also serves several important purposes:
- Preserving Genetic Diversity: By saving seeds, you contribute to the preservation of heirloom and open-pollinated varieties, which often possess unique traits and flavors that might be lost in commercially available hybrid seeds. This helps to maintain genetic diversity and ensures a wide range of options for future gardeners.
- Saving Money: Buying seeds every year can quickly add up. By saving your own seeds, you can significantly reduce your gardening expenses, especially if you have a large garden or grow multiple varieties of vegetables.
- Adapting to Your Climate and Soil: Over time, saved seeds adapt to your specific growing conditions, climate, and soil. This process, known as “seed saving selection,” allows plants to become better suited for your garden, leading to improved resilience and productivity.
- Building Sustainable Gardening Practices: Seed saving is an integral part of sustainable gardening. By reducing reliance on commercial seed sources, you decrease your carbon footprint and contribute to a more self-sufficient and resilient food system.
- Passing Down Traditional Knowledge: Saving seeds from vegetables is an ancient practice that has been passed down through generations. By continuing this tradition, you contribute to the preservation and sharing of valuable gardening knowledge and techniques.
So, whether you’re motivated by a love for unique flavors, a desire to save money, or a commitment to sustainable gardening, saving seeds from vegetables is a worthwhile endeavor that benefits both your garden and the broader ecosystem.
Choosing the Right Vegetables for Seed Saving
Not all vegetables are suitable for seed saving, so it’s important to choose the right ones to ensure successful results. Here are some factors to consider when selecting vegetables for seed saving:
- Open-Pollinated Varieties: Look for vegetables that are labeled as open-pollinated or heirloom varieties. These plants tend to produce seeds that will grow true to their parent plants, unlike hybrids, which may produce unpredictable offspring.
- Isolation Requirements: Some vegetables, such as corn, squash, and cucumbers, are prone to cross-pollination. To maintain the integrity of the seeds, you’ll need to either isolate them from other varieties or hand-pollinate the flowers to control the pollination process.
- Healthy and Vigorous Plants: Choose plants that are healthy, disease-free, and show vigorous growth. These plants are more likely to produce high-quality seeds that will yield healthy and robust plants in the future.
- Seed Maturity: Allow the vegetables to fully mature on the plants before harvesting the seeds. This ensures that the seeds are mature and viable for storage.
- Variety Preference: Consider your personal preferences regarding taste, texture, and appearance when selecting vegetables for seed saving. After all, you want to save seeds from vegetables that you enjoy growing and eating.
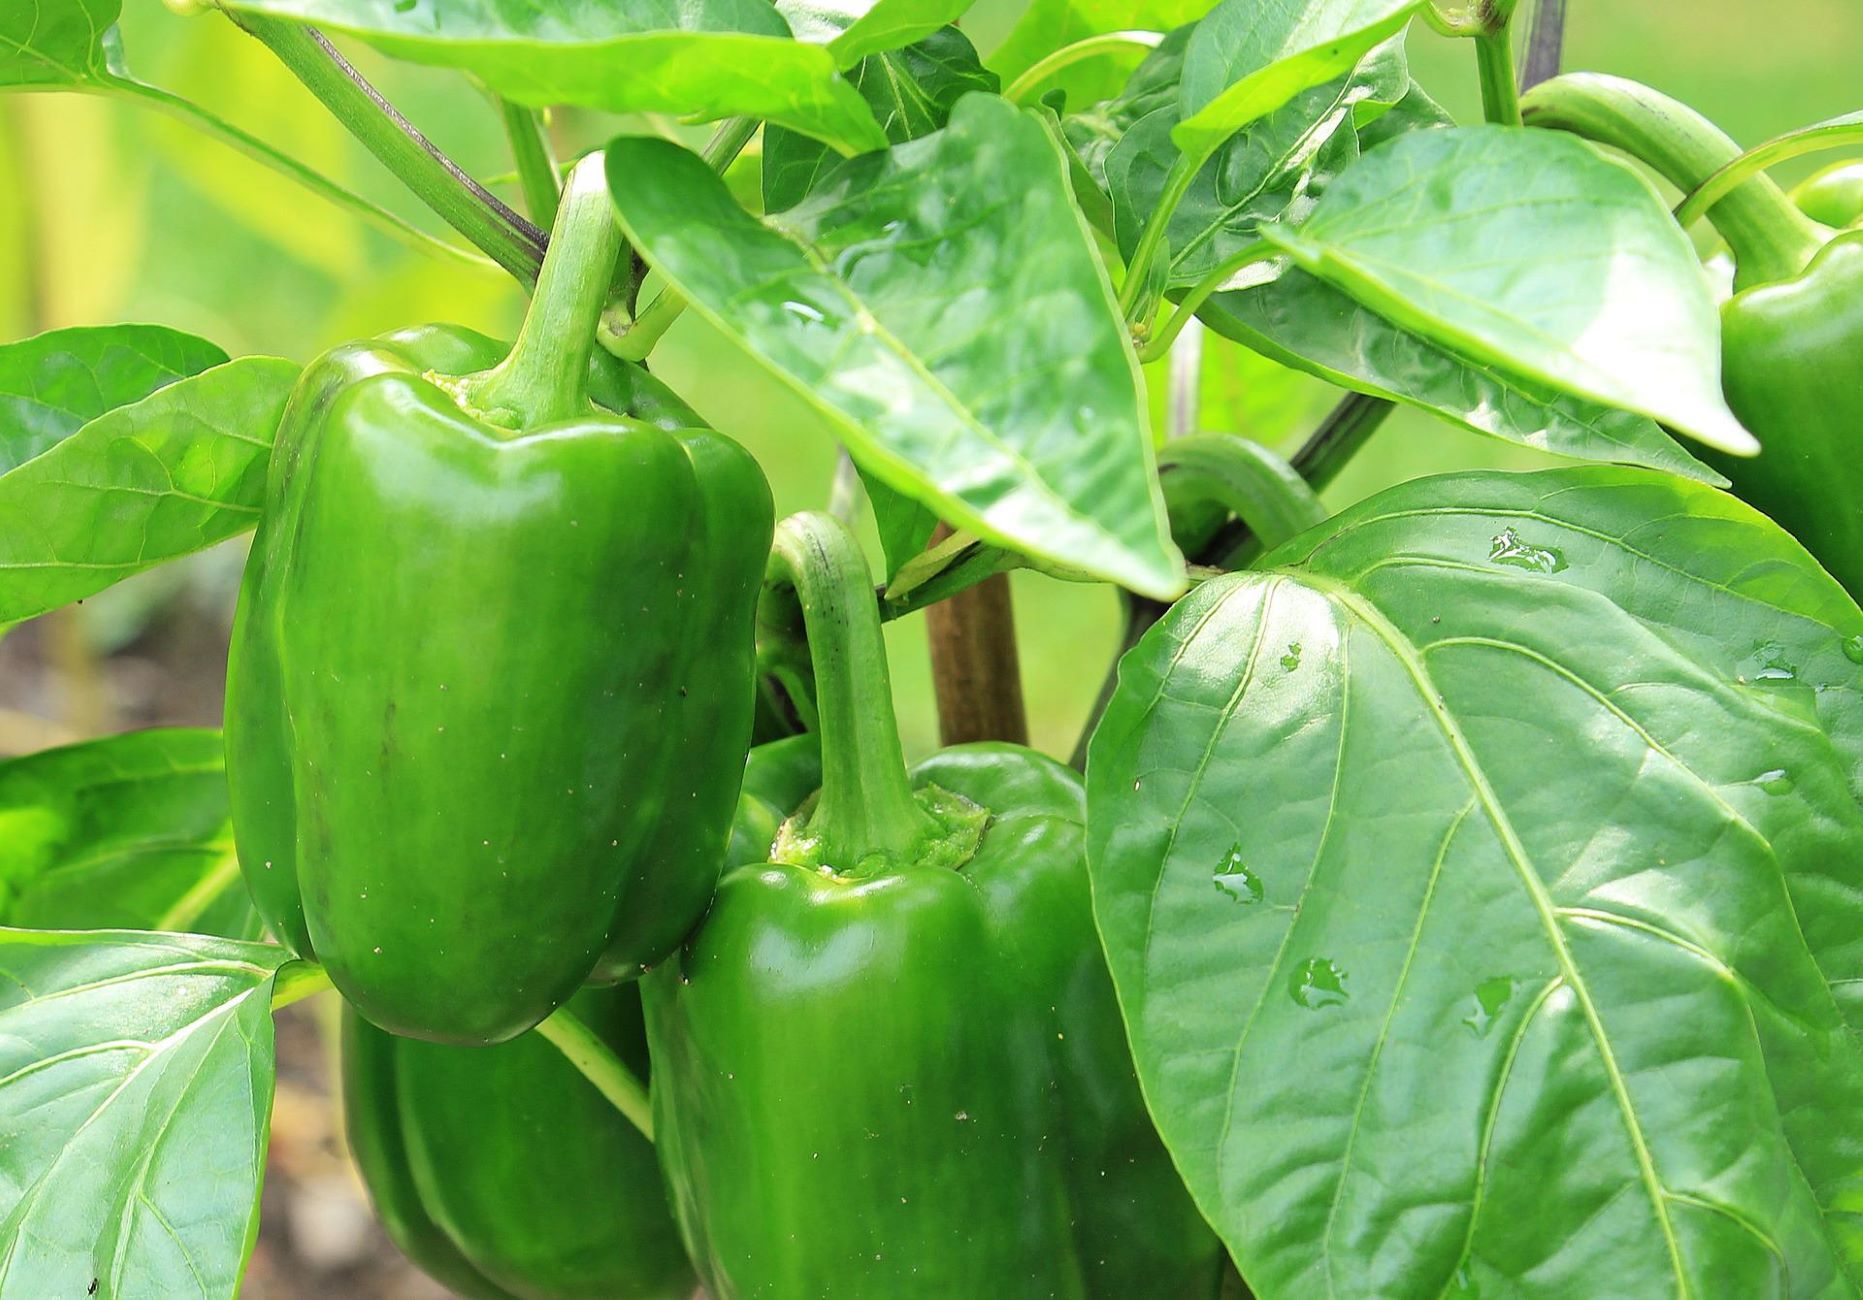
Some common vegetables that are generally well-suited for seed saving include tomatoes, peppers, beans, peas, lettuce, and radishes. These plants are relatively easy to save seeds from and are a good starting point for beginners.
Remember to always choose high-quality, non-GMO seeds or seedlings to start with. This ensures that you have a strong foundation for seed saving and that the resulting seeds are of the highest quality.
By carefully selecting the right vegetables for seed saving, you set yourself up for success and increase the likelihood of obtaining viable seeds that will produce healthy and productive plants in the future. Now, let’s move on to the next step: harvesting the seeds!
How to Harvest Seeds from Vegetables
Harvesting seeds from vegetables requires a bit of patience and attention to detail. Here’s a general step-by-step guide to help you successfully harvest seeds:
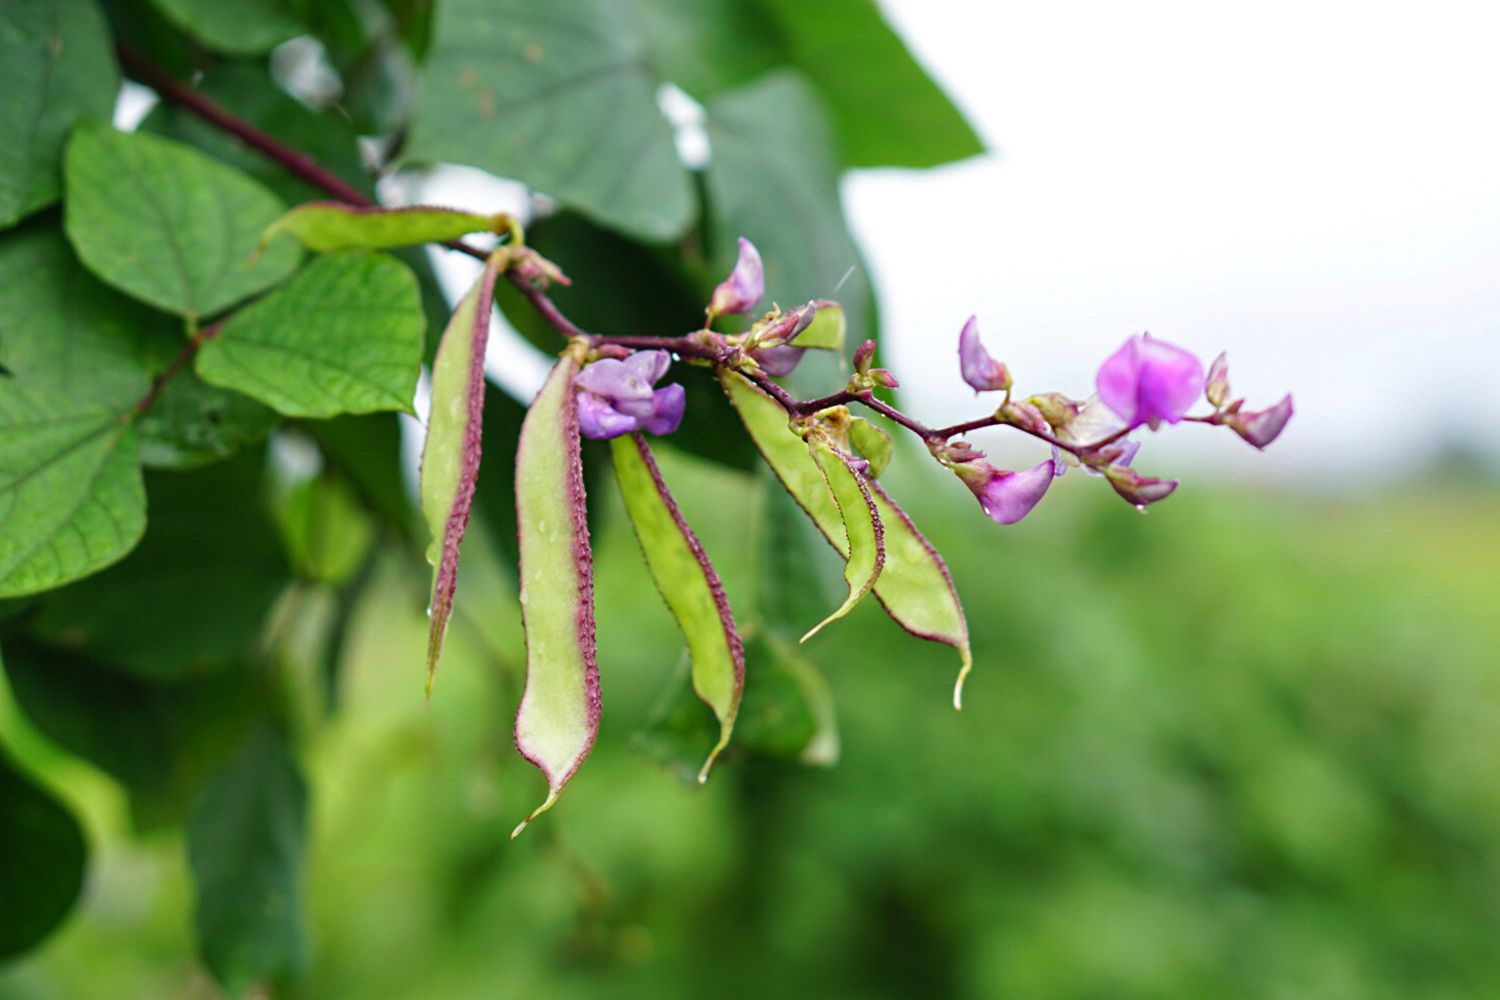
- Allow Vegetables to Fully Ripen: Let the vegetables fully ripen on the plant until they reach their mature stage. This is crucial to ensure that the seeds inside are fully developed and viable.
- Choose the Best Fruits: Select the healthiest and most robust fruits or vegetables to save seeds from. Look for uniformity in size, shape, and color as these characteristics indicate the best specimens.
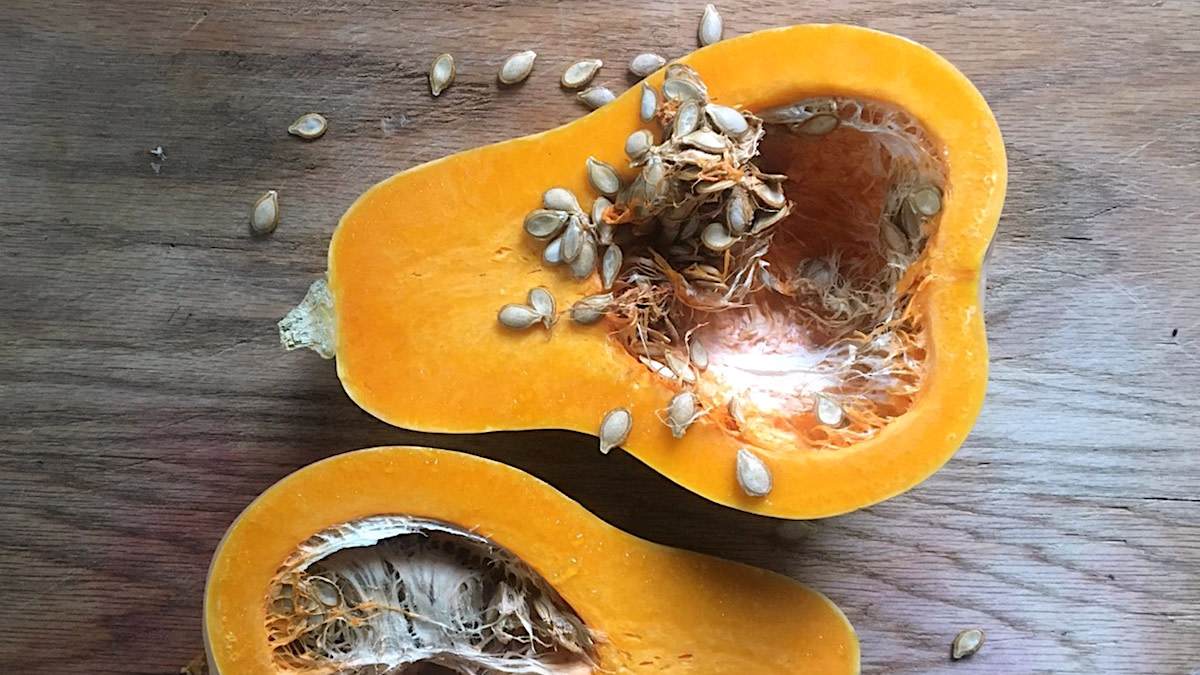
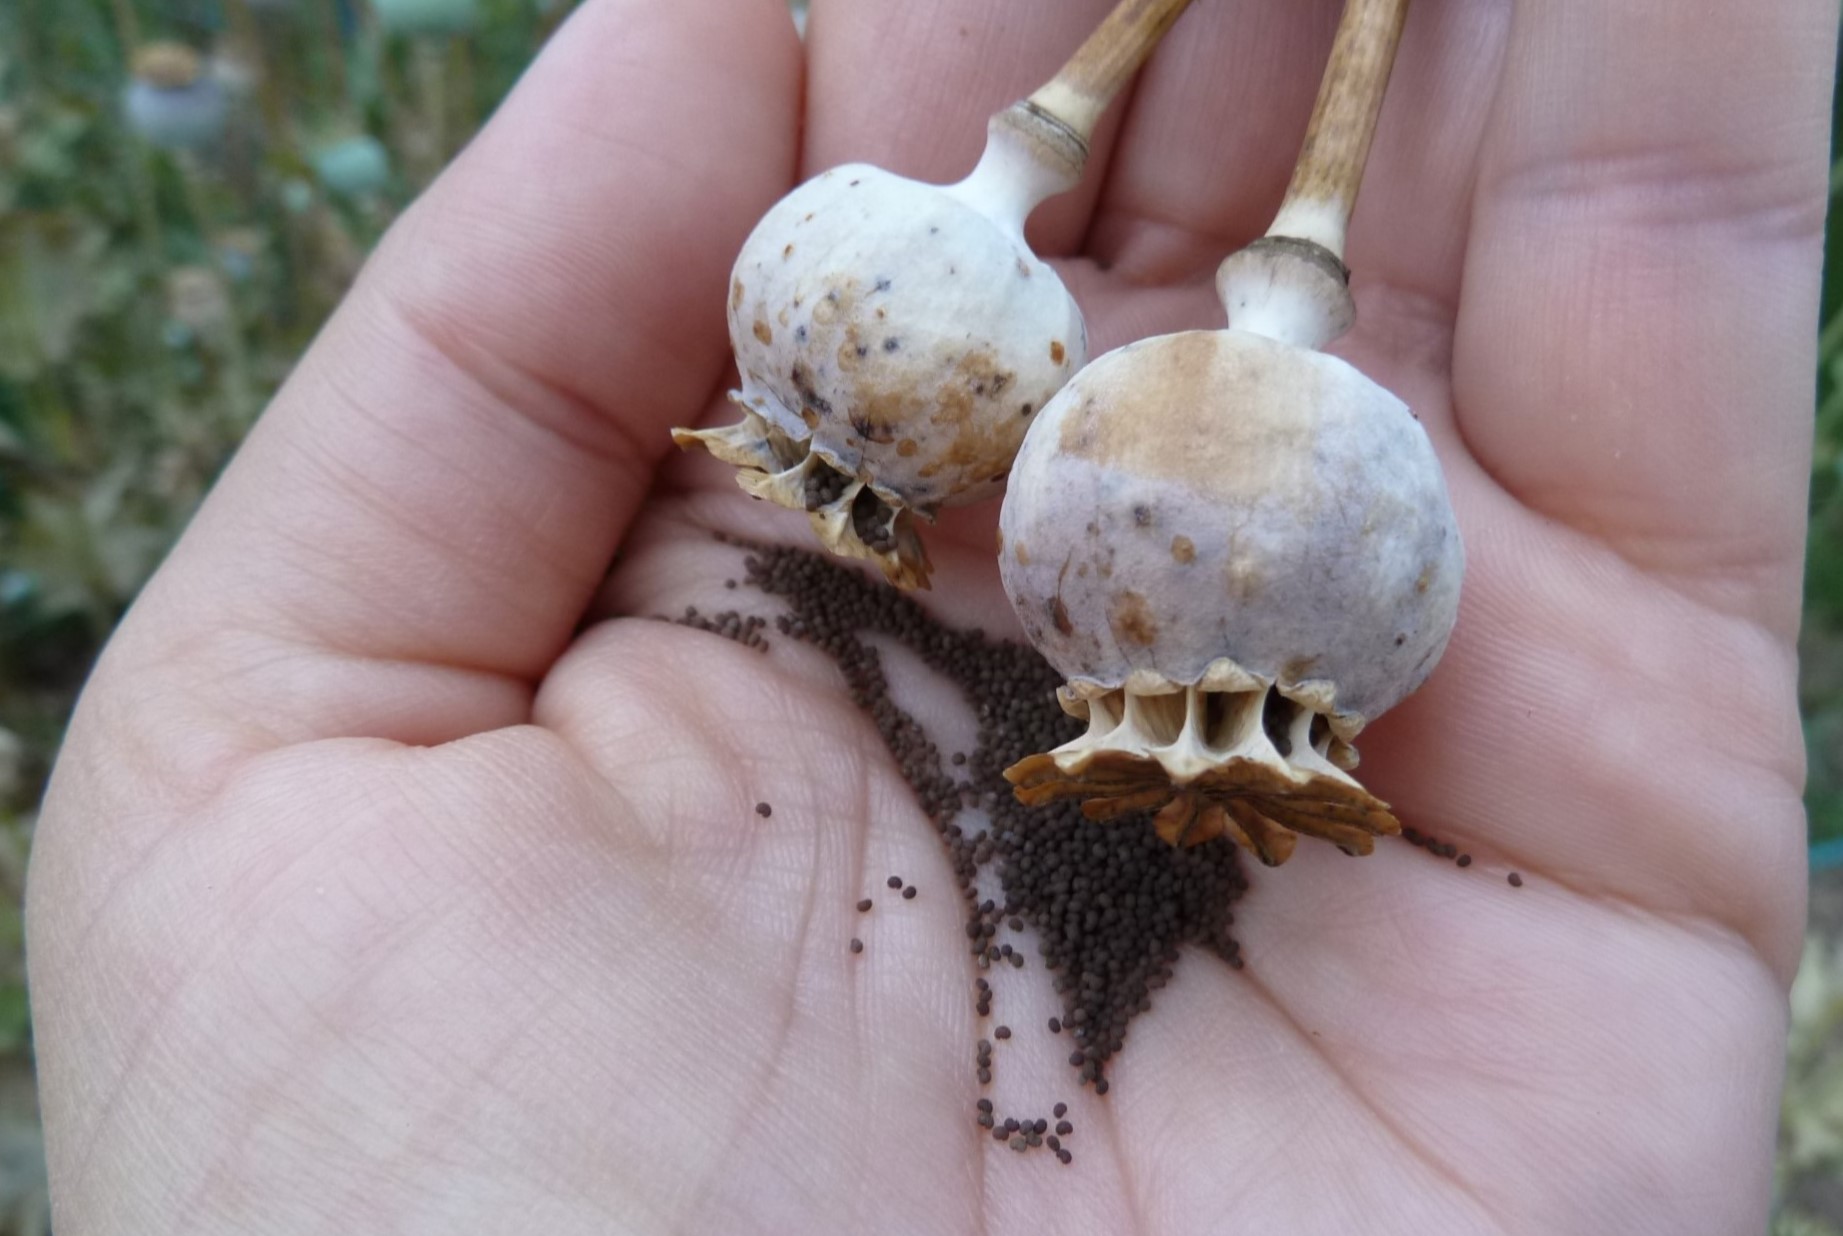
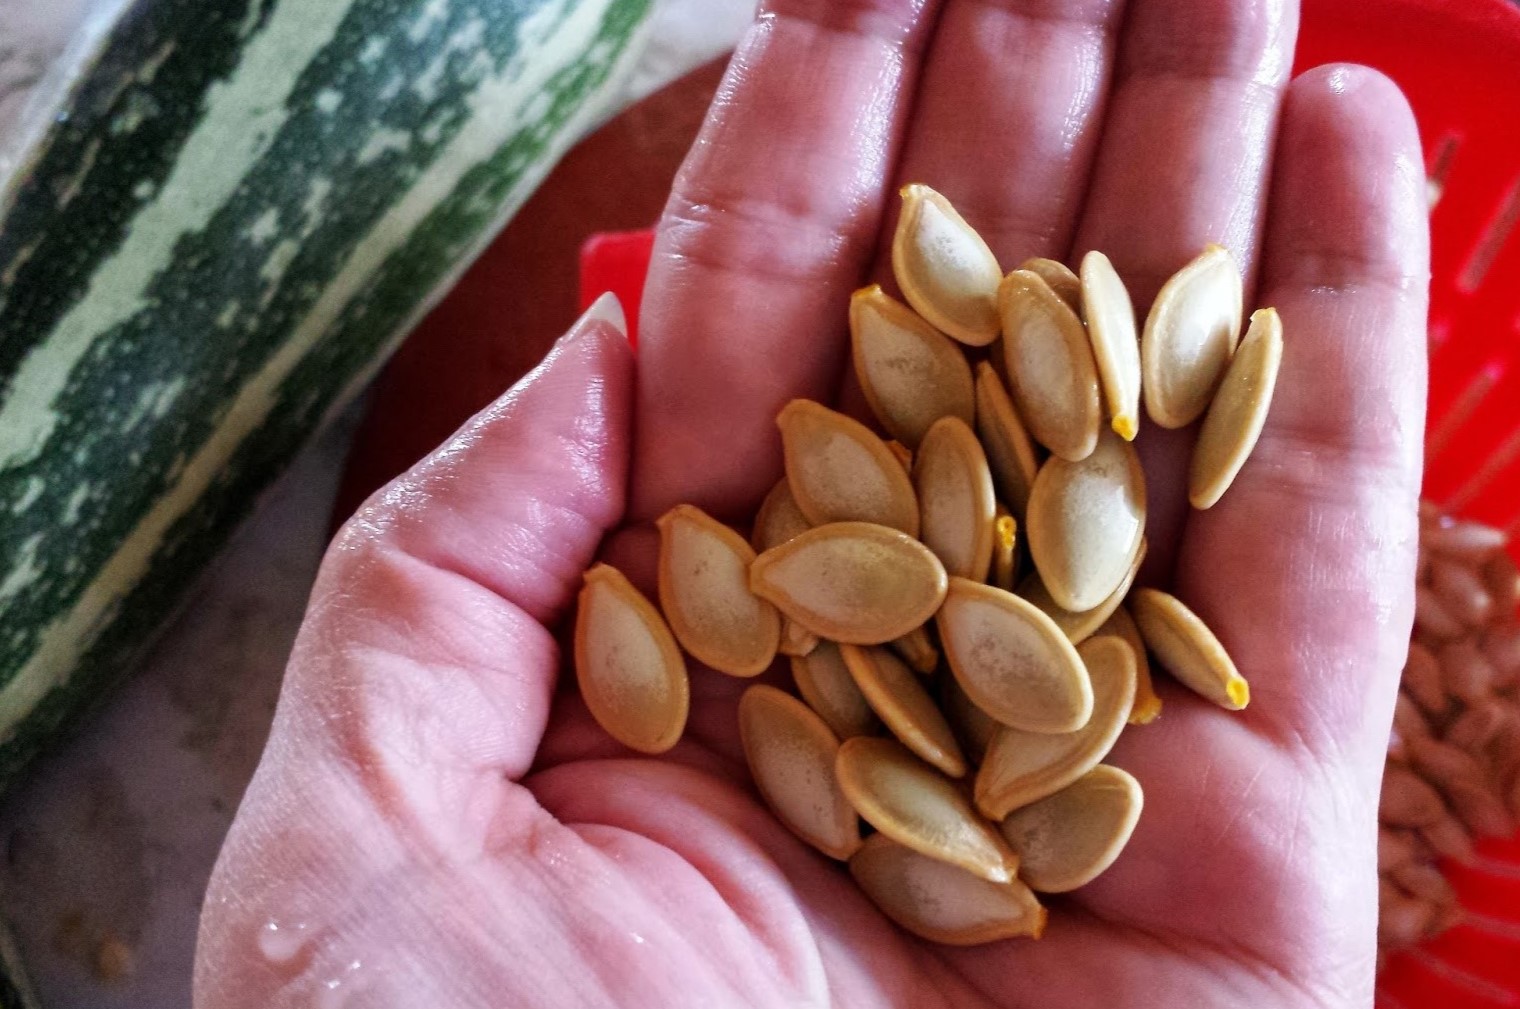
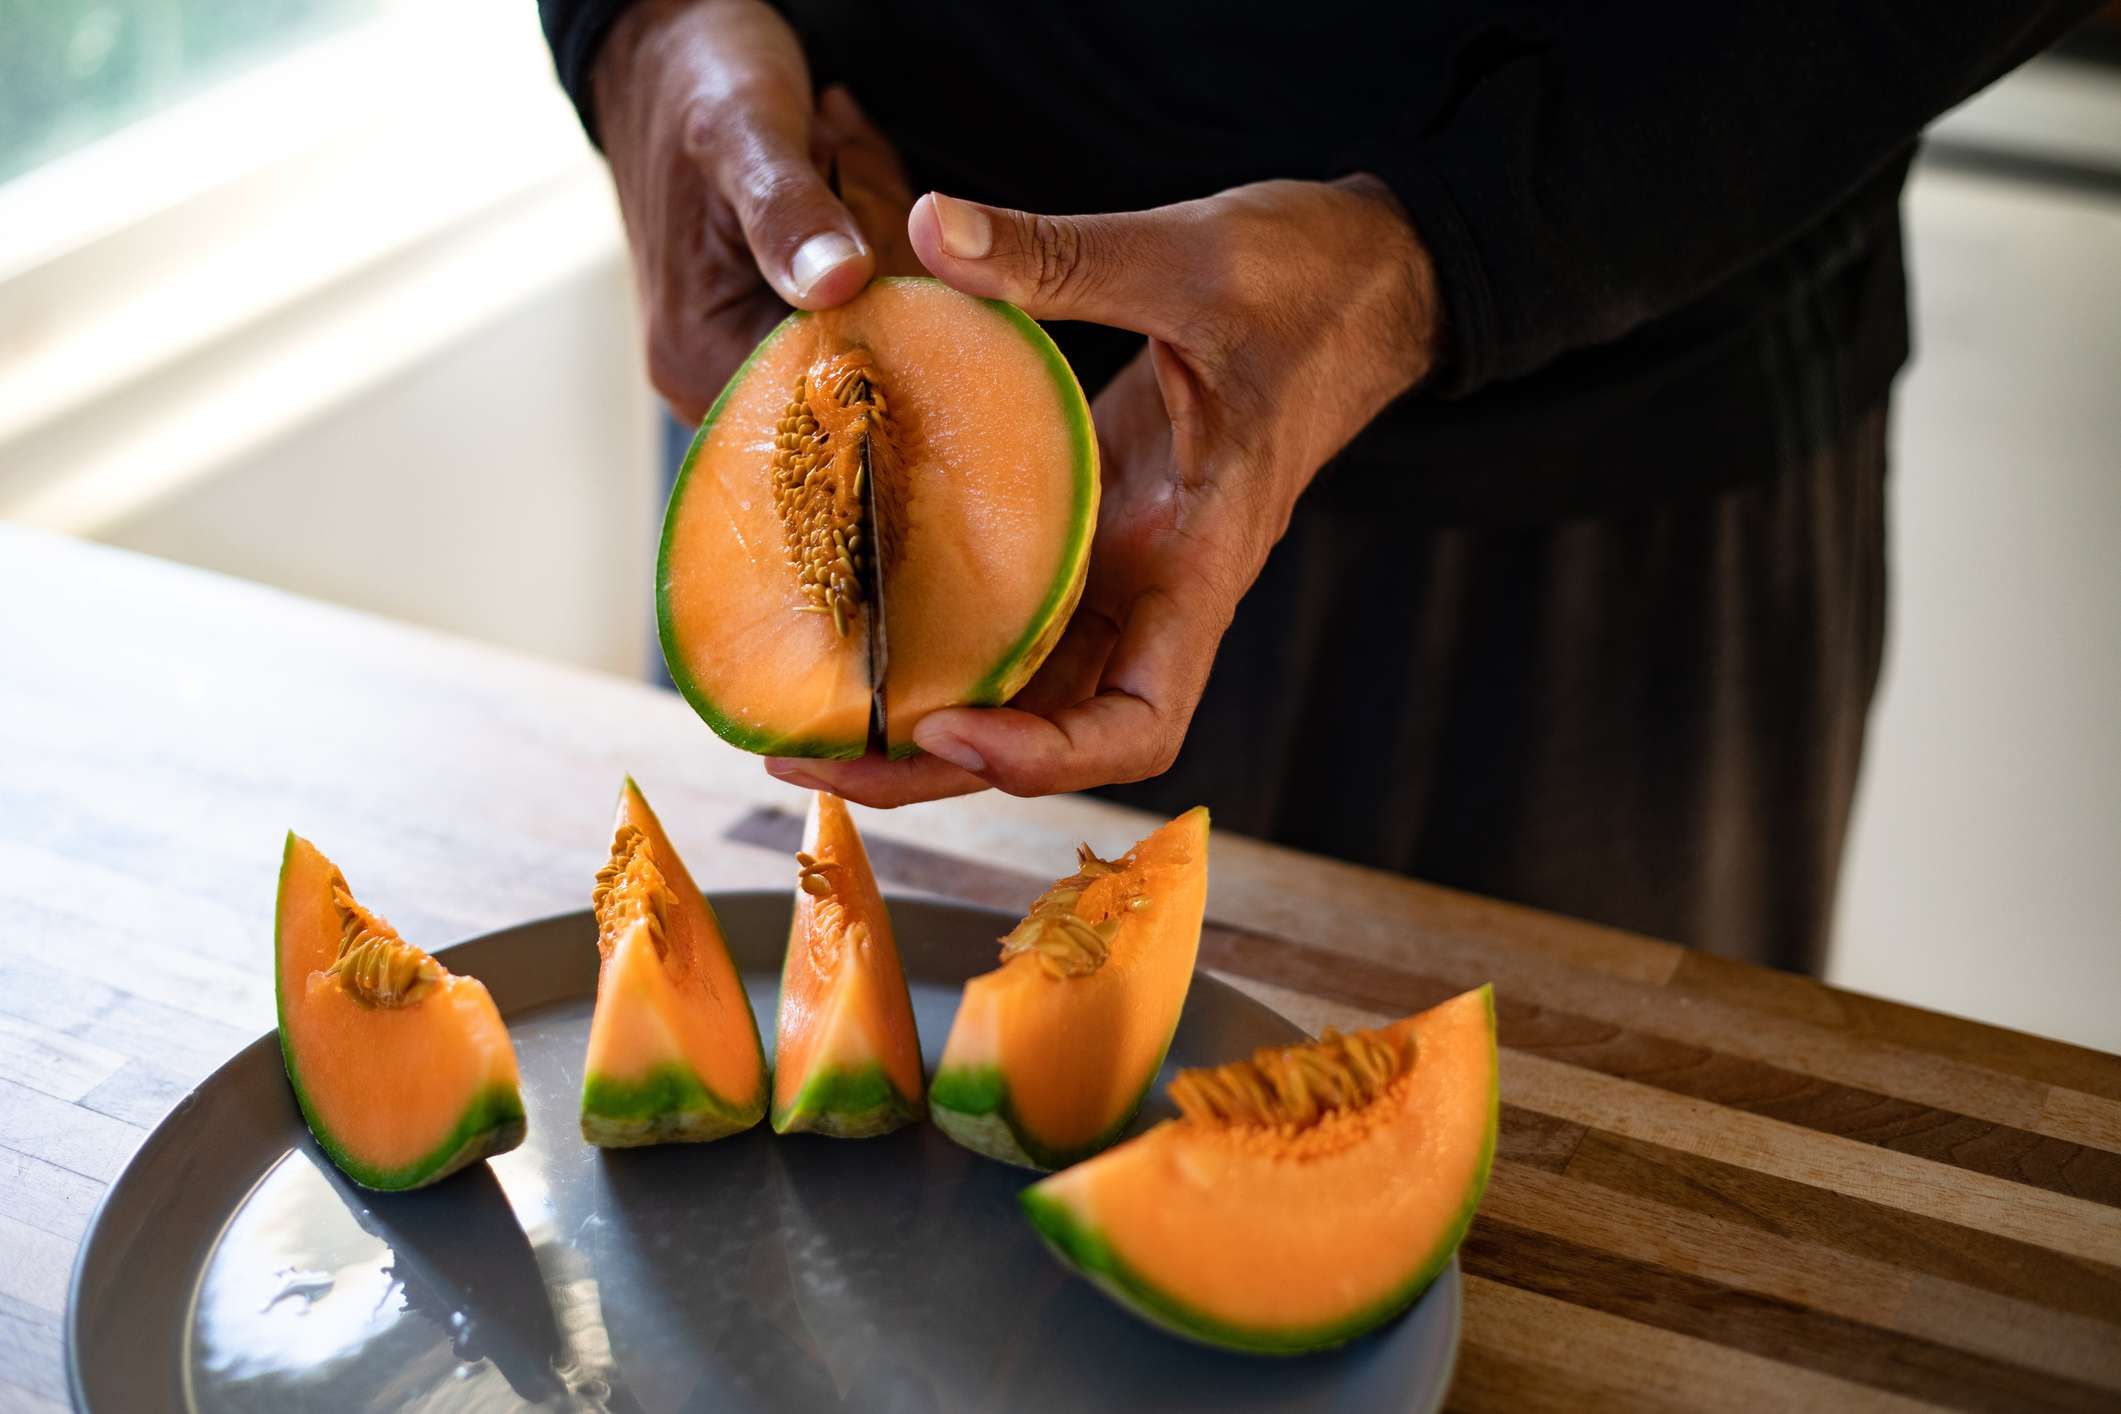
- Extract the Seeds: Depending on the vegetable, there are different methods to extract the seeds. For example:
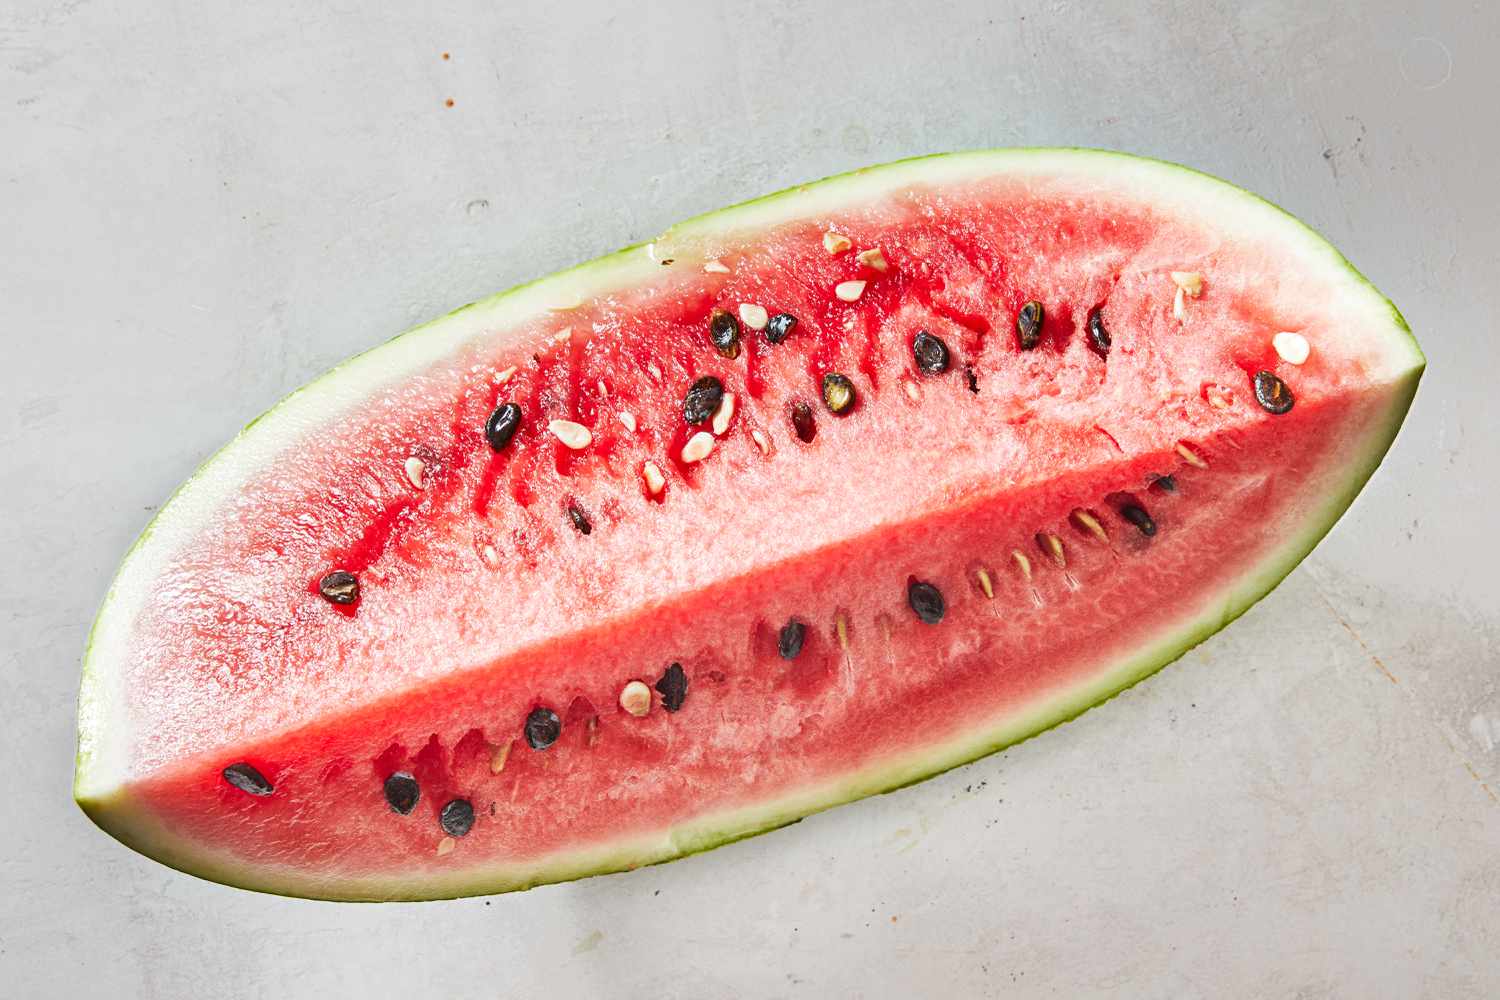
- – Tomatoes: Squeeze out the seeds and gelatinous pulp into a container. Add water and let it ferment for a few days to remove the gel layer.
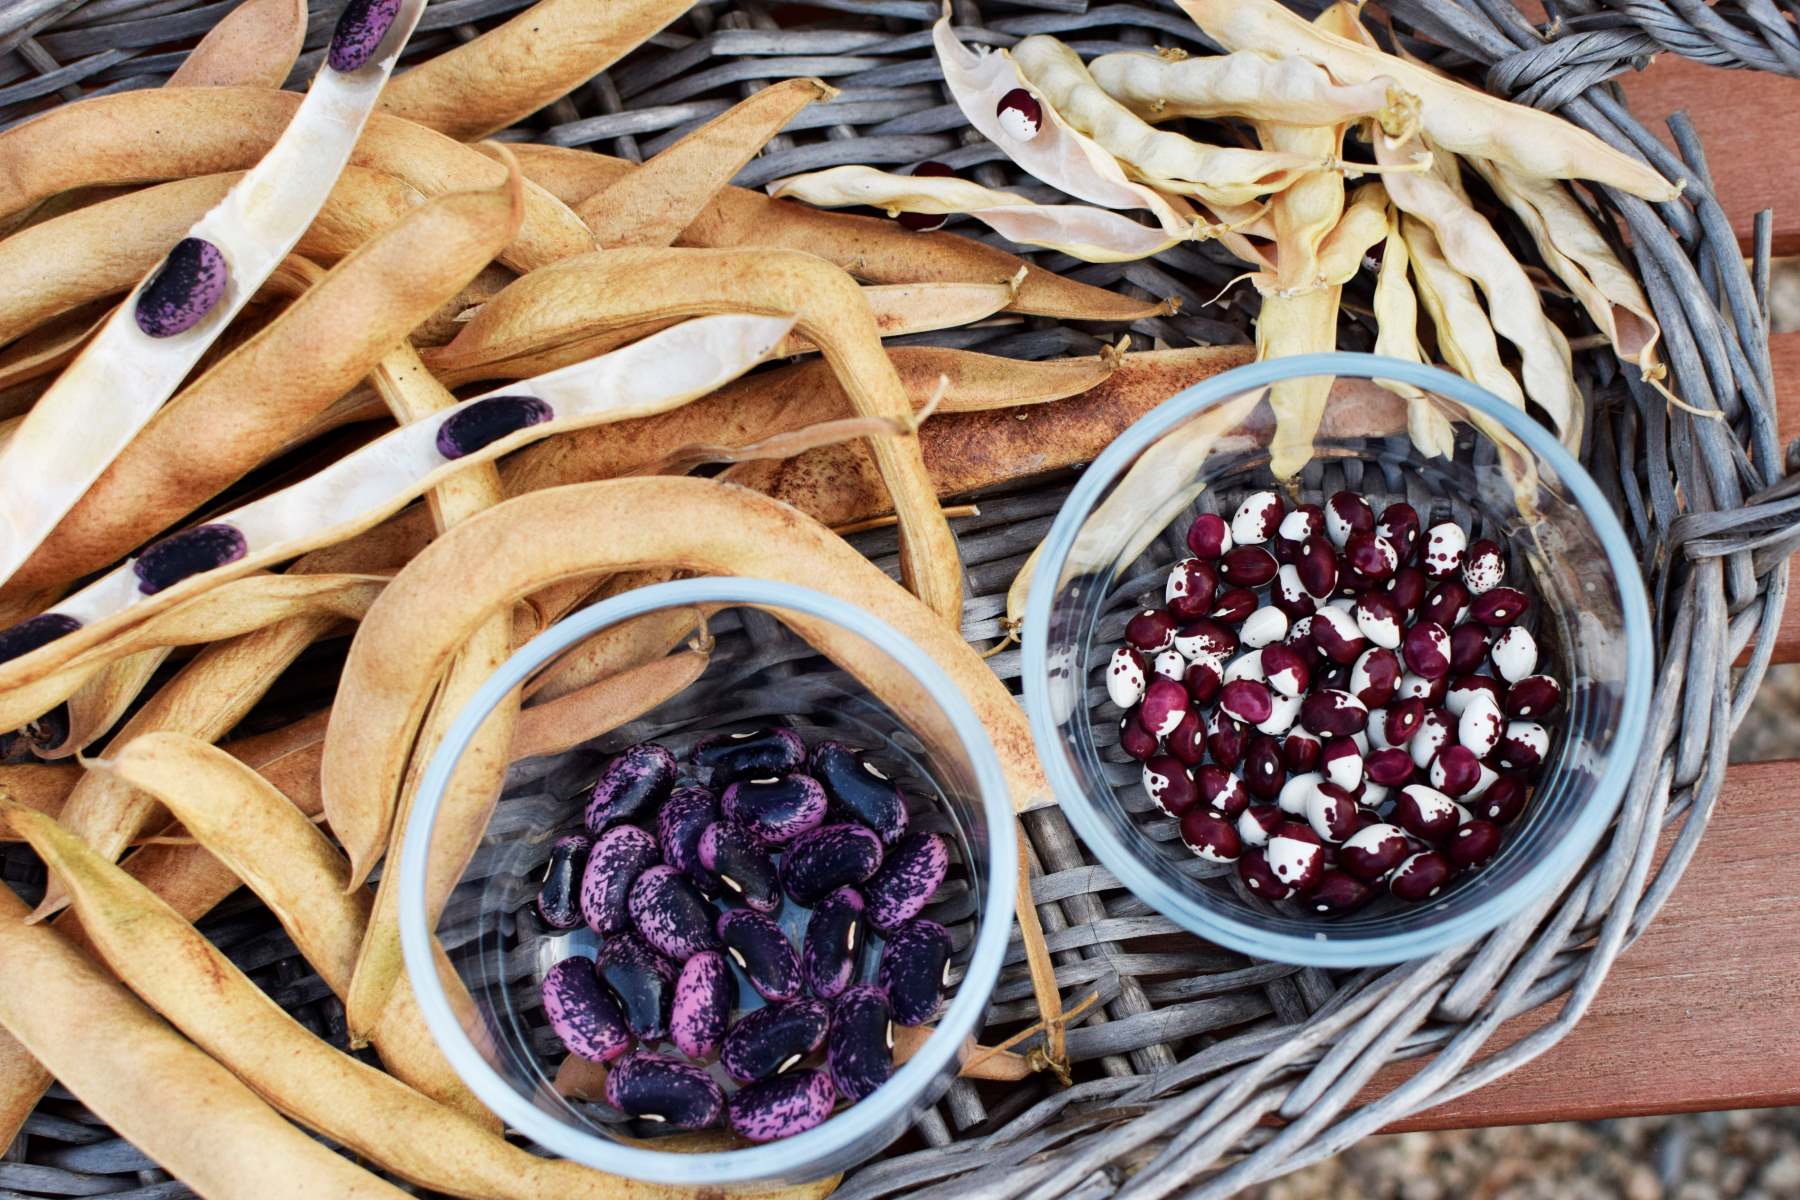
- – Beans and Peas: Allow the pods to dry and turn brown on the plant. Then, remove the pods and extract the seeds.
- – Lettuce: Allow the plant to bolt and produce a seed stalk. Cut the stalk and hang it upside down in a paper bag to catch the seeds as they dry and fall.
- Separate Seeds from Debris: Once you’ve extracted the seeds, remove any remaining plant material, such as pulp, husks, or chaff. You can do this by sifting or winnowing the seeds.
- Dry Seeds Thoroughly: Spread the seeds in a single layer on a clean and dry surface, such as a tray or a screen. Place them in a warm, well-ventilated area to dry completely. Stir or turn the seeds regularly to ensure even drying and prevent mold or mildew.
- Label and Store: Once the seeds are fully dry, transfer them to airtight containers, such as glass jars or envelopes. Label them with the plant variety, date, and any other relevant information. Store the seeds in a cool, dry, and dark place.
It’s important to note that some vegetables, like carrots, onions, and biennial plants such as kale or Brussels sprouts, require overwintering to develop mature seeds. Make sure to research specific instructions for these plants to ensure successful seed saving.
Remember, each vegetable may have its own unique requirements for seed harvesting, so it’s always a good idea to consult reliable gardening resources or books for specific guidance.
Now, let’s move on to the next step: cleaning and preparing the seeds for storage!
Cleaning and Preparing Seeds for Storage
Properly cleaning and preparing seeds for storage is essential to ensure their longevity and viability. Here’s how to clean and prepare seeds for optimal storage:
- Remove Debris: Start by removing any remaining plant debris or chaff from the seeds. You can do this by gently blowing on the seeds or using a fine sieve or screen to separate the seeds from the unwanted material.
- Wash Seeds (if necessary): Some seeds, especially those with sticky coatings or residues, may require washing. Use clean water and a strainer to gently rinse the seeds, being careful not to damage them. After washing, pat the seeds dry with a clean towel or paper towel.
- Air-Dry Seeds: After cleaning, spread the seeds out on a clean surface or a screen to air-dry completely. Make sure to dry them in a well-ventilated area away from direct sunlight. Avoid using artificial heat sources, as excessive heat can damage or reduce the viability of the seeds.
- Cure Fermented Seeds (if necessary): Some seeds, like tomato seeds, may require fermentation before drying. This process helps remove the gel-like substance surrounding the seeds, which can inhibit germination. To ferment, place the seeds in a container with some water and allow them to sit for a few days until a layer of mold forms on the surface. Rinse the seeds thoroughly before air-drying.
- Label and Package: Once the seeds are completely dry, make sure to label them properly with the plant name, variety, and date of collection. This information will be useful for future reference. Store the seeds in airtight containers, such as envelopes, glass jars, or seed storage packets, to protect them from moisture and pests.
- Add Desiccant (optional): For long-term storage, you may consider adding a desiccant, such as silica gel packets, to absorb any excess moisture. This can help prolong the shelf life of the seeds and reduce the risk of mold or fungal growth.
Remember to store your seeds in a cool, dry, and dark place, such as a refrigerator or a cool basement. Proper storage conditions will help maintain seed viability for several years.
By following these steps to clean and prepare your seeds for storage, you can ensure that they remain viable and ready for successful germination in the seasons to come.
Now that your seeds are cleaned and prepared, let’s find out how to store them for long-term use!
When saving seeds from vegetables, make sure to choose the healthiest and ripest fruits. Remove the seeds and allow them to dry completely before storing them in a cool, dry place. Label the seeds with the vegetable variety and the date they were collected.
Read more: How To Save Cantaloupe Seeds
Storing Seeds for Long-Term Use
Properly storing seeds is crucial to maintain their viability and ensure they remain viable for future planting. Here are some key guidelines for storing seeds for long-term use:
- Cool Temperature: Store seeds in a cool location, ideally between 32-41°F (0-5°C). A cool environment helps slow down the aging process and prolongs seed viability.
- Dark and Dry: Keep seeds in a dry and dark place, away from direct sunlight and moisture. Exposure to light and excessive humidity can reduce seed viability. Consider using airtight containers such as glass jars or seed storage envelopes to protect the seeds.
- Consistent Temperature: Fluctuating temperatures can impact seed viability. Avoid storing seeds in areas with significant temperature fluctuations, such as garages or attics. Aim for a consistent temperature throughout the storage period.
- Airflow: Good airflow can help prevent the buildup of moisture and reduce the risk of mold or fungal growth. Ensure that the storage container allows for sufficient ventilation but also protects the seeds from pests and insects.
- Monitor Moisture: Check stored seeds regularly for any signs of moisture or condensation. If moisture is detected, thoroughly dry the seeds before returning them to storage.
- Label and Organize: Clearly label each storage container with the seed type, variety, and date of collection. Organize the containers in a systematic manner to easily locate seeds when needed.
- Rotation: To maintain higher seed viability, establish a rotation system where you use the oldest seeds first. This ensures that seeds don’t sit in storage for too long, maximizing the chances of successful germination.
It’s important to note that different seeds have varying lifespans. Some seeds, such as lettuce or onion, typically have shorter storage lives, while others like beans or peppers can remain viable for several years. Research the specific storage requirements for each type of seed to optimize their longevity.
By following these guidelines, you can ensure that your stored seeds remain viable for an extended period, allowing you to enjoy the benefits of seed saving for years to come.
Next, let’s explore how to test the viability of your saved seeds to determine if they are still viable for planting.
Testing Seed Viability
Before planting saved seeds, it’s essential to test their viability to ensure a successful germination rate. Here’s a simple step-by-step process for testing seed viability:
- Gather Supplies: You’ll need a few basic supplies, including a damp paper towel, a sealable plastic bag, and a marker to label the bag.
- Select a Sample: Choose a representative sample of seeds from the batch you want to test.
- Moisten the Paper Towel: Dampen a paper towel with water, making sure it’s evenly moist but not dripping wet.
- Place Seeds on the Paper Towel: Arrange a few seeds on one half of the damp paper towel. Make sure to space them out to allow room for growth.
- Fold the Paper Towel: Carefully fold the other half of the paper towel over the seeds to cover them completely.
- Seal in a Plastic Bag: Transfer the folded paper towel with the seeds into a sealable plastic bag and close it securely.
- Label and Store: Label the plastic bag with the seed type, variety, and the date of the test. Place the bag in a warm location, ideally around 70-75°F (21-24°C).
- Observe Germination: Check the seeds regularly to monitor germination. Most seeds should start to sprout within 7-10 days, depending on the variety.
- Record Results: After the designated germination period, count the number of seeds that have successfully germinated. This will give you a percentage of seed viability.
Generally, if the germination rate is above 70%, the seeds are considered viable for planting. However, keep in mind that different seeds have varying levels of viability, and even lower germination rates may still be suitable for planting, especially if you have a large quantity of seeds.
By conducting a simple viability test, you can make informed decisions about which seeds to plant, ensuring a higher chance of successful germination and healthy plant growth.
Now that you’ve tested the viability of your saved seeds, it’s time to learn some tips and tricks for successful seed saving!
Tips and Tricks for Successful Seed Saving
When it comes to seed saving, a few tips and tricks can significantly improve your success rate and overall experience. Here are some valuable tips to keep in mind:
- Start with Easy-to-Save Seeds: If you’re new to seed saving, begin with vegetables that are known to be easy to save, such as beans, peas, or tomatoes. As you gain experience, you can try saving seeds from more challenging plant varieties.
- Isolate or Hand-Pollinate: To maintain the purity of your saved seeds, make sure to isolate plants that are prone to cross-pollination. Use physical barriers or hand-pollinate the plants to control the pollination process.
- Save Seeds from Multiple Plants: To preserve genetic diversity, save seeds from multiple healthy plants rather than relying on seeds from just one plant. This helps maintain a wider range of traits and adaptability in the seed stock.
- Allow Seeds to Fully Mature: To ensure seed viability, let the fruits or vegetables fully mature on the plant before harvesting. This allows the seeds inside to develop fully.
- Label and Document: Keep accurate records of the seeds you save, including the plant variety, date of collection, and any specific notes or observations. This information will be valuable for future reference.
- Practice Seed Cleaning Techniques: Learn and practice proper seed cleaning techniques to remove debris and ensure the seeds are clean and ready for storage. Different vegetables may require different cleaning methods, so it’s essential to research specific instructions.
- Store Seeds Properly: Follow the guidelines for storing seeds in a cool, dry, and dark place to ensure their longevity. Check stored seeds regularly for any signs of moisture or degradation.
- Share and Exchange Seeds: Participate in seed exchanges or share seeds with other gardeners to expand your collection, discover new varieties, and contribute to the preservation of heirloom and open-pollinated plants.
- Continually Learn and Experiment: Seed saving is both an art and a science. Continually educate yourself about different plant species, pollination techniques, and seed-saving methods. Don’t be afraid to experiment and learn from both successes and failures.
By implementing these tips and tricks, you’ll become a more confident and successful seed saver, capable of preserving and enhancing the diversity of your garden for future seasons.
Now that you’re equipped with the knowledge and tools for successful seed saving, it’s time to venture into your garden and start collecting and preserving seeds for future planting endeavors!
If you have any further questions or need additional guidance, don’t hesitate to seek advice from fellow gardeners, join seed saving communities, or consult reliable gardening resources.
Happy seed saving!
Conclusion
Congratulations, you’ve now gained a deeper understanding of the art and importance of seed saving in the world of gardening! By saving seeds from your vegetables, you not only unlock the potential for future bountiful harvests but also play a crucial role in preserving genetic diversity and fostering sustainable gardening practices.
We explored the reasons why seed saving is valuable, from preserving heirloom varieties to saving money and adapting plants to your specific growing conditions. We also learned how to choose the right vegetables for seed saving, harvest and clean seeds effectively, and store them properly for long-term use.
Remember, the process of saving seeds is an ongoing journey filled with learning and discovery. As you gain experience, you’ll become more adept at selecting plants, saving seeds, and adapting to the unique characteristics of different vegetable varieties.
Throughout this process, don’t forget to document your experiences, share seeds with fellow gardeners, and continue expanding your knowledge of seed saving techniques. Embrace the beauty of preserving biodiversity and passing down this ancient practice to future generations of gardeners.
So, whether you’re a beginner or an experienced gardener, start saving seeds from your vegetables and embark on a rewarding journey of self-sufficiency, sustainability, and a deep connection to the natural world.
Now, put your newfound knowledge into action, venture into your garden, and begin saving seeds for a fruitful and abundant future!
Happy seed saving!
Frequently Asked Questions about How To Save Seeds From Vegetables
Was this page helpful?
At Storables.com, we guarantee accurate and reliable information. Our content, validated by Expert Board Contributors, is crafted following stringent Editorial Policies. We're committed to providing you with well-researched, expert-backed insights for all your informational needs.


0 thoughts on “How To Save Seeds From Vegetables”