Home>Garden Essentials>How To Seed A Roma Tomato
Garden Essentials
How To Seed A Roma Tomato
Modified: August 27, 2024
Learn how to seed a Roma tomato and start your own garden. Step-by-step instructions and tips for successful gardening.
(Many of the links in this article redirect to a specific reviewed product. Your purchase of these products through affiliate links helps to generate commission for Storables.com, at no extra cost. Learn more)
Introduction
Welcome to our guide on how to seed a Roma tomato! Roma tomatoes are a variety known for their exceptional flavor, and by learning how to seed them properly, you can grow your own tasty tomatoes at home. Seeding tomatoes is an important step in the gardening process, as it allows you to save seeds for future planting and also allows for better germination rates.
In this article, we will walk you through the step-by-step process of seeding Roma tomatoes. We will discuss the necessary tools and ingredients, how to select ripe tomatoes for seeding, techniques for preparing the tomatoes, and methods for storing the seeds.
Whether you’re planning to start your own tomato garden or simply want to enjoy the satisfaction of saving and using your own seeds, this guide is here to help you. So let’s get started!
Key Takeaways:
- Seeding Roma tomatoes is a fun and rewarding process that allows you to save and store seeds for future planting. By following simple steps, you can grow your own delicious tomatoes at home!
- Choosing ripe tomatoes, preparing them carefully, and storing the seeds in a cool, dark place are essential for successful tomato seeding. Enjoy the satisfaction of growing your own tomatoes from seed to harvest!
Read more: How To Store Roma Tomatoes
Step 1: Gather the necessary tools and ingredients
Before you begin seeding your Roma tomatoes, it’s essential to gather all the necessary tools and ingredients. Here is a list of items you will need:
- A sharp knife
- A cutting board
- A bowl or plate
- A spoon or your fingers
- Paper towels
- A small container for storing the seeds
Having these tools and ingredients ready will ensure that you can efficiently and effectively seed your Roma tomatoes.
It’s important to use a sharp knife to cut through the tomato skin without squishing the flesh or damaging the seeds inside. A dull knife may crush the tomato, making the seeding process more challenging. A cutting board will provide a stable surface for cutting the tomatoes and prevent any potential messes on your kitchen counter.
A bowl or plate will serve as a convenient place for collecting the tomato seeds. Make sure it’s wide enough to accommodate the seeds from all the tomatoes you’ll be seeding. You can also use a spoon or your fingers to remove the seeds, depending on your preference and the size of the tomato.
Keep some paper towels nearby to dry the seeds once they are removed from the tomatoes. This will prevent them from sticking together or becoming moldy during the storage process.
Lastly, find a small container to store the seeds. It could be a glass jar, an airtight plastic container, or even a small envelope. The container should be clean and dry to maintain the quality of the seeds for future use.
Now that you have all the necessary tools and ingredients ready, you’re prepared to move on to the next step of selecting the ripe Roma tomatoes for seeding.
Step 2: Selecting the ripe Roma tomatoes
Choosing the right tomatoes is crucial when it comes to seeding Roma tomatoes. Here are some tips to help you select the ripest and most suitable tomatoes for the process:
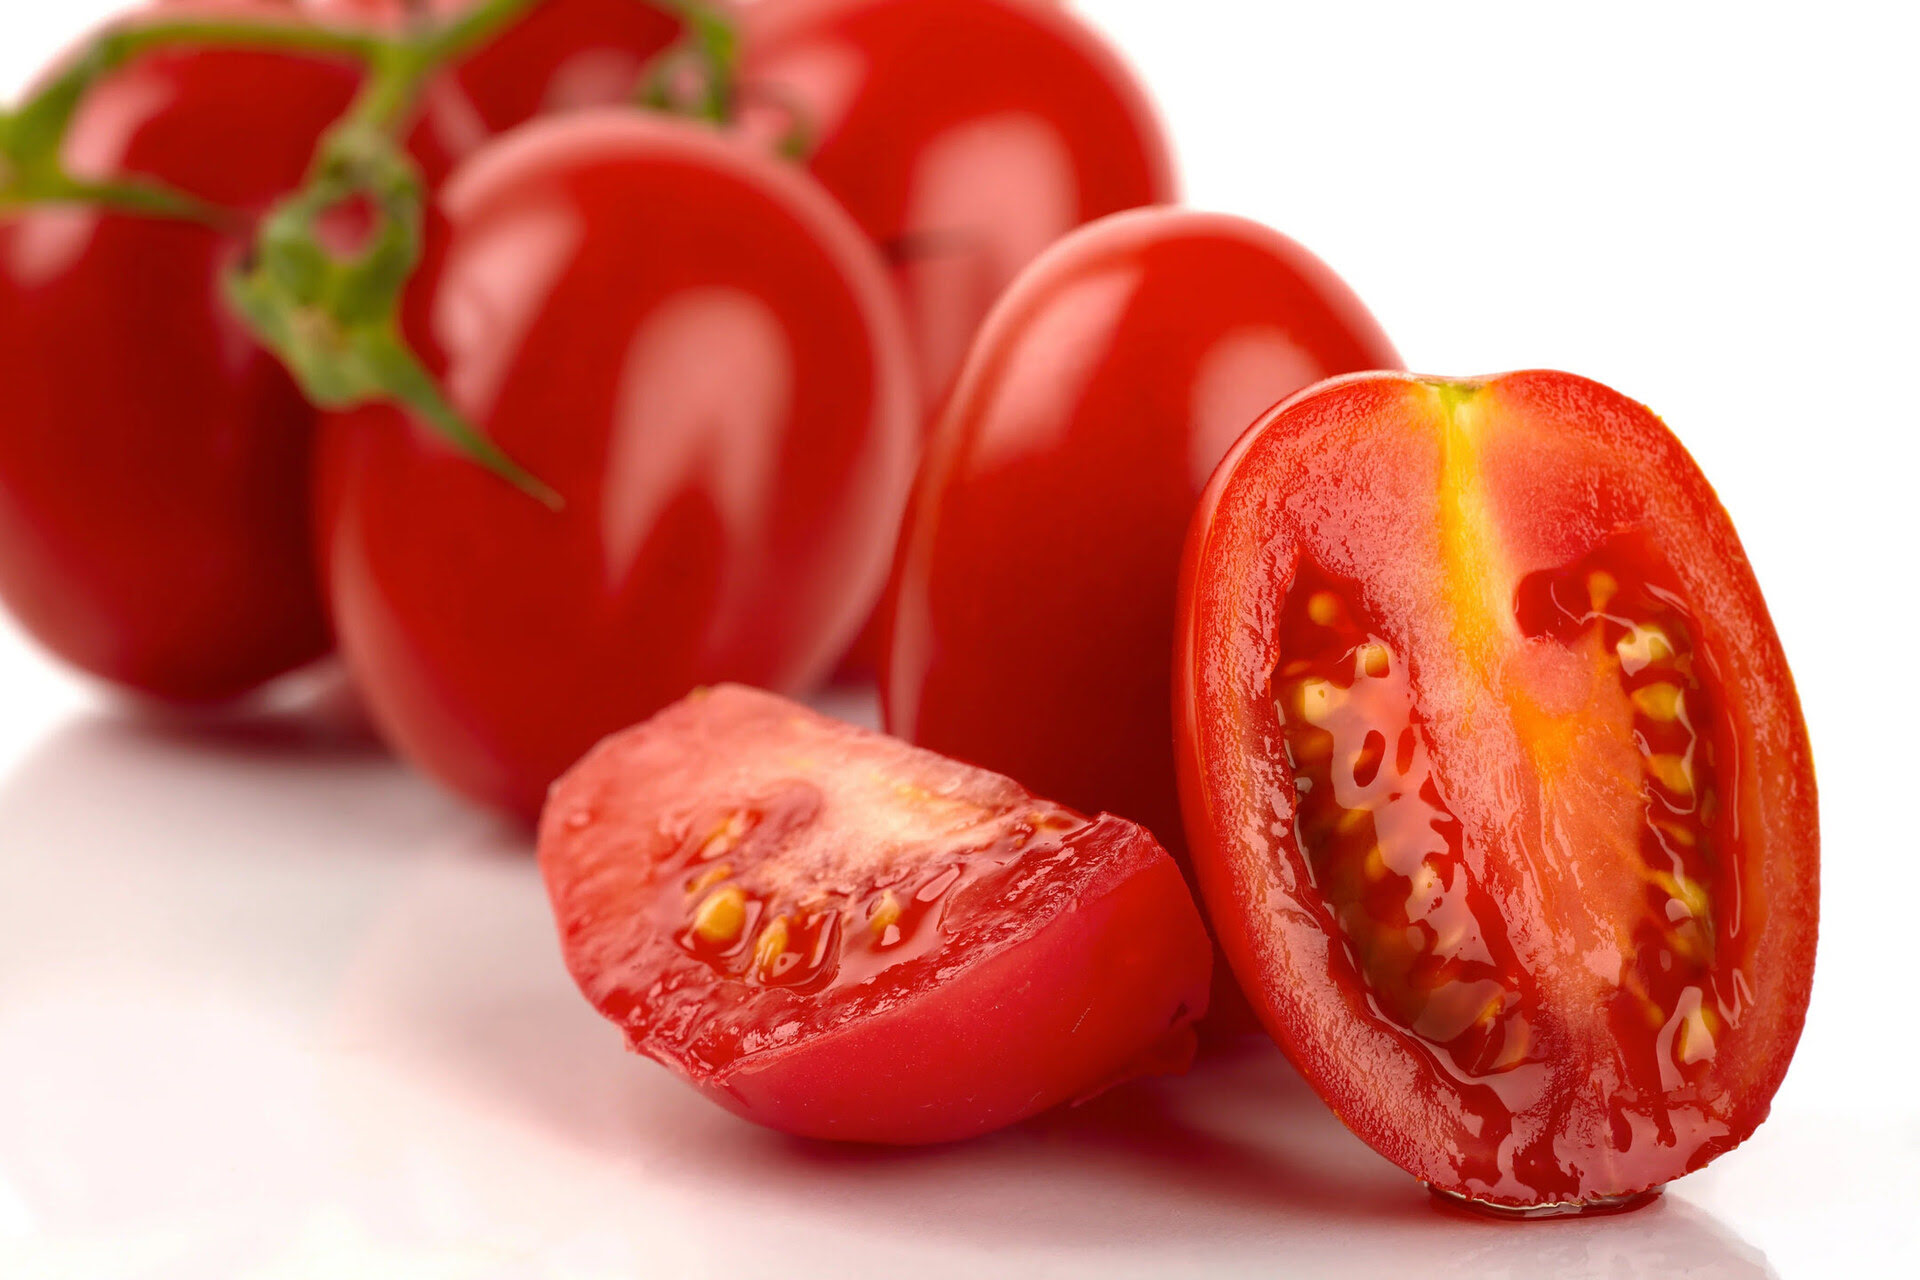
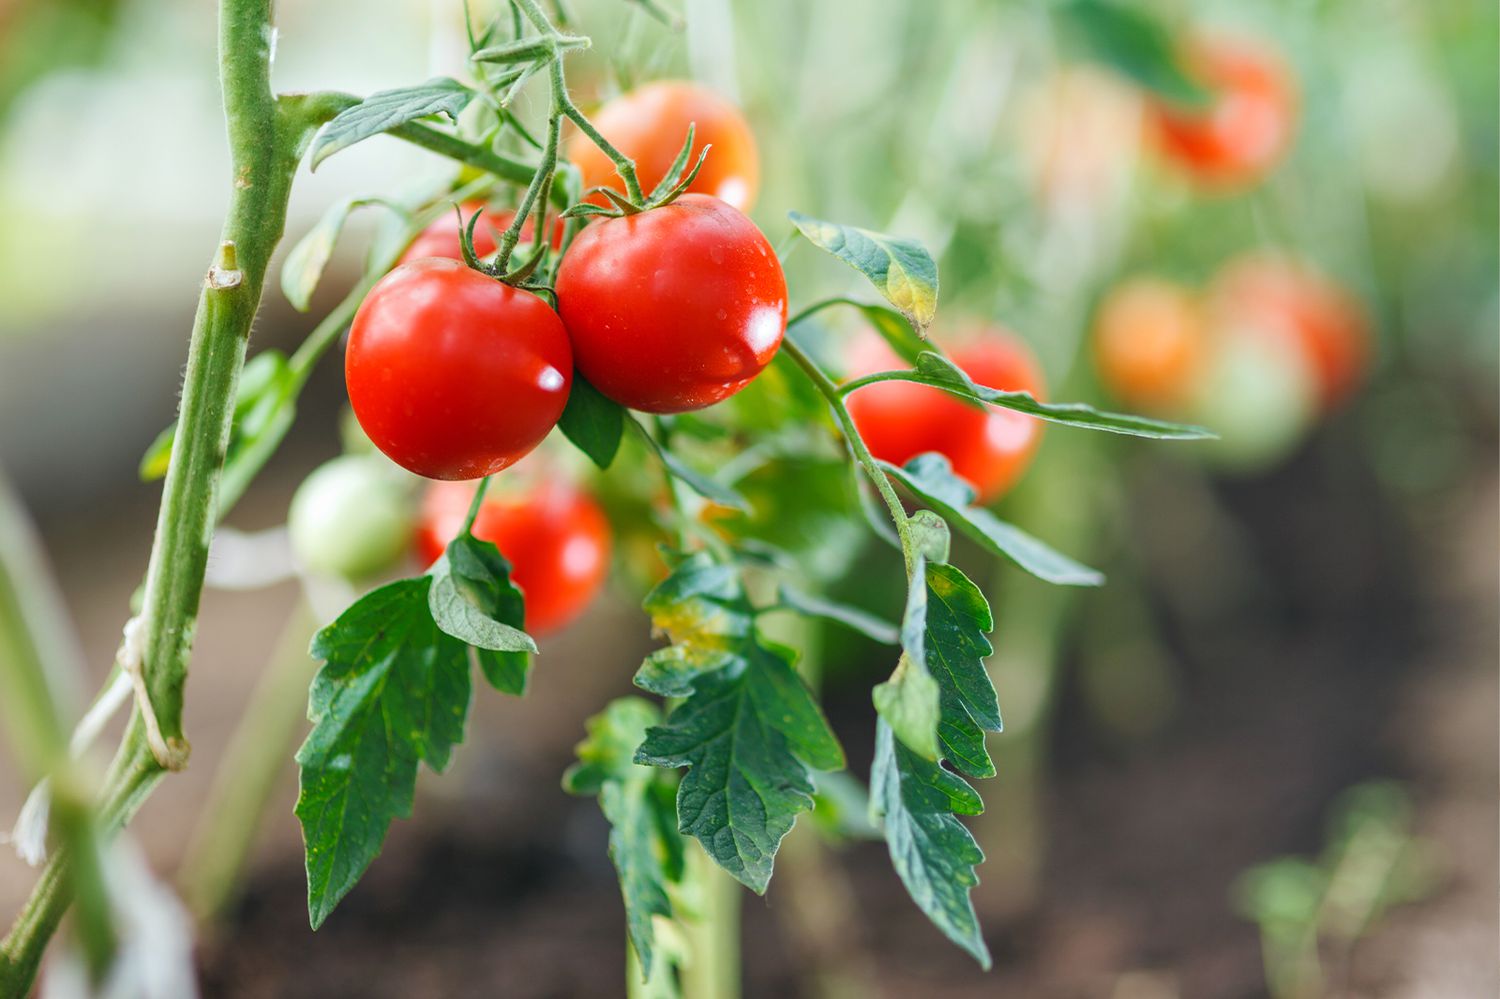
1. Look for deep color: Ripe Roma tomatoes will have a vibrant, deep red color. Avoid tomatoes that are still green or have patches of green, as they are not fully ripe. The rich red color indicates that the tomato is at its peak ripeness and will yield high-quality seeds.
2. Firmness: Gently squeeze the tomato to assess its firmness. It should feel slightly soft when you give it a gentle squeeze, but not mushy or overly ripe. A firm tomato indicates that the seeds inside are mature and ready for harvesting.
3. Avoid blemishes or cracks: Inspect the surface of the tomato for any signs of blemishes or cracks. While minor imperfections may be acceptable, it’s best to choose tomatoes that are relatively smooth and free from significant damage. This ensures that the seeds you extract will be healthy and viable.
4. Size matters: Select tomatoes that are medium to large in size, as they will likely have a higher number of seeds. Smaller tomatoes may have fewer seeds, which can limit your seed collection.
Remember, the goal is to choose tomatoes that are fully ripe and in optimal condition. This will ensure that the seeds you extract are of high quality, increasing the chances of successful germination when you plant them later on.
Once you’ve selected the ripest Roma tomatoes, it’s time to move on to the next step: preparing the tomatoes for seeding.
Step 3: Preparing the tomatoes for seeding
Now that you have selected the ripest Roma tomatoes, it’s time to prepare them for seeding. Follow these steps to ensure the tomatoes are ready for the next stage:
1. Wash the tomatoes: Start by washing the tomatoes under cool running water to remove any dirt or debris on the surface. Gently rub the tomatoes with your hands to ensure they are clean. Remember to handle them with care to prevent any damage.
2. Remove the stem: Use a sharp knife to carefully cut off the stem of each tomato. Make a clean, straight cut to avoid unnecessarily damaging the tomato flesh.
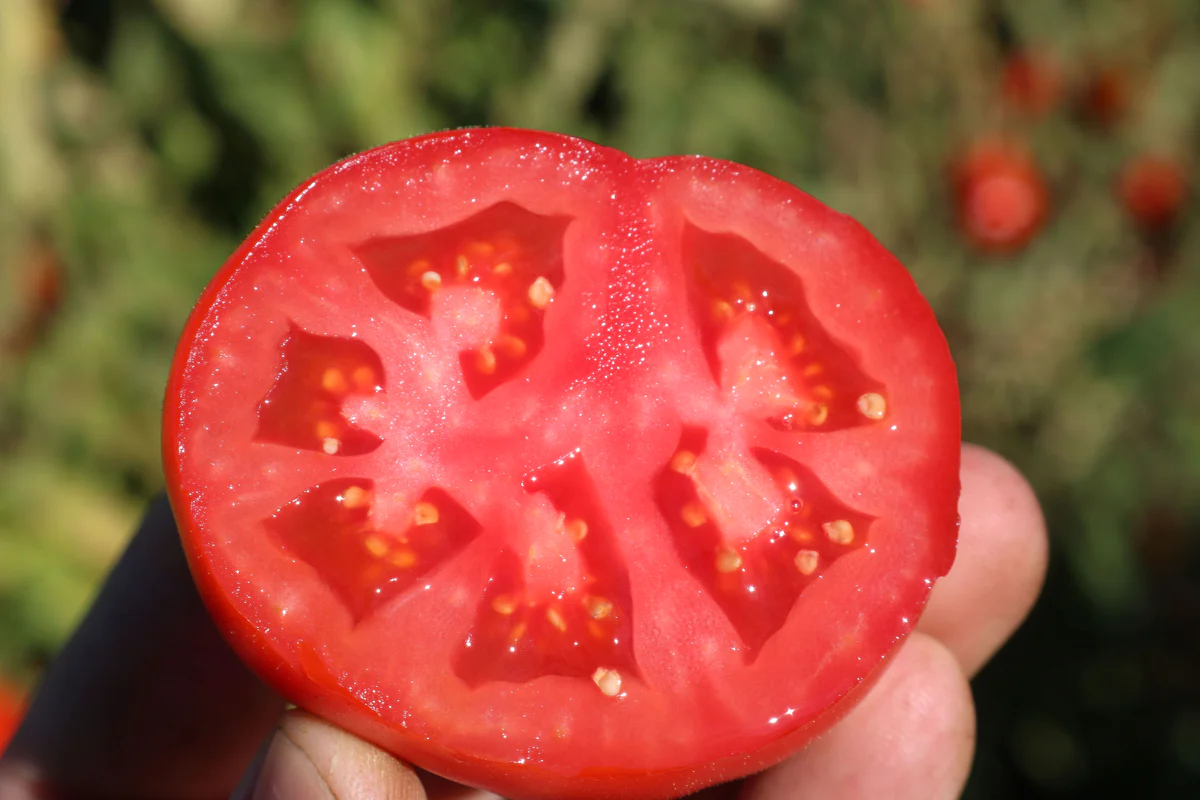
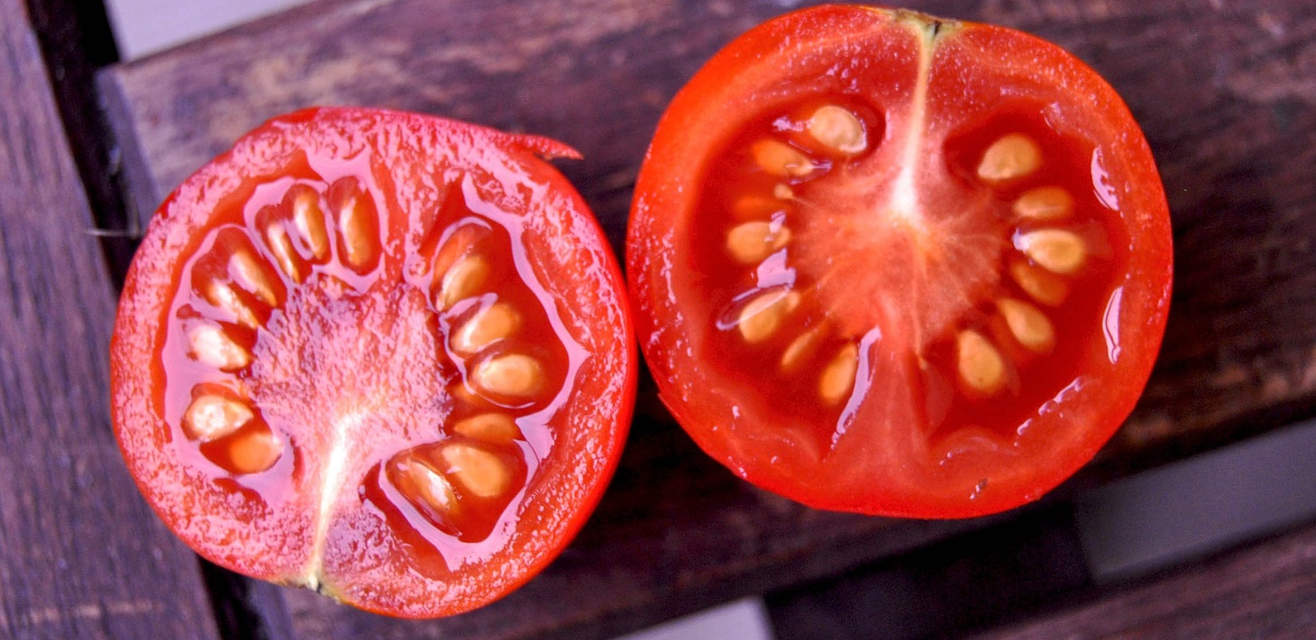
3. Cut the tomatoes into halves: Place the tomato on a cutting board and, using a sharp knife, cut it in half from top to bottom. This will expose the inner part of the tomato, allowing you to access and extract the seeds more easily. Ensure that each half remains intact and not squished or overly misshapen.
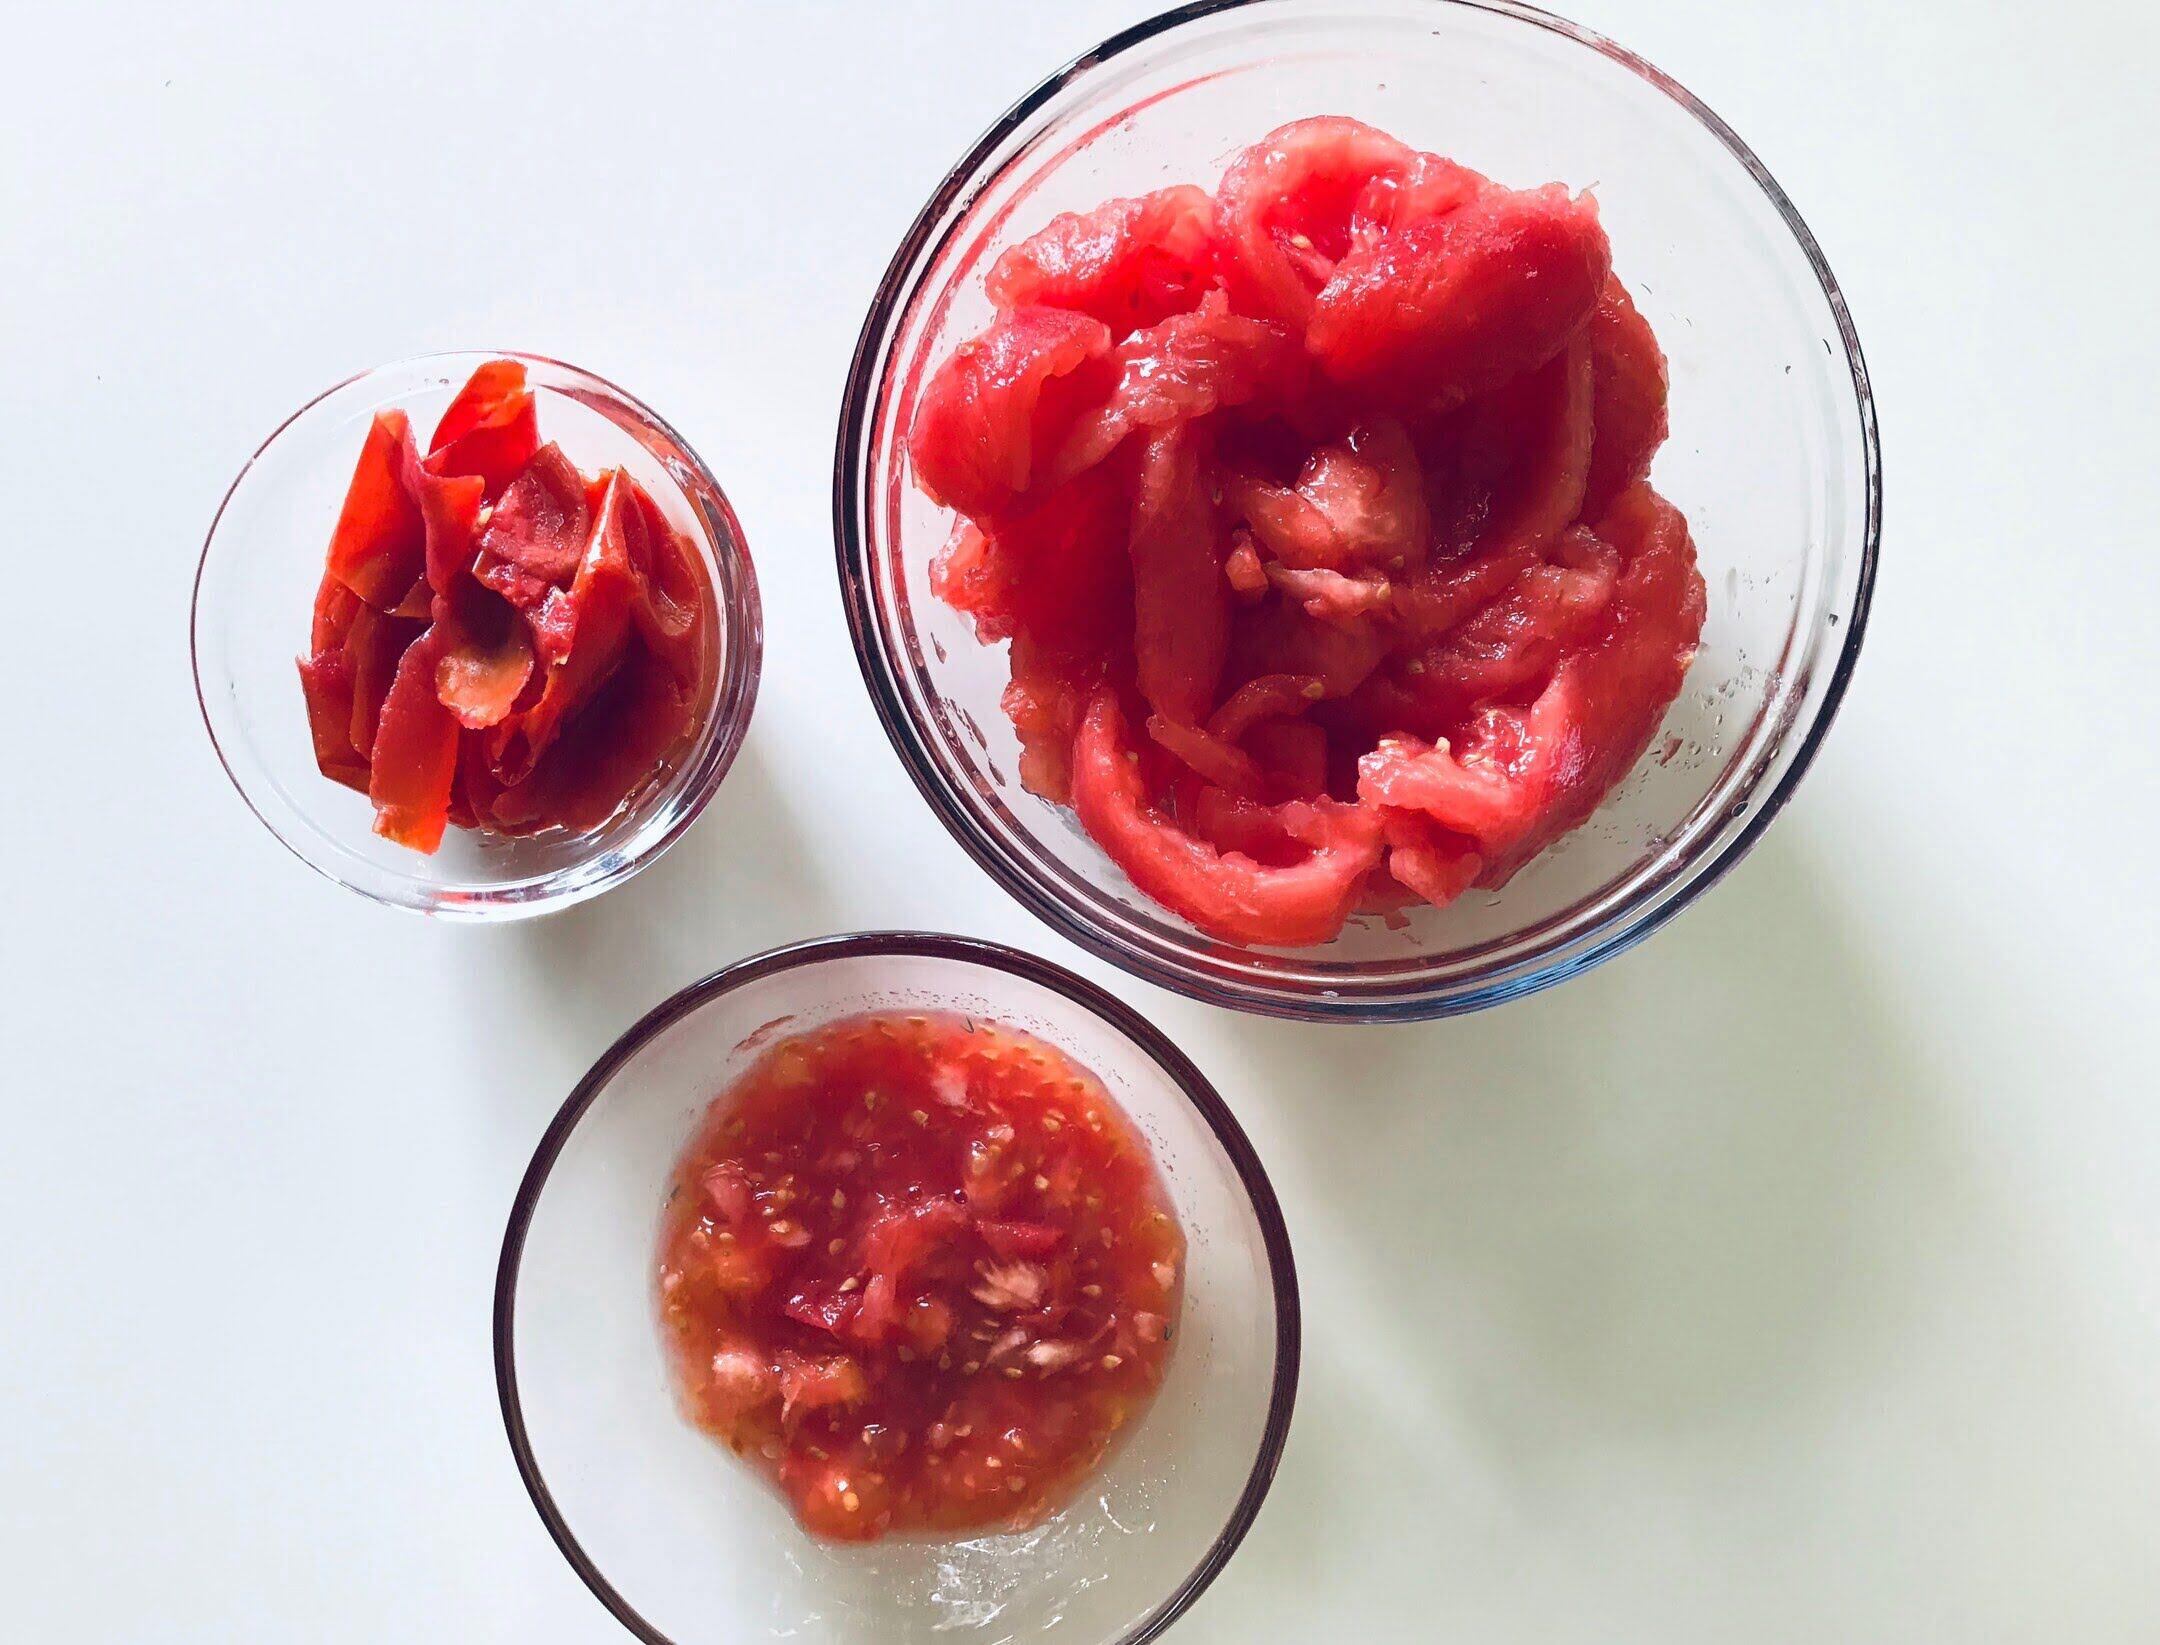
4. Scoop out the seeds: Take a spoon or your fingers and gently scoop out the seeds and gel from the tomato halves. Place the seeds and gel into a bowl or plate. Ensure you remove as many seeds as possible, leaving behind only the flesh.
5. Separate the seeds from the gel: Using your fingers or a spoon, separate the seeds from the gel. You can do this by gently squeezing the gel and allowing the seeds to fall into the bowl or plate. Avoid squishing or crushing the seeds, as this may damage their viability.
6. Drain excess moisture: After separating the seeds from the gel, carefully place them onto a clean, dry paper towel. Allow the seeds to air dry for at least 24 hours. This will help remove excess moisture and prevent the seeds from sticking together during storage.
By following these steps, you are now ready to move on to the most critical phase: seeding the Roma tomatoes.
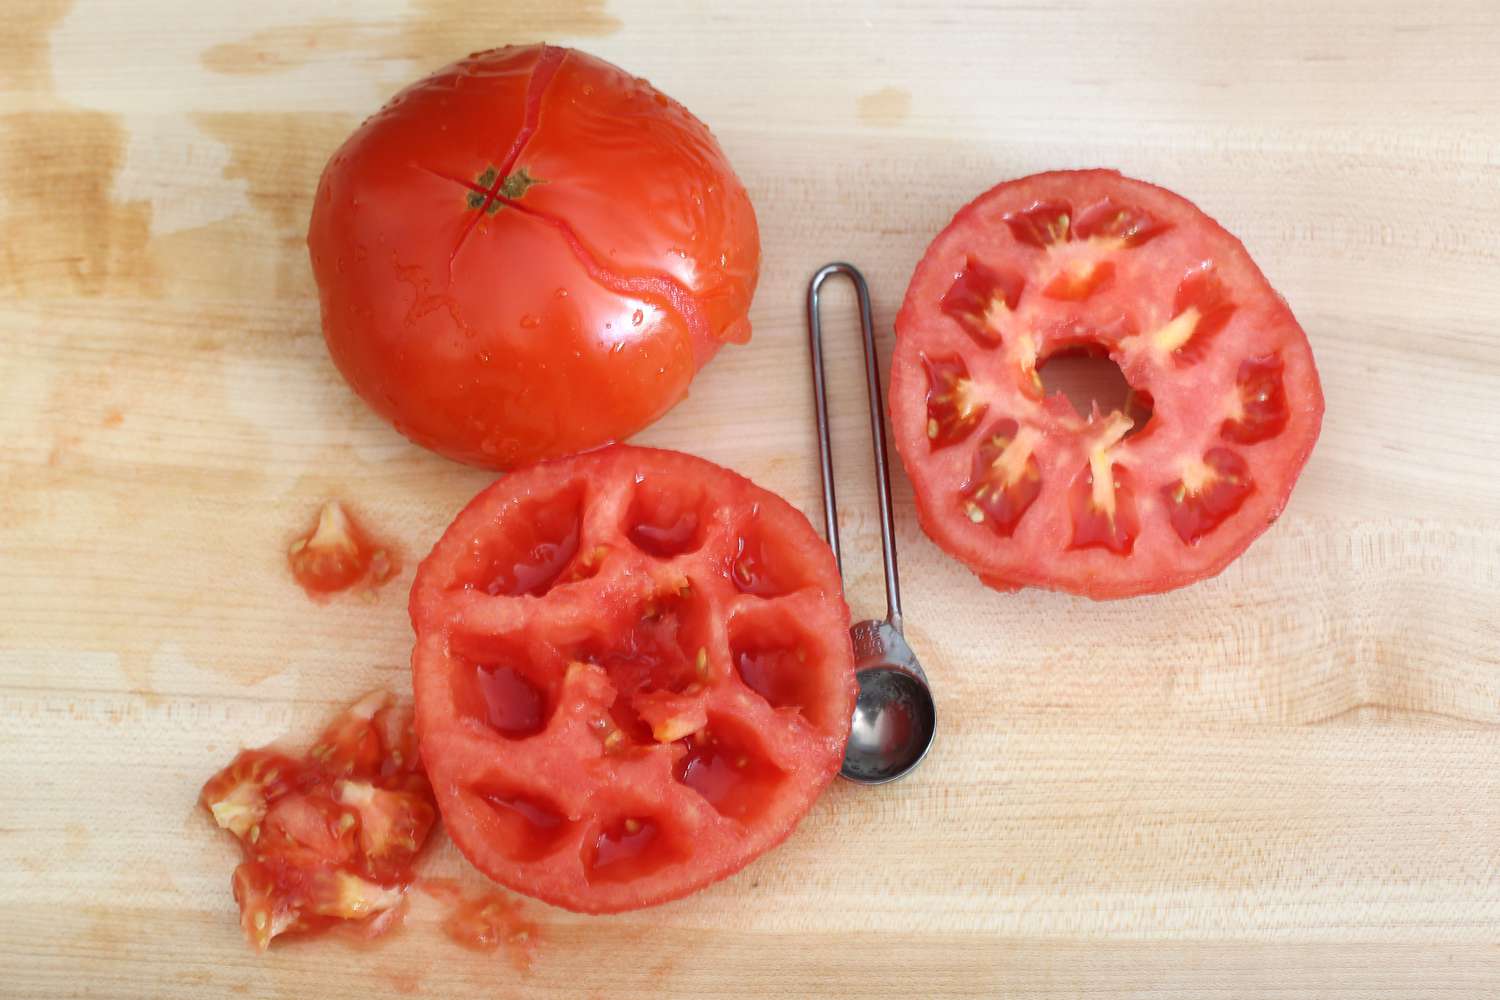
To seed a Roma tomato, cut it in half lengthwise and use a spoon to scoop out the seeds and pulp. This will make the tomato less watery and better for cooking.
Step 4: Seeding the Roma tomatoes
With the tomatoes prepared and the seeds extracted, it’s time to move on to the next step: seeding the Roma tomatoes. Follow these steps to successfully seed your Roma tomatoes:
1. Prepare a clean working surface: Find a clean and dry area to work on. Lay down a paper towel or a clean cloth to prevent the seeds from rolling away or sticking to the surface.
2. Arrange the tomato seeds: Take the dried tomato seeds and carefully arrange them on the prepared surface. Make sure to space them out and avoid clumping them together, as this will make it easier to separate and plant them later.
3. Label the seeds (optional): If you’re saving seeds from different varieties of Roma tomatoes or want to keep track of the specific seeds, you can label them using small pieces of tape or sticky notes. This will help you identify them easily when it’s time to sow or store them.
4. Let the seeds air dry (optional): If you want to further ensure the seeds are completely dry and free from moisture, you can let them air dry for an additional 24 hours before storing them. This extra drying time will minimize the risk of mold formation and improve the longevity of the seeds.
5. Store the seeds: Once the seeds are dry and ready, transfer them to a small container or envelope for storage. Ensure the container is airtight and kept in a cool, dry place away from direct sunlight. Proper storage will help maintain the viability of the seeds for future use.
Now that you have successfully seeded your Roma tomatoes and stored the seeds, you can look forward to using them in your garden or sharing them with other fellow garden enthusiasts.
Seeding tomatoes allows you to harness the power of nature by saving and reusing seeds, ensuring a continuous supply of fresh and delicious tomatoes. It’s a rewarding process that connects you with the life cycle of these beautiful plants.
Congratulations! You have completed the process of seeding your Roma tomatoes. Now you’re ready to enjoy the fruits of your labor and watch your tomatoes grow from seed to harvest.
Read more: How To Seed A Tomato
Step 5: Storing the tomato seeds
After successfully seeding your Roma tomatoes, it’s crucial to store the tomato seeds properly to ensure their long-term viability. Follow these steps to store your tomato seeds effectively:
1. Dry the seeds thoroughly: Before storing the seeds, ensure they are completely dry. Place them on a paper towel or a dry surface and let them air dry for a few days. This will prevent moisture from causing the seeds to mold or rot during storage.
2. Choose the right storage container: Find a small, airtight container to store the seeds. It can be a glass jar, a plastic bag, or an envelope. The container should be clean, dry, and large enough to hold the seeds without overcrowding them.
3. Label and date the container: To avoid any confusion later on, label the container with the type of tomato seeds and the date of collection. This information will help you keep track of the seeds and ensure you use the oldest ones first.
4. Store in a cool and dry place: Find a cool and dry location to store the seeds. Avoid areas with high humidity or temperature fluctuations, such as the kitchen or bathroom. A pantry or a basement shelf can be ideal spots as they provide a consistent temperature and humidity level.
5. Protect from light and pests: Tomato seeds are sensitive to light, so make sure to store them in a dark place or use opaque containers that block light. To protect the seeds from pests like insects or rodents, you can add a silica gel packet or a small piece of cinnamon stick to the container to deter them.
6. Check for viability: Over time, seeds may lose their viability, reducing their ability to germinate successfully. To ensure you are using viable seeds for planting, perform a simple germination test before sowing. Place a few seeds on a damp paper towel and keep them in a warm spot. If most of them sprout within a week, they are still viable.
By following these steps, you can store your tomato seeds properly, prolonging their lifespan and ensuring a higher germination rate when you decide to use them for planting.
Remember, proper seed storage is essential for maintaining the genetic integrity of the tomatoes and preserving their favorable traits. The stored seeds will serve as a valuable resource for future seasons, allowing you to continue growing delicious Roma tomatoes in your garden.
Congratulations! You have successfully completed the process of seeding and storing your Roma tomato seeds. Now you can look forward to bountiful harvests and the joy of growing your own tomatoes from seed.
Conclusion
Seeding Roma tomatoes is a rewarding and essential process in gardening. By following the steps outlined in this guide, you can successfully seed and store your own Roma tomato seeds, ensuring a continuous supply of delicious tomatoes season after season.
Throughout this guide, we discussed the necessary tools and ingredients, how to select ripe Roma tomatoes, techniques for preparing the tomatoes, and methods for storing the seeds. Remember to gather all the essential tools, choose ripe tomatoes, wash and prepare them carefully, and separate and dry the seeds before storing them in a cool, dark, and dry place.
Seeding tomatoes not only allows you to save money on buying new seeds each year, but it also gives you control over the quality and variety of your future tomato crops. By preserving the seeds from your favorite Roma tomatoes, you can ensure that the next generation of plants will possess the same outstanding flavor and characteristics.
Additionally, by saving and storing your own tomato seeds, you contribute to the preservation of heirloom and open-pollinated varieties, maintaining a rich biodiversity in your garden and supporting sustainable gardening practices.
So, whether you’re a seasoned gardener or just starting your journey, seeding Roma tomatoes is a simple yet impactful process that empowers you to nurture and grow your own food. It allows you to savor the taste of homegrown tomatoes and experience the joy of cultivating your own plants from seed to harvest.
Now that you have learned how to seed and store Roma tomato seeds, it’s time to put your knowledge into practice. Gather your tools, select the ripest tomatoes, and follow the step-by-step process to extract, dry, and store your valuable tomato seeds.
Enjoy the journey of growing your own Roma tomatoes, and may your garden be filled with abundance and flavor!
Frequently Asked Questions about How To Seed A Roma Tomato
Was this page helpful?
At Storables.com, we guarantee accurate and reliable information. Our content, validated by Expert Board Contributors, is crafted following stringent Editorial Policies. We're committed to providing you with well-researched, expert-backed insights for all your informational needs.


0 thoughts on “How To Seed A Roma Tomato”