Home>Garden Essentials>How To Plant Tomatoes From Seeds
Garden Essentials
How To Plant Tomatoes From Seeds
Modified: September 1, 2024
Learn how to plant tomatoes from seeds in your garden and enjoy a bountiful harvest. Whether you're a beginner or an experienced gardener, our step-by-step guide will help you succeed.
(Many of the links in this article redirect to a specific reviewed product. Your purchase of these products through affiliate links helps to generate commission for Storables.com, at no extra cost. Learn more)
Introduction
Welcome to the world of gardening, where the joy of planting your own fruits and vegetables knows no bounds. If you’re looking to add some fresh, flavorful tomatoes to your garden bounty, you’ve come to the right place. In this article, we’ll guide you through the process of planting tomatoes from seeds, from choosing the perfect variety to harvesting juicy, ripe tomatoes.
Growing tomatoes from seeds is a rewarding experience that allows you to witness the entire lifecycle of this versatile and delicious fruit. Starting from seeds gives you more control over the growing process and enables you to choose from a wide variety of tomato types, from sweet cherry tomatoes to large slicing tomatoes.
Whether you have a spacious backyard or a small balcony, tomatoes are an excellent choice for any garden. Their vibrant foliage, delightful aroma, and mouthwatering taste make them a staple in many households. By planting tomatoes from seeds, you can enjoy the satisfaction of nurturing the plants from their earliest stages of growth, resulting in an abundant and flavorful harvest.
Before we dive into the details of how to plant tomatoes from seeds, let’s take a look at some key considerations when choosing the right seeds for your garden.
Key Takeaways:
- Growing tomatoes from seeds is a fun and rewarding journey that lets you choose from a variety of tomatoes, nurture them, and enjoy the delicious fruits. It’s like watching a tiny seed turn into a tasty tomato!
- To grow your own tomatoes, choose the right seeds, prepare the soil, provide good care, and harvest the ripe fruits. It’s a hands-on adventure that ends with enjoying the flavorful, homegrown tomatoes!
Read more: How To Plant Tomatoes From Seed
Choosing Tomato Seeds
When it comes to choosing tomato seeds, you’ll find yourself spoiled for choice. There are thousands of tomato varieties available, each with its own unique characteristics, flavor profile, and growth habits. Here are a few factors to consider when selecting the perfect tomato seeds for your garden:
- Climate: Start by considering your local climate. Different tomato varieties thrive in different climates, so choose seeds that are suitable for your region. For hot climates, look for heat-tolerant varieties. If you’re in a cooler climate, opt for cold-tolerant or early-maturing varieties that can handle shorter growing seasons.
- Growth Habit: Tomatoes come in two main growth habits: determinate and indeterminate. Determinate varieties grow to a certain height, typically around 3-4 feet, and produce fruit over a shorter period. Indeterminate varieties, on the other hand, continue to grow and produce fruit throughout the growing season, often reaching 6 feet or taller. Consider the space you have available and your desired harvest schedule when choosing between determinate and indeterminate varieties.
- Flavor and Use: Tomato varieties range from sweet and juicy to tangy and acidic. Consider the flavor profile you prefer and how you plan to use your tomatoes. Cherry tomatoes are perfect for snacking and salads, while larger slicing tomatoes are ideal for sandwiches and sauces. Think about the culinary possibilities you want to explore and choose varieties that align with your taste preferences.
- Resistance to Diseases: Some tomato varieties have natural resistance to common diseases like tomato blight, leaf spot, and root knot nematodes. If you’re concerned about disease prevention, look for seeds labeled as disease-resistant. This can help ensure a healthier and more productive crop.
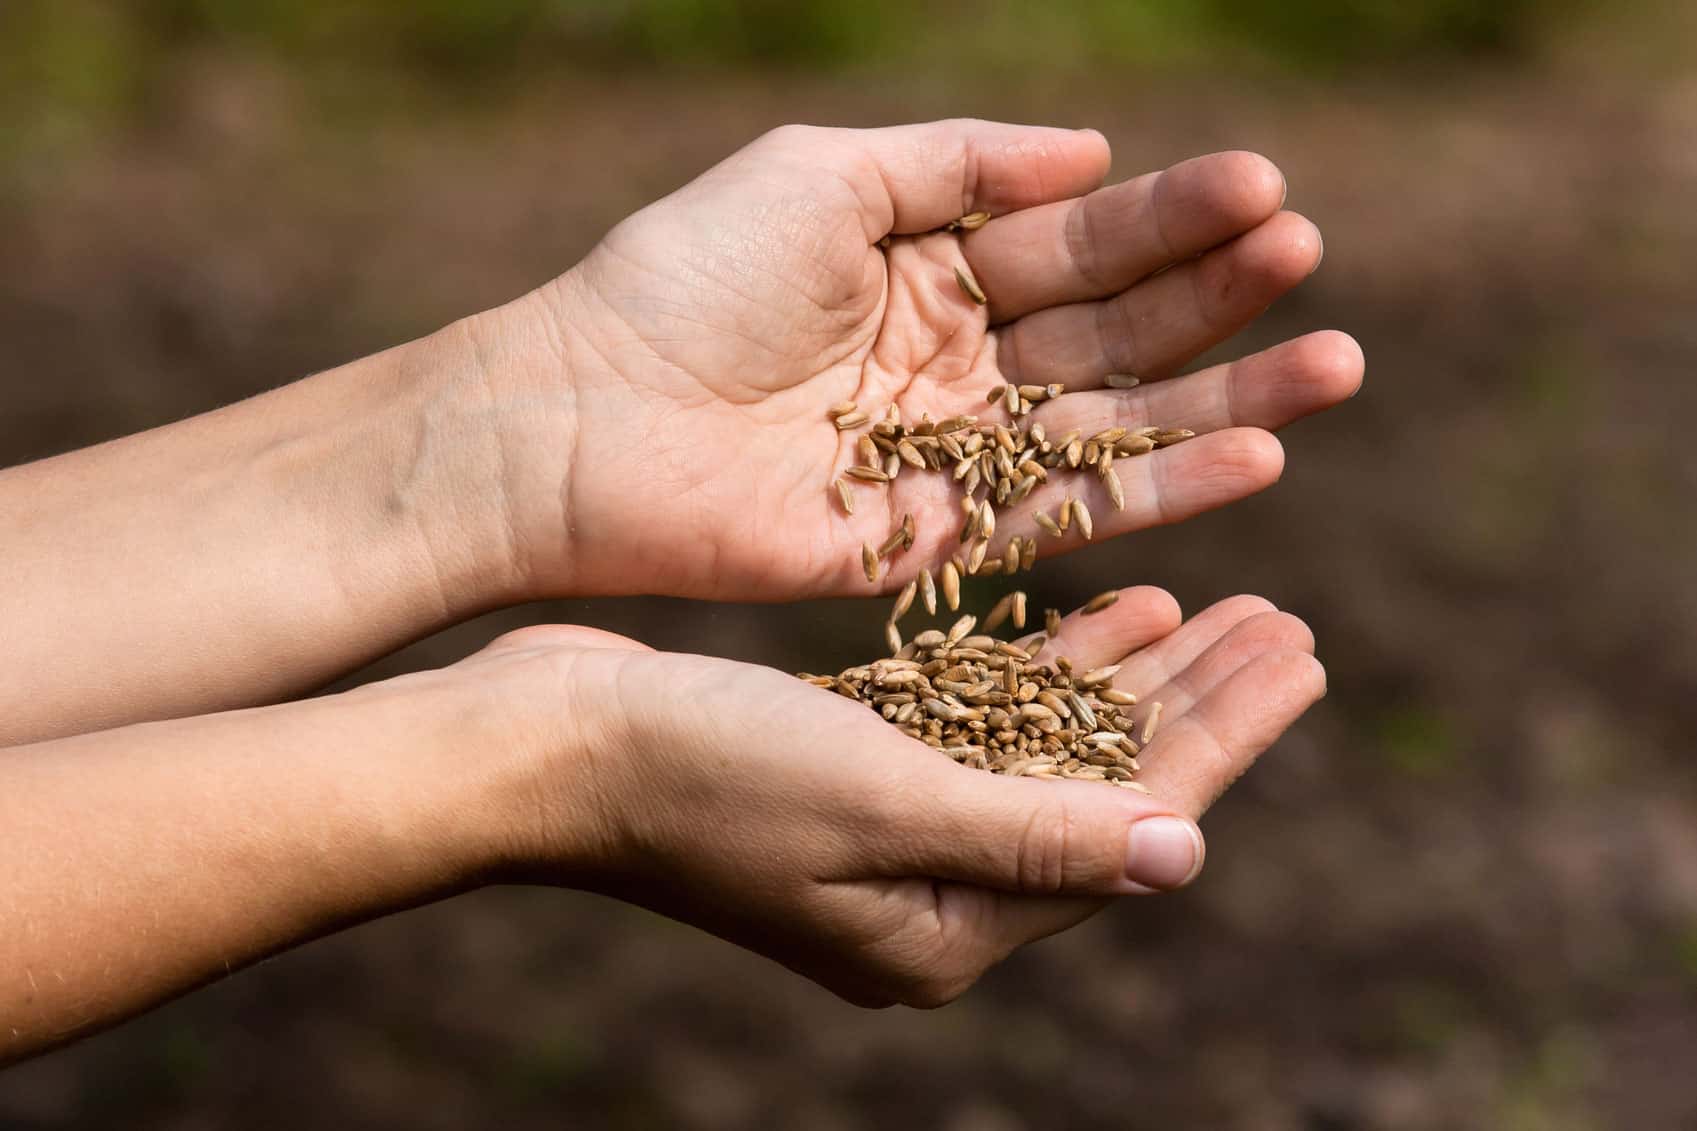
Once you’ve considered these factors, the fun part begins – browsing through seed catalogs or exploring online seed retailers to find the perfect tomato seeds for your garden. Take your time to read descriptions, check reviews, and look for trusted seed suppliers to ensure the quality and authenticity of the seeds.
Now that you have your chosen tomato seeds in hand, it’s time to prepare the soil for planting. Let’s move on to the next step in growing tomatoes from seeds.
Preparing the Soil
Creating a healthy and fertile environment for your tomato plants is crucial for their growth and productivity. Before planting the tomato seeds, it’s essential to prepare the soil properly. Here are the steps to follow:
1. Choose the Right Location: Tomatoes thrive in full sunlight, so select a spot in your garden that receives at least 6 to 8 hours of direct sunlight each day. Ensure that the area has good drainage to prevent waterlogged soil, which can lead to root rot.
2. Clear the Area: Remove any weeds, rocks, or debris from the planting area. Weeds can compete with the tomato plants for nutrients and water, so it’s crucial to keep the area weed-free.
3. Test the Soil: Conduct a soil test to determine its pH level. Tomatoes prefer slightly acidic to neutral soil with a pH range between 6.0 and 7.0. Adjust the pH if necessary by adding soil amendments like sulfur or lime.
4. Improve the Soil’s Structure: Incorporate organic matter into the soil to improve its structure, drainage, and fertility. Add well-rotted compost, aged manure, or other organic materials and mix them thoroughly into the soil. This will provide essential nutrients and promote a healthy root system.
5. Add Amendments: Depending on the soil test results, you may need to add additional amendments to balance the soil. For example, if the soil is deficient in nutrients, you can incorporate organic fertilizer or granular fertilizer specifically formulated for tomatoes.
6. Till or Dig: Use a garden fork or a tiller to loosen the soil to a depth of about 12 inches. This will make it easier for the tomato roots to penetrate the soil and access nutrients and water.
7. Smooth and Level: Rake the soil surface to create a smooth and level planting bed. This will provide a uniform surface for planting and help with water distribution.
By following these steps, you’ll create a nutrient-rich and well-drained soil environment that will set the foundation for strong and healthy tomato plants. Once the soil is ready, it’s time to plant the tomato seeds and watch them sprout and grow into thriving seedlings. We’ll cover the planting process in the next section.
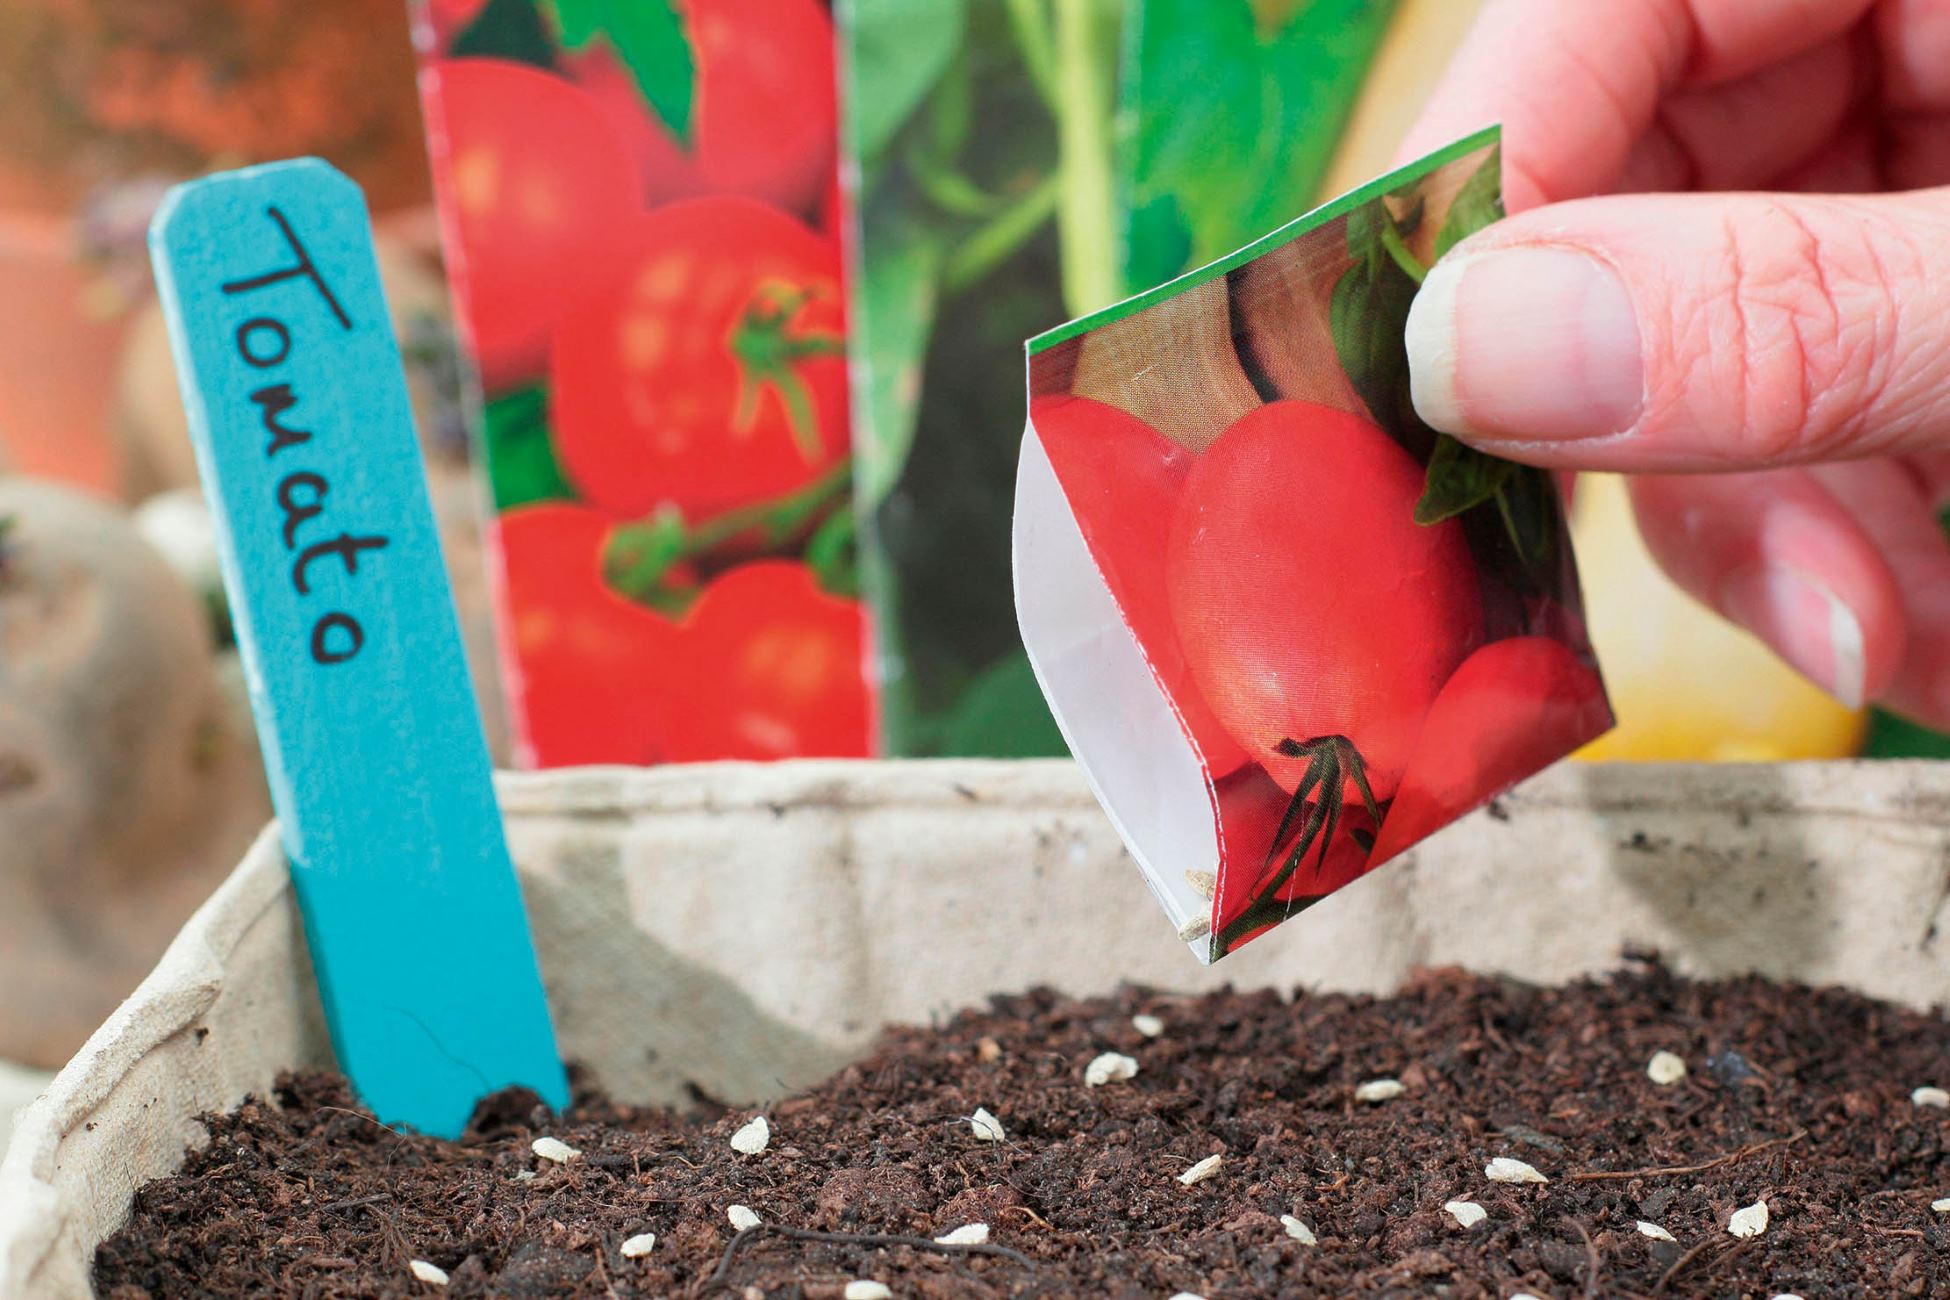
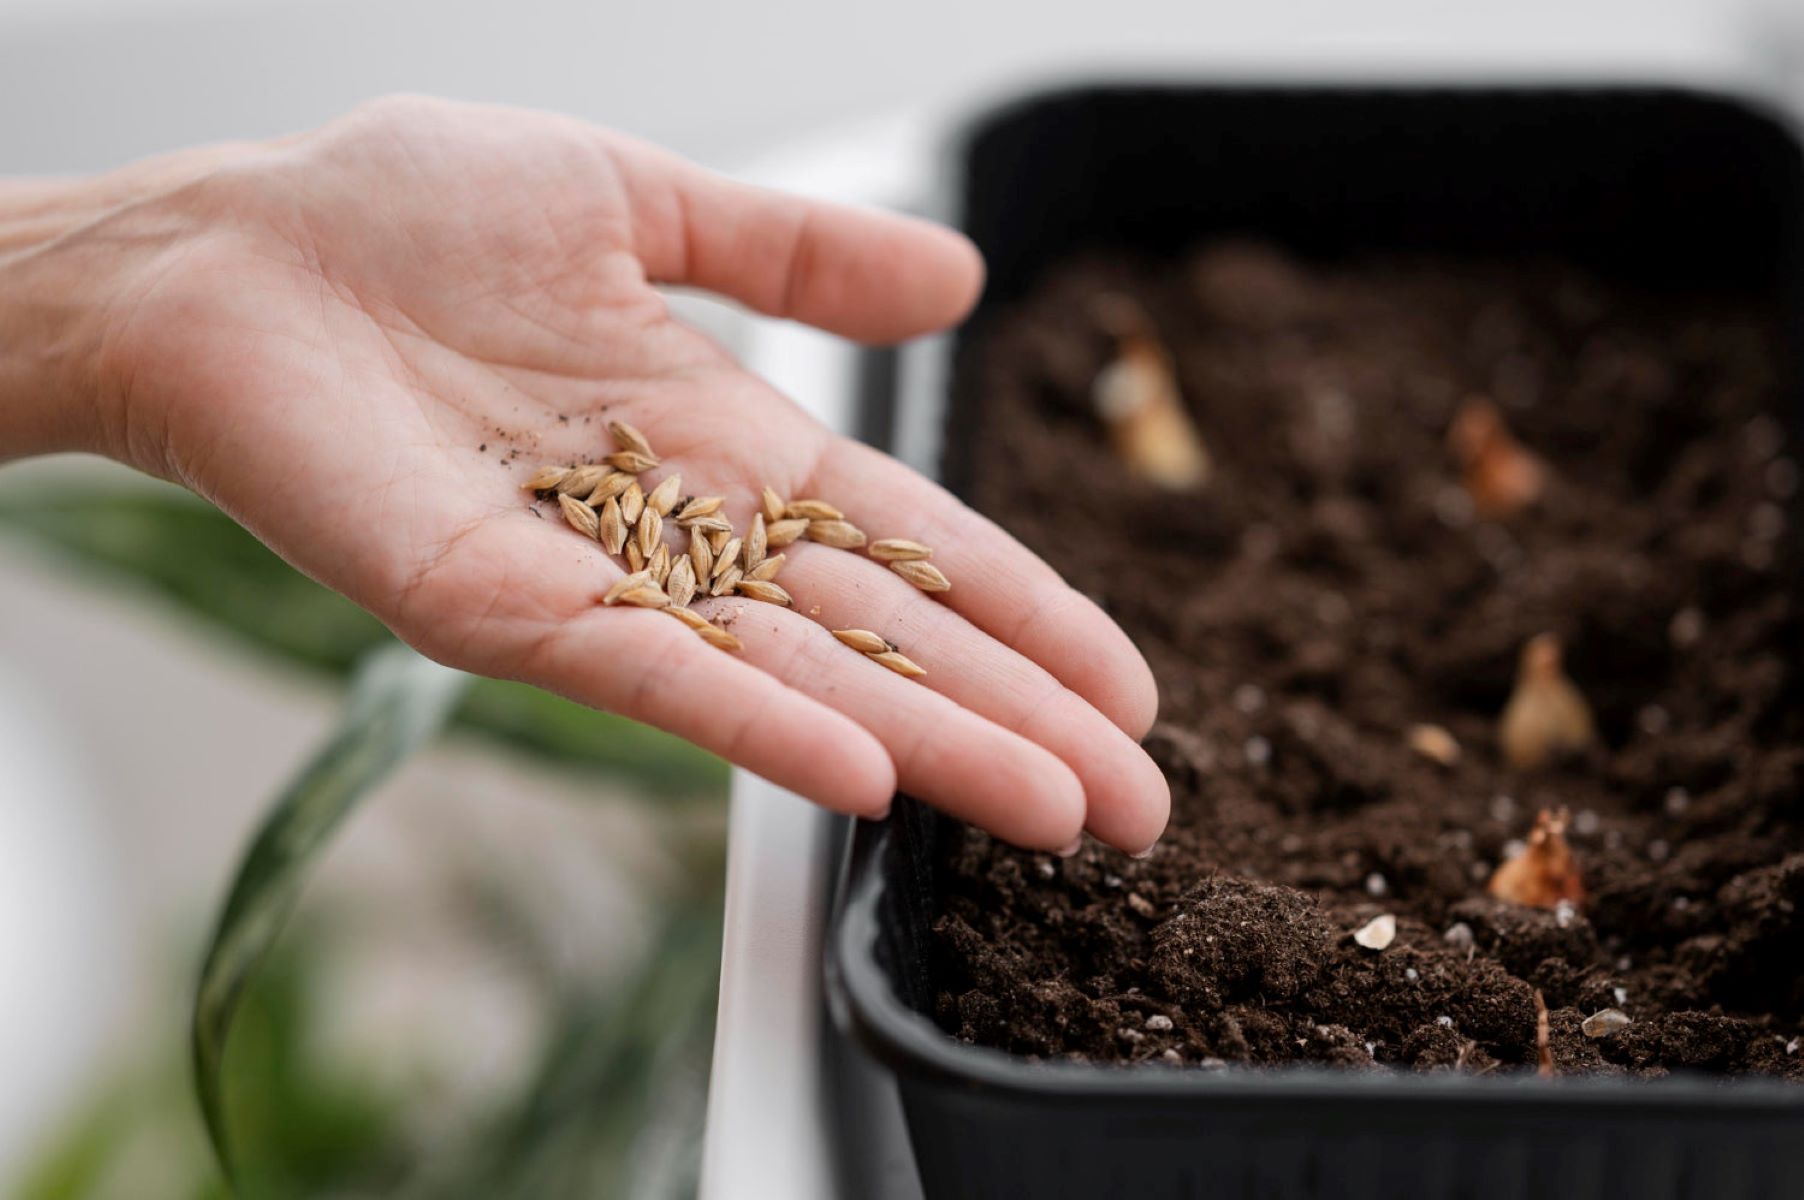
Planting the Seeds
Now that you have prepared the soil, it’s time to sow your carefully selected tomato seeds. Follow these steps to ensure successful and healthy seed germination:
1. Determine the Planting Time: The ideal time to plant tomato seeds depends on your location and the local climate. In most regions, it’s recommended to start indoor seedlings about 6-8 weeks before the last expected frost date. Check with your local agricultural extension office or consult a planting calendar for the best planting time in your area.
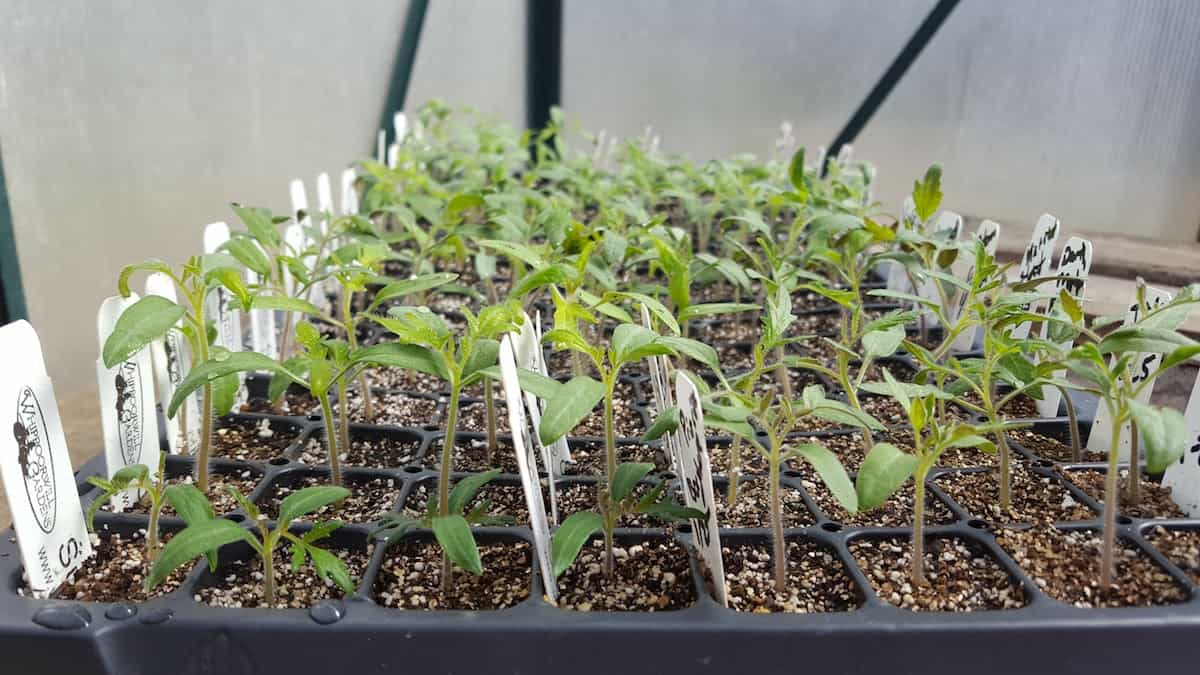
2. Use Seed Trays or Pots: Select seed trays or pots that have drainage holes at the bottom to prevent waterlogging. Fill them with a high-quality seed starting mix, which is light and sterile to promote healthy seed germination.
3. Plant the Seeds: Sow the tomato seeds about ¼ inch deep in each cell or pot. Space the seeds evenly, leaving about an inch between them to allow room for growth. Make sure to label each container with the tomato variety to avoid confusion later on.
4. Provide Moisture: Gently water the seed trays or pots after planting to ensure the soil is evenly moist. Avoid overwatering, as it may lead to damping-off disease or seed rot. Use a spray bottle or a misting nozzle to water the seeds gently.
5. Cover and Maintain Warmth: Cover the seed trays or pots with a clear plastic dome or place them inside a plastic bag to create a mini greenhouse effect. This helps retain moisture and warmth, which promotes faster germination. Place the trays or pots in a warm location, around 70-80°F (21-27°C), to encourage seedling growth.
6. Monitor and Mist: Check the seed trays or pots daily for moisture. If the top layer of the soil feels dry, mist it lightly with water to maintain adequate moisture levels. Avoid allowing the soil to dry out completely.
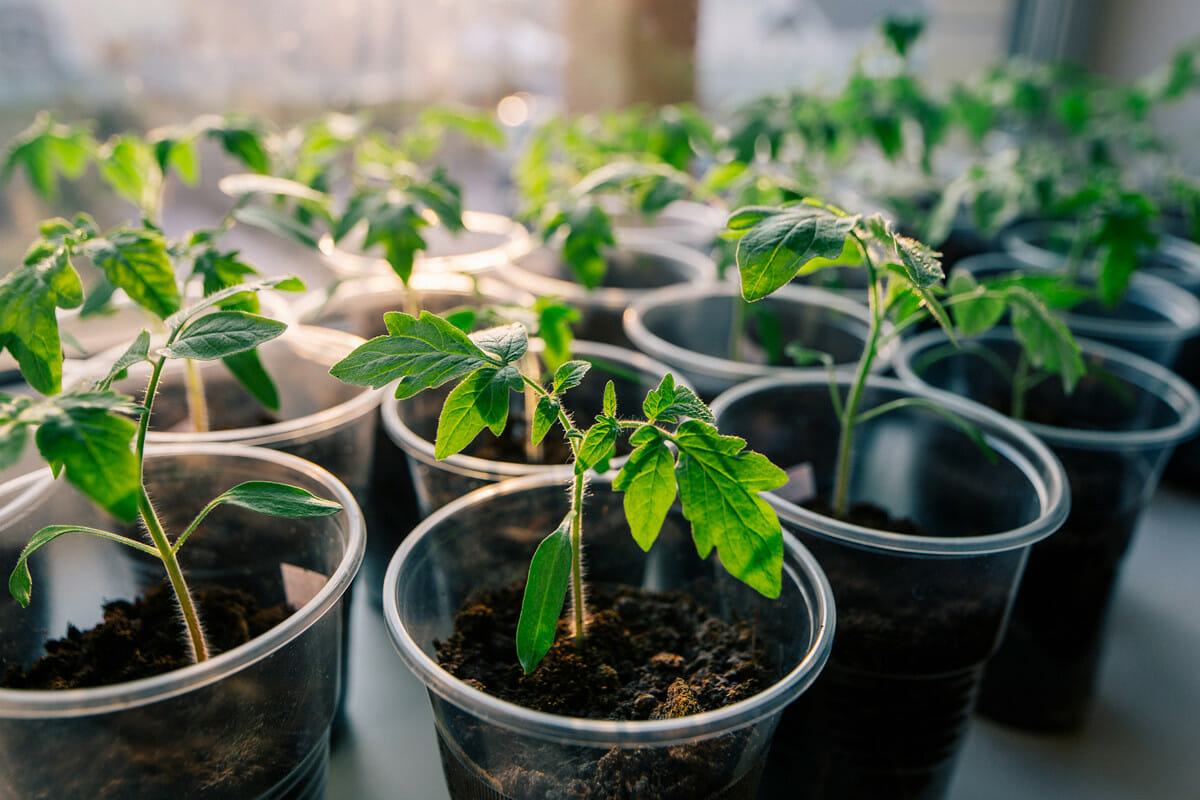
7. Provide Adequate Light: Once the seeds germinate and seedlings emerge, remove the plastic cover and place the trays or pots in a sunny location. Tomato seedlings require at least 14-16 hours of bright light each day to develop into healthy plants. If natural light is insufficient, consider using grow lights to supplement the light requirements.
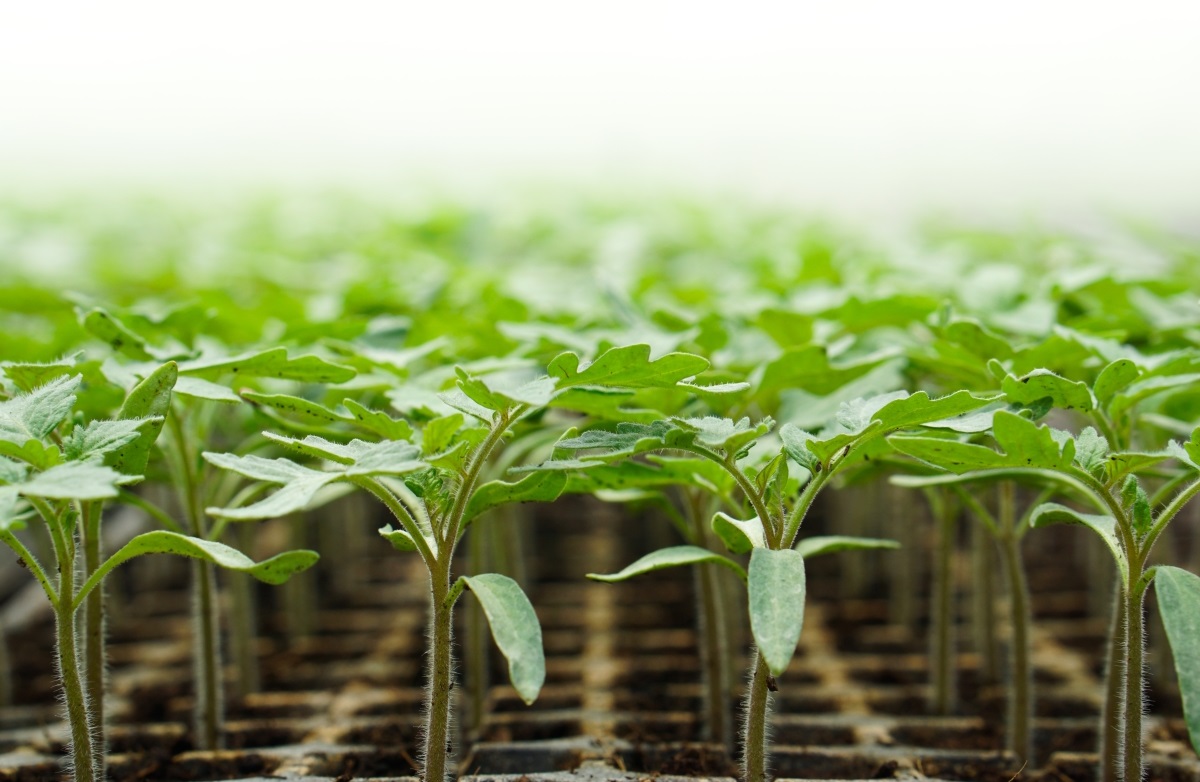
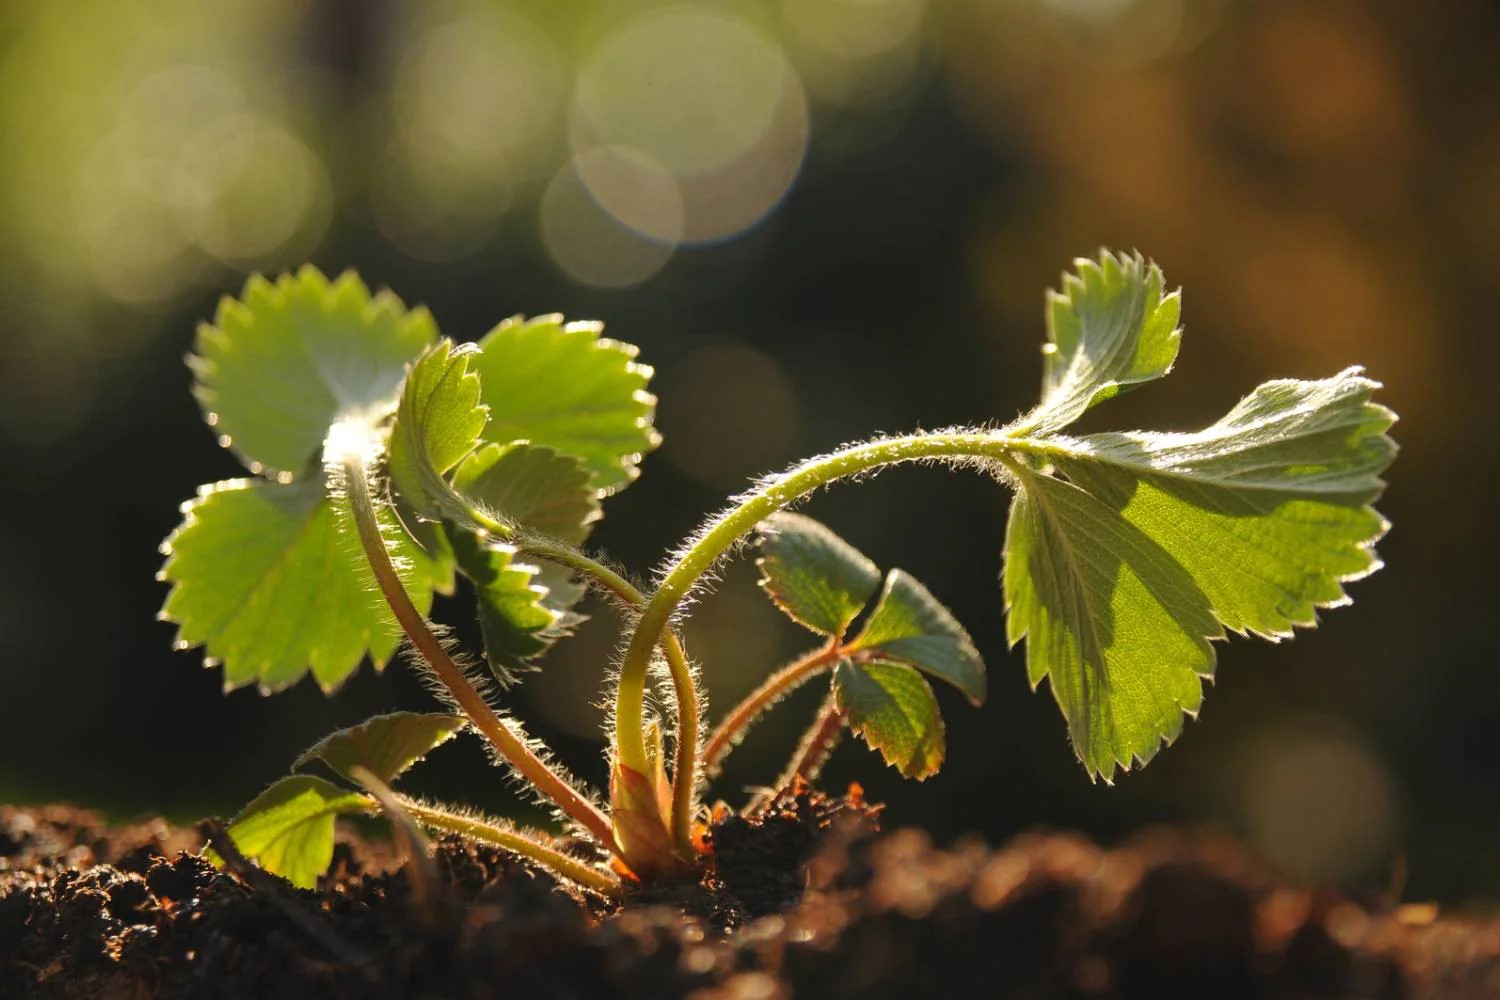
As the seedlings grow, continue to monitor their moisture levels, temperature, and light exposure. Once they have reached a suitable size and have developed a couple of sets of true leaves, they are ready for transplanting. In the next section, we’ll discuss the process of transplanting the tomato seedlings into their permanent growing location.
Providing the Right Conditions
Transplanting the tomato seedlings into their permanent growing location is an exciting step in their journey to becoming fruitful plants. However, before moving them, it’s important to ensure the right conditions are in place to support their growth and development. Here are some key factors to consider:
1. Hardening Off: Before transplanting, gradually expose the seedlings to outdoor conditions over a period of 7-10 days. Start by placing them in a sheltered location for a few hours a day, gradually increasing their exposure to sunlight and outdoor elements. This process, known as hardening off, helps the seedlings adjust to the changes in temperature, wind, and sunlight intensity.
2. Soil Moisture: Ensure that the soil in the planting area is evenly moist, but not waterlogged, before transplanting. Dry or overly wet soil can stress the seedlings and hinder their growth. Water the soil thoroughly a day or two before transplanting to provide adequate moisture.
3. Plant Spacing: Tomato plants need adequate space to grow and spread their branches. Proper spacing allows for good airflow, reducing the risk of diseases. Space determinate varieties about 2-3 feet apart, while indeterminate varieties require about 3-4 feet of spacing. Follow the recommendations provided for the specific variety you are growing.
4. Sun Exposure: Choose a location for your tomato plants that receives full sun for at least 6-8 hours a day. Tomatoes are sun-loving plants and require ample sunlight to develop strong stems, healthy foliage, and abundant fruit production.
5. Support Structures: Determine how you will support your tomato plants as they grow taller and produce heavy fruit clusters. Options include using stakes, cages, or trellises. Install these structures before transplanting the seedlings to avoid damaging their roots later on.
6. Mulch: Apply a layer of organic mulch, such as straw or shredded leaves, around the base of the tomato plants. Mulching helps conserve soil moisture, suppresses weed growth, and regulates soil temperature, creating optimal conditions for root development.
7. Watering: After transplanting, water the seedlings thoroughly to ensure their roots make good contact with the soil. Provide regular watering, aiming for about 1-2 inches of water per week. Water deeply and evenly, avoiding overhead watering to minimize the risk of disease.
By providing the right conditions, you are setting your tomato plants up for success. These factors contribute to the overall health, vigor, and productivity of the plants. With the proper conditions in place, your tomato plants will thrive and reward you with a bountiful harvest. In the next section, we will explore the care needed to support the growth of your tomato plants.
When planting tomato seeds, make sure to start them indoors 6-8 weeks before the last frost date. Use a seed starting mix, keep the soil moist, and provide plenty of light for healthy seedling growth.
Read more: How To Plant Cherry Tomato Seeds
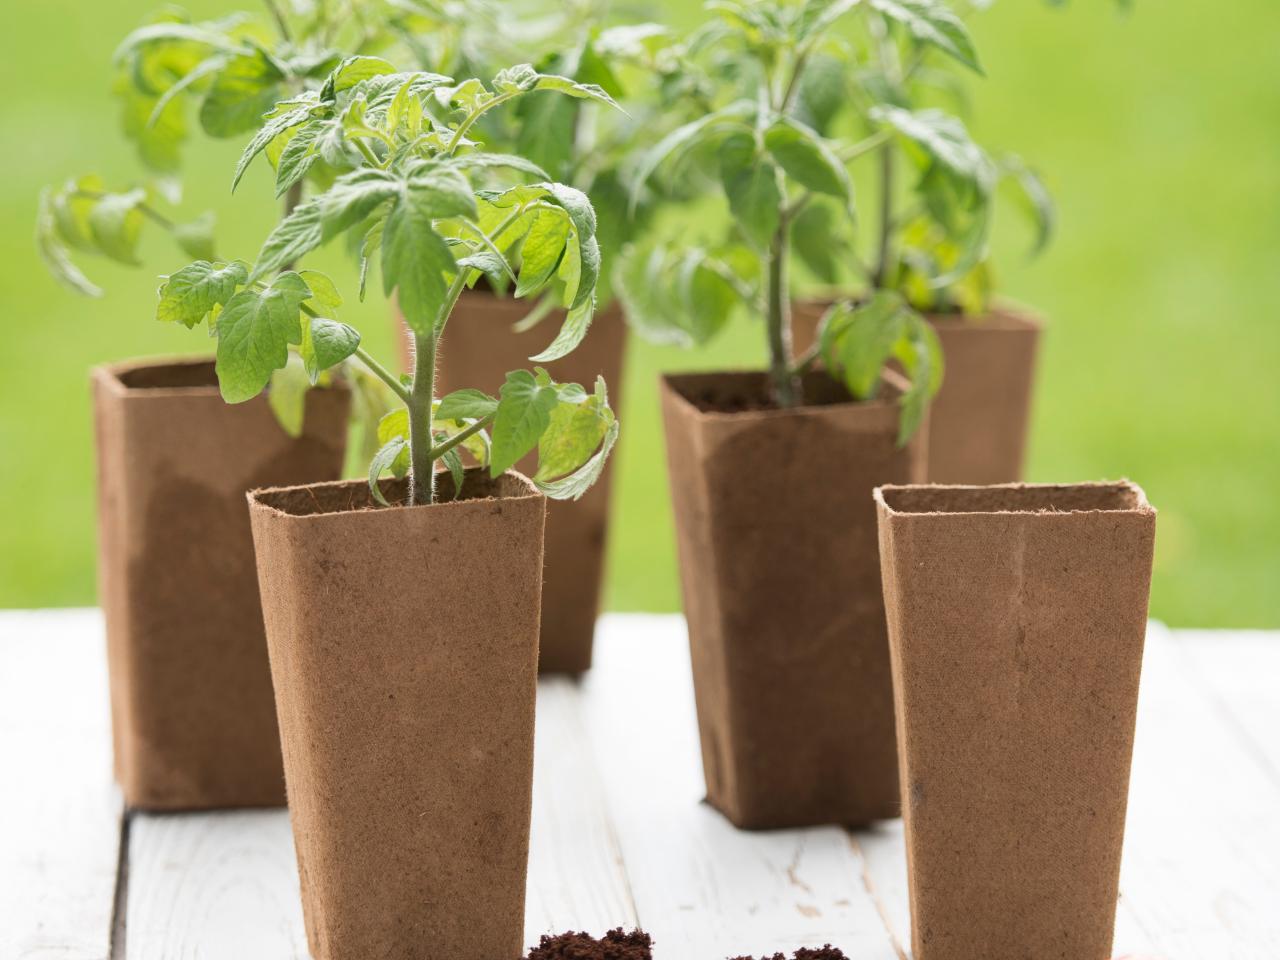
Transplanting the Seedlings
Transplanting tomato seedlings from their indoor pots to the outdoor garden is a crucial step in their journey towards maturity and fruitfulness. Follow these steps to ensure a successful transition and establishment:
1. Timing: Wait until the threat of frost has passed and the soil has warmed before transplanting tomato seedlings. Typically, this is when temperatures consistently stay above 50°F (10°C) at night. Transplanting too early can stunt growth or even kill the young plants.
2. Digging Holes: Dig planting holes slightly larger than the size of the root ball of the seedlings. Space the holes according to the recommended plant spacing for your tomato variety.
3. Preparing the Seedlings: Gently remove the tomato seedlings from their pots, being careful not to damage the delicate roots. If the roots are tightly wound, loosen them slightly to encourage outward growth. For leggy seedlings, bury a portion of the stem in the hole, as buried stems have the ability to develop additional roots.
4. Placing in the Holes: Set the seedlings in the prepared holes, making sure they are at the same depth as they were in their pots. The root ball should be just below the soil surface, and the stem should be straight and upright. Gently backfill the holes with soil, firming it gently around the base of the plants.
5. Watering: After transplanting, give the seedlings a thorough watering to settle the soil and eliminate air pockets around the roots. Provide enough water to moisten the entire root area. Subsequent watering should be done regularly, keeping the soil consistently moist but not waterlogged.
6. Mulching: Apply a layer of organic mulch, such as straw or wood chips, around the base of the seedlings. Mulch helps to conserve soil moisture, regulate soil temperature, and suppress weed growth. Leave a small gap between the mulch and the stem of the plants to prevent rot.
7. Support Structures: Install support structures, such as stakes or cages, near the transplanted seedlings to provide support as they grow taller. This will prevent the plants from sprawling on the ground and protect the fruit from touching the soil, reducing the risk of rot and disease.
8. Monitor Growth: Keep a close eye on the transplanted seedlings in the days following transplanting. Watch for signs of stress, such as wilting or yellowing leaves, and take action as needed. Protect the seedlings from extreme weather conditions, such as strong winds or intense heat, until they become established.
By following these steps, you’ll ensure a smooth transplanting process for your tomato seedlings, allowing them to continue their journey towards healthy growth and eventual fruit production. Now, let’s move on to the next section, where we’ll discuss the essential care needed to nurture your tomato plants to maturity.
Caring for Tomato Plants
Once you have successfully transplanted your tomato seedlings, it’s important to provide consistent and attentive care to help them thrive and produce a bountiful harvest. Here are some essential care tips for nurturing your tomato plants:
Watering: Tomatoes need consistent moisture, especially during hot and dry periods. Water deeply, ensuring that the soil is evenly moist but not waterlogged. Aim to provide about 1-2 inches of water per week, depending on weather conditions. Avoid overhead watering, as it can promote the spread of diseases. Instead, focus on watering at the base of the plant, directing the water towards the root system.
Support and Pruning: As your tomato plants grow taller, they will need support to prevent them from falling over and to keep the fruit off the ground. Use stakes, cages, or trellises to provide support. Regularly prune any suckers that form in the leaf axils, as this allows the plant to focus its energy on fruit production rather than excessive foliage growth.
Fertilizing: Tomatoes are heavy feeders and require regular feeding to obtain the necessary nutrients for optimal growth and fruit development. Start by incorporating organic matter, such as compost, into the soil prior to planting. After that, you can apply a balanced fertilizer every 4-6 weeks, following the package instructions for application rates. Alternatively, you can use organic fertilizers specifically formulated for tomatoes. Monitor the foliage for signs of nutrient deficiencies and adjust your fertilizer application accordingly.
Weed Control: Keep the area around your tomato plants free of weeds, as they compete for nutrients, water, and sunlight. Mulching can help suppress weed growth, and regular inspections and removal of any emerging weeds will help keep your plants healthy and thriving.
Pest and Disease Management: Monitor your tomato plants regularly for signs of pests like aphids, hornworms, or whiteflies. If infestations occur, take appropriate measures like handpicking the insects or using organic pest control methods. It’s also important to be vigilant against common tomato diseases such as blight, wilt, or powdery mildew. Choose disease-resistant varieties, practice crop rotation, and ensure proper spacing and good airflow around the plants to help prevent disease outbreaks.
Pruning: Regularly prune any yellowing or diseased leaves from your tomato plants. This will help improve air circulation and prevent the spread of diseases. Additionally, removing lower leaves can help redirect energy toward fruit development and allow better access to sunlight for maximum photosynthesis.
Mature Fruit Support: As your tomato plants begin to bear fruit, provide additional support for the branches. Tie them gently to the support structure using soft string or plant ties. This will help prevent the branches from breaking under the weight of the fruit as it ripens.
By following these care guidelines, your tomato plants will be well-nourished, protected from pests and diseases, and well-supported throughout their growth. This will increase their chances of producing robust, flavorful tomatoes that you can enjoy fresh from your garden.
In the next section, we’ll explore common issues that you may encounter while growing tomatoes and discuss troubleshooting tips to overcome them.
Troubleshooting Common Issues
While growing tomatoes can be a rewarding experience, it’s not uncommon to encounter a few challenges along the way. Here are some common issues that tomato growers may face and tips to troubleshoot them:
1. Blossom End Rot: This is a condition where the bottom of the tomato fruit turns black and becomes sunken. It is usually caused by calcium deficiency or inconsistent watering. To prevent blossom end rot, ensure consistent moisture levels by watering evenly and avoid over-fertilization with nitrogen. Adding calcium-rich amendments, such as crushed eggshells or gypsum, to the soil can also help prevent this issue.
2. Tomato Hornworms: These large green caterpillars can quickly devour tomato leaves and fruits. Handpick and remove them from the plants, or introduce natural predators like ladybugs or lacewings to control their population. Consider using organic insecticides like neem oil if the infestation becomes severe.
3. Tomato Diseases: Common diseases in tomatoes include early blight, late blight, and powdery mildew. To prevent these diseases, practice proper spacing between plants, provide good airflow, and avoid overhead watering. Regularly inspect your plants for signs of disease, and if detected, treat them with appropriate organic fungicides or contact your local agricultural extension office for guidance.
4. Tomato Cracking: Cracks or splits may occur on the skin of the tomatoes due to fluctuations in moisture levels, especially after a period of dryness followed by heavy rainfall. To prevent cracking, maintain consistent and even soil moisture levels by watering regularly and mulching around the plants to retain moisture.
5. Sunscald: Sunscald happens when the tomatoes are exposed to excessive sunlight and heat, causing them to develop light-colored patches on the skin. Protect your developing tomatoes by providing shade during the hottest part of the day using shade cloth or by providing natural shade from taller plants or structures.
6. Stunted Growth: If your tomato plants are not growing as expected, several factors could be at play. Check for proper watering, adequate sunlight, and nutrient deficiencies. Adjust your care routine accordingly, ensuring your plants have access to the necessary resources for healthy growth.
7. Lack of Fruit Production: If your tomato plants are not producing fruit, it may be due to several reasons, such as inadequate pollination, extreme temperatures, or too much nitrogen fertilizer. To encourage fruit production, hand pollinate the blossoms by gently shaking the flower clusters or use a small brush to transfer pollen between flowers. Avoid excessive nitrogen fertilization, as it can promote vegetative growth at the expense of fruit development.
Remember that growing tomatoes is a learning process, and overcoming these challenges may require some experimentation and adjustments to your gardening practices. Stay observant, take proactive measures to prevent and treat issues, and don’t get discouraged. With patience and care, you’ll soon be enjoying a successful tomato harvest.
In the final section, let’s discuss the exciting part – harvesting your delicious homegrown tomatoes!
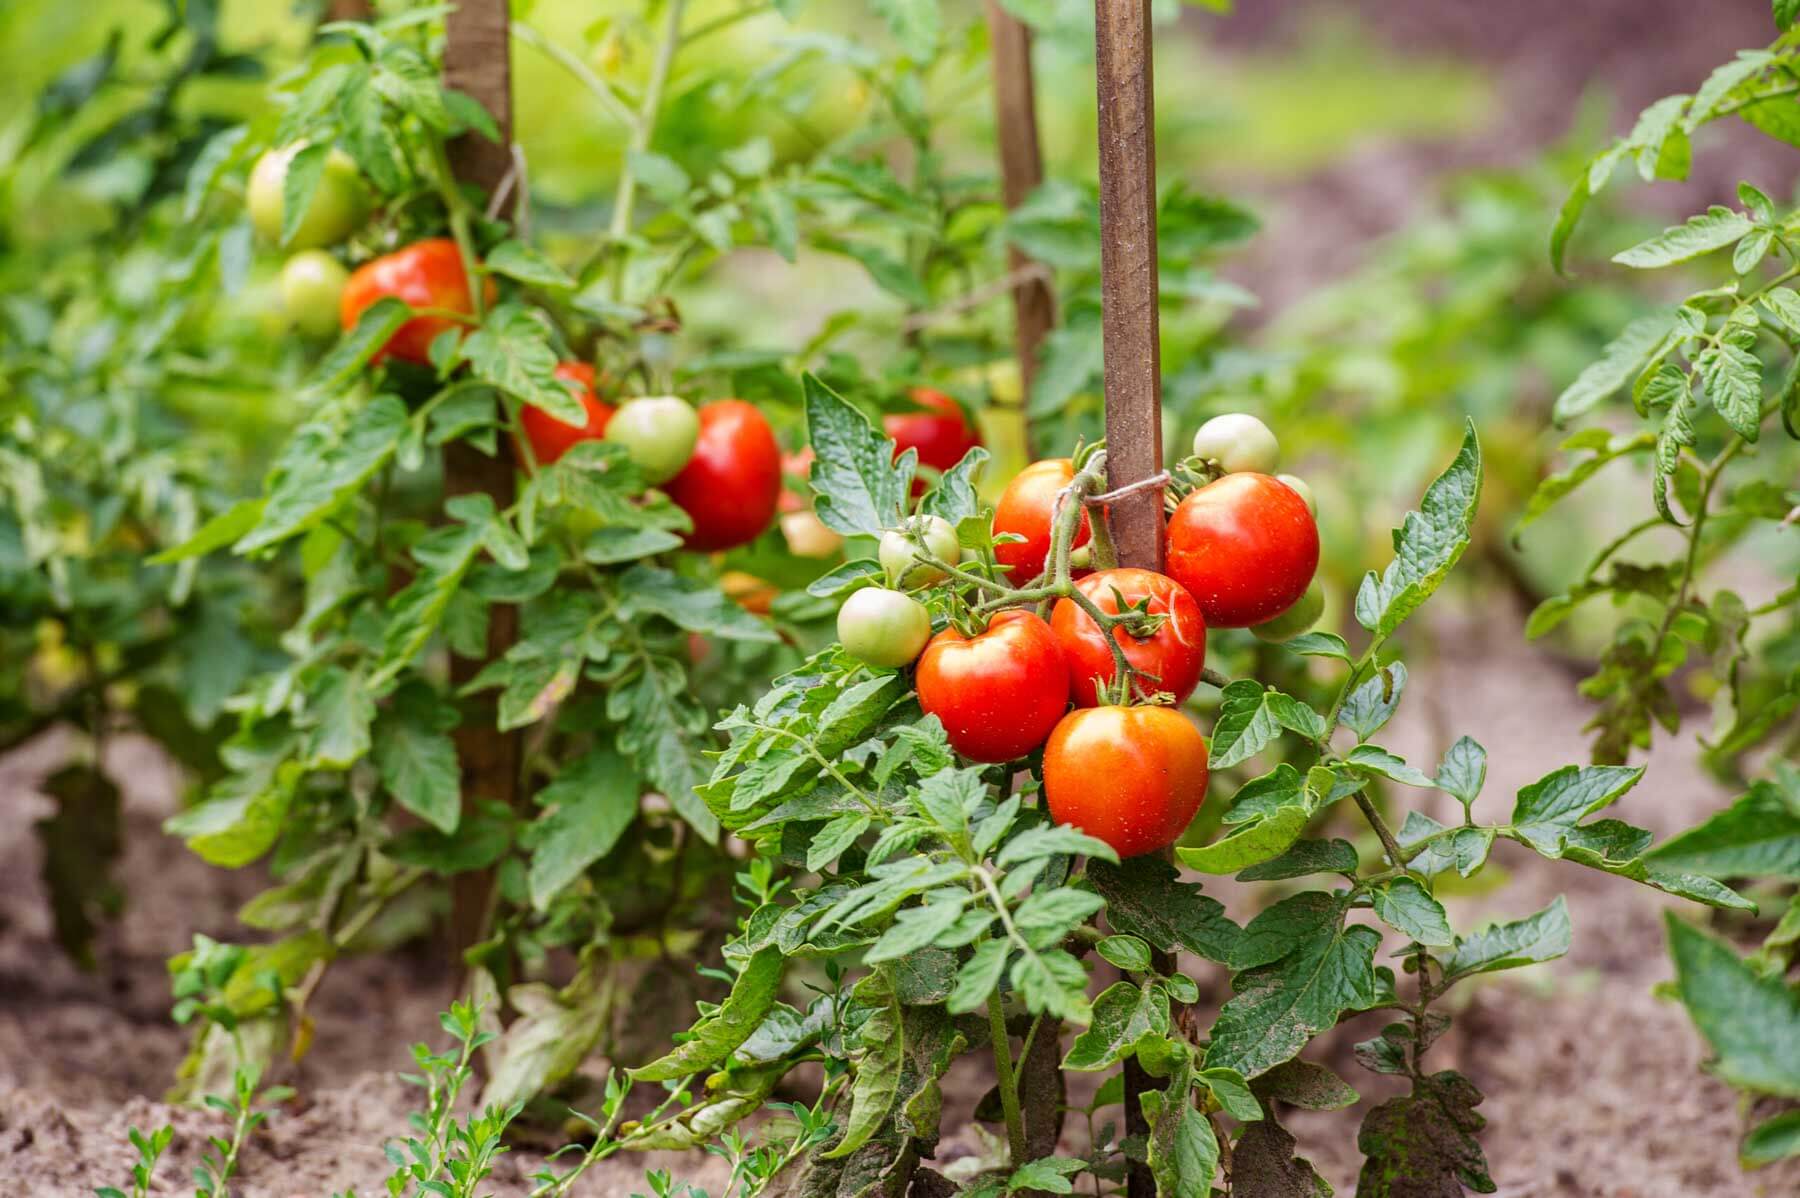
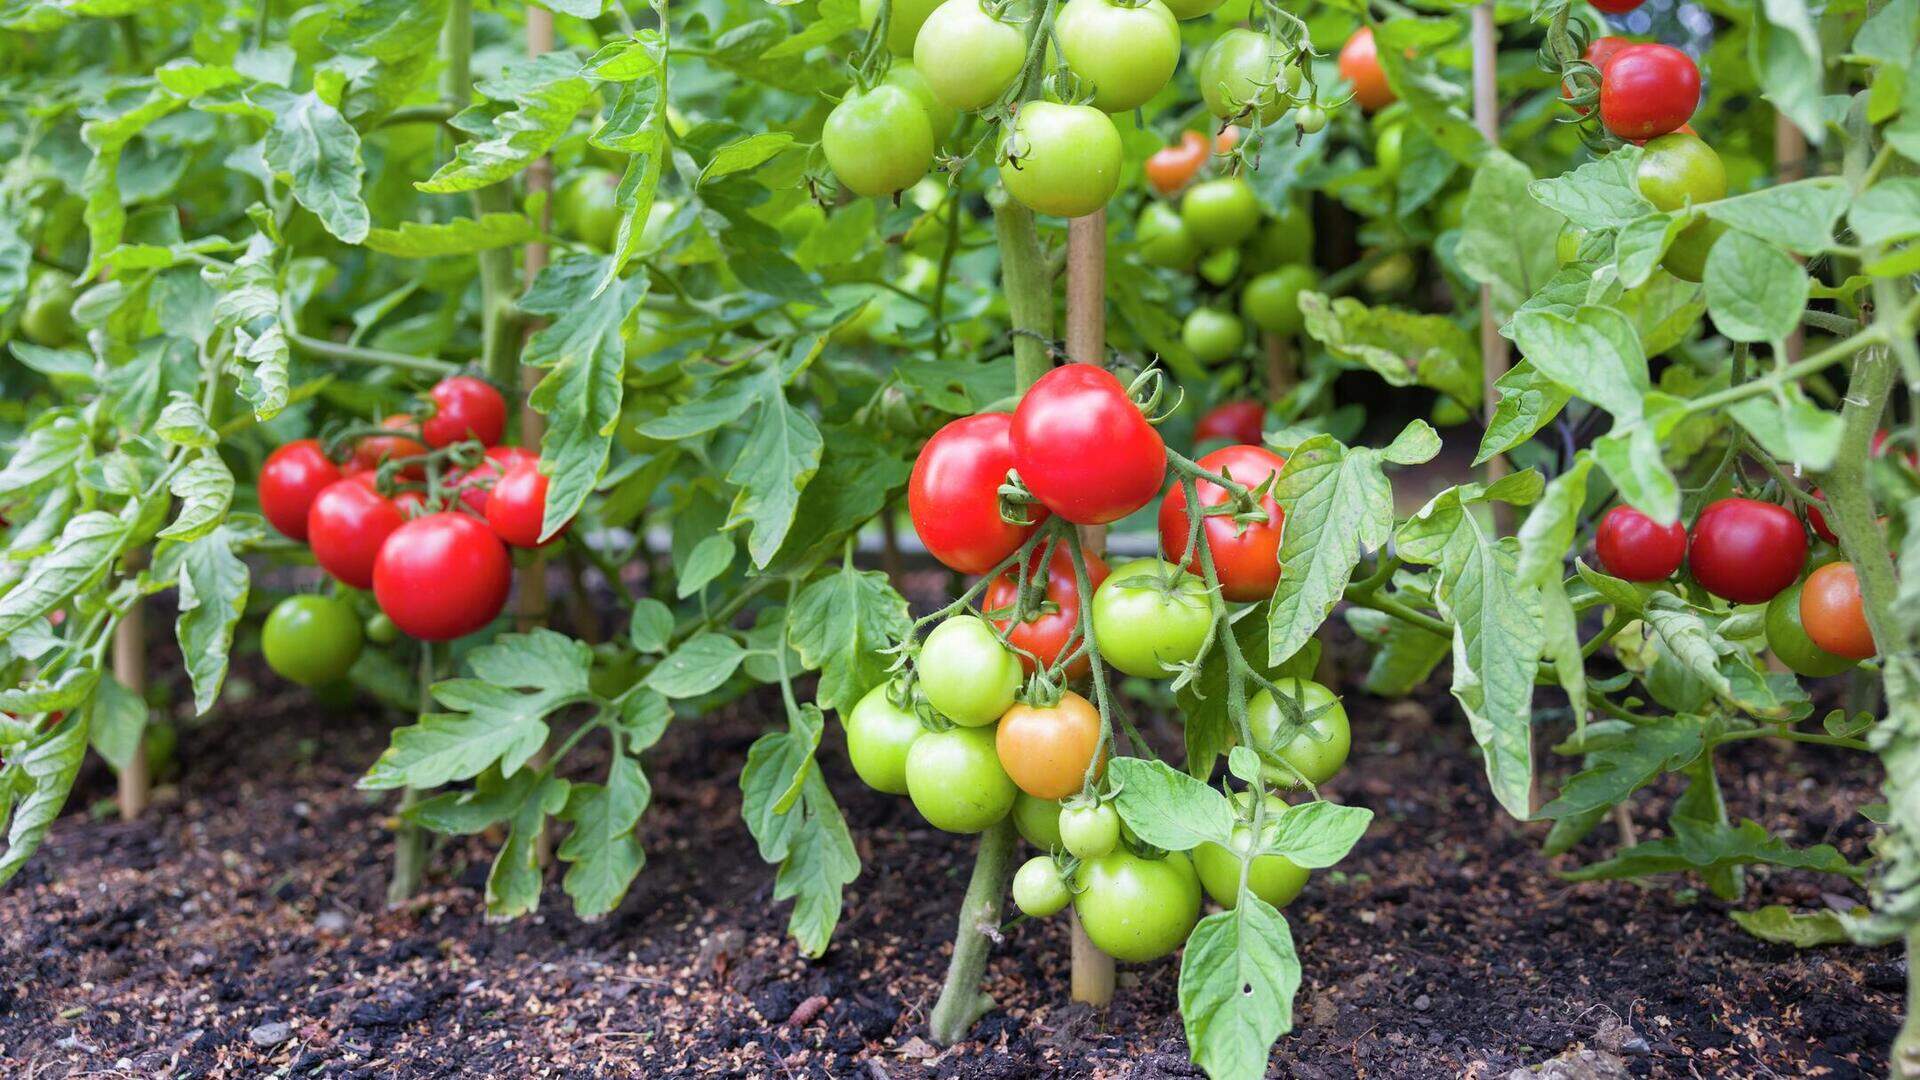
Harvesting Tomatoes
Finally, the time has come to reap the rewards of your hard work and dedication – it’s time to harvest your homegrown tomatoes! Here are some tips to ensure you pick your tomatoes at the right time and enjoy them at their peak:
1. Check for Ripeness: Tomatoes are ready to be harvested when they have reached their full color and are firm, but still yield to gentle pressure. Different tomato varieties have different colors when ripe, so refer to the specific variety’s description or any visual signs of ripeness listed on the seed packet or plant label.
2. Harvesting Techniques: To harvest your tomatoes, simply grasp the fruit gently, close to the stem, and twist it slightly until it separates from the plant. For soft-skinned varieties or fragile fruits, use a pair of clean scissors or pruning shears to cut the stem without damaging the plant or neighboring fruits.
3. Time of Day: It’s best to harvest tomatoes early in the morning when the temperatures are cooler. This helps preserve the flavor and nutritional quality of the fruits. Avoid harvesting tomatoes when the plants are wet from dew or rain, as moisture can lead to spoilage during storage.
4. Fruit Maturation: Tomatoes can ripen both on the plant and off the plant. If you want to extend the harvest period or if your tomatoes are at risk of pests or extreme weather, you can pick partially ripe fruits and allow them to ripen indoors. Place them in a warm spot out of direct sunlight, and they will continue to ripen fully over a few days to a week.
5. Proper Storage: To prolong the shelf life and maintain the quality of your freshly harvested tomatoes, store them at room temperature, preferably in a single layer to prevent bruising. Avoid refrigerating fully ripe tomatoes, as this can affect their flavor and texture. Instead, refrigerate only the excess or partially ripe tomatoes for later use.
6. Enjoying Tomatoes: Once your tomatoes are harvested and ready to be enjoyed, the possibilities are endless. Slice them for sandwiches, toss them in salads, make fresh salsa, or try your hand at homemade pasta sauce. The vibrant flavors of homegrown tomatoes will add a burst of freshness to all your culinary creations.
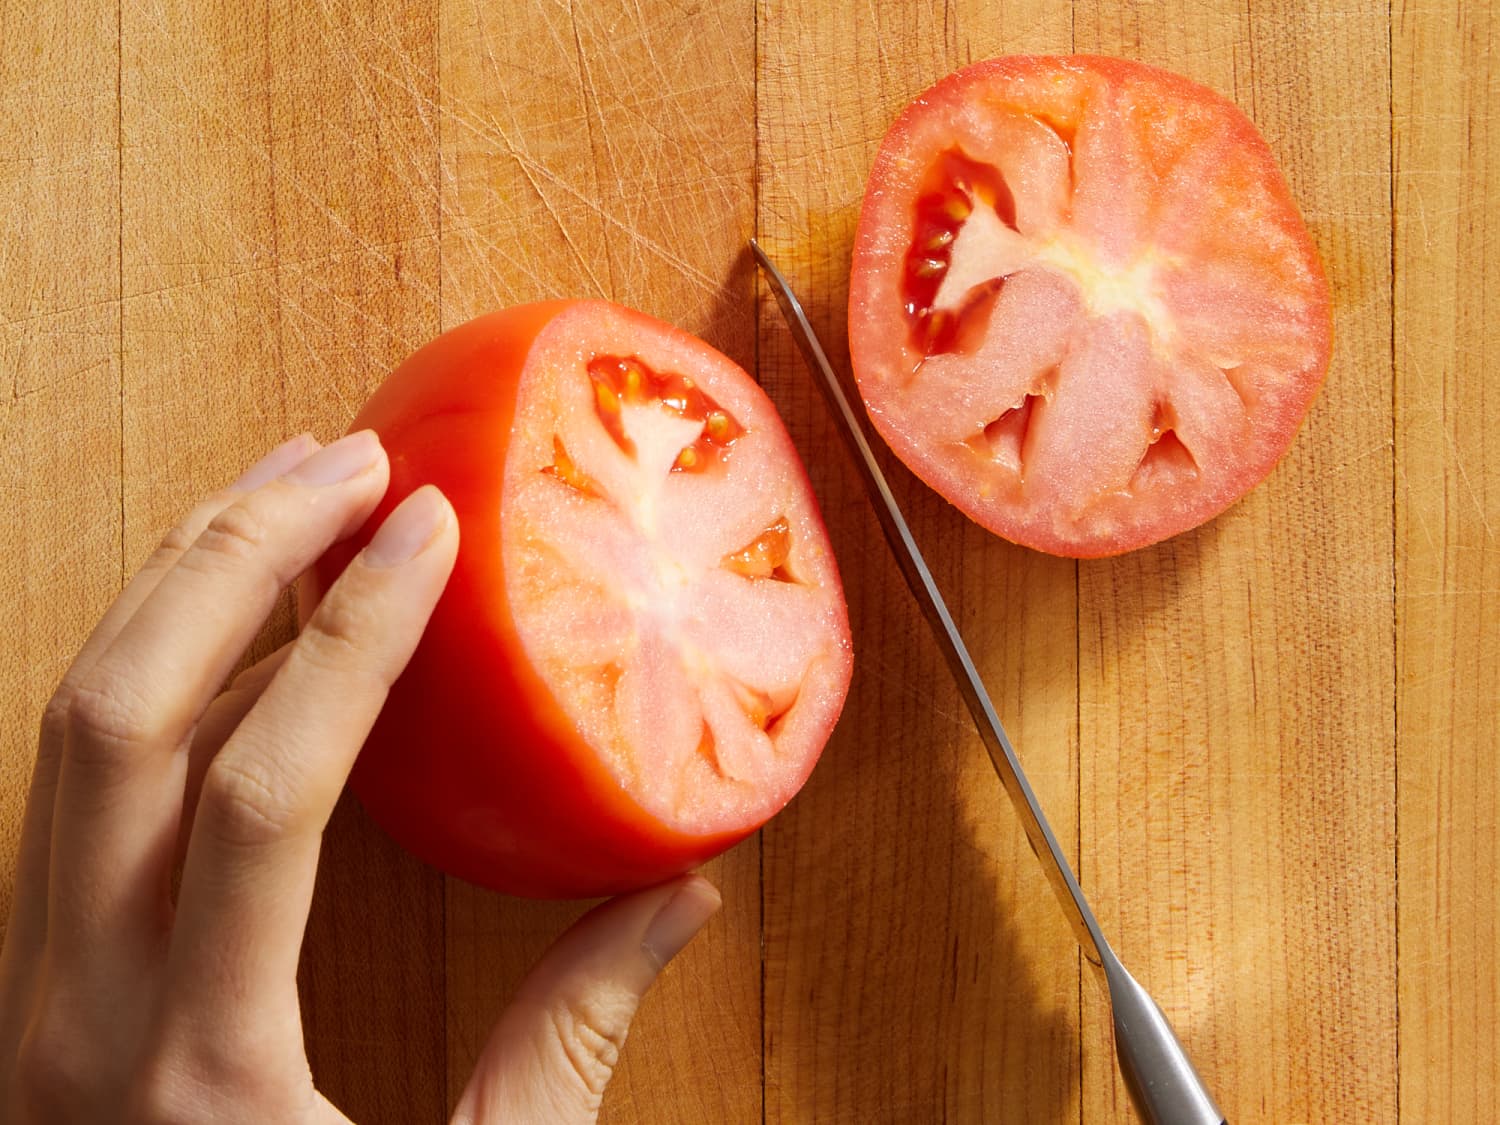
7. Saving Seeds: If you’re interested in saving tomato seeds for future planting, select fully ripe and undamaged fruits. Scoop out the seeds along with some of the surrounding gelatinous pulp and place them in a jar with a little water. Allow the mixture to ferment for a few days until a layer of mold forms on the surface. Rinse the seeds thoroughly, dry them on a paper towel, and store them in a cool, dry place for future planting.
Remember, harvesting tomatoes is the culmination of your efforts. Enjoy the fruits of your labor, share them with friends and family, and savor the delicious flavors that only homegrown tomatoes can provide. Congratulations on a successful tomato-growing journey!
With this comprehensive guide, you’re equipped with the knowledge and tips to plant, care for, and harvest your own tomatoes from seed. Enjoy the process, embrace the beauty of growing your own food, and get ready to indulge in the incomparable taste of freshly harvested, homegrown tomatoes!
Read more: How To Remove Seeds From Tomatoes
Conclusion
Growing tomatoes from seeds is a fulfilling and rewarding experience that allows you to witness the miracle of nature firsthand. From carefully selecting the perfect tomato seeds to nurturing the plants until they bear delicious fruit, the journey is filled with excitement and joy.
By following the steps outlined in this guide, you have learned how to choose the right tomato seeds, prepare the soil, plant the seeds, provide the ideal growing conditions, transplant seedlings, and care for your tomato plants. You have also gained insights into troubleshooting common issues and tips for harvesting your tomatoes at the peak of ripeness.
Remember, gardening is a continuous learning process. Observe, experiment, and adapt your techniques as you gain experience. Each growing season presents new opportunities and challenges, but with perseverance, patience, and a love for gardening, you will find success.
So, roll up your sleeves, get your hands dirty, and embark on your tomato-growing journey. Enjoy the aroma of the plants, the satisfaction of nurturing them from seed to harvest, and the incomparable taste of homegrown tomatoes.
Invite friends and family to share in the abundance of your harvest, and spread the joy of growing your own food. Whether you have a small backyard garden or a few pots on a balcony, the thrill of cultivating your own tomatoes is within reach.
So go ahead, start dreaming of savory tomato salads, tangy tomato sauces, and juicy tomato slices on your sandwiches. With the knowledge and confidence gained from this guide, you are well-prepared to embark on your tomato-growing adventure.
Here’s to a fruitful journey filled with the vibrant and delectable flavors of homegrown tomatoes! Happy gardening!
Frequently Asked Questions about How To Plant Tomatoes From Seeds
Was this page helpful?
At Storables.com, we guarantee accurate and reliable information. Our content, validated by Expert Board Contributors, is crafted following stringent Editorial Policies. We're committed to providing you with well-researched, expert-backed insights for all your informational needs.


0 thoughts on “How To Plant Tomatoes From Seeds”