Home>Garden Essentials>Garden Storage>How To Build A Bean Trellis That Adds Interest To Your Garden
Garden Storage
How To Build A Bean Trellis That Adds Interest To Your Garden
Modified: May 6, 2024
Learn how to build a stunning bean trellis that not only provides storage for your garden, but also adds interest and beauty to your outdoor space.
(Many of the links in this article redirect to a specific reviewed product. Your purchase of these products through affiliate links helps to generate commission for Storables.com, at no extra cost. Learn more)
The Introduction section of the article provides an overview of the topic and captures the reader’s attention.
Introduction
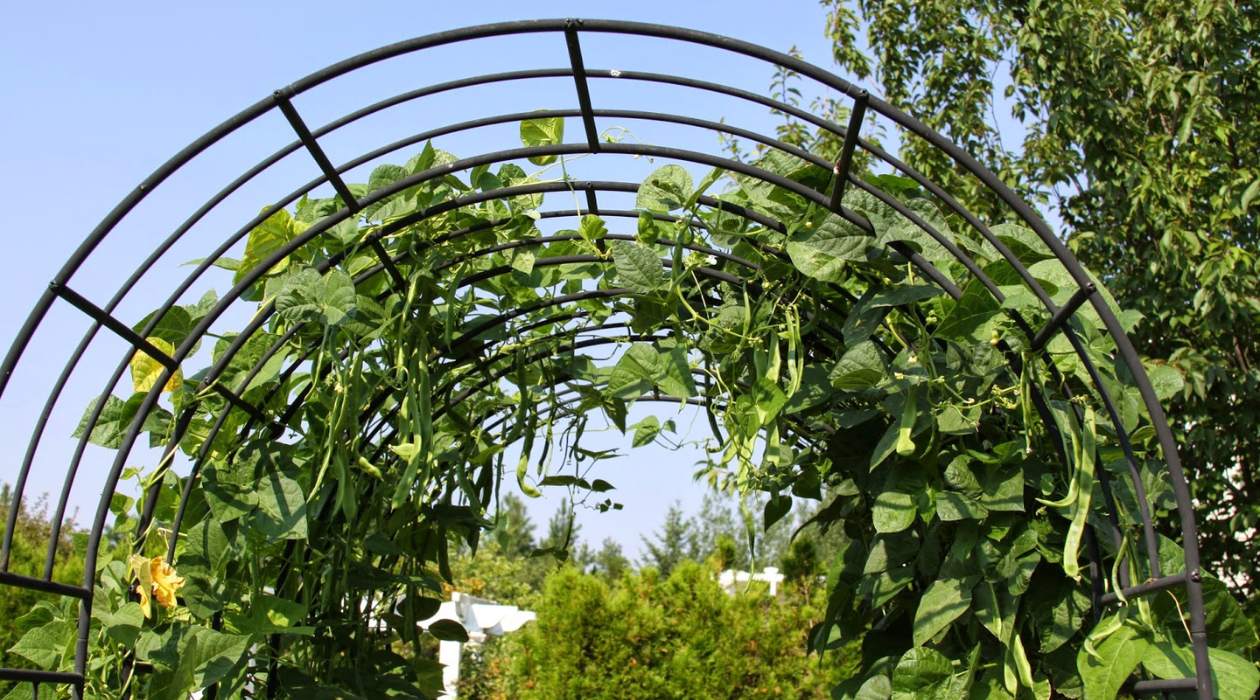
When it comes to gardening, beans are a popular choice. Not only are they delicious and nutritious, but they also add a touch of beauty to any garden. A bean trellis is a fantastic addition to your garden that not only supports the growth of your beans but also adds visual interest and vertical appeal.
Building a bean trellis is a straightforward project that can be done by gardeners of all skill levels. Whether you are a seasoned gardener or just starting out, a bean trellis can be an exciting and rewarding addition to your garden. In this article, we will guide you through the process of building a bean trellis that will add a touch of charm and elegance to your outdoor space.
Before we dive into the steps for building a bean trellis, let’s take a look at the materials you will need.
Key Takeaways:
- Building a bean trellis not only supports the growth of beans but also adds visual interest and vertical appeal to your garden. With the right materials and steps, you can create a functional and charming structure for your outdoor space.
- From choosing the perfect location to regular maintenance and care, this article provides a comprehensive guide to building and maintaining a bean trellis. Follow these steps to enjoy a bountiful harvest of delicious beans while enhancing the beauty of your garden.
Materials Needed
Before you begin building your bean trellis, gather the following materials:
- Wooden or metal stakes: These will serve as the vertical support for your trellis. Opt for stakes that are at least 6 feet tall to provide ample height for your beans to climb.
- Garden twine or wire: This will be used to create the horizontal support structure on which the beans will grow. Choose a strong and durable material that can withstand the weight of the plants.
- Bean seeds or seedlings: Select the type of beans you want to grow, whether it’s pole beans, runner beans, or any other climbing variety.
- Gardening gloves and tools: To dig holes, set stakes, and perform other necessary tasks, you’ll need gloves and basic gardening tools like a shovel, trowel, and hammer.
- Compost or organic fertilizer: Beans thrive in rich, well-draining soil. Adding compost or organic fertilizer will provide essential nutrients for healthy plant growth.
- Mulch: Adding a layer of organic mulch around the base of the bean trellis helps retain moisture and suppress weed growth.
- Watering can or garden hose: Proper watering is crucial to the success of your bean plants. Make sure you have a watering can or garden hose within reach.
Once you have gathered all the necessary materials, you’re ready to move on to the next step: choosing the location for your bean trellis.
Step 1: Choosing the Location
Choosing the right location for your bean trellis is essential to ensure the optimal growth and productivity of your plants. Consider the following factors when selecting a spot:
Sunlight:
Beans thrive in full sun, so choose a location that receives at least 6-8 hours of direct sunlight every day. Adequate sunlight is crucial for the development of the plants and the production of healthy, flavorful beans.
Soil Quality:
Beans prefer well-draining soil that is rich in organic matter. Ensure that the soil is loose, fertile, and has a pH level between 6.0 and 7.0. If the soil in your chosen location is heavy or clayey, consider amending it with compost or organic matter to improve its texture and fertility.
Read more: How To Build A Trellis
Proximity to Water Source:
Beans require regular watering to keep the soil consistently moist throughout the growing season. Select a location that is conveniently situated near a water source, such as a hose or watering can, allowing for easy and efficient watering.
Space Availability:
Consider the space available for your bean trellis. Ensure that the area is large enough to accommodate the height and spread of the trellis, as well as provide ample room for the beans to climb and sprawl without obstructing other plants or structures.
Accessibility:
Choose a location that is easily accessible for tending to your bean plants. This includes planting, pruning, harvesting, and general maintenance activities. Opt for a spot that is within reach and does not require excessive bending or stretching.
Once you have chosen the perfect location for your bean trellis, it’s time to gather the materials needed to begin construction. Let’s move on to the next step: gathering the materials.
Step 2: Gathering the Materials
Now that you have chosen the ideal location for your bean trellis, it’s time to gather the necessary materials. Here’s a quick recap of what you will need:
- Wooden or metal stakes
- Garden twine or wire
- Bean seeds or seedlings
- Gardening gloves and tools
- Compost or organic fertilizer
- Mulch
- Watering can or garden hose
Start by selecting the appropriate stakes for your trellis. Wooden stakes are a popular choice as they are sturdy and easily customizable. If you prefer metal stakes, make sure they are rust-resistant or treated to withstand outdoor conditions.
Next, determine the length and number of stakes required based on the size of your desired bean trellis. Ensure that the stakes are tall enough to support the vertical growth of the beans. A minimum height of 6 feet is recommended for most varieties.
Once you have the stakes, gather the garden twine or wire that will be used to create the horizontal support structure. Look for twine or wire that is strong and durable, able to withstand the weight of the plants as they grow and climb.
If you haven’t already, procure your bean seeds or seedlings. Consider growing pole beans, runner beans, or other climbing varieties. These have longer vines that require support, making them perfect for a trellis.
Now, gather your gardening gloves and tools, such as a shovel, trowel, and hammer. These will come in handy during the process of constructing the trellis and planting the beans.
Additionally, make sure you have compost or organic fertilizer on hand. Beans thrive in nutrient-rich soil, so incorporating compost or organic matter will provide essential nutrients for healthy plant growth.
Lastly, gather mulch to place around the base of the bean trellis. Mulch helps retain moisture in the soil, prevents weed growth, and adds a finished look to your garden bed.
With all the necessary materials gathered, you are ready to move on to the next step: preparing the ground for your bean trellis. Stay tuned!
Step 3: Preparing the Ground
Now that you have gathered all the materials needed for your bean trellis, it’s time to prepare the ground where the trellis will be installed. Proper preparation of the soil ensures that your beans have a healthy growing environment. Follow these steps to prepare the ground:
1. Clear the Area:
Start by clearing the area of any existing vegetation, weeds, or debris. Use a garden rake or hoe to remove any roots or rocks that may hinder the growth of your beans.
2. Loosen the Soil:
Next, use a garden fork or a tiller to loosen the soil. This helps improve drainage and allows the roots of the bean plants to penetrate the soil more easily.
3. Add Compost or Organic Matter:
Incorporate compost or organic matter into the soil to improve its fertility and structure. Spread a layer of compost or organic fertilizer over the area and use a garden fork or shovel to mix it into the soil. This will provide essential nutrients and enhance the water-holding capacity of the soil.
Read more: How To Make A Garden Trellis
4. Level the Ground:
Use a rake to level the ground and create a smooth surface for your bean trellis. This will help ensure that the trellis stands upright and that water is evenly distributed across the garden bed.
5. Install the Support Stakes:
Position the wooden or metal stakes at the desired locations for your bean trellis. Space them evenly and ensure they are firmly pushed into the ground. Alternatively, you can hammer them into the soil for added stability.
6. Secure the Stakes:
Attach the garden twine or wire horizontally to the stakes, creating a framework for your bean plants to climb. Start at the bottom of one stake and wrap the twine or wire around it. Then, guide it horizontally to the next stake and wrap it around that stake as well. Repeat this process until you reach the top of each stake, creating a grid-like pattern for your beans to grow on.
With the ground prepared and the support stakes in place, you are now ready to move on to the exciting part – planting the beans! Stay tuned for the next step in the process.
Step 4: Constructing the Support Structure
Now that you have prepared the ground and installed the support stakes for your bean trellis, it’s time to construct the actual support structure. This step involves creating a framework that provides stability and enables your bean plants to climb and grow vertically. Follow these steps to construct the support structure:
1. Tie the Twine or Wire:
Start at the bottom of one stake and tie the garden twine or wire securely around it. Make sure it is tight enough to support the weight of the bean plants as they grow. If using twine, you can make a knot and leave a long tail to secure it further.
2. Guide the Twine or Wire:
Guide the twine or wire horizontally to the next stake, ensuring it is pulled taut. Wrap it around the stake a couple of times to secure it in place. Repeat this process for all the stakes, creating a grid-like pattern with the twine or wire.
3. Space the Rows:
If you plan on growing multiple rows of beans, space the twine or wire evenly between the stakes to create distinct rows. This will help with organization and make it easier to manage and harvest your beans.
4. Tie Additional Rows:
If you desire more vertical growth for your bean plants, you can add additional rows of twine or wire above the initial row. Simply tie and secure the twine or wire at the top of each stake and repeat the process of guiding it horizontally to the next stake.
5. Adjust the Support Structure:
Take a step back and assess the support structure. Ensure that the twine or wire is taught and properly secured to the stakes. Make any necessary adjustments or tighten any loose sections to provide ample support for your bean plants.
With the support structure in place, your bean trellis is beginning to take shape. The next step is to plant the beans, allowing them to thrive and utilize the support structure as they grow. Stay tuned for the next step in the process!
Step 5: Planting the Beans
With the support structure of your bean trellis constructed, it’s time to plant the beans and watch them grow and climb their way up the trellis. Follow these steps to ensure successful planting:
1. Dig Planting Holes:
Using a shovel or a trowel, dig planting holes spaced about 6-8 inches apart along the base of the trellis. The spacing will vary depending on the variety of beans you are planting, so be sure to refer to the seed package or plant tag for specific instructions.
2. Soak the Seeds (If Direct Sowing):
If you are planting beans from seeds directly into the ground, soak the seeds in water for a few hours before planting. This will help expedite the germination process and improve the chances of successful seedling emergence.
3. Plant the Seeds or Seedlings:
If using seeds, place 2-3 seeds in each planting hole. If using seedlings, carefully remove them from their nursery containers and place one plant in each hole. Gently cover the seeds or seedlings with soil and press it down lightly to ensure good seed-to-soil contact.
4. Water Thoroughly:
Immediately after planting, water the newly planted seeds or seedlings thoroughly. Ensure the soil is evenly moist but not waterlogged. This initial watering will help settle the soil and provide the beans with much-needed hydration.
5. Mulch:
Add a layer of organic mulch around the base of the bean plants. Mulch helps retain moisture in the soil, suppress weeds, and regulate soil temperature. Leave a small gap around the stems to prevent any potential rotting issues.
6. Provide Support:
As the bean plants grow, gently guide the main stems towards the trellis and secure them to the twine or wire using plant ties or soft twine. Avoid tightly tying the stems, as they need some freedom to grow.
7. Regularly Water and Monitor:
Keep an eye on the moisture levels of the soil throughout the growing season. Water the bean plants regularly, aiming to keep the soil consistently moist but not saturated. Monitor for pests, diseases, and weeds, and address them promptly to maintain the health of your plants.
With your beans planted and supported by the trellis, they will soon start their vertical journey, climbing and sprouting beautiful foliage. In the next step, we’ll cover the regular maintenance and care required to ensure healthy bean plants and abundant harvests. Keep reading!
Step 6: Regular Maintenance and Care
Once your bean plants are planted and climbing their way up the trellis, it’s important to provide regular maintenance and care to ensure their health and productivity. Follow these steps to maintain your bean trellis:
1. Watering:
Ensure that your bean plants receive regular watering throughout the growing season. Beans require consistent moisture, especially during flowering and pod formation. Water deeply at the base of the plants to keep the soil evenly moist but avoid overwatering, which can lead to root rot or fungal diseases.
2. Fertilization:
Beans are generally low-maintenance plants that do not require excessive fertilization. However, if your soil lacks nutrients, you can apply a well-balanced organic fertilizer or compost around the base of the plants. Be sure to follow the package instructions and avoid over-fertilization, as it can result in lush foliage but fewer bean production.
3. Mulching:
Maintain a layer of organic mulch around the base of the bean plants to conserve moisture, suppress weed growth, and regulate soil temperature. Monitor the mulch regularly and replenish as needed to maintain an adequate depth.
4. Pruning and Training:
As the bean plants climb the trellis, observe their growth and gently train the vines onto the twine or wire support. Remove any competing or wayward shoots to keep the growth focused on the trellis. Avoid excessive pruning, as it may reduce bean production.
5. Pest and Disease Management:
Regularly inspect your bean plants for pests, such as aphids, beetles, or caterpillars. If you notice any pests, manually remove them or use organic pest control methods. Keep an eye out for signs of diseases like powdery mildew or rust, and take appropriate measures to prevent their spread, such as improving air circulation and avoiding overhead watering.
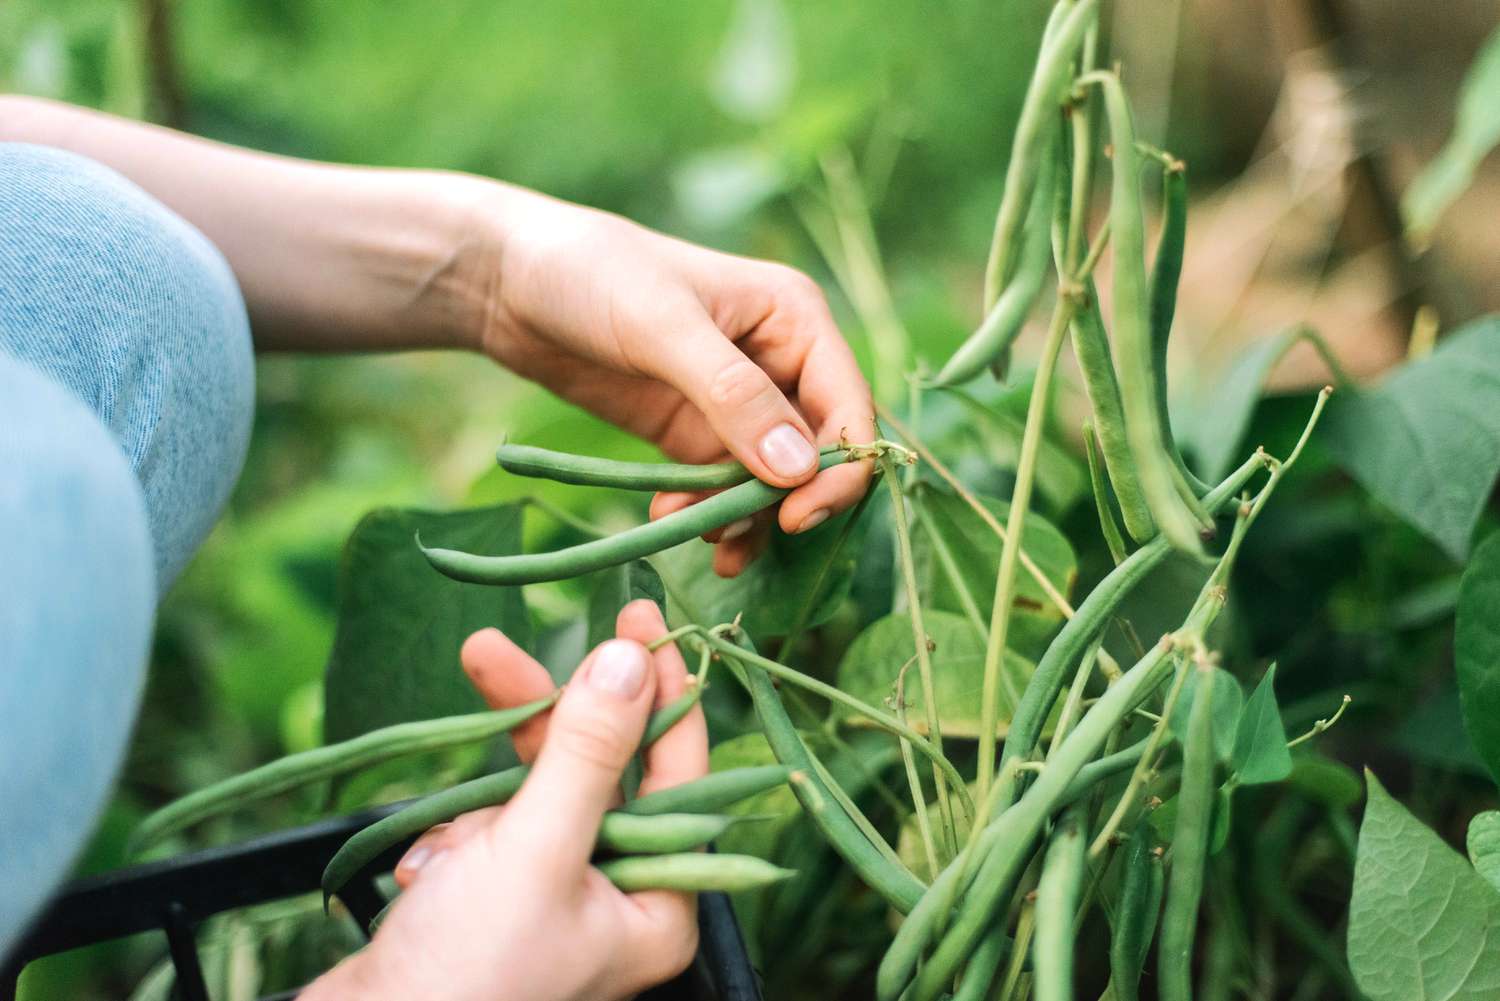
6. Harvesting:
Harvest beans when they reach the desired size but are still tender. Check your specific bean variety for harvest guidelines, as they can vary. Pick beans frequently to encourage continuous production and prevent them from becoming overly mature and tough.
7. Crop Rotation:
Practice crop rotation by planting beans in different areas of your garden each year. This helps prevent the buildup of diseases and pests in the soil and promotes overall garden health.
By following these maintenance and care practices, your bean plants will thrive, producing delicious and bountiful harvests throughout the growing season. Remember to enjoy the process and the rewards of your hard work. Happy gardening!
With the completion of step 6, you have successfully learned how to maintain and care for your bean trellis. In the final section, we will conclude the article and summarize the key points covered. Stay tuned!
Conclusion
Building a bean trellis not only adds visual interest and vertical appeal to your garden but also provides a functional structure to support the growth of your beans. With the right materials and a few simple steps, you can create a trellis that enhances both the aesthetic appeal and productivity of your garden space.
In this article, we have covered the necessary materials needed for building a bean trellis, including wooden or metal stakes, garden twine or wire, bean seeds or seedlings, gardening gloves and tools, compost or organic fertilizer, mulch, and a watering can or garden hose.
We then walked through the step-by-step process, from choosing the perfect location for your trellis to preparing the ground and constructing the support structure. We discussed the importance of sunlight, soil quality, proximity to water source, space availability, and accessibility in selecting the ideal location for your trellis.
We also covered gathering the necessary materials and preparing the ground, ensuring that the soil is loose, fertile, and enriched with organic matter. Constructing the support structure involved tying the twine or wire, guiding it horizontally between the stakes, and ensuring proper spacing for the beans to climb and grow.
Planting the beans involved digging planting holes, soaking the seeds (if direct sowing), placing the seeds or seedlings in the holes, watering thoroughly, and applying mulch. We emphasized the importance of providing support to the growing plants and regularly watering and monitoring their progress.
Regular maintenance and care, such as watering, fertilization, mulching, pruning and training, pest and disease management, harvesting, and crop rotation, are crucial in ensuring the health and productivity of your bean plants.
By following these steps and maintaining your bean trellis, you will enjoy a bountiful harvest of delicious beans while adding beauty and charm to your garden.
So don your gardening gloves, gather your materials, and start building your bean trellis today. Happy gardening!
Please note that individual gardening practices and preferences may vary. Adjustments and modifications to the instructions provided in this article may be necessary based on your specific circumstances and the requirements of your bean varieties.
Now that you've mastered building a bean trellis, why not expand your creative horizons? For those with a passion for gardening, our compilation of garden fence ideas offers endless inspiration to enhance your green spaces. If you're more into hands-on activities, our list of DIY outdoor projects promises fun and functional additions to any area. Or, for a touch of elegance, check out our guide on garden structures that can transform your backyard into a serene retreat. Keep your outdoor adventures exciting with these engaging reads!
Frequently Asked Questions about How To Build A Bean Trellis That Adds Interest To Your Garden
Was this page helpful?
At Storables.com, we guarantee accurate and reliable information. Our content, validated by Expert Board Contributors, is crafted following stringent Editorial Policies. We're committed to providing you with well-researched, expert-backed insights for all your informational needs.
0 thoughts on “How To Build A Bean Trellis That Adds Interest To Your Garden”