Articles
How To Build A Trellis
Modified: August 28, 2024
Discover the step-by-step process of building a trellis with our informative articles. Enhance your garden and create a stunning vertical display with our expert tips and tricks.
(Many of the links in this article redirect to a specific reviewed product. Your purchase of these products through affiliate links helps to generate commission for Storables.com, at no extra cost. Learn more)
Introduction
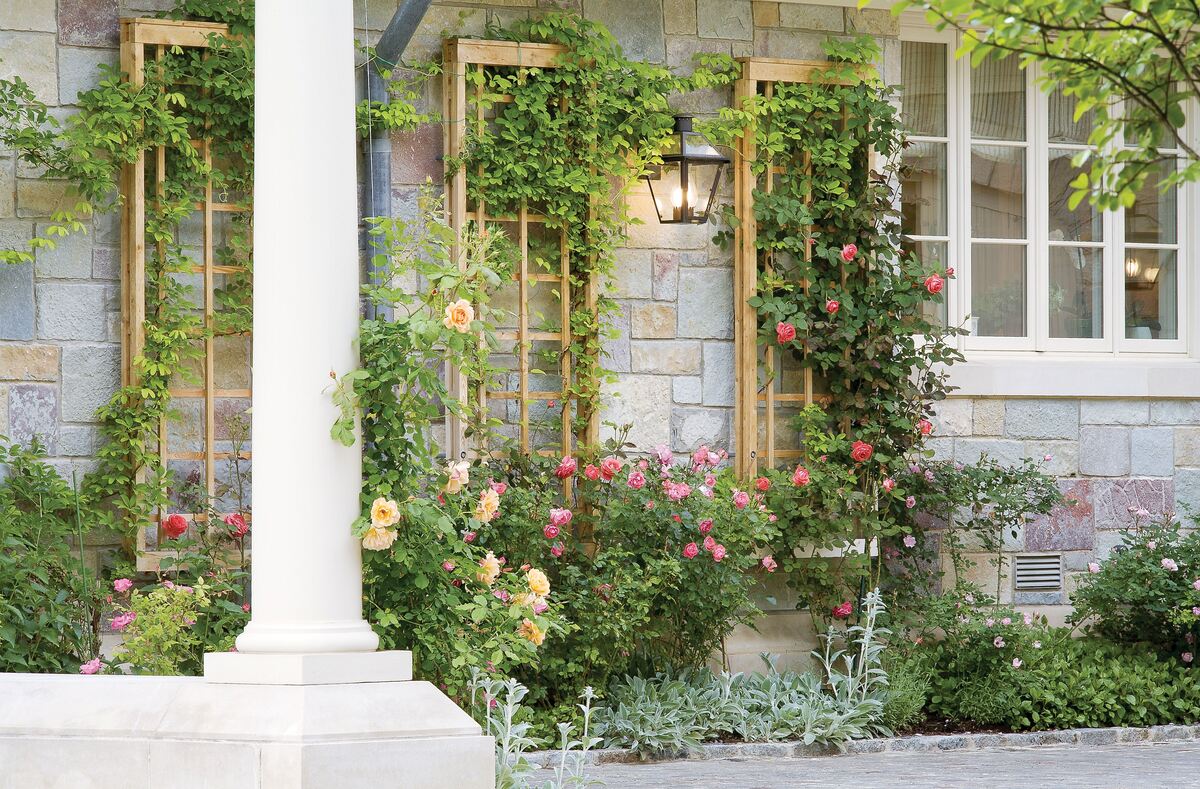
Welcome to the world of trellises – a versatile and eye-catching addition to any garden or outdoor space. A trellis is not only a functional structure that supports climbing plants, but it also adds an element of beauty and charm to your landscape. Whether you want to create a focal point, grow vertical gardens, or provide privacy, building your own trellis can be a rewarding and creative project.
In this article, we will guide you through the process of building a trellis from start to finish. We will cover the materials you’ll need, the step-by-step instructions, and some additional tips and tricks along the way. So, let’s get started!
Key Takeaways:
- Building a trellis involves careful planning, precise measurements, and attention to detail. From choosing the perfect location to securing the trellis panels, each step contributes to creating a sturdy and visually appealing structure.
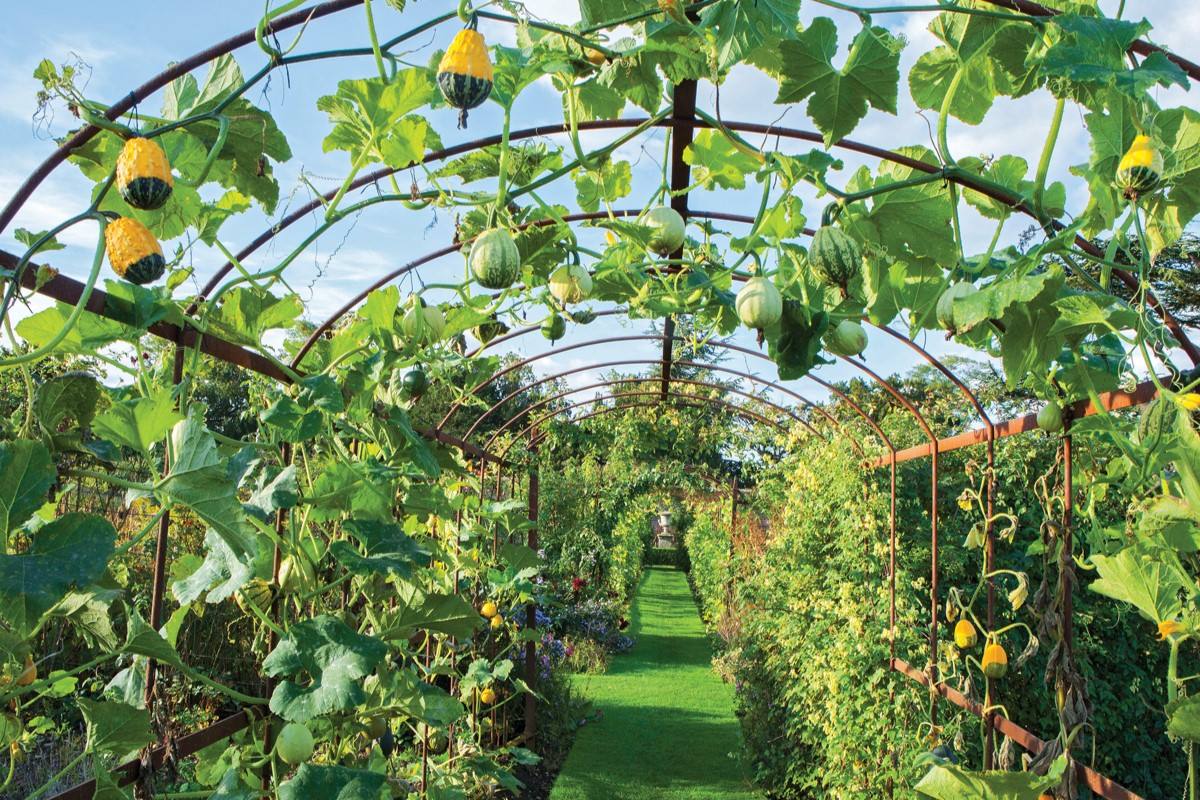
- A well-built trellis not only provides support for climbing plants but also serves as a decorative element that can transform your landscape. With the right materials and a touch of creativity, you can create a captivating oasis in your outdoor space.
Read more: Free Trellis Plan
Materials Needed
Before diving into the construction process, it’s essential to gather all the necessary materials. Here’s a list of items you’ll need:
- Wooden posts (e.g., 4×4 or 6×6)
- Concrete mix
- Crossbeams
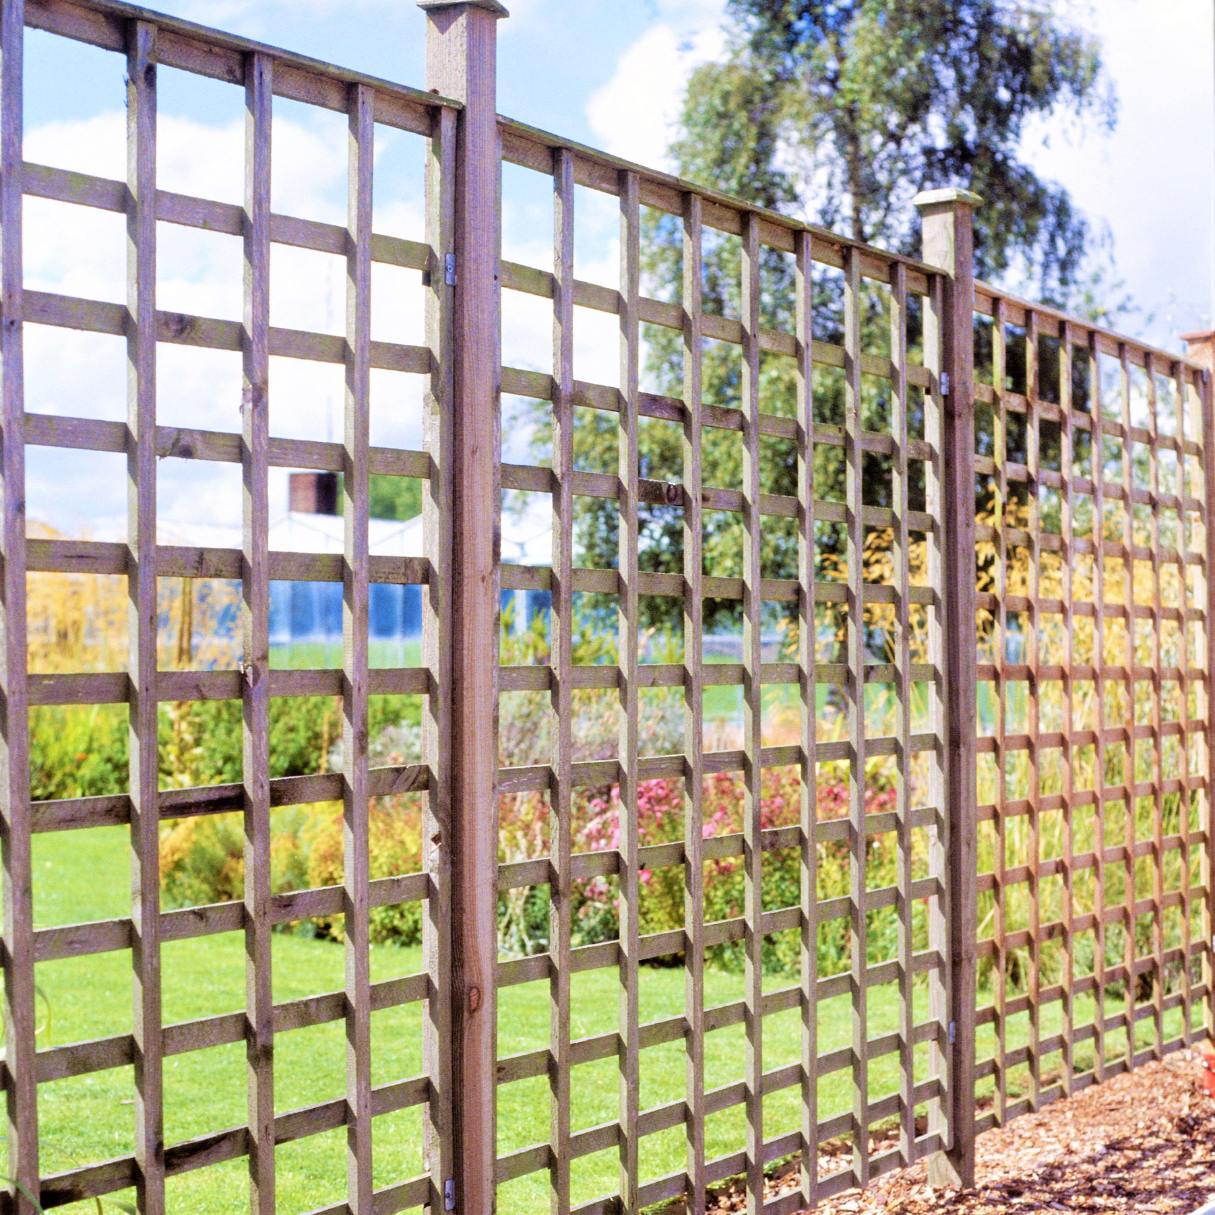
- Trellis panels (wooden or metal)
- Screws or nails
- Drill or screwdriver
- Measuring tape
- Level
- Shovel
- Gravel or crushed stone
- Paint or stain (optional)
Step 1: Choose a Location
The first step in building a trellis is to choose the perfect location. Consider the purpose of your trellis – do you want it to provide shade, act as a privacy screen, or enhance the aesthetic appeal of your garden? Once you determine the purpose, look for an area that receives adequate sunlight and has enough space to accommodate the size of your trellis.
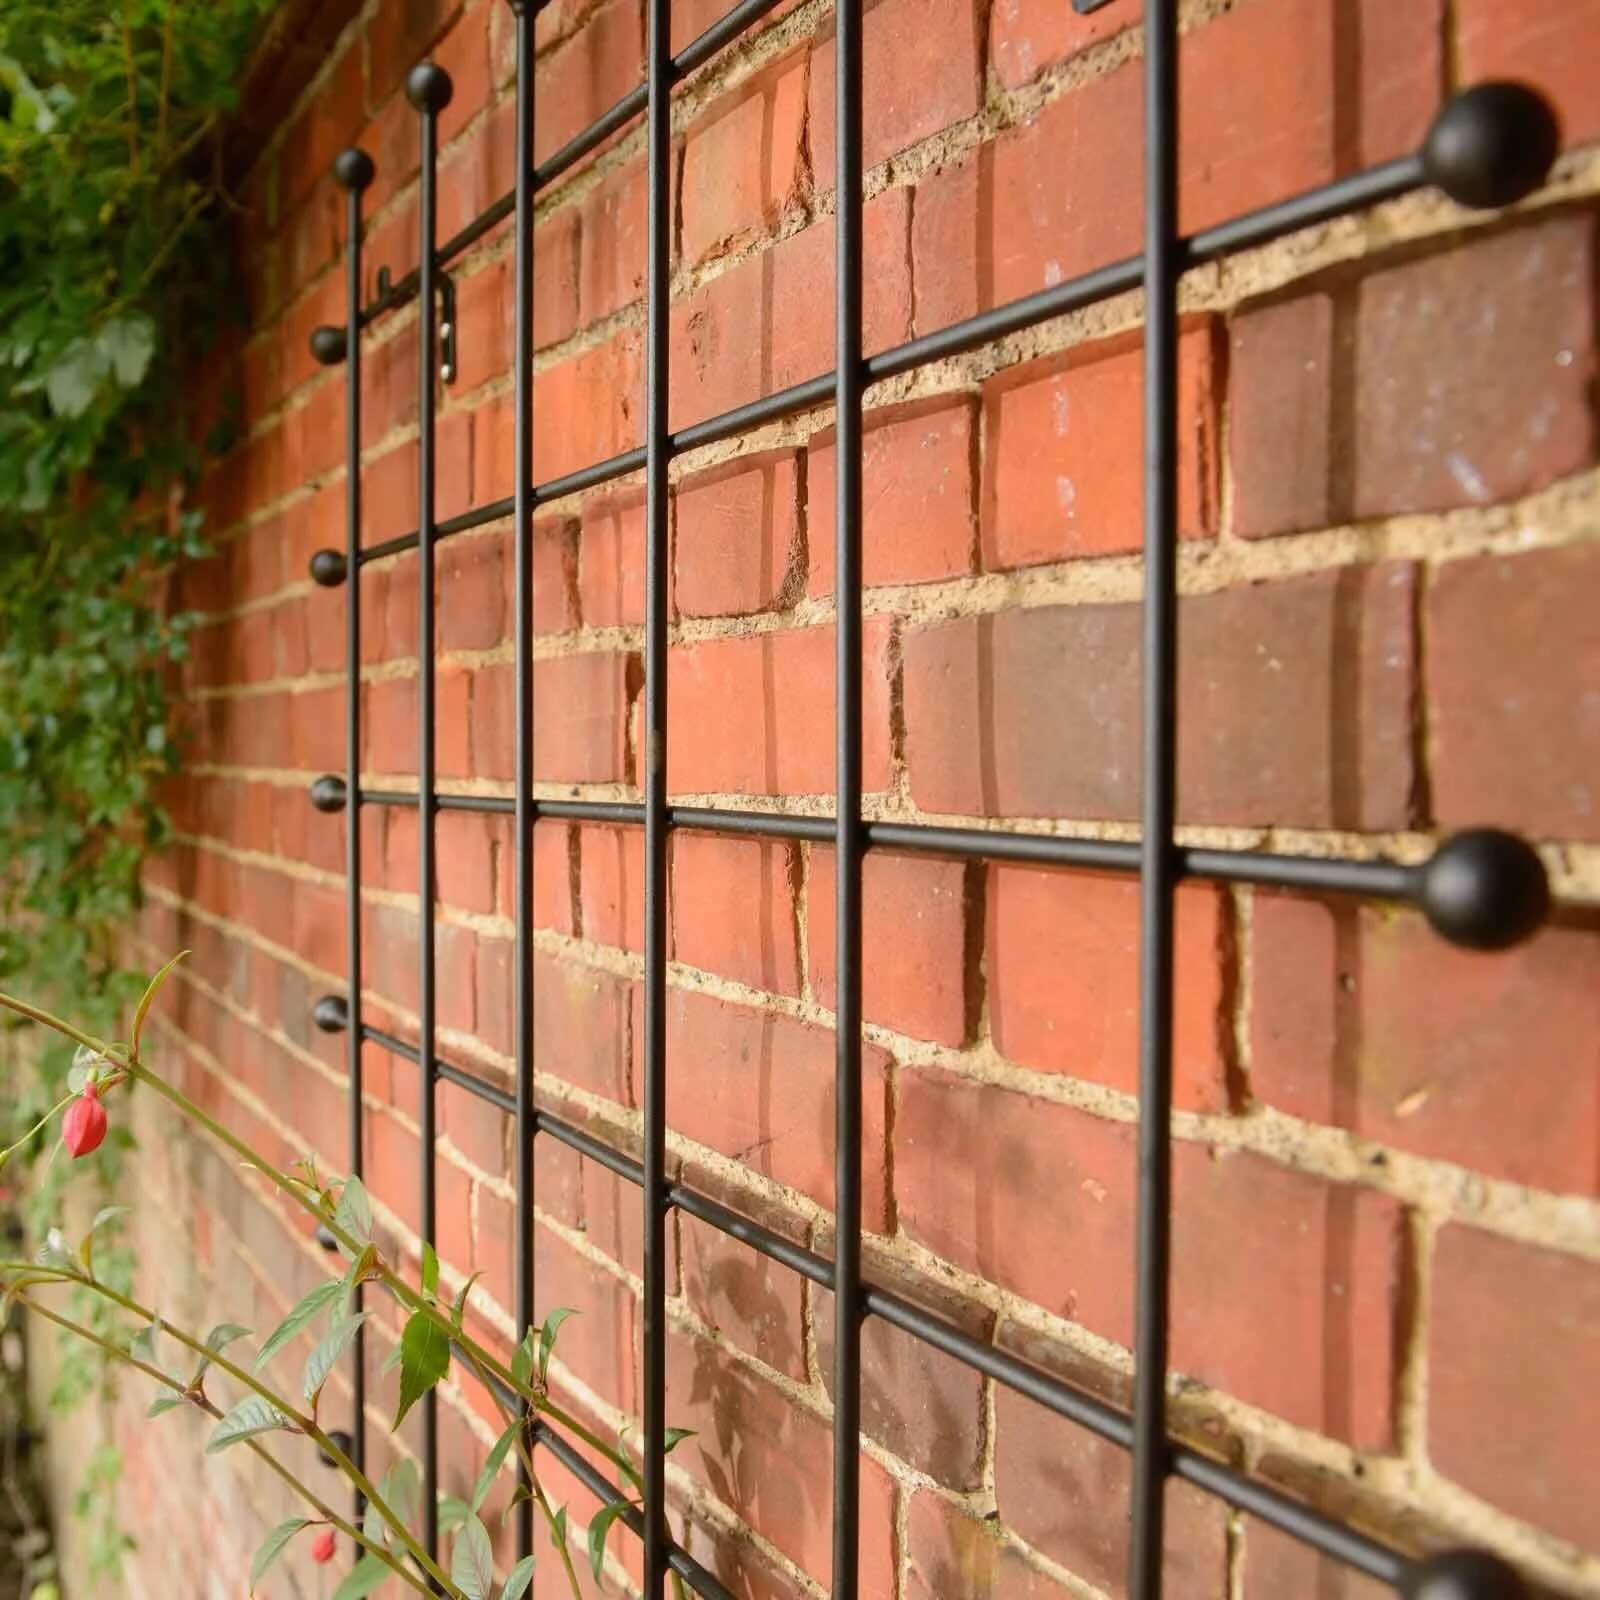
Take into account any nearby structures, such as walls or fences, that you can attach your trellis to for added stability. Keep in mind the proximity to plants or trees that may compete for sunlight or hinder the growth of climbing vines.
Step 2: Measure and Mark the Layout
With the location chosen, it’s time to measure and mark the layout of your trellis. Use a measuring tape and mark the positions where the posts will be placed. For a symmetrical design, measure and mark equal distances from each side.
Using a string or chalk line, draw straight lines to indicate the position of the trellis. This will serve as a guide for digging the post holes and ensure proper alignment.
…
Key Takeaways:
- Building a trellis involves careful planning, precise measurements, and attention to detail. From choosing the perfect location to securing the trellis panels, each step contributes to creating a sturdy and visually appealing structure.
- A well-built trellis not only provides support for climbing plants but also serves as a decorative element that can transform your landscape. With the right materials and a touch of creativity, you can create a captivating oasis in your outdoor space.
Read more: Free Trellis Plan
Materials Needed
Before diving into the construction process, it’s essential to gather all the necessary materials. Here’s a list of items you’ll need:
- Wooden posts (e.g., 4×4 or 6×6): The main structural elements of the trellis, these posts will provide stability and support.
- Concrete mix: To secure the posts in the ground, you’ll need concrete mix to create a sturdy foundation.
- Crossbeams: These horizontal bars will connect the posts and provide additional support for the trellis panels.
- Trellis panels (wooden or metal): The decorative grid framework that climbing plants will grow on. Choose panels that suit your desired aesthetic and functional needs.
- Screws or nails: To attach the crossbeams and trellis panels to the posts, you’ll need screws or nails depending on your preference and the materials you’re working with.
- Drill or screwdriver: Required for drilling pilot holes and driving screws into the wood.
- Measuring tape: For accurately measuring the dimensions and distances during the construction process.
- Level: To ensure the trellis is straight and level during installation.
- Shovel: Used for digging the post holes in the ground.
- Gravel or crushed stone: To provide drainage and stability in the post holes.
- Paint or stain (optional): If desired, you can paint or stain the trellis for added visual appeal and protection against weathering.
These are the basic materials needed to construct a trellis. Depending on your specific design and preferences, you may require additional tools or decorative elements. Make sure to gather everything on the list before starting your project to ensure a smooth and efficient construction process.
Step 1: Choose a Location
The first step in building a trellis is to choose the perfect location. Consider the purpose of your trellis – do you want it to provide shade, act as a privacy screen, or enhance the aesthetic appeal of your garden? Once you determine the purpose, look for an area that receives adequate sunlight and has enough space to accommodate the size of your trellis.
Take into account any nearby structures, such as walls or fences, that you can attach your trellis to for added stability. This can also save you the effort and cost of installing additional posts. Keep in mind the proximity to plants or trees that may compete for sunlight or hinder the growth of climbing vines.
Consider the overall landscape design and how the trellis will integrate with existing elements. Will it complement the architectural style of your home or blend in with the surrounding vegetation? Take into consideration the visual appeal from different viewpoints, as well as any potential obstructions that might affect the view.
Additionally, think about the practicality of the location. Look at factors such as accessibility for maintenance and ease of watering if you plan to grow plants on the trellis. You may also want to consider the proximity to seating areas or other outdoor features where you can enjoy the beauty of the trellis.
Once you have a good idea of the location, spend some time observing the site at different times of the day. Note the amount of sunlight it receives, as this will impact the type of plants you can grow on the trellis. Most climbing plants thrive in full sun or partial shade, but there are also varieties that can tolerate more shade if needed.
Take measurements of the available space, both height and width, to determine the dimensions of your trellis. This will help you determine the number of posts and the size of the trellis panels you should get.
Remember, choosing the right location is crucial for the success and longevity of your trellis. Consider all the factors mentioned above and take your time to select a spot that will showcase your trellis and create a harmonious and inviting outdoor space.
Step 2: Measure and Mark the Layout
With the location chosen, it’s time to measure and mark the layout of your trellis. This step is crucial to ensure proper alignment and a visually appealing end result.
Start by using a measuring tape to determine the exact positions where the posts will be placed. Measure the width and height of the area designated for the trellis and mark these measurements on the ground or nearby structures. This will serve as a guide for digging the post holes and ensure that the trellis fits perfectly into the space.
For a symmetrical design, measure and mark equal distances from each side. Use a level to ensure that your markings are straight and accurate.
Using a string or chalk line, draw straight lines to indicate the position of the trellis. Run the string or line from one side to the other, making sure it aligns with your marked measurements. This will serve as a visual guide and help you visualize the placement and overall shape of the trellis.
Consider the spacing between the posts. The distance will depend on the width of your trellis panels and the desired aesthetic. Typically, a spacing of 4 to 6 feet between posts is suitable, but you can adjust it according to your specific needs. Mark the spots for each post along the drawn lines, ensuring an even spacing.
Make sure to double-check your measurements and adjust as needed before moving on to the next step. This will help avoid any issues during the construction process.
During this step, you may also want to consider any additional support structures or attachments. If you plan to attach the trellis to a wall or fence, mark the locations where the support brackets or hooks will go.
Take your time with this step to ensure accuracy and precision. Properly measuring and marking the layout will set the foundation for a well-built and visually appealing trellis.
When building a trellis, make sure to use durable materials such as cedar or pressure-treated wood to ensure longevity and stability. Also, consider the weight of the plants it will support when designing the structure.
Step 3: Dig the Post Holes
Now that you have your layout marked, it’s time to dig the post holes for your trellis. The depth and size of the holes will depend on the size and weight of your posts.
Start by using a shovel to dig holes at the marked locations along the lines you drew. The depth of the holes should be approximately one-third of the length of your posts. For example, if your posts are 6 feet long, dig holes around 2 feet deep.
Make sure the holes are wide enough to accommodate the size of the posts. The diameter should be about twice the width of the posts to allow room for concrete and proper stability. Remove any rocks or debris from the holes to ensure a smooth bottom surface.
As you dig the holes, it’s important to keep them evenly spaced and aligned with the markings you made in the previous step. Use a measuring tape or the trellis panels as a guide to ensure accurate positioning.
Once the holes are dug, double-check their depth and alignment. Use a level to ensure that the bottoms of the holes are level with each other. This step is crucial, as it will ensure that your trellis stands straight and secure.
Pro tip: If you’re working with heavy or dense soil, it may be helpful to wet the soil slightly before digging. This will make the digging process easier and less strenuous.
Another pro tip: Consider adding a layer of gravel or crushed stone to the bottom of each hole. This will help with drainage and prevent water from collecting around the base of the posts, which can cause rotting.
Now that your post holes are dug and properly prepared, you’re ready for the next step – setting the posts in concrete. This will provide a solid foundation for your trellis and ensure its long-term stability.
Step 4: Set the Posts in Concrete
With the post holes prepared, it’s time to set the wooden posts in concrete. This step is crucial for creating a strong and stable foundation for your trellis.
Start by placing one post in each hole, ensuring they are centered and in line with the markings you made earlier. Use a level to ensure that the posts are perfectly vertical.
Once the posts are in position, it’s time to mix the concrete. Follow the instructions on the concrete mix package to achieve the proper consistency. Typically, you’ll need to mix the concrete with water until it reaches a thick, pourable consistency.
Begin by pouring a few inches of concrete into each hole, ensuring that it reaches the bottom. Use a shovel or a rod to agitate the concrete and remove any air bubbles. Repeat this process until the hole is filled with concrete.
While pouring the concrete, periodically check the level to ensure that the posts remain plumb. Make any necessary adjustments by tapping the posts with a rubber mallet to align them properly.
Once the concrete is poured and the posts are in position, use a trowel to smooth out the surface of the concrete around the base of the posts. This will provide a clean and finished look.
Allow the concrete to dry and cure as per the instructions on the package. It typically takes at least 24 hours for the concrete to set, but it’s recommended to give it a few days for maximum strength.
Note: If you’re working with metal posts or don’t want to use concrete, you can opt for alternative methods to secure the posts. These include using post anchors or driving the posts into the ground with a post driver.
Setting the posts in concrete ensures that your trellis will withstand the elements and remain stable for years to come. Once the concrete is fully cured, you can move on to the next step of installing the crossbeams.
Read more: How To Make A Garden Trellis
Step 5: Install Crossbeams
With the posts securely set in concrete, it’s time to move on to installing the crossbeams. These horizontal bars provide additional support and stability to your trellis.
Start by measuring the distance between the two posts at the desired height for your crossbeams. Mark these measurements on the posts, ensuring that they are level and evenly spaced. This will serve as a guide for installing the crossbeams.
If using wooden crossbeams, you may need to cut them to the appropriate length. Measure and mark the required length based on your trellis dimensions and trim the crossbeams accordingly using a saw.
Place the first crossbeam on top of the posts, aligning it with the marked measurements. Use a level to ensure that the crossbeam is perfectly horizontal. Adjust the position if necessary by tapping it gently with a mallet or hammer.
Secure the crossbeam to the posts using screws or nails. Drill pilot holes first to prevent splitting the wood, then attach the crossbeam firmly into place. Repeat this process for each crossbeam, making sure they are evenly spaced and level.
If using metal crossbeams, follow the manufacturer’s instructions for installation. This may involve using brackets, screws, or other hardware to secure the crossbeams to the posts.
Pro tip: To enhance the aesthetic appeal of your trellis, you can consider adding decorative elements to the crossbeams. This can include carving designs or patterns into the wood, painting the crossbeams in a contrasting color, or adding decorative caps to the ends of the crossbeams.
Once all the crossbeams are securely installed, take a step back and inspect the structure. Make sure the crossbeams are level and aligned with the posts. Adjust if necessary to ensure a visually pleasing and symmetrical appearance.
Completing this step brings you closer to the final stage of attaching the trellis panels, which will transform your structure into a beautiful and functional garden trellis.
Step 6: Attach the Trellis Panels
With the crossbeams in place, it’s time to attach the trellis panels to create the beautiful framework for your climbing plants. Whether you’re using wooden or metal trellis panels, the process is relatively similar.
Start by positioning the trellis panels against the crossbeams, ensuring they are centered and aligned. Use a level to make sure the panels are straight and level with one another.
Once the panels are in the desired position, use screws or nails to attach them to the crossbeams. The method will depend on the material of the panels and the crossbeams. For wooden panels, pre-drill pilot holes to prevent splitting and then secure the panels with screws or nails. For metal panels, you may need to use clips or brackets designed for attaching them to wooden crossbeams.
Work your way from top to bottom, securing the panels at regular intervals to ensure they are firmly attached. Double-check the alignment and make any necessary adjustments before proceeding.
If your trellis design includes multiple panels, make sure to align them properly, maintaining a seamless appearance. Pay attention to the spacing between the panels, creating a symmetrical and visually appealing pattern.
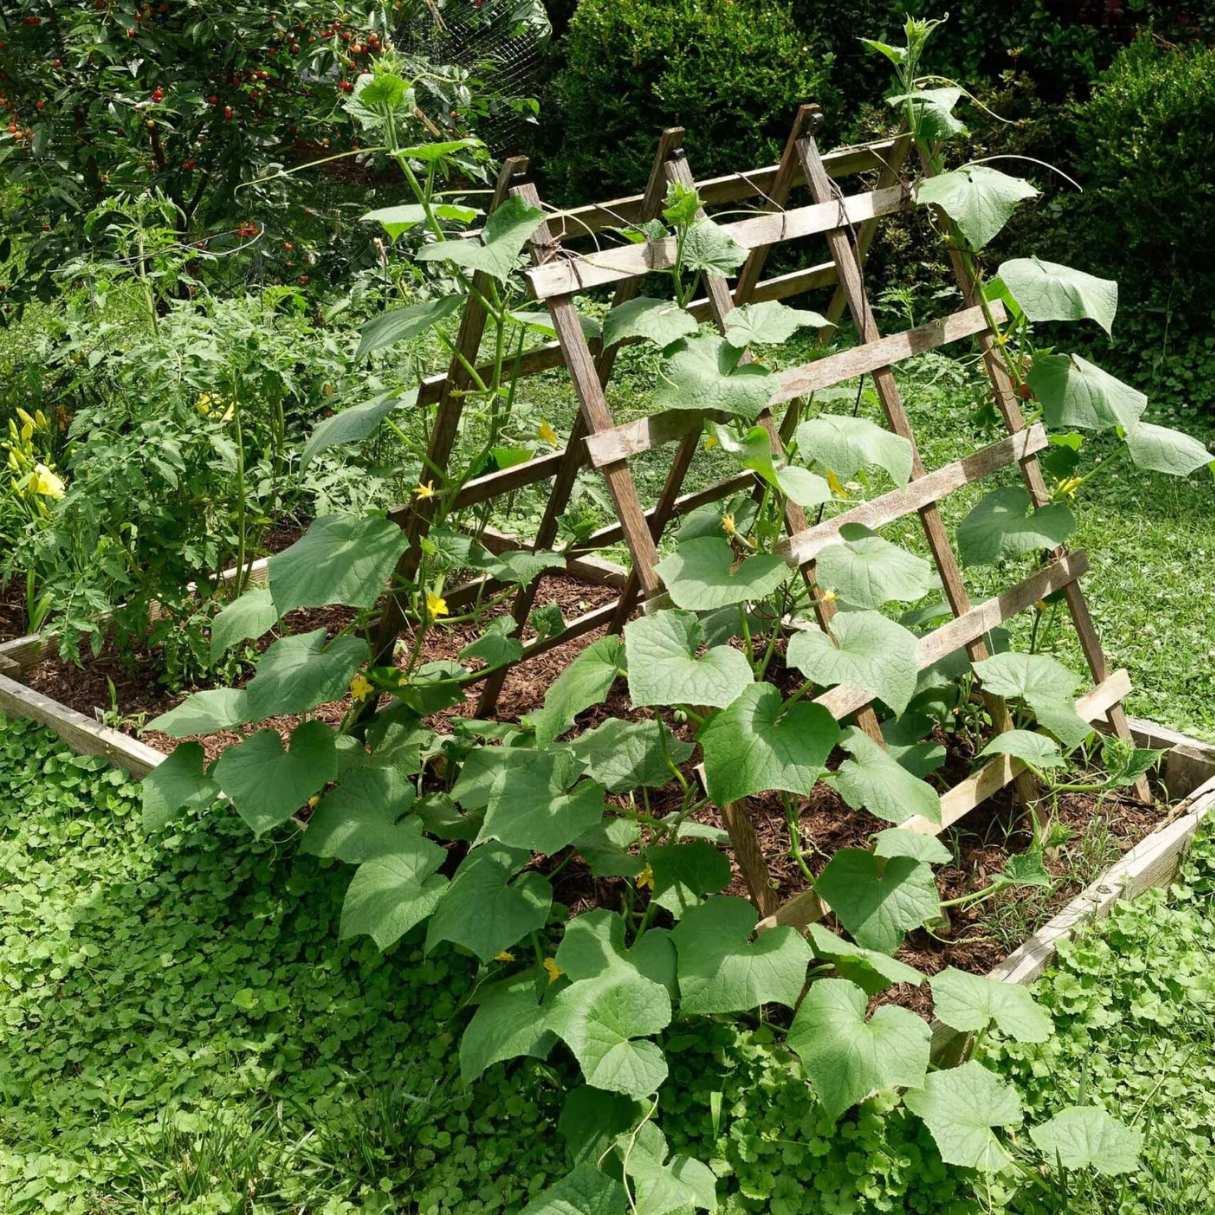
Pro tip: If you prefer a more rustic or natural look, you can consider using branches, bamboo, or other materials to create your own trellis panels. Simply attach them to the crossbeams using wire or zip ties.
As you attach the trellis panels, take breaks to step back and observe the overall appearance. Make any adjustments necessary to ensure a balanced and visually appealing trellis structure.
Once all the panels are securely attached, your trellis will start to take shape, providing an excellent support system for your climbing plants and adding beauty to your garden or outdoor space.
Next, move on to the final step – securing the trellis to the posts and adding some finishing touches and decorations.
Step 7: Secure the Trellis to Posts
After attaching the trellis panels, it’s crucial to secure them firmly to the posts to ensure stability and longevity. This step will ensure that your trellis remains intact even as your climbing plants continue to grow and flourish.
Start by examining the points where the trellis panels intersect with the posts. Depending on the type of trellis panels you have, you may need to use brackets, screws, or nails to secure them in place.
If using wooden trellis panels, you can attach them directly to the posts by driving screws or nails through the panels and into the posts. Ensure that the screws or nails penetrate both the panels and the posts to create a secure connection. Use a level to ensure the panels remain straight and level as you secure them.
If using metal trellis panels, you may need to use brackets designed specifically for attaching them to wooden posts. Position the brackets at the intersection of the panels and the posts, and then use screws or nails to secure them in place.
Continue securing the trellis panels to the posts at regular intervals, ensuring they are firmly attached and aligned properly.
Pro tip: To enhance the stability of your trellis, you can use additional reinforcement methods, such as adding diagonal braces. Attach diagonal pieces of wood or metal from the top corners of the trellis panels down to the base of the posts. This will provide extra support and prevent the trellis from swaying or leaning.
Once the trellis panels are securely attached to the posts, give them a gentle shake to test their stability. The trellis should remain steady and firm.
Now that your trellis is securely fastened to the posts, you’re one step away from completing your trellis-building journey. The final step involves adding some finishing touches and decorations to make your trellis truly personalized and ready for its role as a stunning garden feature.
Step 8: Final Touches and Decorations
Congratulations! You’re in the final stage of building your trellis. Now it’s time to add some final touches and decorations to personalize and enhance the aesthetics of your trellis.
Consider the overall style and theme of your garden or outdoor space. Choose decorations and finishes that complement the existing elements and reflect your personal taste. Here are some ideas to inspire you:
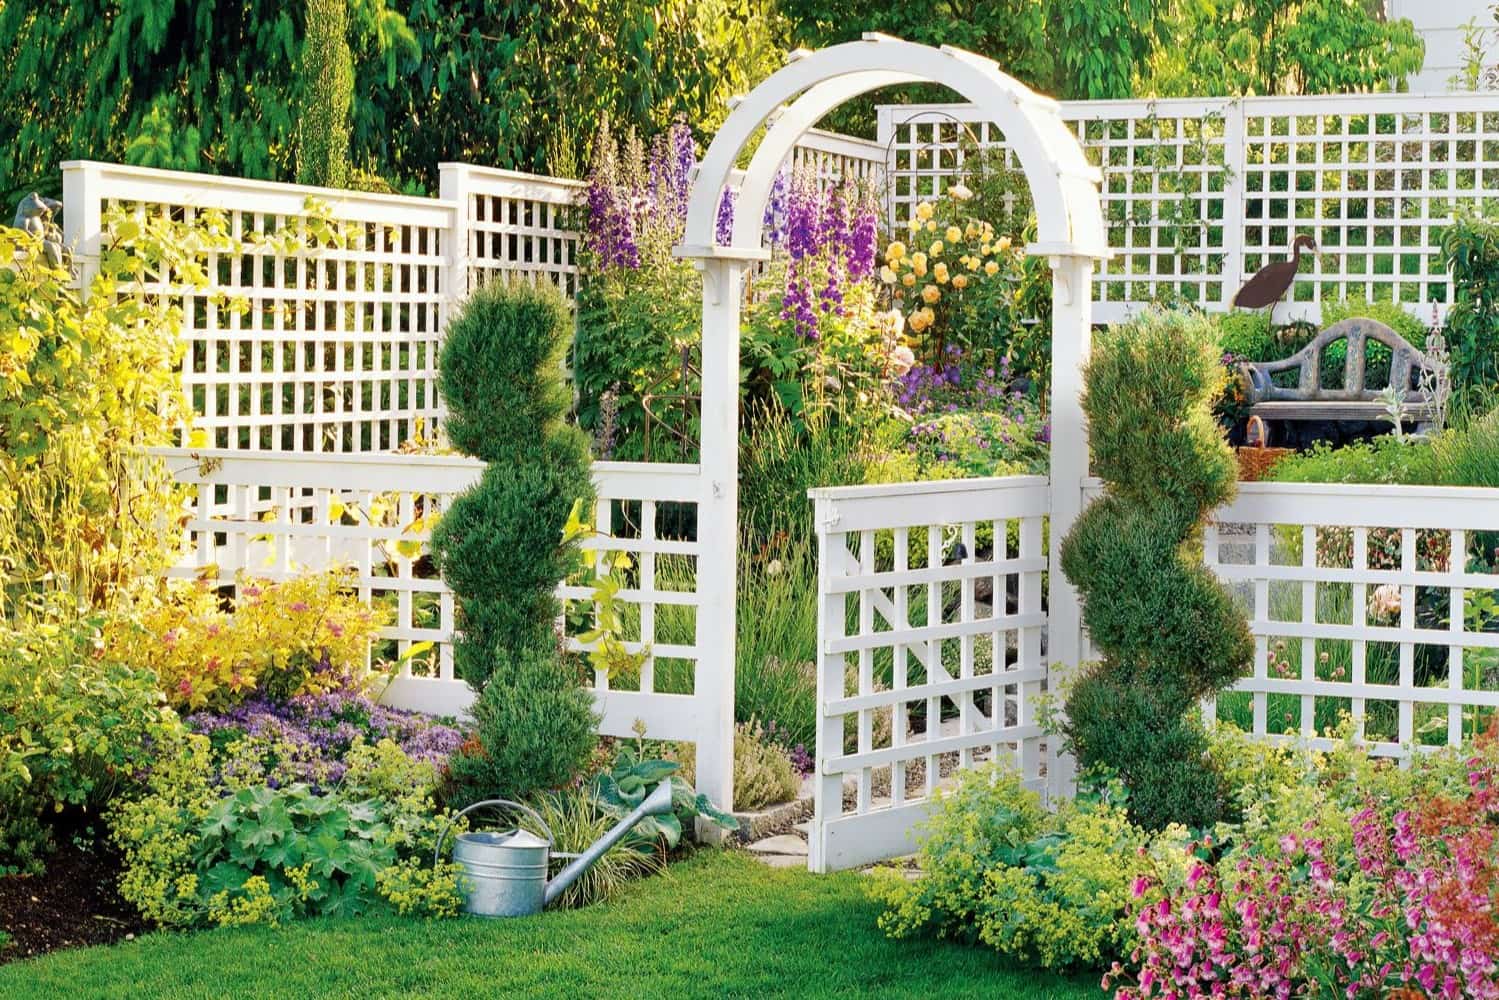
- Paint or stain: If you prefer a splash of color or want to protect the wood from weathering, consider painting or staining your trellis. Choose a color that blends in with the surroundings or makes a bold statement, depending on your preference.
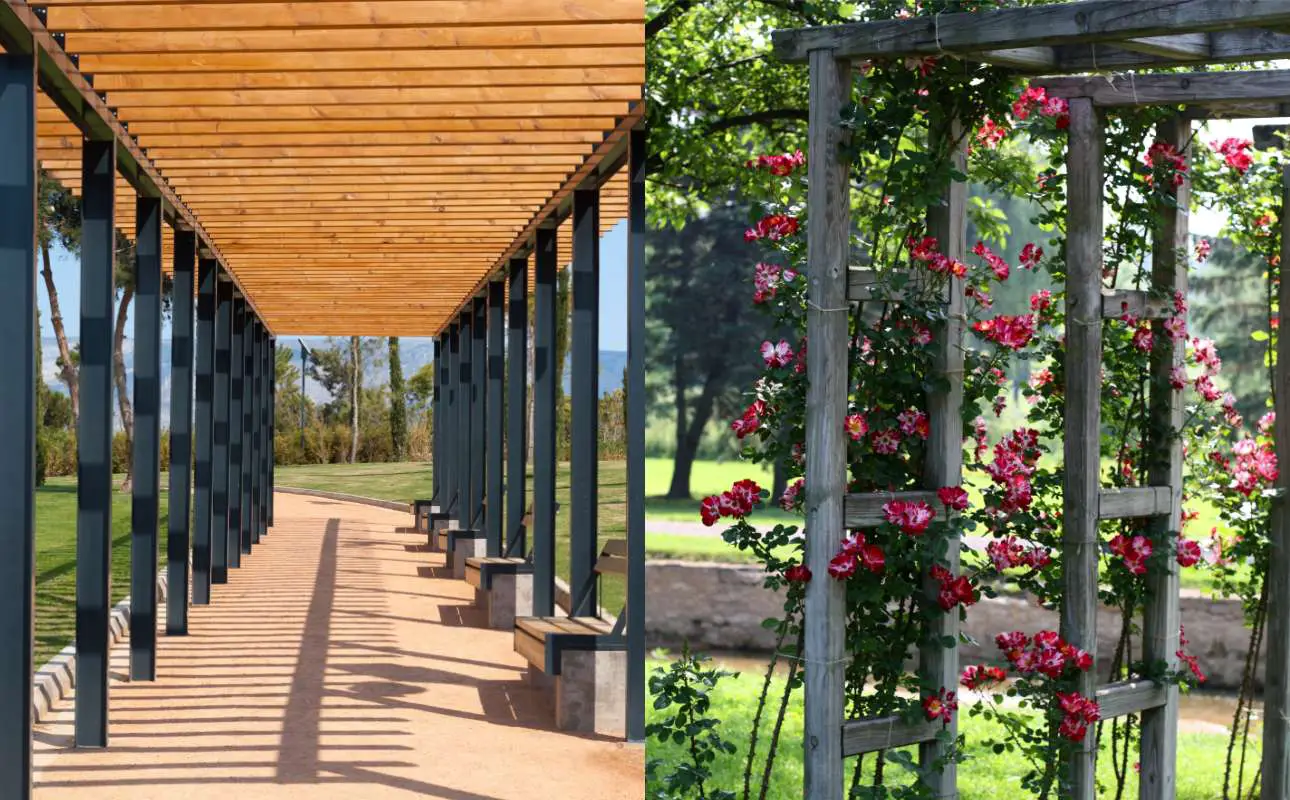
- Plants and vines: The main purpose of a trellis is to support climbing plants, so why not adorn it with beautiful vines and flowers? Plant climbers such as roses, jasmine, or clematis at the base of the trellis and encourage them to grow up and around the structure.
- Lighting: Incorporate lighting elements to highlight your trellis during the evening hours. String fairy lights, install outdoor spotlights, or mount lanterns around the trellis for a magical and inviting ambiance.
- Decorative elements: Add decorative elements such as wind chimes, hanging baskets, or small sculptures to personalize your trellis and infuse it with your unique style. Choose items that are weather-resistant and create a harmonious blend with the surrounding environment.
- Climbing accessories: Provide additional support for your climbing plants by attaching small hooks or wires to the trellis. These will help guide the growth of the plants and ensure they cover the entire structure, creating a lush and green wall.
Take a step back and evaluate your trellis from different angles. Consider how the final touches and decorations enhance its overall appearance and bring to life the vision you had when you started this project. Remember, the goal is not only to create a functional trellis but also to establish a visually appealing focal point in your outdoor space.
Lastly, regularly maintain and care for your trellis to ensure its longevity and keep it looking its best. Prune plants as needed, inspect the structure for any signs of damage, and make any necessary repairs or adjustments.
With the final touches complete, marvel at your creation and enjoy the beauty it brings to your garden or outdoor area. Your trellis is now ready to support and showcase the growth of your climbing plants while adding a touch of charm and elegance to your outdoor space.
Read more: How To Make Trellis For Vertical Garden
Conclusion
Congratulations on successfully building your own trellis! By following the step-by-step instructions in this guide, you now have a beautiful and functional structure that adds charm and sophistication to your garden or outdoor space.
From choosing the perfect location to securing the trellis panels, each step has been carefully outlined to ensure a sturdy and visually appealing trellis. Remember, the trellis not only provides support for climbing plants but also serves as a decorative element that can transform your landscape.
As your climbing plants grow and flourish, they will add life and color to your trellis, creating a captivating display of nature’s beauty. Regular maintenance and care will keep your trellis in top shape and ensure its longevity.
Now is the time to sit back, relax, and enjoy the fruits of your labor. Whether you’re using your trellis to create a vertical garden, provide shade, or enhance privacy, it will undoubtedly become a focal point and a source of pride in your outdoor space.
Experiment with different plants, colors, and arrangements to continually refresh the look of your trellis and discover new combinations that captivate your senses. The possibilities are endless, and your creativity can truly shine through.
We hope this guide has provided you with valuable insights and inspiration for building your trellis. So, embrace your green thumb, let nature take its course, and watch your trellis become a flourishing haven for climbing plants.
Remember, building a trellis is not only a creative endeavor but also a rewarding experience that allows you to connect with nature and transform your outdoor space into a captivating oasis.
Happy trellis building and happy gardening!
Frequently Asked Questions about How To Build A Trellis
Was this page helpful?
At Storables.com, we guarantee accurate and reliable information. Our content, validated by Expert Board Contributors, is crafted following stringent Editorial Policies. We're committed to providing you with well-researched, expert-backed insights for all your informational needs.

0 thoughts on “How To Build A Trellis”