Home>Garden Essentials>What Is The Plan To Prepare For Synthetic Grass Installation
Garden Essentials
What Is The Plan To Prepare For Synthetic Grass Installation
Modified: October 20, 2024
Get your garden ready for synthetic grass installation with a comprehensive plan. Find out what steps you need to take for a successful transformation.
(Many of the links in this article redirect to a specific reviewed product. Your purchase of these products through affiliate links helps to generate commission for Storables.com, at no extra cost. Learn more)
Introduction
Are you tired of spending hours each week mowing, watering, and maintaining your lawn? Are you looking for a low-maintenance alternative that still looks lush and green? Look no further than synthetic grass! Synthetic grass, also known as artificial turf, is an excellent option for those seeking a beautiful and hassle-free lawn.
In this article, we will explore the world of synthetic grass installation and help you understand the process and benefits it offers. Whether you are a homeowner, a landscaper, or a gardening enthusiast, this guide will provide you with valuable insights on preparing for and installing synthetic grass.
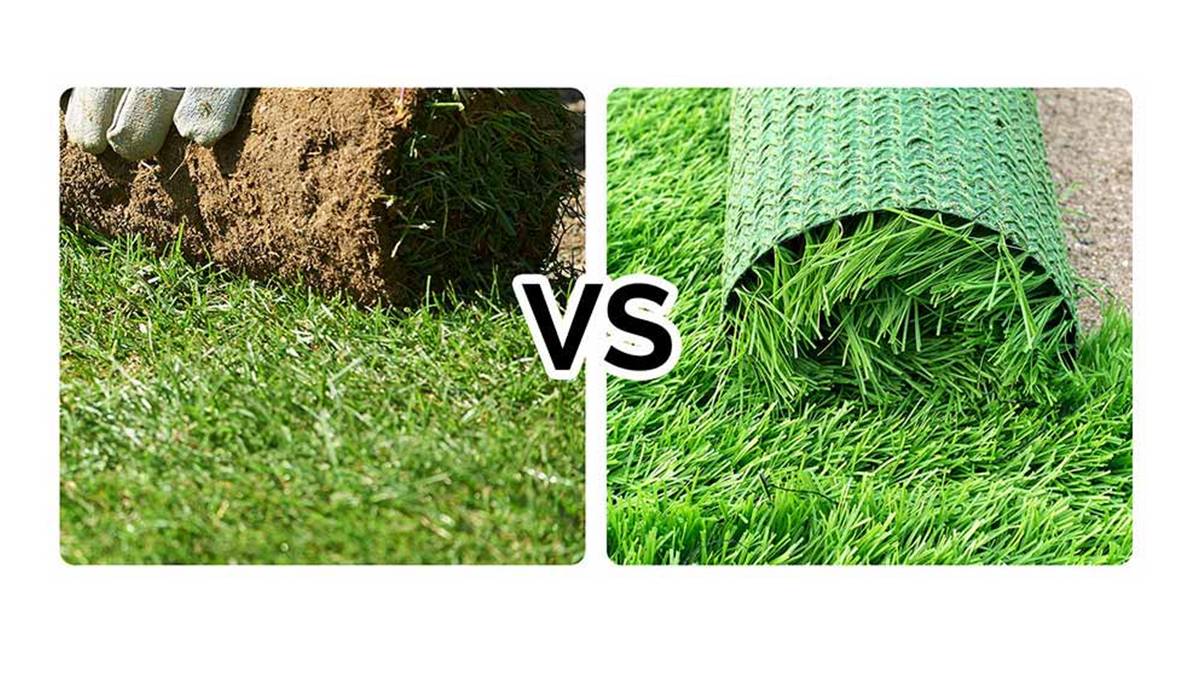
But first, let’s explore what synthetic grass is. Unlike natural grass, synthetic grass is made from carefully crafted materials designed to mimic the look and feel of real grass. It is typically constructed with a blend of polyethylene, polypropylene, or nylon fibers, along with a backing material that provides stability and drainage.
The advancements in synthetic grass technology have made it difficult to distinguish between natural and artificial grass at first glance. The realistic appearance, combined with the numerous benefits of synthetic grass, has led to its increasing popularity in residential and commercial applications.
So, why should you consider installing synthetic grass in your outdoor space? Let’s take a look at some of the key benefits.
Key Takeaways:
- Say goodbye to the hassle of mowing and watering with synthetic grass! It’s low-maintenance, durable, and allergy-friendly, providing a lush, green lawn year-round.
- Prepare for a beautiful, hassle-free lawn with synthetic grass. Follow the installation process, secure the edges, and maintain it for long-lasting beauty.
Read more: How Do You Install Synthetic Grass
Understanding Synthetic Grass
Synthetic grass has come a long way since its early days. Today, it offers an unmatched level of realism and durability. Understanding the components and features of synthetic grass will help you make an informed decision when it comes to installation.
One of the main elements of synthetic grass is the pile height. This refers to the length of the individual grass blades. Pile heights can vary depending on the intended use and personal preference. Shorter pile heights are commonly used for landscaping projects, while longer pile heights are often found on sports fields.
Another important factor to consider is the density of the synthetic grass. This refers to the number of blades per square inch, creating a fuller and more realistic appearance. Higher density grass will typically have a more lush and luxurious feel.
The quality of the backing material is also crucial. The backing provides stability and drainage for the synthetic grass. It is usually made from a combination of mesh or woven fabrics, ensuring proper water flow and preventing the accumulation of moisture.
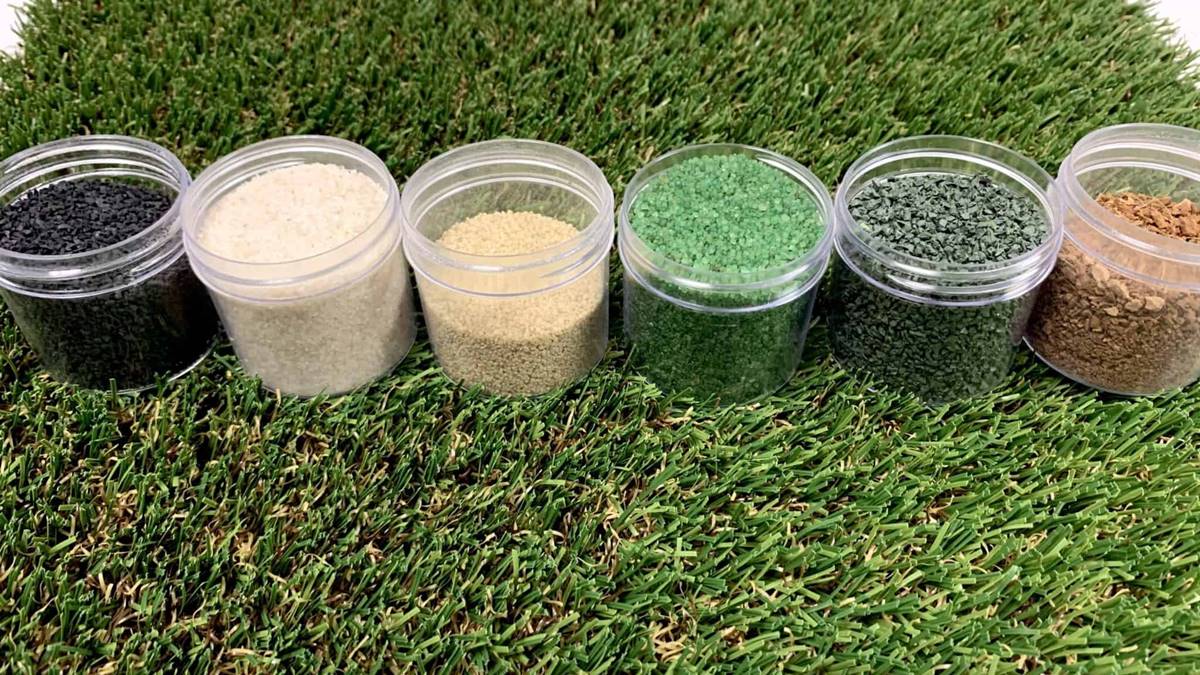
Infill material is often used in the installation of synthetic grass. This is a granular material that is spread across the surface to provide stability, enhance drainage, and give the grass a natural feel. Common infill materials include silica sand, crumb rubber, and organic alternatives like cork or coconut fiber.
When it comes to colors, synthetic grass is available in various shades of green. Some manufacturers also offer different shades to create a more realistic look, with variations in blade color to mimic the natural growth patterns of real grass.
It’s important to note that synthetic grass is designed to be UV resistant and therefore maintains its vibrancy even under direct sunlight. It is also designed to be resistant to fading, ensuring that your lawn will stay green and vibrant all year round.
Now that you have a better understanding of the components and features of synthetic grass, let’s delve into the benefits of synthetic grass installation, which will surely pique your interest.
Benefits of Synthetic Grass Installation
The decision to install synthetic grass comes with a multitude of benefits that make it an attractive option for homeowners, businesses, and even sports facilities. Let’s explore some of the key advantages that synthetic grass has to offer.
- Low Maintenance: One of the biggest advantages of synthetic grass is its low maintenance requirements. Unlike natural grass, synthetic grass does not need to be watered, mowed, or fertilized regularly. This saves you time and money on lawn care and allows you to enjoy a lush, green lawn year-round without the hassle.
- Durability: Synthetic grass is designed to withstand heavy foot traffic, making it an excellent choice for high-traffic areas such as sports fields, playgrounds, and commercial spaces. It is made from durable materials that can withstand wear and tear, ensuring that your lawn remains intact and beautiful for years to come.
- Water Conservation: In today’s world, where water scarcity is a growing concern, synthetic grass offers a sustainable solution. By eliminating the need for regular watering, synthetic grass helps conserve water resources and reduce water bills. It is an eco-friendly alternative that promotes responsible water usage.
- Allergy-Friendly: For individuals who suffer from allergies, synthetic grass can provide relief by significantly reducing exposure to pollen and other allergens. Unlike natural grass, synthetic grass does not produce pollen, making it a more allergy-friendly option for those with sensitivities.
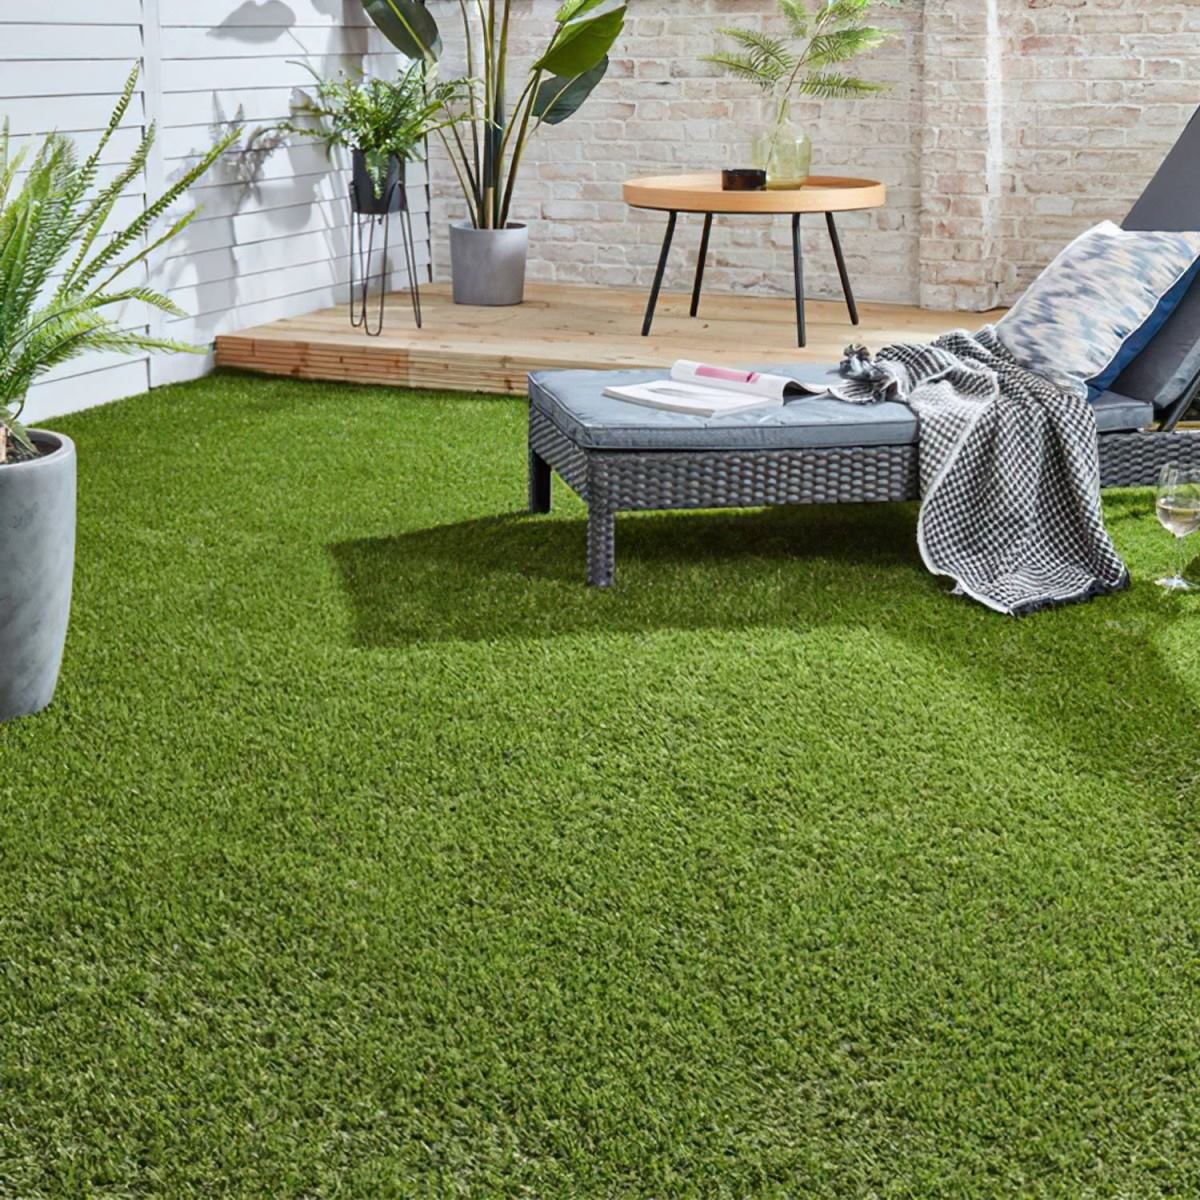
- Year-Round Beauty: With synthetic grass, you can say goodbye to brown patches and muddy areas. It offers a consistently green and vibrant appearance, regardless of the season or weather conditions. You can enjoy a beautiful, well-maintained lawn all year round, enhancing the overall aesthetics of your outdoor space.
- Safe and Child-Friendly: Synthetic grass provides a safe and cushioned surface, making it ideal for children to play on. It can help reduce the risk of injuries from falls, providing a soft and comfortable play area. Many synthetic grass options are also designed to be non-toxic and free from harmful chemicals, ensuring the safety of your loved ones.
- Cost Savings: While the upfront cost of synthetic grass installation may seem higher compared to natural grass, the long-term cost savings can be significant. With no need for watering, mowing, or fertilizing, you can save on water bills, maintenance equipment, and lawn care services. Over time, these savings can outweigh the initial investment.
As you can see, the benefits of synthetic grass installation are plentiful. It offers a practical and aesthetically pleasing solution for those seeking a low-maintenance and durable alternative to natural grass. Now that we understand the advantages, let’s move on to the preparation process for installing synthetic grass.
Site Preparation
Proper site preparation is key to a successful synthetic grass installation. Taking the time to prepare the area will ensure a level, stable, and long-lasting foundation for your synthetic grass. Here are the steps involved in site preparation:
- Clear the Area: Start by removing any existing vegetation, rocks, or debris from the area where you plan to install synthetic grass. Use a rake, shovel, or brush to clear the surface thoroughly.
- Grade the Soil: Next, assess the soil’s grade and make any necessary adjustments. Ensure that the area slopes away from buildings to promote proper drainage. Use a shovel and rake to level the soil and create a smooth surface.
- Compact the Soil: After grading, compact the soil using a plate compactor or a heavy tamper. This step helps to stabilize the soil and prevent future settling or unevenness. Pay extra attention to high traffic areas, such as walkways or play areas.
- Install Weed Barrier: To prevent weeds from growing through your synthetic grass, it is essential to install a weed barrier. Lay a high-quality geotextile fabric or weed control mat over the compacted soil. This barrier will prevent weed growth while allowing proper drainage.
- Add a Sub-Base Layer (Optional): In some cases, adding a sub-base layer can provide additional support and stability. This layer is especially useful in areas with poor drainage or heavy clay soils. Consult with a professional or follow manufacturer recommendations for the appropriate depth and materials to use for the sub-base layer.
- Ensure Proper Drainage: Good drainage is crucial for a healthy and long-lasting synthetic grass installation. Evaluate the area and implement drainage solutions if necessary, such as adding perforated pipes or creating a gentle slope away from buildings.
- Perform Final Soil Preparation: Once the site is cleared, graded, compacted, and prepared with the necessary layers, thoroughly water the area to settle the soil further. This step helps to uncover any remaining uneven spots that need to be corrected before installing the synthetic grass.
By following these site preparation steps, you will create an ideal foundation for your synthetic grass installation. Taking the time to prepare the site properly will ensure a smooth and successful installation process and maximize the longevity of your synthetic grass.
Now that the site is prepared, the next step is to measure and order the appropriate amount of synthetic grass. We will explore this topic in the next section.
Measuring and Ordering Synthetic Grass
Accurately measuring and ordering the right amount of synthetic grass is crucial for a seamless installation process. Follow these steps to ensure you have the correct measurements and make an informed decision when ordering synthetic grass:
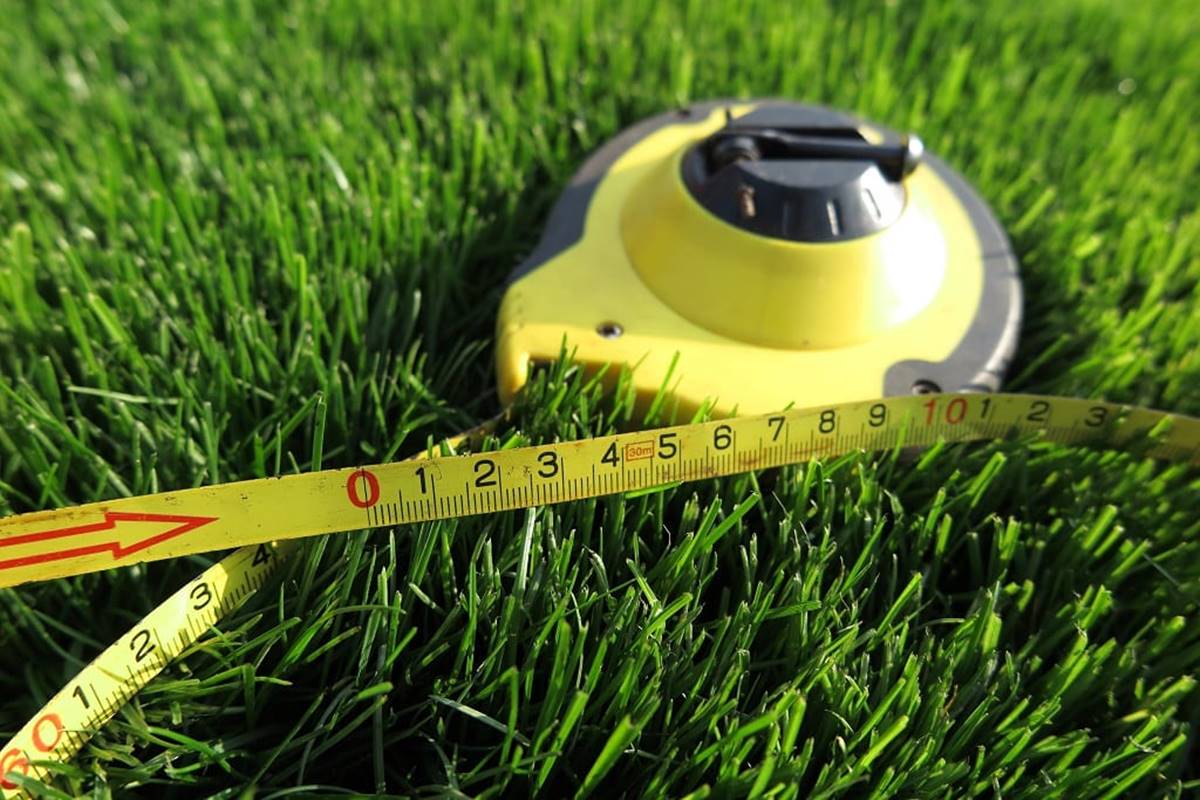
- Assess the Area: Begin by determining the area where you plan to install the synthetic grass. Measure the length and width of the space using a measuring tape. It’s best to measure in linear feet for accuracy.
- Consider Shape: If your installation area has an irregular shape, divide it into smaller sections with simpler shapes, such as rectangles or squares. Measure each section separately and calculate the total area by adding up the measurements.
- Include Waste and Seam Allowance: To account for any cutting, trimming, and seaming during the installation process, it is recommended to add a waste factor and a seam allowance. A good rule of thumb is to add an additional 5-10% to the total calculated area. This will ensure you have enough material to work with and achieve a seamless installation.
- Consider Pile Direction: During the measurement process, consider the direction in which you want the pile (grass blades) to face. It is common to have all the blades facing the same direction for a uniform and aesthetically appealing result.
- Research and Select the Right Synthetic Grass: Once you have accurate measurements, conduct research to find the right synthetic grass for your specific requirements. Consider factors such as pile height, blade density, and color to ensure it aligns with your aesthetic preferences and intended use.
- Order from a Reputable Supplier: When ordering synthetic grass, it is important to purchase from a reputable supplier or manufacturer. Look for companies with positive customer reviews, a wide range of options, and excellent customer service. They can provide guidance on selecting the appropriate product and offer professional advice during the ordering process.
- Verify the Delivery Timeframe: Before placing your order, confirm the estimated delivery timeframe. This will allow you to plan your installation schedule accordingly and ensure you have the synthetic grass when you need it.
By taking the time to measure accurately and make informed decisions when ordering synthetic grass, you can achieve a smooth and efficient installation process. Now that you have the necessary measurements and have ordered your synthetic grass, it’s time to gather the necessary tools and materials for the installation.
Read more: What Is Synthetic Grass Made Of?
Gathering the Necessary Tools and Materials
Before starting the installation process, it’s essential to gather all the necessary tools and materials. Having everything prepared in advance will save time and ensure a smooth installation. Here is a list of the tools and materials you will need:
- Tape Measure: Use a tape measure to accurately measure the installation area and ensure precise cuts and fitting of the synthetic grass.
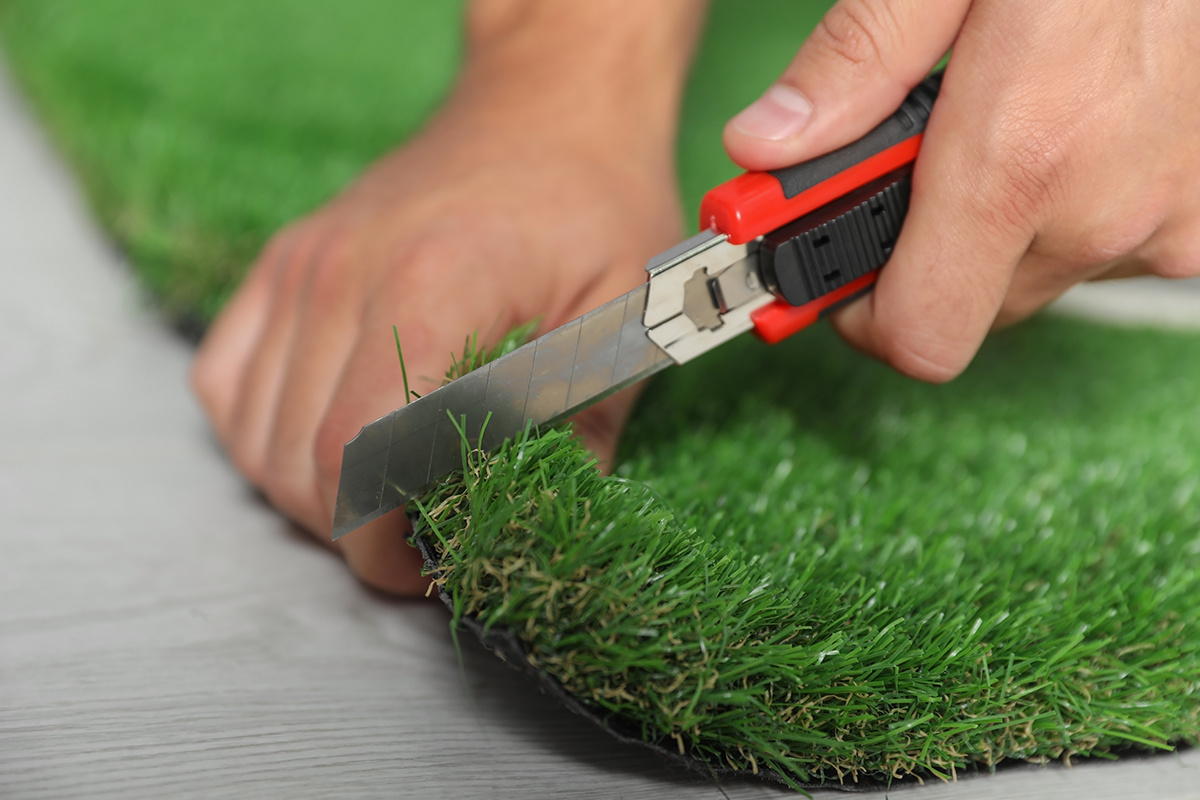
- Utility Knife or Carpet Cutter: A sharp utility knife or carpet cutter is essential for cutting the synthetic grass to the desired size and shape. Ensure the blade is sharp to achieve clean and precise cuts.
- Stakes and Nails: Stakes and nails are used to secure the synthetic grass in place, particularly along the edges. Choose sturdy stakes and nails that are appropriate for outdoor use and capable of holding the grass securely.
- Hammer: You will need a hammer to drive the stakes and nails into the ground securely. Choose a hammer that is comfortable to hold and offers enough force to drive the stakes and nails into the desired depth.
- Infill Material: Depending on the type of synthetic grass you choose, you may need infill material to enhance stability, support, and the natural feel of the grass. Common infill materials include silica sand, crumb rubber, or organic alternatives like cork or coconut fiber.
- Wheelbarrow or Shovel: A wheelbarrow or shovel will come in handy for transporting and spreading the infill material. It allows for efficient distribution and ensures an even layer across the synthetic grass surface.
- Seaming Tape and Adhesive: If you have multiple rolls of synthetic grass that need to be joined together, seaming tape and adhesive are necessary. The seaming tape creates a strong and durable bond, securing the different sections of the grass together.
- Compactor or Tamper: A compactor or tamper is used to compact and level the soil or infill material to create a sturdy foundation for the synthetic grass. It ensures proper drainage and prevents any unevenness or settling.
- Broom or Power Brush: To achieve the most natural and well-groomed look for your synthetic grass, use a broom or power brush to brush the grass blades against the grain. This helps the blades stand upright and gives the appearance of freshly mowed natural grass.
Make sure to gather all the necessary tools and materials before beginning the installation process. Having everything readily available will make the process more efficient and enable you to achieve a professional result. Now that you are prepared, let’s move on to the next step: clearing and leveling the area.
Clearing and Leveling the Area
Clearing and leveling the area is a crucial step before installing synthetic grass. This process ensures a clean and even surface for a smooth installation. Follow these steps to clear and level the area:
- Remove Existing Vegetation: Begin by removing any existing vegetation, including grass, weeds, and plants. Use a garden shovel, rake, or a weed trimmer to clear the area thoroughly. Ensure the surface is free from any debris or obstacles.
- Inspect the Soil: After removing the vegetation, inspect the soil for any rocks, roots, or other debris that may interfere with the installation of the synthetic grass. Clear away any unwanted elements and create a clean surface.
- Grade the Area: Next, use a garden rake to level the area and create a smooth base. Grades and slopes are important for proper water drainage, so ensure that the area has a slight slope away from any structures or buildings.
- Compact the Soil: Once the area is graded, use a compactor or a tamper to compact the soil. This will provide a sturdy foundation for the synthetic grass and prevent any future sinking or unevenness. Pay extra attention to high-traffic areas and ensure they are compacted properly.
- Address Drainage Issues: If you notice any areas with poor drainage, take the necessary steps to address the issue. This might involve adding drainage channels or perforated pipes to ensure that water flows away from the synthetic grass surface.
- Clear Edges and Borders: Properly clearing the edges and borders of the installation area is crucial for a neat and professional finish. Use a spade or border cutter to create clean, straight lines and define the edges of the synthetic grass area.
- Inspect for Proper Levels: Before proceeding with the installation, take the time to inspect the cleared and leveled area for any unevenness or low spots. Use a level tool to ensure that the surface is even and adjust as necessary.
By taking the time to clear and level the area, you will create a solid foundation for your synthetic grass installation. A flat and well-prepared surface will ensure the synthetic grass sits evenly and gives you the best possible result. Now that the area is prepared, it’s time to move on to installing the base layer.
Before installing synthetic grass, make sure to properly prepare the area by removing any existing grass, weeds, and debris. It’s important to create a smooth and level surface to ensure a successful installation.
Installing the Base Layer
Installing the base layer is an important step in the synthetic grass installation process. The base layer provides stability, proper drainage, and a solid foundation for the synthetic grass. Here’s how to install the base layer:
- Excavate the Area: Begin by excavating the area to a depth of about 3 to 4 inches. Use a shovel, rake, or machinery to remove the soil and create space for the base layer.
- Add a Permeable Membrane: To promote proper drainage, it is recommended to add a permeable membrane over the excavated area. This membrane allows water to pass through while preventing the growth of weeds or vegetation from beneath.
- Spread and Compact Crushed Stone or Aggregate: Next, spread a layer of crushed stone or aggregate over the permeable membrane. Compact the material using a compactor or tamper to ensure it is even and well-compacted. This step helps with drainage and provides a sturdy base for the synthetic grass.
- Smooth and Level the Base: After compacting the crushed stone, use a rake or leveling tool to smooth and level the base layer. Pay attention to any low spots or uneven areas and make the necessary adjustments to achieve a uniform surface.
- Moisten and Compact the Base: Moisten the base layer with water to help settle the material and make it more compact. Use a compactor or tamper to further compact the base, ensuring it is solid and stable.
- Check for Proper Slope and Drainage: Before proceeding, check the base layer to ensure it slopes away from any structures or buildings to promote proper drainage. Use a level tool to verify the slope and make any necessary adjustments.
- Inspect for Evenness: Lastly, inspect the base layer for evenness and stability. Walk over the area to feel for any soft or uneven spots. If needed, add more crushed stone or aggregate and compact as necessary to achieve a smooth and solid base.
Installing a proper base layer is crucial for the longevity and performance of your synthetic grass. It provides a stable and well-drained surface for the grass to be installed on. Once the base layer is properly installed and leveled, you are ready to proceed with installing the synthetic grass itself.
Installing the Synthetic Grass
Now that the base layer is properly prepared, it’s time to install the synthetic grass. Follow these steps to ensure a successful installation:
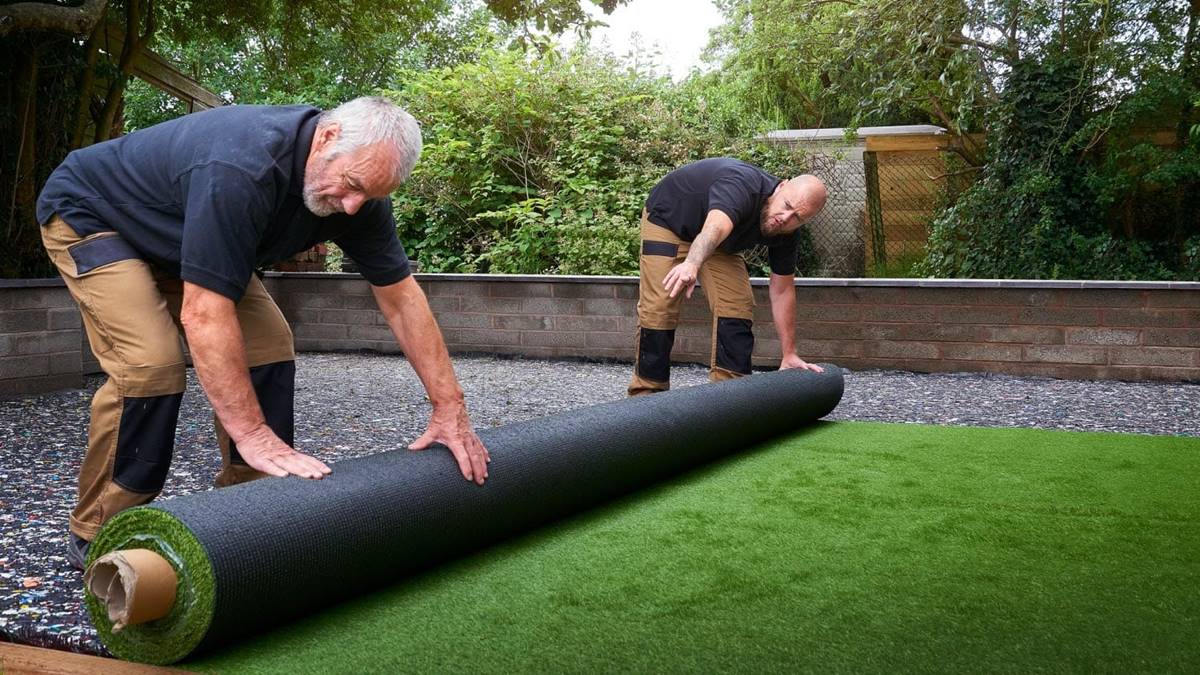
- Roll Out the Synthetic Grass: Start by rolling out the synthetic grass over the prepared base layer. Unroll the grass carefully, making sure the blades are facing the desired direction. Allow the grass to acclimate to the surroundings for a few hours, especially if it has been stored in a roll.
- Trim and Shape the Grass: Using a sharp utility knife or carpet cutter, trim the synthetic grass to fit the installation area perfectly. Trim along the edges, around obstacles or features, such as trees or flower beds, for a clean and precise fit.
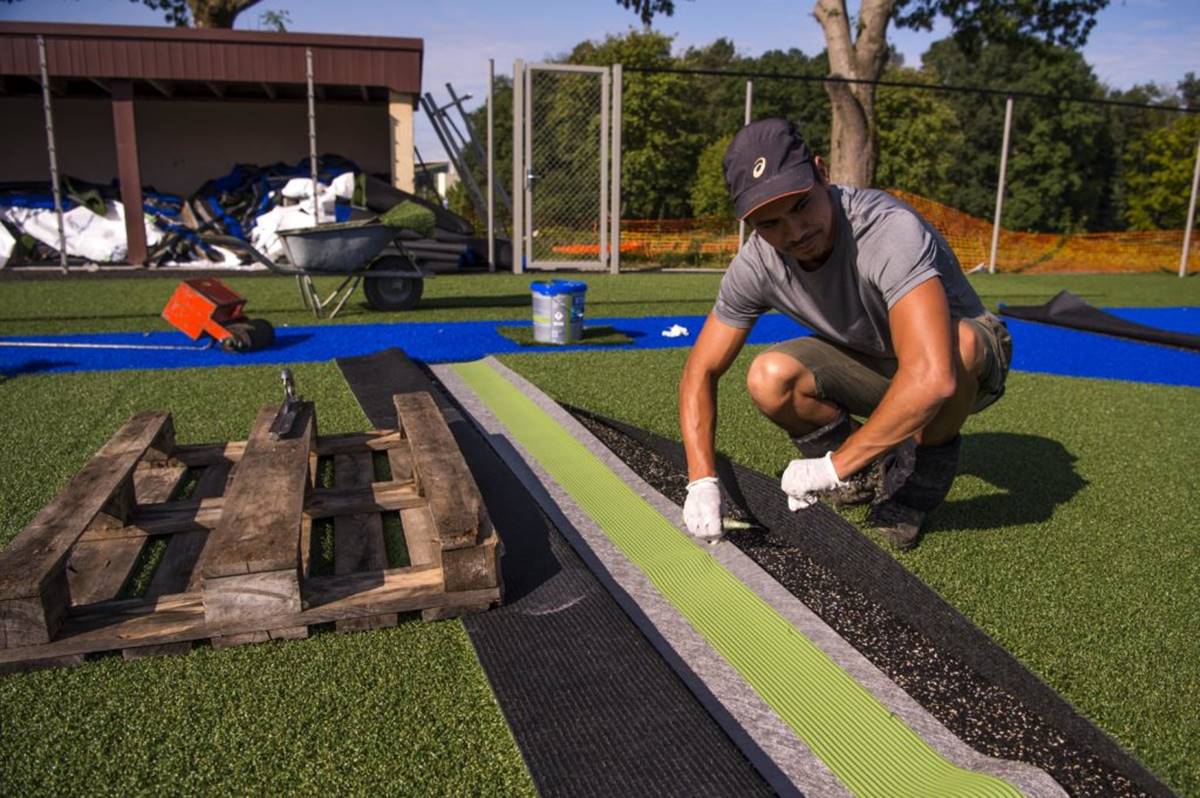
- Join Multiple Rolls (If Applicable): If you have multiple rolls of synthetic grass, you may need to join them together. Place seaming tape along the seam where the rolls meet, ensuring it is positioned underneath the grass. Apply adhesive to the tape and carefully press the grass down, creating a strong and seamless bond.
- Secure the Edges: Secure the edges of the synthetic grass by driving stakes or nails into the ground approximately 6-12 inches apart. Place the stakes close to the edges but ensure they do not penetrate through the grass blade. This will keep the synthetic grass in place and prevent any shifting or movement.
- Trim Excess Grass: Trim any excess grass along the edges, using the same utility knife or carpet cutter. Create clean and straight lines to achieve a professional finish. Take care not to cut into or damage the base layer or surrounding landscaping.
- Add Infill Material: If your synthetic grass requires infill material, now is the time to add it. Spread the infill material evenly across the grass using a shovel, broom, or power brush. Ensure the infill material fills the gaps between the grass blades, providing stability and natural bounce.
- Brush the Grass Blades: To give your synthetic grass a more natural and well-groomed appearance, use a broom or power brush to brush the grass blades against the grain. This will help the blades stand upright and give a freshly-mown lawn effect.
- Inspect and Make Adjustments: Once the synthetic grass is installed, take the time to inspect the entire area. Check for any visible seams, unevenness, or areas where the grass may need smoothing or adjusting. Make necessary adjustments to ensure a seamless and flawless installation.
By following these steps, you can successfully install synthetic grass and achieve a beautiful and functional lawn. Take your time during the installation process, ensuring careful trimming, joining of rolls, and securing of the edges. With proper installation, your synthetic grass will provide a low-maintenance and visually appealing landscape for years to come.
After the installation is complete, it’s important to implement regular maintenance to keep your synthetic grass in optimal condition. Let’s explore some maintenance tips in the next section.
Securing the Edges
Securing the edges of your synthetic grass is an essential step in the installation process. It helps to keep the grass in place, prevent shifting or movement, and maintain a neat and professional appearance. Follow these steps to effectively secure the edges of your synthetic grass:
- Prepare the Edge: Before securing the edges, ensure that the edges of the synthetic grass are neatly trimmed and free from any excess or loose material. Use a sharp utility knife or carpet cutter to create clean and straight edges.
- Drive Stakes or Nails: To hold the edges in place, drive stakes or nails into the ground along the edge of the synthetic grass. Place the stakes or nails approximately 6-12 inches apart, ensuring they are positioned close to the edge of the grass but do not penetrate through the grass blades.
- Angle the Stakes or Nails: When inserting the stakes or nails, angle them slightly towards the center of the synthetic grass area. This helps to provide additional stability and prevent them from being easily pulled out.
- Avoid Overdriving: Be cautious not to overdrive the stakes or nails, as this may cause damage to the base layer or the backing of the synthetic grass. Drive them firmly into the ground, but not so deep that they puncture or tear the material.
- Use a Rubber Mallet: If necessary, use a rubber mallet to gently tap the top of the stakes or nails to ensure they are securely in place. This ensures a tight and solid fit, reducing the risk of movement or lifting along the edges.
- Inspect and Make Adjustments: After securing the edges, thoroughly inspect the entire perimeter of the synthetic grass. Check for any areas where the edge may be loose or where the stakes or nails need further adjustment. Make any necessary adjustments to ensure a uniform and secure edge.
- Consider Using Adhesive: In certain cases, you may want to consider using adhesive along the edges to provide additional reinforcement. This is particularly useful for areas with higher traffic or where the synthetic grass is more prone to movement. Consult the manufacturer’s guidelines and follow proper instructions for using adhesive.
By securely fastening the edges of your synthetic grass, you can ensure that it remains in place and maintains its pristine appearance. It is important to regularly inspect the edges and make any necessary adjustments to prevent potential lifting or shifting. With properly secured edges, your synthetic grass installation will stand the test of time and provide you with a beautiful, durable, and hassle-free lawn.
With the edges secured, the next step is to add infill material to the synthetic grass. We will explore this topic in the next section.
Adding Infill Material
Adding infill material to your synthetic grass is an important step that enhances its performance, stability, and natural appearance. Infill material provides support to the grass fibers, helps with drainage, and gives the grass a more realistic feel underfoot. Follow these steps to properly add infill material to your synthetic grass:
- Choose the Right Type of Infill: There are different types of infill material available, including silica sand, crumb rubber, and organic alternatives like cork or coconut fiber. Consider the specific requirements of your synthetic grass and consult the manufacturer’s guidelines to determine the most suitable infill material.
- Calculate the Amount Needed: Measure the square footage of your synthetic grass area to determine the amount of infill material required. Refer to the manufacturer’s recommendations for the appropriate infill depth for your specific grass type. This will help you calculate how much infill material is needed for your installation.
- Prepare the Synthetic Grass Surface: Ensure that the synthetic grass is clean and free from debris or excess moisture before adding the infill material. Use a stiff-bristle broom or power brush to brush the grass fibers upright and create a clear surface for the infill.
- Distribute the Infill Material: Evenly distribute the infill material across the synthetic grass surface. Start at one end and use a shovel, broom, or power brush to spread the infill in a sweeping motion. Pay close attention to any areas that may require more or less infill to achieve a consistent coverage.
- Brush or Power Broom the Infill: Once the infill material is evenly distributed, use a broom or power brush to work it into the synthetic grass fibers. This brushing action helps the infill settle between the blades and creates a more stable and natural-looking surface. Brush against the grain of the grass for optimal results.
- Use a Drop Spreader (optional): If you are using fine-grained infill material, such as silica sand, you may find it helpful to use a drop spreader to achieve a more precise distribution. This tool allows for controlled release of the infill material, ensuring an even coverage across the grass surface.
- Inspect and Adjust: After adding the infill material, thoroughly inspect the synthetic grass area to ensure even distribution and appropriate infill depth. Make any necessary adjustments, redistributing the infill as needed to achieve the desired performance and appearance.
Adding infill material to your synthetic grass is an important step to create a stable and comfortable surface. It enhances the durability, drainage, and overall performance of the grass. Properly adding and distributing the infill material will ensure that your synthetic grass looks and functions at its best.
With the infill material added, your synthetic grass installation is almost complete. The next step is to test and inspect the installation to ensure everything is in order. We will cover this topic in the next section.
Testing and Inspecting the Installation
After completing the installation of your synthetic grass, it is essential to thoroughly test and inspect the area to ensure that everything is in order and meets your expectations. This final step will help identify any potential issues and allow for timely corrections. Follow these guidelines to test and inspect your synthetic grass installation:
- Walking and Feels Test: Take a walk across the synthetic grass area to assess its stability and comfort. Pay attention to any areas that feel uneven, overly soft, or have excessive movement. Correct any unstable areas by adding more infill material or adjusting the base layer if needed.
- Drainage Check: Test the drainage capabilities of your synthetic grass by pouring water onto the surface. Observe how well the water drains and whether any pooling or puddling occurs. Proper drainage is essential to prevent water accumulation and maintain a healthy lawn.
- Inspect Seams (If Applicable): If your synthetic grass installation required joining multiple rolls, thoroughly inspect the seams for any visible lines or separation. Check that the seaming tape is securely bonded and that the grass blades are properly aligned. Make any necessary adjustments or reapply adhesive as required.
- Look for Visible Deformities: Closely inspect the surface for any visible deformities, such as bumps, wrinkles, or areas of unevenness. Smooth out any wrinkles or bumps and make sure the grass fibers are evenly distributed for a seamless appearance.
- Check for Proper Drainage: Verify that water drains efficiently through the infill material and does not accumulate on the surface. Pay attention to areas near hardscapes, such as driveways or walkways, to ensure proper water runoff.
- Evaluate Appearance: Step back and evaluate the overall appearance of your synthetic grass installation. Look for a consistent color, natural blade orientation, and a well-groomed appearance. If necessary, use a broom or power brush to further enhance the aesthetic appeal of the grass.
- Address Any Issues: If you identify any issues during the testing and inspection process, address them promptly. This might involve adding more infill material, reattaching loose edges, or adjusting the base layer. Taking care of these concerns early on will ensure the longevity and performance of your synthetic grass.
Conducting a thorough testing and inspection of your synthetic grass installation will give you peace of mind and help identify any potential issues. By addressing these issues promptly, you can achieve a flawless and long-lasting synthetic grass lawn that brings beauty and enjoyment to your outdoor space.
Now that your synthetic grass installation is complete and inspected, it’s important to maintain it properly to ensure its longevity and appearance. Let’s explore some maintenance tips in the next section.
Maintenance Tips for Synthetic Grass
Maintaining your synthetic grass properly is essential to keep it looking lush, vibrant, and in optimal condition. Here are some maintenance tips to ensure the longevity and performance of your synthetic grass:
- Regular Brushing: Regularly brush the synthetic grass blades with a broom or power brush to keep them upright and maintain a natural appearance. Brushing helps prevent matting and keeps the grass looking fresh and well-groomed.
- Remove Debris: Regularly remove leaves, twigs, and other organic debris that may accumulate on the surface of the synthetic grass. Use a leaf blower or gently rake the area to keep it clean and prevent any potential clogging of the drainage system.
- Spot Cleaning: In case of spills or stains, promptly clean the affected area. Blot the spill gently with a clean cloth or paper towel, then rinse the area with water. Mild soap or a synthetic grass cleaner can be used for more stubborn stains. Avoid using harsh chemicals or abrasive cleaners that may damage the grass fibers.
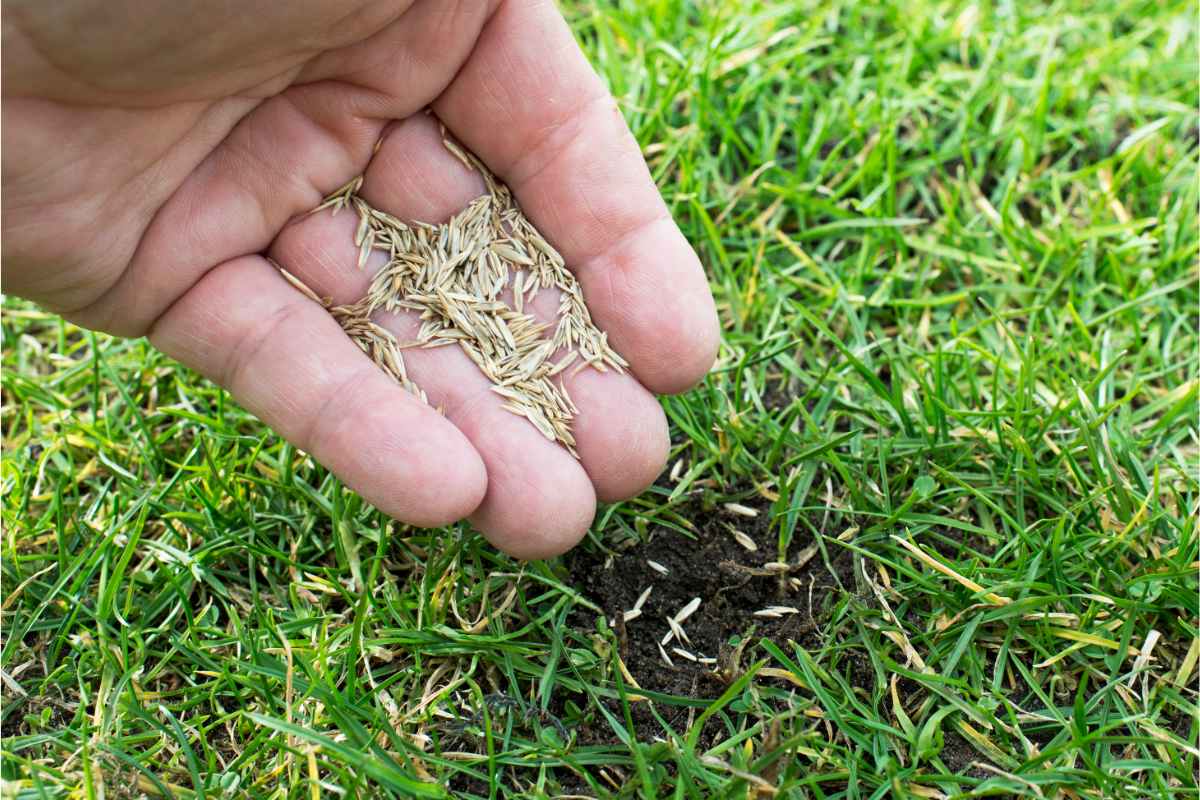
- Control Weed Growth: While synthetic grass naturally deters weed growth, occasional weed seeds may find their way onto the surface. Vigilantly remove any weeds that emerge, ensuring the roots are completely eradicated. Use a weed control product specifically designed for use on synthetic grass if necessary.
- Monitor and Address Drainage: Regularly check the drainage system of your synthetic grass to ensure it is free from debris and functioning properly. Check for any signs of pooling or inadequate drainage, and clear any blockages to ensure efficient water flow.
- Protect from Sharp Objects: Avoid placing or dragging sharp objects, such as furniture or heavy equipment, directly on the synthetic grass. Use protective pads or boards to distribute the weight and prevent damage to the grass fibers or backing material.
- Prevent Heat Damage: During hot summer months, synthetic grass can heat up under direct sunlight. To prevent heat damage, hose down the grass with water to cool it before use. Additionally, consider providing shaded areas or using shade structures to reduce heat absorption.
- Regular Inspections: Periodically inspect your synthetic grass, paying attention to the edges, seams, and any areas of concern. Look for any signs of wear, fading, or damage. Early detection allows for prompt repair or replacement, ensuring the longevity of your synthetic grass.
- Follow Manufacturer Guidelines: Always refer to the manufacturer’s guidelines for specific maintenance instructions and recommendations for your particular synthetic grass product. These guidelines may include brushing techniques, cleaning products to use or avoid, and any specific care instructions.
By following these maintenance tips, you can keep your synthetic grass looking green, vibrant, and well-maintained for years to come. Regular care and attention will not only prolong the life of your synthetic grass but also allow you to fully enjoy its beauty and durability.
Congratulations on the successful installation of your synthetic grass, and enjoy the benefits of a low-maintenance and visually appealing lawn!
Conclusion
Installing synthetic grass offers a multitude of benefits, from saving time and money on lawn maintenance to providing a year-round lush and green landscape. Throughout this comprehensive guide, we have explored the various aspects of synthetic grass installation, from understanding its components to the importance of proper site preparation.
We have discussed the benefits of synthetic grass, including its low-maintenance nature, durability, and water conservation capabilities. By replacing natural grass with synthetic grass, you can enjoy a beautiful lawn without the need for constant watering, mowing, or fertilizing. Synthetic grass is also an allergy-friendly option, safe for children, and offers cost savings in the long run.
We have covered the necessary steps in the installation process, including measuring and ordering the right amount of synthetic grass, preparing the site, and securing the edges. We have delved into the importance of adding a base layer for stability and proper drainage, as well as the techniques for installing the synthetic grass itself.
To ensure a successful installation, we have emphasized the importance of testing and inspecting the areas, addressing any issues promptly, and adding the necessary infill material to enhance performance and appearance.
Lastly, we have provided maintenance tips to help you properly care for your synthetic grass, including regular brushing, removal of debris, spot cleaning, and monitoring the drainage system. By following these guidelines, you can maintain the beauty and functionality of your synthetic grass for years to come.
Installing synthetic grass can transform your outdoor space, providing you with a vibrant and low-maintenance lawn that enhances the beauty of your surroundings. By understanding the installation process, properly maintaining your synthetic grass, and consulting manufacturer guidelines, you can enjoy the benefits of a beautiful and hassle-free lawn year-round.
So, why wait? Say goodbye to the tedious maintenance of natural grass and embrace the lush, green, and ever-lasting beauty of synthetic grass. Get ready to enjoy your picture-perfect lawn and make the most of your outdoor space!
Frequently Asked Questions about What Is The Plan To Prepare For Synthetic Grass Installation
Was this page helpful?
At Storables.com, we guarantee accurate and reliable information. Our content, validated by Expert Board Contributors, is crafted following stringent Editorial Policies. We're committed to providing you with well-researched, expert-backed insights for all your informational needs.


0 thoughts on “What Is The Plan To Prepare For Synthetic Grass Installation”