Home>Garden Essentials>How To Install Synthetic Lawn Turf Grass Carpet
Garden Essentials
How To Install Synthetic Lawn Turf Grass Carpet
Modified: October 20, 2024
Learn how to install synthetic lawn turf grass carpet in your garden with our step-by-step guide. Create a beautiful and low-maintenance outdoor space.
(Many of the links in this article redirect to a specific reviewed product. Your purchase of these products through affiliate links helps to generate commission for Storables.com, at no extra cost. Learn more)
Introduction
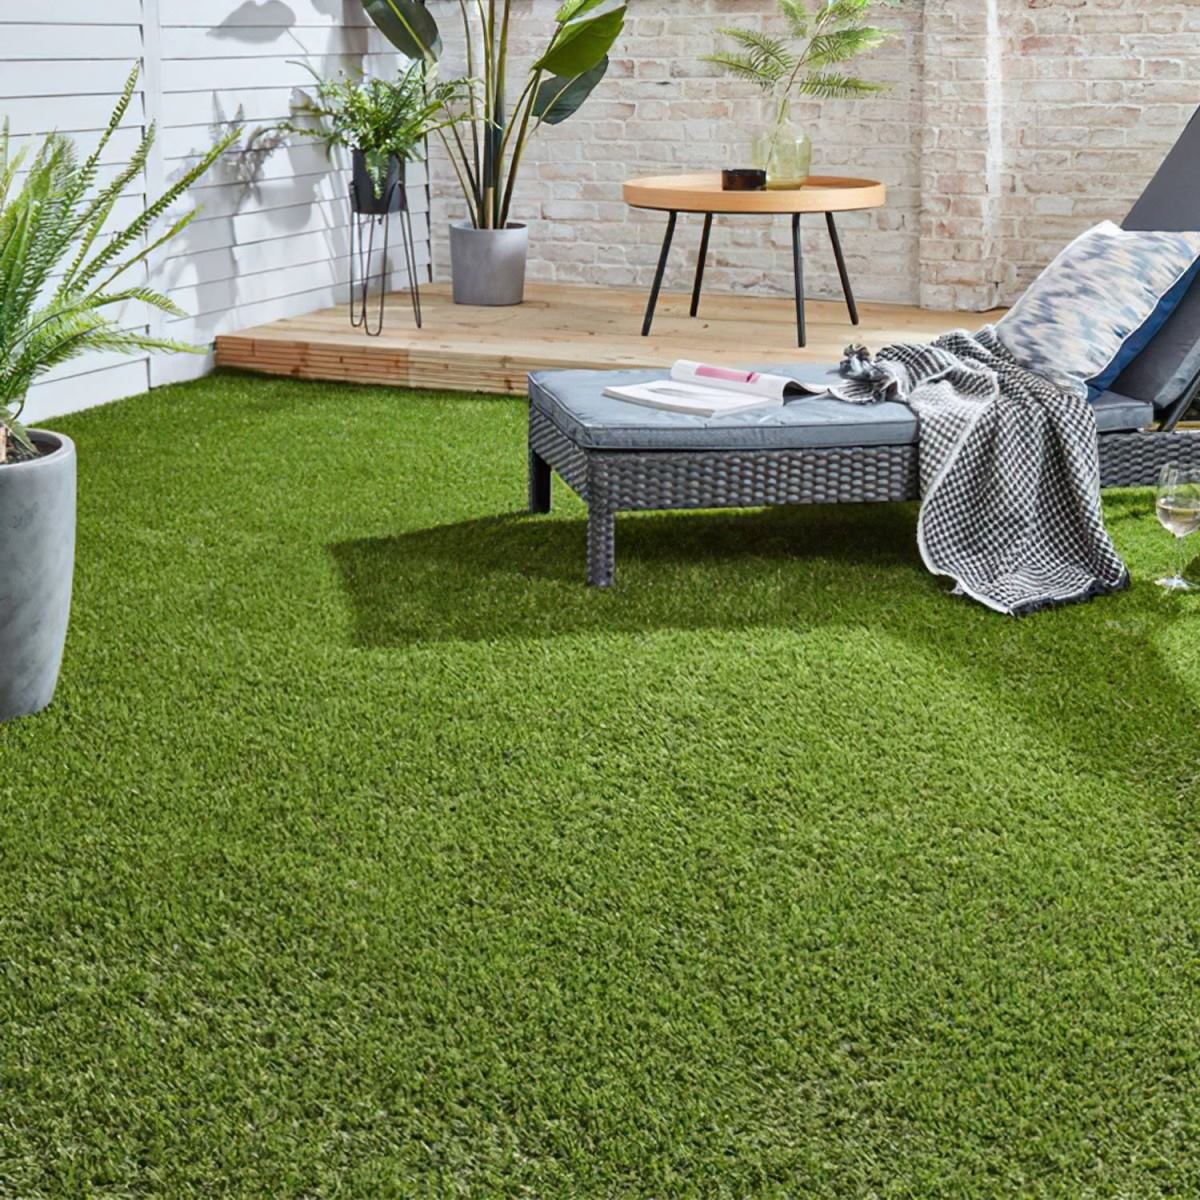
Welcome to the world of synthetic lawn turf grass carpet! If you’re tired of battling with the maintenance of a natural grass lawn, synthetic turf may be the perfect solution for you. Not only does synthetic lawn turf require less maintenance, but it also stays green and lush all year round, regardless of weather conditions. Whether you’re looking to install a new synthetic lawn or replace your existing natural grass, this comprehensive guide will walk you through the step-by-step process of installing synthetic lawn turf grass carpet.
Installing synthetic lawn turf grass carpet not only saves you time and effort but also provides a beautiful and functional outdoor space that can be enjoyed by you and your family. With advancements in technology, modern synthetic turf looks and feels remarkably similar to natural grass, providing a realistic and inviting landscape.
Throughout this guide, we will cover each step of the installation process, from preparing the area to maintaining your new synthetic lawn. Whether you have a small backyard or a sprawling garden, these instructions can be easily adapted to suit your specific needs.
So, if you’re ready to transform your outdoor space into a low-maintenance oasis that stays green and vibrant all year long, let’s get started with the first step—measuring and preparing the area.
Key Takeaways:
- Installing synthetic lawn turf grass carpet saves time and effort, providing a lush and low-maintenance outdoor space. From measuring and preparing the area to regular maintenance, enjoy a hassle-free alternative to natural grass.
- Synthetic turf offers a durable and evergreen appearance, with reduced maintenance costs and environmental benefits. Enjoy a beautiful outdoor oasis that stays green year-round, perfect for leisure and connection with nature.
Read more: How To Install Lawn Turf On A Concrete Pool
Step 1: Measure and Prepare the Area
The first step in installing synthetic lawn turf grass carpet is to measure and prepare the area where you want to install it. This step is crucial to ensure that you have the correct amount of synthetic turf and materials for a seamless installation process.
Here’s how you can get started:
- Measure the area: Use a tape measure to determine the dimensions of the area where you want to install the synthetic lawn. Take accurate measurements of the length and width of the space and record them.
- Clear the area: Remove any existing plants, debris, or obstacles from the area. This includes rocks, branches, weeds, or any other items that may impede the installation process. You may need to use a shovel or rake to clear the space effectively.
- Check for drainage: Assess the area’s drainage to ensure that water can flow freely. Proper drainage is crucial to prevent water accumulation and potential damage to the synthetic turf. If necessary, make any adjustments or improvements to the drainage system before moving forward.
- Address any unevenness: If the ground is uneven, you may need to level it before installing the synthetic lawn turf grass carpet. Use a shovel or a garden rake to remove any high spots and fill in any low areas with topsoil. The goal is to have a smooth and even surface for the synthetic turf to be laid on.
By taking the time to measure and prepare the area correctly, you are setting the foundation for a successful installation of synthetic lawn turf grass carpet. Proper preparation ensures that the turf fits perfectly and creates a visually appealing and functional outdoor space.
Once you have measured and prepared the area, you’re ready to move on to the next step—removing existing grass and debris.
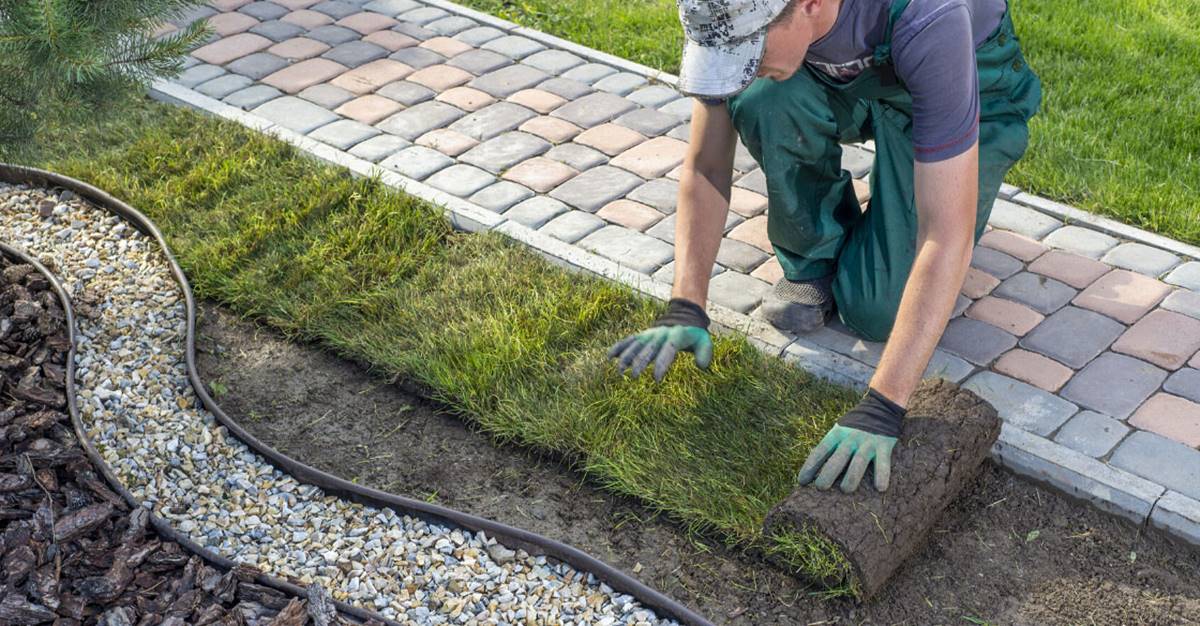
Step 2: Remove Existing Grass and Debris
After measuring and preparing the area for your synthetic lawn turf grass carpet, the next step is to remove any existing grass and debris from the site. This step is essential to create a clean and even surface for the installation of the synthetic turf.
Here’s how you can effectively remove the existing grass and debris:
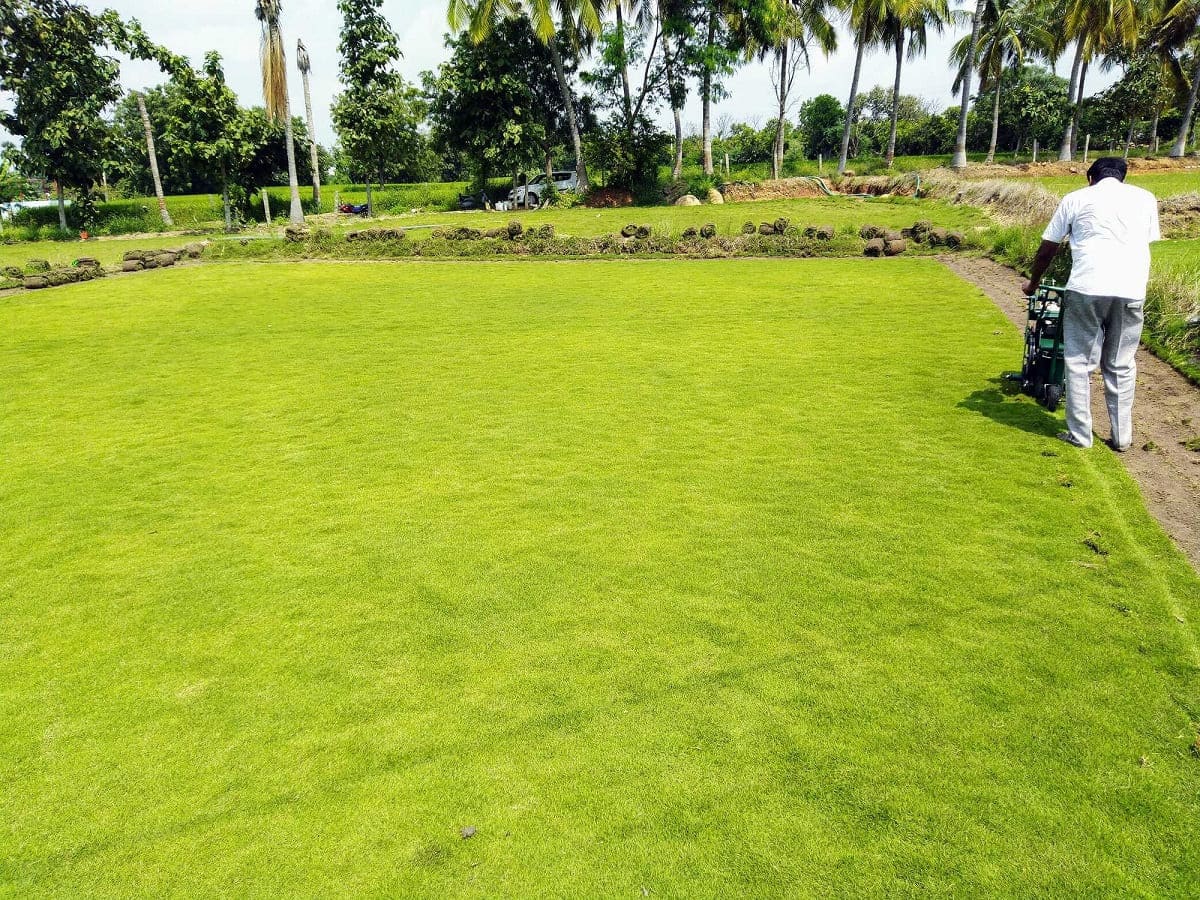
- Mow the lawn: Start by mowing the existing grass as low as possible. Cutting the grass short will make it easier to remove and create a more even surface for the synthetic turf to be laid on.
- Remove the grass: Use a turf cutter or a shovel to remove the remaining grass from the area. Dig down a few inches to ensure that you remove all the roots and grass clumps. Dispose of the grass properly or repurpose it for other gardening projects.
- Clear the debris: Once the grass is removed, carefully inspect the area for any remaining debris such as rocks, twigs, or roots. Remove these items and create a clean and smooth surface.
By removing the existing grass and debris, you’re creating a blank canvas for the installation of your synthetic lawn. This step is crucial to ensure a seamless and professional-looking end result.
Remember, meticulous attention to detail during this step will save you time and effort in the long run. The cleaner and smoother the surface, the easier it will be to lay the synthetic turf in the next steps.
Now that you have successfully removed the existing grass and debris, it’s time to move on to the next step—leveling the ground.
Step 3: Level the Ground
Once you have removed the existing grass and debris, the next step in installing synthetic lawn turf grass carpet is to level the ground. Leveling the ground is crucial to ensure a smooth and even surface for the synthetic turf to be laid on. This step helps prevent any unevenness or bumps that may affect the overall appearance and performance of the turf.
Here’s how you can level the ground effectively:
- Assess the ground: Walk around the area and visually inspect the ground for any dips, depressions, or unevenness. These may have been caused by the removal of the grass or natural settling of the soil over time.
- Add or remove soil: If you notice any low spots or depressions, add topsoil to build up the area. Alternatively, if you come across any high spots, remove excess soil to create a level surface. A garden rake or shovel can be helpful tools for this task.
- Compact the soil: Once the ground is leveled, use a hand tamper or a plate compactor to compact the soil. This helps to create a stable and firm surface for the synthetic turf. Start from one end of the area and work your way to the other end, applying even pressure as you go.
Leveling the ground ensures that your synthetic lawn appears uniform and beautiful. By taking the time to perform this step, you’re setting the foundation for a professional installation and long-lasting synthetic turf.
Remember that a well-leveled ground will not only improve the appearance of the synthetic lawn but also enhance its performance. It provides a solid base for the turf, ensuring proper drainage and stability.
Now that you have successfully leveled the ground, you’re ready to move on to the next step—installing the base layer for your synthetic lawn turf grass carpet.
Step 4: Install the Base Layer
Installing the base layer is an essential step in the installation process of synthetic lawn turf grass carpet. The base layer provides stability, proper drainage, and a solid foundation for the synthetic turf to be laid on. It helps create a level surface and ensures the longevity and performance of your synthetic lawn.
Here’s how you can install the base layer:
- Choose the base material: There are different options for the base material, such as crushed stone, decomposed granite, or a specially formulated base material designed for synthetic turf installations. Choose a base material that suits your specific needs and the requirements of your synthetic turf.
- Spread the base material: Begin by spreading a layer of the chosen base material evenly over the leveled ground. Aim for a thickness of around 2-4 inches, but refer to the specific recommendations provided by the manufacturer of your synthetic turf.
- Compact the base material: Use a hand tamper or a plate compactor to compact the base material. This helps ensure a solid and stable foundation for the synthetic turf. Start from one end of the area and work your way to the other end, applying even pressure as you go. Check for any areas that may need additional compaction.
Installing the base layer is a crucial step as it creates a stable and well-drained surface for your synthetic lawn. It helps prevent the turf from shifting, reduces the risk of unevenness, and improves the overall performance and durability of the synthetic turf.
Remember to follow the manufacturer’s guidelines and recommendations for the base layer material and thickness. This will ensure that you achieve the best results for your specific synthetic lawn turf grass carpet installation.
Now that you have successfully installed the base layer, you’re ready to move on to the next step—compacting the base layer for optimal stability.
Read more: What Are The Synthetic Turf Grass Problems
Step 5: Compact the Base Layer
Compacting the base layer is a crucial step in the installation process of synthetic lawn turf grass carpet. It ensures the stability, firmness, and uniformity of the base material, providing a solid foundation for the synthetic turf to be laid on. Proper compaction helps prevent any shifting or settling of the base layer, ensuring the longevity and performance of your synthetic lawn.
Here’s how you can effectively compact the base layer:
- Select the compaction equipment: Depending on the size of the project, you can choose between a hand tamper or a plate compactor. A hand tamper is suitable for smaller areas, while a plate compactor is more efficient for larger spaces. Make sure to choose the appropriate equipment for your project.
- Start from the outer edges: Begin compacting the base layer from the outer edges of the installation area. Work your way towards the center, applying even pressure as you go. This helps ensure uniform compaction throughout the entire area.
- Overlap each pass: As you compact the base layer, overlap each pass by a few inches to ensure complete coverage and compaction. This helps eliminate any potential weak spots or inconsistencies in the base layer.
- Repeatedly compact the area: Depending on the type of compaction equipment you’re using, you may need to make multiple passes over the entire area. This ensures that the base layer is fully compacted and provides a solid foundation for the synthetic turf.
Proper compaction of the base layer is essential for the overall stability and performance of your synthetic lawn. It helps prevent any settling or shifting of the base material, which could lead to unevenness in the synthetic turf. The more effectively you compact the base layer, the better the end result will be.
Remember to follow the manufacturer’s guidelines and recommendations for compaction procedures, as different base materials may require specific compaction techniques. This will ensure that you achieve optimal stability and performance for your synthetic lawn turf grass carpet installation.
Now that you have successfully compacted the base layer, you’re ready to move on to the next step—laying the synthetic lawn turf grass carpet.
Before installing synthetic lawn turf grass carpet, make sure to properly prepare the area by removing any existing grass, leveling the ground, and adding a layer of compacted base material for stability.
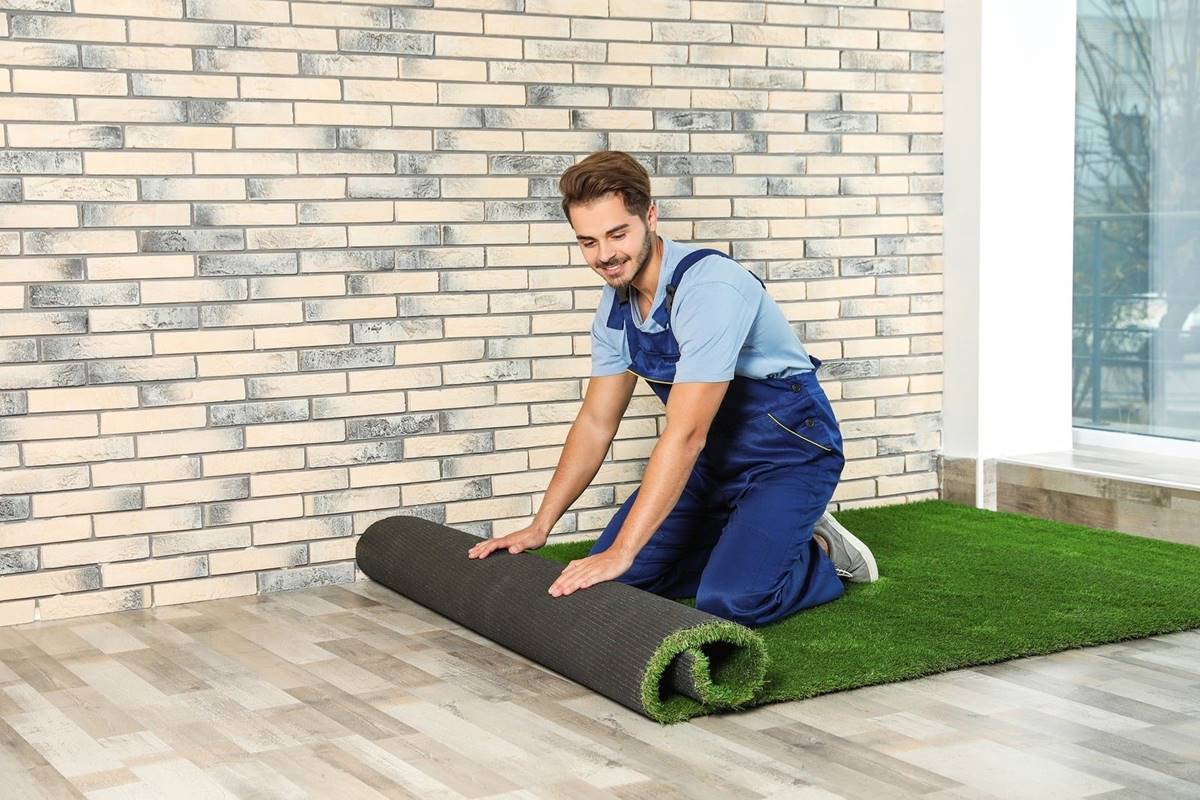
Step 6: Lay the Synthetic Lawn Turf Grass Carpet
This is the exciting step where you get to lay the synthetic lawn turf grass carpet, bringing your outdoor space one step closer to being transformed into a beautiful and low-maintenance oasis. The key to a successful installation is careful planning and attention to detail.
Here’s how you can lay the synthetic lawn turf grass carpet:
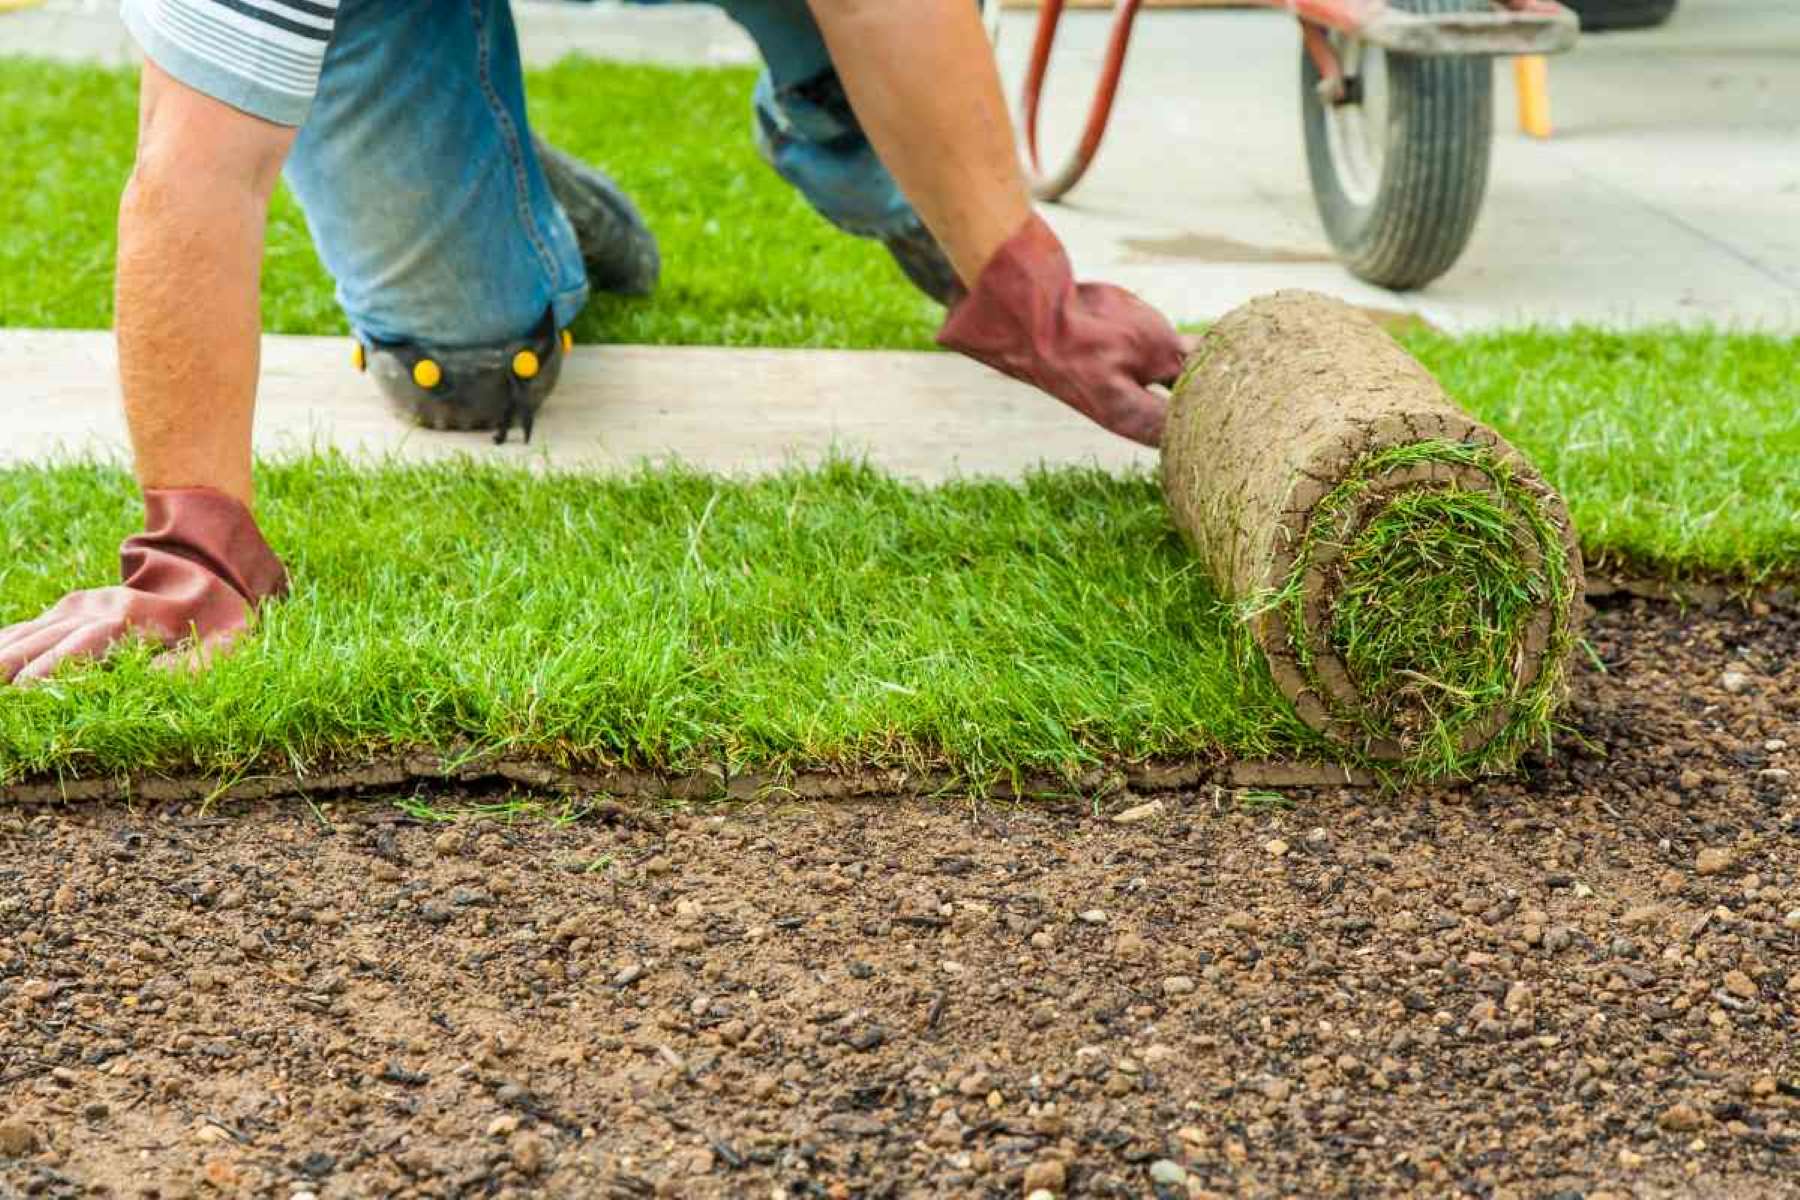
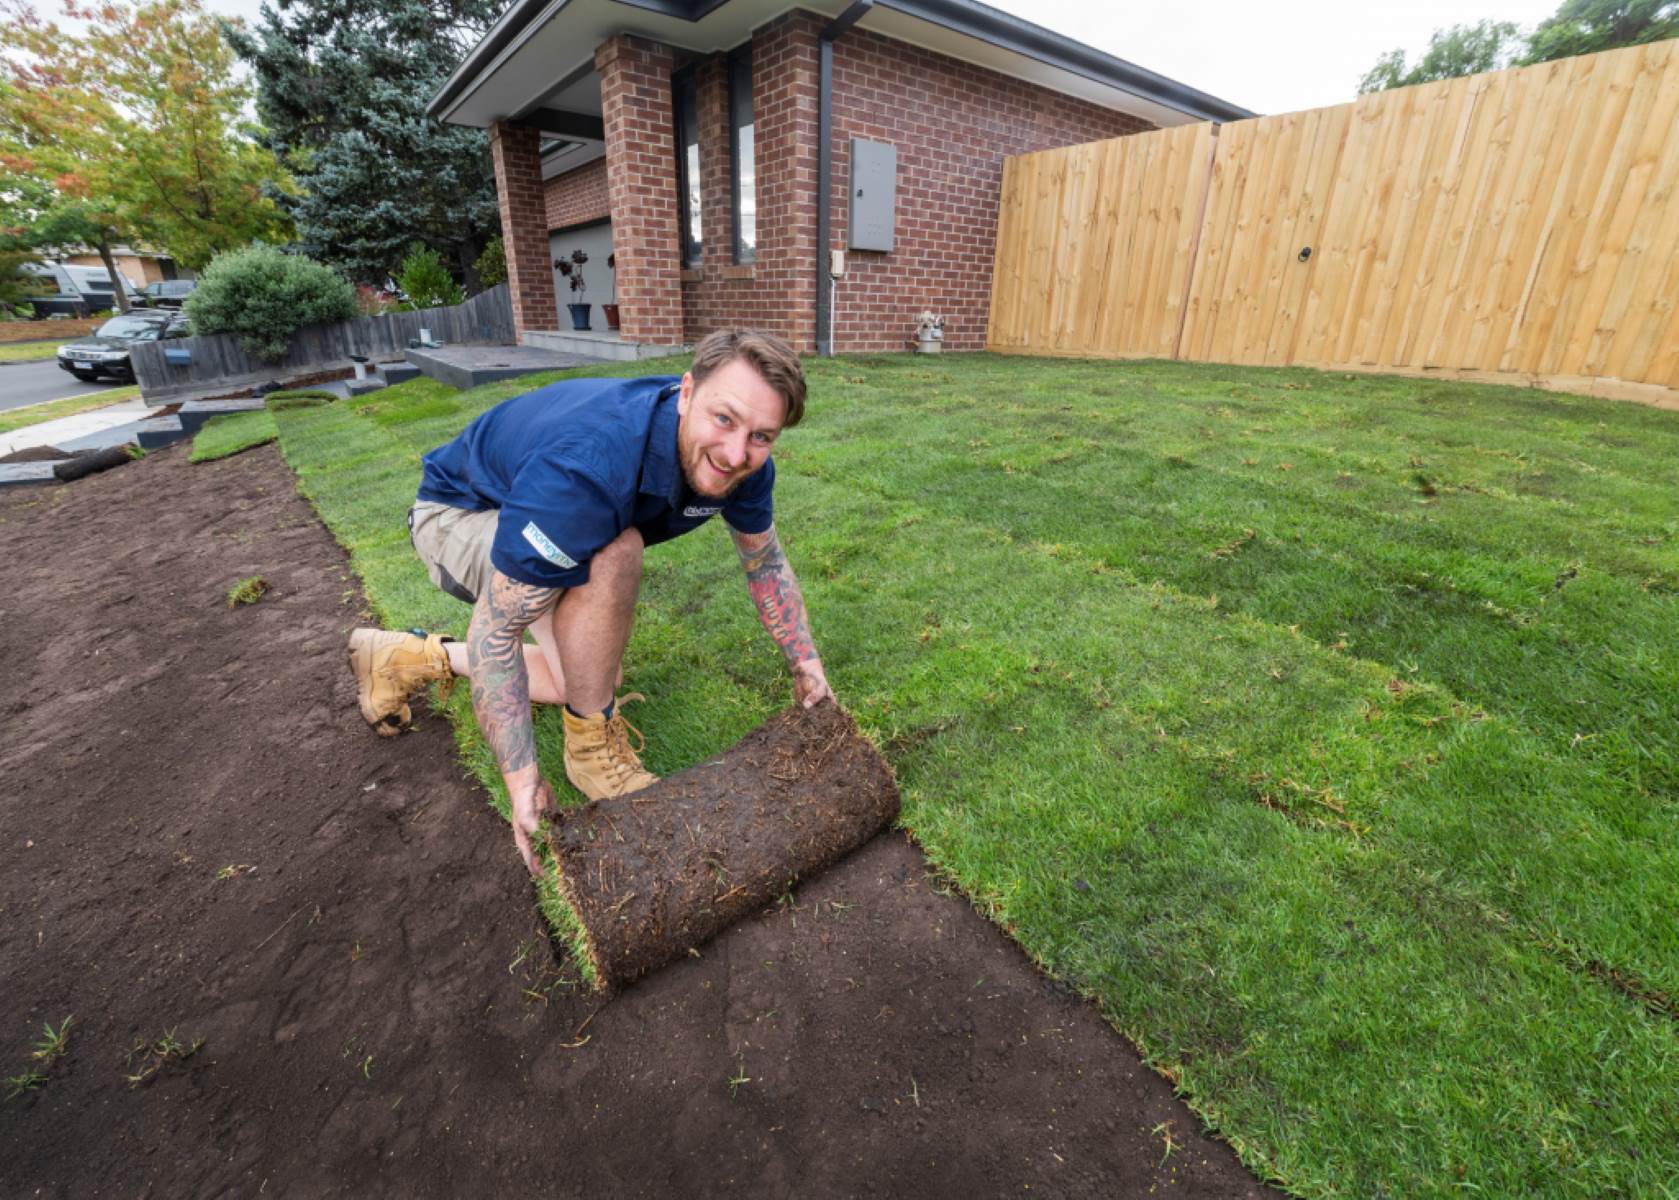
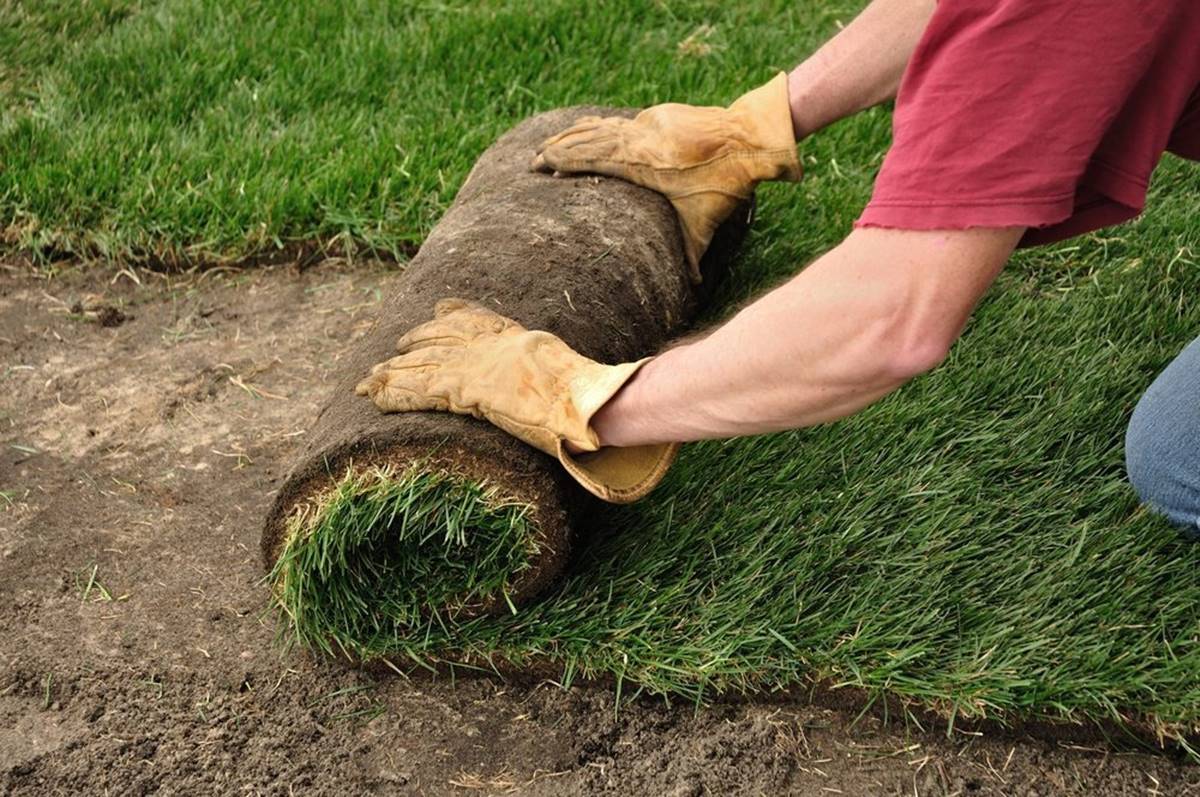
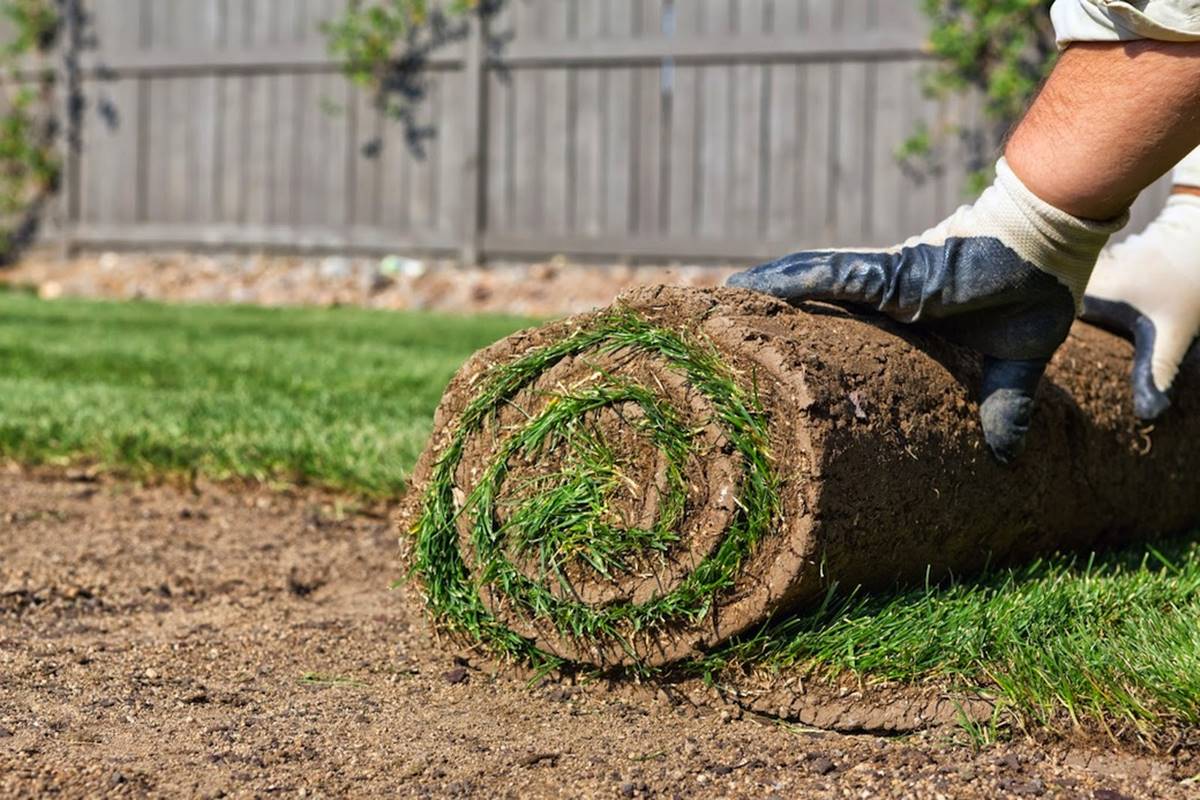
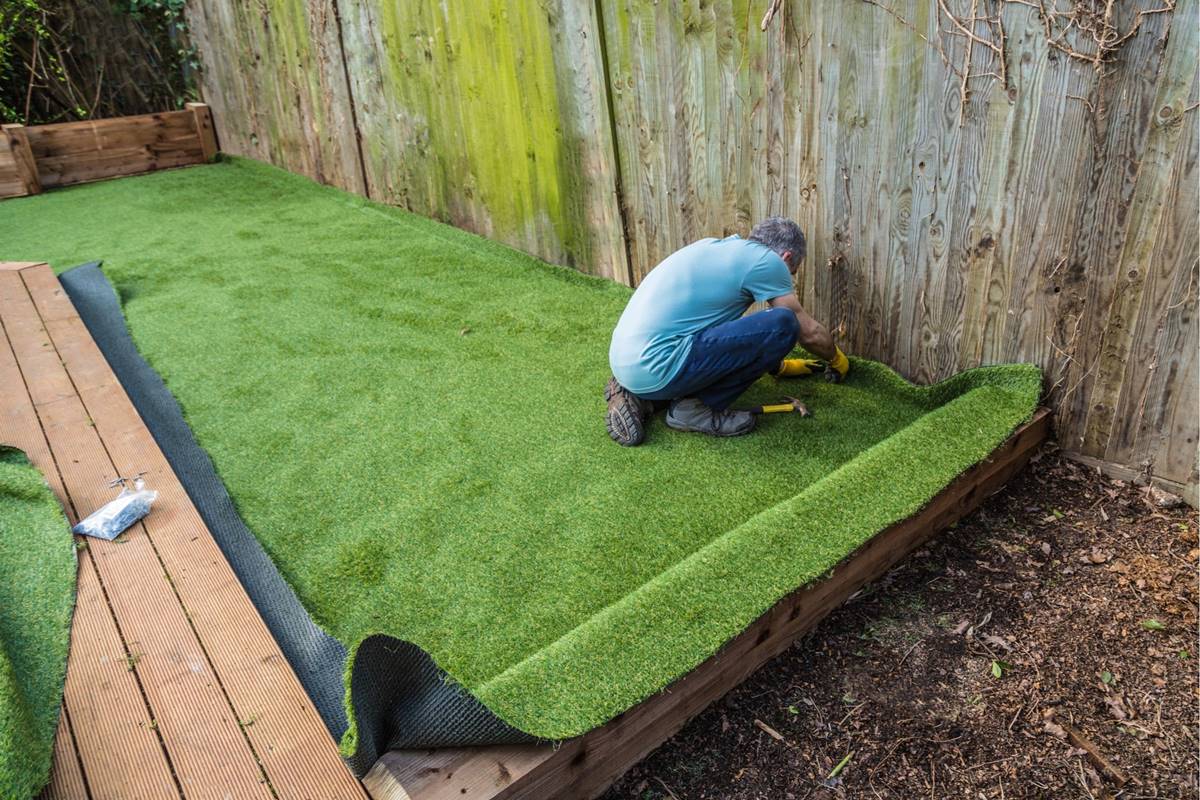
- Roll out the turf: Start by unrolling the synthetic lawn turf grass carpet over the prepared and compacted base layer. Take care to align the edges properly and make adjustments as needed to ensure a neat and seamless appearance.
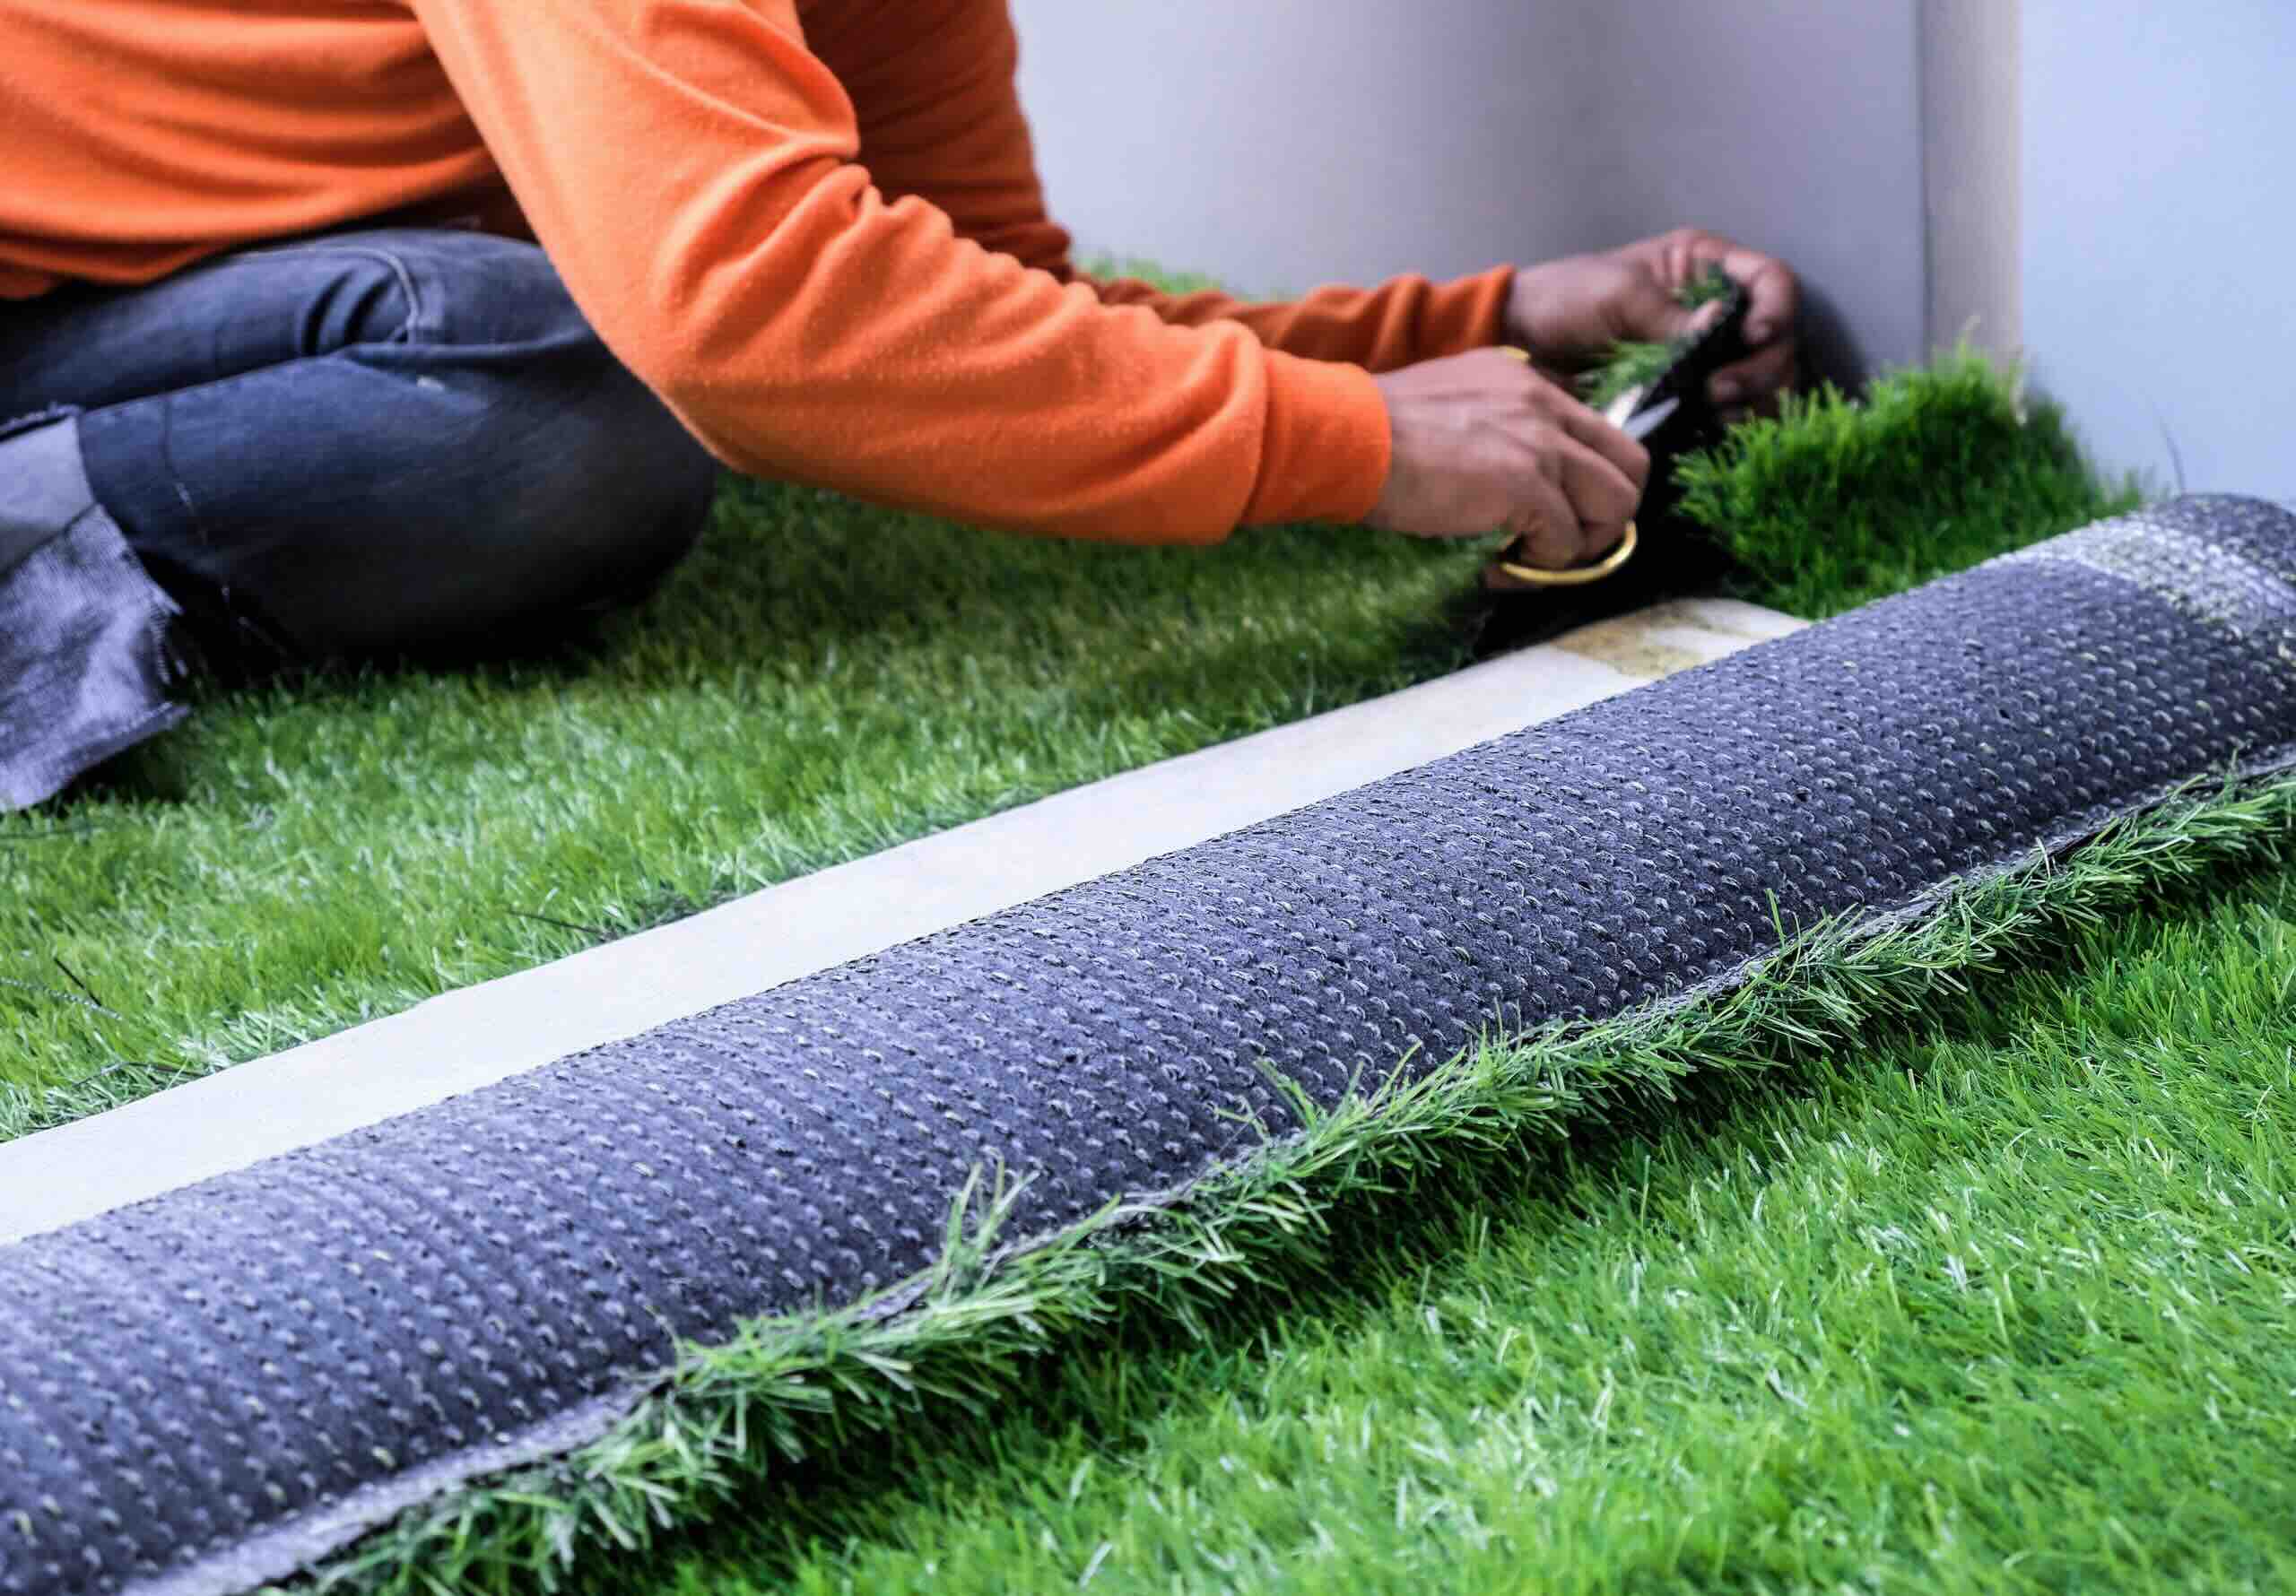
- Trim the edges: Use a sharp utility knife to trim any excess turf along the edges to create clean and defined lines. Take your time during this step to achieve precise cuts and ensure a professional-looking result.
- Butt the edges together: If you have multiple rolls of synthetic turf, butt the edges together without overlapping them. This creates a smooth and seamless transition between the rolls and gives the appearance of a continuous lawn.
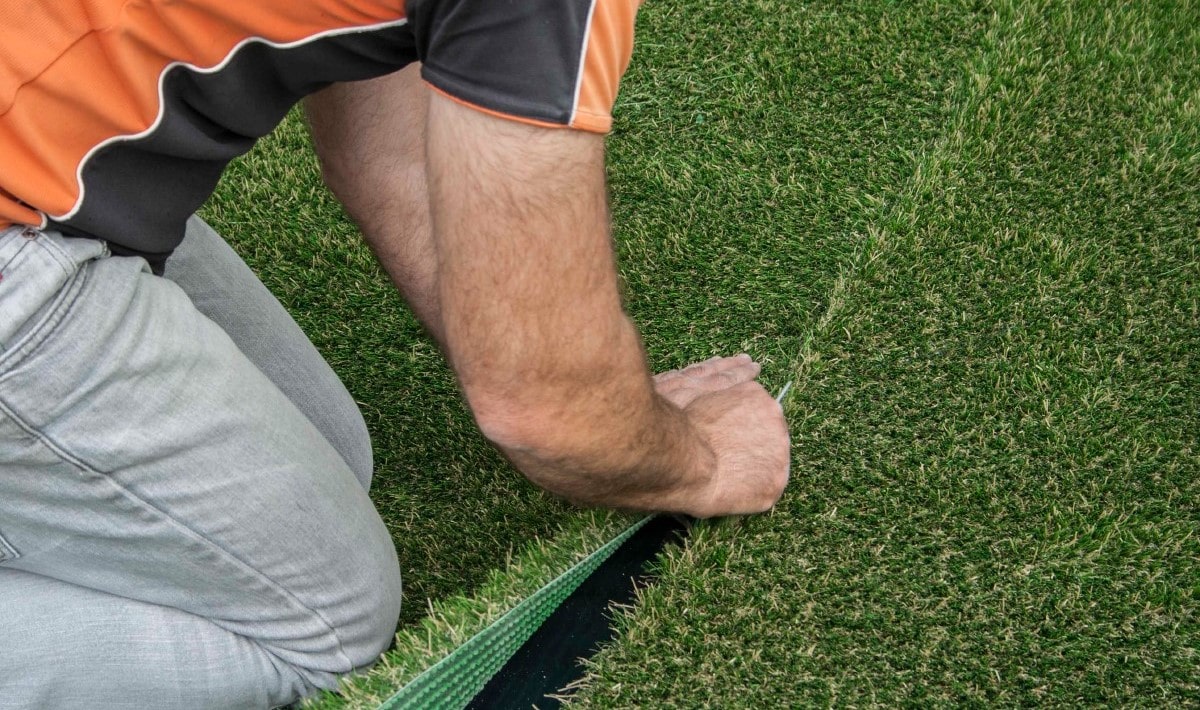
- Secure the turf: While the synthetic turf may be heavy enough to stay in place on its own, it’s a good idea to secure it to the base layer using landscape spikes or adhesive. Follow the manufacturer’s recommendations on the best method for securing the turf.
- Check for evenness: Take a step back and inspect the entire installed turf for any unevenness or wrinkles. Smooth out any imperfections and ensure that the turf is laid flat and taut across the entire area.
Laying the synthetic lawn turf grass carpet requires precision and careful handling to achieve a flawless result. Take your time during this step and make any necessary adjustments to ensure a visually appealing and smooth installation.
Once you have successfully laid the synthetic lawn turf grass carpet, you’re one step closer to enjoying a low-maintenance and green outdoor space. The next step involves trimming and shaping the edges for a polished and finished look.
Step 7: Trim and Shape the Edges
Trimming and shaping the edges of your synthetic lawn turf grass carpet is an important step to achieve a polished and finished look. It helps create clean lines, ensures a neat appearance, and enhances the overall aesthetic of your synthetic lawn.
Here’s how you can effectively trim and shape the edges:
- Mark the desired edge: Use marking spray, chalk, or small stakes to mark the desired edge of your synthetic lawn. This could be along a walkway, garden bed, or any other boundary where you want the turf to end.
- Cut along the marked edge: Carefully cut along the marked edge using a sharp utility knife. Take your time and follow the line accurately to achieve clean and precise cuts.
- Trim excess turf: Once you have cut along the marked edge, trim any excess turf that extends beyond the desired boundary. This ensures that your synthetic lawn fits perfectly within the designated area.
- Shape curved edges: If you have curved edges in your synthetic lawn, use a pair of scissors to carefully shape and trim the turf. Make small, controlled cuts to follow the curve and achieve a smooth and natural-looking edge.
- Secure the edges: To keep the trimmed edges in place, securely anchor them using landscape spikes or adhesive. This helps maintain the desired shape and prevents the edges from lifting or shifting over time.
Trimming and shaping the edges of your synthetic lawn adds that final touch to create a seamless and professional-looking installation. It helps define the boundaries, creates a clean finish, and enhances the overall appearance of your outdoor space.
Take your time during this step to ensure precise cuts and a flawless edge. Remember to step back and evaluate the results as you go to make any necessary adjustments for a visually appealing outcome.
With the edges trimmed and shaped, your synthetic lawn is almost complete. The next step involves securing the turf to ensure its stability and longevity.
Step 8: Secure the Synthetic Lawn
To ensure the stability and longevity of your synthetic lawn, it is important to properly secure it to the base layer. Securing the turf prevents it from shifting, lifting, or causing any tripping hazards, especially in high-traffic areas. Anchoring the turf also helps maintain its desired shape and contributes to a professional-looking installation.
Here’s how you can effectively secure the synthetic lawn:
- Use landscape spikes: Place landscape spikes around the perimeter of the synthetic lawn, ensuring they are evenly spaced. Push the spikes through the turf and into the base layer. This anchors the turf and prevents it from shifting or moving.
- Apply adhesive: If your synthetic lawn manufacturer recommends it, apply adhesive along the edges of the turf where it meets any structures, such as walkways or garden beds. Follow the manufacturer’s instructions for the proper use and application of the adhesive.
- Consider seaming: If you have multiple rolls of synthetic turf, you may need to seam them together to create a seamless appearance. Use turf adhesive and seaming tape according to the manufacturer’s instructions to join the rolls together, ensuring a smooth transition.
Securing the synthetic lawn to the base layer is essential for maintaining its integrity and enhancing its appearance. Properly anchored turf can withstand heavy foot traffic, weather elements, and other external factors, providing you with a long-lasting and visually appealing outdoor space.
Remember to follow the manufacturer’s guidelines and recommendations for securing the synthetic lawn. Different turf products may have specific instructions or requirements for anchoring and adhesion. By doing so, you can ensure the best results and optimal performance of your synthetic lawn turf grass carpet.
Now that your synthetic lawn is securely in place, you may consider adding infill material for added stability and a natural look, which leads us to the next step—spreading infill material.
Read more: How To Remove Lawn Turf
Step 9: Spread Infill Material (Optional)
Infill material is an optional component that can be added to your synthetic lawn turf grass carpet installation. While not all synthetic lawns require infill, it can provide several benefits such as improved durability, stability, and a more natural appearance.
Here’s how you can effectively spread infill material, if applicable:
- Select the right infill material: There are different types of infill materials available, such as silica sand, rubber granules, or a combination of both. Consult with your synthetic turf manufacturer to determine the most suitable infill material for your specific lawn.
- Distribute the infill material evenly: Spread the infill material over the entire synthetic lawn using a spreader or by hand. Ensure that it is distributed evenly to achieve a consistent appearance.
- Brush the infill material into the turf: Use a stiff brush or a power broom to brush the infill material into the synthetic lawn. This helps the infill settle down and interlock with the fibers, providing stability and support to the turf.
- Check and adjust the infill level: After spreading and brushing the infill material, check the level of the infill and adjust as needed. The recommended infill level can vary, so refer to the manufacturer’s instructions for the proper amount of infill for your specific turf product.
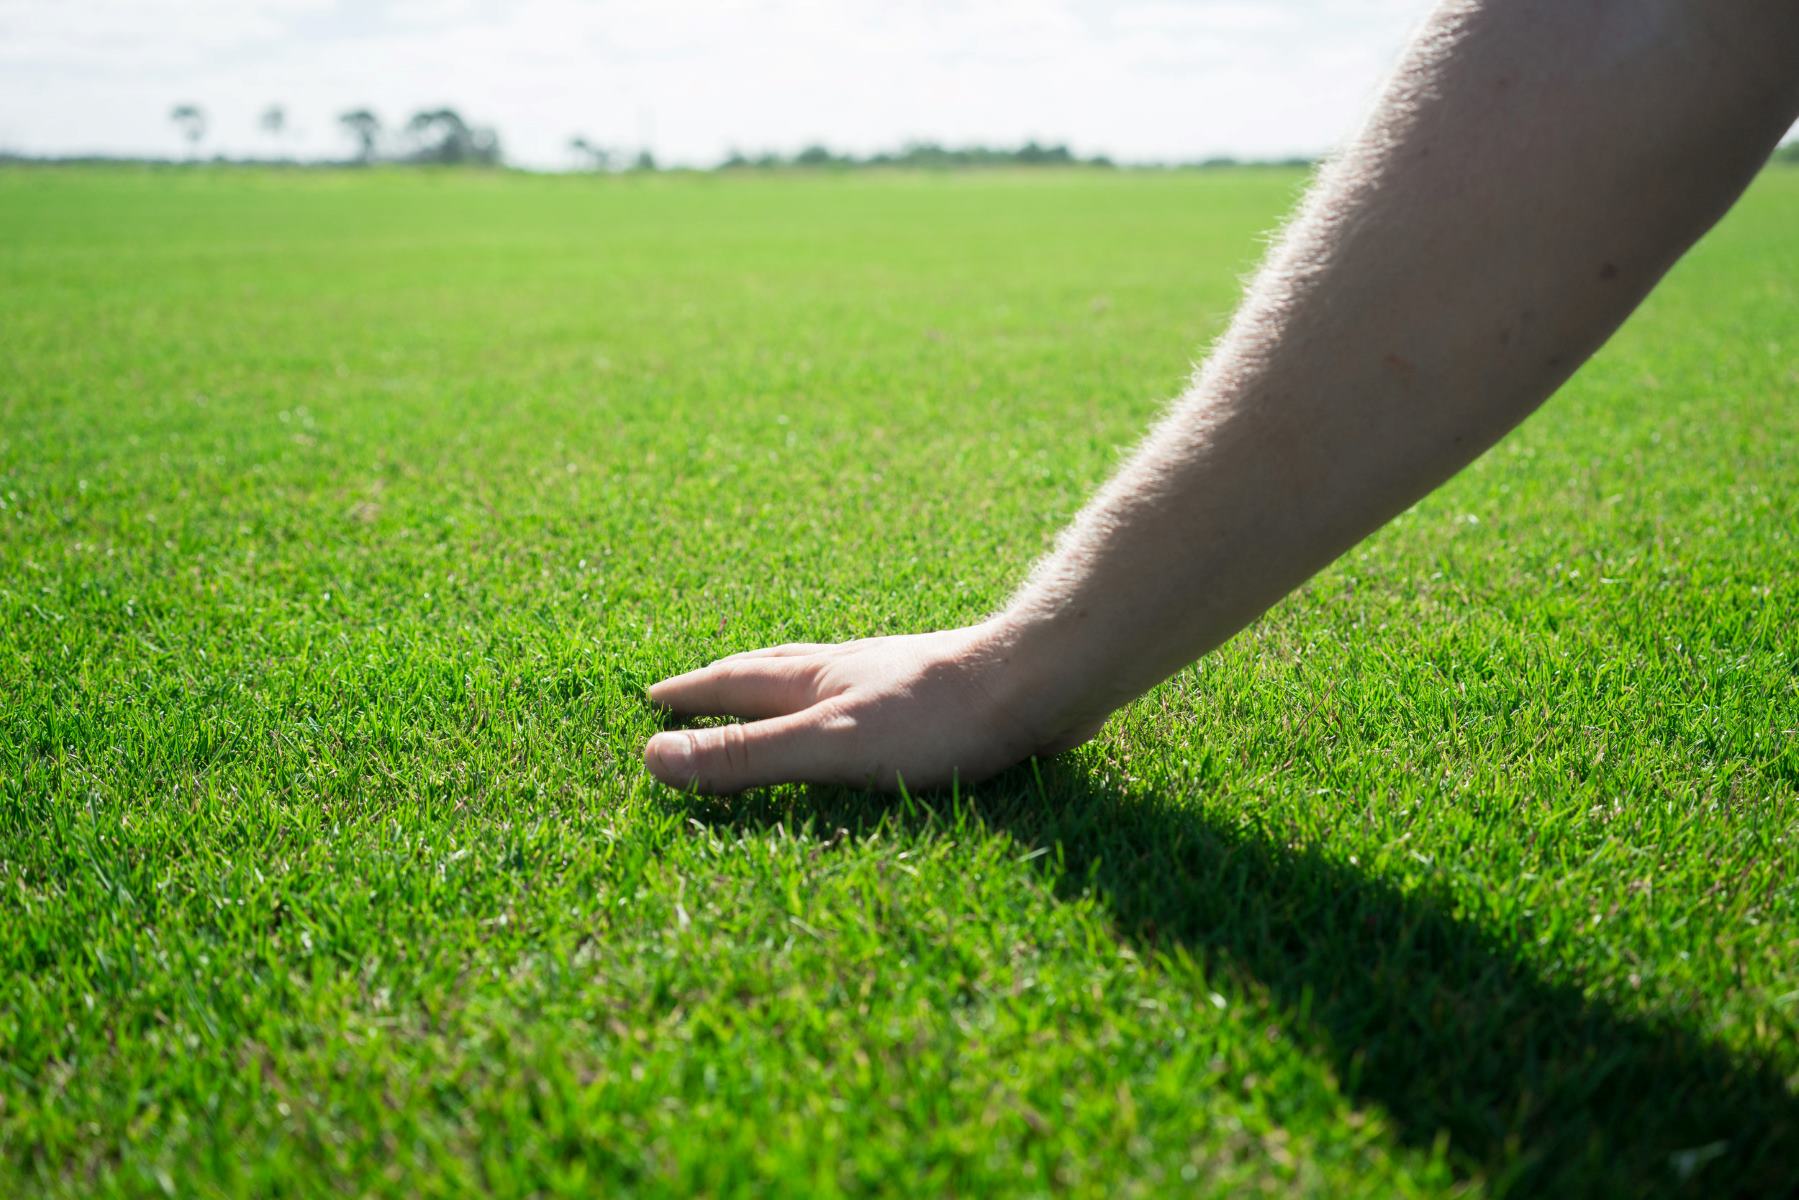
Spreading infill material can enhance the performance and appearance of your synthetic lawn. It helps weigh down the turf, prevents fibers from matting, provides cushioning for foot traffic, and allows for proper water drainage. Additionally, infill can give the synthetic lawn a more realistic look by simulating the feel and movement of natural grass.
However, it’s important to note that not all synthetic lawns require infill. Some types of turf are designed to be used without it. Consult with your synthetic lawn manufacturer to determine whether infill is necessary for your specific turf product.
Now that you have installed and optionally spread infill material, the final step involves brushing and maintaining your synthetic lawn to keep it looking its best for years to come.
Step 10: Brush and Maintain the Synthetic Lawn
The last step in the installation process of your synthetic lawn turf grass carpet is to properly brush and maintain it. Regular maintenance is essential to keep your synthetic lawn looking fresh, lush, and inviting. Fortunately, maintaining synthetic turf requires significantly less effort compared to natural grass.
Here’s how you can effectively brush and maintain your synthetic lawn:
- Brush the fibers: Use a stiff brush or a power broom to brush the fibers of the synthetic lawn regularly. This helps keep the blades upright, prevents matting, and maintains a natural appearance. Brushing is particularly important in high-traffic areas to restore the turf’s resilience.
- Remove debris: Regularly remove leaves, twigs, and other debris that may accumulate on the surface of the synthetic lawn. Use a leaf blower or a rake to gently remove the debris without damaging the turf fibers or infill material.
- Occasionally rinse with water: Though synthetic turf does not require watering like natural grass, it can benefit from an occasional rinsing to remove dust and dirt. Use a hose or sprinkler to lightly spray the turf, ensuring that the water drains properly through the turf’s drainage system.
- Address stains and spills: Accidental spills or stains can occur on your synthetic lawn. Quickly address them by blotting with a cloth or paper towel. If necessary, use a mild detergent mixed with water to gently clean the affected area.
- Inspect for damage: Regularly inspect your synthetic lawn for any signs of damage, such as tears, loose seams, or worn-out areas. Promptly address any issues to prevent further damage and ensure the longevity of your synthetic turf.
By following these maintenance practices, you can ensure that your synthetic lawn remains vibrant and appealing for many years. Regular brushing, debris removal, and occasional rinsing will help preserve the turf’s appearance and optimize its performance.
Additionally, refer to the specific maintenance guidelines provided by the manufacturer of your synthetic turf. They may have additional recommendations or specific instructions tailored to your synthetic lawn product.
With proper brushing and maintenance, your synthetic lawn will provide you with a lush and worry-free outdoor space, ready to be enjoyed year-round.
Congratulations! You have now completed all the steps necessary to install and maintain your synthetic lawn turf grass carpet. Sit back, relax, and enjoy your beautiful and low-maintenance oasis.
Remember, if you have any specific questions or concerns about your synthetic lawn, consult with a professional or the manufacturer for guidance.
Conclusion
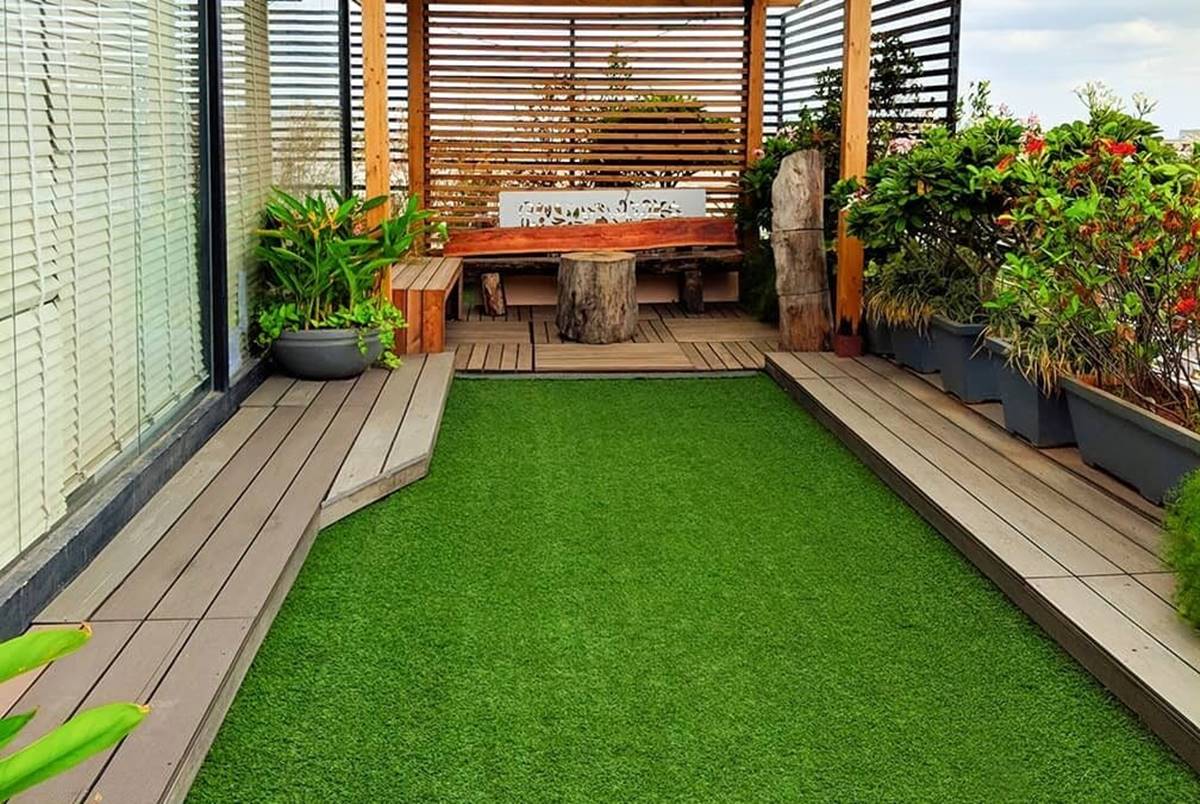
Congratulations on successfully installing your synthetic lawn turf grass carpet! By following the step-by-step process outlined in this guide, you have created a beautiful and low-maintenance outdoor space that will stay green and vibrant all year round. With proper installation and regular maintenance, your synthetic lawn will provide you with years of enjoyment and a hassle-free alternative to natural grass.
Installing synthetic lawn turf offers numerous advantages, including reduced maintenance time and costs, improved durability, and an evergreen appearance. Synthetic turf technology has come a long way, providing a realistic and natural-looking alternative to natural grass. Additionally, the customizable nature of synthetic turf allows you to create the perfect outdoor space tailored to your specific preferences and needs.
Throughout the installation process, you measured and prepared the area, removed existing grass and debris, leveled the ground, installed the base layer, compacted it for stability, laid the synthetic lawn turf grass carpet, trimmed and shaped the edges, secured the turf, spread infill material if needed, and finally, brushed and maintained the synthetic lawn.
Remember, regular maintenance is key to keeping your synthetic lawn looking its best. Brushing the fibers, removing debris, occasional rinsing, addressing stains or spills promptly, and inspecting for damage are essential tasks to ensure the longevity and aesthetics of your synthetic lawn.
By opting for synthetic turf, you’ve made an environmentally-friendly choice as well. Synthetic lawns conserve water, eliminate the need for harmful chemical pesticides and fertilizers, and reduce carbon emissions associated with lawn equipment maintenance.
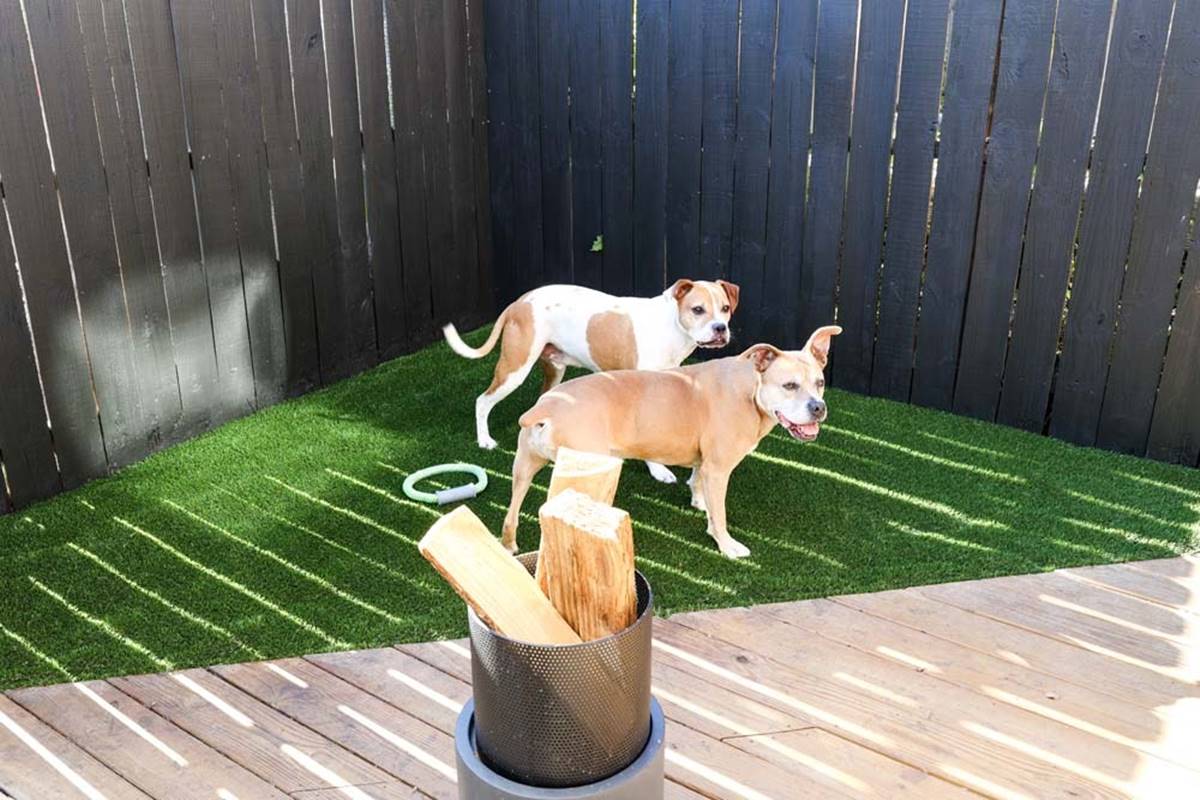
Whether you’ve installed a synthetic lawn in a small backyard, a sprawling garden, or a commercial space, the result is a beautiful and functional outdoor area that requires minimal upkeep, allowing you to spend more time enjoying your outdoor activities.
We hope that this comprehensive guide has provided you with the knowledge and confidence to successfully install and maintain your synthetic lawn. Remember, if you have any specific questions or concerns, consult with a professional or the manufacturer for guidance.
Now, sit back, relax, and revel in the beauty of your new synthetic lawn—the perfect retreat for leisure, play, and connection with nature.
Frequently Asked Questions about How To Install Synthetic Lawn Turf Grass Carpet
Was this page helpful?
At Storables.com, we guarantee accurate and reliable information. Our content, validated by Expert Board Contributors, is crafted following stringent Editorial Policies. We're committed to providing you with well-researched, expert-backed insights for all your informational needs.
0 thoughts on “How To Install Synthetic Lawn Turf Grass Carpet”