Home>Gardening & Outdoor>Garden Tools & Equipment>How To Clean A Lawnmower Carburetor
Garden Tools & Equipment
How To Clean A Lawnmower Carburetor
Modified: August 16, 2024
Learn how to effectively clean a lawnmower carburetor with our expert guide. Keep your garden tools and equipment in top condition for a pristine lawn.
(Many of the links in this article redirect to a specific reviewed product. Your purchase of these products through affiliate links helps to generate commission for Storables.com, at no extra cost. Learn more)
Introduction
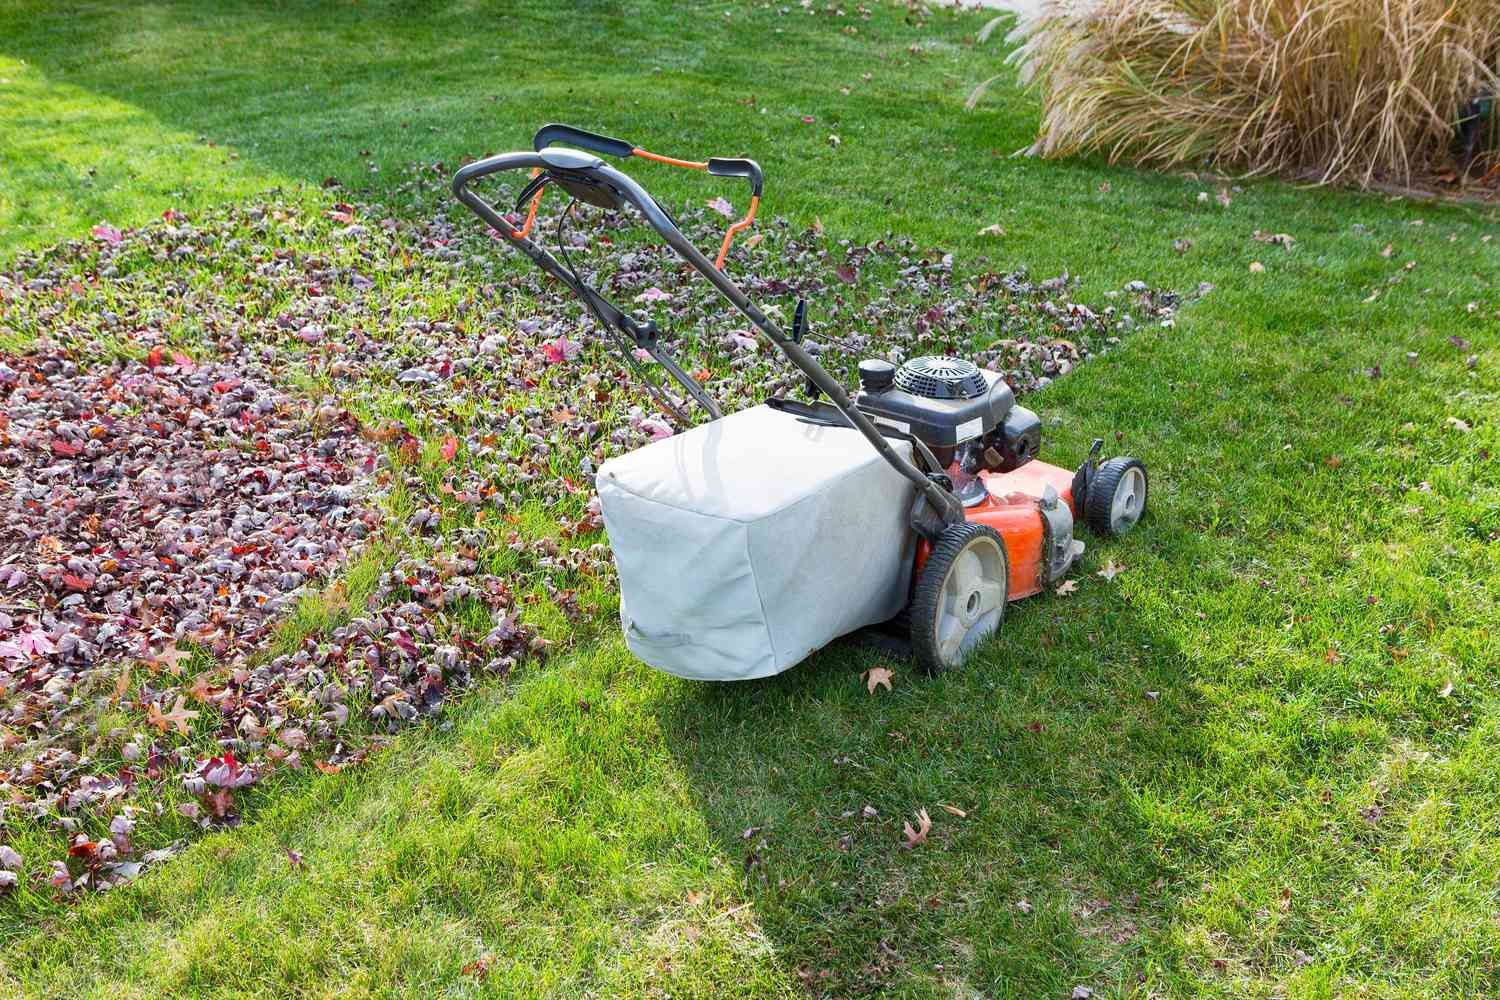
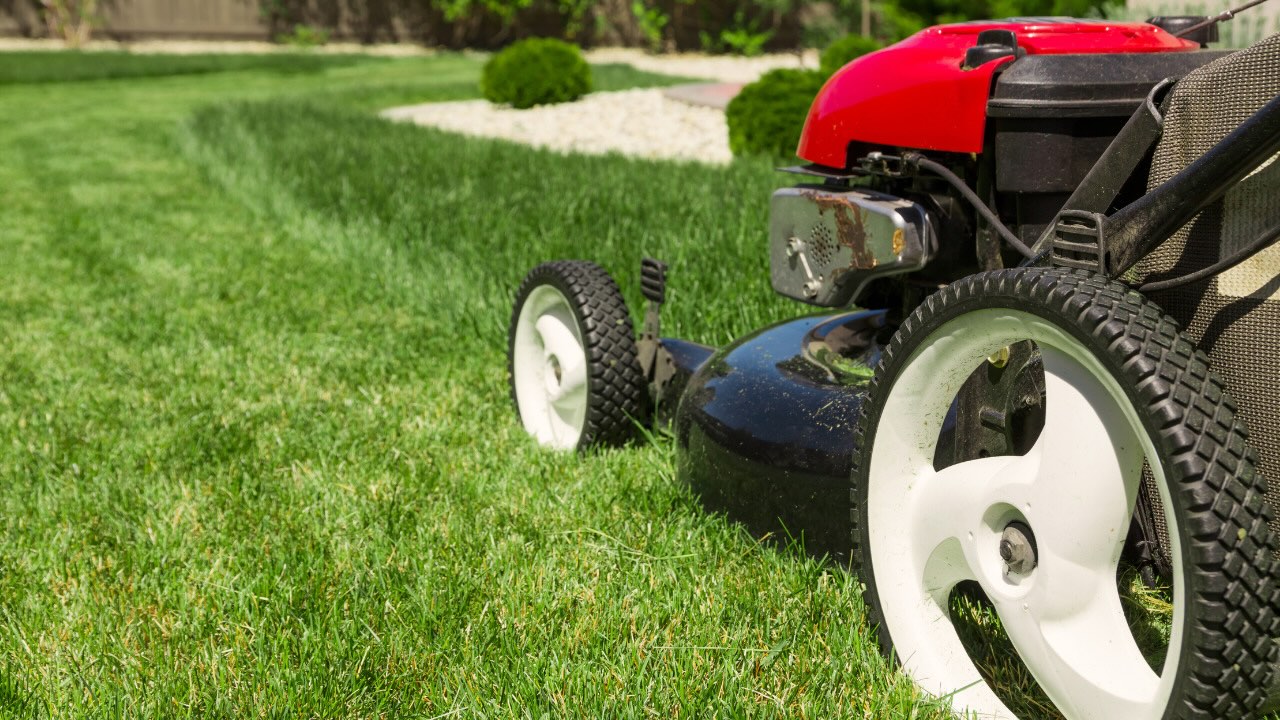
Welcome to the world of lawn care, where the hum of a lawnmower and the scent of freshly cut grass create the soundtrack and perfume of summer. However, to keep your lawnmower running smoothly, it’s essential to maintain its various components, including the carburetor. The carburetor plays a crucial role in the engine’s performance by mixing air and fuel in the proper ratio for combustion. Over time, it can become clogged with debris and varnish, leading to engine performance issues. In this guide, we’ll delve into the process of cleaning a lawnmower carburetor, equipping you with the knowledge and confidence to tackle this essential maintenance task.
Whether you’re a seasoned lawn care enthusiast or a novice homeowner looking to maintain your outdoor equipment, understanding the inner workings of a lawnmower carburetor and how to clean it will help you keep your machine in top condition. By following the steps outlined in this guide, you can ensure that your lawnmower continues to operate efficiently, promoting a well-manicured lawn and a satisfying mowing experience.
Key Takeaways:
- Regularly cleaning and maintaining your lawnmower’s carburetor is essential for ensuring smooth engine performance, preventing issues like difficult starting, reduced power output, and stalling, and promoting a satisfying mowing experience.
- Prioritizing safety, methodically disassembling, meticulously cleaning, and carefully reassembling the carburetor are crucial steps in maintaining your lawnmower’s optimal performance and longevity.
Read more: Where Is The Carburetor On A Lawnmower
Understanding the Carburetor
Before delving into the cleaning process, it’s beneficial to grasp the fundamental role of the carburetor in the operation of a lawnmower. The carburetor is a vital component responsible for the proper mixture of air and fuel for combustion within the engine. This process is essential for generating the power required to propel the lawnmower’s cutting blades and move the machine across the lawn.
Traditional lawnmower carburetors operate based on the principle of air suction. As air flows into the carburetor, it mixes with fuel from the gas tank, creating a combustible mixture. This mixture is then drawn into the engine’s cylinders, where it is ignited by the spark plug, ultimately driving the piston and powering the lawnmower.
Understanding the carburetor’s function is crucial for recognizing the symptoms of a dirty or clogged carburetor. When the carburetor becomes obstructed with dirt, grime, or varnish buildup, it can disrupt the air-fuel mixture, leading to engine performance issues. These issues may manifest as rough idling, difficulty starting the engine, or reduced power output during operation. By familiarizing yourself with these symptoms, you can proactively address carburetor cleanliness to maintain optimal lawnmower performance.
Moreover, comprehending the carburetor’s anatomy, including its various components such as the float bowl, needle valve, and jets, provides insight into the cleaning process. Each part plays a specific role in regulating the fuel flow and air mixture, underscoring the importance of thorough and meticulous cleaning to ensure the carburetor functions optimally.
Signs of a Dirty Carburetor
Recognizing the signs of a dirty or clogged carburetor is crucial for maintaining the performance of your lawnmower. Several indicators may suggest that the carburetor requires cleaning to restore optimal functionality.
- Difficult Starting: A dirty carburetor can impede the proper fuel-air mixture, making it challenging to start the lawnmower engine. If you find yourself repeatedly pulling the starter cord without success, a dirty carburetor could be the culprit.
- Uneven Idling: When the engine idles roughly or inconsistently, it may indicate an irregular air-fuel mixture due to a dirty carburetor. This can lead to erratic engine performance and hinder smooth operation.
- Reduced Power Output: If your lawnmower struggles to maintain consistent power during operation, it could be a result of a compromised carburetor. A dirty carburetor may disrupt the engine’s ability to generate the necessary power for cutting through dense grass or navigating challenging terrain.
- Stalling: An excessively dirty carburetor can cause the engine to stall during operation. This sudden loss of power can be frustrating and may indicate the need for thorough carburetor cleaning.
- Black Exhaust Smoke: When the lawnmower emits black exhaust smoke, it could signify an overly rich fuel mixture, potentially stemming from a dirty carburetor. Addressing the carburetor’s cleanliness can help rectify this issue and promote cleaner engine operation.
By remaining attentive to these signs, you can promptly address carburetor cleanliness to maintain your lawnmower’s consistent and reliable performance. Regular inspection and cleaning of the carburetor can prevent these issues from arising and ensure that your lawnmower operates at its best, allowing you to achieve pristine lawn maintenance results with ease.
Tools and Materials Needed
Before embarking on the carburetor cleaning process, it’s essential to gather the necessary tools and materials to facilitate a thorough and effective maintenance procedure. By ensuring that you have the following items on hand, you can streamline the cleaning process and achieve optimal results.
Tools:
- Screwdriver Set: A set of screwdrivers, including flathead and Phillips head varieties, will enable you to disassemble and reassemble the carburetor with precision.
- Carburetor Cleaner: A high-quality carburetor cleaning solution is essential for effectively removing varnish, dirt, and grime from the carburetor's components.
- Compressed Air: Utilizing compressed air can aid in dislodging stubborn debris from intricate carburetor passages and channels.
- Safety Gloves: Durable gloves will protect your hands from the cleaning solution and any sharp edges on the carburetor components.
- Safety Goggles: Safeguard your eyes with protective goggles to prevent any cleaning solution or debris from coming into contact with them during the cleaning process.
- Clean Cloth or Paper Towels: These are essential for wiping down components and ensuring a thorough cleaning of the carburetor.
Read more: How To Clean A Lawnmower
Materials:
- Fuel Stabilizer: Adding a fuel stabilizer to the gas tank can help prevent fuel degradation and varnish buildup, ultimately reducing the likelihood of carburetor issues in the future.
- Replacement Gaskets (if necessary): Inspect the carburetor gaskets, and if they show signs of wear or damage during disassembly, having replacements on hand will facilitate a seamless reassembly process.
By ensuring that you have these tools and materials readily available, you can approach the carburetor cleaning process with confidence, knowing that you are equipped to address any buildup or debris that may be affecting your lawnmower’s performance. This proactive approach to maintenance will contribute to the longevity and optimal operation of your lawnmower, allowing you to enjoy a well-maintained lawn season after season.
Step 1: Safety Precautions
Prior to initiating the carburetor cleaning process, it is essential to prioritize safety to prevent any potential accidents or injuries. By adhering to the following safety precautions, you can safeguard yourself and ensure a secure working environment while addressing the maintenance needs of your lawnmower.
1. Work in a Well-Ventilated Area: Choose a spacious and well-ventilated location for cleaning the carburetor. Adequate ventilation will help disperse any fumes from the cleaning solution and prevent their accumulation in the workspace.
2. Allow the Engine to Cool: Before handling the lawnmower or carburetor, ensure that the engine has fully cooled down. Operating on a cool engine reduces the risk of accidental burns and allows for safe manipulation of the carburetor components.
3. Wear Protective Gear: Equip yourself with safety gloves and goggles to shield your hands and eyes from cleaning solution splashes and potential debris during the disassembly and cleaning process. This protective gear will mitigate the risk of skin irritation or injury.
4. Disconnect the Spark Plug: To prevent accidental engine ignition, disconnect the spark plug wire from the spark plug before commencing any work on the carburetor. This precaution ensures that the engine cannot start during the cleaning process.
5. Secure the Fuel Tank: Prior to removing the carburetor, ensure that the fuel tank is securely capped to prevent any spills or leaks. This measure minimizes the risk of flammable fuel coming into contact with the cleaning solution or creating a fire hazard.
6. Exercise Caution with Cleaning Solution: Handle the carburetor cleaning solution with care, following the manufacturer’s instructions for proper usage and disposal. Avoid direct contact with the skin or eyes and use the solution in a well-ventilated area to mitigate any potential health risks.
By conscientiously observing these safety precautions, you can create a secure and controlled environment for cleaning the lawnmower carburetor. Prioritizing safety not only protects you from potential hazards but also ensures a focused and effective cleaning process, allowing you to maintain your lawnmower with confidence and peace of mind.
Step 2: Removing the Carburetor
Before delving into the intricacies of cleaning the carburetor, it is necessary to carefully remove the component from the lawnmower. This process allows for thorough access to the carburetor’s internal components, facilitating comprehensive cleaning and maintenance. Follow these steps to safely and effectively remove the carburetor from your lawnmower:
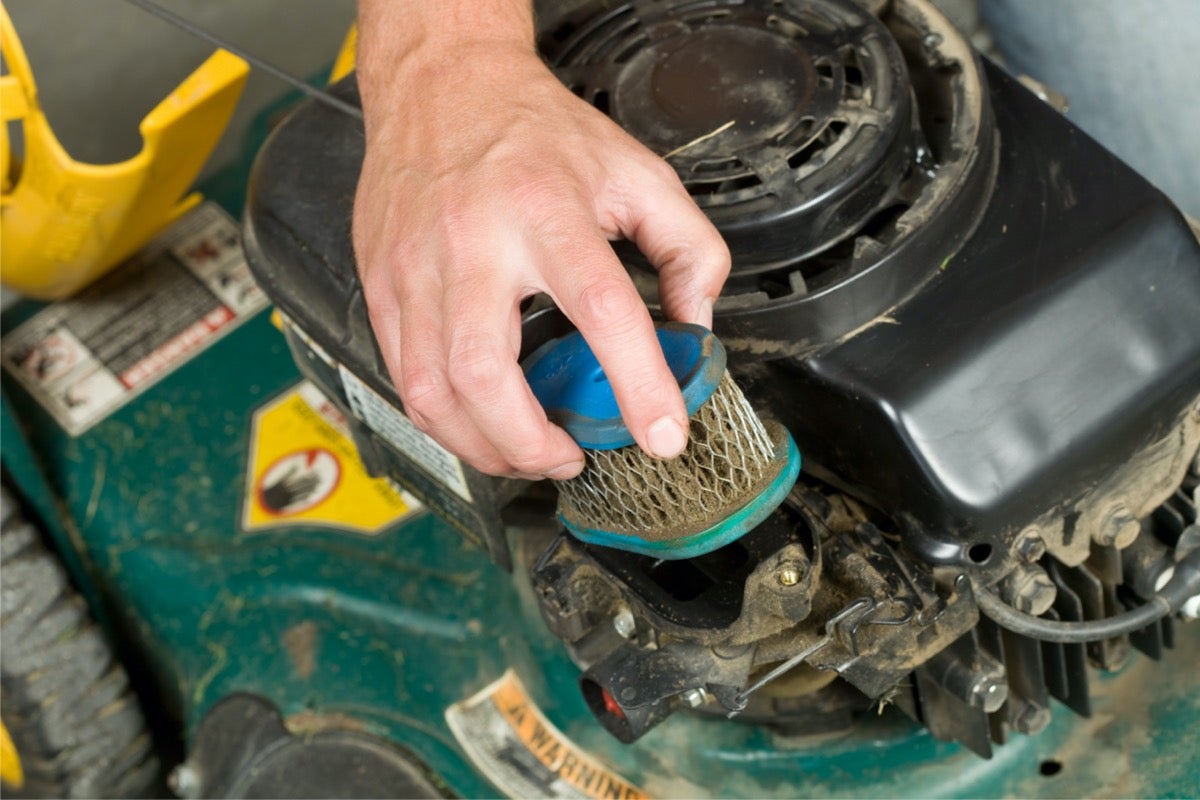
1. Locate the Carburetor: Familiarize yourself with the lawnmower’s engine layout and identify the position of the carburetor. It is typically situated near the air filter and fuel line, and its appearance may vary based on the lawnmower model and type of engine.
2. Disconnect the Linkages: Carefully disconnect any linkages or cables attached to the carburetor, such as the throttle linkage or choke cable. Take note of their positions and connections to facilitate reassembly later.
3. Remove the Mounting Bolts: Using an appropriate-sized wrench or socket, loosen and remove the mounting bolts that secure the carburetor to the engine. Keep track of the bolts and any accompanying washers to ensure they are reinstalled correctly.
4. Detach the Fuel Line: Prior to fully removing the carburetor, detach the fuel line connected to the carburetor’s inlet. Be prepared for any residual fuel in the line and have a suitable container or absorbent materials on hand to manage any spillage.
5. Extract the Carburetor: Gently maneuver the carburetor out of its position, taking care not to damage any surrounding components or the delicate linkages. Ensure a clear and unobstructed pathway for removing the carburetor from the engine.
6. Inspect the Gaskets: As the carburetor is removed, inspect the condition of any gaskets or seals present. If they show signs of wear, tearing, or damage, plan to replace them during the reassembly process to prevent potential air or fuel leaks.
By methodically following these steps, you can safely and effectively remove the carburetor from your lawnmower, setting the stage for a thorough cleaning and inspection. With the carburetor in hand, you can proceed to disassemble and clean its components, addressing any buildup or debris that may be affecting its performance.
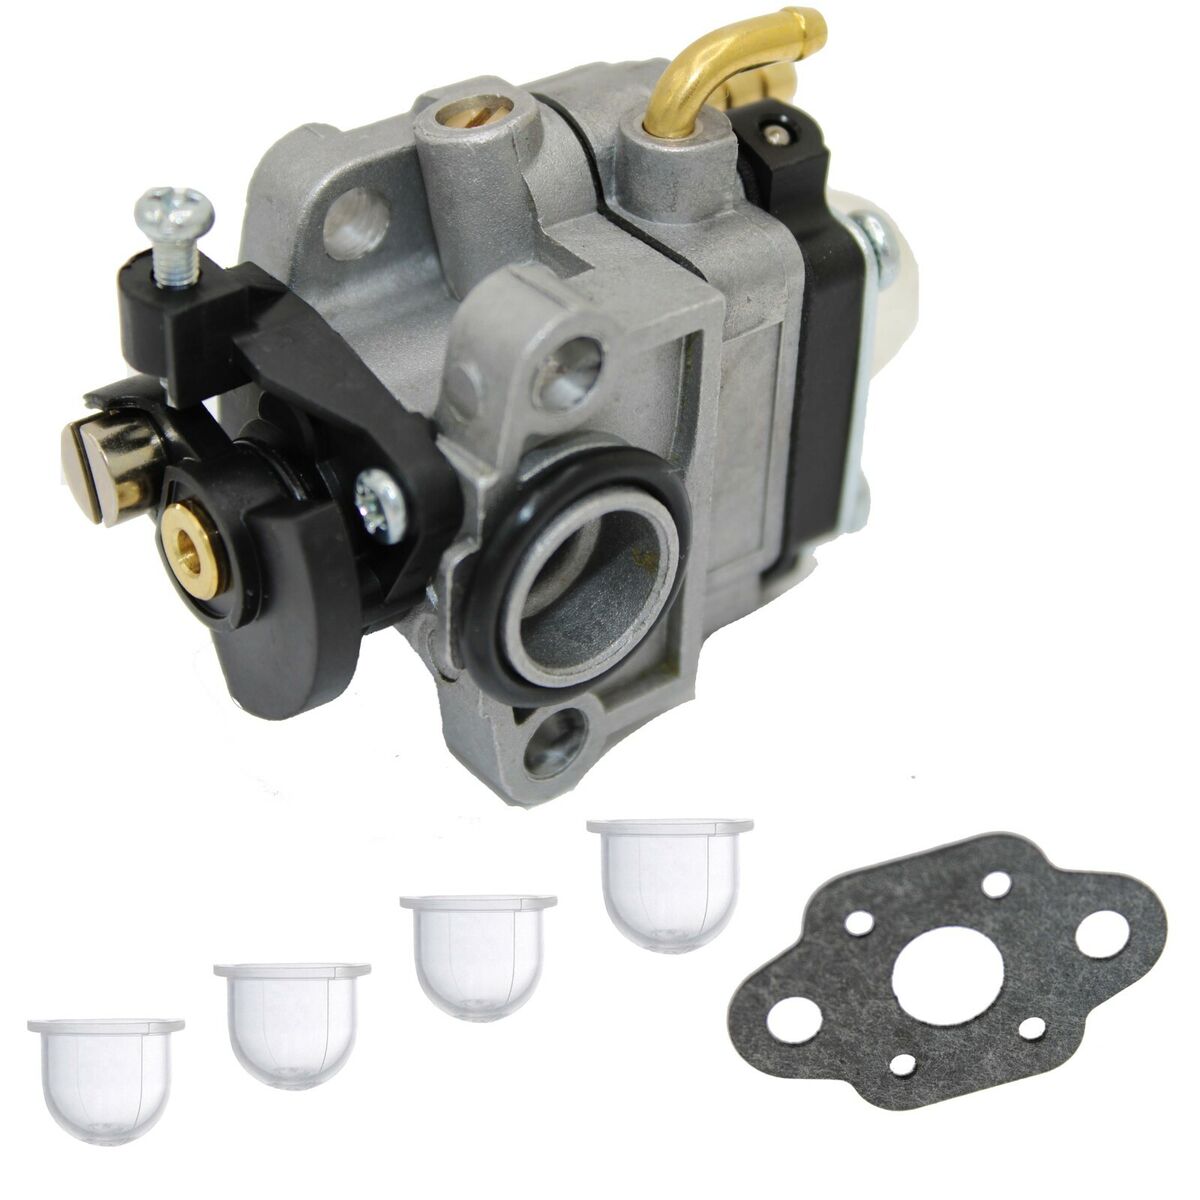
Step 3: Disassembling the Carburetor
With the carburetor removed from the lawnmower, the next crucial step in the cleaning process involves disassembling its components to access and clean the internal parts thoroughly. Follow these steps to methodically disassemble the carburetor and prepare its components for meticulous cleaning:
1. Identify and Organize Components: Lay out a clean workspace and gather small containers or trays to organize the carburetor’s components. This will help prevent misplacement and confusion during reassembly. Take note of the orientation and position of each part as you disassemble the carburetor.
2. Remove the Bowl Retaining Screw: Using an appropriate screwdriver, carefully remove the bowl retaining screw, allowing you to access the float bowl. Take care not to misplace the screw or damage its threads.
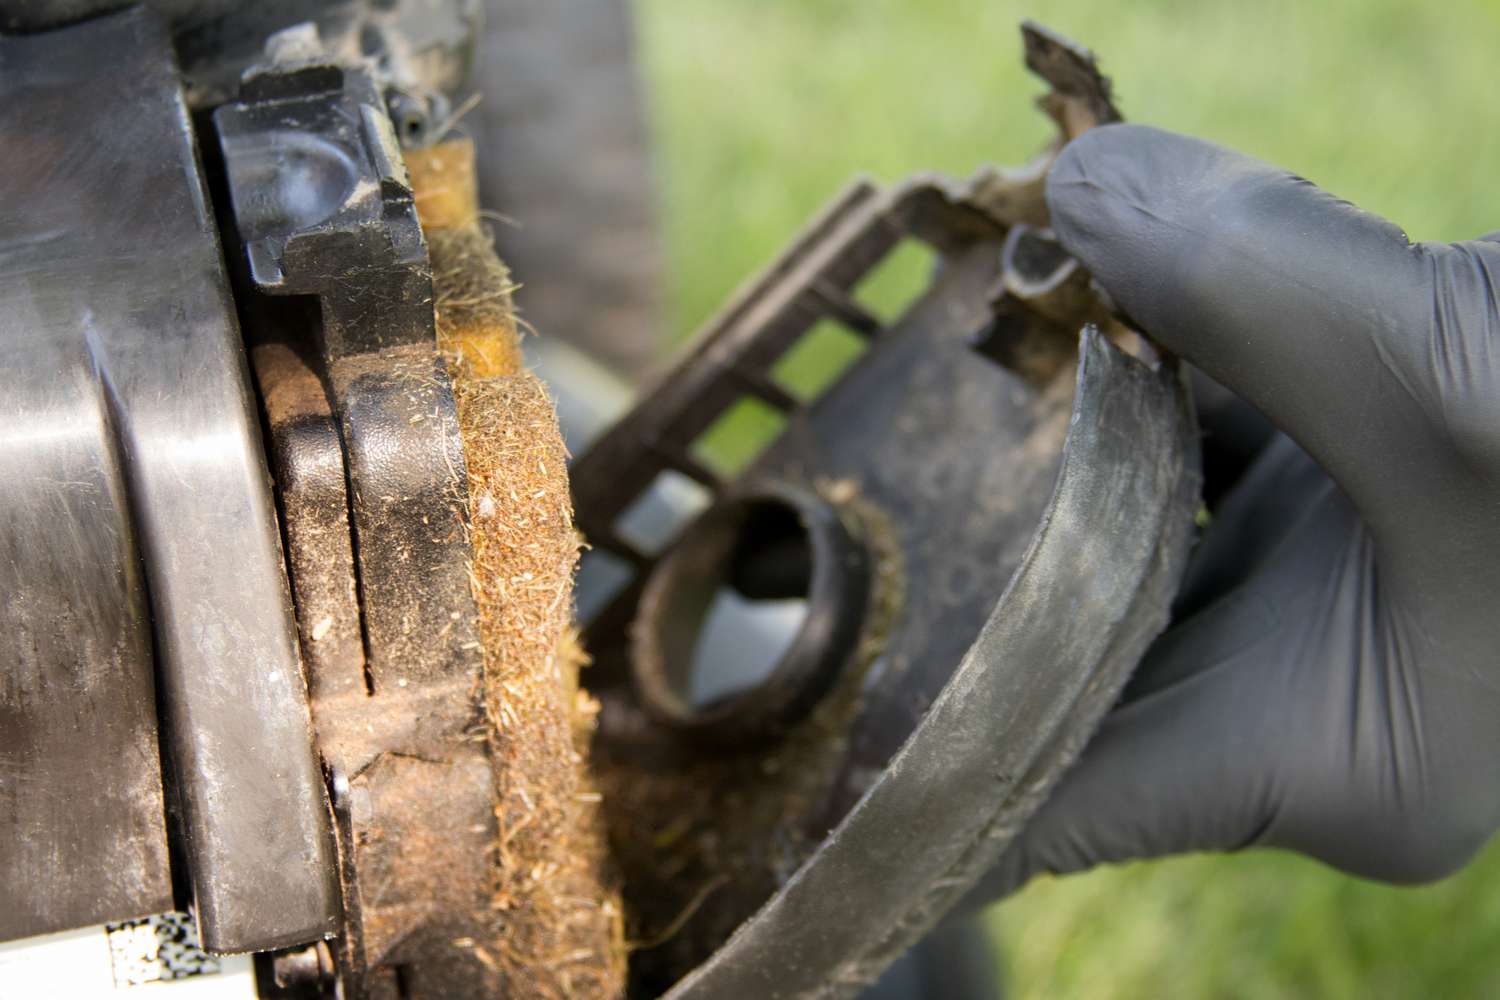
3. Inspect the Float Bowl and Float: Upon removing the bowl, inspect the float and float bowl for any signs of contamination, varnish, or debris. These components play a vital role in regulating fuel flow and must be thoroughly cleaned to ensure optimal carburetor performance.
4. Disassemble the Float and Needle Valve: Carefully remove the float pin to detach the float and needle valve assembly from the carburetor. Take note of the needle valve’s position and orientation for accurate reassembly.
5. Clean the Main Body and Jets: Once the float bowl and internal components are removed, inspect the main body of the carburetor and locate the jets and passages. Utilize a carburetor cleaning solution and compressed air to meticulously clean these intricate passages and ensure unobstructed fuel and air flow.
6. Inspect and Clean Additional Components: Depending on the carburetor model, additional components such as the idle mixture screw, throttle plate, and gaskets may require cleaning and inspection. Thoroughly examine each part for any buildup or contamination and address it accordingly.
By systematically disassembling the carburetor and diligently cleaning each component, you can address any buildup or contamination that may be impeding its functionality. This meticulous approach sets the stage for comprehensive maintenance and contributes to the restoration of optimal carburetor performance, ensuring that your lawnmower operates at its best.
When cleaning a lawnmower carburetor, be sure to use a carburetor cleaner specifically designed for small engines. Remove any buildup or debris carefully to ensure proper function.
Read more: How To Clean Pressure Washer Carburetor
Step 4: Cleaning the Carburetor
With the carburetor disassembled, the cleaning phase is a critical step in restoring its optimal functionality. Thoroughly cleaning each component ensures that any accumulated debris, varnish, or contaminants are effectively removed, promoting smooth operation and reliable performance. Follow these steps to meticulously clean the carburetor components:
1. Soak Components in Carburetor Cleaner: Submerge the disassembled carburetor components, including the float bowl, float, jets, and other relevant parts, in a high-quality carburetor cleaning solution. Allow the components to soak for the duration recommended by the cleaner’s manufacturer to effectively dissolve and loosen any stubborn buildup.
2. Utilize a Cleaning Brush: After soaking, use a small cleaning brush or a toothbrush to gently scrub the components and dislodge any remaining debris or varnish. Pay particular attention to intricate passages and channels to ensure thorough cleaning and unobstructed flow.
3. Compressed Air for Clearing Passages: Employ compressed air to blow out any residual cleaning solution and dislodged debris from the carburetor’s passages and jets. This step ensures that the internal channels are free from obstruction and allows for unimpeded fuel and air flow.
4. Inspect for Cleanliness: After cleaning and drying the components, inspect each part meticulously to ensure that all traces of contamination and buildup have been effectively removed. Verify that the float moves freely and that the needle valve is clean and unobstructed.
5. Clean the Main Body and Gaskets: Thoroughly clean the main body of the carburetor, paying attention to the throttle plate, idle mixture screw, and gasket surfaces. Ensure that all components are free from varnish and residue to promote optimal functionality.
6. Replace Worn or Damaged Parts: While cleaning, assess the condition of gaskets, O-rings, and other seals. If these components show signs of wear or damage, replace them to prevent potential air or fuel leaks that could compromise the carburetor’s performance.
By diligently cleaning each carburetor component and ensuring that all passages and channels are free from obstruction, you can effectively restore the carburetor’s functionality and promote smooth engine operation. This meticulous approach to cleaning sets the stage for successful reassembly and the restoration of your lawnmower’s reliable performance.
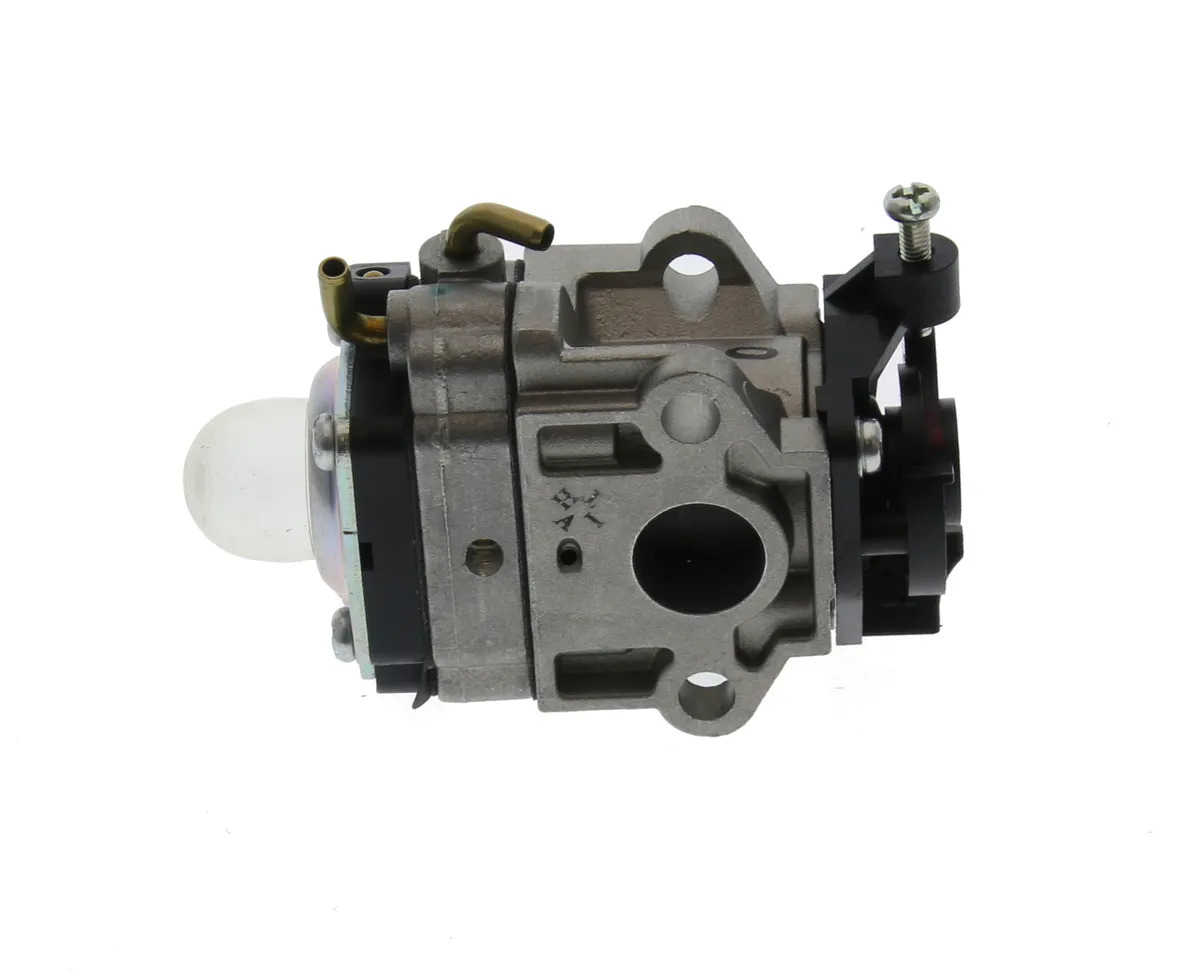
Step 5: Reassembling the Carburetor
After thoroughly cleaning the carburetor components, the reassembly process is a crucial step in restoring the unit to its operational state. Proper reassembly ensures that each component is correctly positioned and secured, setting the stage for optimal carburetor performance. Follow these steps to methodically reassemble the carburetor:
1. Position and Install Gaskets: If the carburetor features gaskets or O-rings, carefully position and install them in their designated locations. Ensure that the gaskets are clean and undamaged to prevent potential air or fuel leaks.
2. Reassemble the Float and Needle Valve: Begin by reattaching the float and needle valve assembly to the carburetor, ensuring that the float is correctly positioned and moves freely. Secure the float in place with the float pin, verifying that it is properly seated.
3. Reinstall the Float Bowl: Place the clean and dry float bowl back onto the carburetor, ensuring a secure and snug fit. Reattach the bowl retaining screw, tightening it to the manufacturer’s specified torque to prevent any leaks or misalignment.
4. Position Jets and Main Body: Carefully reposition the jets and main body of the carburetor, ensuring that each component is correctly aligned and seated. Take care not to overtighten the screws or bolts, as this may damage the threads or components.
5. Connect Linkages and Fuel Line: Reconnect any linkages or cables that were detached during the disassembly process, ensuring that they are correctly linked to the carburetor’s throttle and choke mechanisms. Reattach the fuel line to the carburetor’s inlet, securing it to prevent any leaks or dislodgment.
6. Verify Smooth Operation: Before reinstalling the carburetor onto the lawnmower, verify that all components move smoothly and that the float operates as intended. This ensures that the carburetor is reassembled correctly and is ready for installation.
By methodically reassembling the carburetor and ensuring that each component is correctly positioned and secured, you can restore the unit to its operational state. This meticulous approach sets the stage for successful reinstallation onto the lawnmower, allowing for the seamless restoration of optimal engine performance.
Step 6: Reinstalling the Carburetor
With the carburetor meticulously cleaned and reassembled, the final step in the maintenance process involves reinstalling the unit onto the lawnmower. Proper installation ensures that the carburetor functions optimally and contributes to the smooth operation of the lawnmower’s engine. Follow these steps to successfully reinstall the carburetor:
1. Position the Carburetor: Align the clean and reassembled carburetor with its mounting location on the lawnmower’s engine. Take care to position the carburetor accurately, ensuring that it aligns with the mounting bolt holes and the linkage connections.
2. Secure the Mounting Bolts: Insert and tighten the mounting bolts that secure the carburetor to the engine. Follow the manufacturer’s specified torque settings to ensure that the carburetor is securely fastened without being overtightened.
3. Reconnect Linkages and Cables: Reconnect any linkages or cables that were detached during the removal process, ensuring that they are correctly linked to the carburetor’s throttle and choke mechanisms. Verify that the connections are secure and properly aligned.
4. Attach the Fuel Line: Reattach the fuel line to the carburetor’s inlet, securing it to prevent any leaks or dislodgment. Ensure that the fuel line is correctly connected and that the connection is tight and free from any potential leaks.
5. Reconnect the Spark Plug Wire: Reconnect the spark plug wire to the spark plug, ensuring a snug and secure connection. This step allows the engine to receive the necessary spark for combustion and operation.
6. Test Engine Operation: With the carburetor reinstalled, start the lawnmower’s engine and allow it to run for a few minutes. Verify that the engine idles smoothly and responds to throttle inputs without any hesitation or irregularities. This ensures that the carburetor is functioning optimally and contributing to the lawnmower’s reliable performance.
By attentively following these steps, you can successfully reinstall the carburetor onto the lawnmower, setting the stage for the restoration of optimal engine performance. This meticulous approach ensures that the carburetor functions seamlessly and contributes to the efficient operation of the lawnmower, allowing you to achieve pristine lawn maintenance results with ease.
Conclusion
Congratulations on successfully completing the comprehensive process of cleaning and maintaining your lawnmower’s carburetor. By following the steps outlined in this guide, you have equipped yourself with the knowledge and skills necessary to ensure that your lawnmower operates at its best, promoting efficient and reliable performance.
Understanding the critical role of the carburetor in regulating the air-fuel mixture and its impact on engine performance is essential for every lawn care enthusiast. By recognizing the signs of a dirty carburetor and proactively addressing any issues, you can maintain your lawnmower in top condition, ensuring a satisfying mowing experience and well-manicured lawns.
Throughout the cleaning process, prioritizing safety precautions, methodically disassembling the carburetor, and meticulously cleaning each component were vital steps in restoring the unit to its optimal state. By carefully reassembling and reinstalling the carburetor, you have contributed to the smooth operation of your lawnmower’s engine, setting the stage for seamless lawn maintenance.
Regular maintenance and cleaning of the carburetor, along with other essential components of your lawnmower, will ensure its longevity and reliable performance. Additionally, incorporating a fuel stabilizer in the gas tank can help prevent fuel degradation and varnish buildup, reducing the likelihood of carburetor issues in the future.
By maintaining your lawnmower and its carburetor with care and diligence, you are poised to enjoy a well-manicured lawn and a satisfying mowing experience for years to come. Your commitment to proactive maintenance and attention to detail will contribute to the longevity and optimal performance of your lawnmower, allowing you to revel in the beauty of a lush and meticulously maintained lawn.
Thank you for dedicating your time and effort to the maintenance of your lawnmower’s carburetor. Embrace the satisfaction of a job well done as you admire the results of your meticulous lawn care efforts, knowing that your lawnmower is primed for reliable performance and the creation of pristine outdoor spaces.
Frequently Asked Questions about How To Clean A Lawnmower Carburetor
Was this page helpful?
At Storables.com, we guarantee accurate and reliable information. Our content, validated by Expert Board Contributors, is crafted following stringent Editorial Policies. We're committed to providing you with well-researched, expert-backed insights for all your informational needs.


0 thoughts on “How To Clean A Lawnmower Carburetor”