Home>Gardening & Outdoor>Garden Tools & Equipment>How To Rebuild A Lawnmower Engine
Garden Tools & Equipment
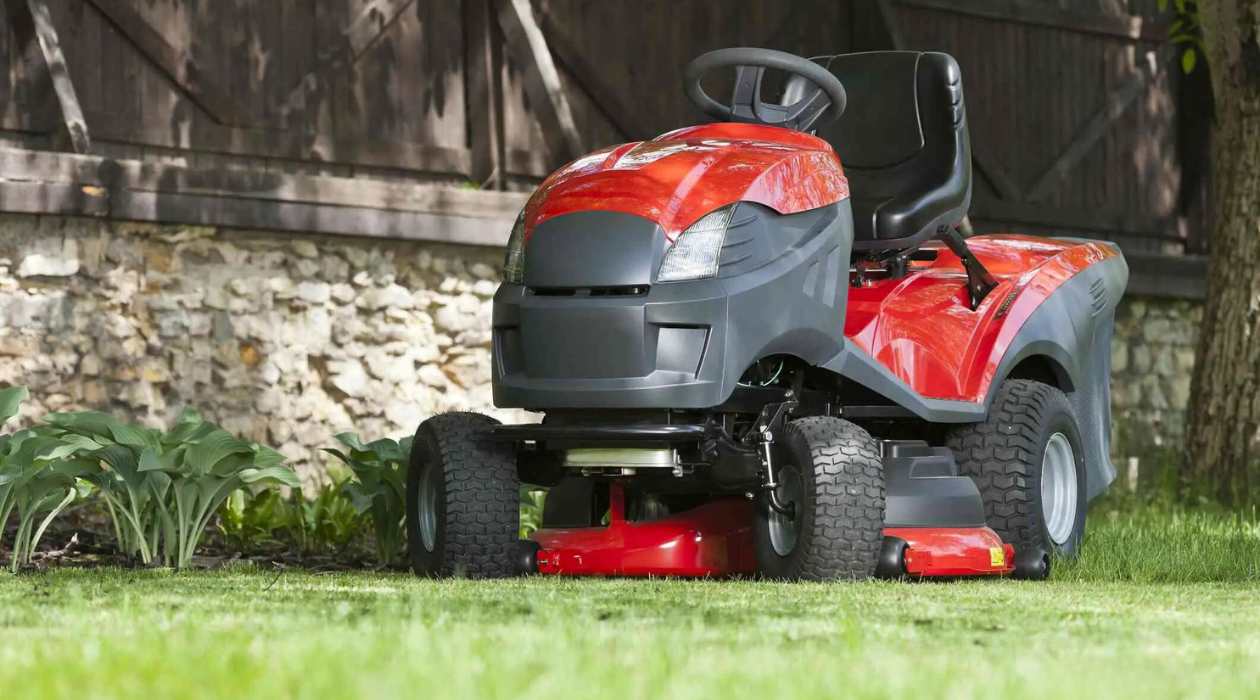
How To Rebuild A Lawnmower Engine
Published: January 21, 2024
Learn how to rebuild a lawnmower engine with our comprehensive guide. Get expert tips on maintaining garden tools and equipment for peak performance.
(Many of the links in this article redirect to a specific reviewed product. Your purchase of these products through affiliate links helps to generate commission for Storables.com, at no extra cost. Learn more)
**
Introduction
**
Maintaining a healthy and efficient lawnmower engine is crucial for a well-groomed and pristine lawn. Over time, wear and tear can take a toll on the engine, leading to decreased performance and reliability. However, with the right knowledge and tools, it's possible to breathe new life into a worn-out lawnmower engine through a comprehensive rebuild.
In this guide, we'll delve into the process of rebuilding a lawnmower engine, covering everything from disassembly to reassembly and testing. Whether you're a seasoned DIY enthusiast or a novice looking to expand your mechanical skills, this step-by-step walkthrough will equip you with the essential know-how to revive your lawnmower engine and keep your lawn looking its best.
Throughout this guide, safety will be a top priority, and we'll highlight the necessary precautions to ensure a secure working environment. Additionally, we'll outline the tools and materials required for the rebuild, providing a clear roadmap for the entire process. By following this guide, you'll not only breathe new life into your lawnmower engine but also gain a deeper understanding of its intricate components and operation.
Embark on this journey with us as we explore the art of lawnmower engine rebuilding, empowering you to tackle this rewarding project with confidence and precision. Let's roll up our sleeves and dive into the world of lawnmower engine restoration.
**
Key Takeaways:
- Safety First!
Before rebuilding a lawnmower engine, prioritize safety by wearing protective gear, preparing a well-lit workspace, and disconnecting the spark plug wire to prevent accidents. Safety ensures a successful project. - Engine Rebuilding Basics
Rebuilding a lawnmower engine involves disassembly, cleaning, inspection, reassembly, and testing. It’s a rewarding journey that enhances mechanical skills and ensures peak performance for your lawnmower.
Read more: How Does A Lawnmower Engine Work
Safety Precautions
**
Before embarking on the journey of rebuilding a lawnmower engine, it’s crucial to prioritize safety at every step of the process. Working with mechanical components and potentially hazardous materials demands a cautious approach to prevent accidents and ensure a secure working environment. Here are essential safety precautions to adhere to:
- Protective Gear: Prior to starting any work, ensure that you are equipped with the appropriate protective gear, including safety goggles, gloves, and sturdy work boots. This will shield you from potential debris, sharp edges, and harmful chemicals.
- Workspace Preparation: Clear the workspace of any clutter and ensure adequate lighting. A clean and well-lit area will minimize the risk of accidents and provide better visibility during intricate tasks.
- Engine Cooling: If the lawnmower has been recently used, allow the engine to cool down completely before initiating the rebuild. Hot engine components can cause severe burns, so exercise caution when handling them.
- Ventilation: When working with cleaning solvents or chemicals, ensure that the workspace is well-ventilated to prevent inhalation of fumes. Consider working outdoors or in a garage with open doors to maintain proper airflow.
- Secure Lifting: When lifting heavy components or the entire lawnmower, use proper lifting techniques to avoid strain or injury. Enlist the help of a partner if needed, and make use of lifting aids such as hoists or jacks.
- Power Disconnection: Prior to any disassembly, disconnect the spark plug wire to prevent accidental engine ignition. This simple step ensures that the engine remains inert during the rebuild process.
- Read Manuals: Familiarize yourself with the lawnmower’s manual and engine specifications. Understanding the manufacturer’s guidelines and recommendations is essential for safe and effective engine rebuilding.
- First Aid Kit: Have a well-stocked first aid kit readily accessible in case of minor cuts, scrapes, or other unforeseen mishaps. Prompt treatment of injuries is vital for a safe and successful rebuilding endeavor.
By adhering to these safety precautions, you’ll create a secure working environment and minimize the risk of accidents or injuries. Prioritizing safety not only safeguards your well-being but also ensures a smooth and focused rebuilding process.
**
Tools and Materials Needed
**
Embarking on a lawnmower engine rebuild necessitates the use of specific tools and materials to effectively disassemble, clean, inspect, and reassemble the engine components. Here’s a comprehensive list of essential items required for this undertaking:
Tools:
- Socket Set: A quality socket set with a variety of metric and standard sockets will be indispensable for removing nuts, bolts, and other fasteners.
- Wrenches: Both open-end and box-end wrenches in various sizes are essential for accessing and loosening tight spaces and fasteners.
- Screwdrivers: A set of flathead and Phillips screwdrivers will aid in removing screws and prying apart components.
- Pliers: Needle-nose pliers and locking pliers will assist in gripping, bending, and securing small parts during disassembly and reassembly.
- Torque Wrench: For precise tightening of fasteners to manufacturer specifications, a torque wrench is indispensable to prevent over-tightening or under-tightening critical components.
- Feeler Gauges: These are essential for checking and setting precise clearances, such as valve lash, during the engine reassembly process.
- Gasket Scraper: A gasket scraper or razor blade will aid in removing old gasket material from engine surfaces without causing damage.
- Rubber Mallet: A rubber mallet can be used to gently tap components into place without causing damage or distortion.
- Cleaning Brushes: Stiff-bristled and soft-bristled brushes are essential for thorough cleaning of engine parts and components.
Materials:
- Engine Oil: High-quality engine oil suitable for the lawnmower engine's specifications will be needed for lubrication during reassembly and testing.
- Replacement Parts: Depending on the condition of the engine, replacement parts such as gaskets, seals, piston rings, and bearings may be necessary for the rebuild.
- Cleaning Solvent: A suitable cleaning solvent or degreaser will be required to thoroughly clean engine components and remove built-up grime and residue.
- Shop Rags: Absorbent shop rags or lint-free cloths are essential for wiping down components and cleaning up spills and messes.
- Assembly Lube: This specialized lubricant is designed for initial startup lubrication and is crucial for preventing dry starts and ensuring proper lubrication of critical components.
- Gasket Sealant: A high-quality gasket sealant will be needed to ensure a proper seal between engine components and prevent oil or fluid leaks.
By ensuring that you have the necessary tools and materials at your disposal, you’ll be well-equipped to tackle the intricate process of rebuilding a lawnmower engine with confidence and precision.
**
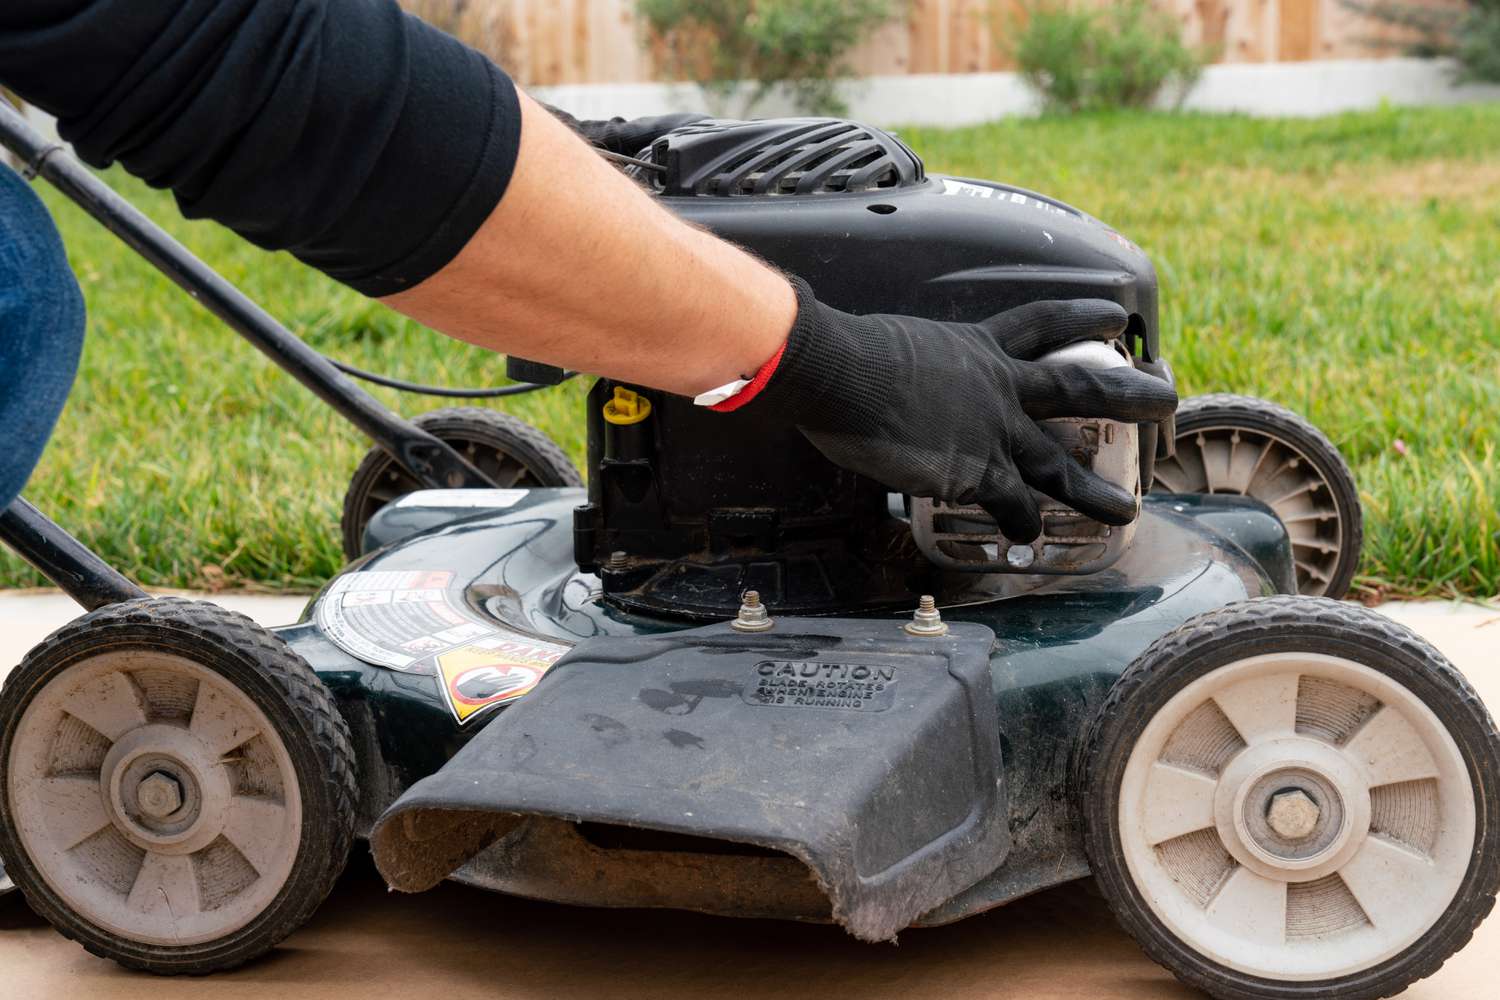
Disassembling the Engine
**
The initial phase of rebuilding a lawnmower engine involves the meticulous disassembly of its components, requiring a systematic approach and attention to detail. Here’s a step-by-step guide to effectively disassembling the engine:
- Preparation: Ensure that the lawnmower is placed on a stable and level work surface, and all necessary safety precautions have been observed. Disconnect the spark plug wire to prevent accidental engine ignition.
- Removal of External Components: Begin by removing the external components such as the air filter, muffler, and engine shroud. Use appropriate tools to loosen and remove fasteners, and carefully set aside the components for cleaning and inspection.
- Draining Fluids: If applicable, drain the engine oil and fuel from the lawnmower to prevent spills and contamination during disassembly. Dispose of the fluids in accordance with local regulations.
- Cylinder Head Removal: Loosen and remove the cylinder head bolts in a crisscross pattern to release the cylinder head from the engine block. Carefully lift off the cylinder head, taking note of any gaskets or seals that may require replacement.
- Piston and Crankshaft Access: With the cylinder head removed, you’ll gain access to the piston and crankshaft. Carefully remove the piston and connecting rod assembly from the engine block, taking care not to damage the cylinder walls or bearings.
- Engine Block Disassembly: Proceed to disassemble the engine block by removing the sump or oil pan, exposing the crankshaft, camshaft, and other internal components. Take note of the arrangement of components and fasteners for accurate reassembly.
- Inspecting Components: As each component is removed, carefully inspect it for signs of wear, damage, or excessive buildup. Make a note of any parts that may require replacement or refurbishment during the rebuilding process.
- Organized Component Storage: To prevent misplacement and confusion during reassembly, organize and label the removed components in a systematic manner. Utilize small containers or bags to store fasteners and smaller parts associated with each assembly.
By methodically disassembling the lawnmower engine and taking the time to inspect each component, you’ll lay the groundwork for a thorough and effective rebuilding process. With the engine disassembled, the next step involves cleaning the components to prepare them for inspection and potential replacement.
**
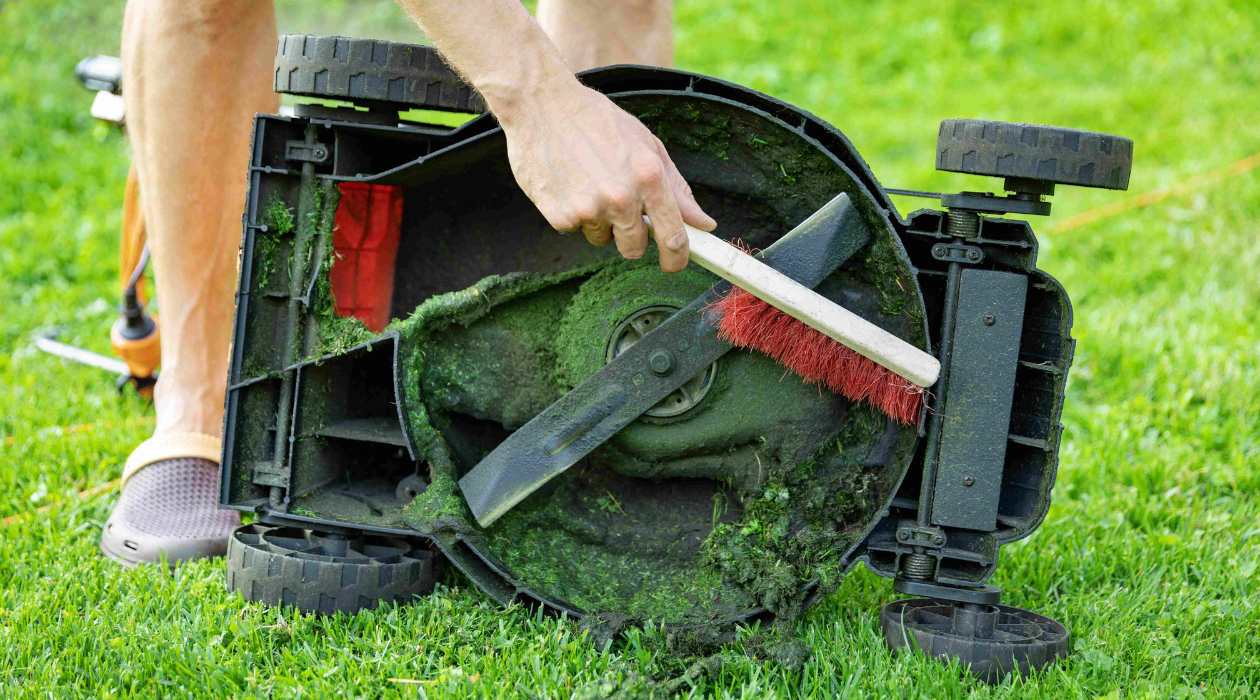
Cleaning the Engine Parts
**
After disassembling the lawnmower engine, the next critical phase involves meticulously cleaning the components to remove built-up grime, residue, and contaminants. Thorough cleaning not only prepares the parts for inspection and potential refurbishment but also ensures optimal performance and longevity once the engine is reassembled. Here’s a comprehensive guide to effectively clean the engine parts:
- Initial Inspection: Before cleaning, visually inspect each component for stubborn deposits, carbon buildup, and other contaminants. Note any areas that require focused cleaning or potential refurbishment.
- Parts Disassembly: If applicable, disassemble components such as the carburetor, valves, and pistons to facilitate thorough cleaning of intricate and hard-to-reach areas.
- Use of Cleaning Solvent: Select a suitable cleaning solvent or degreaser designed for engine components. Apply the solvent liberally to the parts, allowing it to penetrate and dissolve stubborn grime and deposits.
- Brushing and Scrubbing: Utilize a combination of stiff-bristled and soft-bristled brushes to scrub and agitate the solvent, loosening and removing accumulated debris. Pay particular attention to intricate passages and crevices.
- Rinsing and Drying: After thorough scrubbing, rinse the components with clean water to remove residual solvent and loosened contaminants. Ensure that all traces of solvent are removed. Once rinsed, thoroughly dry the components to prevent corrosion.
- Compressed Air: Utilize compressed air to blow out any remaining moisture and debris from intricate passages and components, ensuring that they are completely clean and dry.
- Inspection Post-Cleaning: After cleaning and drying, inspect the components once again to ensure that all contaminants and deposits have been effectively removed. This step is crucial for identifying any areas that may require further attention or refurbishment.
By diligently cleaning each engine component, you’ll pave the way for a comprehensive inspection and potential replacement of worn or damaged parts. This meticulous cleaning process sets the stage for the thorough evaluation and refurbishment of the engine’s internal components as part of the rebuilding process.
**
Inspecting and Replacing Parts
**
Following the thorough cleaning of the lawnmower engine components, the next crucial phase involves a meticulous inspection to assess the condition of each part and determine the need for replacement or refurbishment. This critical evaluation ensures that the rebuilt engine will deliver optimal performance and reliability. Here’s a comprehensive guide to inspecting and replacing parts:
- Visual Inspection: Carefully examine each cleaned component for signs of wear, damage, or deformation. Look for indications of excessive wear, such as scoring on piston walls, pitting on bearing surfaces, or cracks in critical components.
- Measurement and Tolerance Checking: Utilize precision measurement tools such as micrometers, calipers, and feeler gauges to assess clearances, diameters, and other critical dimensions. Compare the measurements with manufacturer specifications to determine if components are within acceptable tolerances.
- Bearing and Seal Evaluation: Inspect bearings and seals for wear, pitting, or damage. Ensure that they rotate smoothly and exhibit no signs of excessive play or roughness. Replace any bearings or seals that show signs of wear or compromise.
- Piston and Ring Assessment: Check the pistons and piston rings for wear, scoring, or damage. Verify that the piston rings provide adequate tension and seal. Replace worn or damaged pistons and rings to ensure proper compression and performance.
- Valve and Seat Inspection: Evaluate the valves and valve seats for wear, pitting, or carbon buildup. Perform a leak test to ensure that the valves seat properly and maintain a tight seal. Refurbish or replace valves and seats as needed.
- Gasket and Seal Examination: Inspect gaskets and seals for signs of deterioration, compression, or leakage. Replace any gaskets or seals that show wear or damage to prevent oil or fluid leaks upon reassembly.
- Critical Component Replacement: Based on the inspection findings, replace any components that fall outside acceptable tolerances or exhibit significant wear or damage. Utilize high-quality replacement parts that meet or exceed manufacturer specifications.
By conducting a thorough inspection and promptly replacing worn or damaged components, you’ll ensure that the rebuilt lawnmower engine operates at peak efficiency and reliability. This critical phase sets the stage for the meticulous reassembly of the engine, laying the foundation for its successful restoration.
**
When rebuilding a lawnmower engine, make sure to clean all parts thoroughly before reassembly to prevent any debris or dirt from causing damage to the engine.
Reassembling the Engine
**
With the inspection and replacement of worn or damaged components completed, the reassembly phase marks a pivotal stage in the lawnmower engine rebuilding process. This meticulous process involves methodically piecing together the cleaned and refurbished components to restore the engine to its optimal functionality. Here’s a comprehensive guide to reassembling the engine:
- Component Organization: Ensure that all cleaned and inspected components are systematically organized and readily accessible for reassembly. Refer to any notes or documentation to ensure accurate placement and alignment.
- Gasket and Seal Preparation: Prior to reassembly, apply high-quality gasket sealant to the appropriate surfaces to ensure a secure and leak-free seal. Carefully position new gaskets and seals, aligning them with precision.
- Piston and Rings Installation: Begin by carefully installing the piston rings onto the pistons, ensuring that they are positioned correctly and provide optimal tension. Lubricate the piston and cylinder walls with clean engine oil before carefully sliding the pistons into place.
- Engine Block Assembly: Gradually reassemble the engine block, ensuring that bearings, seals, and critical components are positioned accurately. Exercise caution to prevent damage to newly installed components during the reassembly process.
- Valve and Camshaft Installation: Carefully reinstall the valves, ensuring that they are properly seated and aligned. Verify that the camshaft is positioned correctly and rotates smoothly, engaging with the valve train as intended.
- Cylinder Head Reattachment: Position the cylinder head onto the engine block, taking care to align it accurately. Gradually tighten the cylinder head bolts in a crisscross pattern to ensure even and secure compression of the head gasket.
- External Component Installation: Reattach external components such as the air filter, muffler, and engine shroud, ensuring that all fasteners are tightened to the manufacturer’s specifications.
- Fluid Refilling: Refill the engine with fresh, high-quality oil and fuel, adhering to the manufacturer’s recommendations for the specific lawnmower model.
By meticulously reassembling the lawnmower engine and adhering to precise installation procedures, you’ll ensure that the engine is restored to its optimal operational state. This meticulous reassembly phase sets the stage for the final critical step: testing the rebuilt engine to validate its performance and reliability.
**
Read more: What Causes A Lawnmower Engine To Surge
Testing the Engine
**
Following the meticulous reassembly of the lawnmower engine, the critical phase of testing ensures that the rebuilt engine operates with optimal performance, reliability, and efficiency. This comprehensive evaluation involves a series of checks and assessments to validate the functionality of the engine before it is put back into regular service. Here’s a detailed guide to testing the engine:
- Initial Inspection: Perform a visual inspection of the engine to ensure that all components are correctly installed and secured. Check for any signs of leaks, loose fasteners, or abnormalities that may require immediate attention.
- Compression Test: Utilize a compression tester to assess the cylinder compression, ensuring that it falls within the acceptable range specified by the manufacturer. Deviations from the specified compression levels may indicate issues that require further investigation.
- Ignition System Check: Verify that the ignition system, including the spark plug and wiring, is functioning correctly. Test for a strong, consistent spark to ensure proper ignition of the air-fuel mixture within the engine.
- Starting and Running Test: Initiate the engine startup procedure and carefully monitor its operation. Listen for any unusual noises, vibrations, or irregularities that may indicate underlying issues. Observe the engine as it runs, noting its responsiveness and smooth operation.
- Throttle Response and Load Test: Test the engine’s throttle response and load-bearing capabilities by gradually increasing and decreasing the throttle. Ensure that the engine responds promptly and smoothly to changes in load and throttle input.
- Exhaust Emissions and Smoke Check: Monitor the exhaust emissions for any abnormal smoke, discoloration, or odors that may indicate incomplete combustion or other issues. A clean and consistent exhaust indicates efficient engine operation.
- Temperature and Overheating Assessment: Monitor the engine’s temperature to ensure that it remains within the optimal operating range. Overheating or rapid temperature fluctuations may indicate cooling system or combustion issues.
By conducting a comprehensive series of tests and assessments, you’ll validate the performance and reliability of the rebuilt lawnmower engine. This meticulous testing phase ensures that the engine is ready to deliver optimal performance and reliability, setting the stage for its return to regular lawn maintenance duties.
**
Maintenance Tips
**
After successfully rebuilding and testing the lawnmower engine, it’s essential to implement ongoing maintenance practices to preserve its performance, extend its lifespan, and ensure consistent reliability. By adhering to proactive maintenance measures, you can safeguard the engine’s efficiency and functionality, contributing to the longevity of your lawnmower. Here are valuable maintenance tips to uphold the rebuilt engine’s optimal condition:
- Regular Oil Changes: Adhere to a regular schedule for changing the engine oil, using high-quality oil that meets the manufacturer’s specifications. Clean oil is essential for lubricating critical components and minimizing wear and friction.
- Air Filter Inspection and Replacement: Routinely inspect the air filter for dirt and debris accumulation, replacing it as needed to maintain optimal airflow and prevent engine contamination.
- Spark Plug Maintenance: Periodically check and clean the spark plug, ensuring that it is in good condition and properly gapped. Replace the spark plug when necessary to maintain consistent ignition and efficient combustion.
- Cooling System Care: Monitor the lawnmower’s cooling system, ensuring that the radiator and cooling fins are clean and free of obstructions. Proper cooling is essential for preventing overheating and maintaining engine performance.
- Fuel System Maintenance: Use clean, fresh fuel and periodically inspect the fuel lines and filter for blockages or deterioration. Proper fuel system maintenance prevents fuel delivery issues that can impact engine operation.
- Thorough Cleaning: Regularly clean the exterior of the lawnmower and engine to prevent debris accumulation and corrosion. A clean exterior minimizes the risk of contaminants entering the engine’s internal components.
- Professional Inspections: Consider scheduling periodic professional inspections of the lawnmower engine to identify and address potential issues before they escalate. Professional maintenance can help detect and resolve issues early, preserving the engine’s integrity.
- Storage Considerations: When storing the lawnmower during off-seasons, follow proper storage practices, including fuel stabilization, thorough cleaning, and protecting the engine from environmental elements.
By incorporating these maintenance tips into your lawnmower care routine, you’ll uphold the performance and longevity of the rebuilt engine, ensuring that it remains a reliable and efficient tool for maintaining a pristine lawn. Consistent maintenance not only safeguards the engine’s functionality but also enhances its overall durability and performance.
**
Conclusion
**
Embarking on the journey of rebuilding a lawnmower engine is a rewarding endeavor that not only revitalizes the heart of your lawn maintenance equipment but also deepens your understanding of its intricate workings. By following the comprehensive steps outlined in this guide, you’ve gained the knowledge and confidence to breathe new life into a worn-out engine, ensuring that your lawnmower continues to deliver peak performance and reliability.
Throughout the rebuilding process, safety remained a top priority, with meticulous attention given to protective gear, workspace preparation, and the secure handling of engine components. By adhering to essential safety precautions, you’ve created a secure environment for the rebuilding endeavor, prioritizing your well-being and the successful completion of the project.
The meticulous disassembly, cleaning, inspection, and reassembly of the engine have equipped you with the skills to methodically restore each component to its optimal condition. From evaluating critical clearances to replacing worn parts, you’ve upheld the highest standards of precision and quality, ensuring that the rebuilt engine operates with efficiency and reliability.
Testing the engine served as the final validation of your meticulous work, confirming that the rebuilt engine meets and exceeds performance expectations. By conducting comprehensive assessments and checks, you’ve verified the engine’s responsiveness, smooth operation, and overall reliability, setting the stage for its return to regular lawn maintenance duties.
As you move forward, the implementation of proactive maintenance measures will be crucial in preserving the rebuilt engine’s performance and longevity. By adhering to regular maintenance practices, you’ll safeguard the engine’s efficiency, minimize wear and tear, and contribute to its sustained reliability for years to come.
In conclusion, the process of rebuilding a lawnmower engine extends beyond mechanical restoration; it embodies a journey of skill development, meticulous craftsmanship, and a deep appreciation for the inner workings of essential equipment. By undertaking this project, you’ve not only revived a vital tool for maintaining your lawn but also cultivated a deeper connection with the art and science of engine rebuilding.
As you witness the restored engine power your lawnmower through lush green landscapes, may the satisfaction of a job well done and the knowledge gained accompany you on future endeavors, reaffirming the rewarding nature of hands-on mechanical craftsmanship.
Frequently Asked Questions about How To Rebuild A Lawnmower Engine
Was this page helpful?
At Storables.com, we guarantee accurate and reliable information. Our content, validated by Expert Board Contributors, is crafted following stringent Editorial Policies. We're committed to providing you with well-researched, expert-backed insights for all your informational needs.


0 thoughts on “How To Rebuild A Lawnmower Engine”