Articles
How To Rebuild A Chimney
Modified: October 20, 2024
Learn how to rebuild a chimney with our informative articles. Find step-by-step instructions and expert tips to ensure a successful chimney reconstruction.
(Many of the links in this article redirect to a specific reviewed product. Your purchase of these products through affiliate links helps to generate commission for Storables.com, at no extra cost. Learn more)
Introduction
The chimney is an essential component of a home’s heating system, providing ventilation for the fireplace or furnace. Over time, however, chimneys can deteriorate due to weathering, age, or poor maintenance. Cracked bricks, loose mortar, or structural damage can pose a risk to the safety and functionality of the chimney. Rebuilding a chimney may seem like a daunting task, but with the right knowledge and tools, it is a manageable and rewarding project.
In this article, we will walk you through the step-by-step process of how to rebuild a chimney, ensuring that it is structurally sound and functioning properly. Whether you are a seasoned DIY enthusiast or a homeowner looking to tackle a new project, we will provide you with the guidance you need to successfully complete this task.
Before diving into the rebuilding process, it is important to thoroughly assess the condition of your chimney to determine the extent of the damage and the necessary repairs. Additionally, gathering the necessary tools and materials will ensure that you have everything you need for a smooth and efficient rebuild. Safety precautions and preparation are paramount in any construction project, and rebuilding a chimney is no exception.
Next, we will guide you through the steps of removing old bricks and mortar, taking care to preserve any salvageable materials for reuse. Repairing or rebuilding the chimney base is an important step in ensuring a stable foundation for the shaft. The chimney shaft construction will involve laying bricks in a specific pattern and securing them with mortar. Installing a new chimney cap is vital for preventing water damage and protecting the interior of your home.
Once the structural elements of the chimney are in place, we will teach you how to apply mortar and secure the bricks to ensure a durable and sturdy chimney. Finally, we will cover the finishing touches and clean up, leaving you with a beautifully restored chimney that will enhance both the appearance and functionality of your home.
It is important to note that rebuilding a chimney can be a time-consuming and physically demanding project. If you do not feel comfortable or confident in your abilities, it is always advisable to consult with a professional chimney contractor who can handle the job safely and efficiently.
Now that you have a general overview of what to expect, let us delve into the detailed steps of how to rebuild a chimney, starting with assessing the chimney’s condition.
Key Takeaways:
- Rebuilding a chimney is a manageable project with the right knowledge and tools. Prioritize safety, assess the condition, and follow the step-by-step guide for a structurally sound and visually appealing chimney.
- Proper preparation, attention to detail, and patience are essential for a successful chimney rebuild. From removing old bricks to applying mortar and finishing touches, each step contributes to a restored and functional chimney.
Read more: How Much Should A Chimney Rebuild Cost
Assessing the Chimney’s Condition
Before starting the chimney rebuilding process, it is crucial to assess the condition of the chimney thoroughly. This will help you determine the extent of the damage and plan the necessary repairs accordingly.
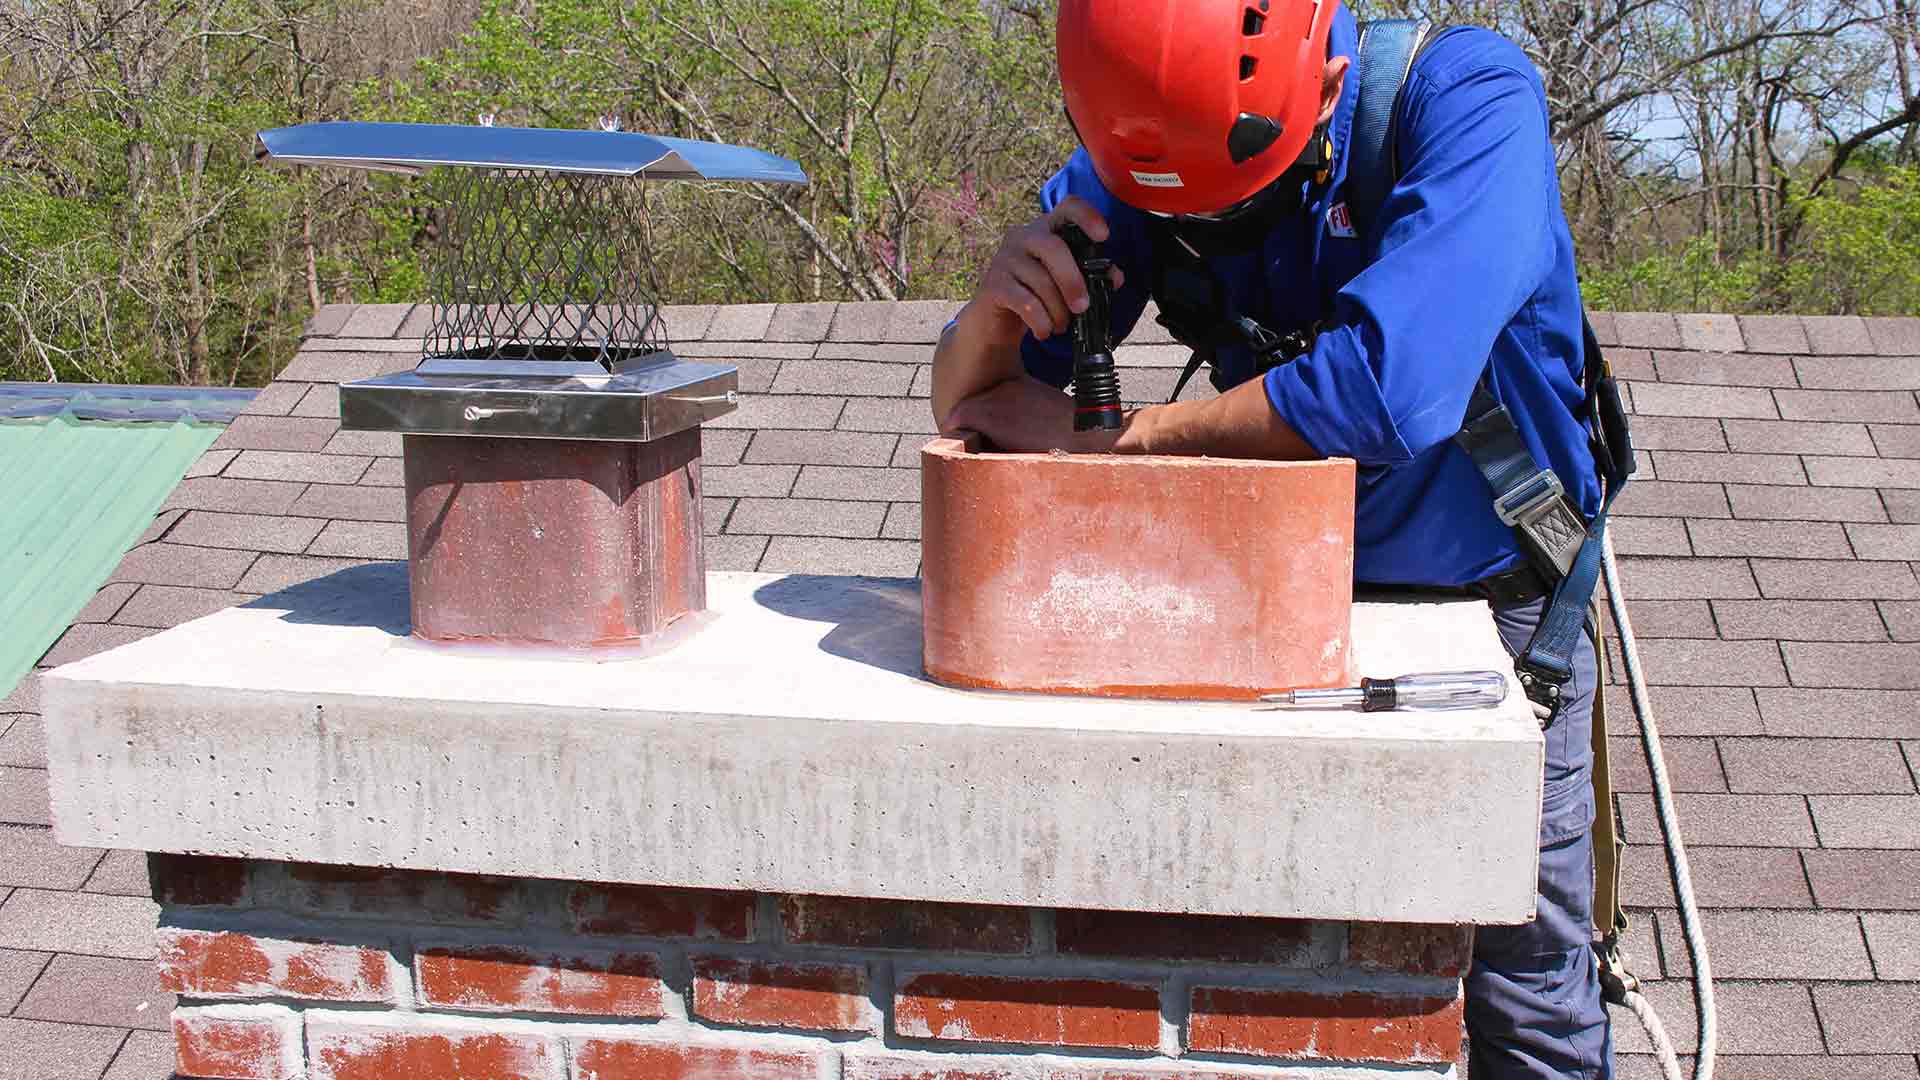
Start by inspecting the exterior of the chimney. Look for any visible cracks, crumbling bricks, or loose mortar joints. Pay attention to any leaning or bulging, as this may indicate structural issues. Check for signs of water damage, such as moss or mold growth, as this can deteriorate the chimney further.
Next, examine the interior of the chimney. You can do this by shining a flashlight up the flue from the fireplace or furnace. Look for any signs of water penetration, such as staining or efflorescence. Check for creosote buildup, which is a flammable substance that can cause chimney fires if not properly addressed.
If you are unsure about the condition of your chimney or are unable to assess it yourself, it is advisable to hire a professional chimney inspector. They have the expertise to thoroughly examine the chimney and provide recommendations for repairs or rebuilding.
Based on your assessment, you will be able to determine the scope of the chimney rebuilding project. Minor repairs may include patching up cracks or replacing a few damaged bricks. However, if the chimney is in significant disrepair or poses a safety risk, a complete rebuild may be necessary.
Keep in mind that rebuilding a chimney can be a complex and time-consuming task. It requires a solid understanding of masonry techniques and the proper use of tools and materials. If you are unsure about your abilities or lack the necessary skills, it is best to enlist the help of a professional chimney contractor.
Now that you have assessed the condition of your chimney, it is time to gather the necessary tools and materials for the rebuilding process. This will ensure that you have everything you need to efficiently and effectively restore your chimney to its former glory.
Gathering the Necessary Tools and Materials
Before embarking on the chimney rebuilding project, it is essential to gather all the necessary tools and materials. Having everything you need at your disposal will streamline the process and prevent delays or interruptions. Here is a list of the commonly required tools and materials:
1. Safety Gear: Safety should always be a top priority. Make sure to have the following safety gear on hand: safety goggles, heavy-duty work gloves, a dust mask or respiratory protection, and sturdy work boots.
2. Masonry Tools: You will need various masonry tools such as a brick trowel, pointing trowel, jointer, hammer, masonry chisel, masonry brush, and a level. These tools will help you remove old bricks, apply mortar, and ensure proper alignment during the rebuilding process.
3. Wheelbarrow and Shovel: A wheelbarrow will come in handy for mixing mortar and transporting materials around the worksite. A sturdy shovel will also be required for mixing and moving mortar.
4. Mortar Mix: High-quality mortar mix is crucial for a durable and long-lasting chimney rebuild. Choose a mortar mix that matches the existing mortar used in your chimney. It is recommended to consult with a local masonry supplier to ensure you select the appropriate mix.
5. Bricks: Depending on the extent of reconstruction needed, you may need a significant number of bricks. Ensure that the bricks you purchase are suitable for masonry work and are compatible with your existing chimney. Consider purchasing extra bricks for any unforeseen repairs or replacements.
6. Metal Chimney Cap: The chimney cap serves as a protective cover that prevents rain, snow, debris, and animals from entering the chimney. Invest in a high-quality metal chimney cap that fits the dimensions of your chimney to ensure proper functionality.
7. Mortar Joint Mesh: Mortar joint mesh is a reinforcement material used to strengthen the mortar joints and improve the overall stability of the chimney. It helps prevent cracking and deterioration caused by weather and temperature changes.
8. Clean Water: You will need clean water for mixing mortar and cleaning tools. Ensure a nearby water source is accessible during the rebuilding process.
9. Masonry Cleaner: If your chimney has extensive soot, creosote, or other stains, a masonry cleaner may be required to remove these deposits. Choose a cleaner specifically designed for masonry surfaces and follow the manufacturer’s instructions for safe and effective use.
10. Ladder or Scaffolding: Depending on the height of your chimney, you may require a ladder or scaffolding to reach the necessary areas safely. Ensure the ladder or scaffolding is sturdy and properly secured before use.
11. Measuring Tape: Accurate measurements are vital for maintaining proper alignment and proportions during the rebuild. Have a measuring tape on hand to ensure precise placement of bricks and other components.
Remember, the specific tools and materials required may vary depending on the size and condition of your chimney as well as the scope of the rebuild. It is always a good idea to consult with a professional or a local masonry supplier to ensure you have everything you need for a successful chimney rebuild.
With all the necessary tools and materials collected, you are now ready to proceed to the next step: safety precautions and preparation.
Safety Precautions and Preparation
Prior to starting any construction project, it is crucial to prioritize safety. Rebuilding a chimney is no exception. By taking the necessary safety precautions and adequately preparing for the task at hand, you can minimize the risk of accidents and ensure a smooth and successful chimney rebuild. Here are some essential safety precautions and preparation steps to keep in mind:
1. Wear Protective Gear: Always wear appropriate safety gear to protect yourself from potential hazards. This includes safety goggles to shield your eyes from flying debris, heavy-duty work gloves to protect your hands, a dust mask or respiratory protection to prevent inhalation of dust and particles, and sturdy work boots to provide stability and protect your feet from falling objects.
2. Secure the Work Area: Safely cordon off the work area using caution tape or barriers to prevent unauthorized access. Inform family members or anyone else on the property about the ongoing construction to avoid any accidental interference or injuries.
3. Check Weather Conditions: Avoid working on the chimney during adverse weather conditions, such as rain, snow, or strong winds. Wet or slippery surfaces can pose a significant safety risk, and inclement weather can compromise the mortar’s effectiveness and drying process.
4. Set Up a Sturdy Ladder or Scaffolding: If your chimney requires work at heights, ensure that the ladder or scaffolding is secure, stable, and properly positioned. Follow the manufacturer’s guidelines for ladder setup, including maintaining a proper angle and locking mechanisms.
5. Clear the Work Area: Remove any obstacles, tools, or debris from the work area to provide a clean and safe environment. This will help prevent tripping and potential accidents during the rebuilding process.
6. Read and Follow Safety Guidelines: Familiarize yourself with the safety guidelines and instructions provided by the manufacturer of the tools and materials you are using. Follow these guidelines carefully to ensure safe and correct usage.
7. Use Proper Lifting Techniques: When handling heavy bricks or equipment, remember to lift with your legs, not your back, to avoid strains or injuries. If assistance is needed, ask someone to help you with lifting and carrying heavy objects.
8. Keep a First Aid Kit on Hand: Accidents can happen, even with proper precautionary measures in place. Have a well-stocked first aid kit nearby in case of minor injuries. Familiarize yourself with basic first aid procedures and know-how to promptly address any health concerns that may arise.
9. Stay Hydrated and Take Breaks: Rebuilding a chimney can be physically demanding and may require extended periods of strenuous labor. Stay hydrated by drinking plenty of water throughout the workday and take regular breaks to rest and recharge.
10. Allow Sufficient Time: Establish a realistic timeline for the chimney rebuild, taking into account potential delays or unexpected challenges. Rushing the project increases the likelihood of mistakes and compromises safety.
By following these safety precautions and adequately preparing for the chimney rebuild, you can ensure a safer and more efficient process. Now that you have taken the necessary safety measures, it is time to proceed to the next step: removing old bricks and mortar.
Removing Old Bricks and Mortar
Before you can start rebuilding a chimney, it is crucial to remove the old bricks and mortar that are in poor condition. This step ensures a strong foundation for the new construction and allows for a clean slate. Here’s a step-by-step guide on how to remove old bricks and mortar:
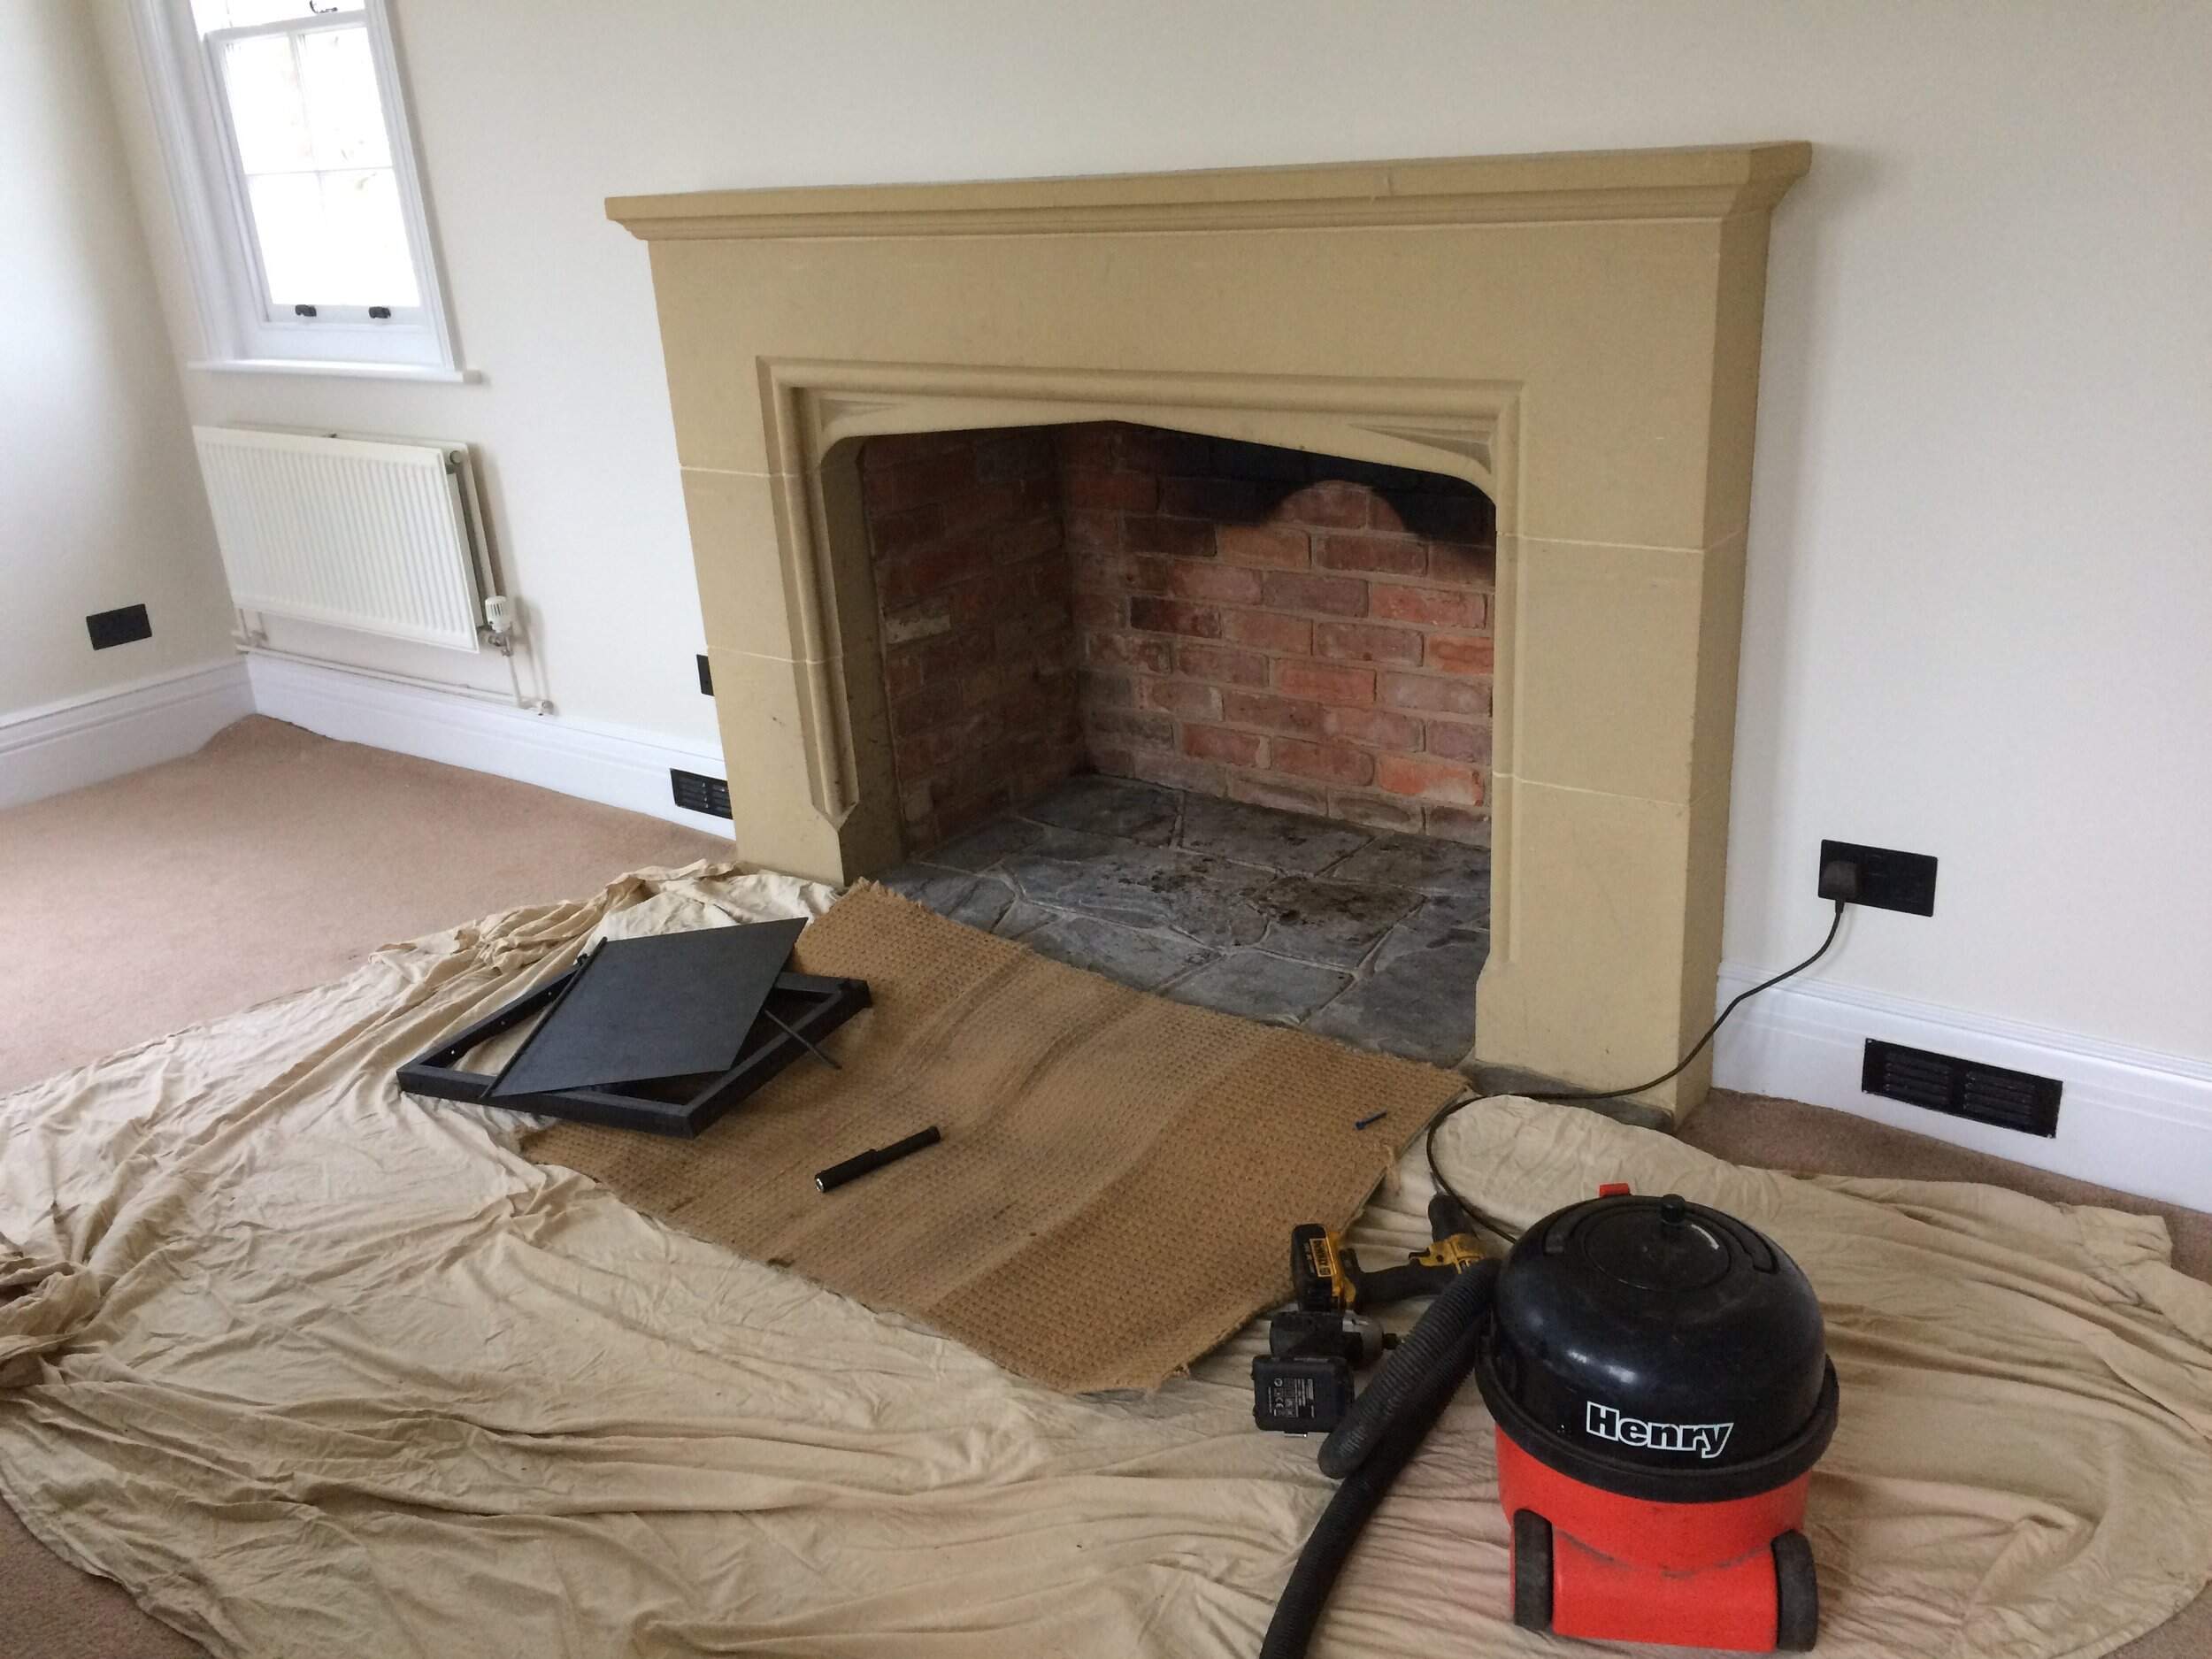
1. Prepare the Work Area: Clear the area around the chimney, removing any furniture, decorations, or landscaping that may obstruct your work. Lay down a tarp or drop cloth to collect debris and make cleanup easier.
2. Wear Protective Gear: Put on your safety goggles, work gloves, and dust mask to protect yourself from dust, debris, and flying particles.
3. Start with Mortar Removal: Use a masonry chisel and hammer to carefully chip away at the mortar joints surrounding the bricks. Start from the top and work your way down, taking care not to damage the surrounding bricks. Be patient and focused, as this step may be time-consuming.
4. Remove Loose Bricks: Once the mortar is cleared from a section, check for any loose bricks. Gently tap on them with the hammer and remove them from the chimney. Place them aside for later inspection, as some may be salvageable for reuse.
5. Continue with Mortar Removal: Move on to the next section and repeat the process of chiseling away the mortar joints. Take breaks when needed, as this task can be physically demanding.
6. Use a Joint Raker: For stubborn or hard-to-reach mortar, consider using a joint raker. This tool has interchangeable blades that can match the depth of the mortar joint, making the removal process easier and more efficient.
7. Clean Up Debris Regularly: As you remove mortar, be sure to clean up the debris regularly. Use a broom or brush to sweep away loose mortar fragments and other debris. This will help maintain a clean and organized work area.
8. Inspect Salvaged Bricks: Examine the bricks you have removed for potential reuse. Look for any damage, cracks, or excessive wear that may compromise their structural integrity. Keep the salvageable bricks in a safe place for later use in the rebuilding process.
9. Dispose of Debris Properly: Dispose of the old bricks and mortar debris responsibly. Check with your local waste management guidelines to determine the appropriate disposal method. Some areas may require you to arrange for a special pickup or drop-off at a designated facility.
10. Clean the Chimney Interior: Once the mortar removal is complete, inspect the interior of the chimney for any remaining debris, soot, or creosote buildup. Use a stiff brush or a vacuum cleaner with a brush attachment to clean the walls thoroughly. This will ensure a clean surface for the chimney rebuild.
Removing old bricks and mortar is a crucial step in the chimney rebuilding process. By following these guidelines, you will prepare the chimney for the next phase: repairing or rebuilding the chimney base.
Read more: How To Rebuild A Water Pump
Repairing or Rebuilding the Chimney Base
The chimney base, also known as the chimney foundation or footing, plays a crucial role in providing stability and support to the chimney structure. If the base is cracked, deteriorated, or compromised in any way, it is important to repair or rebuild it to ensure the structural integrity of the chimney. Here’s a step-by-step guide on how to repair or rebuild the chimney base:
1. Assess the Chimney Base: Carefully examine the chimney base to identify any visible cracks, crumbling mortar, or structural issues. Pay attention to the condition of the bricks and the integrity of the mortar joints. Determine whether repairs or a complete rebuild is necessary based on the severity of the damage.
2. Prepare the Base: Remove any loose or damaged bricks and mortar from the chimney base. Use a chisel and hammer to carefully chip away at the deteriorated sections. Clean the area thoroughly, ensuring there are no debris or loose particles left behind.
3. Mix Mortar: Prepare the mortar mix according to the manufacturer’s instructions. It is crucial to use the appropriate mortar mix for the type of bricks you are working with and match the existing mortar color as closely as possible for a seamless repair.
4. Repair Cracks: If there are minor cracks in the chimney base, you can repair them by applying mortar directly into the cracks. Use a pointing trowel to carefully fill the cracks with mortar, ensuring it completely fills the gaps. Smooth the surface of the mortar with the trowel for a uniform finish.
5. Rebuild the Base: In more severe cases where the chimney base needs to be completely rebuilt, start by creating a mortar bed on the prepared base. Use the trowel to apply a layer of mortar over the cleaned surface, ensuring it is evenly spread and approximately 1 inch thick.
6. Lay the First Course: Place the first row of bricks on top of the mortar bed, pressing them firmly into the mortar. Use a level to ensure the bricks are properly aligned and level. Apply mortar to the ends of the bricks for a secure bond.
7. Continue Bricklaying: Build up the chimney base by laying subsequent courses of bricks on top of the first row. Apply mortar between each brick and use a level to maintain proper alignment and straightness. Check periodically for plumb and level as you stack the bricks.
8. Secure the Bricks: As you lay each brick, tap it gently with a rubber mallet to ensure a tight bond with the mortar. Adjust the position of bricks as needed to maintain alignment and a uniform appearance. Remove any excess mortar that may squeeze out between the bricks.
9. Cure the Mortar: Allow the mortar to cure according to the manufacturer’s instructions. This typically involves keeping the newly laid bricks damp by misting them with water for several days. This process ensures proper bonding and strength of the mortar.
10. Clean up the Area: Once the chimney base is repaired or rebuilt, clean up the work area by removing any excess mortar, debris, or tools. Sweep the surrounding area to ensure a tidy workspace and prevent any potential hazards.
Repairing or rebuilding the chimney base is a crucial step in the chimney restoration process. By following these steps, you can ensure a solid foundation for the upcoming chimney shaft construction. Next, we will guide you through the process of constructing the chimney shaft.
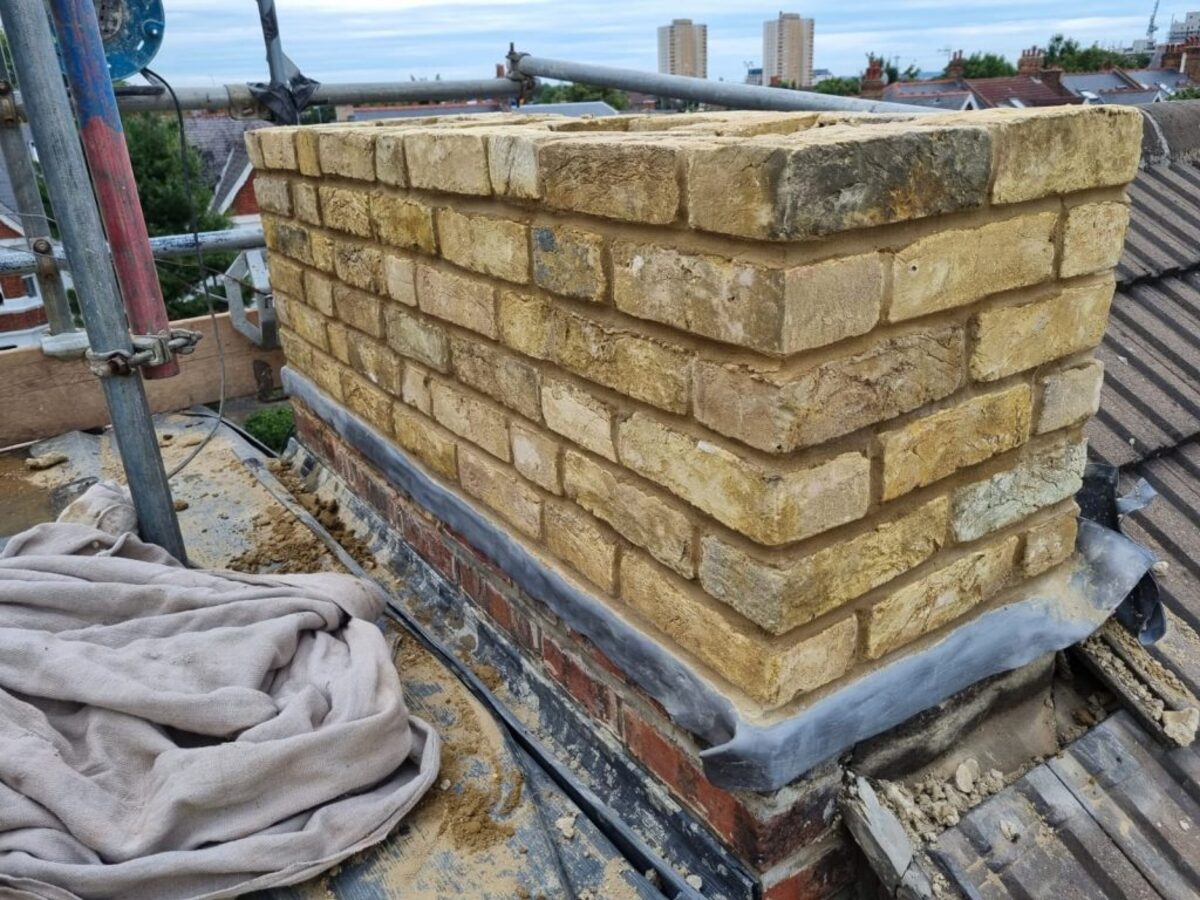
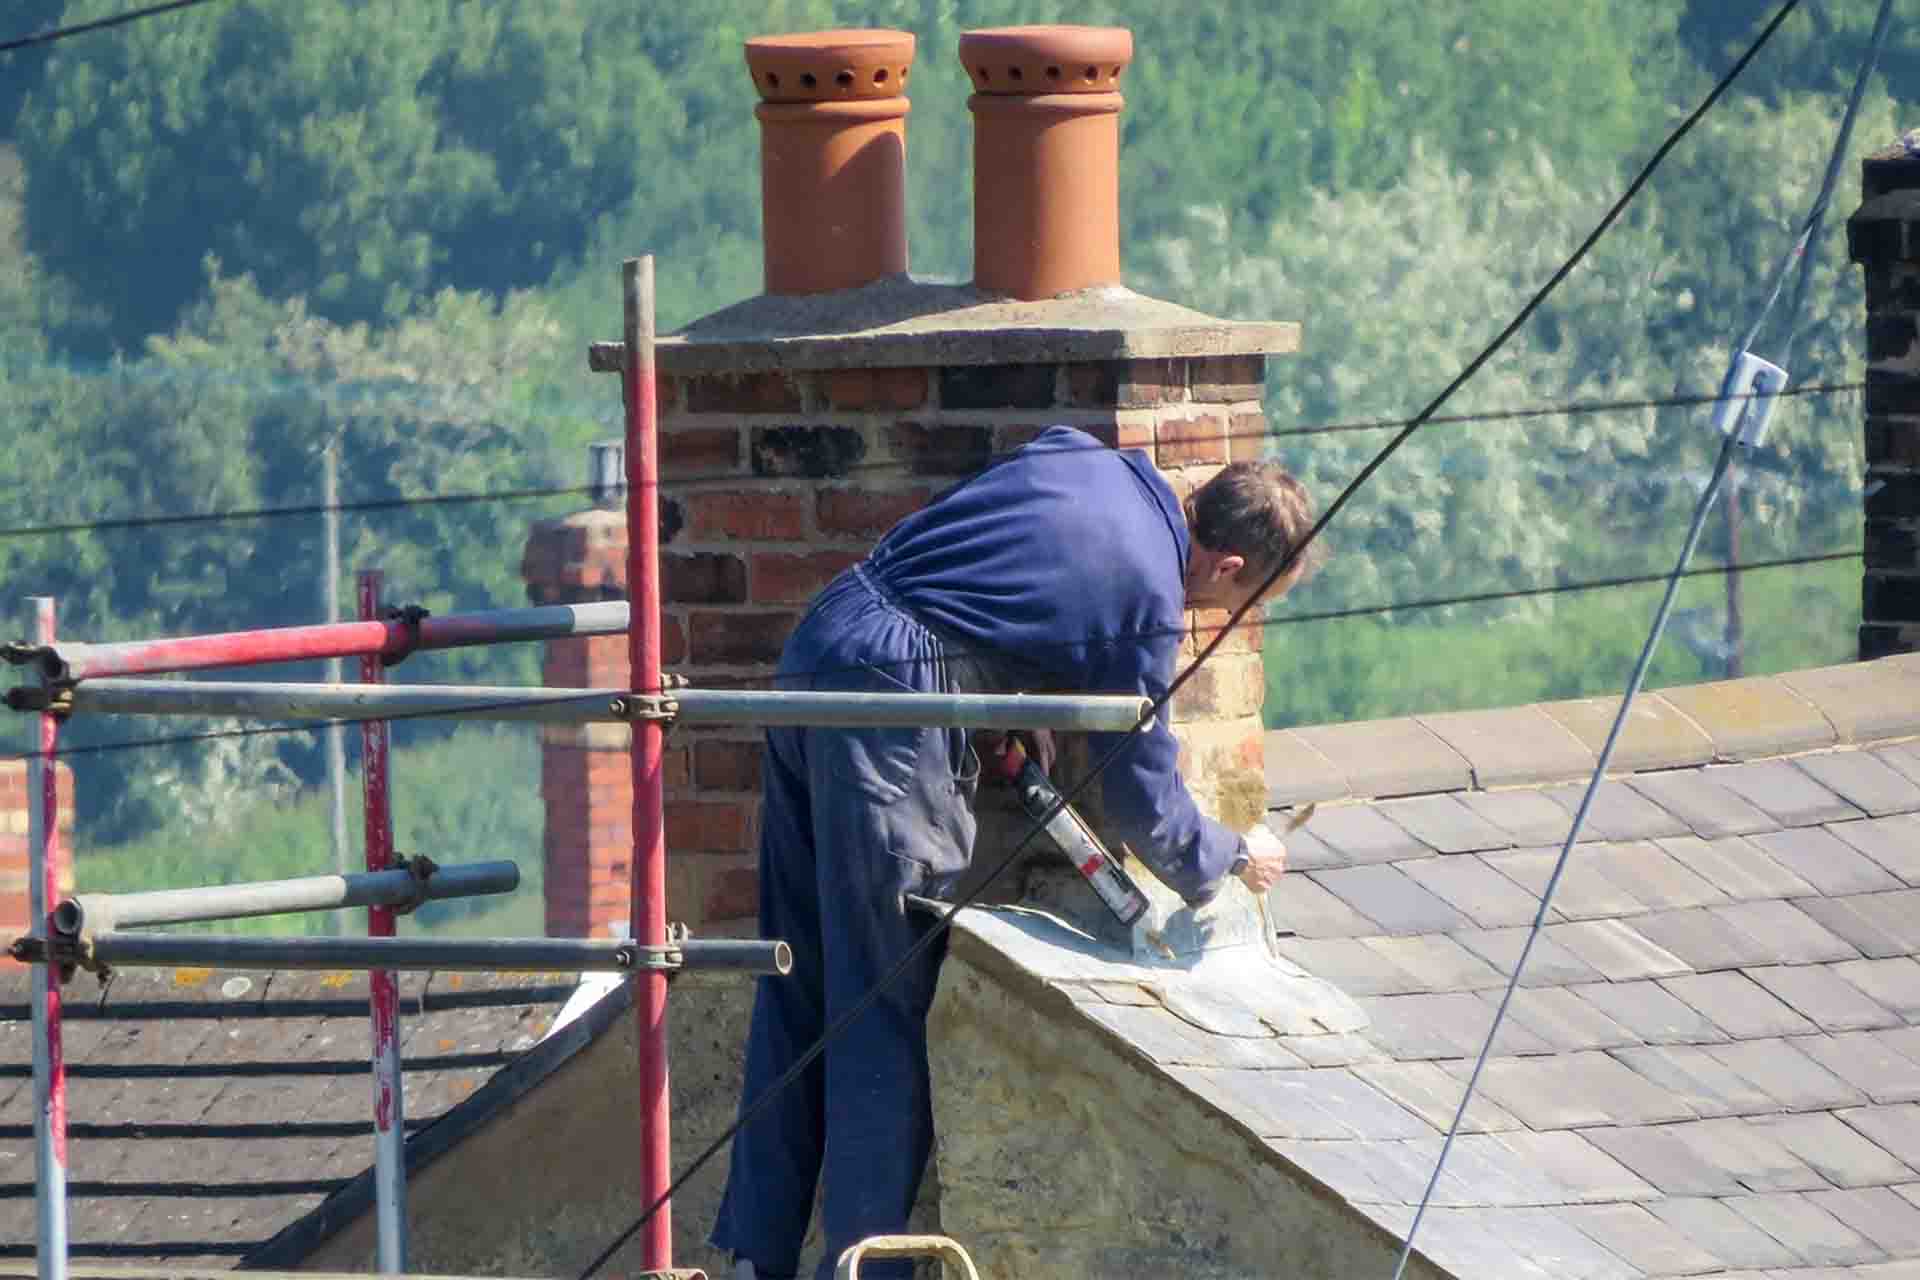
Make sure to thoroughly inspect the chimney for any damage before starting the rebuild process. Look for cracks, loose bricks, and signs of water damage.
Constructing the Chimney Shaft
The chimney shaft is the vertical part of the chimney that extends above the base. To ensure a structurally sound and functional chimney, it is essential to construct the chimney shaft properly. Here’s a step-by-step guide on how to construct the chimney shaft:
1. Prepare the Chimney Base: Ensure the chimney base is sturdy and fully cured before proceeding with the shaft construction. Remove any excess mortar or debris from the base, leaving a clean and level surface for the chimney shaft.
2. Lay the First Course: Start by applying a layer of mortar to the top of the chimney base. This will provide a secure bond between the base and the first row of bricks in the shaft. Place the first row of bricks on top of the mortar, ensuring they are level and aligned. Use a level and a masonry string to guide the placement of bricks and ensure straightness.
3. Build the Chimney Shaft: Continue laying subsequent courses of bricks on top of the first row. Apply mortar between each brick, working your way up. Use a trowel to spread the mortar evenly and a masonry jointer to create a consistent and aesthetically pleasing joint finish.
4. Maintain Alignment and Plumb: Check the alignment and plumb of the chimney shaft regularly to ensure it remains straight and upright. Adjust the position of bricks as needed and tap them gently with a rubber mallet to secure them in place. Use the level to ensure the chimney shaft is straight from all angles.
5. Install Lintels and Air Space: Install steel lintels at the appropriate height to support the weight of the chimney shaft. These lintels are necessary at openings such as windows or doors in the wall where the chimney passes through. Leave a small air gap between the lintel and the bricks to allow for thermal expansion and contraction.
6. Incorporate Ventilation Openings: Chimney shafts may require ventilation openings to facilitate proper air circulation. Consult local building codes and guidelines for the size, placement, and number of required ventilation openings. Incorporate these openings during the bricklaying process, leaving sufficient space between the bricks.
7. Use Bricks and Mortar Supports: Depending on the height and stability requirements of the chimney shaft, consider using bricks and mortar supports at regular intervals. These support structures provide additional strength to the chimney and help distribute the weight evenly. Consult with a structural engineer if needed to determine the appropriate placement and design of these supports.
8. Apply Mortar and Finish Joints: As you lay each course of bricks, ensure that the joints are filled with mortar and properly finished. Use a pointing trowel to smooth and shape the mortar joints, creating a neat and uniform appearance. Remove any excess mortar that may squeeze out between the bricks.
9. Cure the Mortar: Allow the mortar to cure properly according to the manufacturer’s instructions. This typically involves keeping the newly laid bricks damp by misting them with water for several days. This curing process helps strengthen the mortar and ensures a durable chimney shaft.
10. Clean up the Area: Once the chimney shaft is constructed, clean up the work area by removing any excess mortar, debris, or tools. Use a brush or broom to sweep the surrounding area and ensure a tidy workspace.
By following these steps, you can construct a sturdy, straight, and aesthetically pleasing chimney shaft. The next step is to install a new chimney cap to protect the interior of the chimney from water damage and other external elements.
Installing a New Chimney Cap
A chimney cap is an essential component of a chimney system, as it serves to protect the chimney from water damage, prevent debris from entering, and deter animals from nesting. Installing a new chimney cap is a relatively simple yet important step in completing the chimney rebuild. Here’s a step-by-step guide on how to install a new chimney cap:
1. Measure the Chimney Flue: Start by measuring the dimensions of the chimney flue to determine the appropriate size of the chimney cap. Use a measuring tape to measure the width and length of the flue opening. Ensure accurate measurements to ensure a proper fit for the chimney cap.
2. Choose the Right Chimney Cap: Select a high-quality chimney cap that is suitable for the specific dimensions of your chimney flue. Consider materials such as stainless steel or copper, which offer durability and resistance against the elements. Look for chimney caps that feature mesh screens to prevent sparks and embers from escaping.
3. Position the Chimney Cap: Place the chimney cap over the flue opening, ensuring that it is centered and aligned correctly. Depending on the type of chimney cap, there may be adjustable brackets or screws that need to be positioned accordingly.
4. Attach the Chimney Cap: Secure the chimney cap in place using the provided brackets, screws, or fasteners. Make sure that the chimney cap is firmly attached and does not wobble or move when gently tested. Use a screwdriver or a wrench to tighten the fasteners as needed.
5. Inspect the Installation: Once the chimney cap is securely installed, step back and visually inspect the positioning and alignment. Ensure that the chimney cap covers the entire flue opening and provides an adequate overhang to prevent water from entering the chimney shaft.
6. Test for Proper Functionality: To verify that the chimney cap is functioning correctly, perform a simple functionality test. Light a small piece of paper and hold it near the base of the chimney cap. Observe if the smoke is being drawn up the chimney shaft, indicating that the chimney cap is allowing proper ventilation while preventing downdrafts.
7. Maintain the Chimney Cap: Regularly inspect and maintain the chimney cap to ensure its continued functionality. Remove any debris or obstructions that may accumulate on the chimney cap’s screens or surface. Check for signs of damage or wear and replace the chimney cap as necessary to maintain protection for your chimney.
Installing a new chimney cap is a vital step in safeguarding your chimney from potential damage and ensuring proper ventilation. Once the chimney cap is securely in place, it’s time to move on to the next step: applying mortar and securing the bricks in the chimney shaft.
Applying Mortar and Securing the Bricks
Applying mortar and securing the bricks is a crucial step in the chimney rebuilding process as it ensures the stability and strength of the chimney structure. Proper application of mortar and precise placement of the bricks are essential for a durable and long-lasting chimney. Here’s a step-by-step guide on how to apply mortar and secure the bricks:
1. Prepare the Mortar Mix: Follow the manufacturer’s instructions to prepare the mortar mix. Ensure that you use the appropriate mortar type for your specific project and climate conditions. The mortar mix should have a workable consistency, allowing it to adhere to the bricks easily.
2. Apply Mortar to the Base: Start by applying a layer of mortar onto the chimney base using a trowel. This serves as a bonding agent between the base and the first course of bricks in the chimney shaft. Make sure the mortar is evenly spread and covers the entire surface where the bricks will be placed.
3. Butter the Brick: Take a brick and apply a layer of mortar on one end, known as “buttering” the brick. This ensures a secure bond between the brick and the mortar bed. Use the trowel to apply a thin, even layer of mortar on the end of the brick.
4. Place the Brick: Position the buttered end of the brick onto the mortar bed, pressing it firmly and leveling it with the surrounding bricks. Use a level to ensure that the brick is straight and aligned with the rest of the course. Adjust the position of the brick as needed, and remove any excess mortar that squeezes out from the joints.
5. Repeat the Process: Continue buttering each brick and placing them onto the mortar bed, one after another. Apply mortar between each brick and ensure proper alignment with adjacent bricks. Use a level and a masonry string to maintain a straight and level chimney shaft. As you progress upwards, periodically check for plumb to ensure the chimney remains vertically straight.
6. Secure the Bricks: After placing each brick, tap it gently with a rubber mallet to ensure a tight bond with the mortar. This helps eliminate any gaps between the bricks and strengthens the overall structure. Pay attention to maintaining consistent mortar joint thickness throughout the chimney shaft.
7. Tool the Joints: Once a section of bricks is laid and secured, use a masonry jointer or a striking tool to finish the mortar joints. Run the jointer along the joints, forming a concave shape and creating a neat and finished look. Make sure the joints are properly filled and smoothed, leaving no gaps or empty spaces.
8. Clean Up Excess Mortar: Regularly clean up excess mortar that may accumulate on the brick surfaces or in the joints. Use a trowel or a brush to scrape away any excess mortar before it hardens. This will help maintain a clean and professional-looking chimney.
9. Allow Mortar to Cure: Proper curing of the mortar is essential for its strength and durability. Follow the manufacturer’s guidelines for curing time, which typically involves misting the newly laid bricks with water and keeping them damp for several days.
10. Periodically Inspect and Maintain: After the mortar has fully cured, periodically inspect the chimney for any signs of mortar deterioration or brick movement. Repoint any gaps or cracks in the mortar joints as needed to ensure the continued stability of the chimney.
By following these steps, you can ensure that the bricks are securely placed and bonded with the mortar, resulting in a strong and stable chimney structure. The next step is to add the finishing touches and clean up the work area.
Read more: How To Rebuild Your Wardrobe
Finishing Touches and Clean Up
Once you’ve completed the major stages of rebuilding the chimney, it’s time to add the finishing touches and clean up the work area. Paying attention to these final details will not only enhance the overall appearance of the chimney but also ensure a clean and safe environment. Here are the steps for the finishing touches and clean up:
1. Remove Excess Mortar: Carefully scrape off any excess mortar from the brick surfaces using a trowel or a brush. Be gentle to avoid damaging the newly laid bricks. Cleaning off excess mortar will give the chimney a neat and polished look.
2. Brush off Loose Particles: Use a stiff brush or a broom to sweep away any loose particles, dust, or debris around the chimney area. Pay special attention to the base and the surrounding ground to ensure that no materials are left that could potentially cause hazards or aesthetic nuisances.
3. Inspect for Gaps or Cracks: Once the chimney has been cleaned, conduct a thorough inspection of the mortar joints and brickwork. Look for any gaps or cracks that may have formed during the rebuilding process. If necessary, use a pointing trowel to repoint any areas that require additional mortar.
4. Apply a Weatherproof Sealant: Consider applying a weatherproof sealant or water repellent to protect the chimney from moisture damage. Consult with a professional or a local masonry supplier to select the appropriate sealant and follow the manufacturer’s instructions for application.
5. Replace Damaged or Missing Bricks: If you identified any damaged or missing bricks during the rebuilding process, now is the time to address them. Replace any bricks that are cracked, chipped, or broken, ensuring a consistent and uniform appearance.
6. Install a Chimney Crown: If your chimney is equipped with a chimney crown, inspect it for any cracks or damage. Repair or replace the chimney crown as necessary to provide added protection to the chimney structure from water infiltration.
7. Clean the Chimney Interior: After completing the exterior work, it’s essential to clean the chimney interior. Use a chimney brush or hire a professional chimney sweep to remove any soot, creosote, or debris that may have accumulated during the rebuilding process. This will optimize the efficiency and safety of your chimney system.
8. Organize Tools and Materials: Properly organize and store your tools and materials to ensure a clutter-free work area. Clean and store your tools, dispose of any leftover debris, and organize any unused materials for future projects or proper disposal.
9. Reveal the Finished Chimney: Step back and admire the fruits of your labor. Your rebuilt chimney should now be structurally sound, visually appealing, and ready for use. Take pride in the accomplishment of restoring an essential part of your home.
By completing these finishing touches and thoroughly cleaning up the work area, you are ensuring that the chimney is in its best shape and ready to serve its purpose. Regular maintenance and periodic inspections will help prolong the lifespan of your chimney and ensure its continued functionality and safety.
With the completion of the finishing touches and clean up, you have successfully rebuilt your chimney. Congratulations on a job well done! Remember to consult professionals or experts if needed, and always prioritize safety throughout the entire process. Enjoy the benefits of a restored and functional chimney for years to come.
Conclusion
Rebuilding a chimney may initially seem like a daunting task, but with the right knowledge, tools, and materials, it is a manageable project that can greatly enhance the functionality and aesthetics of your home. By following the step-by-step guide outlined in this article, you have learned how to assess the condition of your chimney, gather the necessary tools and materials, take proper safety precautions, remove old bricks and mortar, repair or rebuild the chimney base, construct the chimney shaft, install a new chimney cap, apply mortar and secure the bricks, and finish with the appropriate touches and clean up.
Throughout the rebuilding process, safety should always remain a priority. Ensuring that you have the proper protective gear, securing the work area, and following recommended guidelines will help prevent accidents and injuries. Additionally, consulting professionals or seeking expert advice when needed can further ensure the success of your chimney rebuild.
Remember that each step requires attention to detail and patience. Taking the time to properly assess, prepare, and execute each stage will result in a structurally sound and visually appealing chimney. Regular maintenance and inspections are essential to preserving the longevity and functionality of your rebuilt chimney.
Rebuilding a chimney not only improves the chimney’s performance but also adds value to your home. You can enjoy the warmth, ambiance, and energy efficiency provided by your fireplace or heating system while maintaining peace of mind knowing that your chimney is in optimal condition.
If you ever feel unsure or overwhelmed during the chimney rebuilding process, do not hesitate to reach out to a professional chimney contractor who can offer guidance or handle the project on your behalf. Their expertise and experience can ensure a safe and successful rebuild, saving you time and providing peace of mind.
Congratulations on your commitment to restoring and enhancing your chimney. By following this comprehensive guide, you have equipped yourself with the knowledge and confidence to tackle this project. Embrace the satisfaction of a job well done and enjoy the benefits of a fully functional and visually stunning chimney in your home for years to come.
Frequently Asked Questions about How To Rebuild A Chimney
Was this page helpful?
At Storables.com, we guarantee accurate and reliable information. Our content, validated by Expert Board Contributors, is crafted following stringent Editorial Policies. We're committed to providing you with well-researched, expert-backed insights for all your informational needs.


0 thoughts on “How To Rebuild A Chimney”