Articles
How To Rebuild Electric Motor
Modified: October 20, 2024
Learn how to rebuild an electric motor with our comprehensive articles. Get step-by-step instructions and expert tips for a successful motor restoration.
(Many of the links in this article redirect to a specific reviewed product. Your purchase of these products through affiliate links helps to generate commission for Storables.com, at no extra cost. Learn more)
Introduction
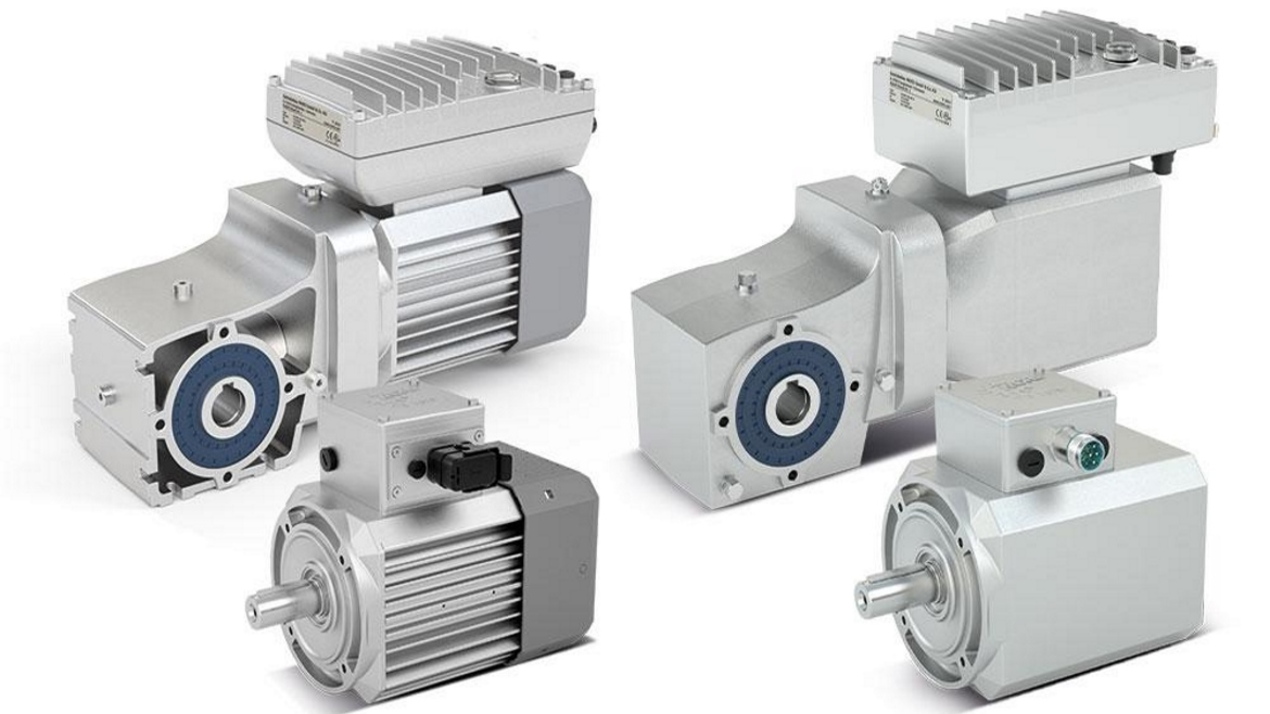
Electric motors are crucial components in various appliances, machinery, and equipment. They provide the necessary power to ensure the smooth operation of everything from ceiling fans to industrial machinery. However, over time, motors can wear out or become damaged, requiring them to be rebuilt.
Rebuilding an electric motor involves disassembling it, inspecting for any issues, cleaning the components, replacing faulty parts, and then reassembling it to restore its functionality. This process can help extend the lifespan of the motor, save money on replacements, and reduce waste.
In this article, we will guide you through the step-by-step process of rebuilding an electric motor. Whether you are a DIY enthusiast or a professional technician, this comprehensive guide will provide you with the knowledge and skills to successfully rebuild a motor and bring it back to life.
Please note that working with electric motors can be potentially hazardous. It is essential to take necessary safety precautions and follow manufacturer guidelines throughout the rebuilding process. If you are unsure or uncomfortable with any step, it is always best to consult a professional.
Now, let’s get started with the first step: assessing the motor’s condition.
Key Takeaways:
- Rebuilding an electric motor involves assessing, disassembling, cleaning, inspecting, replacing faulty parts, reassembling, and testing. This comprehensive process can extend the motor’s lifespan and ensure optimal functionality.
- Prioritizing safety, following manufacturer guidelines, and seeking professional assistance when needed are crucial when rebuilding electric motors. Regular maintenance and timely repairs contribute to sustainability and equipment efficiency.
Read more: How To Build A Electric Motor
Step 1: Assess the motor’s condition
Before diving into the rebuilding process, it is crucial to assess the condition of the electric motor. This step helps identify any issues or damages that may need attention. Here are two essential aspects to consider: inspecting for physical damages and checking for electrical failures.
Inspecting for physical damages:
Begin by examining the motor’s exterior for any visible signs of physical damage. Look for dents, cracks, or bent components that may affect the motor’s performance. Pay attention to the housing, shafts, and connections. Additionally, inspect the motor’s cooling system, such as the fan and ventilation, as airflow is vital for proper operation.
If you notice any physical damages, assess their severity. Minor dents or cracks may not require immediate attention, but major damages may compromise the motor’s functionality and safety. In such cases, it is recommended to consult a professional before proceeding with the rebuilding process.
Checking for electrical failures:
Next, you need to evaluate the motor’s electrical components for any failures. Start by examining the wiring and connections for loose or damaged wires. Faulty connections can cause electrical short circuits and impact the motor’s performance.
Use a multimeter to test the motor’s windings for continuity. Your multimeter should be set to the resistance or continuity mode. Touch the multimeter probes to the different terminals of the motor windings. If there is no continuity or an unusually high resistance, it indicates a problem with the windings.
Another important aspect to check is the motor’s brushes if it has a brush system. These are usually located next to the commutator. Inspect the condition of the brushes and their contact with the commutator. Worn-out brushes or poor contact can lead to a loss of power or erratic motor operation.
If you find any electrical failures during the assessment, it may be necessary to replace the faulty components. Some issues, such as loose connections, can be resolved with simple repairs, while others may require more complex interventions.
By thoroughly assessing the motor’s condition and identifying any physical damages or electrical failures, you will have a clear understanding of the issues that need to be addressed during the rebuilding process. This will help ensure that the motor is rebuilt effectively and performs optimally once it is reassembled.
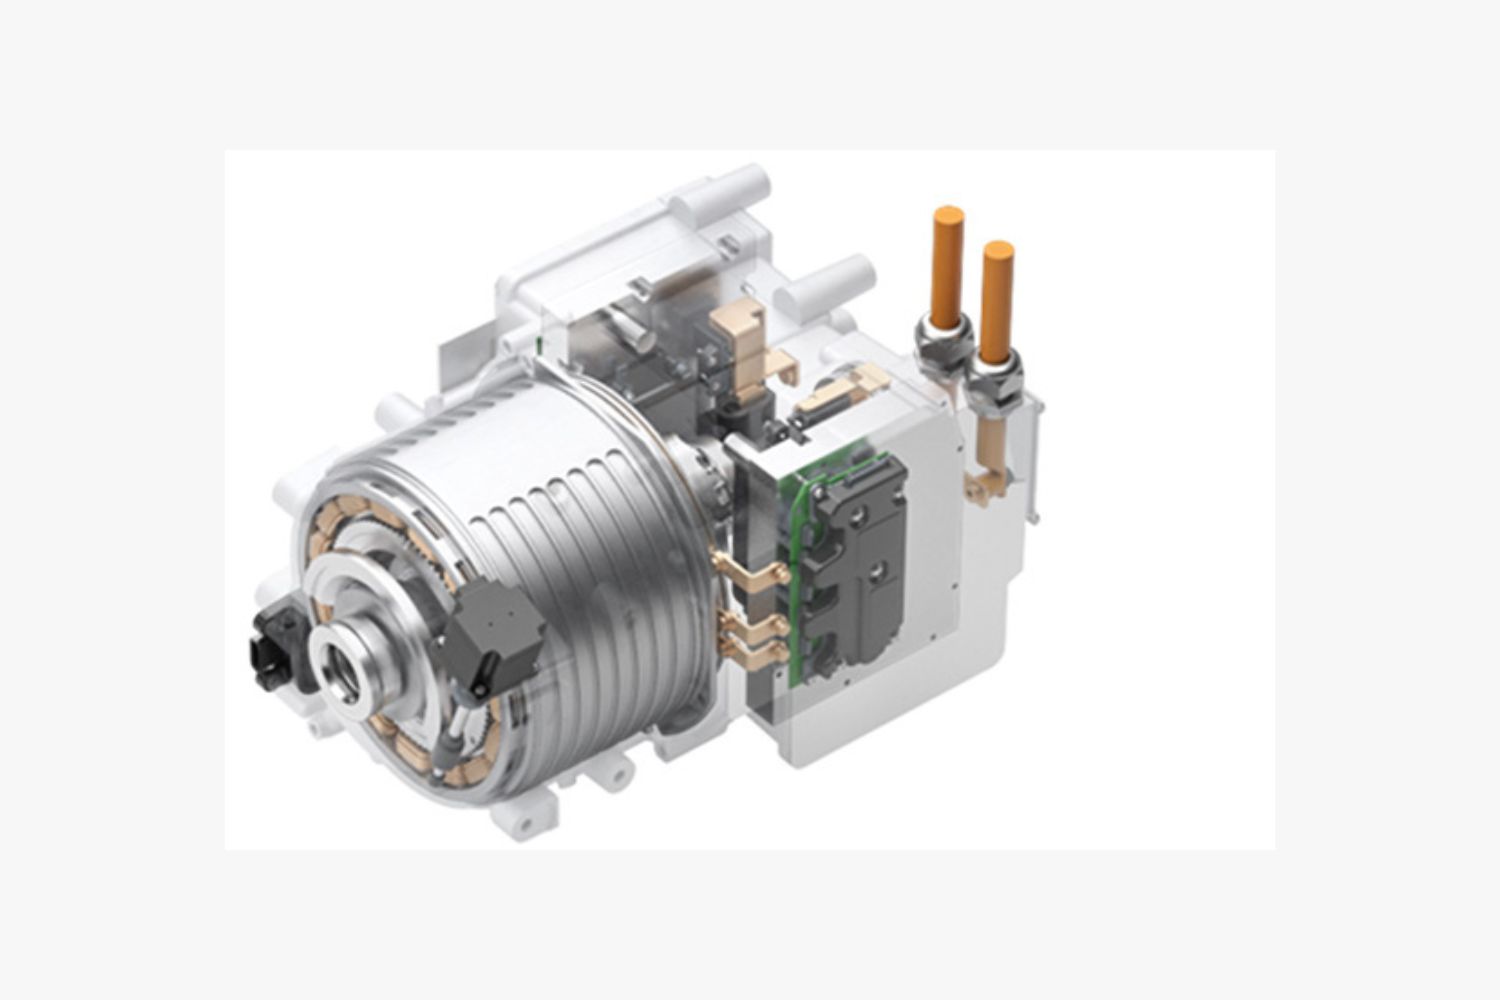
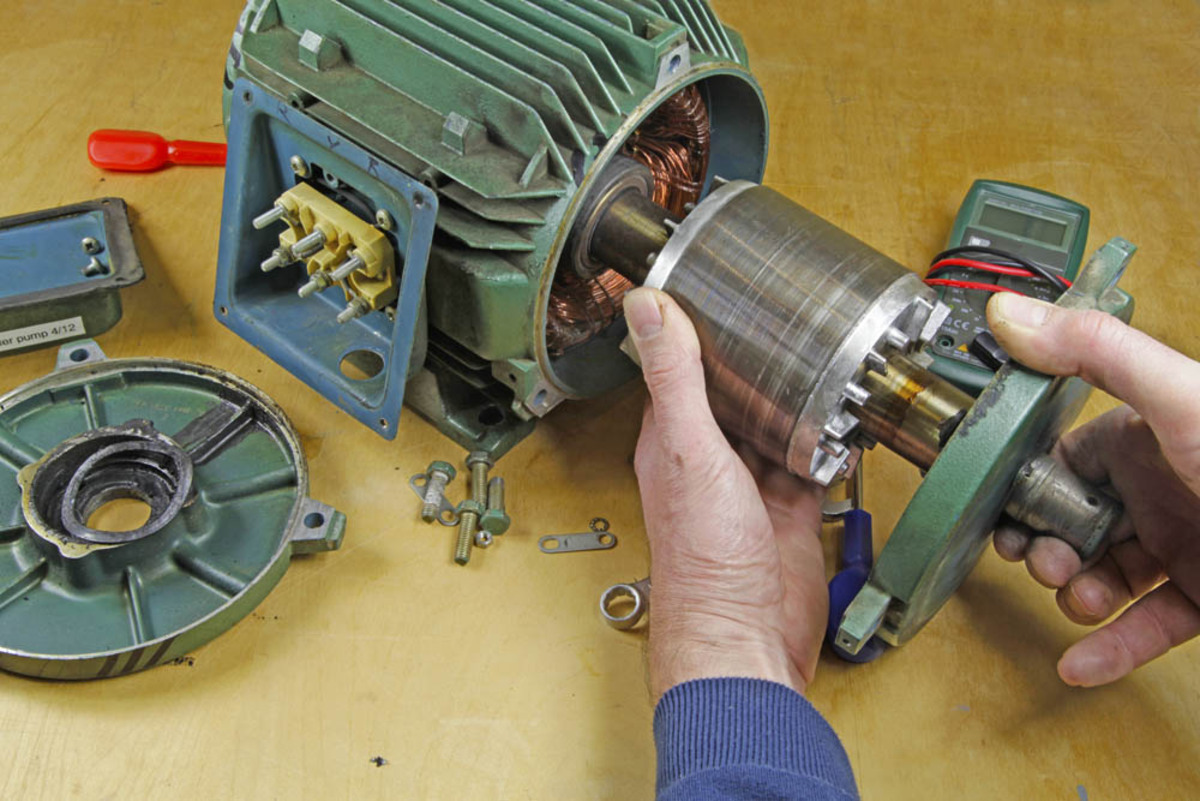
Step 2: Disassembly
Once you have assessed the motor’s condition and identified any issues, it’s time to proceed with the disassembly process. Disassembling the motor involves removing the outer casing and separating the rotor and stator. Here are the essential steps to follow:
Removing the outer casing:
Start by locating the fasteners that hold the outer casing of the motor in place. These fasteners are typically screws or bolts located around the perimeter of the motor. Use the appropriate tools, such as a screwdriver or wrench, to carefully remove them. Keep track of the fasteners and store them in a safe place to prevent loss.
Once the fasteners are removed, gently lift off the outer casing. Be cautious not to force or pry it off, as this can potentially damage the motor. In some cases, the outer casing may be sealed with adhesive or silicone. If this is the case, use a heat gun or a utility knife to carefully loosen or cut the sealant.
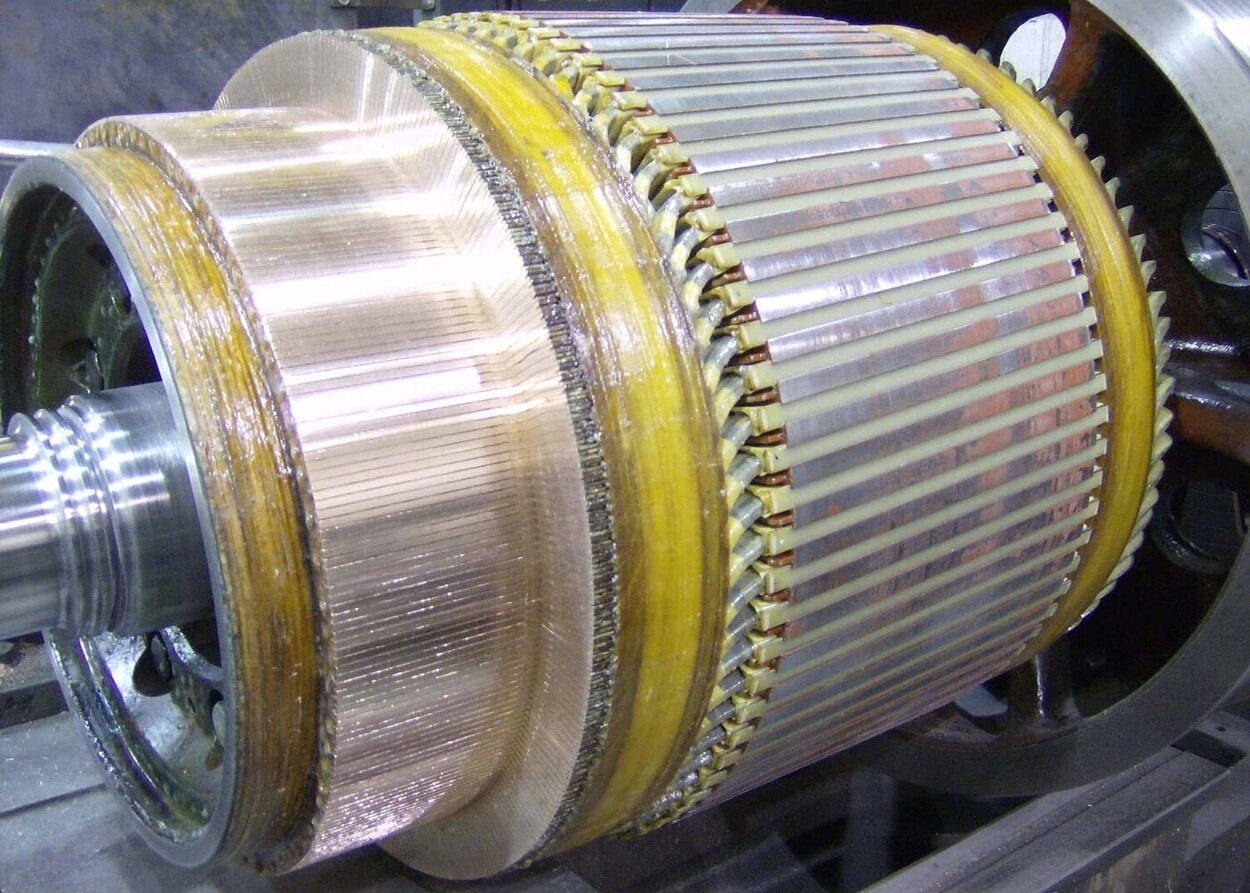
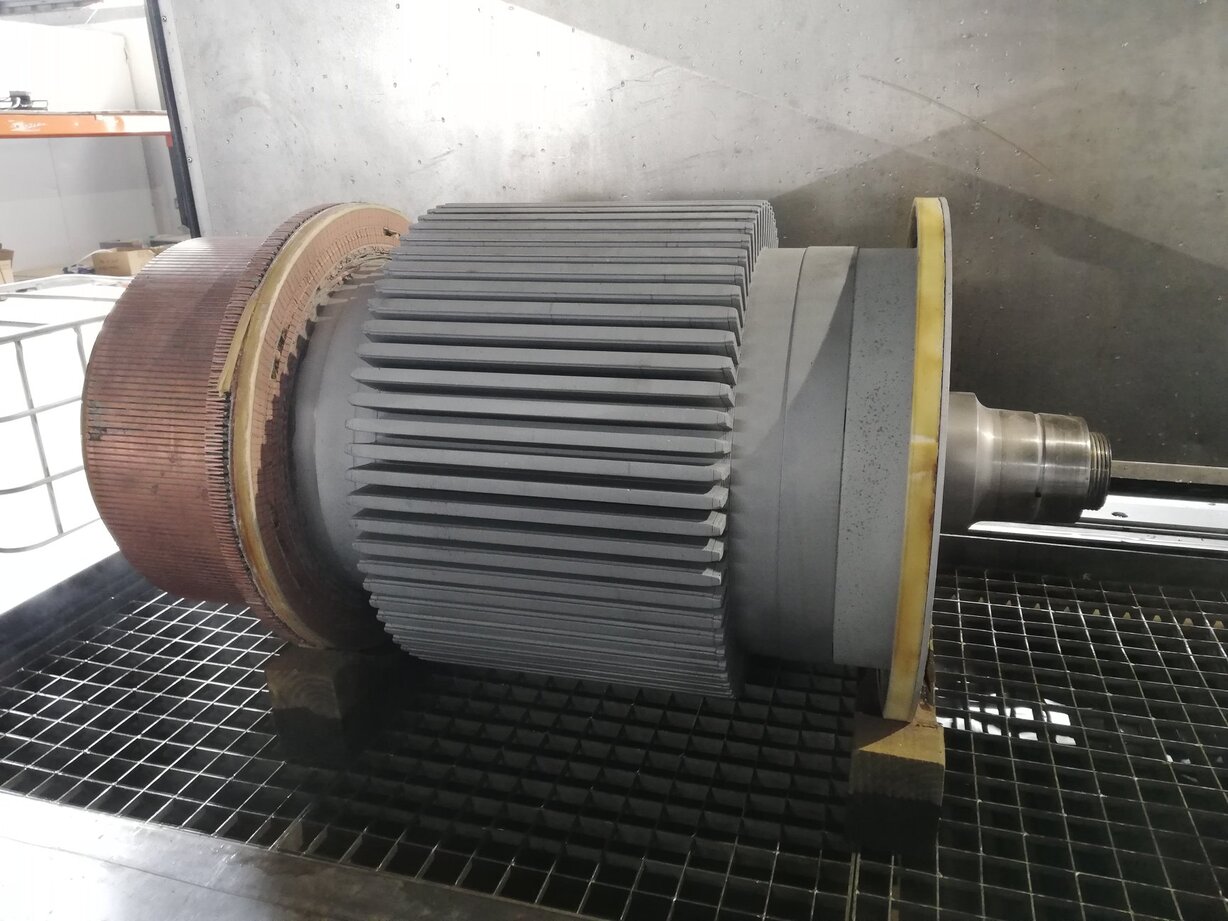
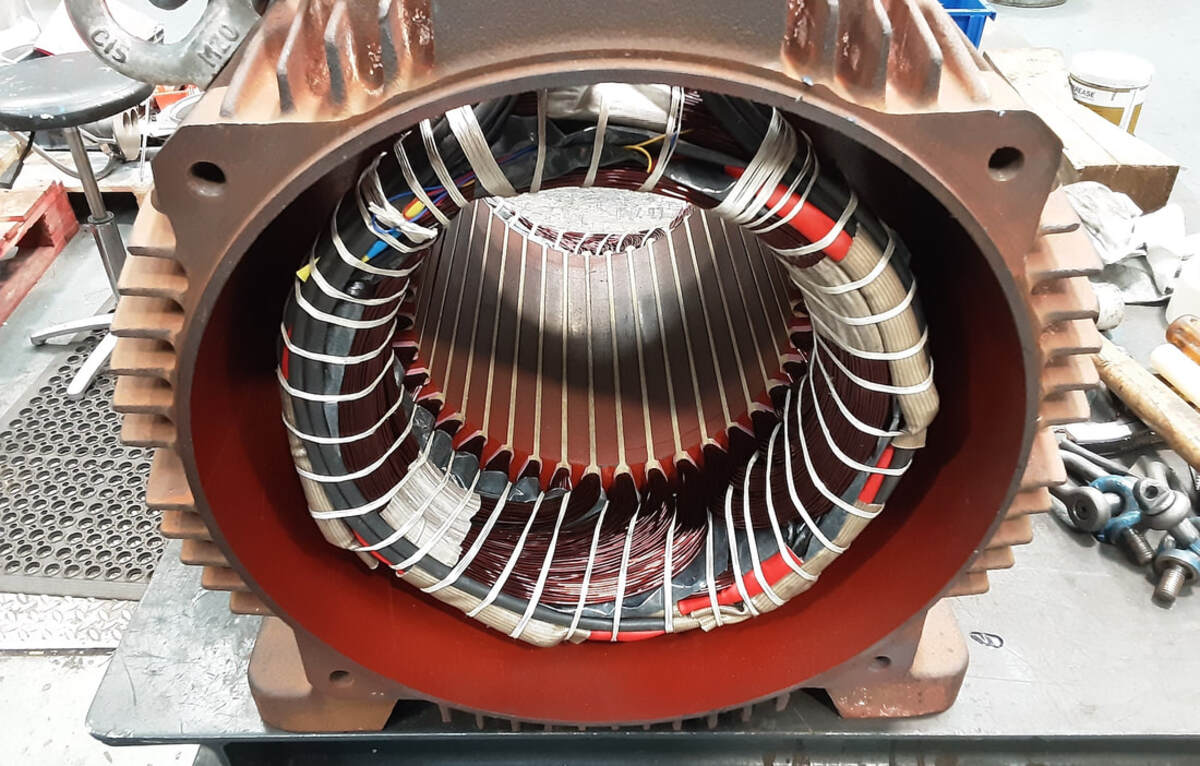
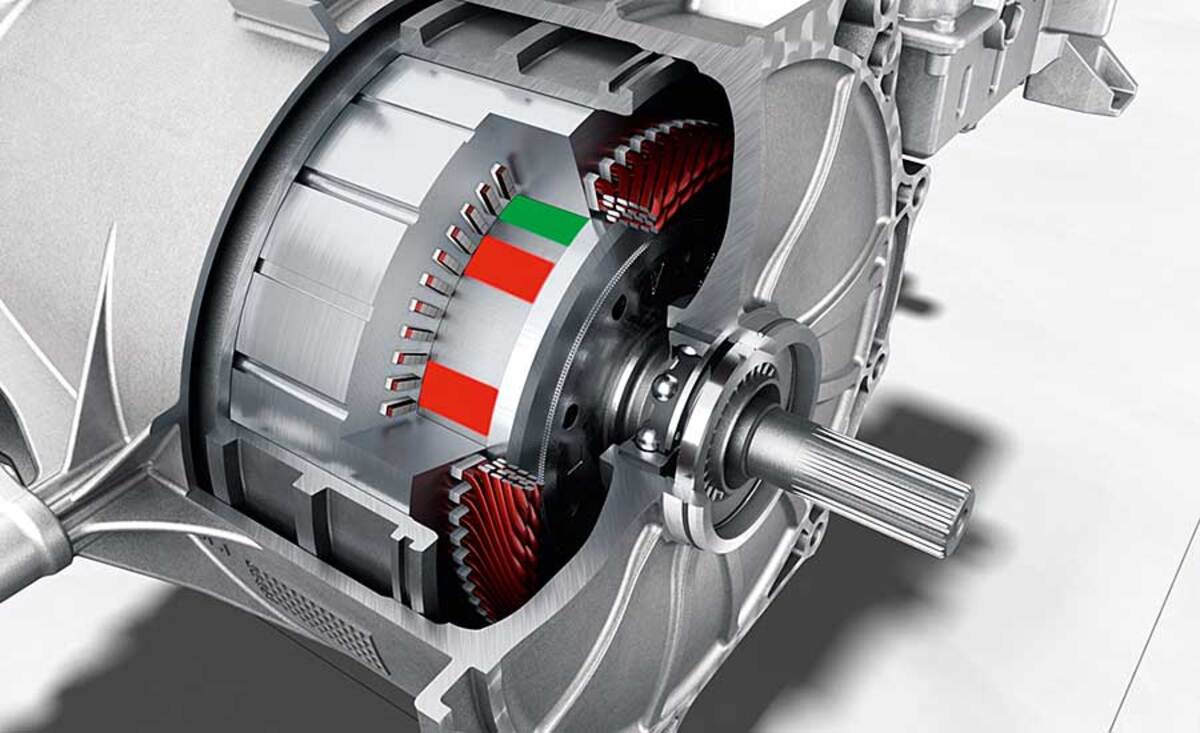
Detaching the rotor and stator:
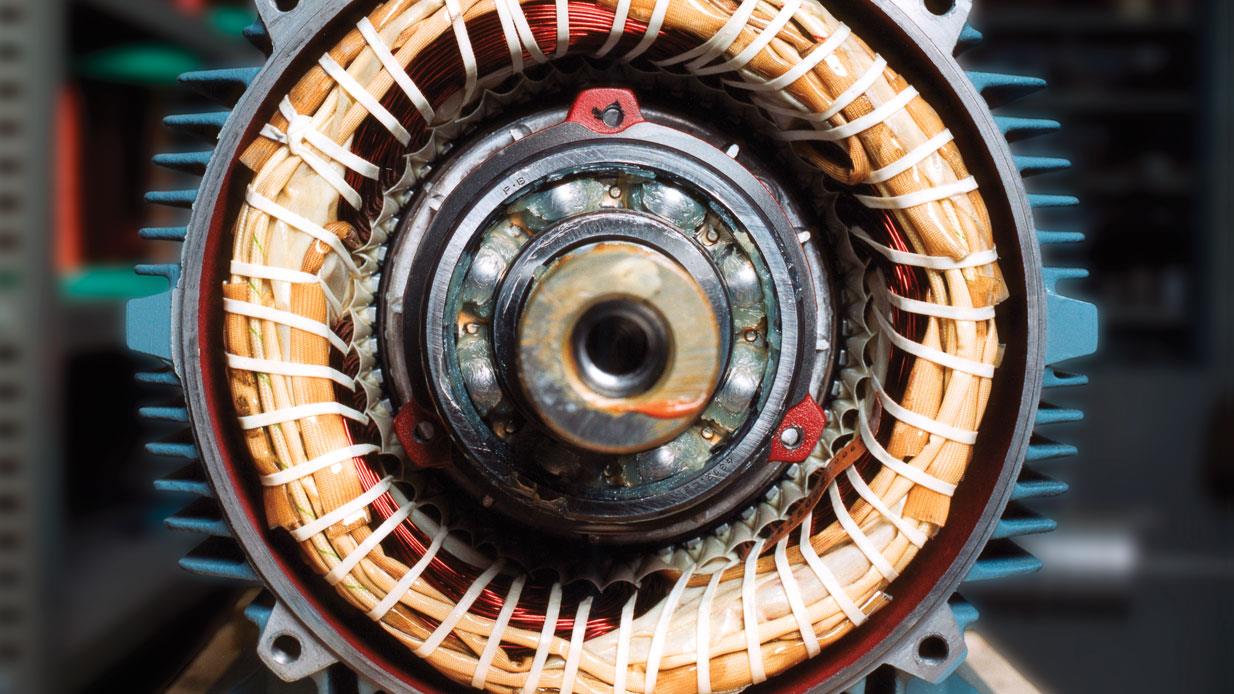
After removing the outer casing, you will have access to the internal components of the motor. Locate the rotor and stator, which are the two main parts responsible for generating the motor’s movement and magnetic field.
To detach the rotor, which is the rotating part of the motor, look for a retaining bolt or nut at the center of the rotor. Use the appropriate tool to loosen and remove it. Once the retaining bolt or nut is removed, gently slide the rotor out of its position.
Next, focus on detaching the stator, which is the stationary part of the motor. The stator is typically held in place by a series of mounting screws or bolts. Remove these fasteners, taking care not to damage the stator or its winding wires.
When removing the rotor and stator, be mindful of any connectors, terminals, or wiring that may be connected to them. Disconnect these components carefully to avoid any damage or disconnection.
By correctly disassembling the motor, you will have access to its internal components for inspection, cleaning, and potential repair or replacement. Remember to handle each part with care to prevent any further damage or misalignment.
Step 3: Cleaning
Once the motor has been disassembled, it is vital to clean the components thoroughly. Cleaning helps remove dirt, dust, debris, and any other contaminants that may have accumulated over time. Here are the key steps to follow:
Removing dirt and debris:
Start by inspecting each component for the presence of dirt, dust, or debris. Use a soft brush, such as a paintbrush or toothbrush, to gently remove any loose particles. Be careful not to scrub or apply excessive force, as this can potentially damage the components.
Pay special attention to hard-to-reach areas, such as crevices, grooves, and cooling fins. Use compressed air or a can of compressed air to blow out any dirt or debris that may be trapped in these areas.
Using appropriate cleaning solutions:
After removing loose dirt and debris, it’s time to use appropriate cleaning solutions to further clean the motor components. The choice of cleaning solution will depend on the type and severity of contamination.
For general cleaning, mild detergent mixed with warm water can be used. Dip a clean cloth or sponge into the soapy solution and gently wipe down the components. Avoid soaking the components in water to prevent damage to electrical parts or insulation.
If there are stubborn stains or grease on the components, you may need to use specialized solvent-based cleaning solutions. Ensure that the solvent is compatible with the material of the components and follow the manufacturer’s instructions for safe usage.
For metal components, such as the rotor and stator, you can use a degreaser or a specialized electrical contact cleaner to remove any oil or grease buildup. Carefully apply the cleaning solution using a clean cloth or a soft brush, and then wipe off any residue.
Keep in mind that some components, especially electrical parts, may require extra caution when cleaning. If you are unsure about how to clean a particular component safely, refer to the manufacturer’s guidelines or consult a professional.
By thoroughly cleaning the motor components, you will ensure the removal of contaminants that can hinder performance or cause damage. Clean components also facilitate easier inspection and allow for a more accurate assessment of any further repairs or replacements required.
When rebuilding an electric motor, make sure to carefully document the disassembly process, take note of the position of each component, and clean all parts thoroughly before reassembly.
Step 4: Inspection and replacement of faulty parts
After cleaning the motor components, the next step is to carefully inspect each part for any damage or wear. Identifying and replacing faulty or worn-out parts is crucial to ensure optimal performance and longevity of the rebuilt motor. Here’s how to proceed:
Identifying damaged components:
Start by visually inspecting each component for signs of damage or wear. Look for cracks, breaks, excessive corrosion, or any other visible defects. Pay close attention to the rotor, stator, bearings, brushes (if applicable), and wiring connections.
Use a magnifying glass or a high-intensity light source to examine the components more closely. Look for any microscopic cracks, loose connections, or signs of overheating, such as discoloration or melted insulation.
In addition to visual inspection, perform functional tests where applicable. For example, rotate the rotor manually to check for smooth movement, test the continuity of the winding wires with a multimeter, or apply voltage to the motor to see if it operates properly.
Replacing worn-out parts:
If any components are found to be damaged or worn beyond repair, they will need to be replaced. The specific parts that may require replacement will depend on the type and condition of the motor.
Common components that often require replacement include worn-out brushes, damaged bearings, cracked or broken rotor or stator laminations, and faulty wiring connections. Consult the motor’s technical specifications or manufacturer’s guidelines to ensure you use the correct replacement parts.
When replacing parts, ensure they are installed correctly and securely. Follow any assembly instructions provided by the manufacturer, including torque specifications for fasteners. Take care not to damage any new parts during the installation process.
If you are unsure about how to replace a specific component or part, consider seeking assistance from a professional technician or referring to specialized motor repair resources.
By thoroughly inspecting the motor components and replacing any faulty or worn-out parts, you will improve the reliability and overall performance of the rebuilt motor. Proper maintenance and timely replacement of damaged parts are vital to ensure the motor operates efficiently and safely.
Read more: How To Cool An Electric Motor
Step 5: Reassembly
After inspecting and replacing any faulty parts, it’s time to reassemble the motor. Reassembling the motor involves putting the rotor and stator back in their respective positions and securing the outer casing. Here’s how to proceed:
Placing the rotor and stator back in position:
Begin by carefully positioning the stator back in place. Align the mounting holes on the stator with the corresponding holes on the motor housing. Ensure that the stator is seated evenly and securely. Insert the mounting screws or bolts and tighten them to the specified torque, following the manufacturer’s guidelines.
Next, insert the rotor back into the motor. Align the shaft of the rotor with the bearing and slide it into the stator. If there was a retaining bolt or nut that was removed during disassembly, reattach and tighten it to secure the rotor in place. Verify that the rotor rotates smoothly and without any obstructions.
Securing the outer casing:
Once the rotor and stator are properly positioned, it’s time to secure the outer casing. Align the casing with the motor housing and carefully lower it into position. Ensure that any wires or connectors associated with the motor are placed appropriately and do not get pinched or obstructed during this process.
If the outer casing is fastened with screws or bolts, insert them into the designated holes and tighten them securely. If there was any adhesive or sealant used during the initial disassembly, apply it as recommended to ensure a proper seal and prevent any moisture or dust from entering the motor.
Double-check the tightness of all fasteners and connections before proceeding to the next step.
By correctly reassembling the motor, you are ensuring that all the internal components are properly aligned and secured. This helps maintain the integrity of the motor, minimizing the risk of any issues or damage during operation.
Step 6: Testing the rebuilt motor
After successfully reassembling the motor, it’s crucial to test its functionality to ensure it is operating correctly. This step involves verifying proper operation and conducting performance tests. Here’s how to proceed:
Verifying proper operation:
Start by connecting the motor to the appropriate power source. Ensure that all wiring connections are securely in place and that there are no loose or exposed wires. Double-check the voltage and current requirements of the motor to ensure it matches the power supply.
Turn on the power and observe the motor’s behavior. Listen for any unusual sounds, such as grinding or humming noises, which may indicate a problem. Check for any excessive vibration or heating of the motor. Observe the rotation of the rotor to ensure it is smooth and consistent.
If the motor operates as expected without any abnormal issues, it is a good sign that the rebuilding process was successful. However, it’s important to continue with further testing to ensure optimal performance.
Conducting performance tests:
To thoroughly evaluate the rebuilt motor, conduct performance tests. These tests will help determine if the motor meets the required specifications and performance standards. Some common performance tests include:
- Load test: Apply an appropriate load to the motor and monitor its performance under different load conditions. Observe if the motor can maintain a stable speed and handle the load effectively.
- Efficiency test: Measure the energy efficiency of the motor by comparing the input power with the output power. This test can help identify any inefficiencies or energy losses within the motor.
- Temperature test: Monitor the temperature of various motor components during operation. Excessive heating can indicate a problem, such as inadequate cooling or an issue with the winding insulation.
- No-load test: Run the motor with no load to observe its rotational speed and check for any irregularities or unexpected variations.
Perform these tests in a controlled and safe environment. Follow the appropriate procedures and guidelines related to the type and rating of the motor being tested. If you are unsure about conducting performance tests, consult a professional or refer to specialized resources.
By verifying the proper operation and conducting performance tests, you can gain confidence in the quality and functionality of the rebuilt motor. This step ensures that the motor is ready to be used in its intended application without any performance or reliability concerns.
Conclusion
Rebuilding an electric motor can be a rewarding process that allows you to extend the life of a valuable component and save money on replacements. By following the step-by-step process outlined in this article, you can successfully rebuild an electric motor and restore it to optimal functionality.
Throughout the rebuilding process, it is crucial to assess the motor’s condition, disassemble it carefully, clean the components thoroughly, inspect for any damages or wear, replace faulty parts, and reassemble the motor with precision. Testing the rebuilt motor is the final step to ensure its proper operation and performance.
Remember to always prioritize safety when working with electric motors. Take necessary precautions, follow manufacturer guidelines, and seek assistance if needed. If you are unsure or uncomfortable with any aspect of the rebuilding process, it is best to consult a professional technician.
By rebuilding electric motors, not only are you contributing to the sustainable use of resources, but you are also enhancing the efficiency and reliability of your equipment. Regular maintenance and timely repairs can prolong the lifespan of motors and reduce waste in the long run.
Now that you have a comprehensive understanding of how to rebuild an electric motor, go forth with confidence and embark on your motor rebuilding journey. Enjoy the satisfaction of bringing a worn-out motor back to life and experiencing the benefits of a well-functioning, reliable, and efficient machine.
Frequently Asked Questions about How To Rebuild Electric Motor
Was this page helpful?
At Storables.com, we guarantee accurate and reliable information. Our content, validated by Expert Board Contributors, is crafted following stringent Editorial Policies. We're committed to providing you with well-researched, expert-backed insights for all your informational needs.

0 thoughts on “How To Rebuild Electric Motor”