Home>Renovation & DIY>Tools & Equipment>How To Sharpen Knife With Sandpaper
Tools & Equipment
How To Sharpen Knife With Sandpaper
Published: December 20, 2023
Learn how to sharpen a knife using sandpaper with our step-by-step guide. Get the best results with our expert tips and tricks. Perfect for DIY enthusiasts and those interested in tools and equipment.
(Many of the links in this article redirect to a specific reviewed product. Your purchase of these products through affiliate links helps to generate commission for Storables.com, at no extra cost. Learn more)
Introduction
Welcome to the world of DIY knife sharpening! Whether you’re an outdoor enthusiast, a culinary aficionado, or simply someone who values the importance of a sharp blade, learning how to sharpen a knife with sandpaper can be a valuable skill. While traditional sharpening stones and honing rods are commonly used for this purpose, sandpaper offers a cost-effective and accessible alternative that can deliver impressive results.
In this guide, we’ll explore the step-by-step process of sharpening a knife using sandpaper, a method that requires minimal investment and can be done in the comfort of your own home. By following these instructions, you’ll be able to breathe new life into dull blades and restore their cutting prowess with just a few simple materials and a bit of elbow grease.
So, grab your sandpaper, sharpening enthusiasts, and let’s dive into the art of honing blades with this unconventional yet effective technique!
Key Takeaways:
- Sharpening knives with sandpaper is a cost-effective and accessible way to restore blade sharpness at home. By following the steps and testing the sharpness, you can transform dull knives into precision cutting tools.
- Properly preparing the sandpaper, securing the knife, and methodically honing the blade are key to achieving a razor-sharp edge. Testing the sharpness and making final adjustments ensure your knife is ready for any cutting task.
Read more: How To Sharpen Scissors With Sandpaper
Materials Needed
Before embarking on your knife-sharpening journey, it’s important to gather the necessary materials. Here’s what you’ll need:
- Sandpaper: Select a variety of grits, ranging from coarse to fine, to accommodate the different stages of the sharpening process. Coarser grits, such as 120 or 220, are ideal for restoring a severely dulled edge, while finer grits, like 600 or 1000, can be used for refining and polishing the blade.
- Flat Surface: A stable and flat work surface, such as a table or countertop, will provide the foundation for sharpening your knife. Ensure that the surface is clean and free of any debris that could interfere with the sharpening process.
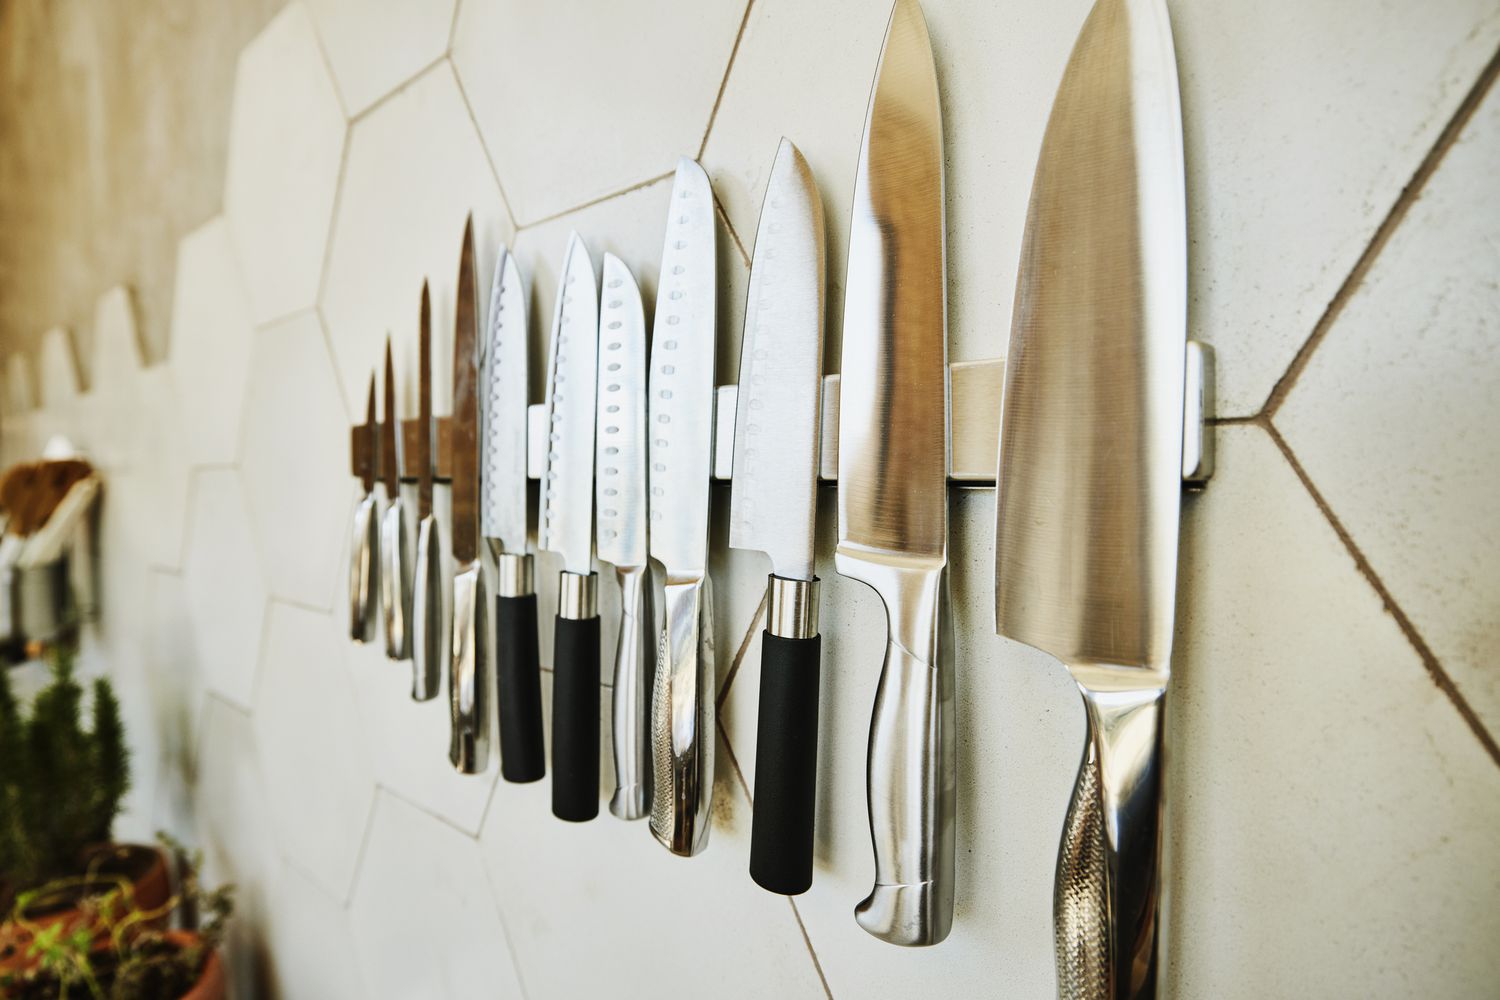
- Knife: The blade you intend to sharpen is, of course, a crucial component. Whether it’s a kitchen knife, a pocket knife, or a hunting knife, ensure that the blade is clean and free of any lingering food particles, rust, or dirt before beginning the sharpening process.
- Protective Gear: While not essential, wearing a pair of cut-resistant gloves can provide an added layer of safety, especially if you’re new to knife sharpening or working with particularly sharp blades.
- Cleaning Cloth: A soft, clean cloth will come in handy for wiping down the blade and removing any metal shavings or residue that accumulate during the sharpening process.
- Optional: Lubricant or Water: Depending on your preference and the type of sandpaper you’re using, you may opt to use a lubricant or water to facilitate the sharpening process and prevent the sandpaper from clogging with metal particles.
With these materials at your disposal, you’re well-equipped to begin the knife-sharpening process using sandpaper. Now, let’s delve into the step-by-step instructions to achieve a razor-sharp edge on your blade!
Step 1: Prepare the Sandpaper
Before diving into the actual sharpening process, it’s crucial to properly prepare the sandpaper to ensure optimal results. Here’s how to get your sandpaper ready for action:
- Choose the Right Grit: Select the appropriate grit of sandpaper based on the condition of your knife’s blade. If the blade is significantly dull or damaged, start with a coarser grit, such as 120 or 220, to begin the sharpening process. For routine maintenance or fine-tuning, a finer grit, such as 600 or 1000, may be more suitable.
- Cut the Sandpaper: Using a pair of scissors or a utility knife, cut the sandpaper into strips that are slightly wider than the width of your knife blade. This will provide ample coverage and ensure that the entire length of the blade can be sharpened evenly.
- Secure the Sandpaper: Once the sandpaper strips are cut to size, affix them to a flat and stable surface, such as a tabletop or workbench. You can use double-sided tape or clamps to secure the sandpaper, ensuring that it remains taut and free of wrinkles or creases during the sharpening process.
- Consider Lubrication: Depending on the type of sandpaper you’re using, you may opt to apply a small amount of lubricant or water to the surface of the sandpaper. This can help prevent the buildup of metal particles and extend the lifespan of the sandpaper, resulting in more effective sharpening.
By taking the time to properly prepare the sandpaper, you’ll set the stage for a smooth and efficient sharpening process. With the sandpaper in place and ready for action, you’re now prepared to move on to the next step: securing the knife for sharpening.
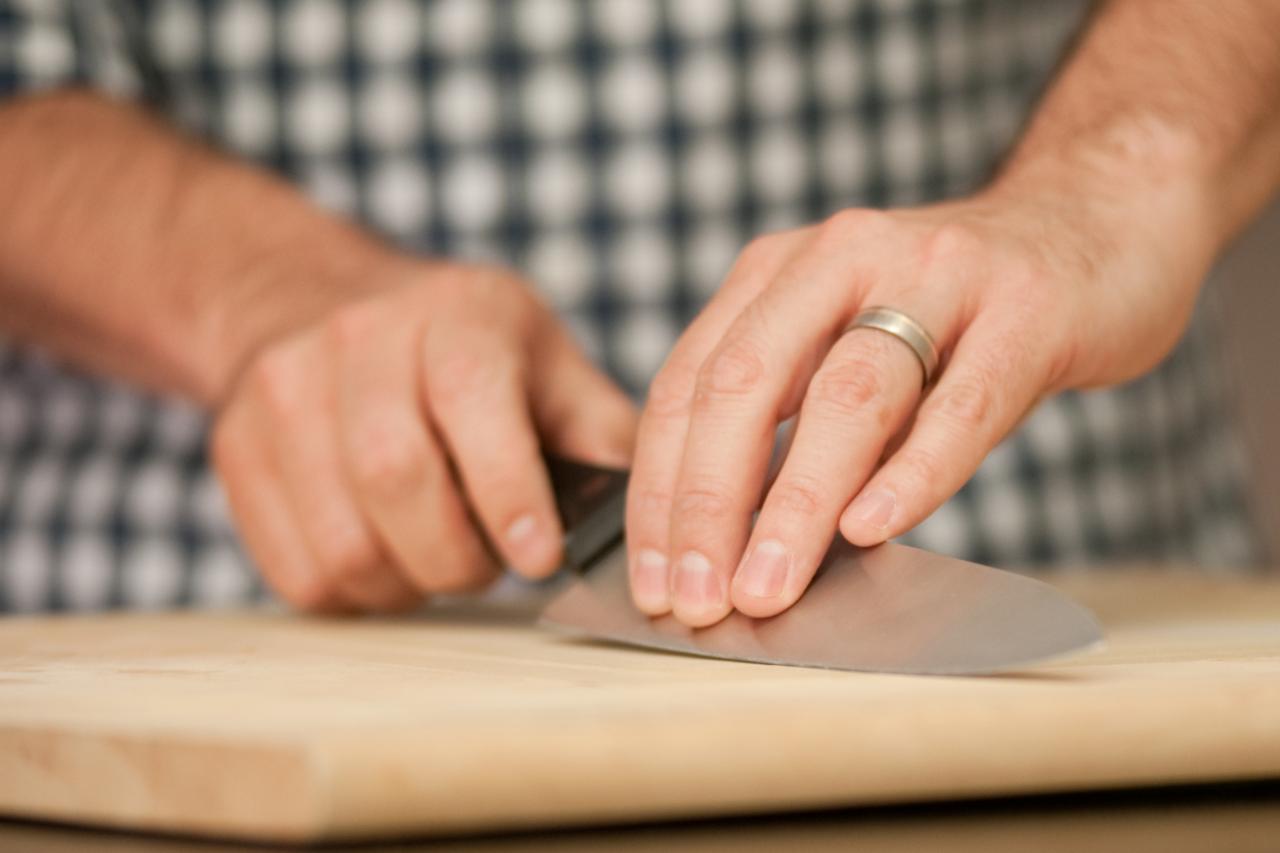
Step 2: Secure the Knife
Once the sandpaper is prepped and ready, the next crucial step in the knife-sharpening process is to secure the blade in a stable position. Properly securing the knife will not only ensure safety during sharpening but also facilitate precision and consistency. Follow these steps to securely position the knife for sharpening:
- Select a Stable Surface: Choose a flat and secure surface for the sharpening process. Whether it’s a workbench, table, or countertop, ensure that the surface is stable and provides ample space for maneuvering the knife during sharpening.
- Use a Non-Slip Base: To prevent the knife from shifting or sliding during sharpening, place a non-slip mat or damp cloth beneath the surface where the blade will be positioned. This added grip will enhance stability and minimize the risk of accidents.
- Grip the Knife Handle: Firmly grasp the handle of the knife, ensuring a secure and comfortable grip. Position the blade at a consistent angle against the sandpaper, maintaining a steady hand throughout the sharpening process.
- Maintain a Safe Distance: When securing the knife, be mindful of maintaining a safe distance between your hands and the blade. Avoid positioning your fingers in close proximity to the sharpening area to prevent accidental cuts or injuries.
- Consider a Knife Sharpening Guide: For those new to knife sharpening or seeking enhanced precision, a knife sharpening guide can be utilized to maintain a consistent sharpening angle. These guides attach to the spine of the knife and help ensure uniform sharpening across the blade.
By securely positioning the knife and taking the necessary precautions, you’ll create a safe and controlled environment for sharpening. With the blade firmly in place and ready for honing, it’s time to move on to the next step: the actual sharpening process using the prepared sandpaper.
When sharpening a knife with sandpaper, start with a coarse grit (around 220) and work your way up to a finer grit (around 1000) for a sharp edge. Use a consistent angle and light pressure for best results.
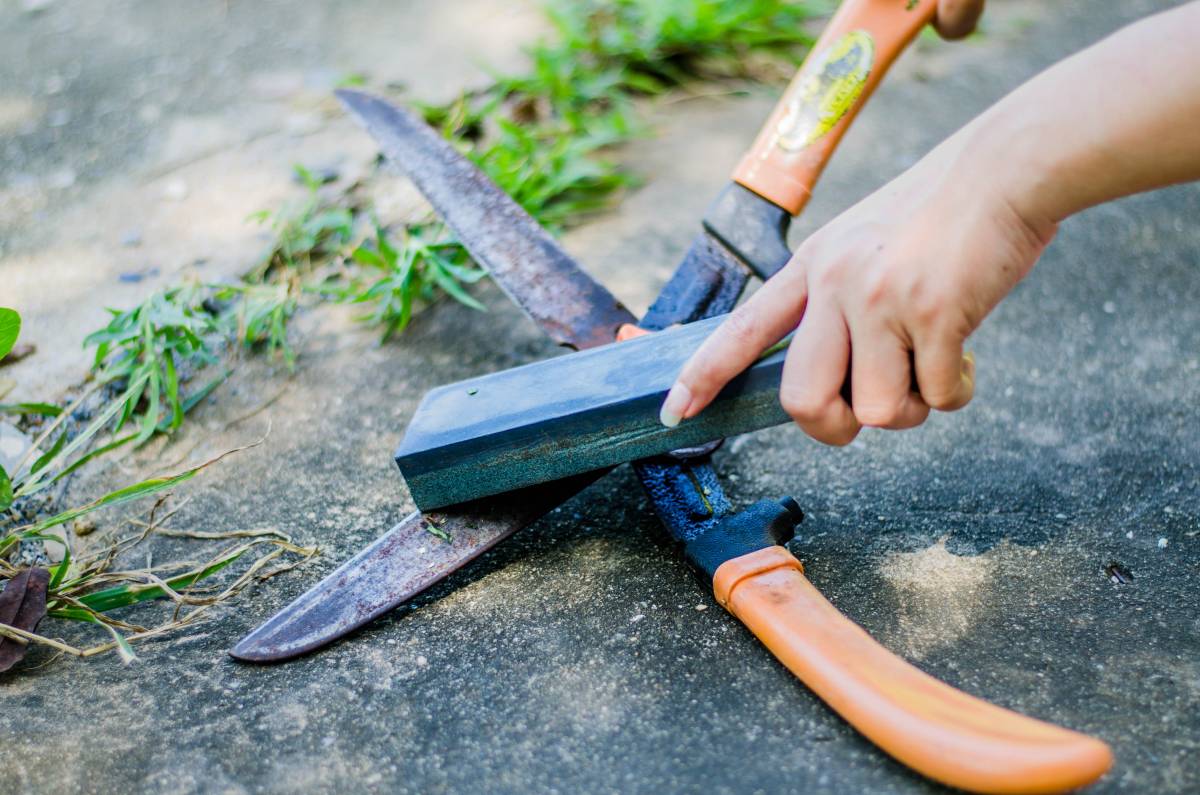
Step 3: Sharpening the Blade
With the knife securely positioned and the sandpaper prepared, it’s time to delve into the heart of the sharpening process. Sharpening a blade with sandpaper requires patience, precision, and a keen eye for detail. Follow these steps to effectively sharpen the blade using sandpaper:
- Determine the Sharpening Angle: Depending on the type of knife and your desired sharpness, establish the appropriate sharpening angle. For most kitchen knives, a 15 to 20-degree angle is commonly recommended, while hunting or outdoor knives may benefit from a slightly steeper angle for added durability.
- Begin with Coarse Grit: If the blade is notably dull or damaged, start the sharpening process with a coarse grit sandpaper, such as 120 or 220. Hold the knife at the predetermined angle and, using smooth and controlled motions, draw the blade across the sandpaper in a consistent direction. Apply gentle pressure and maintain a steady pace to ensure even sharpening.
- Progress to Finer Grits: As the blade begins to regain its sharpness, gradually transition to finer grits of sandpaper, such as 600 or 1000, to refine the edge and achieve a polished finish. Repeat the sharpening process with each finer grit, ensuring that the blade is honed uniformly and free of any remaining dull spots or imperfections.
- Alternate Sides Regularly: To maintain an even edge and prevent asymmetrical sharpening, alternate between sharpening each side of the blade at regular intervals. This balanced approach will result in a symmetrical and well-honed edge that enhances cutting performance.
- Check for Burr Formation: As you progress through the sharpening stages, periodically check for the formation of a burr along the edge of the blade. A burr indicates that the metal is being properly realigned and sharpened. Once a burr is formed, it’s a sign that the edge is being honed effectively.
- Refine the Edge: As the blade nears its optimal sharpness, make light and smooth passes across the finest grit of sandpaper to refine the edge and achieve a razor-sharp finish. This final stage of sharpening will ensure that the blade is honed to perfection and ready for action.
By diligently following these steps and maintaining a steady hand, you’ll be able to effectively sharpen your knife using sandpaper, restoring its cutting prowess and revitalizing its performance. With the blade honed to perfection, it’s time to put its sharpness to the test!
Read more: How To Sharpen Chisels With Sandpaper
Step 4: Test the Sharpness
After diligently sharpening the blade using sandpaper, it’s essential to assess the sharpness of the knife to ensure that it meets your expectations. Testing the sharpness will not only validate the effectiveness of the sharpening process but also provide an opportunity to make any final adjustments if needed. Here’s how to test the sharpness of your newly honed blade:
- Perform a Paper Test: A simple yet effective way to gauge the sharpness of the blade is to perform a paper test. Hold a piece of paper taut and attempt to slice through it with the sharpened knife. A well-honed blade should effortlessly glide through the paper, producing clean and precise cuts without tearing or snagging.
- Assess Cutting Performance: Put the knife to practical use by testing its cutting performance on various materials, such as fruits, vegetables, or rope. A sharp blade will effortlessly slice through these items with minimal resistance, demonstrating its newfound sharpness and cutting efficiency.
- Inspect the Edge: Carefully examine the edge of the blade under adequate lighting to assess its sharpness. A well-sharpened blade will exhibit a consistent and uniform edge without any visible dull spots or irregularities, indicating a successful sharpening outcome.
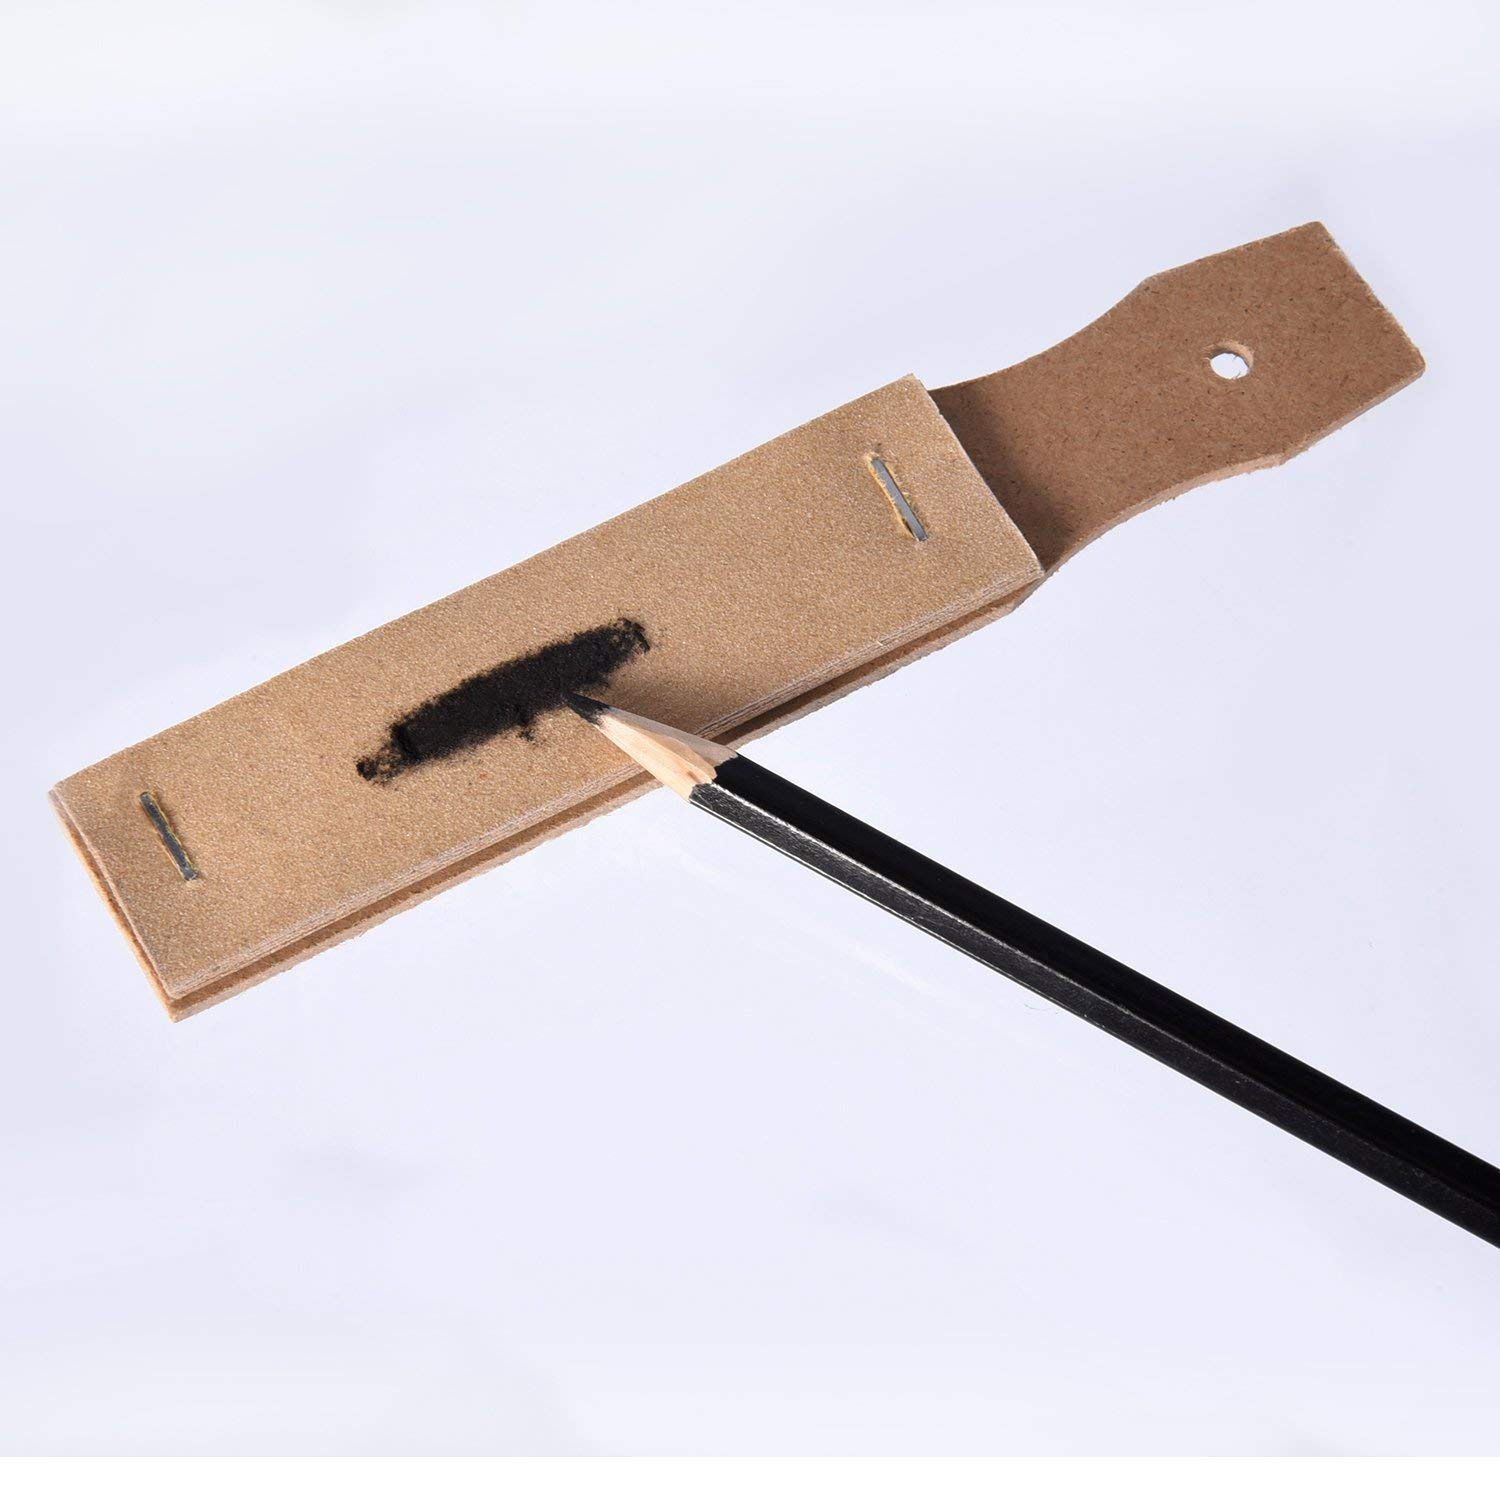
- Check for Burrs: While testing the sharpness, be mindful of any burrs that may have formed during the sharpening process. If present, gently remove any burrs using a leather strop or honing rod, ensuring that the blade’s edge is smooth and free of any protrusions.
- Re-Sharpen if Necessary: If the knife’s sharpness falls short of your expectations or if any areas of the blade require further honing, consider revisiting the sharpening process with a finer grit of sandpaper to refine the edge and enhance its cutting performance.
By conducting these tests and assessments, you’ll be able to ascertain the effectiveness of the sharpening process and make any final adjustments to achieve the desired level of sharpness. Once you’re satisfied with the blade’s performance, you can confidently conclude the sharpening process, knowing that your knife is ready for a myriad of cutting tasks.
Conclusion
Congratulations on mastering the art of sharpening a knife with sandpaper! By following the step-by-step process outlined in this guide, you’ve transformed a dull blade into a precision instrument capable of tackling a variety of cutting tasks with ease. This cost-effective and accessible sharpening method has empowered you to breathe new life into your knives, all from the comfort of your own home.
As you’ve discovered, the key to successful knife sharpening with sandpaper lies in proper preparation, precision, and patience. By selecting the right grits, securing the knife, and methodically honing the blade, you’ve achieved a razor-sharp edge that’s ready to take on any cutting challenge. The satisfaction of restoring a dull blade to its former glory is a testament to your newfound sharpening prowess.
Remember, the sharpening process is not merely a maintenance task; it’s an opportunity to connect with your tools and optimize their performance. Regularly honing your knives ensures that they remain in peak condition, ready to serve you in the kitchen, during outdoor adventures, or in everyday tasks.
As you continue your journey in the world of knife sharpening, consider exploring other sharpening methods, such as whetstone sharpening or honing rod techniques, to further expand your skill set. Each method offers its own unique nuances and challenges, contributing to your growth as a proficient sharpener.
So, sharpening enthusiasts, revel in the satisfaction of a job well done and the knowledge that your blades are now honed to perfection. Armed with the expertise gained from this guide, you’re equipped to maintain razor-sharp edges on your knives, ensuring that they remain indispensable tools in your culinary and outdoor pursuits.
Happy sharpening!
Frequently Asked Questions about How To Sharpen Knife With Sandpaper
Was this page helpful?
At Storables.com, we guarantee accurate and reliable information. Our content, validated by Expert Board Contributors, is crafted following stringent Editorial Policies. We're committed to providing you with well-researched, expert-backed insights for all your informational needs.
0 thoughts on “How To Sharpen Knife With Sandpaper”