Home>Gardening & Outdoor>Landscaping Ideas>How To Edge A Garden Bed
Landscaping Ideas
How To Edge A Garden Bed
Modified: February 16, 2024
Learn how to edge a garden bed with our expert landscaping ideas. Create a polished look for your outdoor space with our step-by-step guide.
(Many of the links in this article redirect to a specific reviewed product. Your purchase of these products through affiliate links helps to generate commission for Storables.com, at no extra cost. Learn more)
Introduction
Creating well-defined and visually appealing garden beds can significantly enhance the overall look of your outdoor space. One of the key elements in achieving this polished appearance is edging. Properly edging a garden bed not only adds a professional touch but also helps to contain soil, define the bed's boundaries, and prevent grass and weeds from encroaching.
In this comprehensive guide, we will walk you through the step-by-step process of edging a garden bed, providing you with the knowledge and confidence to transform your outdoor space into a stunning and well-maintained landscape. Whether you are a seasoned gardener or a novice enthusiast, mastering the art of edging will undoubtedly elevate the aesthetic appeal of your garden.
By following the detailed instructions and tips provided in this guide, you will learn how to select the right tools and materials, mark the edge of the garden bed, dig out the edge, install the edging material, and complete the process with finesse. With a bit of effort and the right approach, you can achieve clean, defined edges that will make your garden beds stand out and become a focal point of your outdoor oasis.
So, roll up your sleeves, gather your tools, and let's dive into the art of edging garden beds. Whether you're aiming for a classic, formal look or a more natural, organic feel, the techniques and insights shared in this guide will empower you to create garden beds that exude charm and elegance. Let's embark on this journey to elevate your landscaping skills and bring your garden vision to life.
Key Takeaways:
- Edging a garden bed enhances its beauty and functionality by creating clean boundaries, preventing weed encroachment, and adding a professional touch. With the right tools and materials, anyone can transform their outdoor space into a stunning landscape.
- The art of edging allows for creative expression and customization, reflecting personal style and aesthetic preferences. By mastering the edging process, one can elevate the visual appeal and functionality of their garden beds, creating captivating focal points within their outdoor oasis.
Read more: How To Edge A Garden Bed
Step 1: Gather the necessary tools and materials
Before embarking on the process of edging a garden bed, it's essential to gather the appropriate tools and materials to ensure a smooth and efficient workflow. Having the right equipment at your disposal will not only streamline the edging process but also contribute to the professional and polished outcome of the project.
Tools:
-
Spade or Edging Tool: A sturdy spade or specialized edging tool is indispensable for cutting through the soil and creating clean, defined edges. Look for a tool with a sharp, straight blade to facilitate precise cutting.
-
Garden Gloves: Protect your hands with a pair of durable garden gloves. They will shield your skin from blisters, thorns, and rough surfaces while providing a secure grip on the tools.
-
Wheelbarrow or Garden Cart: A wheelbarrow or garden cart will come in handy for transporting soil, edging materials, and debris. Opt for a sturdy, well-balanced cart that can withstand the weight of the materials.
-
Measuring Tape or Garden Hose: To ensure straight and uniform edges, a measuring tape or garden hose can be used to mark the boundary of the garden bed. This step is crucial for achieving a symmetrical and visually appealing result.
-
Level: A level will help you confirm that the edging material is installed evenly and at the desired height, preventing any potential issues with water runoff or uneven appearance.
-
Safety Glasses: Protect your eyes from debris and soil particles with a pair of safety glasses. They are essential for maintaining clear vision and safeguarding your eyes during the digging and edging process.
Materials:
-
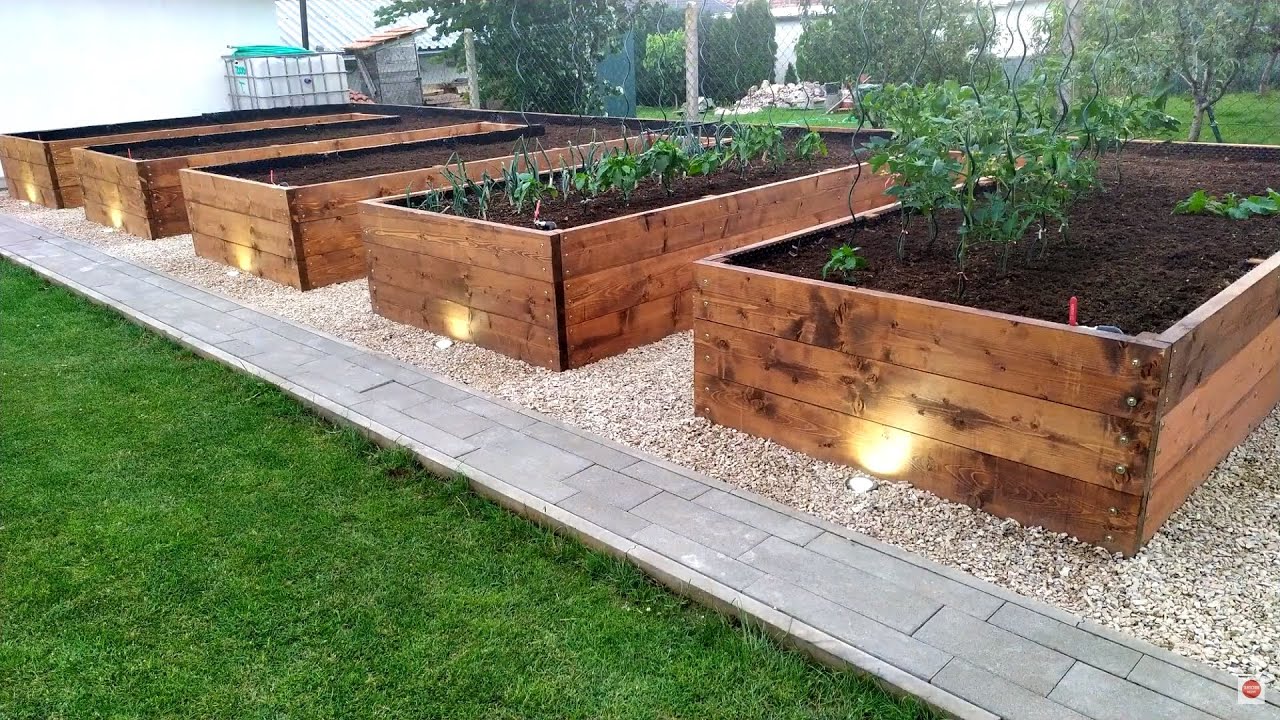
Edging Material: Depending on your preference and the overall aesthetic of your garden, choose from a variety of edging materials such as metal, plastic, wood, or stone. Each material offers distinct visual appeal and durability, so select one that complements the style of your garden.
-
Gravel or Sand: If you opt for flexible edging materials such as plastic or metal, having gravel or sand on hand will aid in securing the edging in place and providing stability.
-
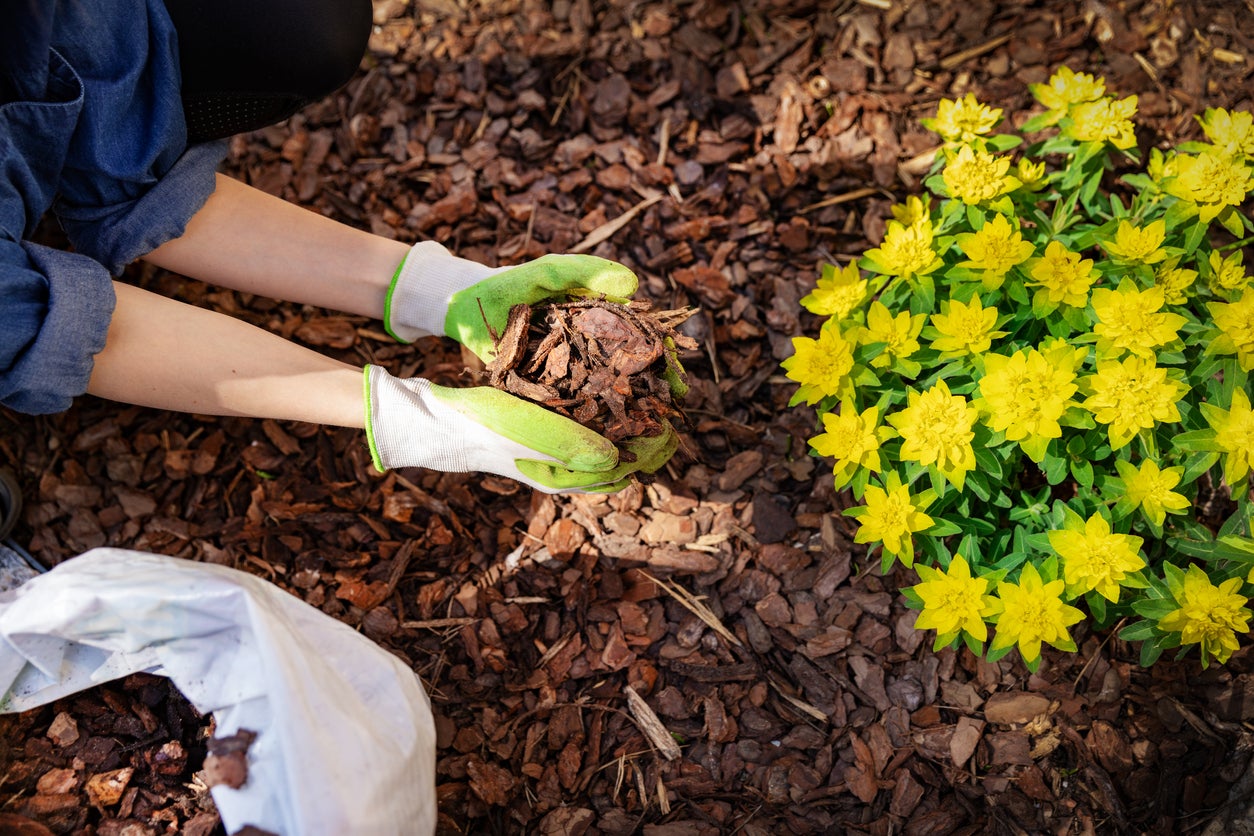
Topsoil or Mulch: Once the edging is in place, topsoil or mulch can be used to backfill the garden bed, creating a seamless transition between the bed and the surrounding landscape.
By ensuring that you have these essential tools and materials ready, you can proceed with confidence to the next step of marking the edge of the garden bed and commencing the edging process. With the right equipment at your disposal, you are well-prepared to embark on this transformative journey to elevate the visual appeal of your garden beds.
Step 2: Mark the edge of the garden bed
With the necessary tools and materials at your disposal, the next crucial step in the process of edging a garden bed is marking the edge with precision and care. This step sets the foundation for creating well-defined and visually appealing boundaries for your garden beds. Here's how to effectively mark the edge of the garden bed:
-
Clear the Area: Begin by clearing any debris, rocks, or vegetation along the perimeter of the garden bed. This will provide a clear and unobstructed path for marking the edge.
-
Select the Boundary Line: Determine the desired shape and layout of the garden bed's edge. Whether you prefer straight lines, gentle curves, or intricate patterns, envision the ideal boundary that complements the overall design of your garden.
-
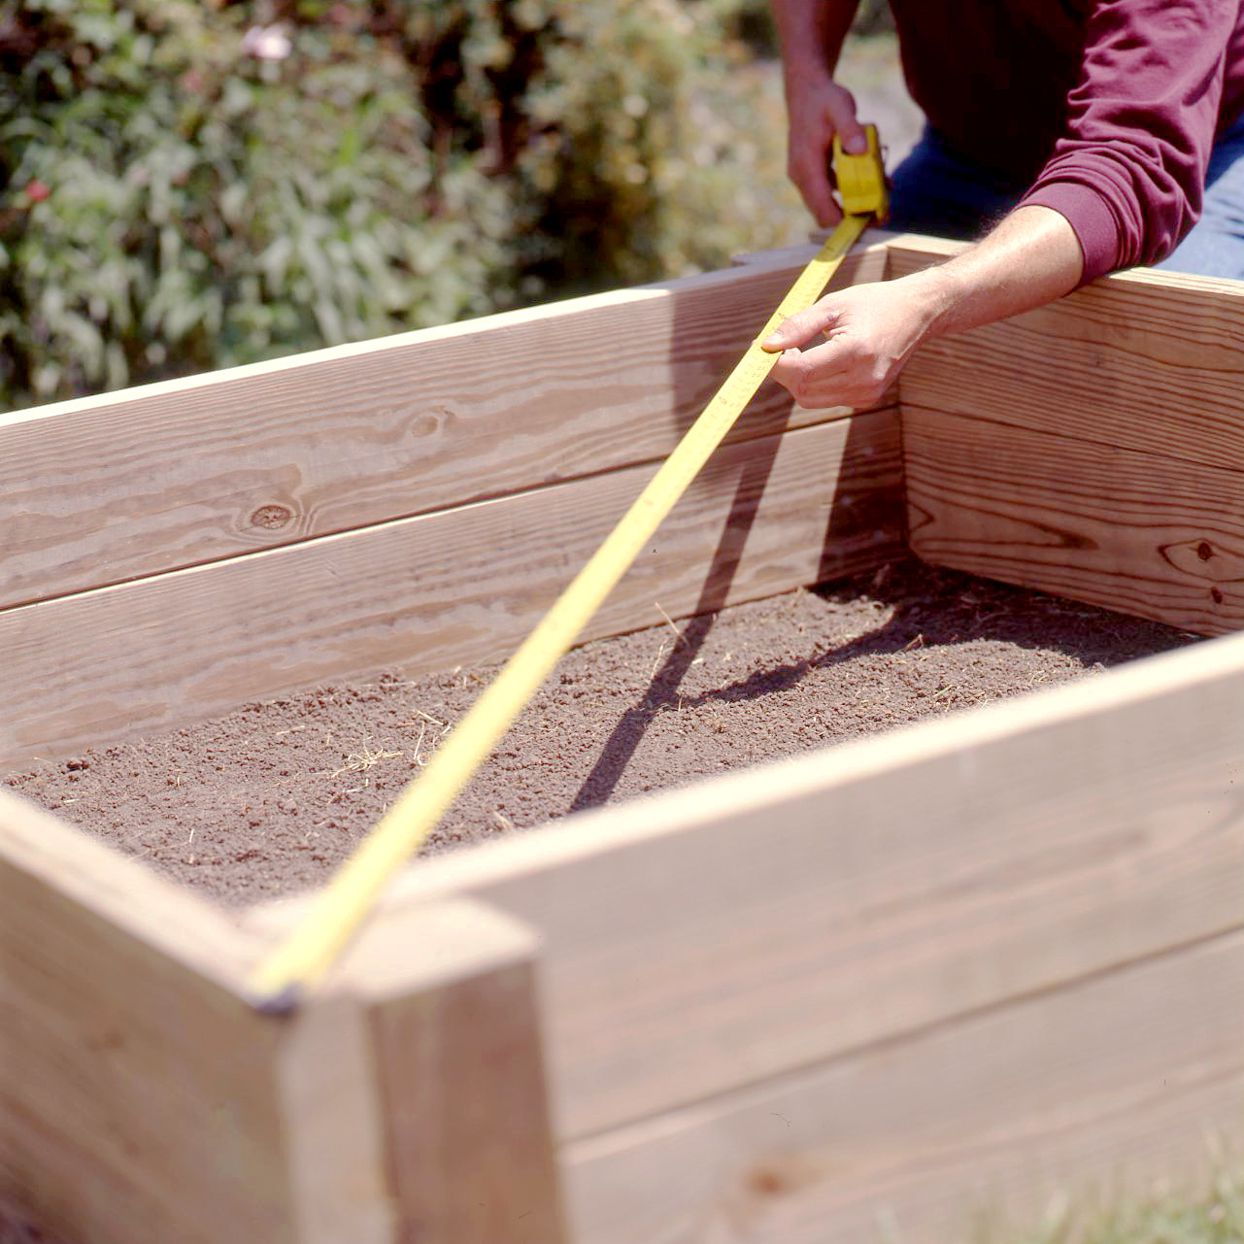
Use Measuring Tools: Employ a measuring tape or a garden hose to outline the boundary of the garden bed. For straight edges, simply measure and mark equidistant points along the perimeter. If you prefer curved edges, gently manipulate the garden hose to achieve the desired curves, ensuring a smooth and graceful outline.
-
Verify Symmetry and Alignment: Step back and assess the marked boundary from different angles to ensure symmetry and alignment with the surrounding landscape. Adjust the markings as needed to achieve a balanced and visually pleasing edge.
-
Double-Check the Measurements: Before proceeding to the next phase of the edging process, double-check the measurements and alignment of the marked edge. Accuracy at this stage is crucial for the overall appearance and functionality of the garden bed's boundary.
By meticulously marking the edge of the garden bed, you establish a clear and defined boundary that serves as the canvas for the subsequent steps of the edging process. This initial phase sets the stage for creating a polished and professional look, elevating the aesthetic appeal of your garden beds and transforming them into captivating focal points within your outdoor space.
Read more: How To Lay Brick Garden Edging
Step 3: Dig out the edge
Once the edge of the garden bed is clearly marked, the next pivotal step in the edging process is to dig out the defined boundary. This step involves carefully excavating the soil along the marked edge to create a clean and well-defined trench. By following these detailed instructions, you can effectively dig out the edge of the garden bed, laying the groundwork for the seamless installation of the edging material.
Instructions:
-
Prepare the Area: Clear any remaining debris or vegetation from the marked edge to ensure unobstructed access for digging. This preparatory step sets the stage for a smooth and efficient excavation process.
-
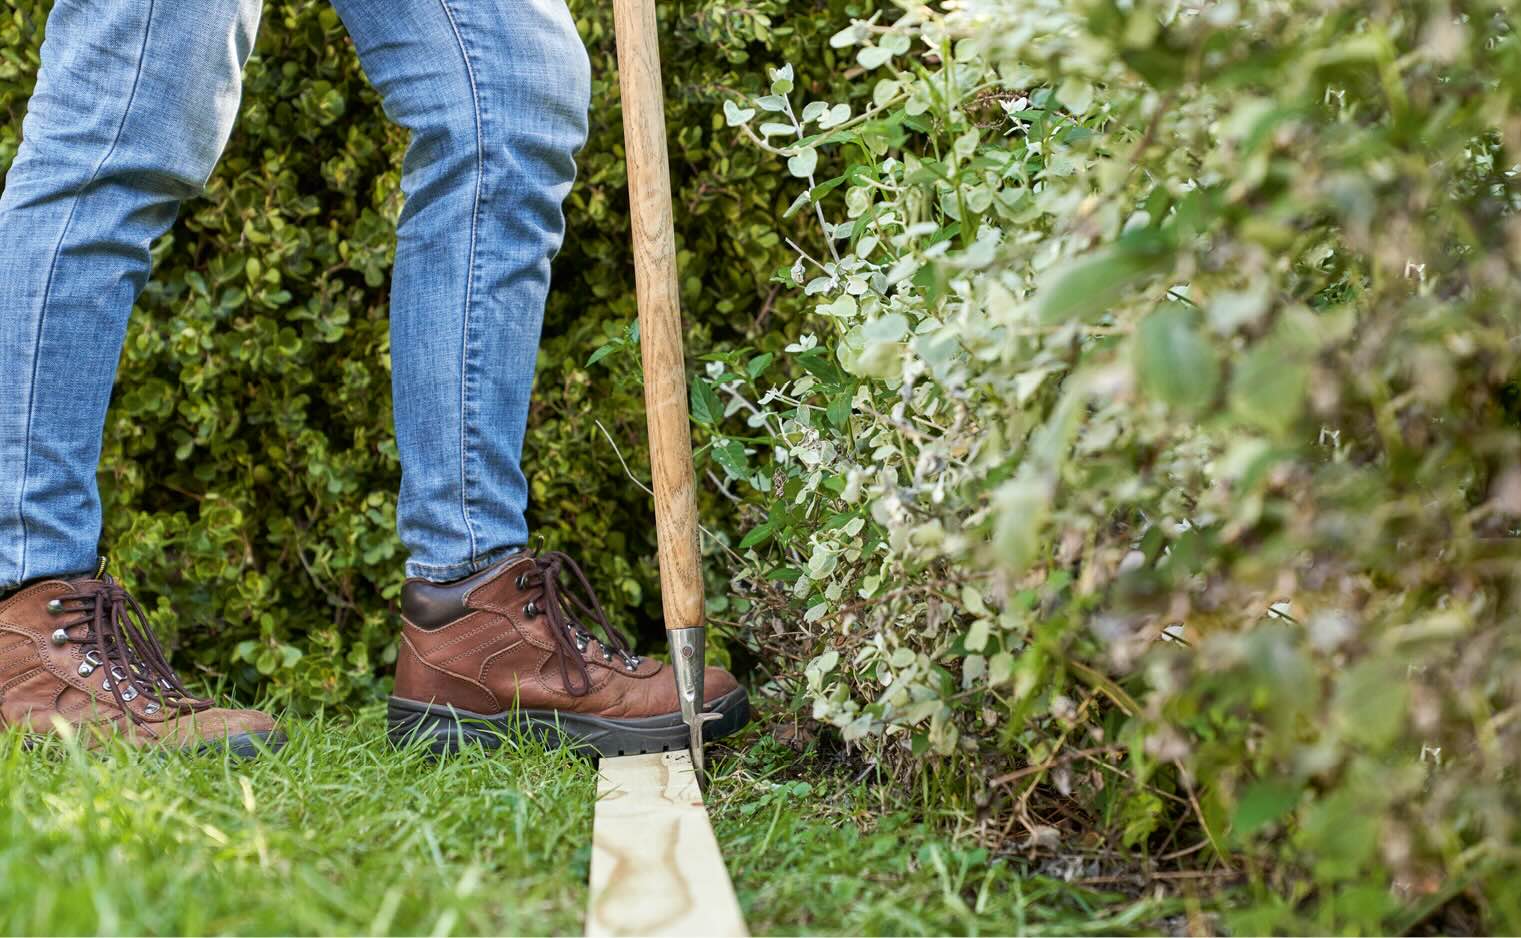
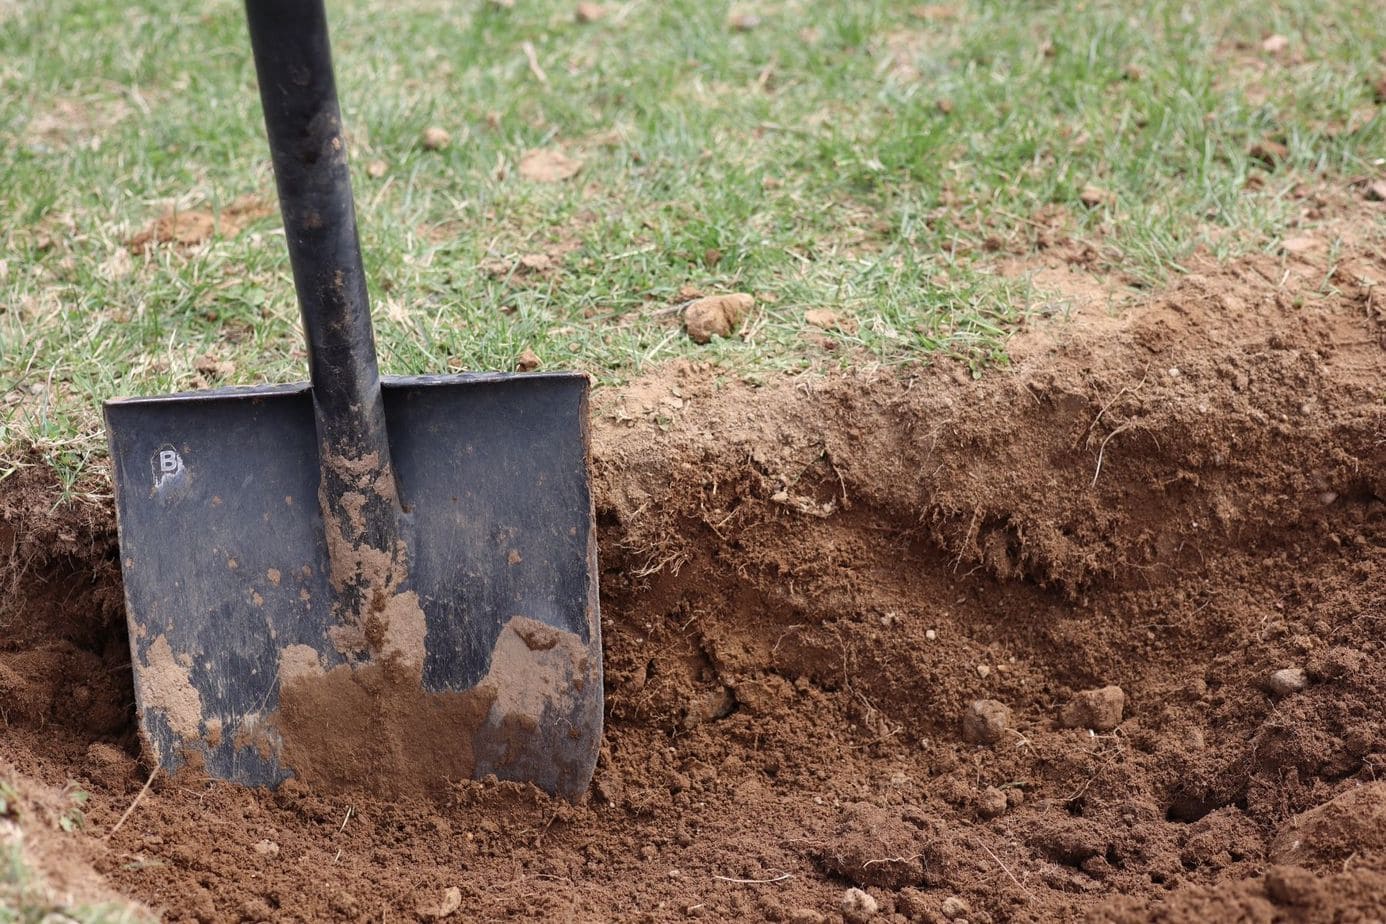
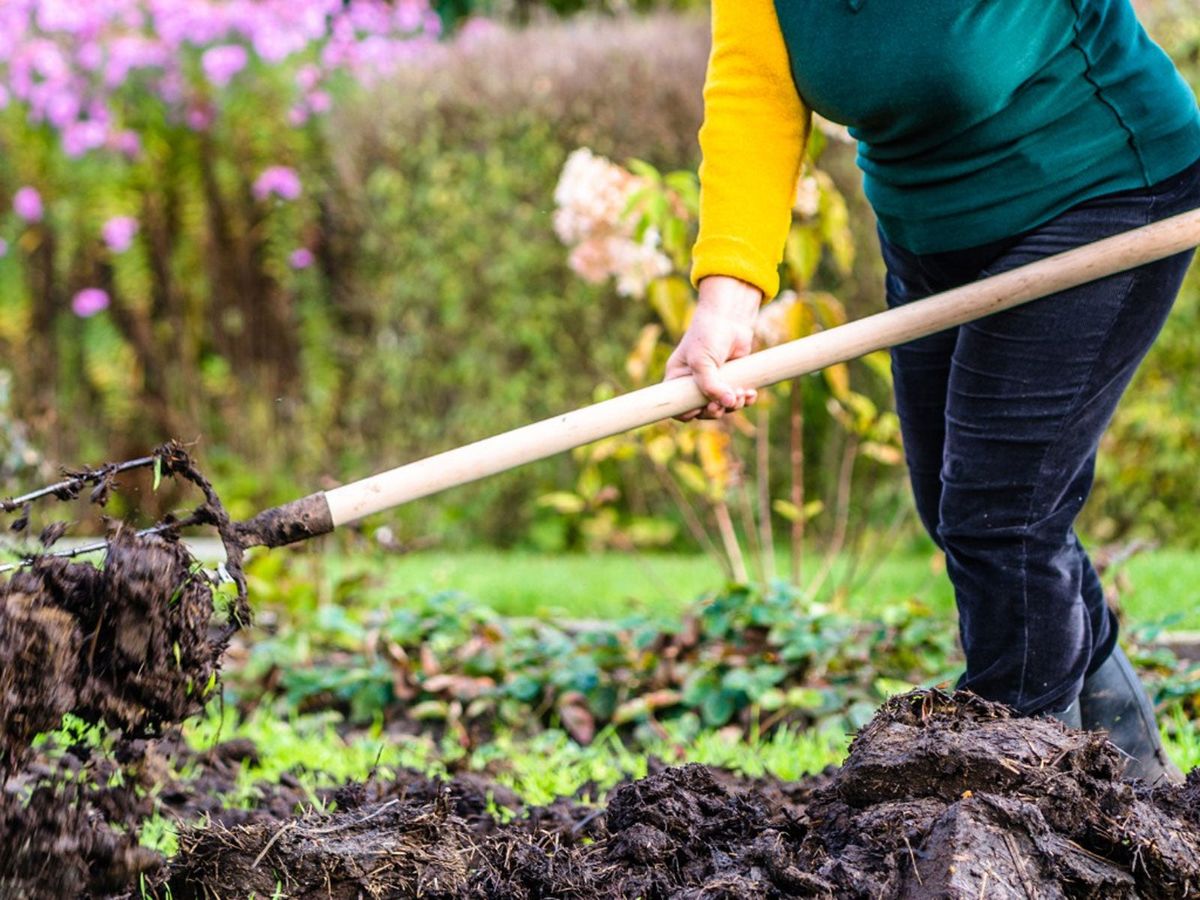
Use the Spade or Edging Tool: With a sturdy spade or specialized edging tool, begin digging along the marked boundary. Position the tool vertically to create a straight and uniform trench, maintaining the depth and width specified for the edging material.
-
Work Methodically: Proceed to dig along the entire length of the marked edge, maintaining a consistent depth and angle to achieve a clean and precise trench. Take your time to ensure that the trench is uniform and free from irregularities.
-
Remove Excavated Soil: As you dig, periodically remove the excavated soil from the trench to prevent it from obstructing the work area. A wheelbarrow or garden cart can be used to transport the soil away from the edge, keeping the workspace clear and organized.
-
Verify Depth and Alignment: Periodically check the depth and alignment of the trench to ensure that it meets the requirements for installing the chosen edging material. Use a level to confirm that the trench is even and at the desired depth throughout the entire length.
-
Refine the Trench: Once the initial trench is dug, take the time to refine and smoothen the edges, ensuring a clean and professional appearance. Remove any remaining debris or roots to create a pristine trench for the subsequent installation of the edging material.
By meticulously following these steps, you can effectively dig out the edge of the garden bed, laying the groundwork for the seamless installation of the chosen edging material. This meticulous approach ensures that the resulting trench is uniform, well-defined, and ready to accommodate the edging material, setting the stage for a visually striking and professionally finished garden bed edge.
Step 4: Install the edging material
With the edge of the garden bed meticulously marked and the trench dug out to precision, the next pivotal step is the installation of the chosen edging material. This phase of the edging process is instrumental in defining the visual appeal and structural integrity of the garden bed's boundary. Whether you opt for classic stone edging, versatile metal strips, or natural wood borders, the installation process follows a set of fundamental guidelines to ensure a seamless and professional outcome.
Instructions:
-
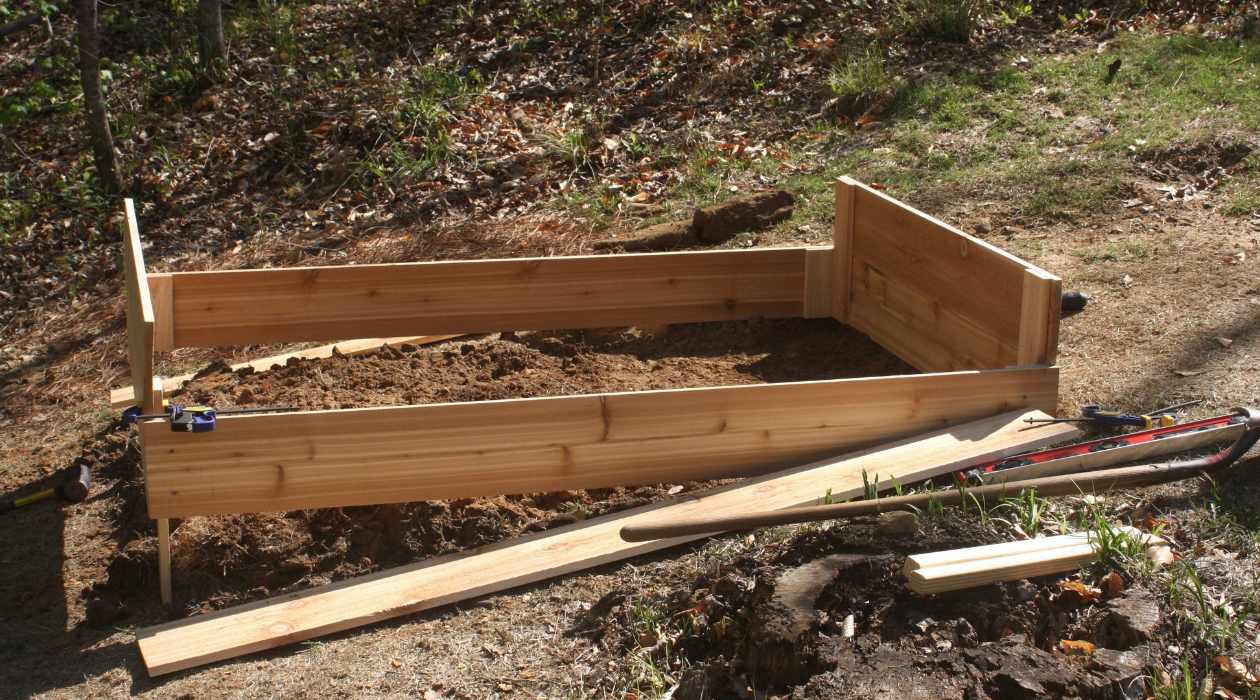
Positioning the Edging Material: Carefully place the selected edging material into the trench, ensuring a snug fit against the excavated edge. For flexible materials such as plastic or metal strips, gently bend and manipulate the edging to conform to the curves or angles of the garden bed's boundary.
-
Securing the Edging: Use stakes or anchors designed for the specific edging material to secure it in place. Drive the stakes into the ground at regular intervals, ensuring that the edging remains stable and upright. This step is crucial for maintaining the integrity and visual appeal of the installed edging material.
-
Interlocking or Overlapping Joints: If the chosen edging material features interlocking or overlapping joints, ensure that these connections are securely fastened. This enhances the stability and uniformity of the edging, creating a seamless and polished appearance along the entire length of the garden bed's boundary.
-
Adjusting for Height and Alignment: Verify that the installed edging material is at the desired height and alignment. Use a level to confirm that the edging is even and consistent, making any necessary adjustments to achieve a uniform and professional finish.
-
Backfilling and Stabilizing: Once the edging material is securely in place, backfill the trench with topsoil or mulch, ensuring that the material is stabilized and supported. This backfilling process creates a seamless transition between the garden bed and the surrounding landscape, enhancing the overall aesthetic appeal.
-
Finishing Touches: After the edging material is installed and backfilled, take the time to inspect the boundary for any irregularities or adjustments. Make any final refinements to ensure that the edging presents a cohesive and visually appealing border for the garden bed.
By meticulously following these instructions, you can effectively install the chosen edging material, elevating the visual appeal and structural integrity of the garden bed's boundary. This phase of the edging process sets the stage for a polished and professional finish, transforming the garden bed into a captivating focal point within your outdoor landscape.
Read more: How To Design A Garden Bed
Step 5: Backfill and finish the edge
With the edging material securely in place, the final step in the process of edging a garden bed involves backfilling the trench and adding the finishing touches to achieve a seamless and visually appealing edge. This critical phase not only enhances the stability and longevity of the edging but also contributes to the overall cohesiveness and aesthetic charm of the garden bed's boundary.
Instructions:
-
Backfilling the Trench: Begin by carefully backfilling the trench with topsoil or mulch, ensuring that the edging material is adequately supported and stabilized. The backfill should be added gradually, allowing for thorough compaction to create a firm and uniform transition between the garden bed and the surrounding landscape.
-
Smoothing and Leveling: As you backfill the trench, use a garden rake or hand tamper to smooth and level the topsoil or mulch. This process helps to create a seamless and visually appealing edge, eliminating any unevenness or irregularities along the boundary of the garden bed.
-
Tucking and Blending: Pay attention to the interface between the backfilled material and the edging. Tuck the topsoil or mulch against the edging material, ensuring a snug and cohesive connection. This step contributes to a polished and integrated appearance, seamlessly blending the garden bed's boundary with the surrounding landscape.
-
Refining the Transition: Take the time to refine the transition between the backfilled material and the edging, ensuring a gradual and natural slope. This refined transition not only enhances the visual appeal but also promotes proper water drainage and prevents erosion along the edge of the garden bed.
-
Inspecting for Uniformity: After backfilling and smoothing the trench, inspect the entire length of the garden bed's edge for uniformity and consistency. Address any areas that may require additional backfilling or leveling to achieve a cohesive and professional finish.
-
Final Adjustments: Make any final adjustments to the backfilled material and the edging, ensuring that the transition is seamless and visually pleasing. This meticulous attention to detail contributes to the overall aesthetic appeal and structural integrity of the garden bed's boundary.
By meticulously following these instructions, you can effectively backfill the trench and add the finishing touches to the edge of the garden bed, culminating in a visually striking and professionally finished boundary. This phase of the edging process not only enhances the overall appearance of the garden bed but also contributes to its long-term durability and visual impact within the outdoor landscape.
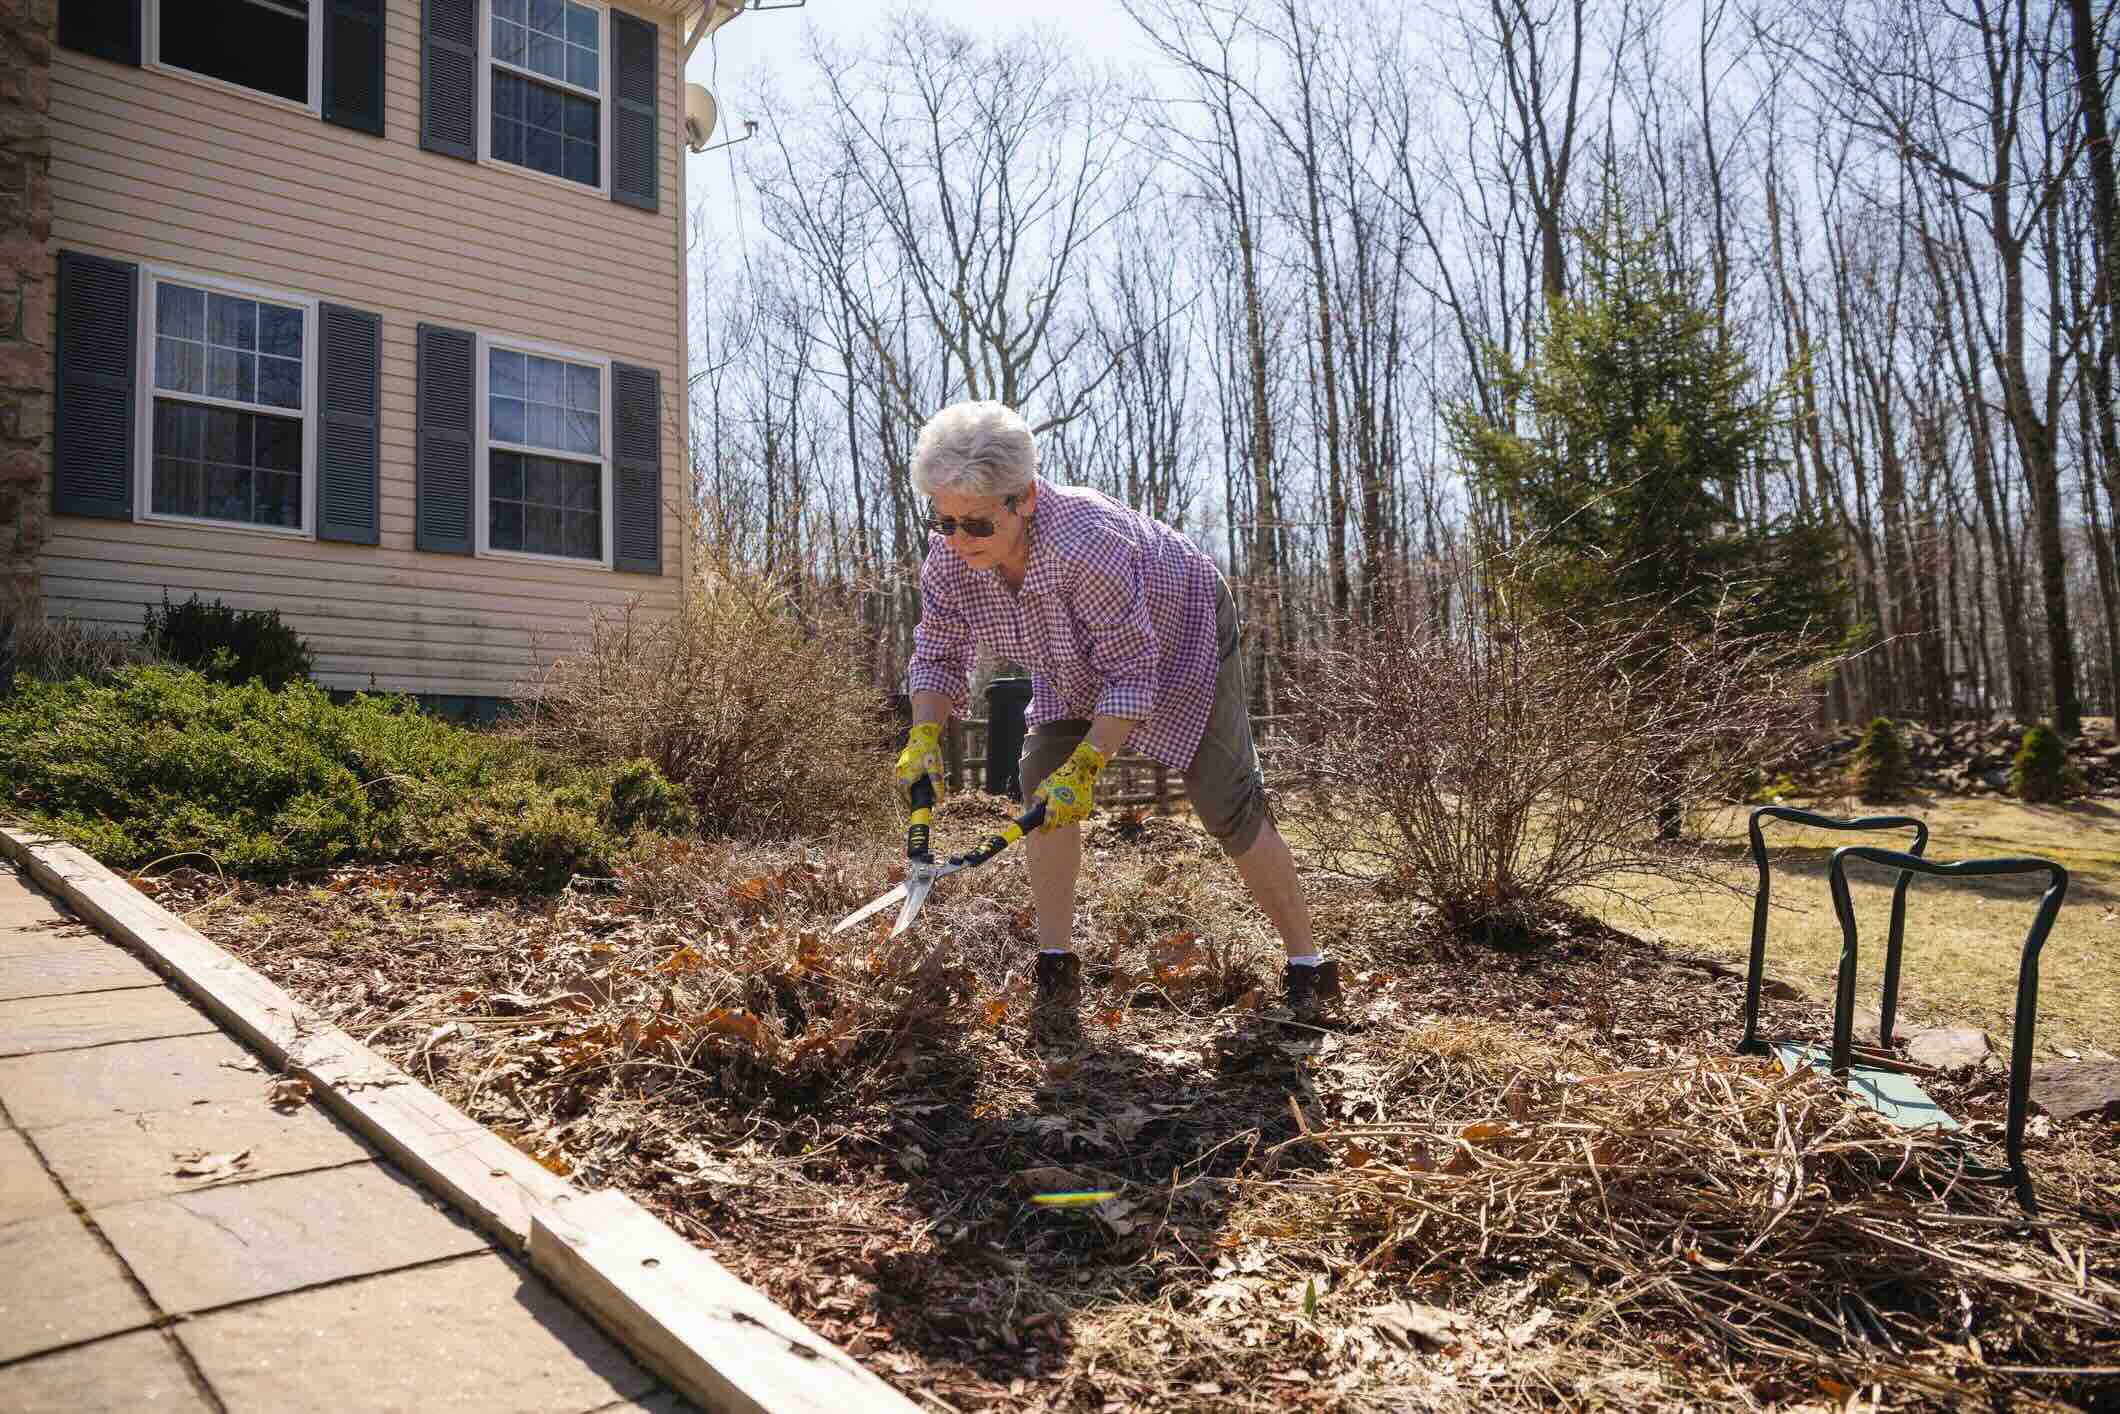
Use a spade or edging tool to create a clean edge for your garden bed. Dig straight down and remove any excess grass or soil. This will define the border and prevent grass from encroaching on your garden.
Conclusion
In conclusion, the process of edging a garden bed is a transformative endeavor that elevates the visual appeal and structural integrity of outdoor spaces. By following the comprehensive steps outlined in this guide, you have gained the knowledge and confidence to create well-defined and visually captivating garden bed boundaries. From gathering the necessary tools and materials to meticulously backfilling and finishing the edge, each step contributes to the creation of a polished and professional landscape feature.
The art of edging not only enhances the aesthetic charm of garden beds but also serves practical purposes. Well-defined edges help contain soil, prevent erosion, and minimize the encroachment of grass and weeds, contributing to the overall maintenance and longevity of the garden beds. Additionally, the visual impact of neatly edged garden beds cannot be overstated, as they serve as focal points within the outdoor landscape, adding a touch of elegance and sophistication.
As you embark on the journey of edging your garden beds, consider the overall design and style of your outdoor space. Whether you opt for classic stone edging to complement a formal garden or choose natural wood borders for a more organic feel, the edging process allows for creative expression and customization. The choice of edging materials, shapes, and patterns provides an opportunity to infuse your personal touch into the landscape, reflecting your unique aesthetic preferences.
Furthermore, the attention to detail and precision exhibited during the edging process contributes to the overall professionalism and visual appeal of the garden beds. The clean, defined edges serve as a testament to your landscaping prowess and dedication to creating a captivating outdoor environment. As the edging material seamlessly integrates with the surrounding landscape, it establishes a harmonious transition, enhancing the overall cohesiveness of the outdoor space.
In essence, the process of edging a garden bed is a testament to the transformative power of landscaping. It empowers you to sculpt and define your outdoor environment, creating captivating garden beds that serve as focal points of beauty and elegance. By mastering the art of edging, you have unlocked the potential to elevate the visual allure and functionality of your outdoor oasis, setting the stage for a captivating and well-maintained landscape that exudes charm and sophistication.
Frequently Asked Questions about How To Edge A Garden Bed
Was this page helpful?
At Storables.com, we guarantee accurate and reliable information. Our content, validated by Expert Board Contributors, is crafted following stringent Editorial Policies. We're committed to providing you with well-researched, expert-backed insights for all your informational needs.


0 thoughts on “How To Edge A Garden Bed”