Home>Construction & Tools>Building Materials>How To Lay Brick Garden Edging
Building Materials
How To Lay Brick Garden Edging
Published: January 22, 2024
Learn how to lay brick garden edging with the right building materials. Create a beautiful and durable border for your garden with our step-by-step guide.
(Many of the links in this article redirect to a specific reviewed product. Your purchase of these products through affiliate links helps to generate commission for Storables.com, at no extra cost. Learn more)
Introduction
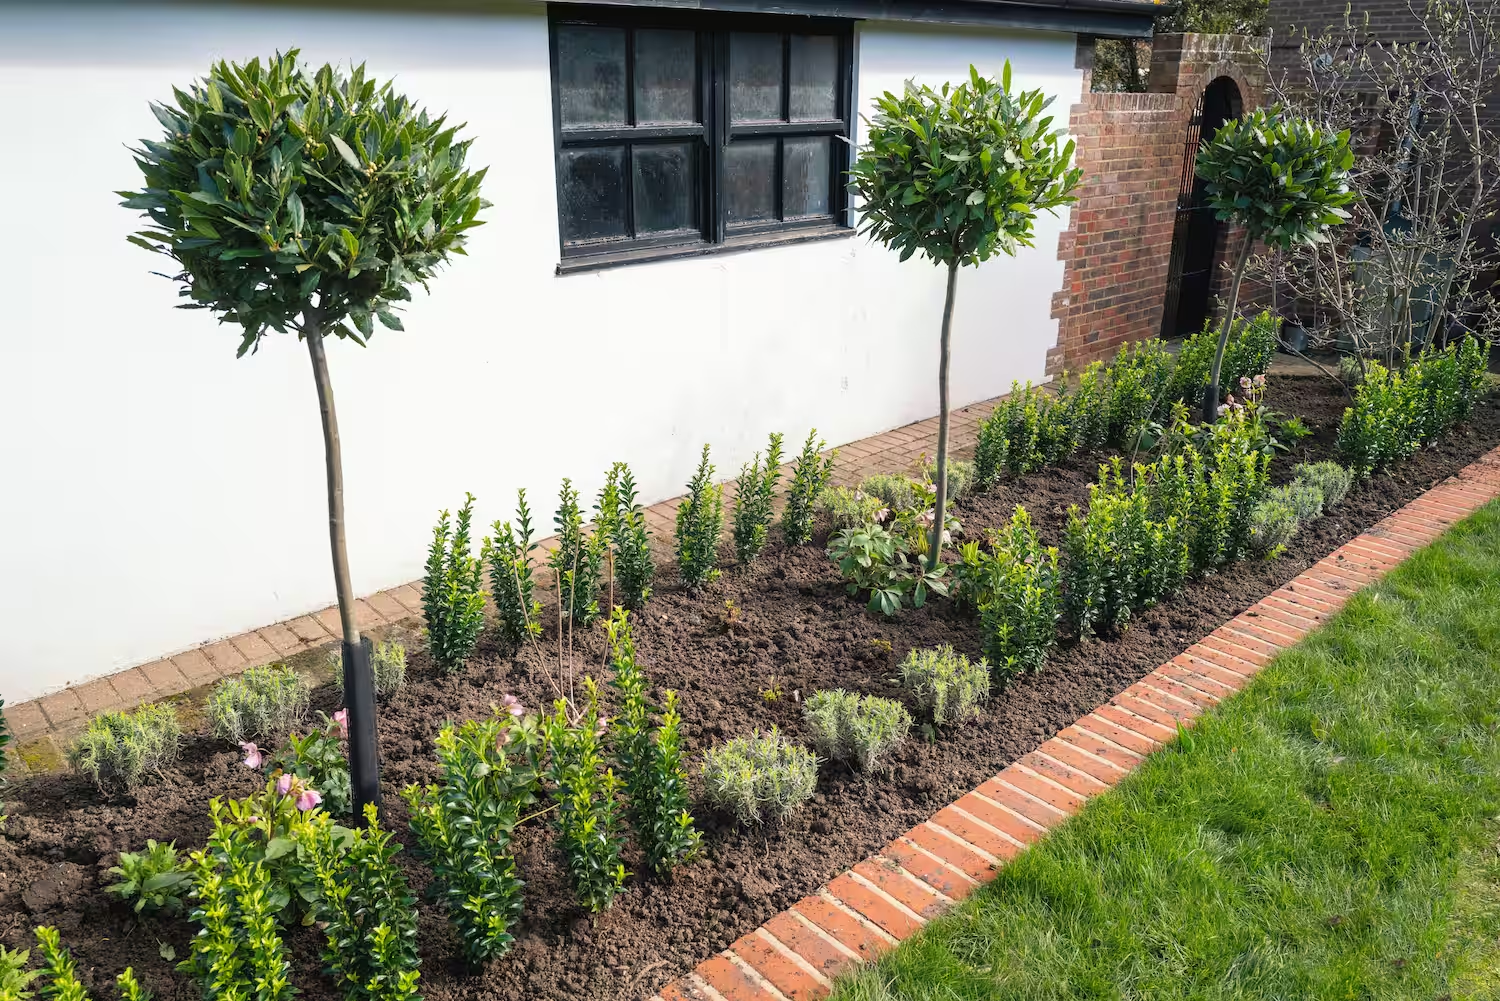
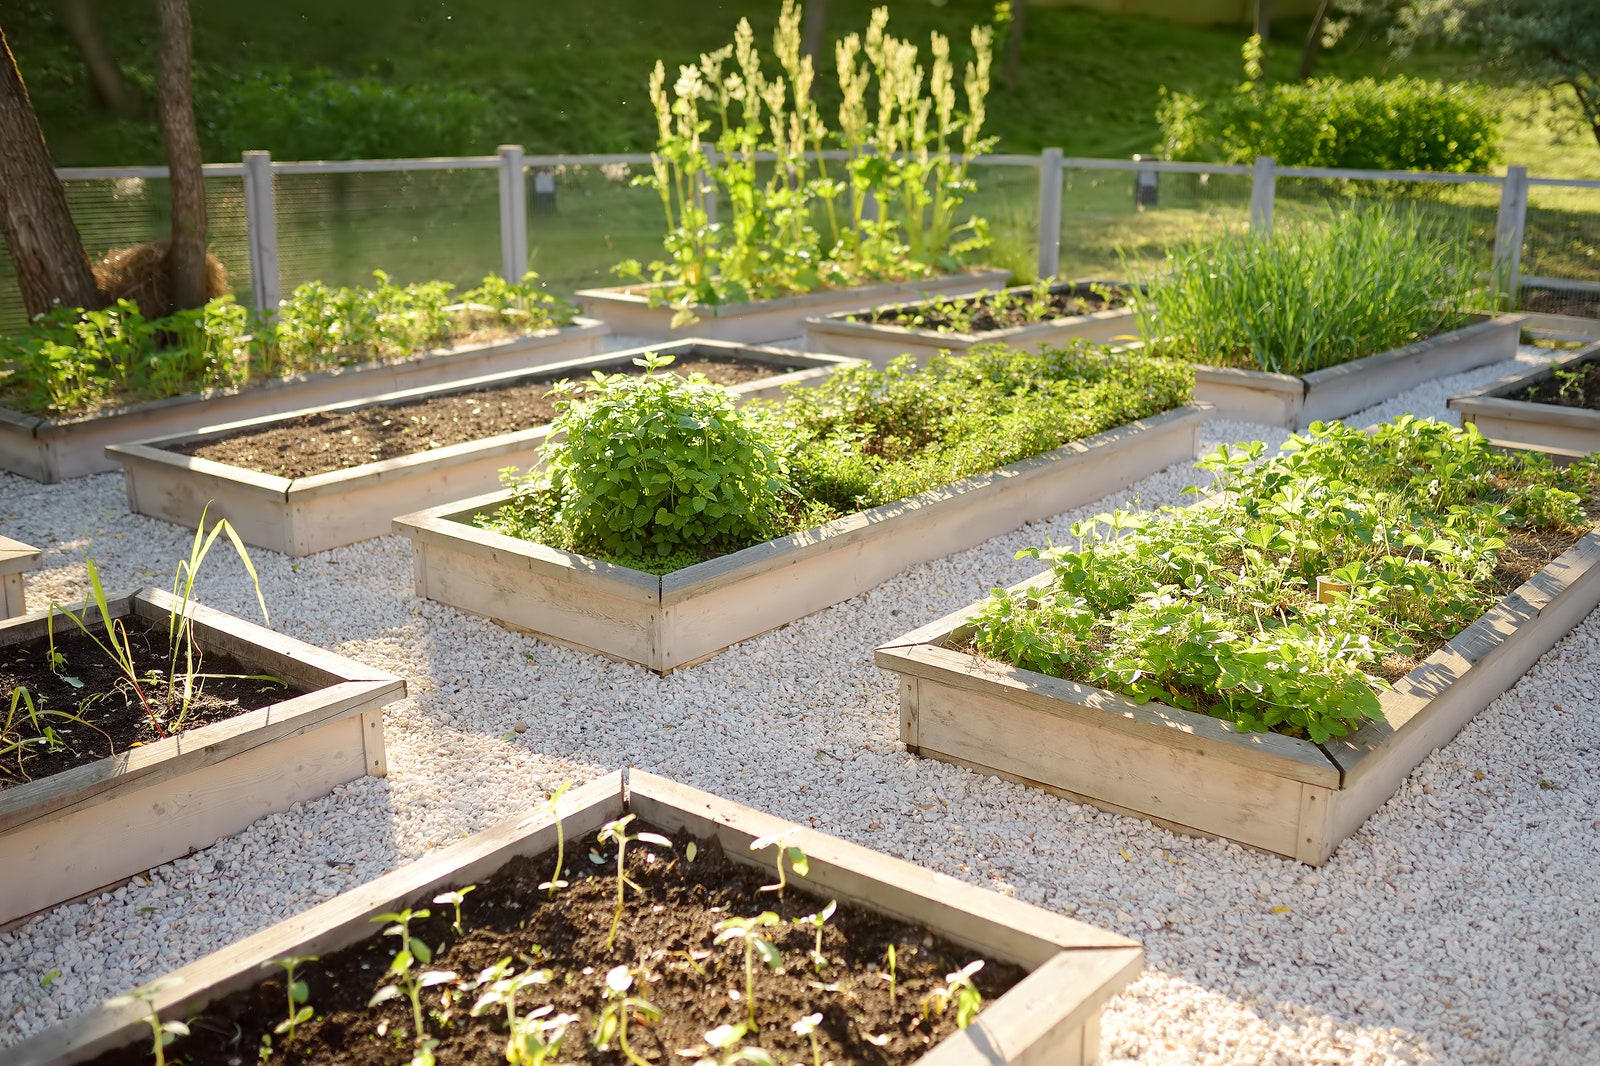
Creating a beautiful and functional garden space often involves defining the borders and pathways with attractive edging. One popular and timeless choice for garden edging is brick. Not only does brick garden edging add a touch of elegance to the landscape, but it also provides a durable and long-lasting solution for containing soil, mulch, and plants within the garden beds.
In this comprehensive guide, we will walk you through the step-by-step process of laying brick garden edging. Whether you are a seasoned DIY enthusiast or a novice gardener looking to enhance the aesthetics of your outdoor space, this guide will equip you with the knowledge and confidence to tackle this rewarding project.
By following these detailed instructions, you will learn how to select the right materials and tools, plan the layout for optimal visual impact, prepare the area for seamless installation, and lay the bricks with precision. Additionally, we will explore the crucial steps of securing the edging in place and adding the finishing touches to ensure a professional and polished appearance.
As we delve into each stage of the process, you will discover valuable tips and insights to help you avoid common pitfalls and achieve a stunning result. Whether you envision a classic, straight-lined edging or a more intricate, curved design, this guide will empower you to bring your vision to life with finesse and expertise.
So, roll up your sleeves, gather your tools, and let's embark on this fulfilling journey of creating a captivating garden edging that will elevate the charm and functionality of your outdoor oasis. Let's get started!
Key Takeaways:
- Laying brick garden edging involves gathering materials, planning the layout, preparing the area, laying the bricks, securing the edging, and adding finishing touches. It’s a rewarding project that enhances outdoor spaces with timeless charm and functionality.
- By meticulously following the step-by-step process, you can transform your outdoor space into a captivating oasis. The finishing touches, such as cleaning, sealing, and adding decorative elements, elevate the edging from functional to enduringly beautiful.
Read more: How To Lay Bricks For Garden Edging
Step 1: Gather materials and tools
Before embarking on the project of laying brick garden edging, it's essential to gather all the necessary materials and tools. This ensures a smooth and efficient workflow, allowing you to focus on the task at hand without interruptions. Here's a comprehensive list of items you will need:
Materials:
- Bricks: Select high-quality bricks that complement the aesthetic of your garden. Common options include clay bricks, concrete bricks, or interlocking pavers. Ensure that the quantity matches the length of the intended edging.
- Sand: Opt for coarse sand, which provides a stable base for the bricks and facilitates proper drainage.
- Gravel: This will be used for creating a sturdy foundation beneath the sand layer, promoting stability and preventing shifting over time.
- Landscape Fabric: A durable landscape fabric helps to suppress weed growth and maintain the integrity of the edging.
- Edging Restraints: Depending on the design and layout, you may require edging restraints to secure the bricks in place and prevent lateral movement.
- Masonry Adhesive: If you plan to create curved or intricate designs, masonry adhesive can be used to secure the bricks together for added stability.
Tools:
- Shovel: A sturdy shovel is essential for excavating the area and preparing the ground for the edging installation.
- Tape Measure: Accurate measurements are crucial for achieving a symmetrical and visually appealing edging layout.
- Level: To ensure that the bricks are laid evenly and maintain a consistent height throughout the edging.
- Rubber Mallet: This tool is used to gently tap the bricks into place, ensuring a snug fit and uniform alignment.
- Gloves and Safety Glasses: Protect your hands and eyes while handling the materials and using cutting tools.
- Wheelbarrow: Useful for transporting heavy materials such as sand, gravel, and bricks to the work area.
- Masonry Saw or Chisel: If adjustments to the brick size are necessary, a masonry saw or chisel can be used to make precise cuts.
By assembling these materials and tools in advance, you will set the stage for a successful and efficient brick garden edging project. With everything at your fingertips, you can proceed to the next step with confidence and readiness.
Step 2: Plan the layout
Planning the layout is a crucial step in the process of laying brick garden edging. A well-thought-out layout not only enhances the visual appeal of the edging but also ensures structural integrity and long-term stability. Here's a detailed guide to help you plan the layout effectively:
Read more: How To Lay Brick
Assess the Landscape
Begin by assessing the landscape where the brick garden edging will be installed. Take note of any existing features such as trees, flower beds, or pathways. Understanding the natural flow of the landscape will guide your layout decisions and help you create a seamless transition between the edging and the surrounding elements.
Determine the Design
Consider the design and shape of the garden edging. Will it be a straight, linear layout, or do you envision a more intricate, curved design? The design should complement the overall aesthetic of the garden while serving its functional purpose. Take into account any existing curves or angles in the landscape and use them to inform your edging design.
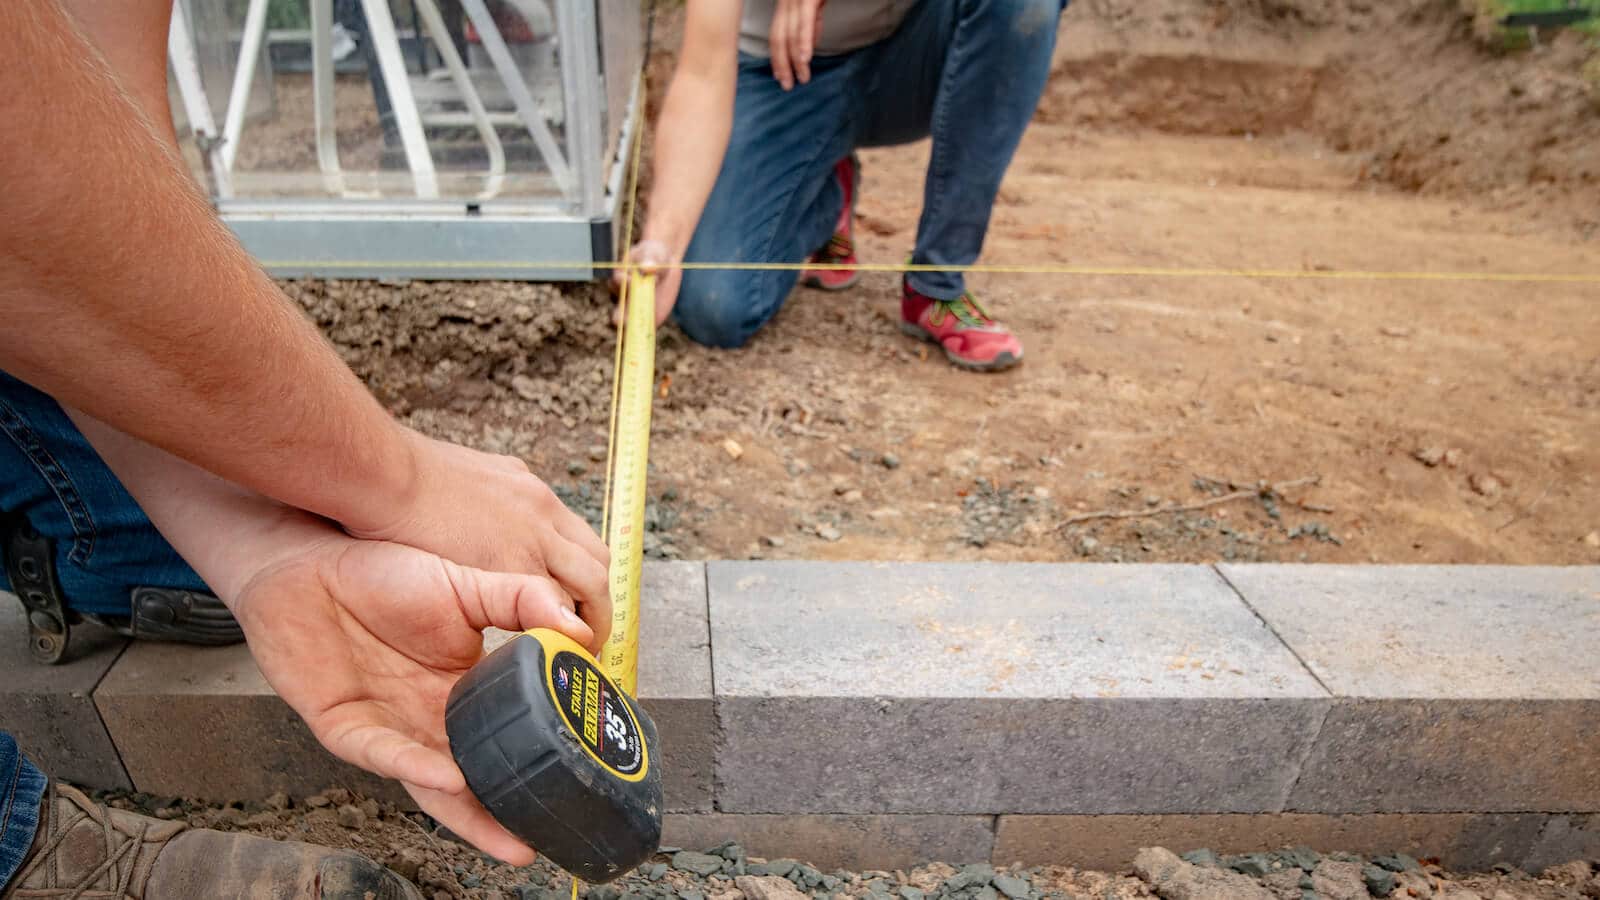
Measure and Mark
Using a tape measure and marking tools, carefully measure and mark the intended layout of the brick edging. Ensure that the lines are straight and accurately reflect the desired shape and dimensions. Pay close attention to corners and curves, as precise measurements are essential for a professional-looking result.
Create a Visual Guide
To visualize the layout before proceeding with the installation, consider using a temporary visual guide such as a garden hose or rope. This allows you to adjust the layout as needed, ensuring that the final design harmonizes with the surrounding landscape and meets your aesthetic preferences.
Read more: How To Set Brick Edging
Consider Drainage
Incorporate proper drainage into the layout plan to prevent water from pooling along the edging. If the garden bed is sloped, adjust the layout to facilitate natural water runoff and prevent erosion around the edging area.
Seek Balance and Symmetry
Strive for balance and symmetry in the layout, especially if the edging spans a significant portion of the garden. Symmetrical designs often create a sense of harmony and visual appeal, contributing to the overall beauty of the landscape.
By meticulously planning the layout of the brick garden edging, you set the stage for a successful and visually striking installation. This thoughtful approach ensures that the edging seamlessly integrates with the landscape, enhancing the overall charm and functionality of the garden space.
Step 3: Prepare the area
Before laying the bricks for the garden edging, thorough preparation of the area is essential to ensure a stable foundation and long-lasting results. Proper preparation not only facilitates the installation process but also contributes to the structural integrity and visual appeal of the edging. Here's a detailed guide on how to prepare the area effectively:
Clear the Site
Begin by clearing the designated area of any debris, rocks, or existing edging materials. Use a shovel or garden rake to remove any surface vegetation, ensuring that the ground is level and free from obstructions. This step creates a clean canvas for the edging installation and allows for better control over the layout and foundation.
Read more: How To Lay Brick Pavers
Excavate the Trench
Using the layout plan as a guide, carefully excavate a trench along the marked lines for the edging. The depth of the trench will depend on the size of the bricks and the desired height of the edging. Typically, a depth of 3 to 4 inches is sufficient to accommodate most brick sizes while providing stability and support.
Add a Layer of Gravel
Once the trench is excavated, add a layer of gravel to the bottom. The gravel serves as a foundational base, promoting drainage and preventing the accumulation of water beneath the bricks. Spread the gravel evenly and compact it using a hand tamper to create a stable and level surface.
Lay Landscape Fabric
To inhibit weed growth and maintain the integrity of the edging, lay a durable landscape fabric along the excavated trench. The fabric acts as a barrier, preventing soil and mulch from infiltrating the gravel base while allowing for proper drainage. Trim the fabric to fit the trench dimensions, ensuring complete coverage.
Distribute Coarse Sand
Following the landscape fabric installation, distribute a layer of coarse sand over the fabric and gravel base. The sand provides a level surface for laying the bricks and facilitates minor adjustments to achieve a uniform height for the edging. Use a screed board or a straight piece of lumber to level the sand evenly.
Read more: How To Lay Brick For A Fireplace
Compact and Level
Using a hand tamper, compact the sand layer to create a firm and stable foundation for the bricks. Check the level of the sand surface to ensure uniformity, making adjustments as needed to accommodate the variations in the landscape and achieve a consistent height for the edging.
By meticulously preparing the area for the brick garden edging, you establish a solid foundation for the installation process. This meticulous approach sets the stage for a seamless and visually appealing edging that enhances the overall aesthetics and functionality of the garden space.
Step 4: Lay the bricks
With the area meticulously prepared, it's time to embark on the pivotal step of laying the bricks for the garden edging. This stage requires precision, attention to detail, and a keen eye for maintaining uniformity and alignment. Here's a comprehensive guide to help you navigate the process of laying the bricks with expertise and finesse.
Begin at the Starting Point
Start laying the bricks at the designated starting point, typically a corner or an easily identifiable reference point along the layout. This ensures a consistent and organized approach to the installation, allowing for seamless progression along the edging.
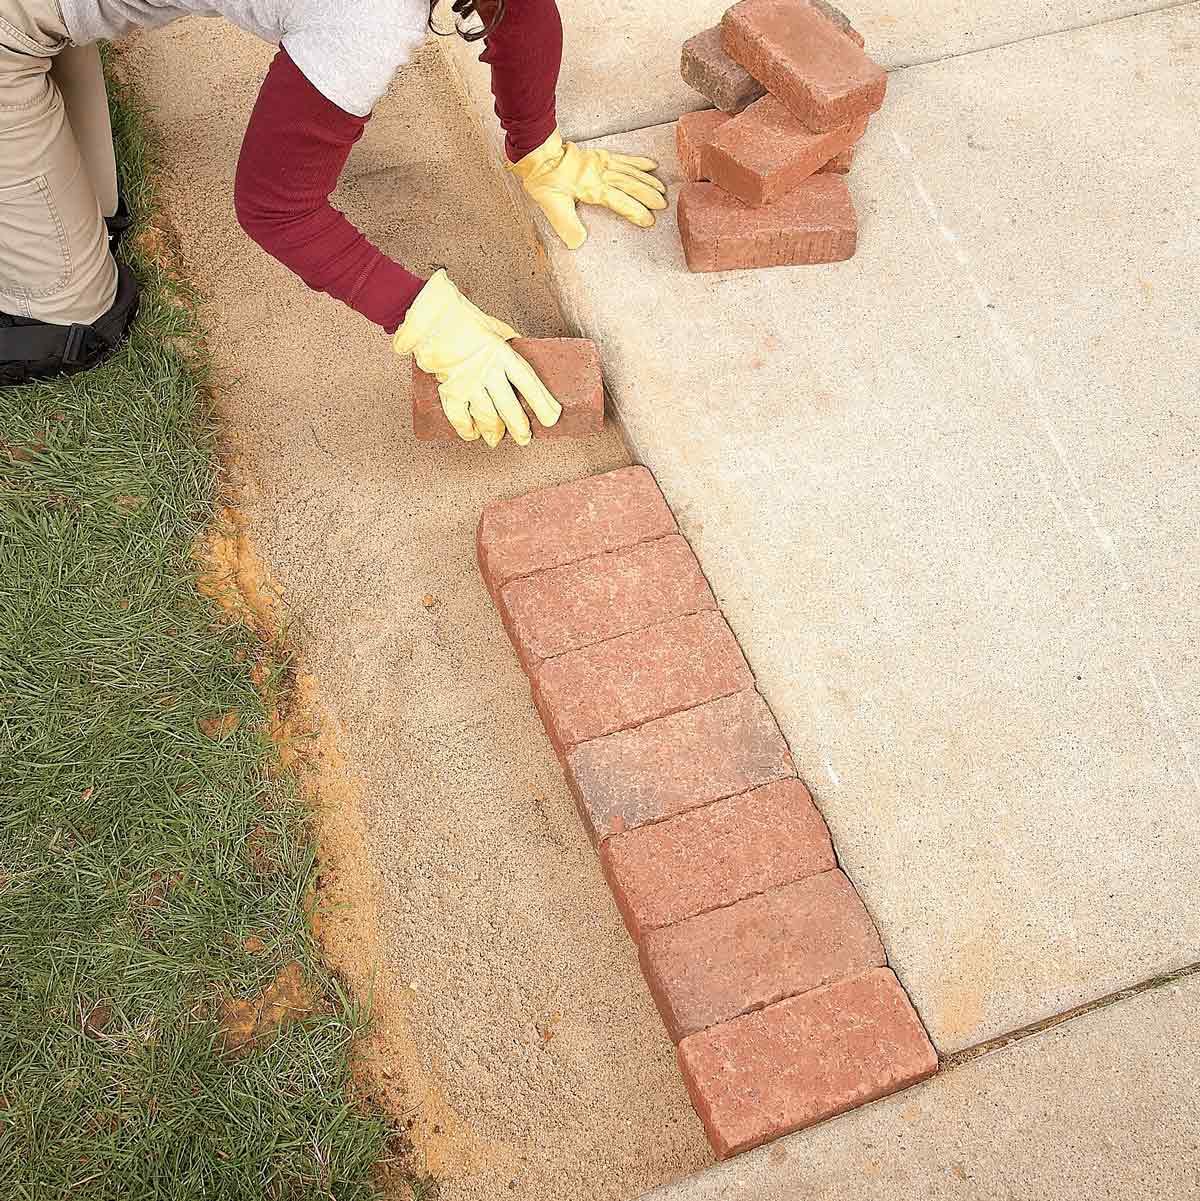
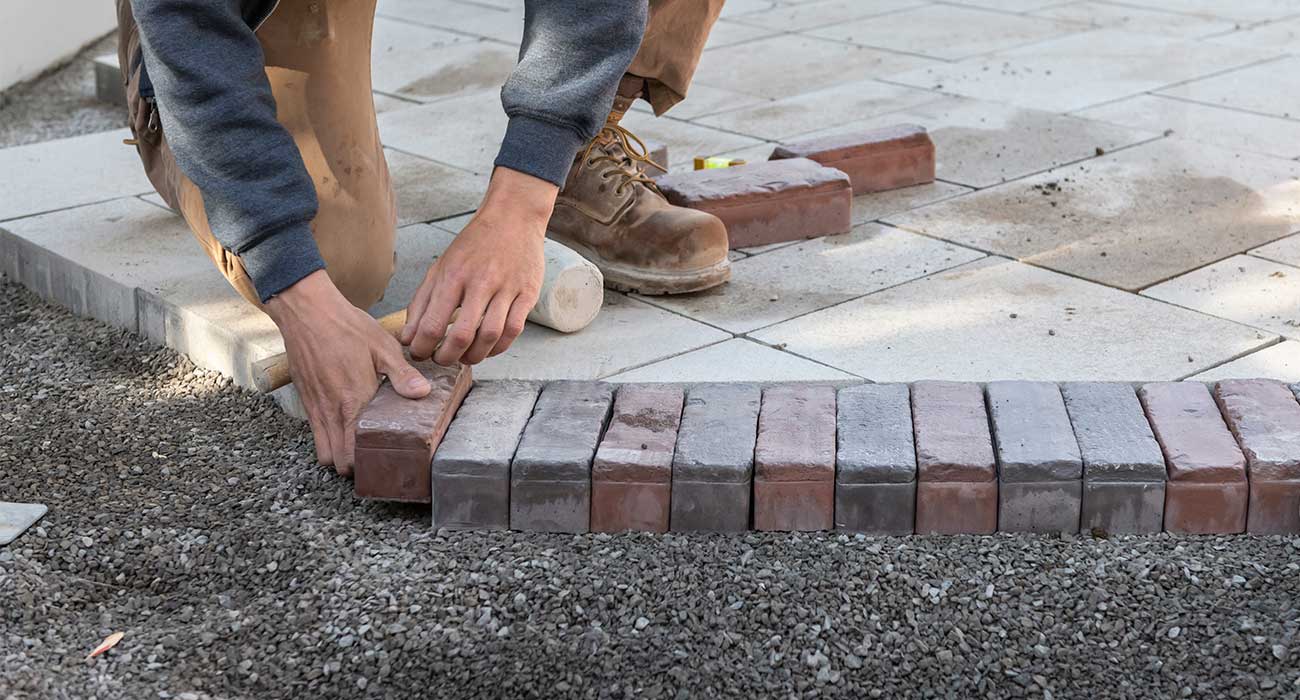
Place the Bricks
Carefully place the bricks along the prepared trench, ensuring a snug fit and uniform alignment. Use a level to verify that the bricks are positioned at the desired height and maintain a consistent slope if the garden bed is inclined. Pay close attention to the spacing between the bricks, aiming for a visually pleasing and structurally sound arrangement.
Read more: How To Lay Brick Floor
Make Adjustments
As you lay the bricks, be prepared to make minor adjustments to accommodate variations in the landscape and ensure a seamless fit. Use a rubber mallet to gently tap the bricks into place, making subtle modifications to achieve a uniform and visually appealing alignment.
Consider Patterns and Designs
If you are incorporating specific patterns or designs into the edging, such as herringbone or basket weave, carefully follow the predetermined layout to achieve the desired visual impact. Maintain precision and attention to detail, ensuring that the patterns align seamlessly and create a cohesive and polished appearance.
Create Smooth Transitions
As you progress along the edging, focus on creating smooth transitions at corners and junctions. This involves carefully cutting and fitting the bricks to maintain a continuous flow and eliminate abrupt changes in the edging layout. Pay special attention to maintaining symmetry and visual harmony throughout the installation.
Verify Alignment and Stability
Periodically verify the alignment and stability of the laid bricks, using a level to ensure that they maintain a consistent height and slope. Make any necessary adjustments to correct minor deviations and guarantee a professional and structurally sound result.
Read more: How To Lay Brick Walkway
Continue the Progression
Continue laying the bricks along the entire length of the edging, adhering to the predetermined layout and design. Maintain a steady pace while exercising precision and attention to detail, ensuring that each brick contributes to a cohesive and visually striking garden edging.
By following these detailed steps and guidelines, you will lay the bricks for the garden edging with confidence and expertise, achieving a visually appealing and structurally sound result that enhances the overall charm and functionality of your outdoor space.
Step 5: Secure the edging
Securing the brick garden edging is a critical step that ensures long-term stability and structural integrity. Properly securing the edging not only prevents shifting and displacement but also enhances the overall durability of the installation. Here's a detailed guide on how to effectively secure the brick garden edging:
Utilize Edging Restraints
Incorporate edging restraints, such as metal or plastic strips specifically designed for securing brick or paver edging. These restraints are installed along the outer edge of the bricks, anchoring them in place and preventing lateral movement. Secure the restraints to the ground using stakes or anchors, ensuring a firm and immovable hold.
Apply Masonry Adhesive
For added stability, consider applying masonry adhesive between the bricks, especially in curved or intricate designs. The adhesive creates a strong bond between the bricks, effectively uniting them into a cohesive and resilient edging structure. Apply the adhesive sparingly, focusing on the points of contact between the bricks to maintain a clean and professional appearance.
Read more: How To Lay Brick Patio
Backfill with Soil or Mulch
After securing the edging restraints and applying masonry adhesive, backfill the area behind the bricks with soil or mulch. This not only conceals the restraints and adhesive but also provides additional support to the edging, enhancing its resistance to external forces. Ensure that the backfill material is evenly distributed and gently compacted to promote stability.
Verify Alignment and Stability
Once the edging is secured and backfilled, carefully inspect the entire length of the installation to verify alignment and stability. Use a level to ensure that the bricks maintain a consistent height and slope, making any necessary adjustments to guarantee a uniform and visually appealing result. Pay close attention to corners and transitions, ensuring that they remain structurally sound and aesthetically pleasing.
Consider Weed Prevention
As a final touch, consider applying a layer of mulch or installing a weed barrier along the garden bed adjacent to the edging. This helps prevent weed growth and maintains a clean and polished appearance around the edging. By addressing weed prevention at this stage, you contribute to the long-term maintenance and visual appeal of the garden edging.
By diligently securing the brick garden edging, you ensure that the installation remains steadfast and visually captivating for years to come. This meticulous approach not only enhances the structural integrity of the edging but also contributes to the overall beauty and functionality of the garden space.
Step 6: Finishing touches
As the brick garden edging nears completion, attention to the finishing touches elevates the overall aesthetics and functionality of the installation. These final details add a polished and professional touch, enhancing the visual appeal and long-term durability of the edging. Here's a comprehensive guide to the essential finishing touches that will perfect the brick garden edging:
Read more: How To Edge A Garden Bed
Clean and Neaten
After securing the edging and backfilling the area, take the time to clean and neaten the surroundings. Remove any excess soil, mulch, or debris that may have accumulated during the installation process. A clean and tidy finish contributes to the overall attractiveness of the edging and ensures a seamless integration with the surrounding landscape.
Seal the Bricks (Optional)
Consider applying a brick or paver sealer to enhance the color and protect the surface of the bricks. This optional step can help prolong the lifespan of the edging by shielding the bricks from moisture, UV exposure, and natural wear. Select a high-quality sealer designed for outdoor use and follow the manufacturer's instructions for proper application.
Add Decorative Elements
To infuse personality and charm into the garden edging, consider incorporating decorative elements such as ornamental stones, small sculptures, or colorful pebbles along the outer edge. These accents can complement the overall design of the garden while adding a touch of individuality and creativity to the edging.
Incorporate Lighting Features
For a captivating nighttime ambiance, integrate low-voltage landscape lighting along the brick garden edging. Strategically placed lights not only illuminate the pathway and accentuate the edging but also contribute to enhanced safety and security within the garden space. Select energy-efficient LED fixtures for a cost-effective and environmentally friendly lighting solution.
Read more: How To Install Sawtooth Brick Edging
Maintain Regular Inspections
Once the finishing touches are in place, commit to regular inspections and maintenance of the brick garden edging. Periodically check for any signs of shifting, settling, or damage, addressing any issues promptly to preserve the integrity and appearance of the edging. By staying proactive, you ensure that the edging continues to enhance the beauty and functionality of the garden for years to come.
By attending to these essential finishing touches, you elevate the brick garden edging from a functional installation to a captivating and enduring feature within the landscape. These meticulous details not only contribute to the visual appeal of the garden but also reflect your dedication to creating a welcoming and well-maintained outdoor space.
Conclusion
In conclusion, the process of laying brick garden edging is a rewarding endeavor that combines practical functionality with timeless aesthetic appeal. By following the comprehensive steps outlined in this guide, you have gained the knowledge and confidence to embark on this fulfilling project and transform your outdoor space into a captivating oasis.
From the initial stage of gathering materials and tools to the meticulous planning of the layout, thorough preparation of the area, precise laying of the bricks, and the crucial steps of securing the edging, you have acquired the essential skills to execute the project with finesse and expertise. The emphasis on attention to detail, alignment, and stability ensures that the resulting garden edging not only enhances the visual charm of the landscape but also contributes to its long-term durability.
As you apply the finishing touches, such as cleaning and neatening the surroundings, considering optional sealing of the bricks, and incorporating decorative elements or lighting features, you infuse personality and individuality into the edging, elevating it from a functional installation to a captivating and enduring feature within the landscape.
It is important to recognize that the journey does not end with the completion of the project. Regular inspections and maintenance are essential to preserve the integrity and appearance of the brick garden edging, ensuring that it continues to enhance the beauty and functionality of the garden for years to come.
Ultimately, the process of laying brick garden edging is a testament to your dedication to creating a welcoming and well-maintained outdoor space. The harmonious blend of practicality and aesthetics embodied in the garden edging reflects your commitment to cultivating a landscape that not only delights the eye but also provides a functional and inviting environment for relaxation and enjoyment.
So, as you stand back and admire the beautifully laid brick garden edging, take pride in the transformation you have brought to your outdoor space. Let this project be a reminder of your ability to create beauty and functionality hand in hand, and may it inspire you to continue exploring new ways to enhance and enrich your surroundings.
Frequently Asked Questions about How To Lay Brick Garden Edging
Was this page helpful?
At Storables.com, we guarantee accurate and reliable information. Our content, validated by Expert Board Contributors, is crafted following stringent Editorial Policies. We're committed to providing you with well-researched, expert-backed insights for all your informational needs.
0 thoughts on “How To Lay Brick Garden Edging”