Home>Gardening & Outdoor>Landscaping Ideas>How To Install A Pergola On Grass
Landscaping Ideas
How To Install A Pergola On Grass
Modified: February 18, 2024
Learn how to install a pergola on grass with our expert landscaping ideas. Create a stunning outdoor space with our step-by-step guide.
(Many of the links in this article redirect to a specific reviewed product. Your purchase of these products through affiliate links helps to generate commission for Storables.com, at no extra cost. Learn more)
Introduction
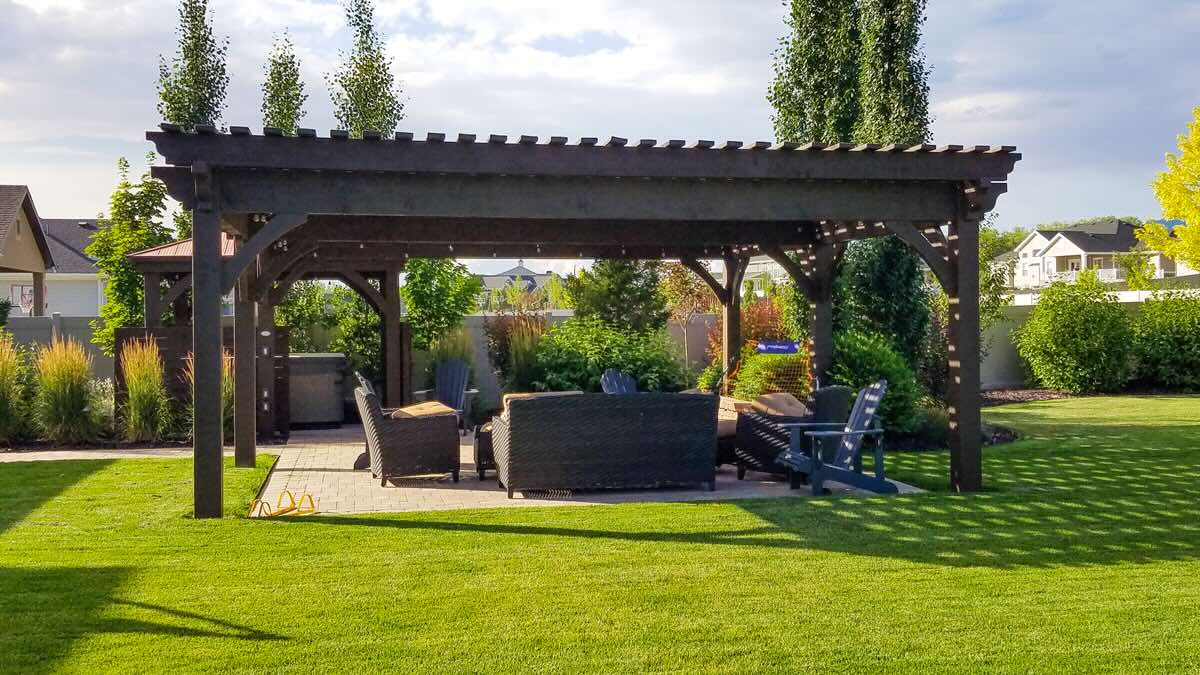
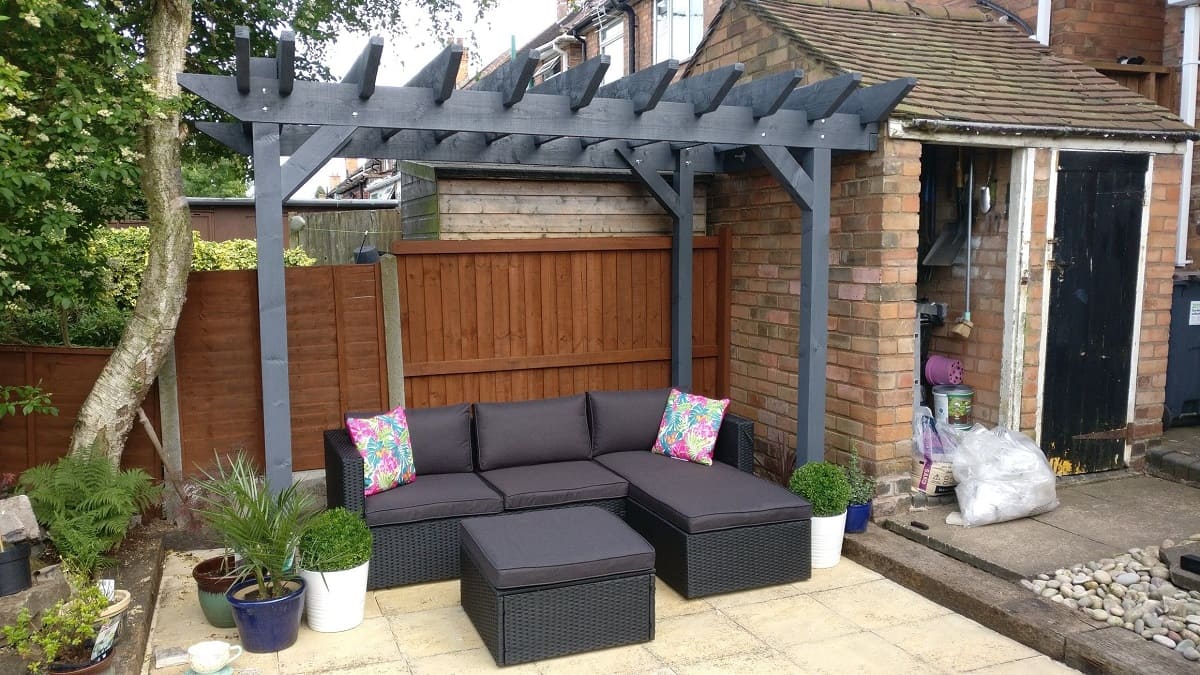
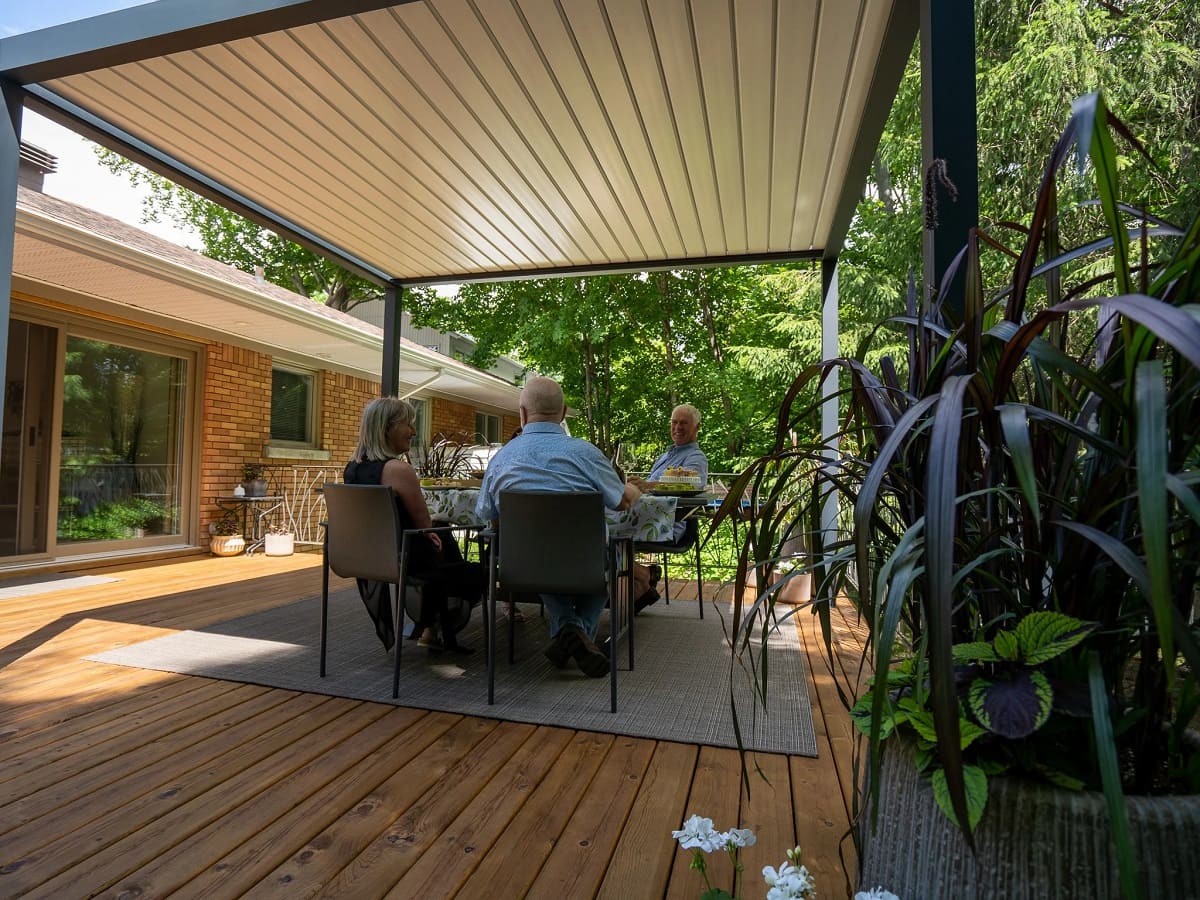
Installing a pergola on grass can transform your outdoor space into a captivating retreat, providing a perfect setting for relaxation, entertainment, and al fresco dining. Whether you envision a cozy nook for reading or a charming spot for hosting gatherings, a pergola offers a versatile and stylish solution to elevate your landscape. By following a few simple steps, you can seamlessly integrate this elegant structure into your lawn, creating a focal point that enhances the beauty and functionality of your outdoor environment.
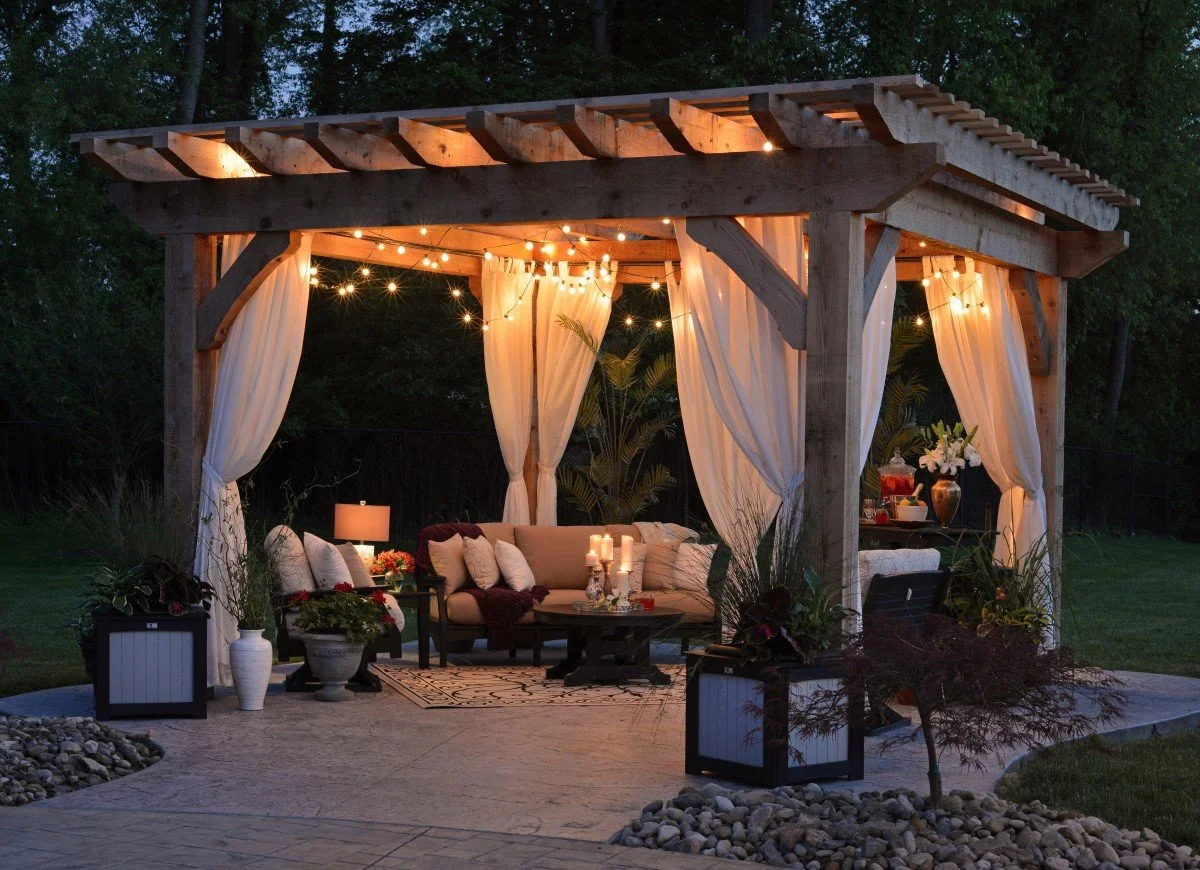
A pergola serves as an inviting extension of your home, blurring the boundaries between indoor and outdoor living. Its open framework allows for the interplay of light and shadow, creating a captivating ambiance that beckons you to unwind and savor the beauty of nature. With the addition of climbing plants or drapes, a pergola can also provide a sense of privacy and seclusion, making it an ideal space for intimate conversations or quiet contemplation.
The process of installing a pergola on grass may seem daunting at first, but with the right guidance and a touch of creativity, it can become a rewarding and enjoyable endeavor. Whether you are a seasoned DIY enthusiast or a novice homeowner eager to embark on a new project, this guide will walk you through the essential steps, empowering you to bring your vision to life with confidence and precision.
As we delve into the intricacies of installing a pergola on grass, you will discover the art of harmonizing form and function, as well as the joy of creating a captivating outdoor oasis that reflects your unique style and preferences. From selecting the perfect location to securing the pergola in place, each step is an opportunity to infuse your personal touch and elevate the charm of your outdoor space.
So, roll up your sleeves, gather your tools, and let's embark on this enriching journey to install a pergola on your grass, unlocking the potential of your outdoor area and setting the stage for unforgettable moments amidst the beauty of your own backyard.
Key Takeaways:
- Installing a pergola on grass can create a captivating outdoor retreat, blending indoor and outdoor living. Careful planning and attention to detail ensure a stable and enduring structure that enhances your outdoor space.
- Choosing the right location, preparing the ground, setting the posts, installing the beams and rafters, and securing the pergola are essential steps in creating a beautiful and resilient outdoor oasis.
Read more: How To Install A Pergola On Grass
Step 1: Choose the Right Location
Selecting the ideal location for your pergola is a pivotal first step that sets the stage for a harmonious integration with your outdoor space. Consider the following factors to ensure that your chosen spot not only complements the aesthetics of your landscape but also aligns with your functional needs:
-
Assess the Landscape: Begin by surveying your lawn to identify potential sites for the pergola. Take note of any existing features, such as trees, shrubs, or garden beds, that can either enhance or obstruct the visual appeal of the pergola. Additionally, consider the natural elements, such as sunlight and shade patterns, to determine the optimal placement for your pergola.
-
Define the Purpose: Reflect on how you intend to use the pergola. Will it serve as a cozy retreat for intimate gatherings, a shaded lounging area, or a picturesque backdrop for outdoor dining? Understanding the primary purpose of the pergola will guide you in selecting a location that caters to your specific lifestyle and preferences.
-
Maximize Views and Privacy: Take into account the surrounding views and sightlines from different vantage points in your yard. Position the pergola to frame captivating vistas, such as a lush garden, a tranquil pond, or distant mountains, while also ensuring a sense of privacy and seclusion. Strategic placement can create a harmonious balance between openness and intimacy within the pergola space.
-
Consider Accessibility: Evaluate the accessibility of the chosen location, ensuring that it seamlessly integrates with the flow of your outdoor space. Whether it's adjacent to a patio, pool area, or garden pathway, the pergola should be easily accessible and inviting, encouraging seamless transitions between different outdoor zones.
-
Account for Ground Conditions: Take note of the ground conditions, such as the slope and drainage patterns, to ensure a stable foundation for the pergola. Level ground is preferable, but if the terrain is slightly uneven, consider the necessary adjustments to accommodate the pergola while maintaining structural integrity.
By carefully considering these aspects, you can strategically choose a location that harmonizes with the natural beauty of your landscape and fulfills your vision for an enchanting outdoor retreat. The right location sets the stage for a captivating interplay between the pergola, the surrounding environment, and your lifestyle, laying the groundwork for a seamless and captivating installation process.
Step 2: Prepare the Ground
Preparing the ground for your pergola is a crucial step that lays the foundation for a stable and enduring structure. By meticulously attending to the ground preparation, you can ensure that your pergola stands the test of time while seamlessly blending with the natural contours of your lawn. Here's a detailed guide on how to prepare the ground for your pergola installation:
Clear the Area
Begin by clearing the designated area of any debris, rocks, or vegetation that may impede the installation process. Use a rake or shovel to remove any surface-level obstructions, ensuring a clean and unobstructed canvas for the groundwork.
Mark the Layout
Using stakes and string, mark the layout of the pergola on the ground, outlining the precise location and dimensions of the structure. This visual guide will help you visualize the placement of the pergola and ensure that it aligns with your initial vision.
Read more: How To Build A Patio Pergola
Excavate the Soil
Once the layout is marked, proceed to excavate the soil to create a level foundation for the pergola. The depth of the excavation will depend on the type of foundation you plan to use. For a traditional post-and-beam installation, dig holes for the posts, ensuring that they are deep enough to provide stability and support for the structure.
Level the Ground
After excavating the soil, use a level to ensure that the ground is uniformly flat and even. This step is essential for establishing a stable base for the pergola and preventing any potential tilting or shifting over time. Adjust the soil as needed to achieve a level surface throughout the designated area.
Consider Drainage
Assess the drainage patterns in the area to prevent water accumulation around the pergola. If the ground tends to retain water, consider incorporating drainage solutions, such as gravel or a slight slope away from the pergola, to mitigate potential water-related issues and preserve the integrity of the structure.
Add a Base Layer
To further enhance stability and durability, consider adding a base layer of gravel or compacted aggregate to the excavated area. This additional layer provides a solid foundation for the pergola, aiding in water drainage and minimizing the risk of ground shifting.
By meticulously preparing the ground for your pergola, you set the stage for a seamless and enduring installation process. The attention to detail in this foundational step ensures that your pergola not only enhances the beauty of your outdoor space but also stands as a testament to meticulous craftsmanship and thoughtful planning.
Read more: How To Build A Pergola On A Patio
Step 3: Set the Posts
Setting the posts forms the backbone of your pergola's structural integrity, anchoring it firmly to the ground and providing a sturdy framework for the subsequent installation steps. The process of setting the posts requires precision and attention to detail to ensure that the pergola stands the test of time while seamlessly integrating with the surrounding landscape. Here's a comprehensive guide on how to set the posts for your pergola installation:
Gather the Necessary Materials and Tools
Before commencing the post installation, gather the essential materials and tools, including the pergola posts, concrete mix, post hole digger, level, stakes, string, and a shovel. Ensuring that you have all the required items at hand will streamline the installation process and minimize interruptions.
Mark the Post Locations
Using the previously marked layout as a guide, identify the precise locations for the pergola posts. Use stakes and string to outline the positions, ensuring that they align with the dimensions and orientation of the pergola. This visual guide will aid in accurately placing the posts and maintaining uniformity throughout the installation.
Dig the Post Holes
With the post locations marked, use a post hole digger to excavate the holes for the pergola posts. The depth and diameter of the holes should correspond to the specific requirements of your pergola design, taking into account factors such as soil composition and local building codes. Aim for consistent hole dimensions to facilitate a uniform and stable foundation for the posts.
Read more: How To Fix A Pergola To A Patio
Position and Align the Posts
Carefully position the pergola posts in the excavated holes, ensuring that they are plumb and aligned with the predetermined layout. Use a level to verify the vertical alignment of each post, making any necessary adjustments to achieve precise positioning. This step is critical in ensuring that the pergola stands straight and true once the installation is complete.
Secure the Posts with Concrete
Once the posts are aligned, pour concrete mix into the holes, ensuring that it fully surrounds the base of each post. The concrete provides essential stability and support, anchoring the posts securely to the ground. Use a level to confirm that the posts remain plumb as the concrete sets, preventing any potential tilting or misalignment.
Allow the Concrete to Cure
After securing the posts with concrete, allow sufficient time for the concrete to cure and set firmly. Follow the manufacturer's recommendations regarding the curing period, ensuring that the posts are fully stabilized before proceeding with the subsequent installation steps. This patience will contribute to the long-term durability and stability of your pergola.
By meticulously following these steps to set the posts for your pergola, you establish a solid foundation for the structure, ensuring that it stands as a testament to meticulous craftsmanship and thoughtful planning. The precision and care invested in this pivotal stage lay the groundwork for a seamless and enduring installation, bringing your vision of an enchanting outdoor retreat one step closer to reality.
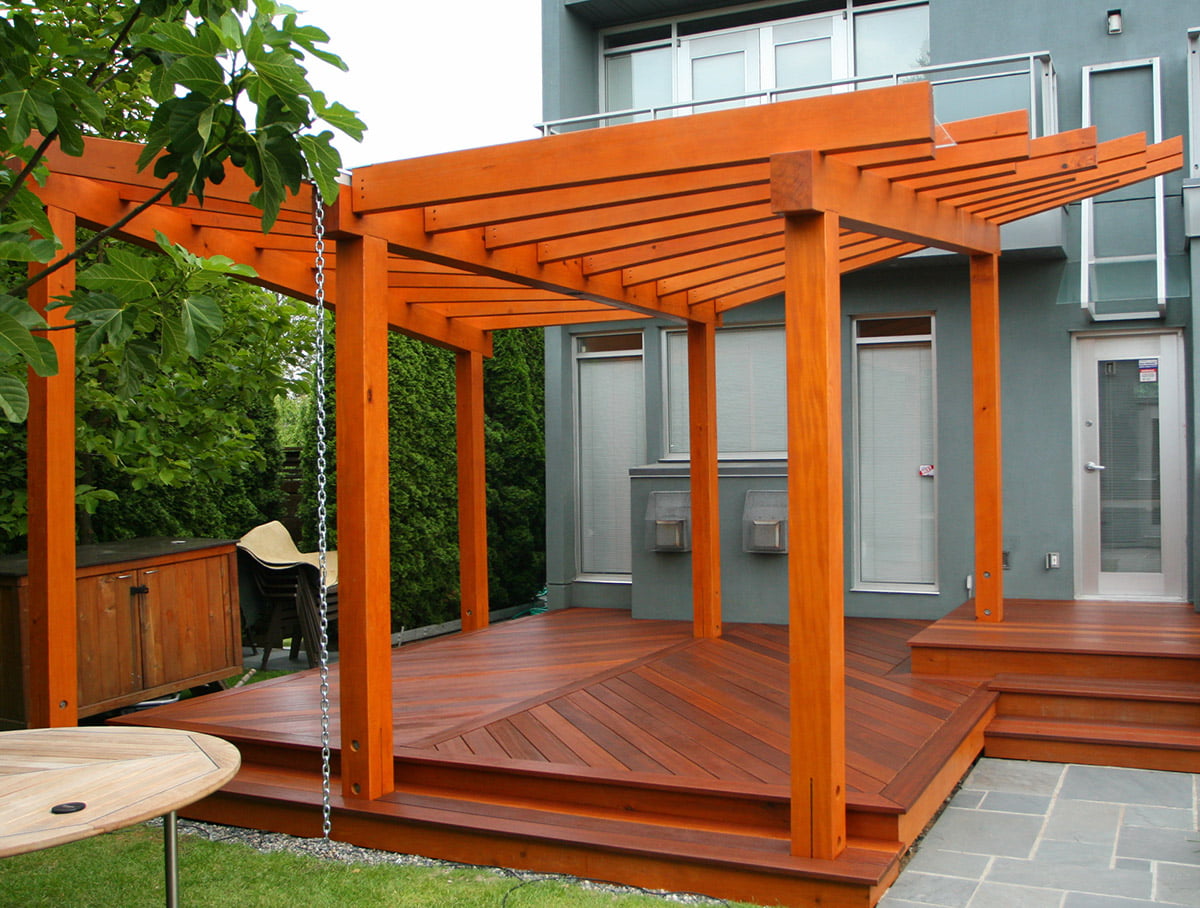
Step 4: Install the Beams and Rafters
With the posts firmly set in place, the installation process progresses to the pivotal stage of installing the beams and rafters, which form the defining framework of your pergola. This step involves meticulous precision and a keen eye for detail to ensure that the structural elements are seamlessly integrated, creating a visually captivating and enduring outdoor space. Here's a comprehensive guide on how to install the beams and rafters for your pergola:
Gather the Necessary Materials and Tools
Before commencing the installation, gather the essential materials and tools, including the beams, rafters, fasteners, drill, screws, level, and a ladder. Having all the required items readily available will streamline the installation process and minimize interruptions, allowing for a smooth and efficient workflow.
Position the Beams
Begin by positioning the beams on top of the installed posts, ensuring that they align precisely with the predetermined layout and dimensions of the pergola. Use a level to verify the horizontal alignment of the beams, making any necessary adjustments to achieve uniformity and structural integrity. This step is crucial in laying the foundation for the subsequent attachment of the rafters and ensuring the overall stability of the pergola structure.
Secure the Beams to the Posts
Once the beams are accurately positioned, secure them to the posts using appropriate fasteners and hardware. Depending on the design of your pergola, this may involve using brackets, screws, or specialized connectors to firmly attach the beams to the posts. Ensure that the connections are secure and robust, providing essential support for the entire framework of the pergola.
Install the Rafters
With the beams in place, proceed to install the rafters perpendicular to the beams, creating the distinctive overhead lattice pattern that defines the aesthetic appeal of the pergola. Carefully position the rafters at consistent intervals, ensuring uniform spacing and alignment throughout the installation. Use a level to confirm the horizontal orientation of the rafters, making any necessary adjustments to achieve a visually pleasing and structurally sound arrangement.
Read more: How To Cover A Pergola
Secure the Rafters to the Beams
Once the rafters are in position, secure them to the beams using appropriate fasteners and hardware. Depending on your design preferences, this may involve using screws, nails, or specialized connectors to establish secure connections between the rafters and beams. Pay meticulous attention to the integrity of these connections, as they play a pivotal role in ensuring the enduring stability and visual appeal of the pergola structure.
By meticulously following these steps to install the beams and rafters for your pergola, you bring your vision of an enchanting outdoor retreat one step closer to reality. The precision and care invested in this pivotal stage lay the groundwork for a seamless and enduring installation, culminating in the creation of a captivating outdoor space that beckons you to savor the beauty of nature and indulge in moments of relaxation and tranquility.
Step 5: Secure the Pergola
Securing the pergola is the final step in the installation process, ensuring that the structure is firmly anchored and poised to withstand the elements while providing a captivating focal point in your outdoor space. This critical stage involves reinforcing the connections, addressing potential movement, and fortifying the overall stability of the pergola. Here's a detailed guide on how to securely anchor and stabilize your pergola:
Reinforce Connections
Inspect all the connections, including those between the posts, beams, and rafters, to ensure that they are secure and robust. Tighten any loose fasteners and hardware, reinforcing the structural integrity of the pergola. Pay meticulous attention to the junctions where different components meet, as these areas are crucial for maintaining the stability and longevity of the structure.
Address Movement
Assess the pergola for any signs of movement or sway, especially in response to external forces such as wind or inclement weather. If necessary, implement additional bracing or reinforcement to minimize any potential swaying or shifting. By addressing movement proactively, you enhance the overall resilience of the pergola, ensuring that it remains steadfast in the face of varying environmental conditions.
Read more: How To Screen A Pergola
Consider Ground Anchoring
Depending on the specific design and location of your pergola, consider implementing ground anchoring solutions to further fortify its stability. This may involve using ground anchors, stakes, or specialized footings to secure the pergola to the underlying soil. Ground anchoring provides an extra layer of support, particularly in areas prone to strong winds or soil movement, enhancing the overall durability of the structure.
Evaluate Climbing Plant Support
If your pergola is designed to accommodate climbing plants or vines, assess the support system for these botanical elements. Ensure that the trellises, lattice panels, or other climbing aids are firmly attached to the pergola framework, providing a stable and inviting environment for the growth of lush vegetation. By securing the climbing plant support, you not only enhance the aesthetic appeal of the pergola but also contribute to its structural integrity.
Weatherproofing Considerations
Incorporate weatherproofing measures to protect the pergola from the elements and extend its lifespan. This may involve applying a protective sealant or weather-resistant finish to the wood components, safeguarding them against moisture, UV exposure, and natural wear. Additionally, consider integrating features such as retractable canopies or drapes to provide shelter from sun and rain, further enhancing the functionality and resilience of the pergola.
By meticulously addressing these aspects to secure your pergola, you ensure that it stands as a resilient and enduring centerpiece in your outdoor space. The attention to detail in this final step not only reinforces the structural integrity of the pergola but also sets the stage for countless moments of relaxation, entertainment, and cherished gatherings in a captivating outdoor setting.
Conclusion
As you conclude the installation of your pergola on grass, you stand at the threshold of a transformative journey that has redefined your outdoor space. The culmination of meticulous planning, precise execution, and a touch of creativity has given rise to a captivating retreat that beckons you to savor the beauty of nature and indulge in moments of relaxation and tranquility.
The installation process, from choosing the perfect location to securing the pergola in place, has been a testament to your vision and dedication to enhancing your outdoor environment. Each step has been an opportunity to infuse your personal touch, harmonizing form and function to create a space that reflects your unique style and preferences.
As you stand beneath the elegant framework of your pergola, you are greeted by a sense of accomplishment and the promise of unforgettable moments amidst the beauty of your own backyard. The open framework allows for the interplay of light and shadow, creating a captivating ambiance that blurs the boundaries between indoor and outdoor living. Whether it's a cozy nook for reading, a shaded lounging area, or a picturesque backdrop for outdoor dining, your pergola stands ready to fulfill your desires and enrich your lifestyle.
The enduring stability and resilience of your pergola, fortified through meticulous groundwork and secure anchoring, ensure that it will stand the test of time, becoming a cherished centerpiece in your outdoor space. The attention to detail in securing the structure, addressing potential movement, and weatherproofing considerations reflects your commitment to creating a space that not only captivates the eye but also withstands the elements with grace and poise.
As you step back to admire the seamless integration of the pergola with the natural contours of your lawn, you are filled with a sense of pride and satisfaction. The pergola has become more than just a structure; it is a testament to your creativity, craftsmanship, and the joy of transforming a vision into reality.
With the pergola as the focal point, your outdoor space has been elevated into a captivating oasis that invites you to linger, unwind, and create cherished memories. Whether it's basking in the dappled sunlight, enjoying the company of loved ones, or simply reveling in the serenity of your surroundings, the pergola stands as a symbol of the enriching journey you have embarked upon.
As you look ahead to the countless moments of joy and tranquility that await within the embrace of your pergola, you can take pride in the transformative impact it has had on your outdoor environment. The pergola on grass is not merely a structure; it is a testament to your vision, a canvas for cherished moments, and a gateway to a lifestyle enriched by the beauty of nature.
Frequently Asked Questions about How To Install A Pergola On Grass
Was this page helpful?
At Storables.com, we guarantee accurate and reliable information. Our content, validated by Expert Board Contributors, is crafted following stringent Editorial Policies. We're committed to providing you with well-researched, expert-backed insights for all your informational needs.

0 thoughts on “How To Install A Pergola On Grass”