Home>Gardening & Outdoor>Landscaping Ideas>How To Install Pavers With Grass In Between
Landscaping Ideas
How To Install Pavers With Grass In Between
Modified: February 18, 2024
Learn how to enhance your landscaping with our step-by-step guide on installing pavers with grass in between. Create a stunning outdoor space with our landscaping ideas.
(Many of the links in this article redirect to a specific reviewed product. Your purchase of these products through affiliate links helps to generate commission for Storables.com, at no extra cost. Learn more)
Introduction
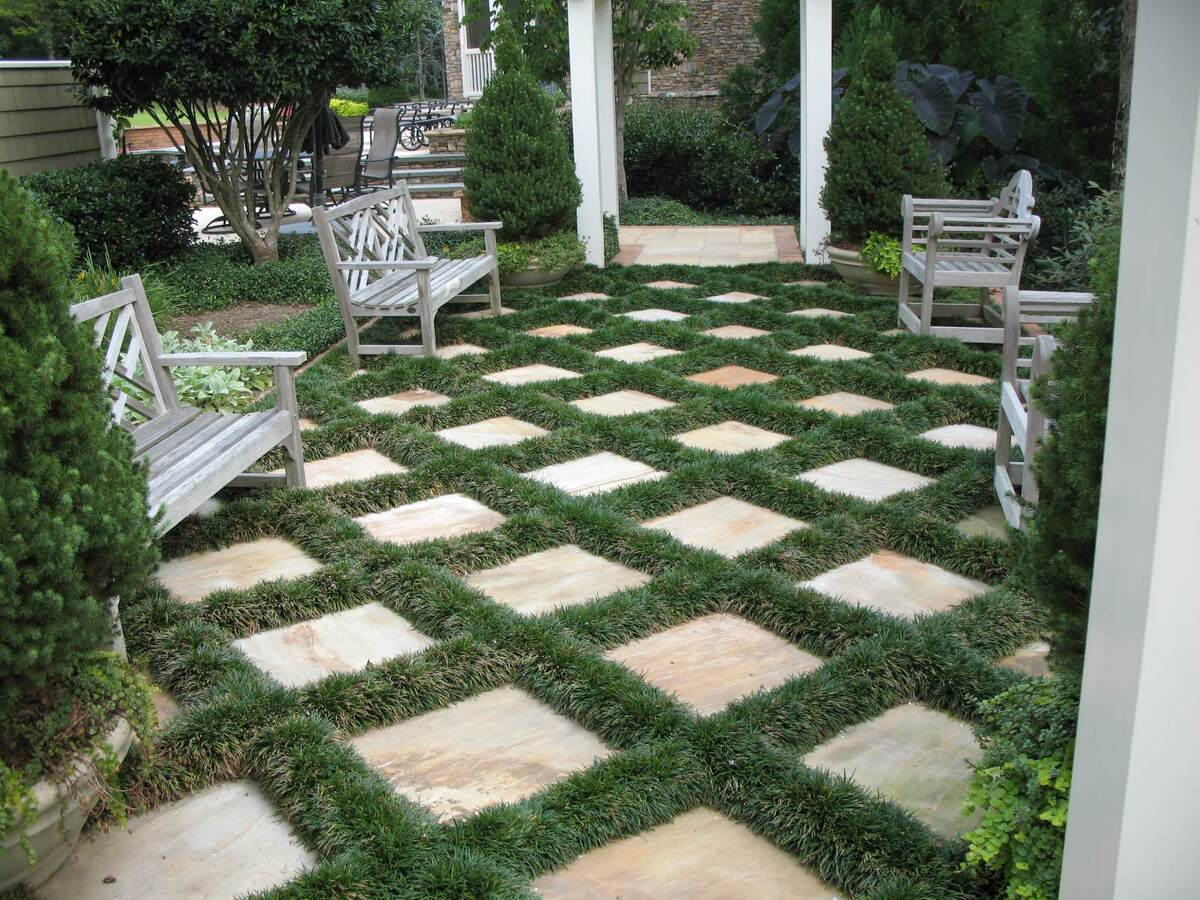
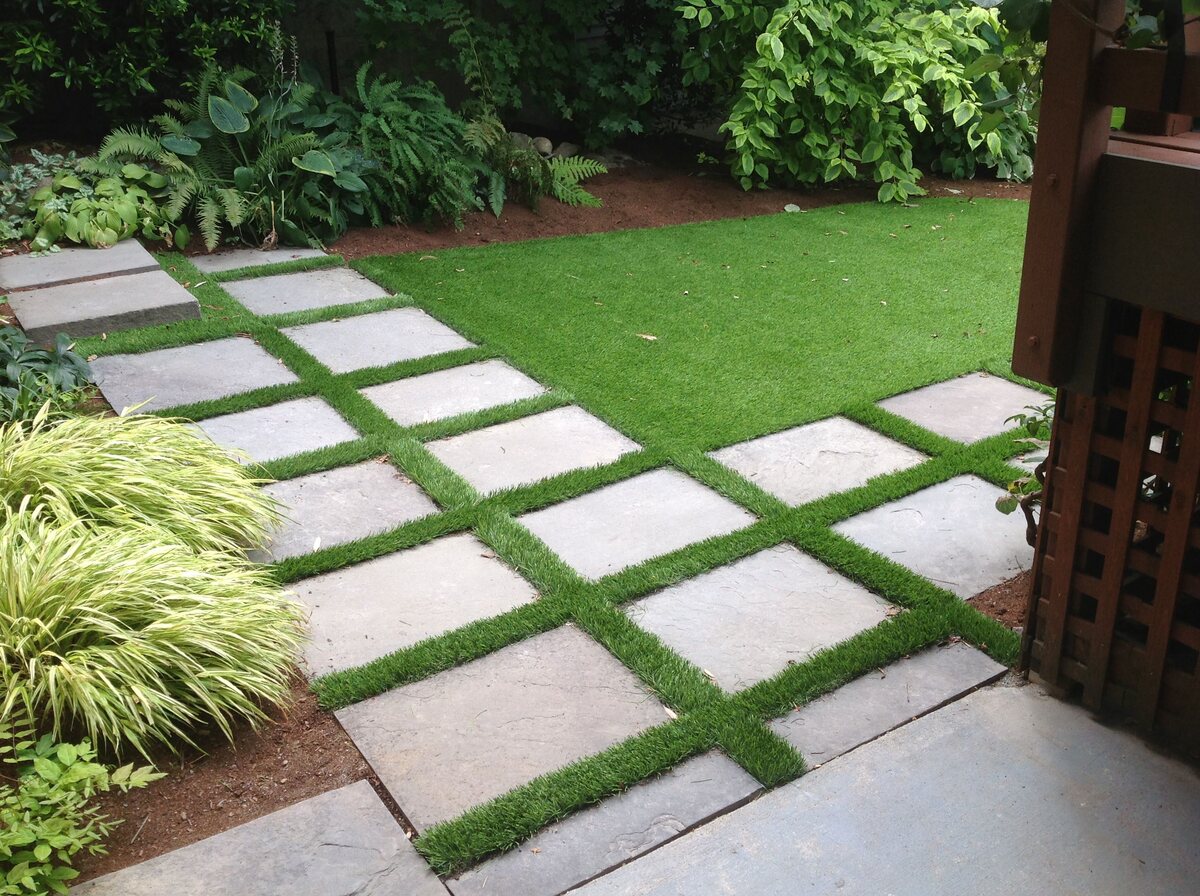
Welcome to the wonderful world of paver installations with a natural touch! If you’re looking to enhance your outdoor living space with a touch of greenery, installing pavers with grass in between is a fantastic option. This innovative landscaping technique not only adds visual interest and texture to your outdoor area but also helps to create a more eco-friendly and sustainable environment.
By seamlessly blending the rugged charm of pavers with the natural beauty of grass, you can create a unique and inviting space that’s perfect for relaxing, entertaining, and enjoying the great outdoors. Whether you’re revamping your patio, walkway, or driveway, this creative approach to landscaping is sure to make a lasting impression.
In this comprehensive guide, we’ll walk you through the step-by-step process of installing pavers with grass in between. From selecting the right materials to planting and maintaining the grass, you’ll gain valuable insights and practical tips to bring your vision to life. So, roll up your sleeves, put on your gardening gloves, and let’s dive into the exciting world of paver and grass installations!
Key Takeaways:
- Create a unique outdoor space by installing pavers with grass in between. Choose the right materials and follow a step-by-step process for a stunning, eco-friendly landscape design.
- Maintain the beauty of your paver and grass installation with regular cleaning, weed control, and grass care. Periodic professional maintenance ensures a captivating outdoor oasis for relaxation and enjoyment.
Read more: How To Remove Grass Between Pavers
Choosing the Right Pavers and Grass
Before diving into your paver and grass installation project, it’s crucial to carefully select the right materials to ensure a successful and visually appealing outcome. When it comes to pavers, you’ll find a wide array of options, including concrete, natural stone, brick, and permeable pavers. Each type offers its own unique aesthetic and functional benefits, so it’s essential to consider factors such as durability, style, and maintenance requirements.
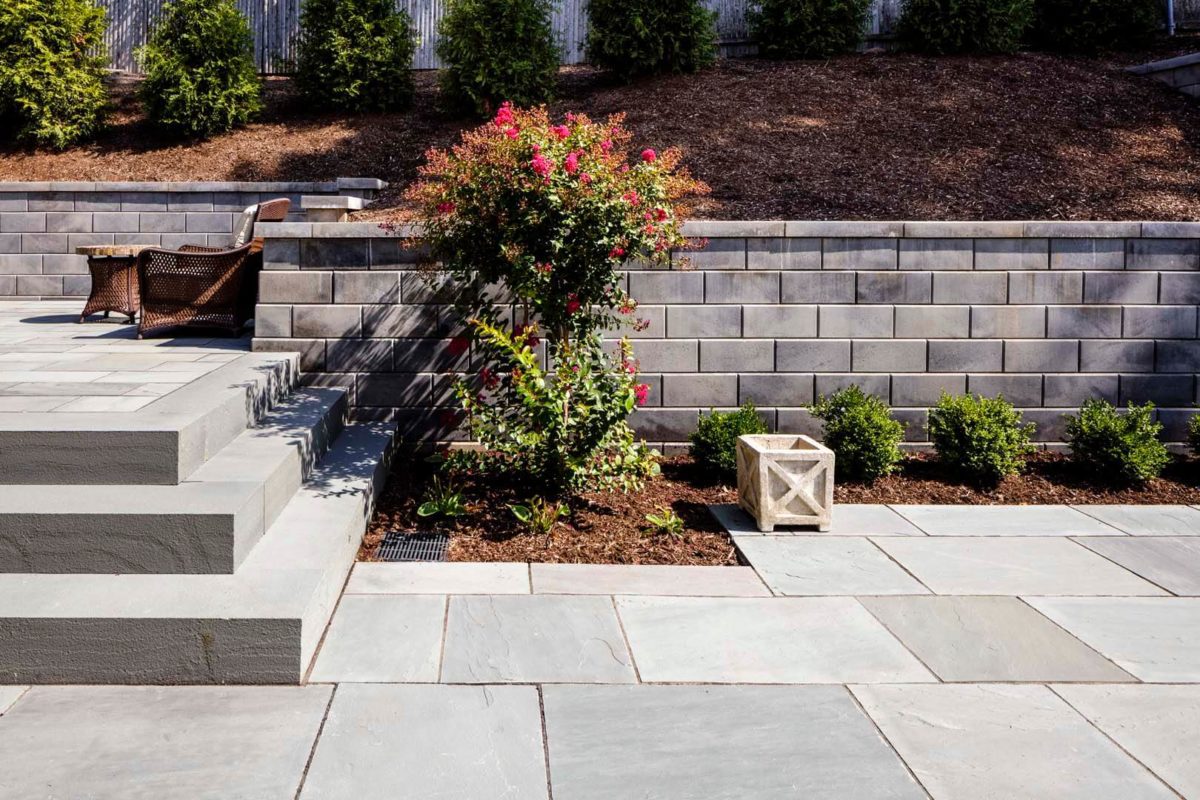
Concrete pavers are a popular choice for their versatility and affordability. They come in various shapes, sizes, and colors, allowing you to create custom designs that suit your outdoor space. Natural stone pavers, such as limestone, travertine, and bluestone, exude a timeless and elegant charm, perfect for creating a sophisticated look. Brick pavers, known for their classic appeal, are durable and can withstand heavy foot traffic, making them ideal for pathways and driveways.
If you’re aiming for an eco-friendly and permeable surface that allows water to infiltrate the soil, permeable pavers are an excellent option. These pavers help reduce stormwater runoff and prevent erosion, contributing to a more sustainable landscape. Consider the specific requirements of your project, such as load-bearing capacity and design preferences, to choose the paver type that best suits your needs.
When it comes to selecting the right grass for planting between the pavers, consider low-growing, drought-tolerant varieties that can withstand foot traffic. Creeping thyme, also known as thymus praecox, is a popular choice for its fragrant foliage and ability to thrive in various climates. Another option is Irish moss, a lush and vibrant ground cover that adds a touch of lushness to the paver gaps. For a more rugged and natural look, consider using a fine fescue grass blend, which requires minimal maintenance and creates a soft, green carpet between the pavers.
By carefully choosing the pavers and grass that align with your design vision and practical needs, you’ll set the stage for a stunning and functional paver and grass installation. The next step is to prepare the area for the upcoming transformation.
Preparing the Area
Before you start installing pavers with grass in between, it’s essential to prepare the area thoroughly to ensure a solid foundation and optimal growing conditions for the grass. Here’s a step-by-step guide to preparing the area for your upcoming project:
1. Clearing the Space
Begin by clearing the area where you plan to install the pavers and grass. Remove any existing vegetation, debris, and obstacles to create a clean and level surface. This may involve digging up grass, removing weeds, and ensuring that the ground is free of rocks and other impediments.
2. Marking the Layout
Using stakes, string, or spray paint, mark the layout of your paver installation area. This will help you visualize the design, plan the placement of the pavers, and ensure that the final result meets your expectations. Take measurements and double-check the layout to ensure accuracy.
Read more: How To Plant Ground Cover Between Pavers
3. Excavating the Soil
Once the layout is marked, it’s time to excavate the soil to create a stable base for the pavers. The depth of the excavation will depend on the thickness of the pavers and the base materials. Typically, a depth of 6 to 8 inches is sufficient to accommodate the pavers and provide space for the base layers.
4. Adding Base Materials
After excavating the soil, add a base layer of crushed gravel or aggregate to the excavated area. This base material provides stability, facilitates drainage, and helps prevent the pavers from shifting over time. Compact the base layer thoroughly using a compactor to ensure a solid and level foundation.
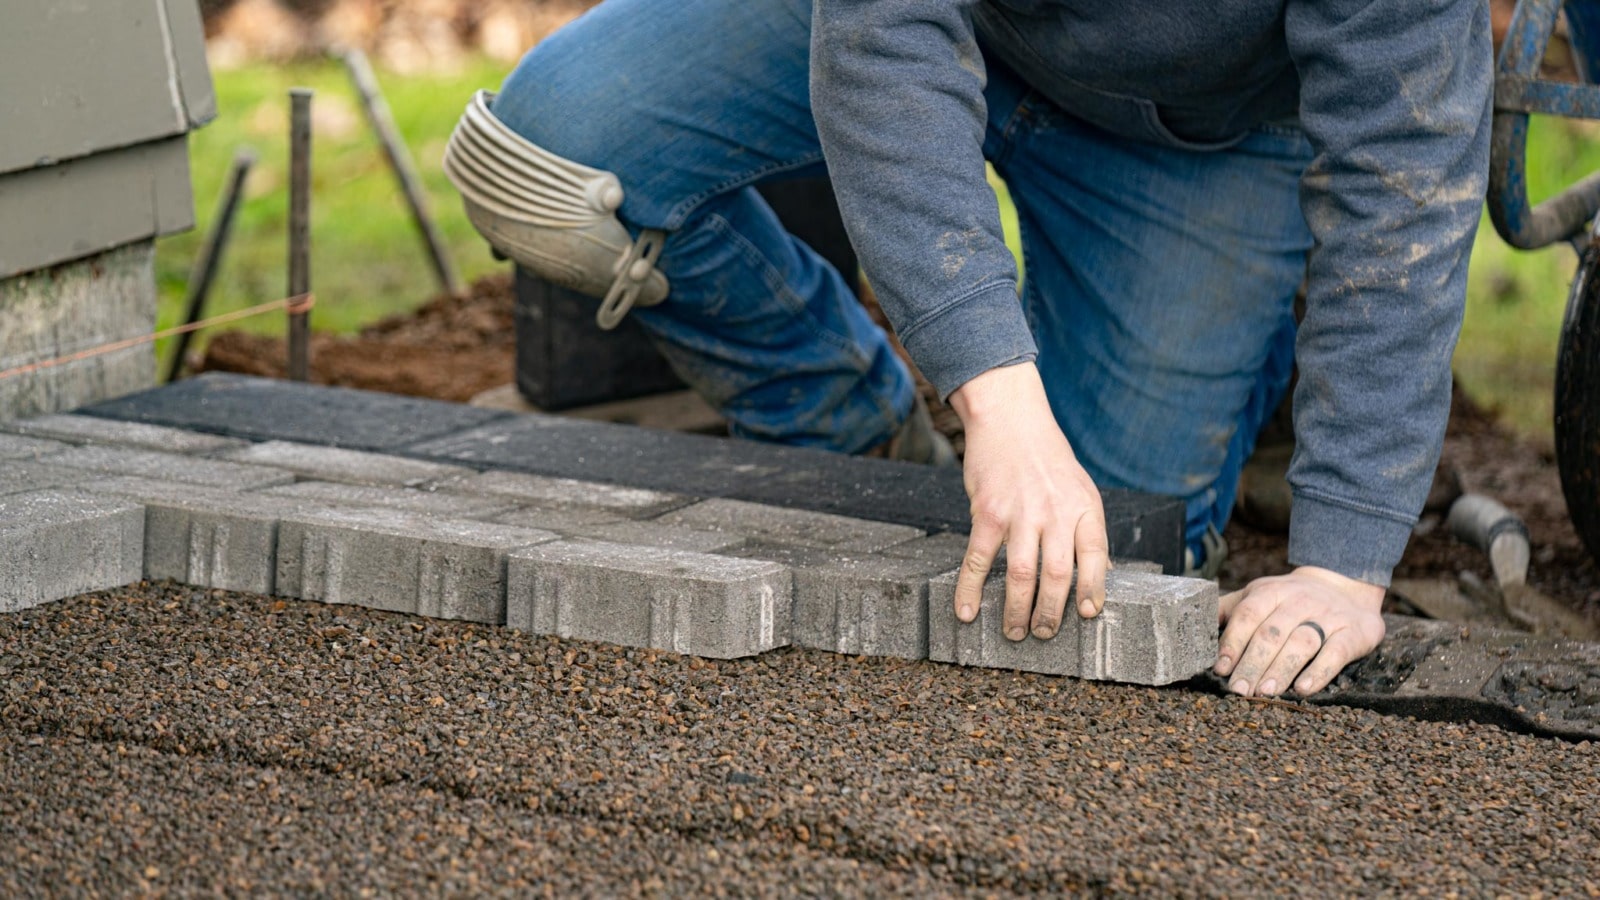
5. Edging the Area
Install sturdy edging along the perimeter of the paver installation area to define the boundaries and keep the pavers in place. This can be achieved using plastic or metal paver restraints, which help create clean lines and prevent the pavers from spreading or shifting.
By meticulously preparing the area for your paver and grass installation, you’ll establish a solid groundwork for the subsequent steps. With the area prepped and ready, you’re now set to embark on the exciting process of installing the pavers.
Installing the Pavers
With the area prepped and the materials at the ready, it’s time to embark on the exciting phase of installing the pavers. This process requires precision, attention to detail, and a creative eye to bring your design vision to life. Here’s a step-by-step guide to installing the pavers with finesse:
Read more: How To Lay Artificial Grass Between Pavers
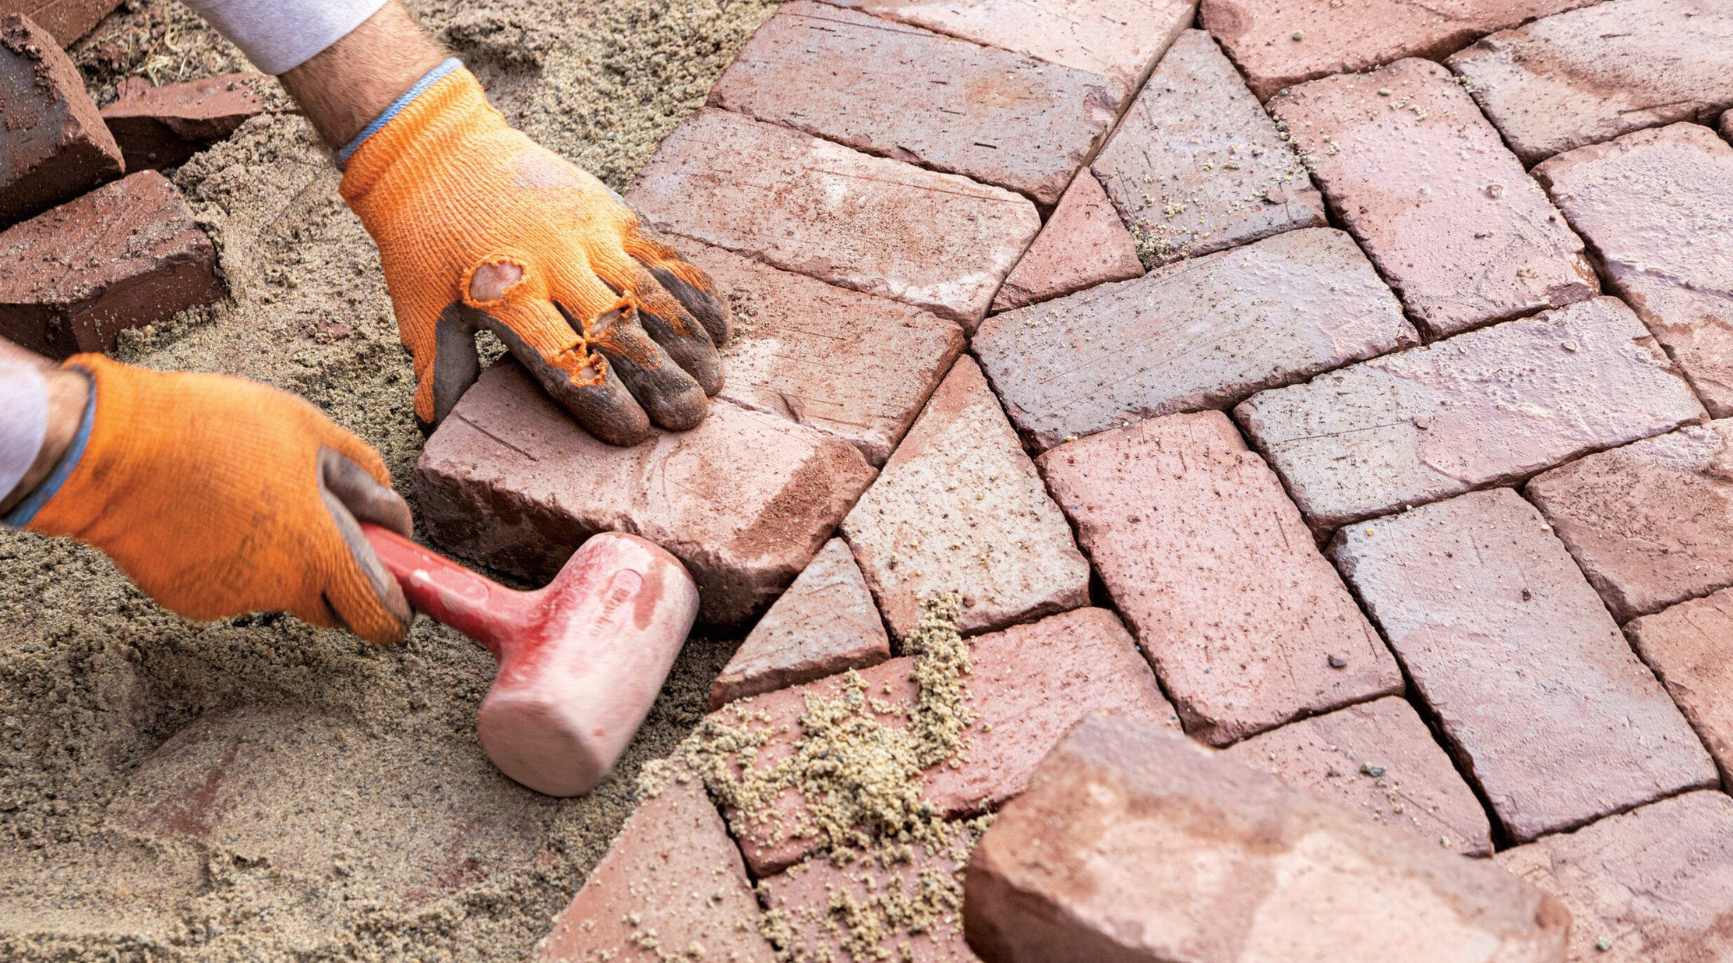
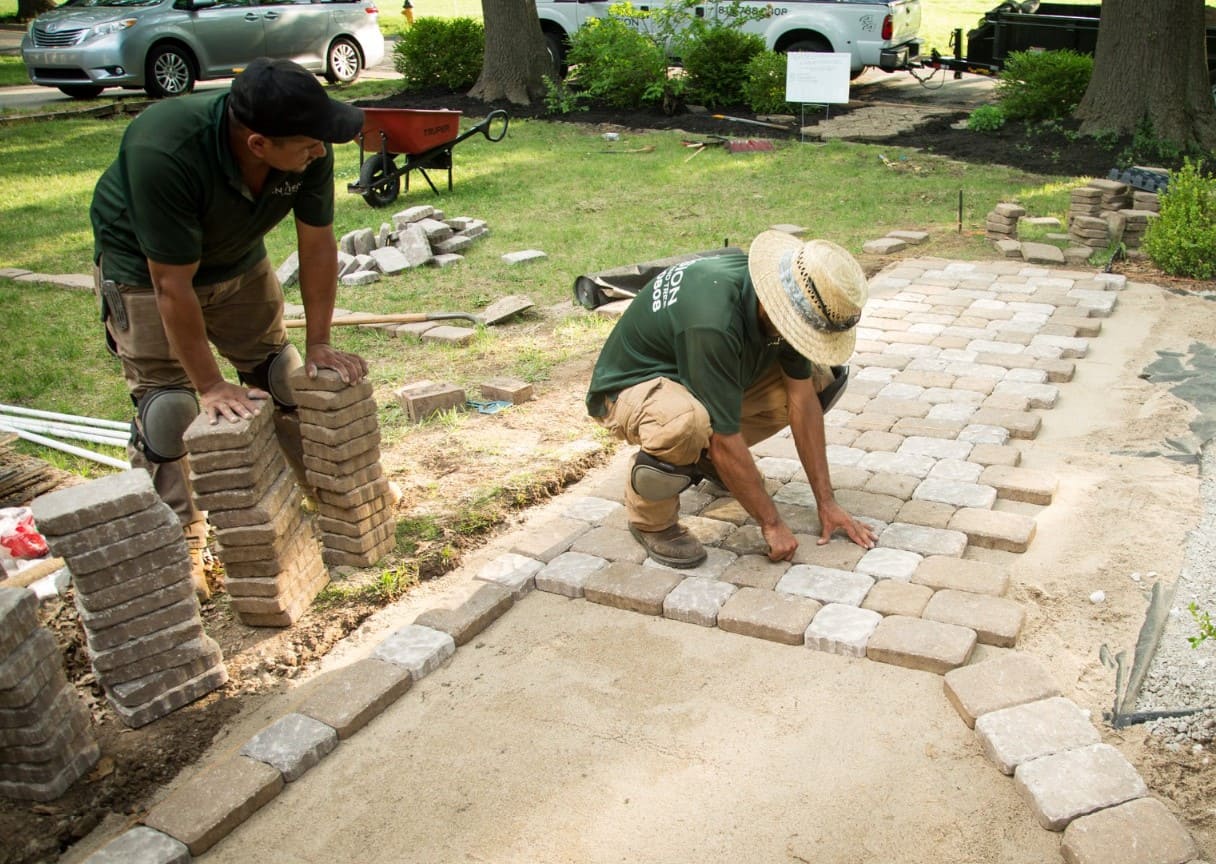
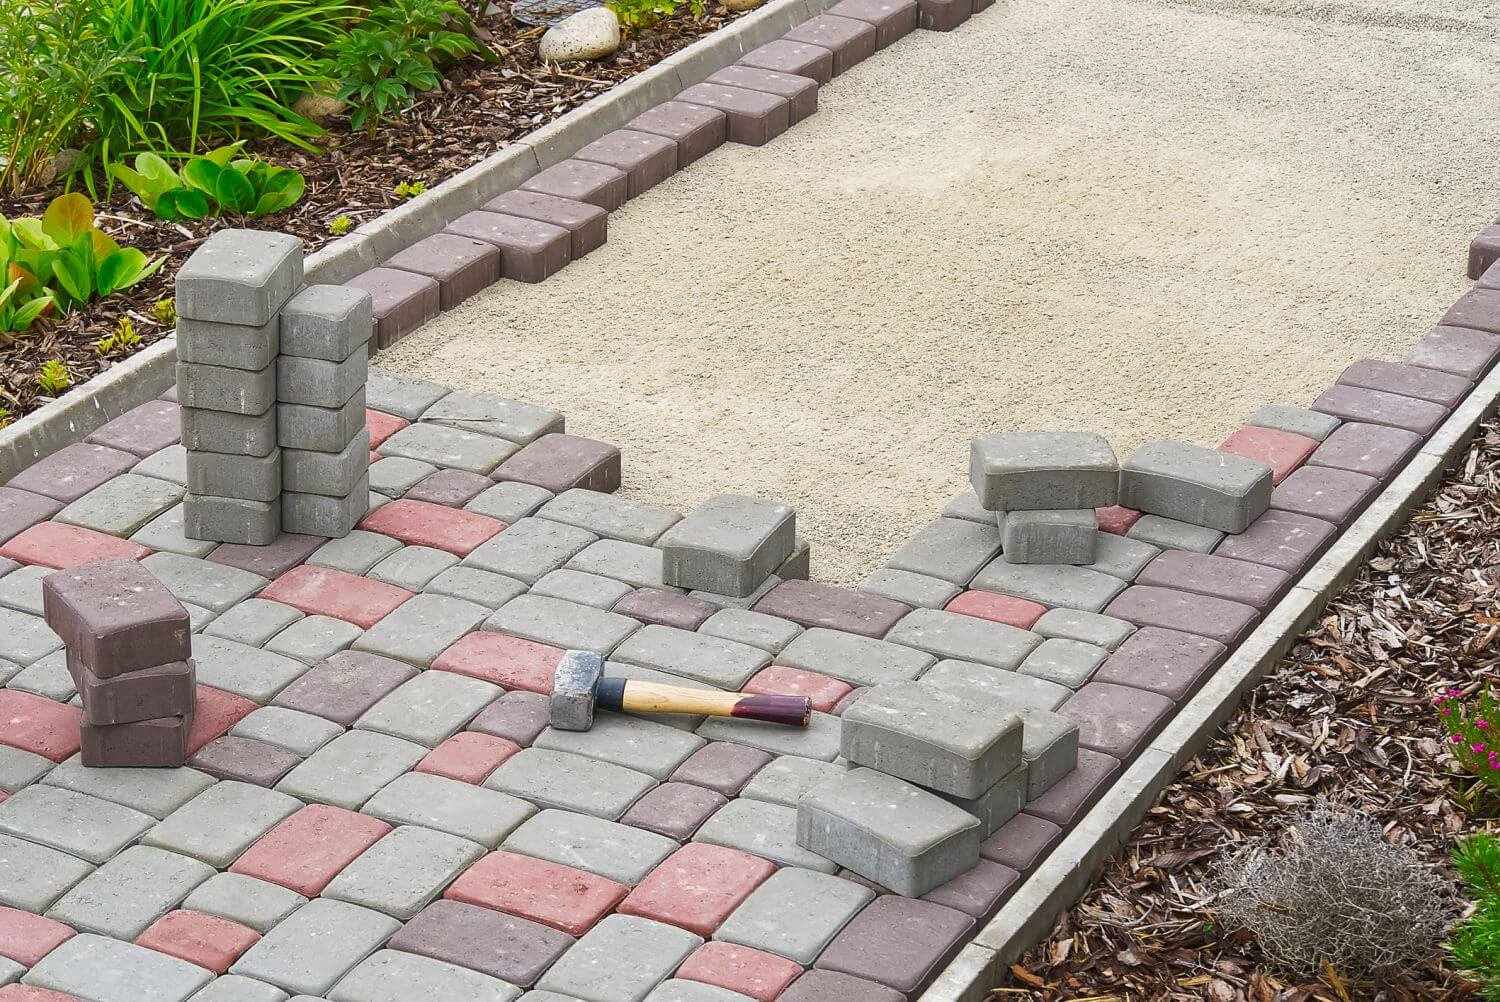
1. Dry Layout
Before securing the pavers in place, create a dry layout by placing them in the desired pattern and configuration. This allows you to visualize the design, make any necessary adjustments, and ensure that the pavers fit together seamlessly. Take your time with this step to achieve the perfect arrangement.
2. Cutting Pavers
If your design requires custom-sized pavers to fit specific areas or curves, use a paver splitter, wet saw, or chisel to cut the pavers to the desired dimensions. Ensure that the cuts are precise and clean to maintain a professional finish.
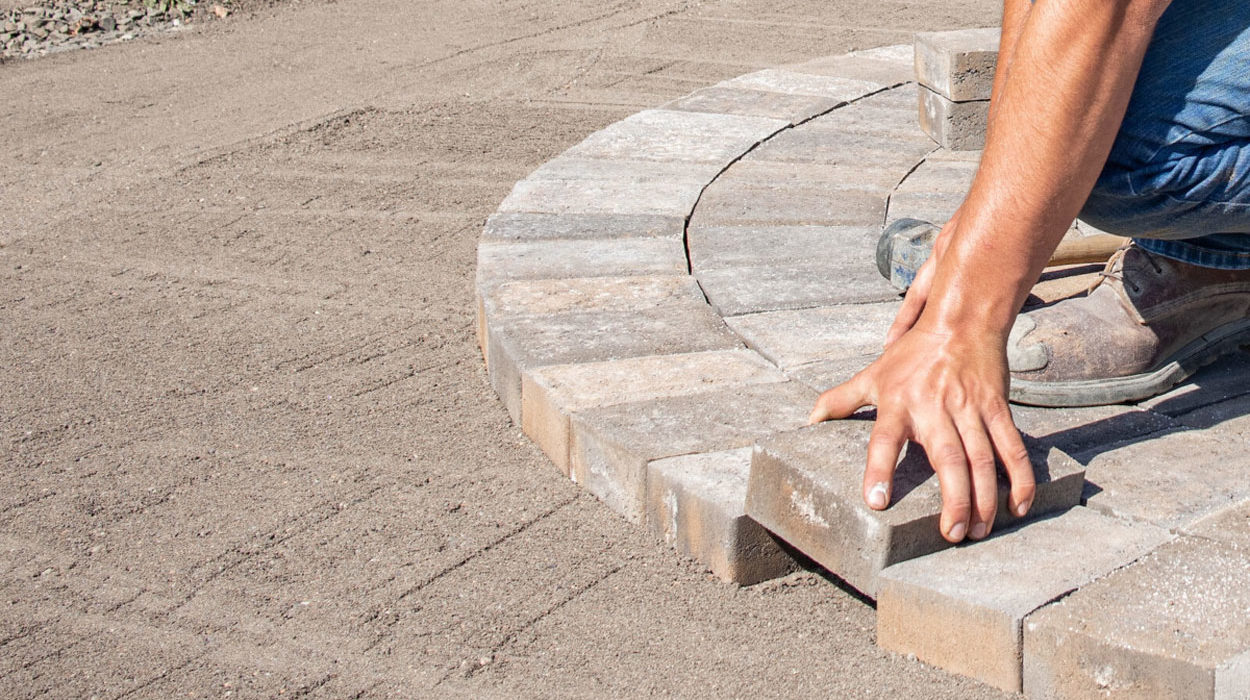
3. Setting the Pavers
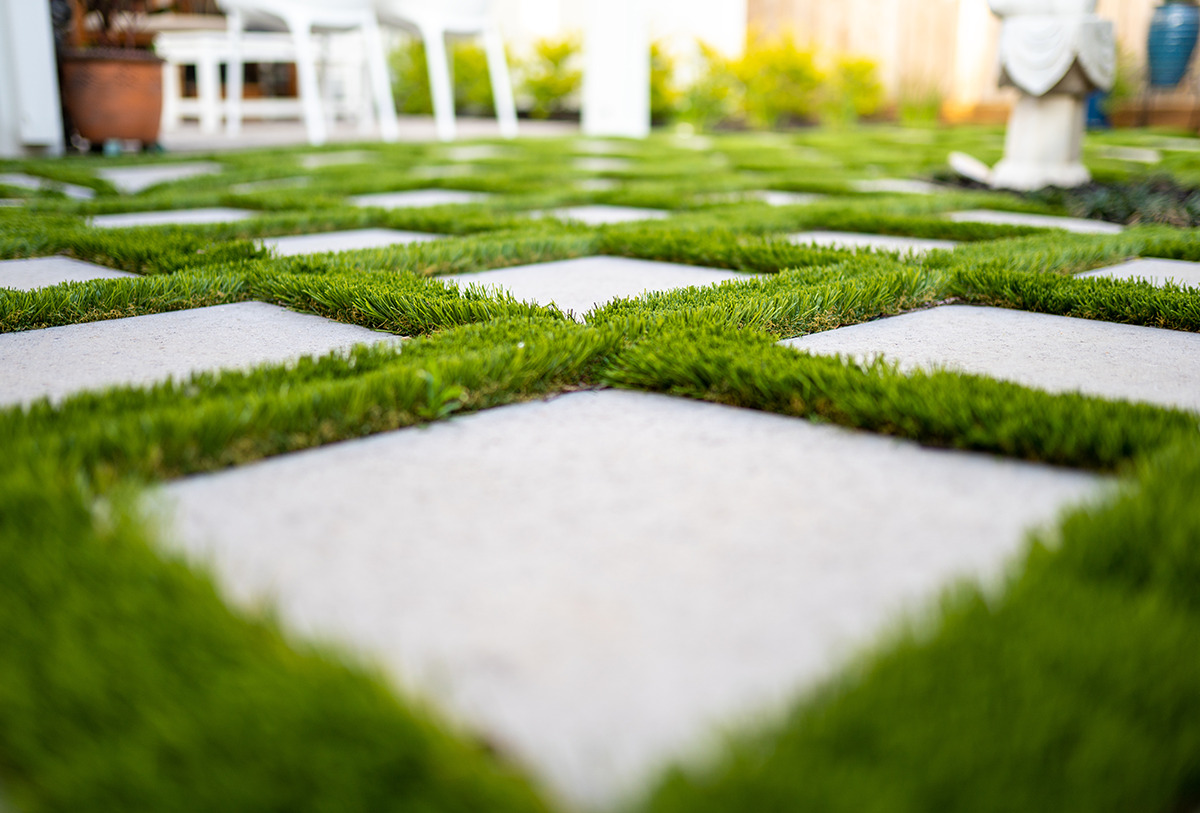
Once you’re satisfied with the dry layout, begin setting the pavers in place, starting from one corner and working your way across the installation area. Use a rubber mallet to gently tap the pavers into position, ensuring that they are level and snugly fit together. Pay attention to the spacing between the pavers to create uniform gaps for the grass to be planted.
4. Filling the Joints
After all the pavers are set, fill the joints between the pavers with polymeric sand or fine gravel. This material helps lock the pavers in place, prevents weed growth, and enhances the overall stability of the installation. Use a broom to sweep the sand or gravel into the joints and ensure even coverage.
Read more: What To Put Between Patio Pavers
5. Compact and Seal
Once the joints are filled, use a compactor to gently compact the pavers, ensuring that they are firmly set in place. This step helps to stabilize the pavers and create a smooth, level surface. If using permeable pavers, skip the sealing process to maintain their water-permeable properties.
By meticulously following these steps, you’ll achieve a stunning paver installation that forms the perfect canvas for integrating natural greenery. With the pavers securely in place, the next step is to infuse the spaces between them with vibrant, lush grass.
Planting Grass Between Pavers
Now that the pavers are securely in place, it’s time to introduce the natural element that will bring your outdoor space to life: lush, vibrant grass. Planting grass between the pavers is a transformative step that adds softness, color, and a touch of nature to your hardscape. Here’s a detailed guide to planting and nurturing the grass between the pavers:
1. Soil Preparation
Before planting the grass, ensure that the soil between the pavers is well-prepared. Loosen the soil and remove any debris or rocks to create a hospitable environment for the grass to take root. Consider amending the soil with organic matter to enhance its fertility and drainage capabilities.
2. Selecting the Grass
Choose a grass variety that is well-suited for the specific growing conditions between the pavers. Low-growing, creeping grasses such as thyme, Irish moss, or fine fescue are ideal choices for creating a verdant carpet that can withstand light foot traffic and thrive in compact spaces.
3. Planting the Grass
Carefully plant the selected grass between the pavers, ensuring that it is nestled securely in the soil and the spaces between the pavers. Gently press the soil around the grass to provide stability and promote root establishment. Water the newly planted grass thoroughly to help it settle into its new environment.
4. Nurturing the Growth
After planting, maintain consistent moisture levels to support the grass’s establishment and growth. Monitor the grass regularly to ensure that it is adapting well to its surroundings. Depending on the variety, consider applying a slow-release fertilizer to provide essential nutrients for healthy growth.
5. Trimming and Maintenance
As the grass between the pavers begins to flourish, regular trimming and maintenance will help keep it looking tidy and well-groomed. Use handheld shears or a trimmer to carefully trim any overgrowth and maintain the desired height. Additionally, remove any debris or fallen leaves to keep the grass looking pristine.
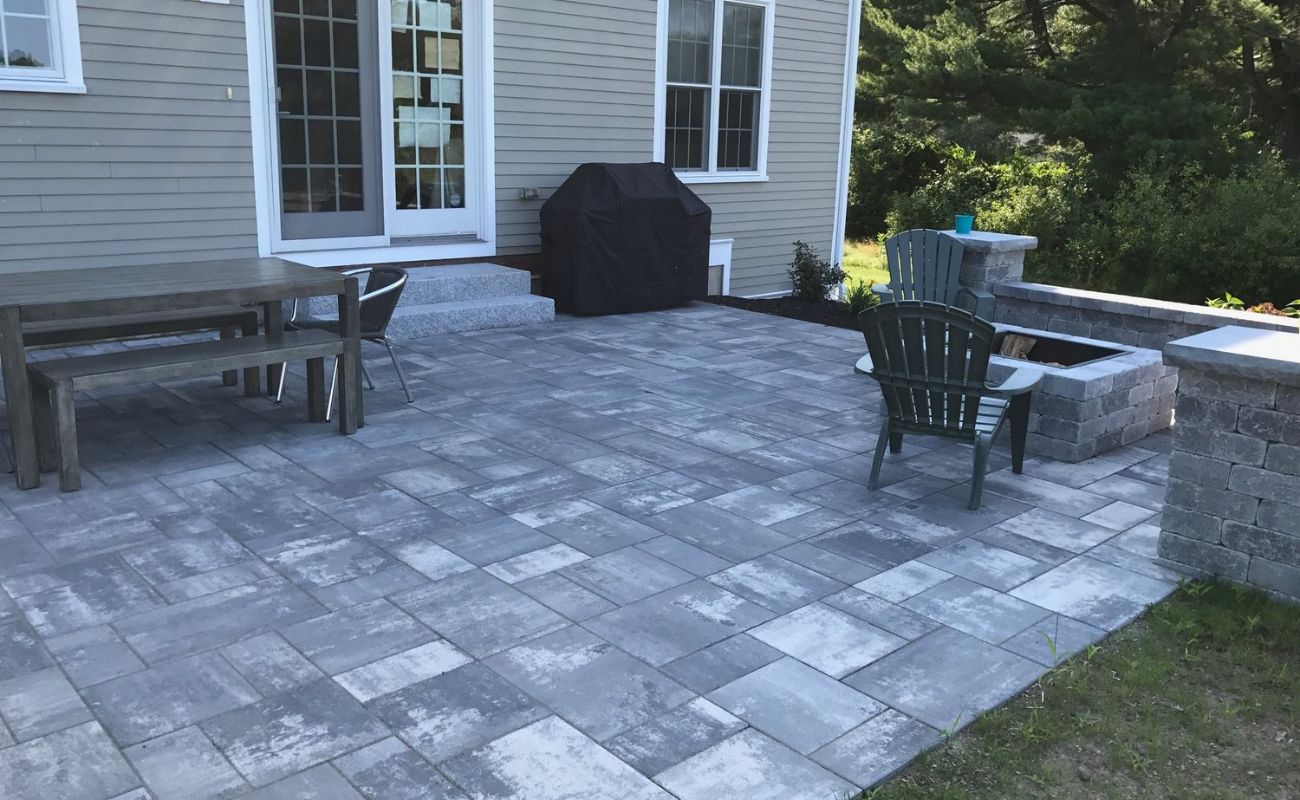
By following these steps and providing attentive care, you’ll witness the transformation of the spaces between your pavers into lush, inviting pockets of greenery. The harmonious blend of hardscape and softscape elements will elevate the visual appeal of your outdoor space, creating a welcoming and tranquil environment for relaxation and enjoyment.
Maintaining Your Paver and Grass Installation
Once your pavers and grass are seamlessly integrated, it’s essential to establish a maintenance routine to preserve the beauty and functionality of your outdoor space. By implementing regular care and attention, you can ensure that your paver and grass installation remains inviting and visually captivating for years to come. Here’s a comprehensive guide to maintaining your paver and grass installation:
Read more: How To Install Turf Over Pavers
1. Regular Cleaning
Keep your pavers looking pristine by regularly sweeping away debris, fallen leaves, and dirt. This simple practice prevents the buildup of organic matter and maintains the integrity of the paver surface. For a deeper clean, use a mild detergent and water to wash the pavers, removing any stains or discoloration.
2. Weed Control
Monitor the joints between the pavers for any signs of weed growth. Promptly remove any weeds that emerge to prevent them from taking root and spreading. Consider applying a weed inhibitor or natural weed control methods to discourage weed growth and maintain the clean, manicured appearance of the installation.
3. Grass Care
Regularly tend to the grass between the pavers by watering it as needed and providing essential nutrients to support healthy growth. Trim the grass regularly to maintain a neat and uniform appearance, ensuring that it complements the pavers and enhances the overall aesthetic of the outdoor space.
4. Sealing the Pavers
If your paver installation includes non-permeable pavers, consider applying a sealant to protect the surface from staining, moisture penetration, and color fading. Follow the manufacturer’s guidelines for the appropriate timing and method of sealing to maintain the pavers’ durability and visual appeal.
Read more: How To Install Pavers Over A Concrete Patio
5. Seasonal Inspections
Conduct seasonal inspections of your paver and grass installation to identify any areas that may require attention. Check for uneven pavers, signs of erosion, or areas where the grass may need reseeding. Addressing any issues promptly will help preserve the integrity and longevity of the installation.
6. Professional Maintenance
Consider scheduling periodic professional maintenance to assess the condition of your paver and grass installation. Professional landscapers can provide expert care, such as releveling pavers, addressing drainage concerns, and ensuring that the grass remains healthy and vibrant.
By incorporating these maintenance practices into your routine, you’ll uphold the allure and functionality of your paver and grass installation, creating an inviting outdoor space that continues to captivate and delight. With proper care and attention, your outdoor oasis will serve as a tranquil retreat for relaxation and enjoyment, seamlessly blending the beauty of nature with the enduring charm of hardscape elements.
Frequently Asked Questions about How To Install Pavers With Grass In Between
Was this page helpful?
At Storables.com, we guarantee accurate and reliable information. Our content, validated by Expert Board Contributors, is crafted following stringent Editorial Policies. We're committed to providing you with well-researched, expert-backed insights for all your informational needs.
0 thoughts on “How To Install Pavers With Grass In Between”