Home>Gardening & Outdoor>Landscaping Ideas>How To Make A Patio Area On Grass
Landscaping Ideas
How To Make A Patio Area On Grass
Modified: August 27, 2024
Learn how to create a stunning patio area on grass with our expert landscaping ideas. Transform your outdoor space today!
(Many of the links in this article redirect to a specific reviewed product. Your purchase of these products through affiliate links helps to generate commission for Storables.com, at no extra cost. Learn more)
Introduction
Creating a patio area on grass can transform your outdoor space into a charming and functional extension of your home. Whether you envision a cozy retreat for relaxation or an inviting space for entertaining guests, a well-designed patio can elevate the aesthetics and functionality of your backyard. By following the right steps and incorporating thoughtful design elements, you can craft a stunning outdoor oasis that seamlessly blends with the natural beauty of your lawn.
In this comprehensive guide, we will walk you through the process of crafting a beautiful patio area on grass, from selecting the perfect location to adding the finishing touches. With careful planning and a touch of creativity, you can bring your vision to life and enjoy the benefits of an enchanting outdoor sanctuary right in your own backyard.
So, roll up your sleeves, gather your materials, and let's embark on this exciting journey to create a picturesque and inviting patio area that will become the envy of your neighborhood. Whether you're a seasoned DIY enthusiast or a novice homeowner eager to explore your creative side, this guide is designed to provide you with the knowledge and inspiration you need to tackle this rewarding project with confidence. Let's dive in and discover how to make a patio area on grass that reflects your unique style and enhances your outdoor living experience.
Key Takeaways:
- Create a stunning patio on grass by carefully choosing the location, preparing the ground, laying a solid foundation, installing the flooring, and adding furniture and decorations to enjoy a beautiful outdoor sanctuary.
- Transform your backyard into a charming and functional extension of your home with a patio area on grass, blending indoor comforts with the natural beauty of the outdoors for relaxation and entertaining.
Read more: How To Make A Play Area For Baby
Step 1: Choose the Location
Before you start creating your patio area, it’s essential to carefully choose the location where it will be situated. The right location can significantly impact the functionality and visual appeal of your patio, so consider the following factors when making your decision:
- Accessibility: Select a location that is easily accessible from your home, ensuring seamless transitions between indoor and outdoor spaces. This accessibility will enhance the practicality of your patio and encourage frequent use.
- Views and Privacy: Take into account the surrounding views and the level of privacy you desire. If you have a scenic backyard or garden, positioning the patio to take advantage of these views can create a serene and visually captivating setting. Additionally, consider using natural elements such as shrubs, trees, or strategic fencing to enhance privacy and create a cozy atmosphere.
- Sunlight and Shade: Observe the sun’s path throughout the day to determine the best placement for your patio. While some may prefer abundant sunlight for a warm and inviting ambiance, others might seek a balance of shade and sunlight for comfort. Understanding the sun exposure will help you plan for the placement of seating, shading elements, and potted plants.
- Proximity to Utilities: If you plan to incorporate features such as an outdoor kitchen, a fire pit, or a water feature, consider the proximity to utilities such as water and electricity. Ensuring easy access to these utilities will streamline the installation process and enhance the functionality of your patio area.
By carefully considering these factors, you can select a location that aligns with your vision for the patio area and maximizes its potential as a versatile and inviting outdoor space. Once you’ve identified the perfect spot, you can move on to the next step in creating your dream patio.
Step 2: Prepare the Ground
With the location chosen, the next crucial step in creating a patio area on grass is to prepare the ground. Proper preparation is essential for ensuring the stability, durability, and longevity of your patio. Follow these steps to prepare the ground effectively:
- Clear the Area: Begin by clearing the designated area of any vegetation, rocks, debris, and other obstructions. Use a shovel, rake, or a sod cutter to remove the grass and create a clean, level surface for your patio.
- Measure and Mark: Use measuring tape and stakes to outline the dimensions of your patio. This will help you visualize the space and ensure that the patio fits seamlessly into the chosen location.
- Excavation: Once marked, excavate the area to a depth that allows for the base and paving materials. The depth will depend on the type of foundation and flooring you plan to use. Typically, a depth of 4 to 6 inches is suitable for most patio projects.
- Compaction: After excavation, use a plate compactor to compact the soil thoroughly. Compaction helps to stabilize the ground and prevent settling, ensuring a solid foundation for your patio.
- Install Edging: Consider installing edging materials such as plastic or metal paver restraints to define the perimeter of your patio. This edging will help contain the base and paving materials, preventing shifting and maintaining the structural integrity of the patio.
- Drainage Considerations: Evaluate the drainage patterns in the area to prevent water accumulation on your patio. If necessary, incorporate drainage solutions such as French drains or permeable pavers to direct water away from the patio and ensure proper water management.
By meticulously preparing the ground, you will create a stable and level foundation for your patio, setting the stage for the next steps in the construction process. Taking the time to prepare the ground properly will contribute to the overall quality and longevity of your patio area, ensuring that it remains a beautiful and functional outdoor space for years to come.
Step 3: Lay the Foundation
With the ground prepared, the next critical step in building your patio area on grass is to lay the foundation. The foundation serves as the base for the patio, providing stability and support for the flooring materials. Follow these essential steps to lay a solid foundation for your patio:
- Add Base Material: Begin by spreading a layer of base material, such as crushed stone or gravel, over the compacted soil. This base layer serves as a stable foundation for the patio and aids in drainage.
- Leveling and Compaction: Use a rake and a hand tamper to level the base material, ensuring an even surface for the patio. Compact the base layer thoroughly with a plate compactor to enhance stability and prevent shifting over time.
- Install Landscape Fabric: Consider laying landscape fabric over the compacted base material to inhibit weed growth and promote long-term stability. This fabric acts as a barrier, preventing weeds from penetrating the patio surface while allowing water to drain freely.
- Additional Base Layers: Depending on the specific requirements of your patio project, you may need to add additional layers of base material and compact each layer meticulously. The depth and composition of the base layers will depend on the type of patio flooring you plan to install.
- Edge Restraints: Secure the perimeter of the patio area by installing edge restraints. These restraints help contain the paving materials, preventing them from shifting or spreading beyond the designated patio space.
- Consider Drainage: Evaluate the drainage needs of your patio and ensure that the foundation allows for proper water runoff. Depending on the location and local regulations, you may need to incorporate drainage solutions to manage water effectively.
By meticulously laying the foundation, you will establish a sturdy and level base for your patio, setting the stage for the installation of the flooring materials. A well-constructed foundation is essential for the structural integrity and long-term durability of your patio, ensuring that it stands the test of time and provides a reliable outdoor living space for years to come.
Before laying down any materials for your patio, make sure to clear the area of any grass and weeds. Use a shovel or a sod cutter to remove the top layer of grass and create a level surface for your patio.
Step 4: Install the Flooring
As you progress in creating your patio area on grass, the installation of the flooring materials marks a significant milestone in bringing your vision to life. The flooring not only contributes to the aesthetic appeal of the patio but also determines its functionality and durability. Follow these essential steps to install the flooring for your patio:
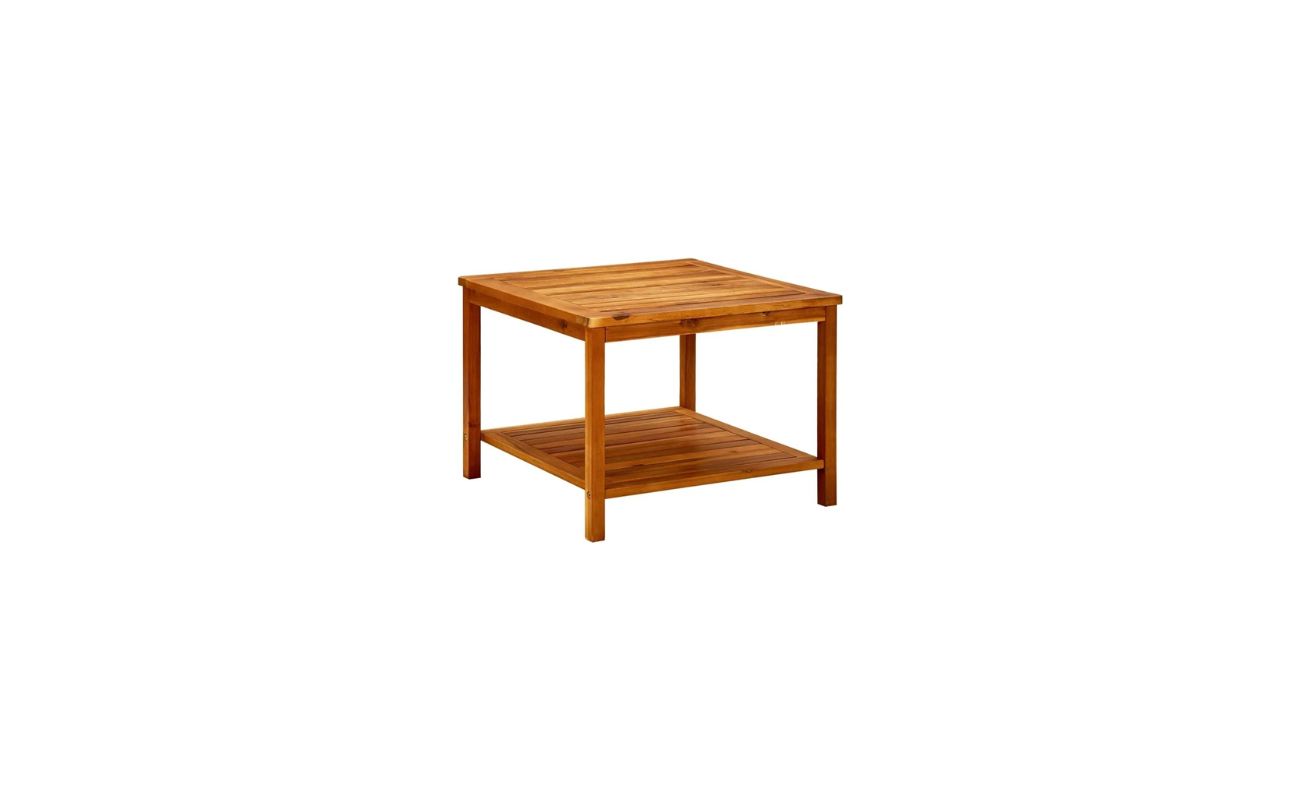
- Select Suitable Materials: Choose flooring materials that align with your design preferences, maintenance requirements, and climate considerations. Options range from traditional pavers and natural stone to low-maintenance composite decking and decorative concrete. Select materials that complement the overall style of your outdoor space and meet your practical needs.
- Plan the Layout: Visualize the layout of the flooring materials and plan for any patterns or designs you wish to incorporate. Consider the orientation of the materials, potential border details, and any focal points within the patio area.
- Begin Installation: Start laying the flooring materials according to the planned layout, ensuring proper spacing and alignment. Follow the manufacturer’s guidelines for installation, especially if you are using interlocking pavers, natural stone, or composite decking.
- Cutting and Shaping: Use appropriate tools to cut and shape the flooring materials as needed to fit the designated patio area. Precision in cutting is essential for achieving a seamless and professional-looking installation.
- Secure the Flooring: Depending on the type of flooring materials, secure them in place using the recommended methods, such as applying sand or gravel for interlocking pavers, using mortar for natural stone, or fastening decking boards according to the manufacturer’s instructions.
- Consider Finishing Touches: Once the main flooring is installed, consider adding finishing touches such as decorative borders, contrasting patterns, or inlays to enhance the visual appeal of your patio area.
- Maintain Proper Slope: Ensure that the flooring is installed with a slight slope to facilitate water runoff and prevent pooling. Proper drainage is essential for preserving the integrity of the patio and preventing water-related issues.
By meticulously installing the flooring materials, you will bring your patio area to life, creating a captivating and functional outdoor space that reflects your style and enhances your outdoor living experience. The flooring serves as the foundation for your patio’s visual appeal and practical utility, making this step a pivotal part of the overall construction process.
Read more: How To Make A Play Area For A Hedgehog
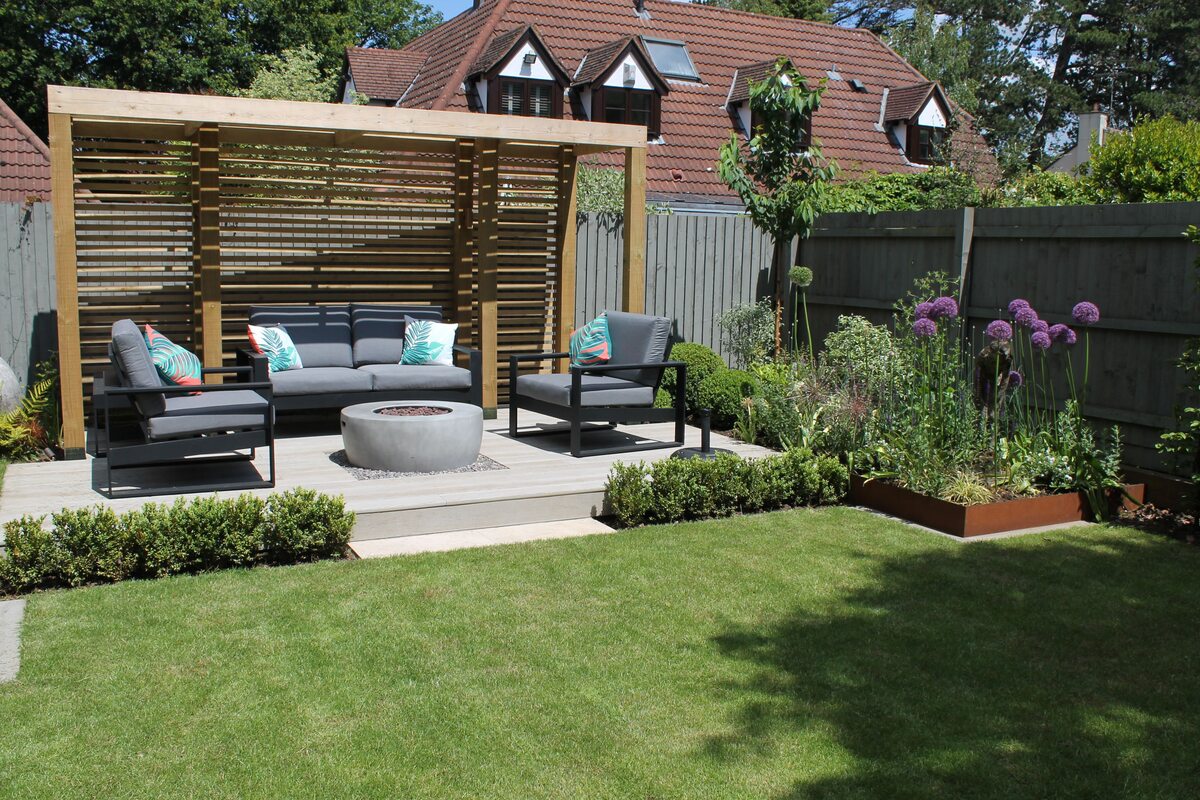
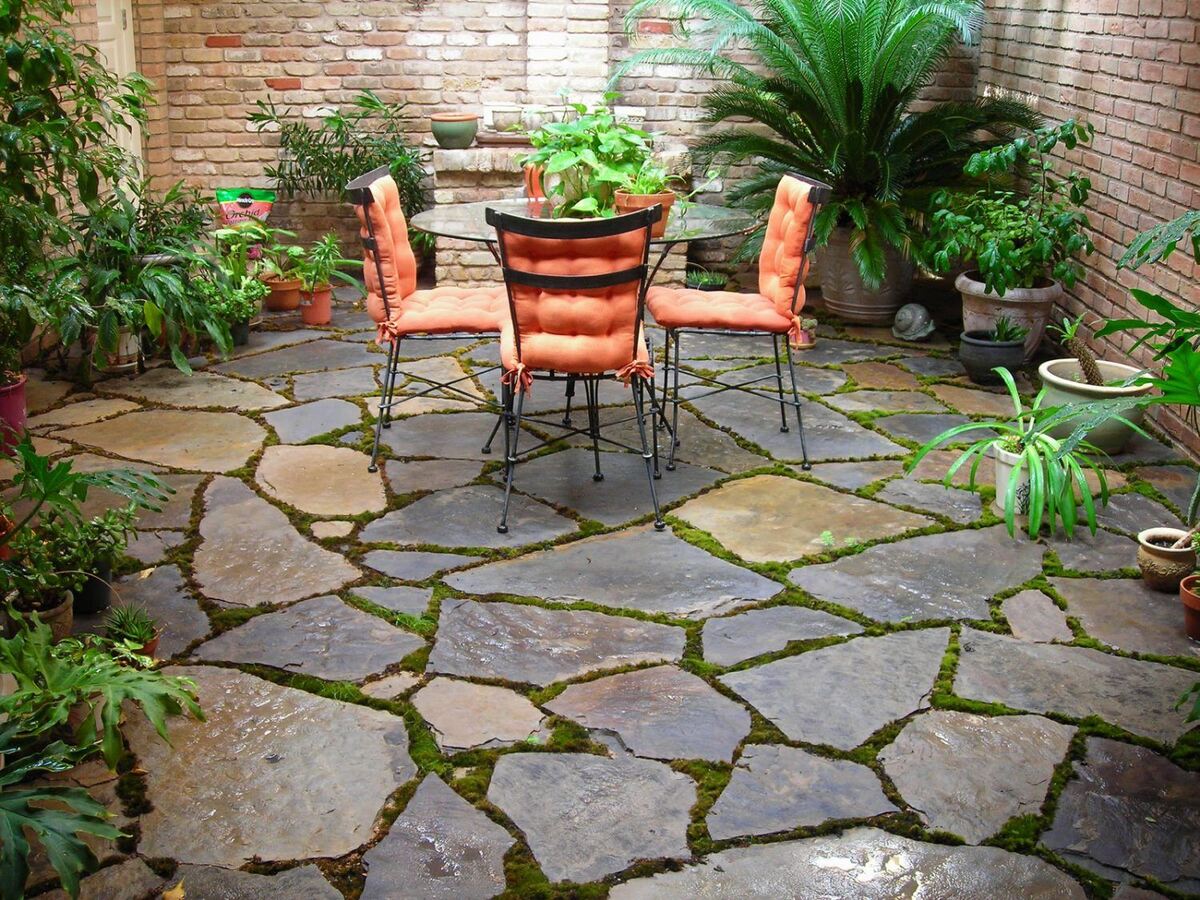
Step 5: Add Furniture and Decorations
With the foundation and flooring in place, it’s time to infuse personality and functionality into your patio area by adding furniture and decorations. This step allows you to transform the space into a welcoming and comfortable outdoor retreat where you can relax, entertain, and connect with nature. Consider the following elements as you furnish and decorate your patio:
- Select Functional Furniture: Choose outdoor furniture that suits your lifestyle and the intended use of the patio. Options may include comfortable seating arrangements, dining sets, loungers, hammocks, and versatile pieces that can adapt to different activities.
- Consider Comfort: Enhance the comfort of your outdoor space by incorporating weather-resistant cushions, pillows, and throws. These elements not only add a cozy touch but also encourage relaxation and extended enjoyment of the patio.
- Add Shade and Shelter: If your patio area is exposed to direct sunlight or inclement weather, consider adding shade solutions such as umbrellas, pergolas, or retractable awnings. These features provide relief from the sun and create inviting spaces for outdoor gatherings.
- Introduce Greenery: Incorporate potted plants, hanging baskets, and vertical gardens to bring natural beauty to your patio. Greenery adds freshness, color, and a sense of tranquility to the outdoor environment, contributing to a more inviting and vibrant space.
- Illuminate with Lighting: Extend the functionality of your patio into the evening hours by incorporating outdoor lighting. Options include string lights, lanterns, solar-powered fixtures, and strategically placed landscape lighting to create ambiance and ensure safety.
- Add Personal Touches: Infuse your personality into the patio area by adding decorative elements such as outdoor rugs, throw pillows, artwork, and accessories that reflect your style and enhance the visual appeal of the space.
- Create Zones: Define different areas within the patio for specific activities, such as dining, lounging, and cooking. This zoning creates a sense of purpose and organization, making the patio more versatile and accommodating for various uses.
By thoughtfully selecting furniture and decorations, you can elevate your patio area into a captivating and functional outdoor sanctuary that complements your lifestyle and enhances your home. The addition of these elements transforms the patio into an inviting extension of your living space, inviting you and your guests to savor the beauty and tranquility of the outdoors.
Conclusion
Congratulations on completing the transformation of your outdoor space with a stunning patio area on grass. By following the steps outlined in this guide, you have embarked on a journey that has allowed you to craft a captivating and functional extension of your home, seamlessly blending the comforts of indoor living with the natural beauty of the outdoors.
Your careful consideration of the location, meticulous preparation of the ground, and thoughtful selection and installation of flooring materials have laid the foundation for a space where lasting memories will be made. The addition of furniture, decorations, and personal touches has infused the patio with warmth, comfort, and your unique style, creating an inviting oasis for relaxation, entertainment, and connection with nature.
As you enjoy the fruits of your labor, remember that your patio area is a versatile canvas, ready to adapt to your evolving needs and preferences. Whether you seek moments of solitude surrounded by the tranquility of your garden or vibrant gatherings filled with laughter and joy, your patio stands ready to accommodate and inspire.
Embrace the changing seasons as your patio area transitions gracefully from sun-drenched summer retreats to cozy fall gatherings and perhaps even serene winter escapes. With each passing season, your patio will continue to be a source of delight, providing a space where you can unwind, entertain, and create cherished experiences with loved ones.
As you bask in the beauty of your newly created patio area, take pride in the craftsmanship and creativity that have brought this vision to life. Your outdoor sanctuary is a testament to your dedication, ingenuity, and the desire to enhance your home with a touch of natural elegance.
May your patio area on grass be a place where tranquility and inspiration abound, where connections are strengthened, and where the simple pleasures of outdoor living are savored. With each passing day, may your patio area continue to enrich your life and serve as a cherished retreat within the embrace of your beautiful outdoor surroundings.
Ready to elevate your backyard further? After mastering patio creation, why not tackle a DIY Patio project next? With straightforward guidance, turning any space into a chic, functional area becomes a breeze. Also, if you love curating outdoor spaces, our compilation of unique Landscaping ideas will inspire you. From simple tweaks to major overhauls, these suggestions ensure your garden fences stand out, blending security with style.
Frequently Asked Questions about How To Make A Patio Area On Grass
Was this page helpful?
At Storables.com, we guarantee accurate and reliable information. Our content, validated by Expert Board Contributors, is crafted following stringent Editorial Policies. We're committed to providing you with well-researched, expert-backed insights for all your informational needs.


0 thoughts on “How To Make A Patio Area On Grass”