Home>Furniture>Outdoor Furniture>How To Make A Patio With Pavers

Outdoor Furniture
How To Make A Patio With Pavers
Modified: September 1, 2024
Learn how to create a stunning patio with pavers and transform your outdoor space into a cozy oasis. Discover the best outdoor furniture options for ultimate relaxation.
(Many of the links in this article redirect to a specific reviewed product. Your purchase of these products through affiliate links helps to generate commission for Storables.com, at no extra cost. Learn more)
Introduction
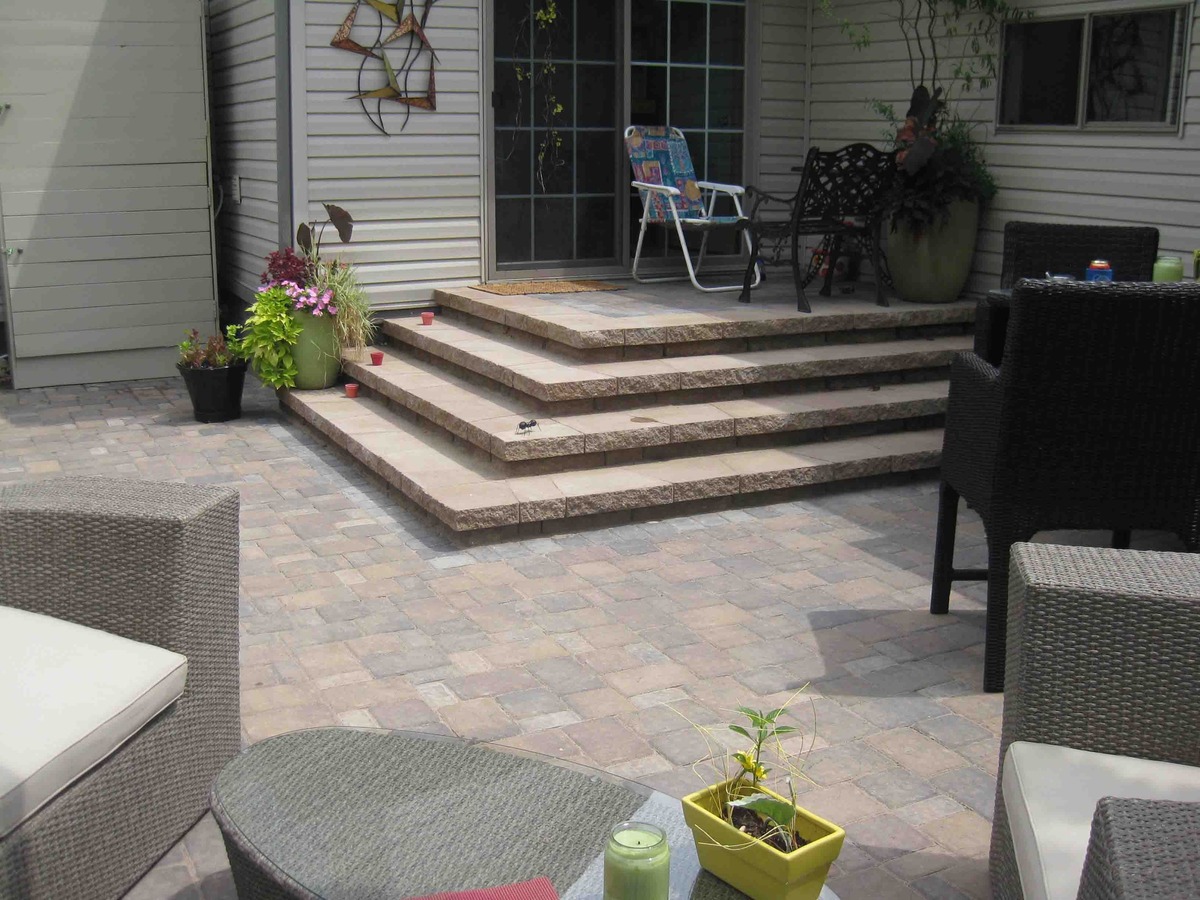
Welcome to our comprehensive guide on how to create a beautiful and functional patio using pavers. A patio is the perfect addition to any outdoor space, providing a versatile area for relaxation, dining, and entertainment. Pavers are an excellent choice for patio construction due to their durability, versatility, and aesthetic appeal. Whether you’re a seasoned DIYer or a beginner looking to take on a new project, this article will provide you with all the information you need to create a stunning patio using pavers.
Before we dive into the step-by-step process, let’s take a moment to understand why pavers are an excellent choice for patio construction. Pavers are manufactured from a variety of materials such as concrete, natural stone, and brick. They come in various shapes, sizes, and colors, allowing for endless design possibilities. Additionally, pavers are known for their strength and durability, withstanding the test of time and adverse weather conditions.
Creating a patio with pavers offers numerous advantages. Firstly, pavers are easy to install, making it a DIY-friendly project that can be completed over a weekend with basic tools and materials. Secondly, pavers provide excellent drainage, preventing puddles and water accumulation on your patio. This is particularly important in areas with heavy rainfall or poor drainage. Thirdly, pavers are low-maintenance and can withstand regular use without showing signs of wear and tear, making them ideal for outdoor areas.
In this guide, we will walk you through each step of the process to create your paver patio. We will cover everything from planning and preparation to finishing touches and maintenance. By following our expert advice and guidance, you’ll be able to create a patio that complements your outdoor space and enhances your lifestyle.
So, let’s grab our tools and get started on creating your dream patio with pavers!
Key Takeaways:
- Creating a patio with pavers is a fun and rewarding project that can transform your outdoor space. By following the steps in this guide, you can design a beautiful and functional patio that complements your home.
- Proper planning, preparation, and maintenance are essential for a successful paver patio. From marking the patio area to laying the pavers and adding finishing touches, attention to detail is key to creating a long-lasting outdoor space.
Read more: How To Make A Circular Patio With Pavers
Step 1: Planning and Preparation
The first step in creating a patio with pavers is proper planning and preparation. This stage is crucial to ensure a successful and well-executed project. Here are the key elements to consider:
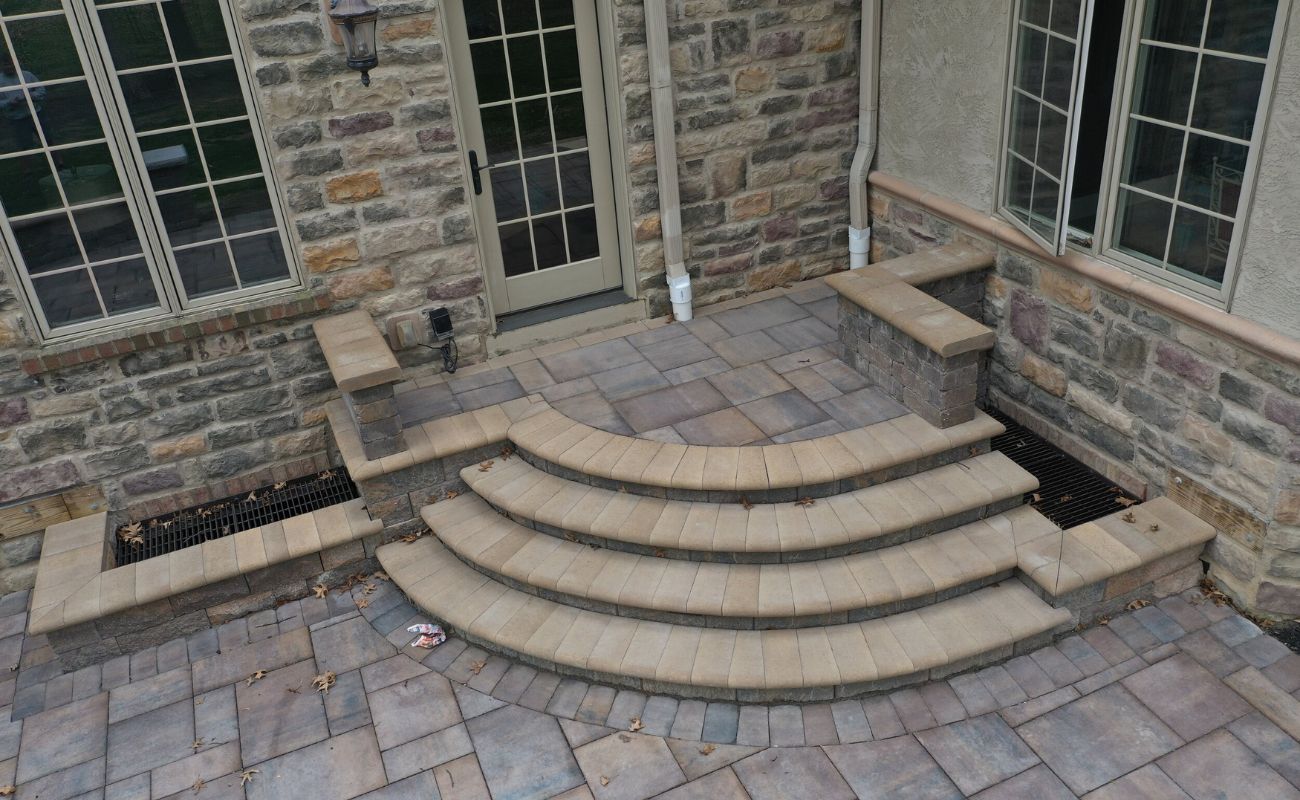
- Design and Layout: Begin by determining the desired size and shape of your patio. Consider how you intend to use the space and any specific features you want to include, such as a seating area, fire pit, or decorative patterns.
- Materials: Choose the type of pavers that best suit your style and budget. Concrete pavers are versatile and affordable, while natural stone pavers add a touch of elegance. Take into account factors like durability, color, and texture when making your selection.
- Location and Accessibility: Assess the area where you plan to build your patio. Consider factors such as sun exposure, privacy, and the proximity to your home. Ensure that the location is easily accessible and provides a seamless flow between indoor and outdoor spaces.
- Permits and Regulations: Check with your local municipality or homeowner’s association to determine if any permits or approvals are required for your patio construction. Familiarize yourself with any building codes or regulations that apply to your area.
Once you have a clear vision for your patio and have made the necessary decisions, it’s time to move on to the preparation phase:
- Measure and Mark: Use a tape measure to determine the exact dimensions of your patio. Use stakes and string to mark the boundaries of the patio area, ensuring that it is properly squared and aligned with your home.
- Clear the Area: Remove any obstacles such as plants, rocks, or debris from the marked area. This will provide a clean and level surface for construction.
- Consider Drainage: Evaluate the natural slope of your yard and plan for appropriate drainage to prevent water accumulation on your patio. This may involve adjusting the grading or installing a drainage system.
- Understand Utility Lines: Before digging, contact your local utility companies to identify the location of any underground utility lines. This will help prevent accidental damage and ensure a safe construction process.
By dedicating time to careful planning and thorough preparation, you set yourself up for a smooth and successful patio construction project. Take the time to visualize and finalize the design, select the appropriate materials, and ensure that you have obtained any necessary permits or approvals. With these tasks completed, you are ready to move on to the exciting phase of creating your patio with pavers.
Step 2: Marking the Patio Area
Once you have completed the planning and preparation stage, the next step in creating your patio with pavers is marking the area where the patio will be located. Properly marking the patio area is crucial to ensure accuracy and precision during the construction process. Here’s how to do it:
- Gather your Tools: Before you begin, gather the necessary tools and materials. You will need stakes, string, a tape measure, a level, and spray paint or marking chalk.
- Measure and Mark: Use the tape measure to measure the dimensions of your desired patio area. Starting from one corner, drive a stake into the ground to mark the first corner point.
- Create a Straight Line: Attach a piece of string to the stake and stretch it out to the next corner point. Use the level to ensure the string is taut and level. Drive another stake into the ground to mark the second corner point.
- Establish Right Angles: Repeat this process for the remaining corners to establish right angles and ensure that your patio will be square or the desired shape.
- Connect the Stakes: Once all the corner points are marked with stakes, connect the stakes with string or twine. This will outline the perimeter of the patio and provide a visual guide for the next steps.
- Double-check the Measurements: Take the time to double-check the measurements and make any necessary adjustments. Use the tape measure and level to ensure that the patio area is properly squared and aligned.
- Mark the Edges: If you plan to install edging around your patio, mark the outer edges of the edging line using spray paint or marking chalk. This will provide a clear guide for the installation of the edging.
- Remove Sod and Vegetation: Within the marked patio area, remove the sod and any vegetation using a shovel or sod cutter. Dig down to a depth that is appropriate for your patio construction, typically around 6-8 inches. Ensure that the excavated area is smooth and level.
By accurately marking the patio area, you establish the foundation for the construction process. Taking the time to measure, align, and connect the corner points will ensure that your patio is properly shaped and aligned with your outdoor space. Removing the sod and vegetation within the marked area prepares the ground for the subsequent steps, ensuring a solid base for the patio installation process.
With the patio area properly marked and prepared, you are ready to move on to the next step: excavating the area. Stay tuned for step 3 of our guide, where we will walk you through the process of excavating the patio area to create a sturdy foundation for your paver patio.
Step 3: Excavating the Area
Excavating the area is a crucial step in creating a patio with pavers. Proper excavation ensures a stable base for your patio, allowing for proper drainage and preventing future issues. Here’s how to excavate the area:
- Gather the Necessary Equipment: Before you begin, gather the necessary equipment for excavation. This typically includes a shovel, a wheelbarrow, a compacting tool (such as a plate compactor or hand tamper), and safety gear such as gloves and goggles.
- Start Digging: Using a shovel, start digging within the marked patio area. Begin by removing the top layer of grass, sod, or vegetation. Dig down to a depth that allows for a solid base and the planned thickness of your paver installation, typically around 6-8 inches.
- Create a Slope: As you excavate, create a slight slope away from your home or any existing structures. This slope will help with drainage and prevent water from pooling on the patio surface. Aim for a slope of approximately 1/8 inch per foot.
- Check for Consistency: While digging, periodically check the depth and consistency of the excavated area. Use a tape measure or a level to ensure that the depth is consistent throughout the patio area. Additionally, verify that the slope is uniform and consistent.
- Remove Excess Soil: As you dig, place the excavated soil into a wheelbarrow or a designated area to remove it from the patio space. This will create a clean and manageable work area.
- Compact the Soil: Once the excavation is complete, use a compacting tool (such as a plate compactor or hand tamper) to compact the soil in the excavated area. This will provide a firm and stable base for the subsequent layers of your patio construction.
- Check Depth and Smoothness: After compacting, check the depth of the excavated area once again to ensure it is consistent and matches the desired thickness of your paver installation. Smooth out any uneven areas using a rake or a shovel.
Proper excavation is essential for a successful patio construction project. It creates a stable foundation for your patio, ensuring proper drainage and preventing settling or shifting in the future. By taking the time to dig to the appropriate depth, create a slope, and compact the soil, you set the stage for a durable and long-lasting patio.
With the area properly excavated, you are ready to move on to the next step: installing the base. Stay tuned for step 4 of our guide, where we will walk you through the process of installing the base material to provide stability and support for your paver patio.
Step 4: Installing the Base
Installing a solid and stable base is a crucial step in creating a patio with pavers. The base provides a foundation for your patio, ensuring proper weight distribution, stability, and longevity. Here’s how to install the base:
- Gather the Necessary Materials: Before you begin, gather the necessary materials for the base installation. This typically includes crushed stone or gravel (such as class 5 or ¾” minus), a landscape fabric, and wooden stakes.
- Prepare the Area: Ensure that the excavated area is clean and free of debris. Remove any excess soil or debris that may interfere with the base installation. Use a rake or a shovel to level the surface if needed.
- Install the Landscape Fabric: Lay a landscape fabric over the excavated area. This fabric helps to prevent weed growth and maintain the integrity of the base. Cut the fabric to fit the patio area and secure it in place using wooden stakes.
- Spread the Crushed Stone: Pour the crushed stone or gravel over the landscape fabric. Spread it evenly across the surface, ensuring a uniform layer. The recommended thickness for the base material is typically around 2-4 inches, but this may vary depending on the specific patio design and the soil conditions in your area.
- Level and Compact the Base: Use a rake or a shovel to level the crushed stone and ensure a smooth, even surface. Once the stone is leveled, use a compaction tool (such as a plate compactor or hand tamper) to firmly compact the base material. This will create a solid foundation and help prevent settling or shifting in the future.
Installing a proper base is essential for the stability and longevity of your patio. The crushed stone or gravel provides excellent drainage, preventing water from pooling and causing damage to the patio. Additionally, the compacted base ensures that the weight of the pavers is evenly distributed, reducing the risk of uneven surfaces or sinking.
With the base installed, you are one step closer to completing your paver patio. In the next step, we will guide you through the process of leveling and compacting the base to ensure a sturdy and level surface for your pavers. Stay tuned for step 5 of our guide!
Read more: What Is A Paver Patio
Step 5: Leveling and Compacting the Base
Leveling and compacting the base is a crucial step in creating a stable and even surface for your patio with pavers. This step ensures that your pavers will lay smoothly and evenly, reducing the risk of shifting or sinking over time. Here’s how to level and compact the base:
- Inspect the Base: Before starting, take a careful look at the base to ensure it is level and free of any large debris or irregularities. Use a level to check for any uneven areas, adjusting the base if necessary.
- Fill in Low Spots: If you notice any low spots or depressions in the base, fill them in with additional crushed stone or gravel. Use a rake or shovel to distribute and level the additional material.
- Use a Screed Board: To achieve a completely level surface, you’ll want to use a screed board. A screed board is a long, straight board that is used to smooth and level the surface of the base. Place the screed board across the base, resting it on two parallel guides (such as PVC pipes or wooden boards) on either side of your patio area.
- Scrape and Fill: While holding the screed board, use a scraping motion to pull excess base material towards you. This process fills in any low areas and redistributes the material, creating a more level surface. Continue this scraping and filling motion until the entire base is even and level.
- Compact the Base: Once the base is level, use a compaction tool (such as a plate compactor or hand tamper) to firmly compact the entire surface. Start from one end and work your way across the entire patio area, making several passes over each section. This will compress the base material, making it solid and stable.
- Check for Levelness: After compacting, check the levelness of the base once again using a level. Make any necessary adjustments by adding or removing base material to ensure a completely level surface.
Leveling and compacting the base is a critical step in the construction of your paver patio. A level and compacted base will provide a solid foundation for your pavers, ensuring that they lay evenly and securely. This step is essential in preventing future issues such as uneven settling or shifting of the pavers.
With the base leveled and compacted, you are now ready to move on to the exciting part of the process: laying the pavers. Keep following our guide to learn how to properly lay the pavers and create the beautiful patio you envision.
Before starting your patio project, make sure to properly prepare the area by leveling the ground, adding a base layer of gravel, and using sand to create a smooth surface for laying the pavers. This will ensure a stable and long-lasting patio.
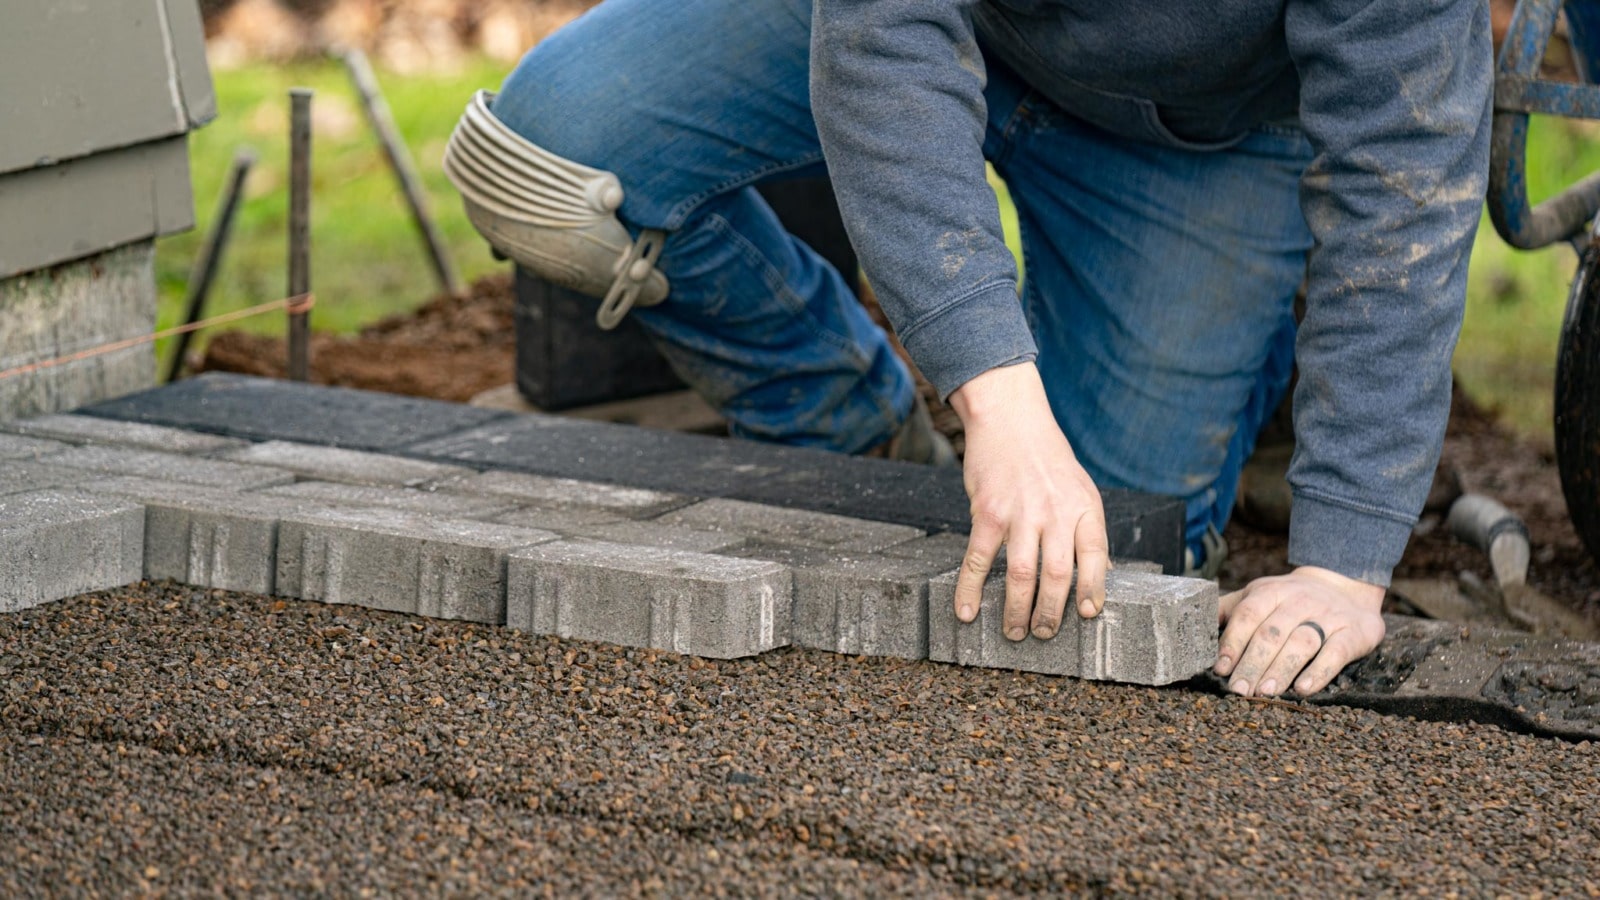
Step 6: Laying the Pavers
Now that you have a properly leveled and compacted base, it’s time to move on to the exciting step of laying the pavers. This is where you’ll see your patio start to take shape. Here’s how to lay the pavers:
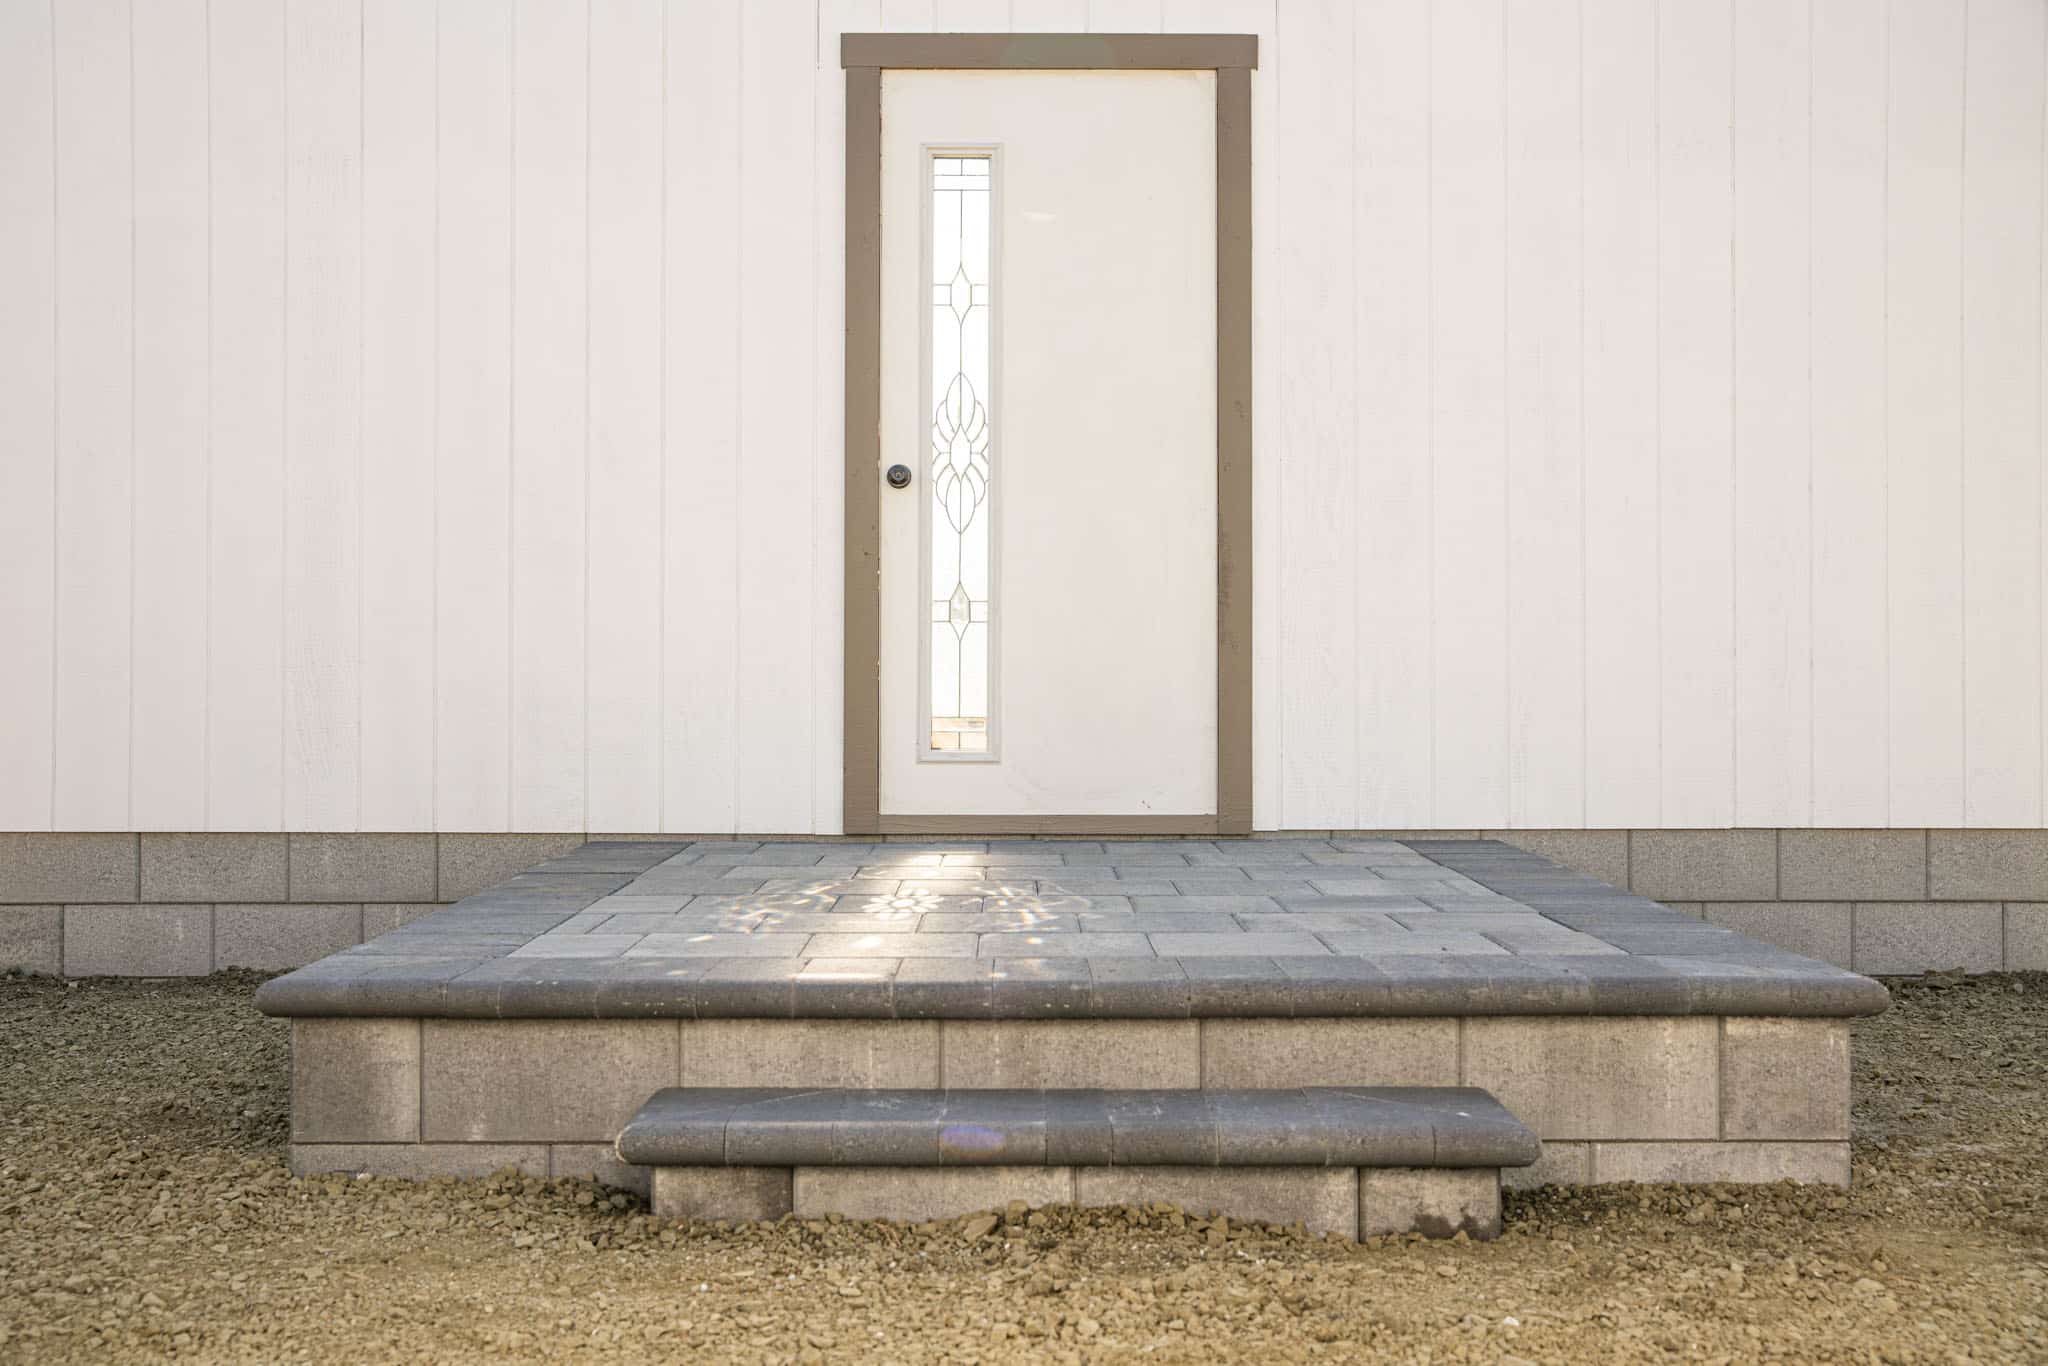
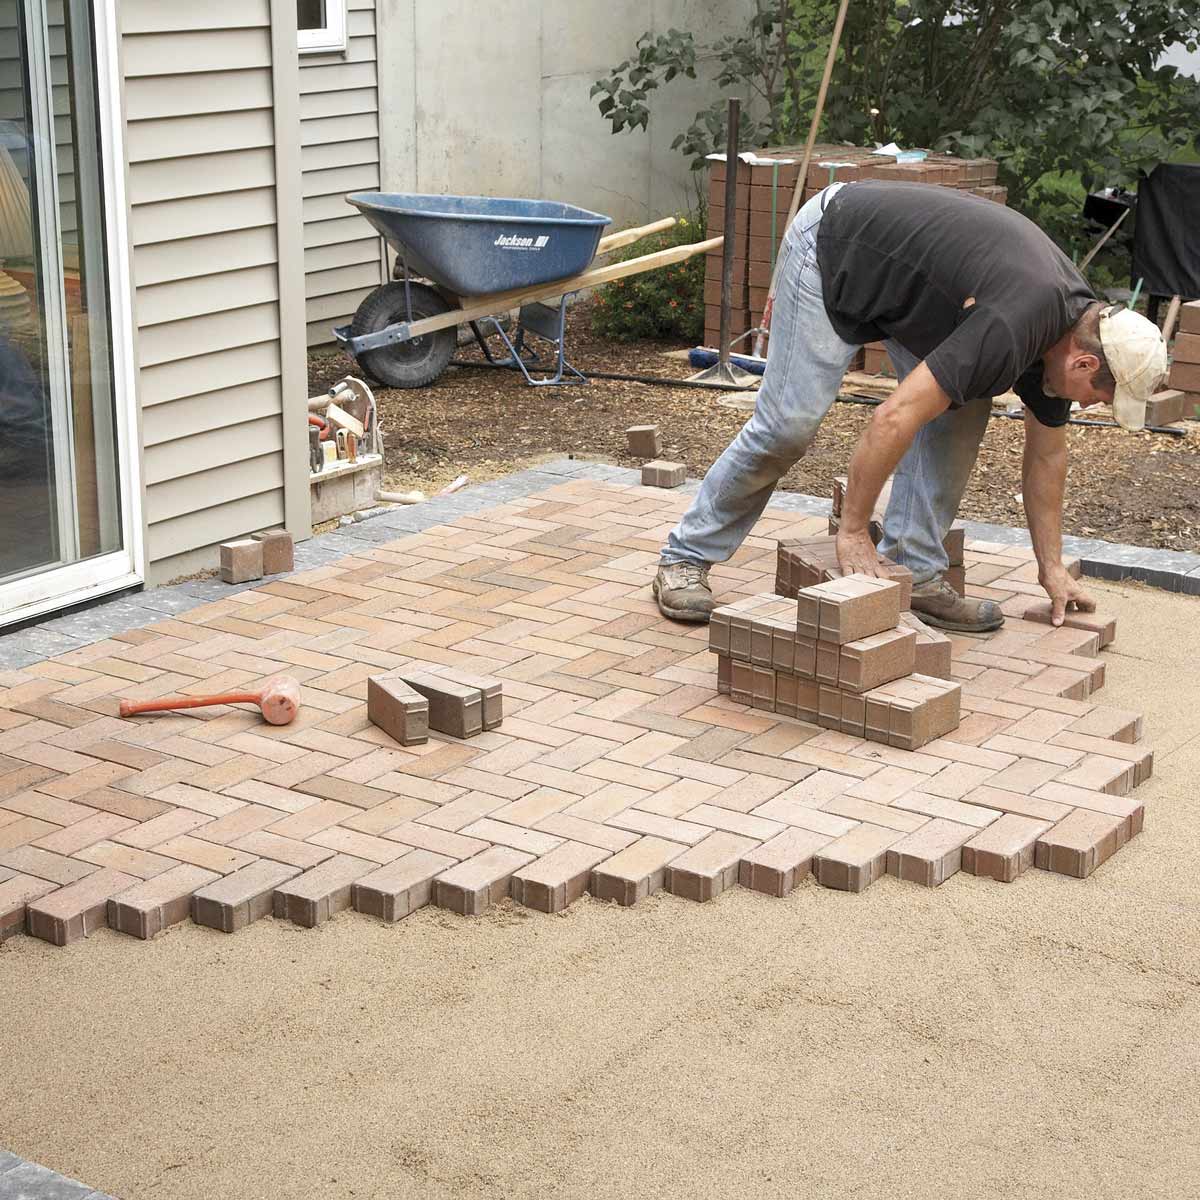
- Start from a Straight Edge: Begin by laying the first row of pavers along a straight edge of your patio. This can be an existing structure, such as the edge of your house or a border. Ensure that the pavers are snugly fit against each other and aligned with the straight edge.
- Work in sections: Divide your patio area into manageable sections to make the laying process more organized. This helps you maintain control over the pattern and ensures a consistent look throughout your patio. Use string or stakes to mark the boundaries of each section.
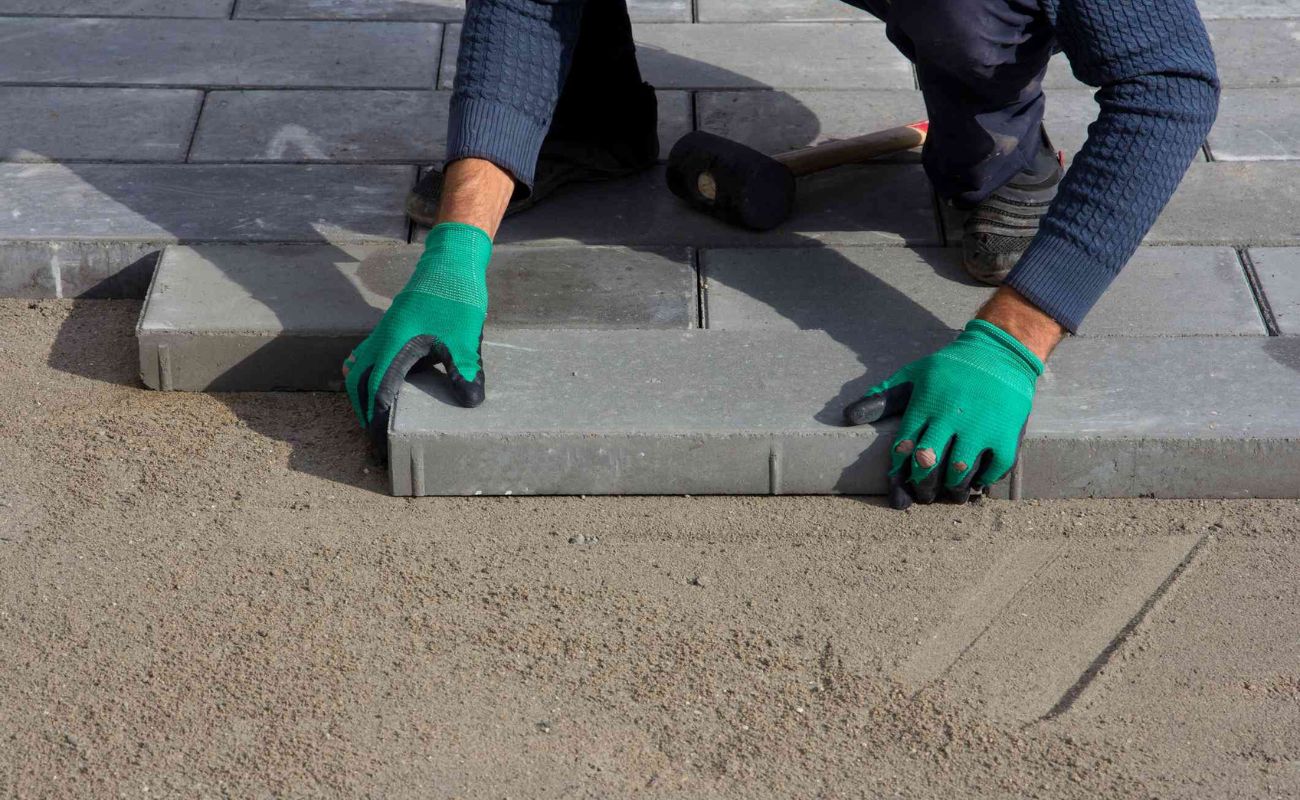
- Interlock the Pavers: When laying the pavers, interlock them tightly with each other. This helps create stability and prevents shifting over time. Use a rubber mallet or a piece of wood and a hammer to tap each paver gently into place, ensuring they are level and flush with the surrounding pavers.
- Check for Alignment and Levelness: Regularly check the alignment and levelness of the pavers as you go. Use a level or a straight edge to ensure that the pavers are laying flat and even. Make any necessary adjustments by adding or removing base material beneath the pavers or tapping them into place.
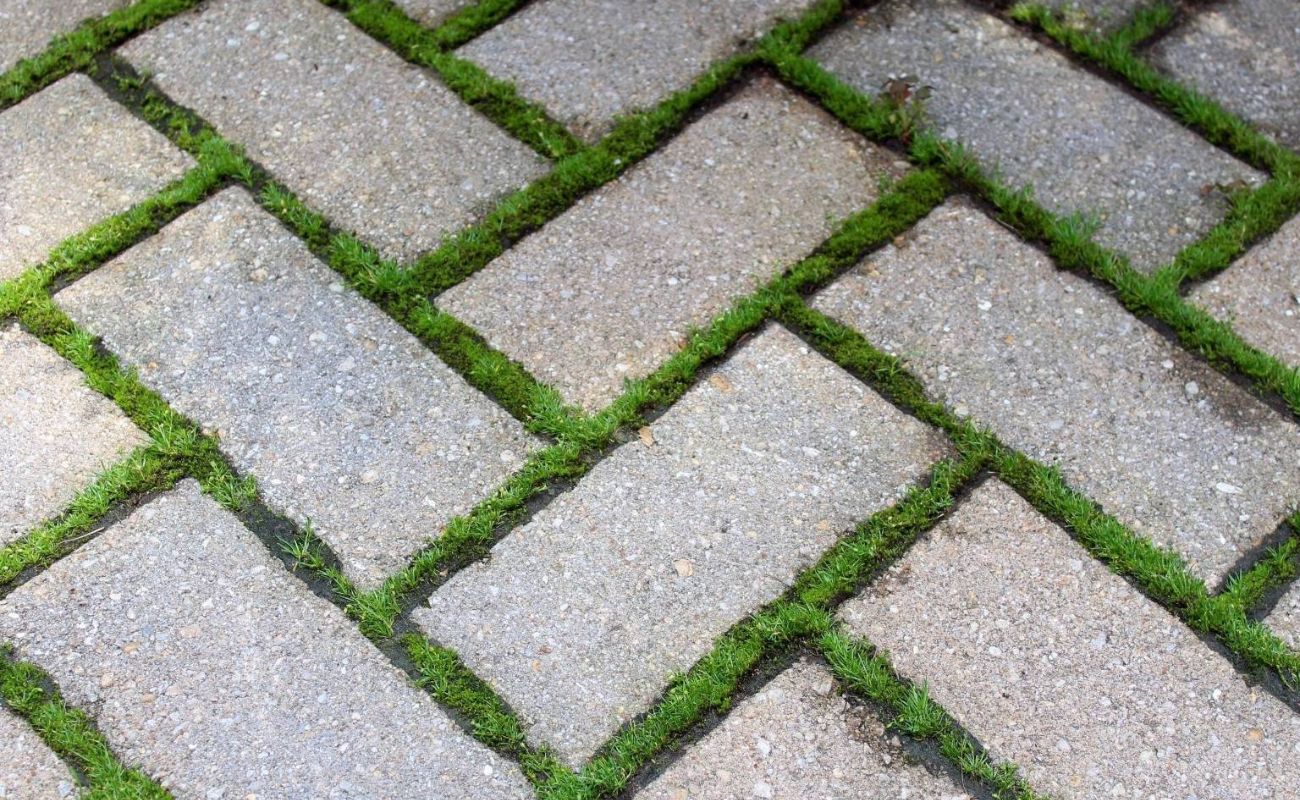
- Create Patterns and Variation: As you lay the pavers, be creative with patterns and variations if desired. You can use different paver colors or sizes to add visual interest to your patio. Explore different laying patterns, such as herringbone or basket weave, to create a unique look.
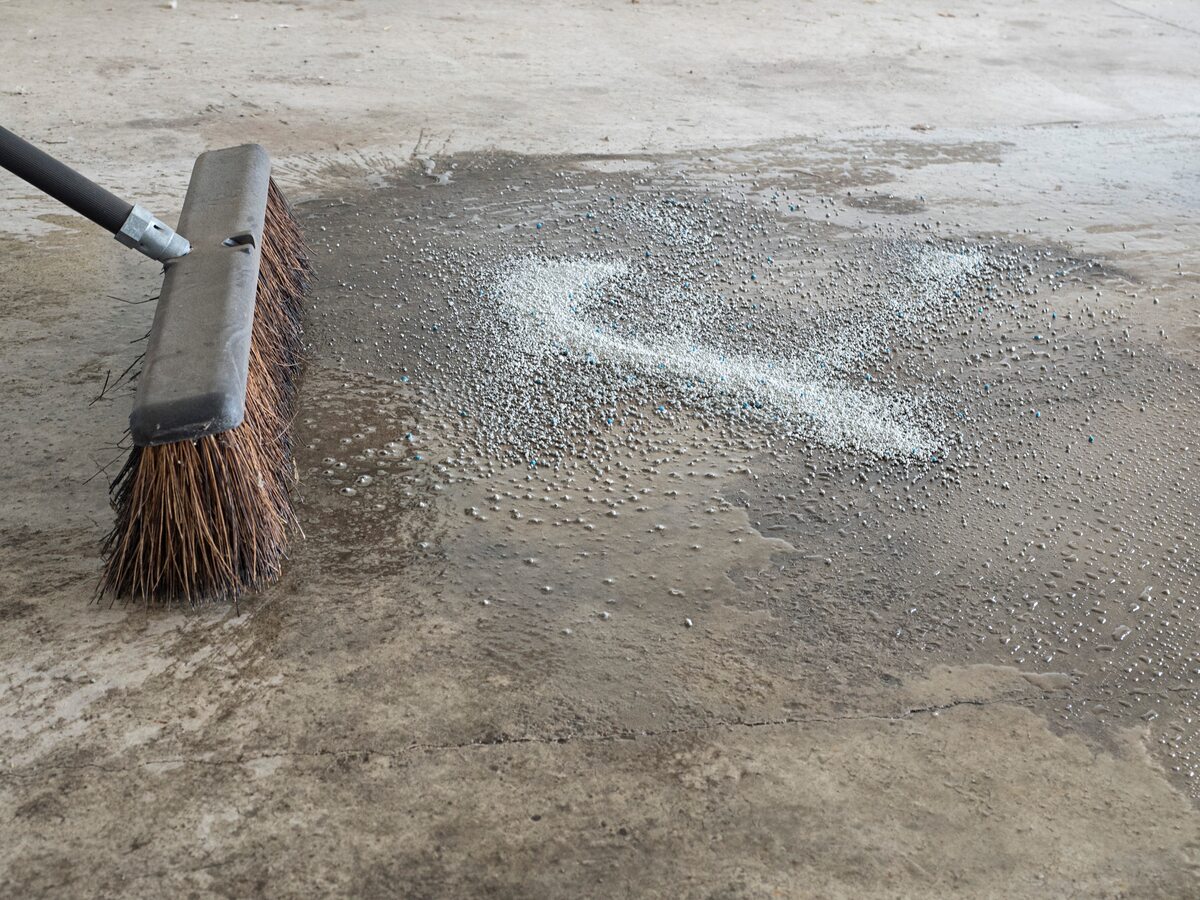
- Fill in the Gaps: Once a section of pavers is laid, fill in the gaps between them with fine sand or polymeric sand. Spread the sand evenly over the surface and use a broom to sweep it into the joints between the pavers. This helps lock them in place and prevents weed growth.
- Compact the Pavers: After filling in the gaps, use a compaction tool, such as a plate compactor, to gently compact the pavers. This helps settle the sand into the joints and ensures that the pavers are securely in place.
- Continue the Process: Repeat the above steps for each section of your patio until all the pavers are laid. Take your time and pay attention to detail to ensure a professional-looking installation.
Laying the pavers requires patience and attention to detail, but the end result will be a stunning patio space. Take the time to ensure that the pavers are properly aligned, level, and interlocked with each other. This will contribute to the stability and longevity of your patio.
With the pavers laid, you’re one step closer to enjoying your newly created patio. In the next step, we will guide you through cutting and fitting the pavers to ensure a seamless and professional finish. Stay tuned for step 7 of our guide!
Step 7: Cutting and Fitting Pavers
When creating a patio with pavers, you may come across areas where standard-sized pavers won’t fit perfectly. In these cases, cutting and fitting the pavers is necessary to achieve a seamless and professional-looking finish. Here’s how to cut and fit pavers:
- Assess the Area: Before you begin cutting and fitting the pavers, assess the areas that require adjustments. Measure the space and consider the specific cuts and shapes needed to ensure a proper fit. Keep in mind that it is better to cut the pavers slightly smaller than needed and make small adjustments as necessary.
- Gather the Necessary Tools: To cut the pavers, you will need a masonry saw, a chisel, a hammer, and safety gear such as gloves and goggles.
- Mark the Pavers: Use a pencil or marker to mark the areas on the pavers where you need to make cuts. Measure twice and mark clearly to ensure accuracy.
- Use a Masonry Saw: For straight cuts, use a masonry saw with a diamond blade. Carefully guide the saw through the marked line, applying steady and even pressure. Follow all safety precautions and wear safety gear when operating the saw.
- Make Curved or Irregular Cuts: For curved or irregular cuts, use a chisel and a hammer. Score the marked lines on the paver with the chisel, then carefully tap along the scored line to break off the unwanted portion. Take your time and make small adjustments as needed to achieve the desired shape.
- Fitting the Pavers: Once the necessary cuts are made, fit the pavers into the designated areas. Check for proper fit, alignment, and levelness. Use a rubber mallet or a piece of wood and a hammer to gently tap the pavers into place, ensuring they are securely fitted with the surrounding pavers.
- Fill in the Gaps: If there are any small gaps remaining between the fitted pavers and the surrounding ones, fill them in with sand or polymeric sand. Sweep the sand into the gaps and use a broom to ensure it is evenly distributed.
- Compact and Finish: After the fitting process is complete, use a compaction tool, such as a plate compactor, to gently compact the entire patio surface. This helps ensure that the pavers are securely in place and the gaps are fully filled with sand.
Cutting and fitting pavers can be a bit challenging, but with the right tools and patience, you can achieve a professional and seamless result. Take your time to measure and mark accurately, and use proper safety precautions when operating the saw. Remember, it’s always better to cut the pavers slightly smaller and make small adjustments as needed to ensure a proper fit.
With the pavers cut and fitted, your patio is almost complete. In the next step, we will guide you through the process of installing edging to add a finishing touch to your paver patio. Stay tuned for step 8 of our guide!
Step 8: Installing Edging
Installing edging is an important step in creating a polished and finished look for your paver patio. Edging helps define the perimeter of the patio, create clean lines, and prevent the pavers from shifting or spreading over time. Here’s how to install edging for your patio:
- Choose the Right Edging Material: There are various types of edging materials available, such as plastic, metal, or concrete. Choose the material that suits your style and complements your patio design.
- Measure and Prepare: Measure the length of each side of your patio to determine the amount of edging material needed. Add a few extra inches to account for any curves or angles. Use a shovel or a rake to create a small trench along the perimeter of the patio area where the edging will be installed.
- Place the Edging: Begin by placing the edging material into the trench along one side of the patio. Make sure it is positioned securely and at a consistent height with the pavers. Use a rubber mallet or a hammer to tap it into place if necessary.
- Connect the Edging: If your patio has multiple sides, connect the pieces of edging together. Most edging materials have interlocking mechanisms or connectors that allow for easy assembly. Secure the connections according to the manufacturer’s instructions.
- Adjust as Needed: As you proceed with installing the edging, ensure that it remains straight and properly aligned with the edge of the patio. Make any necessary adjustments by tapping the edging with a rubber mallet or adjusting the depth of the trench.
- Backfill and Compact: Once all the edging is in place, backfill the trench with soil, gravel, or sand. Compact the backfilled material using a tamper or your foot to ensure stability and prevent shifting.
- Check for Levelness: Use a level to check the levelness of the edging. Adjust the backfilled material if needed to maintain a consistent level along the entire perimeter of the patio.
- Finish with Polymeric Sand: To ensure a secure connection between the pavers and the edging, fill the small gap between them with polymeric sand. Sweep the sand into the gap, making sure it is evenly distributed, and use a broom to remove any excess.
Installing edging adds a professional and finished touch to your patio, creating clean lines and enhancing the overall appearance. The edging also helps to prevent the pavers from shifting or spreading, ensuring the longevity and stability of your patio.
With the edging installed, your patio is almost complete. In the next step, we will guide you through securing the patio to ensure it remains stable and in place. Stay tuned for step 9 of our guide!
Read more: How To Sand Patio Pavers
Step 9: Securing the Patio
Securing your patio is an important step to ensure its long-term stability and durability. By taking the time to properly secure the patio, you can prevent shifting, settling, and other issues that may arise over time. Here’s how to secure your paver patio:
- Inspect the Patio: Before securing the patio, thoroughly inspect it for any pavers that may be loose or uneven. If you find any, gently remove them and adjust the base beneath, adding or removing sand or crushed stone as needed to create a level surface.
- Use Polymeric Sand: Fill in the gaps between the pavers with polymeric sand. This special sand hardens when it comes into contact with water, creating a solid and secure bond. Pour the sand onto the patio surface and use a broom to sweep it into the gaps, ensuring it fills each joint completely.
- Mist the Sand: Once the polymeric sand is spread into the gaps, use a garden hose or a spray bottle to lightly mist the surface. The water will activate the sand and initiate the hardening process. Follow the manufacturer’s instructions regarding the amount of water and curing time needed.
- Compact the Patio: After misting the sand, use a plate compactor to gently compact the entire patio surface. This helps to ensure that the pavers are securely set and the polymeric sand is fully activated. Make several passes over the surface to ensure even compaction.
- Check for Stability: Once the patio is compacted, check for any remaining loose or uneven pavers. If necessary, gently lift and adjust them, adding or removing polymeric sand as needed. Repeat the misting and compacting process until all the pavers are securely set and the gaps are filled with sand.
- Seal the Pavers (Optional): If desired, apply a sealer to the pavers according to the manufacturer’s instructions. A sealer can enhance the color and appearance of the pavers while providing additional protection against stains and weathering.
Properly securing your patio ensures that the pavers remain in place, reducing the risk of shifting and settling. By filling the gaps with polymeric sand and compacting the surface, you create a solid and stable foundation for your patio.
With the patio secured, you’re almost finished! In the next step, we will guide you through the final touches and maintenance needed to complete and maintain your beautiful paver patio. Stay tuned for step 10 of our guide!
Step 10: Finishing Touches and Maintenance
Congratulations! You’ve reached the final step of creating your paver patio. Now it’s time to add those finishing touches and learn how to properly maintain your patio to keep it looking beautiful for years to come:
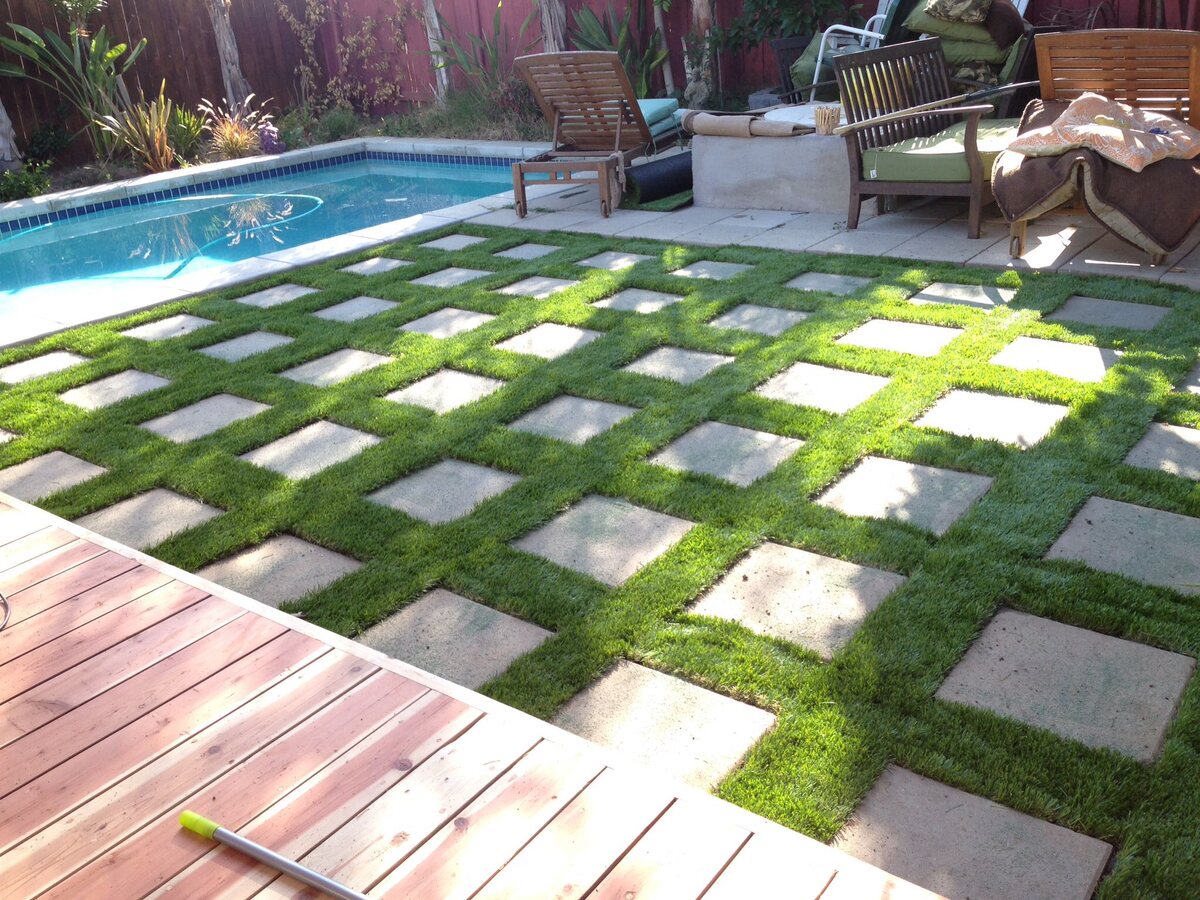
- Add Landscape Elements: Enhance the beauty of your patio by adding landscape elements such as plants, flower beds, or outdoor lighting. These additions can create a cozy and inviting atmosphere, further transforming your outdoor space.
- Clean Regularly: Keep your patio clean by regularly sweeping away debris, leaves, or dirt. Use a stiff brush or a leaf blower to remove any buildup in the gaps between the pavers. This will help prevent weed growth and maintain the overall appearance of your patio.
- Remove Stains Promptly: If you notice any stains on your patio, such as oil or grease, address them promptly. Use a suitable cleaning solution or a mild detergent and scrub the area gently with a brush. Rinse with water to remove the cleaning solution.
- Inspect for Damage: Regularly inspect your patio for any signs of damage or shifting. Look for cracks, loose pavers, or uneven surfaces. If you notice any issues, address them promptly to prevent further deterioration. Repair or replace damaged pavers as needed.
- Reapply Polymeric Sand: Over time, the polymeric sand between the pavers may begin to wear away. To maintain a secure bond and prevent weed growth, periodically inspect the gaps and reapply polymeric sand as needed. Follow the same process of sweeping and misting the sand.
- Protect from Harsh Weather: In regions with harsh winters or extreme weather conditions, protect your patio from potential damage. Clear away snow or ice promptly to prevent the moisture from seeping into the pavers and causing cracks. Consider using a sealant to add an extra layer of protection.
- Enjoy and Maintain: Finally, enjoy your beautifully created paver patio! Regularly maintain and care for it to ensure its longevity and continued beauty. With proper maintenance, your patio will provide a welcoming outdoor space for relaxation, dining, and entertaining.
By following these finishing touches and maintenance steps, you can ensure that your paver patio remains in top condition and continues to be a stunning addition to your outdoor space. With regular cleaning, prompt stain removal, and periodic inspections, you will be able to enjoy your patio for many years to come.
Thank you for following our comprehensive guide on how to create a patio with pavers. We hope that it has been informative and helpful in your paver patio construction journey. May your patio bring you joy, relaxation, and many memorable moments!
Conclusion
Creating a patio with pavers is an exciting and rewarding project that can transform your outdoor space into a stunning and functional area. By following the steps outlined in this comprehensive guide, you have learned how to plan, prepare, and execute the construction of a beautiful paver patio. From marking the patio area to laying the pavers and securing the patio, each step is crucial in creating a stable and visually appealing outdoor space.
Pavers offer endless design possibilities, allowing you to showcase your personal style and create a unique patio that complements your home and enhances your outdoor living experience. Whether you choose concrete, natural stone, or brick pavers, their durability, versatility, and aesthetic appeal make them an excellent choice for patio construction.
Throughout the construction process, it is important to pay attention to detail, ensure proper alignment, and use high-quality materials. Taking the time to properly level and compact the base, cut and fit the pavers, install edging, and secure the patio will ensure its stability and long-term functionality.
Once your paver patio is complete, maintain it with regular cleaning, prompt stain removal, and periodic inspections. With proper care and maintenance, your patio will continue to be a welcoming and enjoyable outdoor space for relaxation, entertainment, and creating lasting memories.
Thank you for joining us on this journey of creating a patio with pavers. We hope that this guide has been informative and helpful, providing you with the knowledge and confidence to undertake and successfully complete your own paver patio project. Enjoy the beauty and functionality of your newly created outdoor space!
Frequently Asked Questions about How To Make A Patio With Pavers
Was this page helpful?
At Storables.com, we guarantee accurate and reliable information. Our content, validated by Expert Board Contributors, is crafted following stringent Editorial Policies. We're committed to providing you with well-researched, expert-backed insights for all your informational needs.


0 thoughts on “How To Make A Patio With Pavers”