Home>Furniture>Outdoor Furniture>How To Make A Patio On Grass
Outdoor Furniture
How To Make A Patio On Grass
Modified: May 6, 2024
Learn how to create a gorgeous outdoor patio on grass with our expert tips and tricks. Discover the best outdoor furniture options for a comfortable and stylish space.
(Many of the links in this article redirect to a specific reviewed product. Your purchase of these products through affiliate links helps to generate commission for Storables.com, at no extra cost. Learn more)
Introduction
Creating a patio on grass is a fantastic way to transform your outdoor space into a functional and inviting area for relaxation and entertainment. Whether you want to create an outdoor dining area, a cozy seating nook, or a place to gather with friends and family, a patio provides the perfect gathering spot.
One of the main advantages of building a patio on grass is that it allows for flexibility in terms of location. Unlike a concrete patio that requires a permanent foundation, a grass patio can be easily modified or moved if desired. Additionally, a grass patio adds a natural touch to your outdoor space, blending seamlessly with your garden or landscaping.
In this guide, we will take you through the step-by-step process of creating a patio on grass. From selecting the perfect location to adding the finishing touches, we will cover everything you need to know to make your patio a stunning and functional addition to your outdoor living space.
Before we begin, it’s important to note that creating a patio on grass requires some planning and preparation. From choosing the right materials to properly preparing the ground, every step is crucial to ensure the longevity and stability of your patio. So, let’s dive in and discover how to make a patio on grass that will be the envy of your neighbors!
Read on to learn how to choose the perfect location for your patio on grass.
Key Takeaways:
- Creating a patio on grass is a versatile and natural way to enhance your outdoor space. From choosing the perfect location to adding finishing touches, careful planning and preparation are key to building a stunning and functional grass patio.
- Selecting the right materials, preparing the ground, and adding personalized touches like outdoor furniture and lighting are essential for creating a welcoming and enjoyable grass patio. With proper execution, your patio will become a serene extension of your home.
Read more: How To Make A Brick Patio
Choosing the Perfect Location
The first step in creating a patio on grass is choosing the perfect location. The location of your patio will have a significant impact on the overall functionality and aesthetic appeal of your outdoor space.
Here are a few factors to consider when selecting the location:
- Sunlight exposure: Take note of the sunlight patterns in your yard throughout the day. Choose a location that receives the optimal amount of sunlight for your desired use. If you plan to use your patio for outdoor dining, consider a location that gets ample shade during meal times to ensure comfort.
- Accessibility: Think about how you will access your patio from your house or other areas of your yard. Ensure that the location is easily accessible and convenient for you and your guests.
- Privacy: Consider the level of privacy you wish to have in your patio area. If you prefer a more secluded space, choose a location that is shielded from neighboring properties or add some privacy screens or plants to create a sense of seclusion.
- Views: Take advantage of any beautiful views in your yard when selecting the location for your patio. Positioning it in a spot that offers scenic views can enhance your outdoor experience and create a relaxing atmosphere.
- Drainage: Pay attention to the drainage in your yard and choose a location that has good water drainage. This will help prevent water pooling on your patio during rainy seasons and prolong its lifespan.
Once you have considered these factors, you will have a clearer idea of where to position your patio on the grass. Take some time to walk around your yard and visualize how the space will look once the patio is installed. Consider the overall layout and how it complements the existing features of your outdoor area.
With the perfect location in mind, it’s time to move on to the next step: preparing the ground for your patio on grass.
Preparing the Ground
Before you can start building your patio on grass, it is essential to properly prepare the ground to ensure a stable and long-lasting foundation. Here’s a step-by-step guide on how to prepare the ground for your grass patio:
- Clear the area: Start by clearing the area where you plan to install your patio. Remove any rocks, weeds, or vegetation that may be present.
- Level the ground: Use a rake or shovel to level the ground in the designated area. Ensure that there are no major bumps or uneven spots.
- Compact the soil: To create a stable base for your patio, you’ll need to compact the soil. Use a compactor or tamper to firmly pack down the soil. This will prevent future settling or shifting of your patio.
- Add a layer of gravel: Next, add a layer of gravel to help with drainage and provide additional stability. Spread the gravel evenly over the compacted soil, making sure to maintain a consistent thickness of around 2-3 inches.
- Compact the gravel: Once the gravel is in place, use a compactor to compact it firmly. This step is crucial for creating a solid and level surface for your patio.
By following these steps, you will have a well-prepared ground that is ready for the next phase of building your grass patio. The compacted soil and gravel layer will ensure proper water drainage and prevent any future sinking or shifting of your patio materials.
Next, it’s time to move on to selecting the materials for your patio on grass.
Selecting Patio Materials
Selecting the right materials for your patio on grass is crucial for achieving your desired aesthetic and functionality. Here are some popular options to consider:
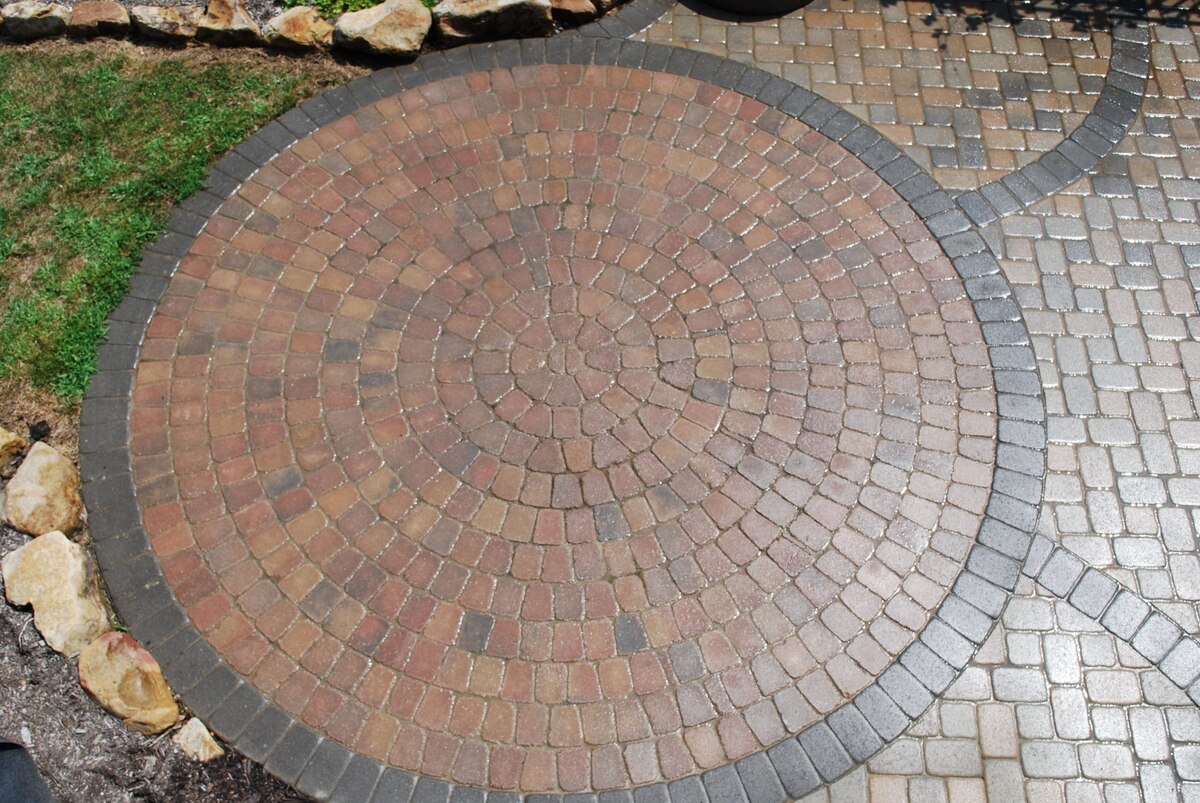
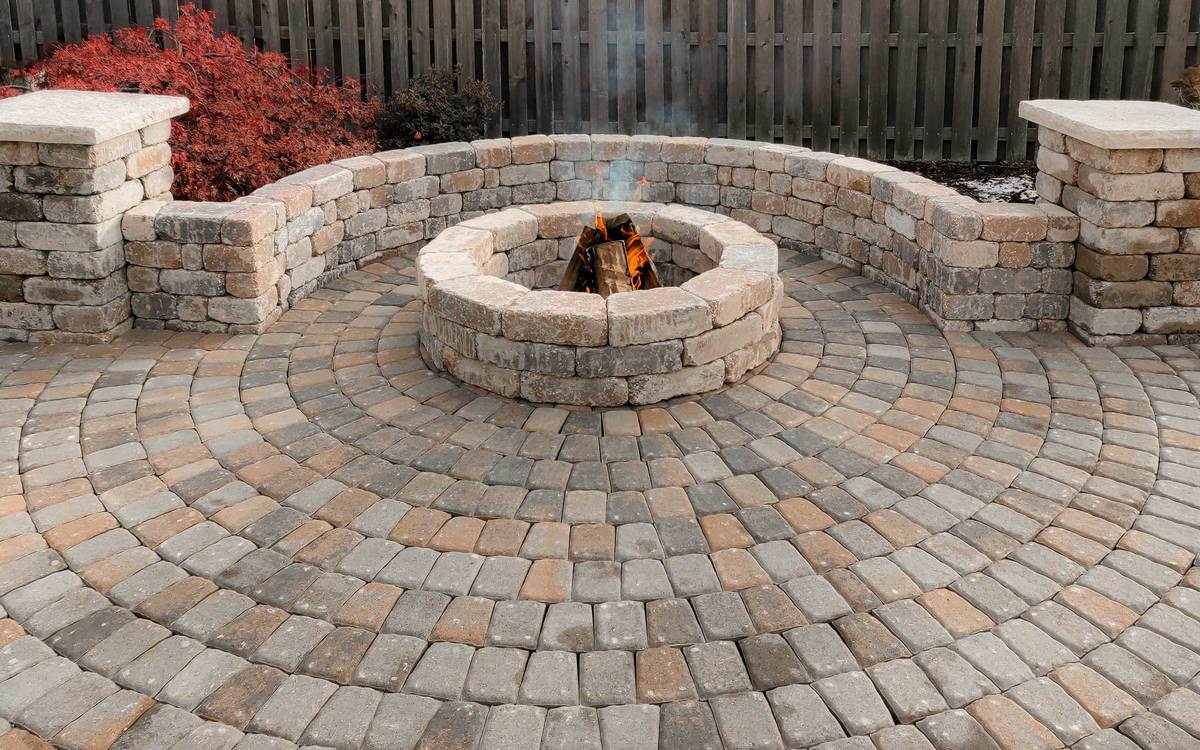
- Pavers: Pavers are a versatile and popular choice for grass patios. They come in various shapes, sizes, and colors, allowing you to create a unique design. Pavers are durable, easy to install, and require minimal maintenance.
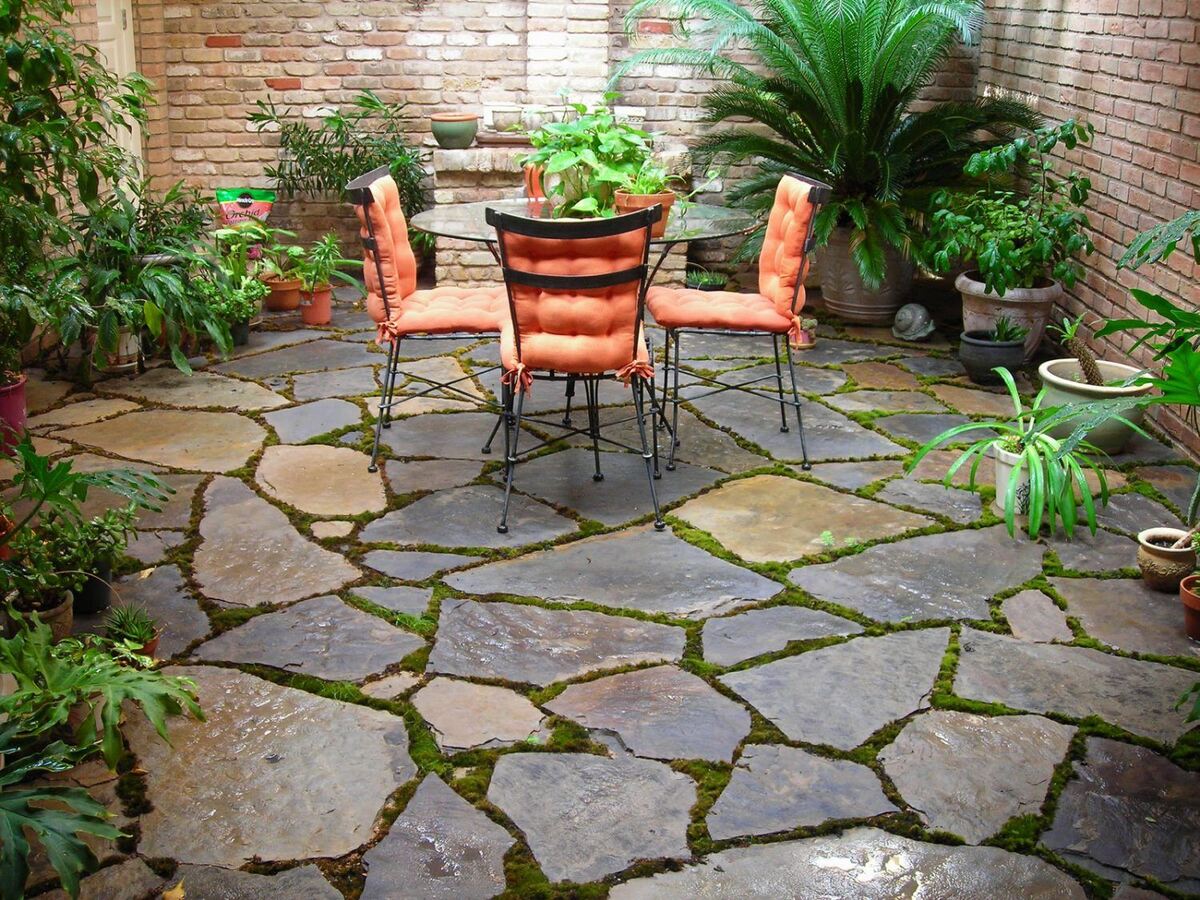
- Patio Stones: Patio stones offer a natural and rustic look to your grass patio. They come in different textures and colors and can be arranged in various patterns. Patio stones are durable and can withstand heavy foot traffic.
- Composite Decking: If you prefer a more modern and sleek look, composite decking is an excellent option. It mimics the look of real wood but is more durable and low maintenance. Composite decking is resistant to rot, warping, and insect damage.
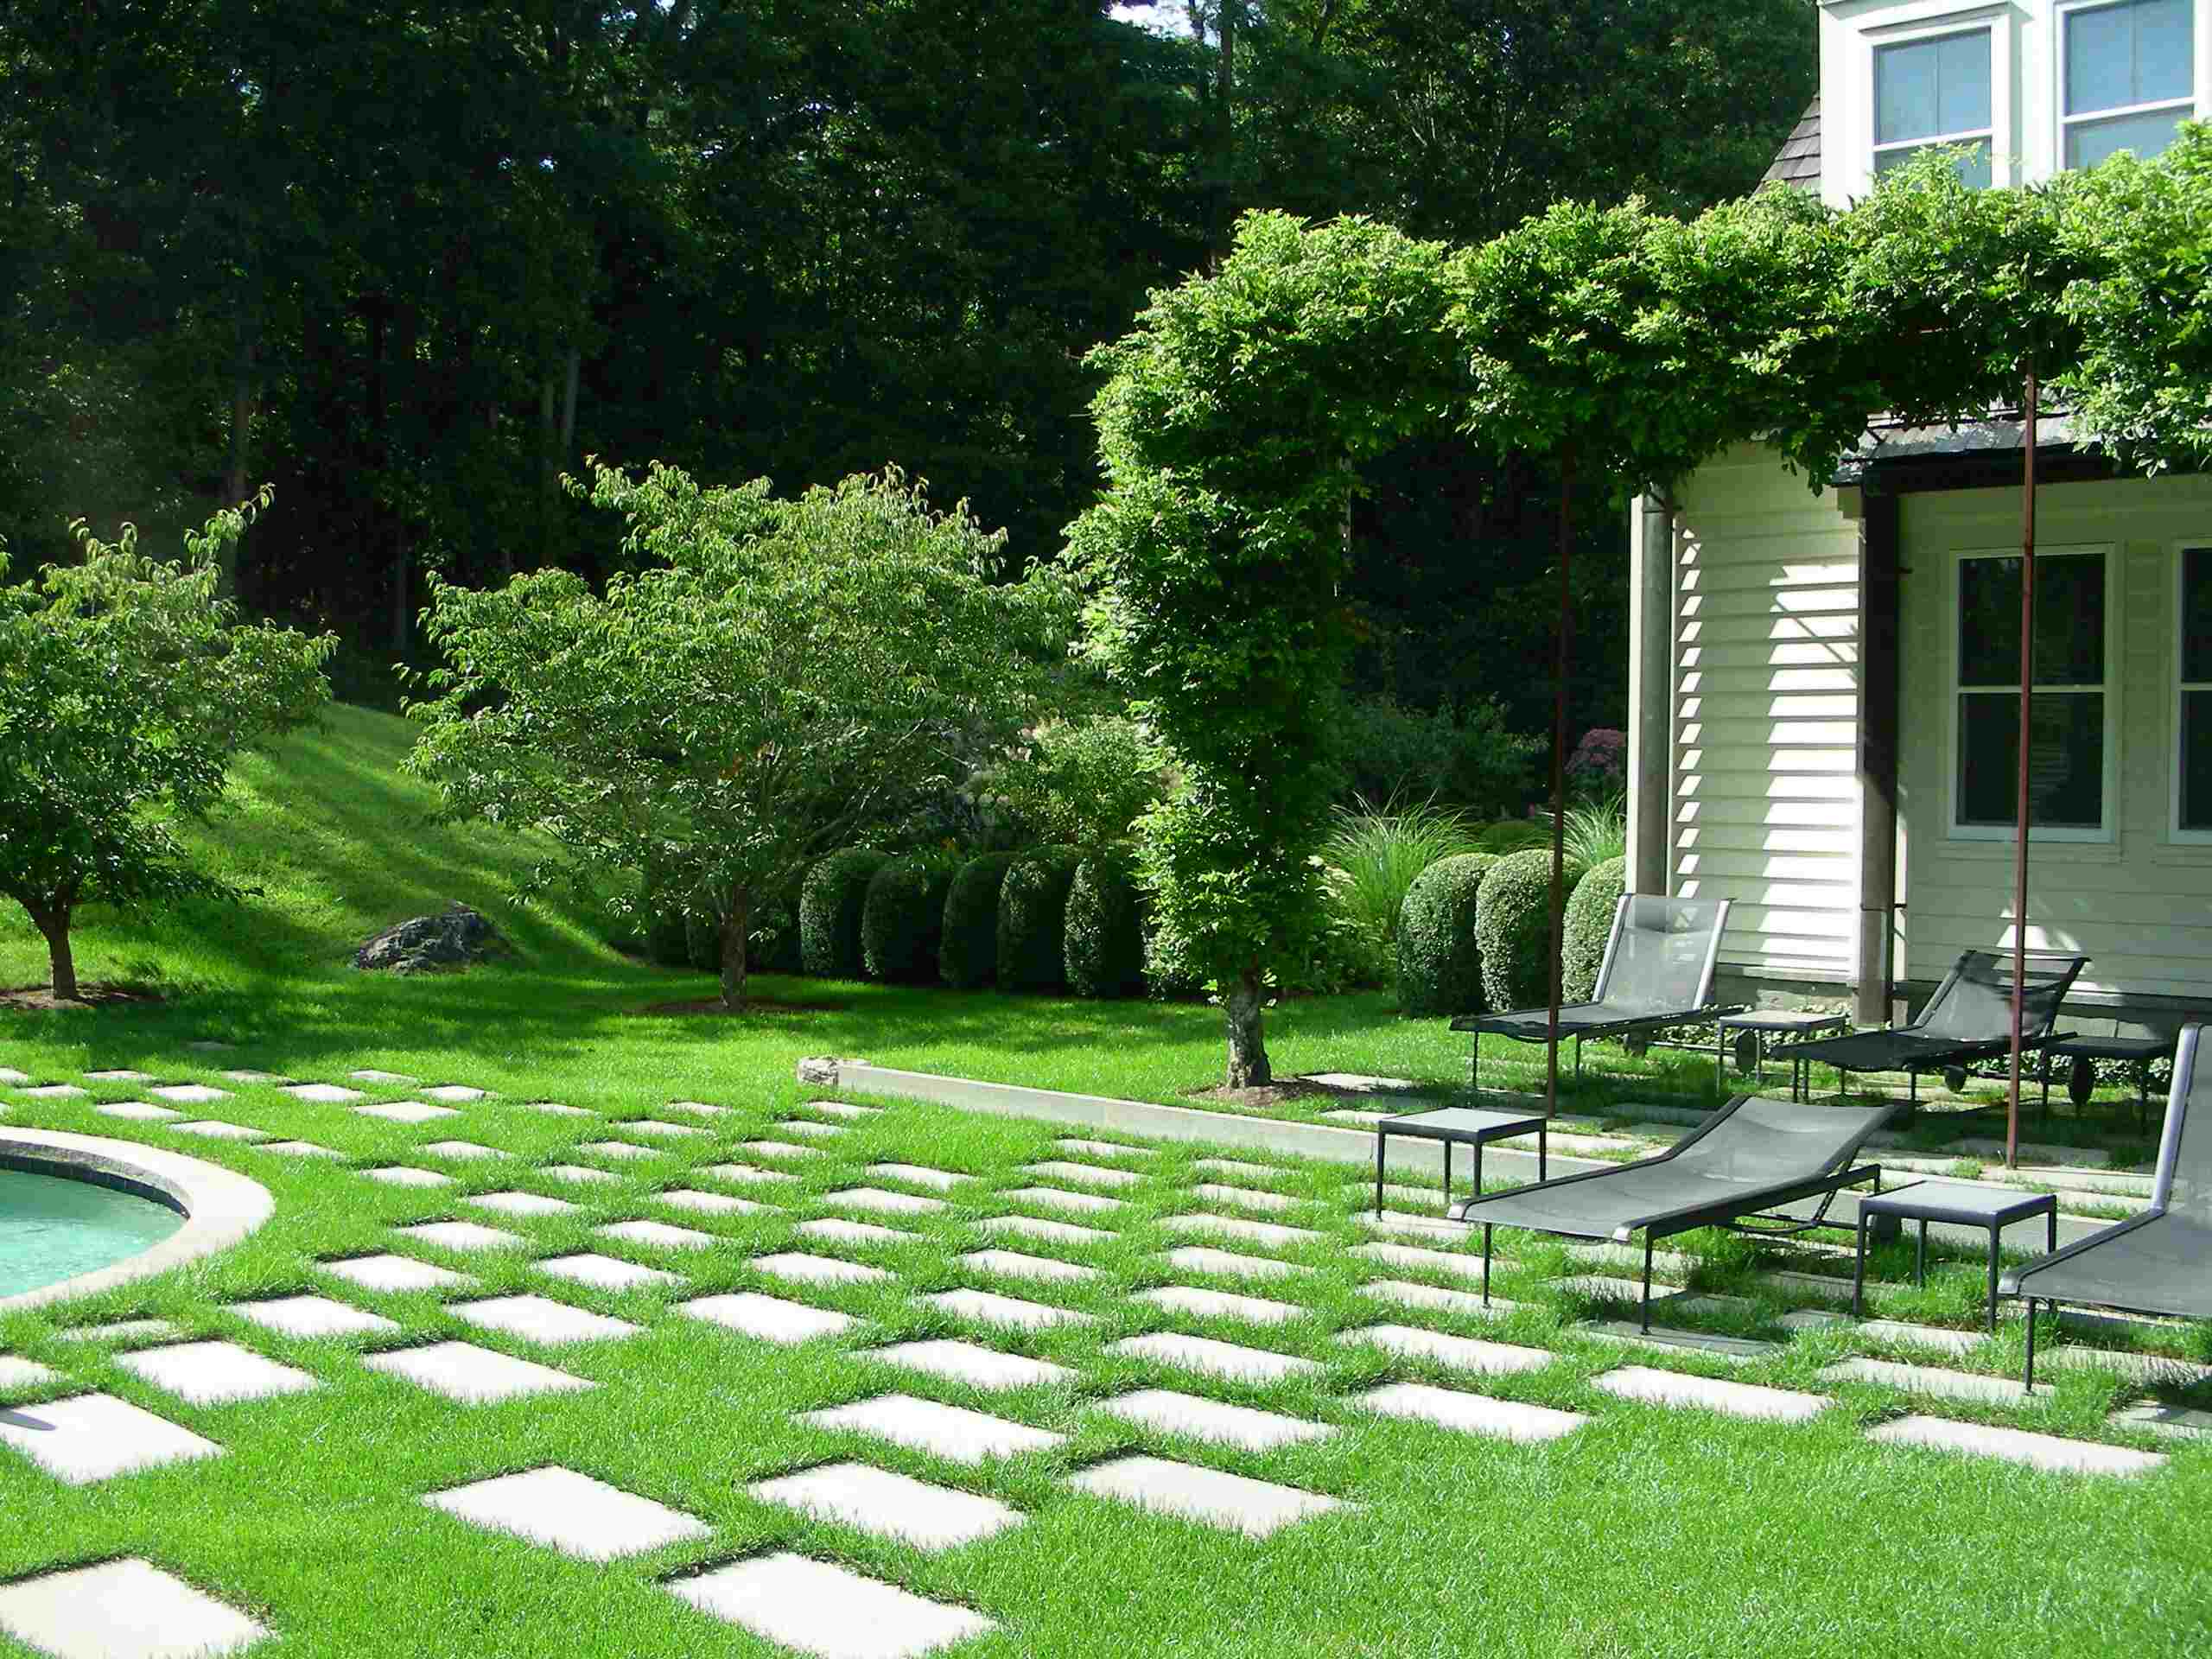
- Grass Pavers: Grass pavers are a unique option that allows you to have a grassy surface while still providing stability. These pavers have openings that allow grass to grow through, creating a visually appealing and eco-friendly patio.
Consider the style and feel you want to achieve in your outdoor space when choosing the materials for your patio on grass. It’s also essential to consider the durability, maintenance requirements, and cost of the materials.
Additionally, you may want to think about whether you want to use traditional grass or artificial turf between the patio materials. Traditional grass adds a natural and organic feel, but it may require more maintenance and care. Artificial turf, on the other hand, is low maintenance but doesn’t provide the same natural texture and feel.
Once you have chosen the materials for your grass patio, the next step is to install a weed barrier to prevent unwanted vegetation from growing between the patio materials.
Installing a Weed Barrier
Installing a weed barrier is an important step in creating a patio on grass to prevent unwanted weeds and vegetation from growing between the patio materials. Here’s how to install a weed barrier:
- Clean the area: Start by ensuring that the ground is free of any debris, rocks, or weeds. Clearing the area will make it easier to lay the weed barrier evenly.
- Measure and cut the barrier: Measure the dimensions of your patio area and cut the weed barrier accordingly. Make sure to leave a few extra inches on each side to ensure full coverage.
- Lay the barrier: Lay the weed barrier over the prepared ground, making sure it covers the entire patio area. Smooth out any wrinkles or folds in the barrier to ensure a flat and even surface.
- Secure the edges: Use landscaping staples or anchor pins to secure the edges of the weed barrier. This will prevent it from shifting or moving during the installation of the patio materials.
The weed barrier serves as a protective layer that prevents weeds and grass from growing through your patio, keeping it clean and weed-free. It also helps with water drainage and prevents the patio materials from sinking into the ground.
With the weed barrier in place, you are now ready to move on to the next step: creating a base layer for your grass patio.
Before laying down any materials for your patio, make sure to level the ground and remove any rocks or debris. This will ensure a smooth and stable surface for your patio.
Read more: How To Make A Patio With Pavers
Creating a Base Layer
Creating a solid and stable base layer is crucial for the longevity and durability of your grass patio. The base layer provides a foundation for the patio materials and helps distribute weight evenly. Here’s how to create a base layer for your patio on grass:
- Spread a layer of sand: Start by spreading a layer of sand over the weed barrier. The sand acts as a leveling agent and provides additional stability. Use a rake or shovel to distribute the sand evenly.
- Compact the sand: Use a compactor or tamper to compact the sand layer. This helps to create a firm and even surface for the patio materials to sit on. Compact the sand in multiple passes, ensuring that it is tightly packed.
- Check for levelness: Use a level or long straight edge to check if the sand layer is level. Adjust as needed to ensure a flat and even surface for your patio.
- Add a layer of crushed stone or gravel: For added stability, you can add a layer of crushed stone or gravel over the compacted sand. This layer provides additional drainage and helps prevent any shifting or settling of the patio materials.
- Compact the crushed stone or gravel: Use a compactor or tamper to compact the crushed stone or gravel layer. Like with the sand, multiple passes may be necessary to achieve a tightly packed and uniform base.
By creating a solid base layer, you ensure that your patio on grass remains level and sturdy. The combination of sand and crushed stone or gravel adds stability and prevents the patio materials from sinking into the ground over time.
With the base layer in place, you are now ready to lay the pavers or patio stones for your grass patio. Keep reading to learn the next steps.
Laying Pavers or Patio Stones
Laying the pavers or patio stones is an exciting step in building your grass patio. This is where you can unleash your creativity and bring your design ideas to life. Here’s how to lay pavers or patio stones for your grass patio:
- Plan the layout: Before you start laying the pavers or patio stones, take some time to plan the layout. Consider the pattern, design, and spacing between each piece. This planning stage will help ensure a cohesive and visually appealing patio.
- Start at one corner: Begin in one corner of the patio area and lay the first paver or patio stone. Use a rubber mallet or a hammer and block of wood to tap it into place, ensuring it is level and well-aligned.
- Add the next pavers/stones: Place the next paver or patio stone beside the first one, leaving a small gap for joint sand or gravel. Use a level to check for both levelness and alignment with the previous piece. Continue this process, adding one paver or patio stone at a time.
- Fill the joints: Once all the pavers or patio stones are in place, fill the gaps between them with joint sand or gravel. This helps stabilize the patio and prevents weed growth. Use a broom to sweep the sand or gravel into the joints, ensuring they are filled completely.
- Compact the patio surface: Use a compactor or tamper to compact the entire patio surface. This will help settle the pavers or patio stones into place and create a solid and stable surface.
Be sure to follow the manufacturer’s instructions for any specific requirements or recommendations for your chosen pavers or patio stones. Proper installation and alignment will ensure a professional-looking and long-lasting grass patio.
With the pavers or patio stones in place, the structural aspect of your grass patio is nearly complete. The next step is to fill the gaps between the pavers or stones. Keep reading to learn more.
Filling the Gaps
After laying the pavers or patio stones for your grass patio, it’s time to fill the gaps between them. This step not only enhances the overall appearance of your patio but also helps stabilize the pavers or stones. Here’s how to fill the gaps:
- Choose a joint material: There are a few options for filling the gaps between pavers or stones, such as joint sand, polymeric sand, or gravel. Consider the look you want to achieve and the level of stability required for your patio.
- Sweep in the joint material: Start by sweeping the joint material into the gaps between the pavers or stones. Use a broom or brush to ensure the material fills the gaps completely.
- Compact the joint material: After sweeping, use a compactor or tamper to gently but firmly compact the joint material. This will help settle it into the gaps and create a more stable surface.
- Remove excess material: Use a broom or brush to sweep away any excess joint material from the surface of the pavers or stones. This will give your patio a clean and finished appearance.
It’s important to note that different joint materials may require different curing times or additional steps. Follow the manufacturer’s instructions for the specific joint material you are using to ensure proper installation and longevity.
Filling the gaps between the pavers or patio stones not only improves the visual appeal of your grass patio, but it also helps prevent weed growth and keeps the pavers or stones securely in place. The joint material adds stability and durability to your patio.
With the gaps filled, your grass patio is nearing completion. It’s time to add the finishing touches to make it truly shine.
Adding Finishing Touches
Once you have laid the pavers or patio stones and filled the gaps, it’s time to add the finishing touches to complete your grass patio. These final touches help elevate the overall aesthetic and functionality of your outdoor space. Here are some ideas for adding those finishing touches:
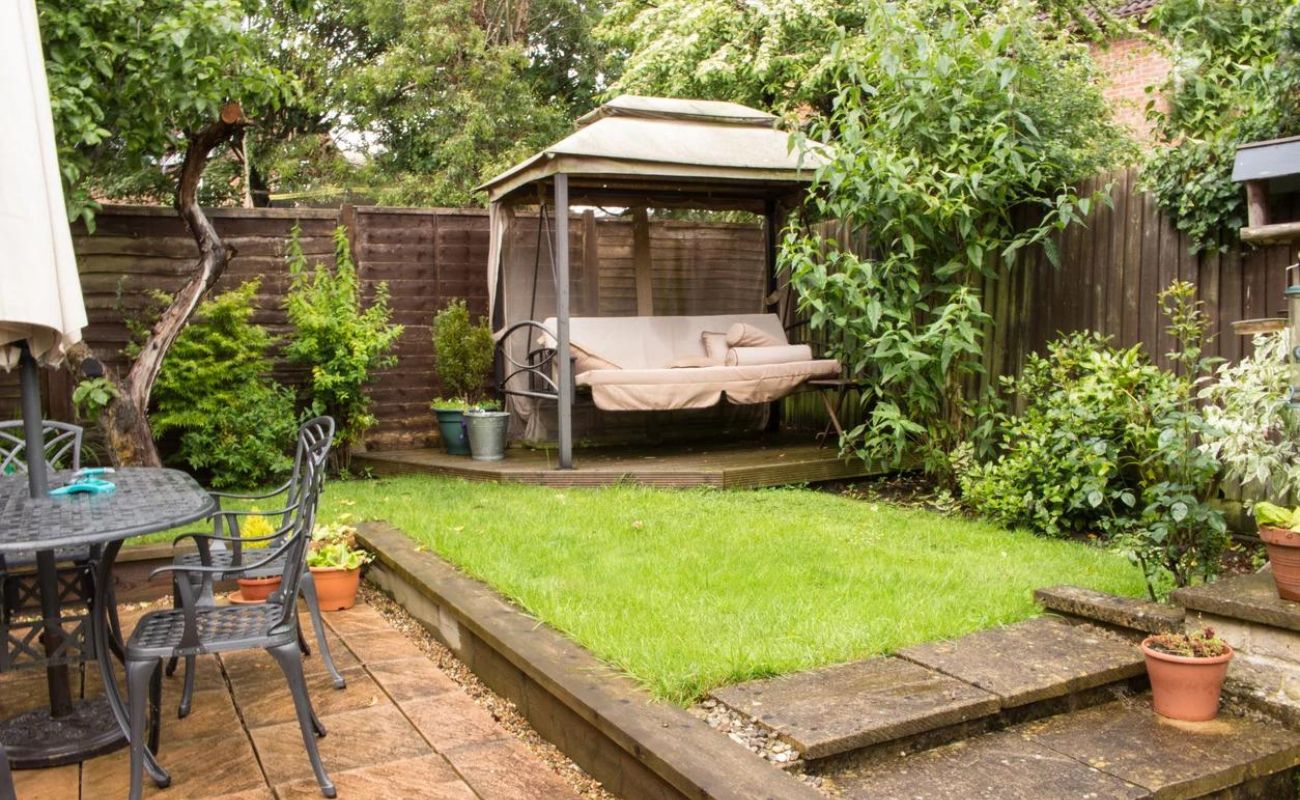
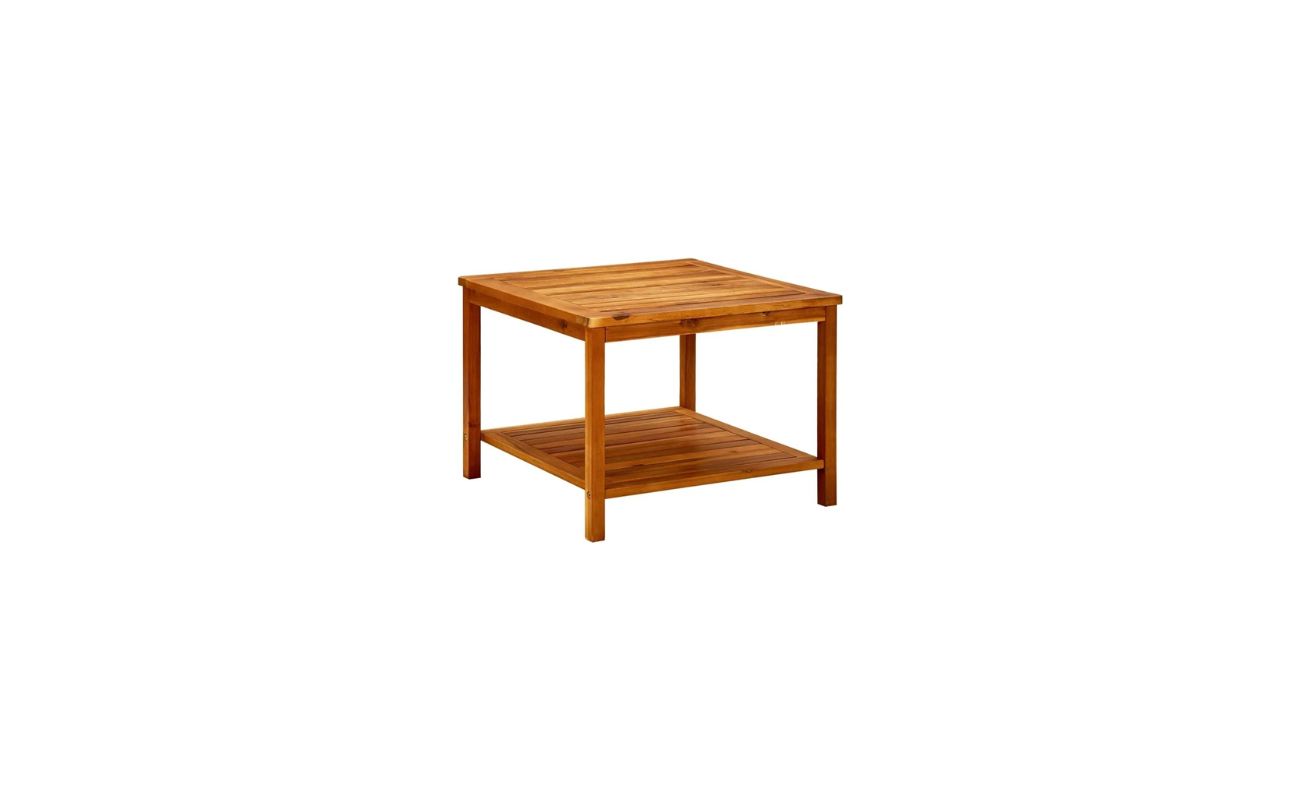
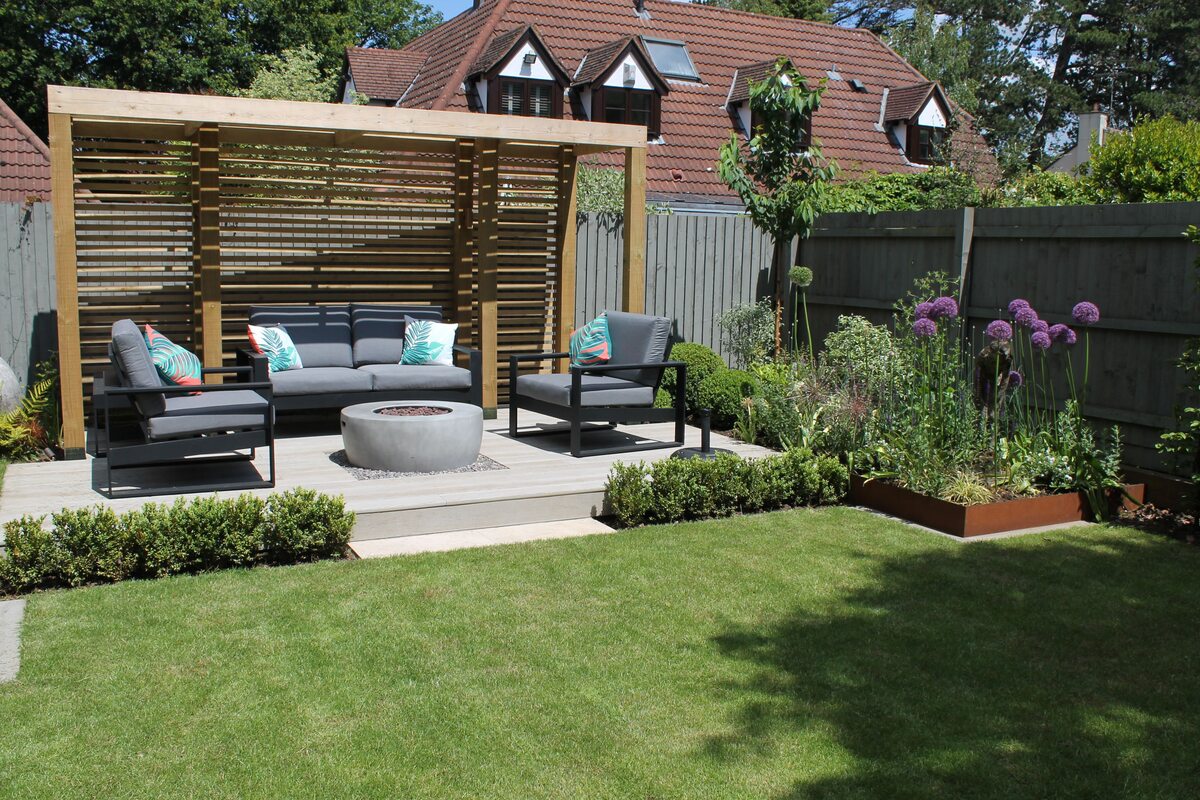
- Outdoor Furniture: Place comfortable and stylish outdoor furniture on your grass patio to create a cozy seating area. Whether it’s a dining set, lounge chairs, or a hammock, choose pieces that complement your patio design and provide ample seating for gatherings and relaxation.
- Outdoor Lighting: Install outdoor lighting to set the mood and enhance the ambiance of your grass patio. Consider string lights, solar-powered lanterns, or pathway lights to illuminate the space during evening gatherings and create a warm and inviting atmosphere.
- Decorative Elements: Add decorative elements such as planters, sculptures, or outdoor art to enhance the visual appeal of your grass patio. These elements can add personality and charm to your outdoor space, reflecting your style and creating a unique focal point.
- Outdoor Rug: Place an outdoor rug on your grass patio to add comfort and define specific areas. An outdoor rug not only adds a layer of softness underfoot but also adds color and pattern, tying the entire outdoor space together.
- Outdoor Kitchen or Barbecue: If you enjoy outdoor cooking and entertaining, consider adding an outdoor kitchen or barbecue area to your grass patio. This addition will allow you to prepare and enjoy meals with ease, making your patio a gathering spot for culinary delights.
By incorporating these finishing touches, you’ll create a welcoming and inviting atmosphere in your grass patio. These elements will not only enhance the functionality of the space but also make it a place where you can relax, entertain, and enjoy the beauty of your outdoor surroundings.
With the finishing touches complete, step back and admire your beautifully transformed grass patio. It’s now ready for you to enjoy many memorable moments outdoors.
Read more: How To Make A Cat Patio
Conclusion
Creating a patio on grass allows you to bring your outdoor living dreams to life. From a cozy seating area to an outdoor dining space, a grass patio provides versatility and natural beauty to your outdoor space. By following the steps outlined in this guide, you can successfully build a functional and visually appealing patio on grass.
Choosing the perfect location for your patio is essential, considering factors such as sunlight exposure, accessibility, privacy, and views. Preparing the ground properly by clearing the area, leveling the ground, compacting the soil and adding a layer of gravel sets a solid foundation for your grass patio.
Selecting the right patio materials, such as pavers, patio stones, composite decking, or grass pavers, sets the tone for your patio’s style and durability. Installing a weed barrier helps prevent unwanted weeds and vegetation from growing through your patio, while creating a base layer with sand and crushed stone or gravel ensures stability and evenness.
Laying the pavers or patio stones requires planning the layout, starting from one corner, and filling the gaps with joint sand or gravel. Adding the finishing touches, such as outdoor furniture, lighting, decorative elements, and an outdoor rug, personalizes your patio and creates a welcoming atmosphere.
Remember to follow the manufacturer’s instructions for each step and choose materials that align with your vision and maintenance preferences. With proper planning, preparation, and execution, your grass patio will become an inviting extension of your home, providing a serene and enjoyable outdoor space for years to come.
Now, it’s time to grab a refreshment, sit back, and relax on your newly created grass patio, soaking in the beauty of the great outdoors right in your own backyard.
Excited to enhance your backyard further? Dive into our guide on creating a simple yet elegant DIY Patio that will transform any outdoor space. For those with a green thumb looking to add more privacy or style, our collection of garden fence ideas offers creative and practical solutions to beautify your landscape. Both guides promise practical steps and inspiring designs to help you craft the perfect outdoor haven.
Frequently Asked Questions about How To Make A Patio On Grass
Was this page helpful?
At Storables.com, we guarantee accurate and reliable information. Our content, validated by Expert Board Contributors, is crafted following stringent Editorial Policies. We're committed to providing you with well-researched, expert-backed insights for all your informational needs.


0 thoughts on “How To Make A Patio On Grass”