Home>Gardening & Outdoor>Outdoor Structures>How To Build A 12×16 Shed
Outdoor Structures
How To Build A 12×16 Shed
Modified: August 27, 2024
Learn how to build a 12x16 shed for your outdoor space with our comprehensive guide. Get step-by-step instructions for constructing durable outdoor structures. Start your DIY project today!
(Many of the links in this article redirect to a specific reviewed product. Your purchase of these products through affiliate links helps to generate commission for Storables.com, at no extra cost. Learn more)
Introduction
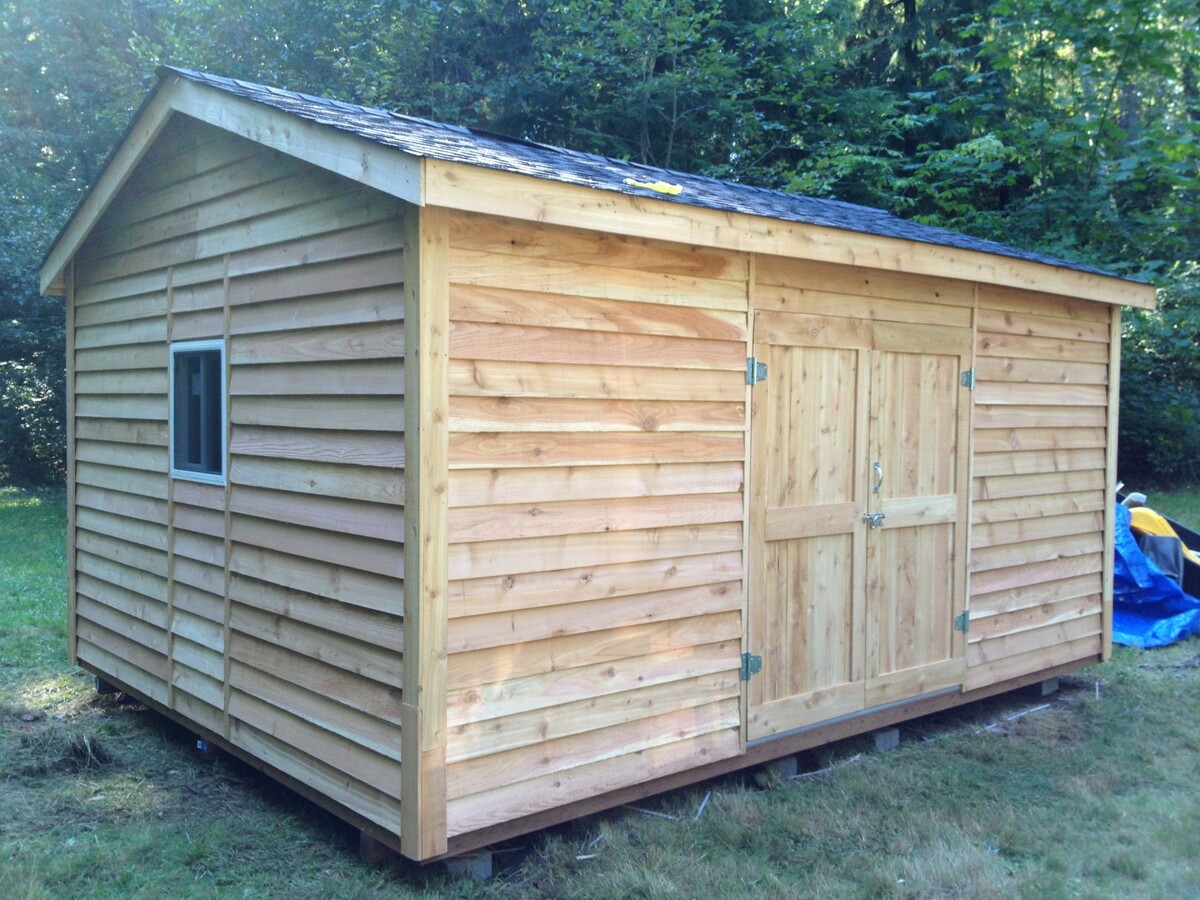
Welcome to the world of outdoor construction! Building a 12×16 shed is not just a practical endeavor; it's a fulfilling project that can enhance your property and provide valuable storage space. Whether you're a seasoned DIY enthusiast or a novice looking to embark on your first major construction project, this guide will walk you through the process of creating a sturdy and functional shed that meets your specific needs.
Constructing a 12×16 shed requires careful planning, precise measurements, and a solid understanding of construction principles. From laying the foundation to adding the finishing touches, each step demands attention to detail and a commitment to quality craftsmanship. As you embark on this journey, envision the possibilities that await – a versatile workshop, a secure storage space, or a charming retreat nestled in your backyard.
Throughout this guide, we'll explore the essential steps involved in building a 12×16 shed, offering practical tips, expert insights, and creative inspiration along the way. By the end, you'll have the knowledge and confidence to tackle this project with enthusiasm and skill. So, roll up your sleeves, gather your tools, and let's dive into the exciting world of shed construction!
Key Takeaways:
- Building a 12×16 shed requires meticulous planning, quality materials, and attention to detail. From the foundation to the finishing touches, it’s a fulfilling project that enhances your property and offers versatile functionality.
- Selecting the right foundation, roofing, siding, and finishing touches is crucial for creating a durable and visually appealing 12×16 shed. Thoughtful design and construction result in a space that seamlessly integrates into your outdoor environment.
Read more: How Build A Shed
Planning and Preparation
Before diving into the construction process, meticulous planning and thorough preparation are essential. Start by determining the shed’s purpose – will it serve as a storage space for gardening tools, a workshop for DIY projects, or a combination of both? Understanding its intended use will guide the design and layout decisions.
Next, familiarize yourself with local building codes and regulations. Obtain the necessary permits and approvals to ensure compliance with legal requirements. Additionally, consider the shed’s positioning in your yard, taking into account factors such as sunlight exposure, drainage, and accessibility.
Once you’ve settled on the shed’s purpose and secured the appropriate permissions, it’s time to create a detailed plan. Sketch out the shed’s layout, including the dimensions, door and window placements, and interior features. This blueprint will serve as a roadmap during the construction phase, helping you stay organized and on track.
With the plan in hand, compile a comprehensive list of materials and tools required for the project. From lumber and fasteners to roofing materials and paint, ensure that you have everything on hand before commencing construction. This proactive approach minimizes delays and keeps the project running smoothly.
Lastly, consider the environmental impact and longevity of your shed. Choose durable, weather-resistant materials that can withstand the elements and provide long-term functionality. Additionally, explore eco-friendly options such as solar-powered lighting and rainwater collection systems to enhance sustainability.
By investing time in meticulous planning and thorough preparation, you’ll lay a solid foundation for the construction phase, setting the stage for a successful and rewarding building experience.
Foundation
The foundation is the bedrock of your shed, providing stability and ensuring longevity. When it comes to building a 12×16 shed, there are several foundation options to consider, each with its own advantages and suitability based on your location and terrain.
- Concrete Slab: A popular choice for its durability and resistance to moisture, a concrete slab provides a solid base for your shed. Proper site preparation, including excavation and compacting the soil, is crucial before pouring the concrete. Ensure that the slab is level and adequately reinforced to support the shed’s weight.
- Concrete Footings: Ideal for areas with expansive soils or significant frost depth, concrete footings offer stability and prevent shifting. By digging below the frost line and pouring concrete piers, you can create a reliable foundation that withstands seasonal ground movement.
- Gravel Pad: For a more budget-friendly option, a well-constructed gravel pad can provide adequate support for your shed. Excavate the site, add a layer of compacted gravel, and ensure proper drainage to prevent water accumulation. While not as permanent as concrete, a gravel pad can be an effective foundation in certain environments.
Regardless of the foundation type, precise measurements and careful leveling are essential to ensure the shed’s structural integrity. Additionally, consider incorporating a moisture barrier, such as a vapor barrier or gravel layer, to protect the shed from ground moisture and potential water damage.
Before proceeding with the construction, it’s crucial to consult local building codes and regulations to ensure compliance with specific foundation requirements. By laying a solid foundation, you’re establishing the groundwork for a sturdy and reliable 12×16 shed that will stand the test of time.
Framing
As you transition from the foundation to the framing phase, you’re embarking on the structural skeleton of your 12×16 shed. The framing process is a critical stage that demands precision and attention to detail, as it sets the stage for the shed’s overall strength and stability.
Begin by selecting high-quality lumber that is suitable for framing, ensuring that it is straight, free of defects, and treated to resist rot and decay. The framing design typically consists of wall studs, top and bottom plates, headers, and joists, all of which work in unison to create a robust framework for your shed.
When framing the walls, follow the precise measurements outlined in your initial plan, ensuring that the studs are evenly spaced and securely anchored to the foundation. Use a level to guarantee that the walls are plumb and square, as this will facilitate the installation of doors, windows, and the roof.
As you progress to the roof framing, consider the pitch and design that best suits your shed’s aesthetic and functional requirements. Common roof styles for sheds include gable, gambrel, and lean-to designs, each offering unique advantages in terms of interior space and water shedding capabilities.
Throughout the framing process, prioritize structural integrity and load-bearing capacity, especially if you plan to store heavy equipment or utilize the shed as a workshop. Reinforce critical junctions and corners with appropriate bracing and fasteners to fortify the frame against external forces.
While the framing stage requires precision and adherence to construction principles, it also presents an opportunity to infuse your shed with personal touches. Consider incorporating architectural details, such as decorative trims or customized window openings, to elevate the shed’s visual appeal and reflect your unique style.
By approaching the framing phase with a blend of technical expertise and creative vision, you’ll lay the groundwork for a 12×16 shed that is not only structurally sound but also a charming and functional addition to your outdoor space.
Roofing
When it comes to roofing your 12×16 shed, the choices abound, offering both functional protection and aesthetic appeal. The roof serves as a crucial shield against the elements, safeguarding the shed’s interior and ensuring its long-term durability.
One of the primary decisions to make is the roofing material. Asphalt shingles, known for their affordability and ease of installation, are a popular choice for shed roofs. They come in a variety of colors and styles, allowing you to customize the shed’s appearance to complement your property.
If you’re seeking a more eco-friendly option with a rustic charm, consider metal roofing. Corrugated metal panels or standing seam metal roofs offer exceptional durability and weather resistance, making them a sustainable and visually striking choice for your shed.
For a touch of timeless elegance, cedar shingles or shakes can impart a classic, natural aesthetic to your shed. While requiring more maintenance than other materials, cedar roofing adds character and warmth to the structure, creating a picturesque focal point in your outdoor space.
As you embark on the roofing installation, prioritize proper underlayment to shield the shed from moisture infiltration. Whether using felt paper, synthetic underlayment, or specialized membrane systems, a reliable underlayment enhances the roof’s weatherproofing capabilities and prolongs its lifespan.
Consider the roof’s pitch and overhang design, as these elements not only contribute to the shed’s visual appeal but also play a crucial role in water shedding and drainage. Adequate ventilation, such as ridge vents or soffit vents, promotes air circulation and prevents moisture buildup in the attic space.
Throughout the roofing process, prioritize safety measures, especially when working at elevated heights. Secure ladder placement, proper fall protection, and adherence to roofing material manufacturer’s guidelines are essential for a safe and successful installation.
By selecting the right roofing material, paying attention to proper installation techniques, and infusing the roof with your personal style, you’ll ensure that your 12×16 shed stands as a resilient and captivating structure, ready to weather the seasons for years to come.
When building a 12×16 shed, make sure to start with a solid foundation and use pressure-treated lumber to prevent rot. Also, double-check your measurements before cutting to ensure everything fits together properly.
Read more: How To Build A Shed
Siding
The choice of siding for your 12×16 shed not only influences its visual appeal but also plays a vital role in protecting the structure from the elements. From traditional wood options to modern composite materials, the siding you select will contribute to the shed’s durability, maintenance requirements, and overall aesthetic.
One of the timeless choices for shed siding is wood. Whether opting for tongue-and-groove cedar planks, beveled pine boards, or rustic board-and-batten designs, wood siding exudes natural charm and can be stained or painted to complement your outdoor environment. It’s essential to properly treat and maintain wood siding to ensure its longevity and resistance to rot and decay.
Vinyl siding offers a low-maintenance alternative with a wide array of colors and textures. Its durability, ease of installation, and resistance to moisture make it a popular choice for shed exteriors. Additionally, vinyl siding is known for its cost-effectiveness and long-term color retention, providing a practical and visually appealing solution.
Fiber cement siding, composed of cement, sand, and cellulose fibers, presents a durable and fire-resistant option for your shed. It mimics the look of wood or masonry while offering superior resistance to pests, rot, and impact. With proper installation and maintenance, fiber cement siding can provide long-lasting protection and aesthetic appeal.
Metal siding, such as corrugated steel or aluminum panels, delivers a sleek and industrial aesthetic to your shed. It offers exceptional durability, weather resistance, and low maintenance, making it an ideal choice for contemporary or utilitarian shed designs.
As you select the siding material, consider factors such as climate, exposure to sunlight, and the surrounding landscape. Additionally, explore trim options, such as corner boards, fascia, and window casings, to add architectural interest and complete the shed’s exterior presentation.
Proper installation and attention to detail are crucial for ensuring the siding’s weatherproofing capabilities. Flashing around windows and doors, sealing joints and seams, and incorporating proper ventilation contribute to a well-protected and visually appealing shed exterior.
By choosing the right siding material and implementing meticulous installation practices, you’ll not only fortify your 12×16 shed against the elements but also bestow it with a distinctive and enduring facade that enhances your outdoor space.
Windows and Doors
Windows and doors are not merely functional elements of your 12×16 shed; they are essential components that contribute to its aesthetics, ventilation, and accessibility. Thoughtful selection and proper installation of windows and doors can elevate the shed’s functionality and visual appeal, creating a welcoming and well-lit interior space.
When choosing windows for your shed, consider the orientation of the structure and the desired level of natural light. Single-hung or double-hung windows offer ventilation and a classic look, while sliding windows are ideal for sheds with limited space for outward sashes. Additionally, consider the window’s material – from traditional wood frames to low-maintenance vinyl or aluminum options, select windows that complement the shed’s design and withstand outdoor exposure.
For doors, prioritize functionality, security, and aesthetic cohesion with the shed’s exterior. Whether opting for a classic hinged door, a space-saving sliding door, or a roll-up garage-style door, ensure that the door provides sufficient clearance and easy access for your intended use. Additionally, consider features such as windows, decorative panels, and hardware that enhance the door’s visual appeal.
Proper placement of windows and doors is crucial for maximizing natural light and ventilation while maintaining the shed’s structural integrity. Strategically position windows to capture favorable views and cross ventilation, and ensure that doors open without obstruction and provide a seamless transition between the interior and exterior spaces.
During installation, prioritize weatherproofing measures to safeguard the shed’s interior from moisture infiltration. Proper flashing, caulking, and insulation around windows and doors contribute to energy efficiency and protect against water damage, ensuring a comfortable and durable interior environment.
Consider incorporating window boxes, shutters, or awnings to add character and charm to the shed’s exterior. These decorative elements not only enhance the shed’s visual appeal but also provide opportunities for personalization and creative expression.
By thoughtfully selecting and installing windows and doors that align with your shed’s design, functionality, and environmental considerations, you’ll create a welcoming and well-appointed space that serves your needs and enhances the overall allure of your outdoor environment.
Finishing Touches
As you near the completion of your 12×16 shed, it’s time to add the finishing touches that will transform it from a construction project into a functional and visually appealing space. From interior enhancements to exterior accents, these final details will elevate the shed’s overall charm and usability.
Start by considering the interior layout and functionality. If you plan to use the shed as a workshop, install sturdy workbenches, tool racks, and adequate lighting to create a productive and organized workspace. For storage purposes, consider adding shelving, hooks, and storage containers to maximize the shed’s utility.
Lighting plays a crucial role in enhancing the shed’s usability and ambiance. Whether installing overhead fixtures, task lighting, or incorporating natural light through windows and skylights, ensure that the shed is well-lit for various activities and that the lighting design complements the shed’s purpose.
For the exterior, landscaping and hardscaping elements can integrate the shed seamlessly into your outdoor environment. Surround the shed with a well-defined pathway, plant shrubs or flowers, and consider adding a small patio or seating area to create a cohesive and inviting outdoor space.
Personalization and decorative accents can infuse the shed with character and reflect your unique style. Consider painting the shed in a color that harmonizes with your property’s palette, adding a weather vane or cupola for a touch of whimsy, or incorporating architectural details such as trim work and window boxes to enhance its visual appeal.
Functional elements such as gutters and downspouts contribute to the shed’s maintenance and longevity by directing rainwater away from the structure. Additionally, consider installing a rain barrel to collect and utilize rainwater for gardening or other outdoor activities, promoting sustainability and resource conservation.
Finally, prioritize security measures to safeguard the shed and its contents. Install sturdy locks on doors and windows, consider motion-activated lighting or a security system, and ensure that the shed is well-integrated into your overall property security plan.
By attending to these finishing touches, you’ll not only enhance the functionality and visual appeal of your 12×16 shed but also create a space that seamlessly integrates into your outdoor environment, offering both practical utility and aesthetic delight.
Conclusion
Congratulations on completing the construction of your 12×16 shed! What began as a vision has now materialized into a versatile and valuable addition to your property, offering functional space and aesthetic charm. As you reflect on the journey from planning to finishing touches, you’ve not only honed your construction skills but also enriched your outdoor environment with a structure that embodies your creativity and craftsmanship.
Building a 12×16 shed is a testament to your dedication, perseverance, and attention to detail. From the meticulous planning and preparation to the hands-on framing, roofing, and siding, each phase of the construction process has contributed to the realization of a durable and visually captivating structure.
As you step inside the completed shed, you’re greeted by a space that can serve a myriad of purposes – a workshop for pursuing your passions, a sanctuary for relaxation, or a storage haven for your outdoor essentials. The thoughtful placement of windows and doors invites natural light and ventilation, while the finishing touches have transformed the shed into a welcoming and well-appointed retreat.
Beyond its practical functionality, your 12×16 shed is a reflection of your personal style and a harmonious extension of your outdoor landscape. Whether nestled amidst lush greenery or standing as a focal point in your yard, the shed embodies the seamless integration of form and function, enriching your property and daily life.
As you embark on new adventures and projects within the shed, may it continue to inspire creativity, productivity, and moments of tranquility. Cherish the memories of its construction and the satisfaction of bringing your vision to life, knowing that the shed stands as a testament to your craftsmanship and dedication.
Thank you for allowing this guide to accompany you on your shed-building journey. May your 12×16 shed be a source of pride, productivity, and joy for years to come, enriching your outdoor living experience and serving as a tangible symbol of your ingenuity and passion for construction.
Frequently Asked Questions about How To Build A 12x16 Shed
Was this page helpful?
At Storables.com, we guarantee accurate and reliable information. Our content, validated by Expert Board Contributors, is crafted following stringent Editorial Policies. We're committed to providing you with well-researched, expert-backed insights for all your informational needs.


0 thoughts on “How To Build A 12×16 Shed”