Home>Gardening & Outdoor>Outdoor Structures>How To Build A Lean-To Pergola
Outdoor Structures
How To Build A Lean-To Pergola
Modified: August 27, 2024
Learn how to build a sturdy and stylish lean-to pergola for your outdoor space with our expert tips and guidance. Enhance your outdoor living with this versatile outdoor structure.
(Many of the links in this article redirect to a specific reviewed product. Your purchase of these products through affiliate links helps to generate commission for Storables.com, at no extra cost. Learn more)
Introduction
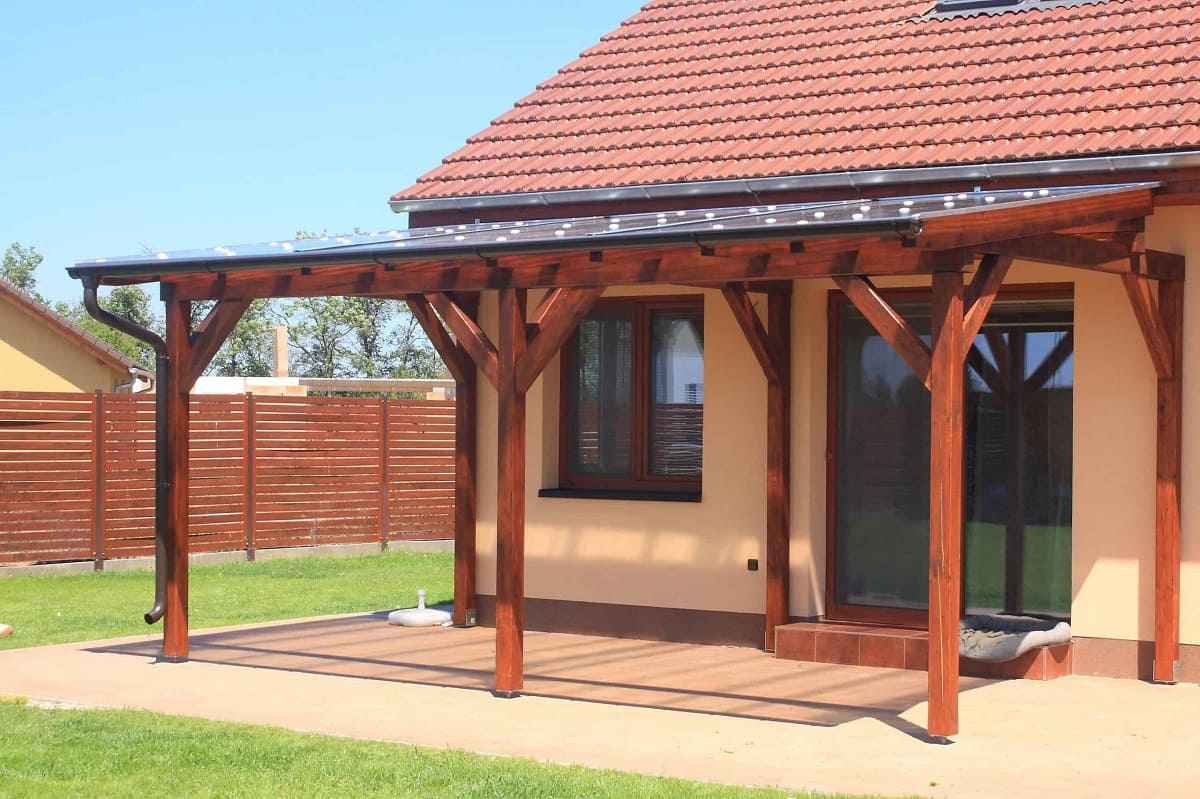
Are you dreaming of a cozy outdoor space where you can relax, entertain, and bask in the beauty of nature? Building a lean-to pergola might be the perfect project to turn that dream into a reality. A lean-to pergola is a versatile and stylish addition to any backyard, providing a shaded retreat for hot summer days and a charming setting for outdoor gatherings.
In this comprehensive guide, we will walk you through the step-by-step process of constructing your own lean-to pergola. Whether you're a seasoned DIY enthusiast or a novice looking to embark on your first major outdoor project, this guide will equip you with the knowledge and confidence to bring your vision to life.
From planning and preparation to the final finishing touches, we will cover everything you need to know to build a stunning and functional lean-to pergola. So, roll up your sleeves, gather your tools, and let's dive into the rewarding journey of creating a captivating outdoor haven right in your own backyard.
Key Takeaways:
- Planning and preparation are crucial for building a lean-to pergola. Assess your space, obtain permits, design the pergola, create a materials list, and set a realistic budget to ensure a smooth construction process.
- Building a lean-to pergola requires gathering the right materials and tools, setting the footings, installing the framework and roof, and adding finishing touches like lighting, greenery, and furnishings for a personalized outdoor retreat.
Read more: How To Build A Lean To Carport
Planning and Preparation
Before diving into the construction process, meticulous planning and thorough preparation are essential for ensuring the success of your lean-to pergola project. Here are the key steps to take:
Assessing Your Space
Start by surveying your outdoor space to determine the ideal location for your lean-to pergola. Consider factors such as sunlight exposure, existing landscaping, and the proximity to your home. This assessment will help you visualize how the pergola will integrate with the surrounding environment and guide you in making informed decisions during the planning phase.
Obtaining Permits and Checking Regulations
Depending on your local regulations and the scale of your project, you may need to obtain permits before commencing construction. Check with your municipality or homeowners’ association to ensure compliance with building codes and zoning requirements. It’s crucial to address these considerations early in the planning process to avoid any potential setbacks later on.
Designing Your Pergola
Now comes the exciting part – designing your lean-to pergola. Consider the architectural style of your home and the overall aesthetic you wish to achieve. Whether you prefer a sleek, modern design or a rustic, traditional look, there are various pergola styles and materials to choose from. Sketch out your design ideas or utilize online design tools to create a blueprint that aligns with your vision.
Read more: How To Build A Lean Tool Shed
Creating a Materials List
Once your design is finalized, compile a detailed list of materials required for the construction. This typically includes lumber, fasteners, concrete for footings, and any additional elements such as decorative hardware or lighting. Accurately estimating the quantity of materials will streamline the procurement process and prevent delays during construction.
Setting a Realistic Budget
Establishing a realistic budget is crucial for managing the costs associated with building a lean-to pergola. Factor in expenses for materials, tools, potential labor assistance, and any unforeseen expenditures. While it’s important to strive for quality, being mindful of your budget will help you make informed choices without compromising on the structural integrity or visual appeal of your pergola.
By meticulously planning and preparing for your lean-to pergola project, you’ll set the stage for a smooth and rewarding construction journey. With these foundational steps in place, you’ll be well-equipped to move on to the next phase of bringing your vision to life.
Choosing the Location
When it comes to building a lean-to pergola, selecting the perfect location within your outdoor space is a pivotal decision that will significantly impact the functionality and visual allure of the structure. Here’s how to make an informed choice:
Consider Sunlight and Shade
Assess the movement of sunlight throughout your yard at different times of the day. While a pergola can provide shade, it’s essential to determine the amount of natural light you want to filter through. If you envision a space for both sunbathing and shaded relaxation, consider a location that strikes a balance between sun and shade based on your preferences.
Read more: How To Build A Pergola Roof
Integration with Landscape
Take into account the existing landscape features such as trees, shrubbery, and garden beds. Your lean-to pergola should harmonize with the surrounding environment, complementing the natural beauty of your outdoor space. Additionally, consider how the pergola’s placement will affect the flow of foot traffic and the overall functionality of the area.
Proximity to the House
Positioning your lean-to pergola in close proximity to your house offers several advantages, including convenient access from indoor living spaces and the extension of your home’s architectural aesthetic into the outdoor environment. This proximity can also create a seamless transition between indoor and outdoor activities, fostering a cohesive and inviting atmosphere.
Privacy and Views
Assess the sightlines from your chosen location to ensure that the pergola will provide a desirable backdrop or focal point from various vantage points. Additionally, consider the level of privacy the pergola will afford, especially if you intend to use it for intimate gatherings or relaxation. Strategic placement can enhance privacy while maximizing scenic views.
Accessibility and Functionality
Evaluate the practicality of the location in terms of accessibility and functionality. Ensure that the space around the pergola allows for comfortable movement and potential furnishing arrangements. Whether you envision hosting outdoor meals, installing a cozy seating area, or incorporating potted plants, the chosen location should accommodate these activities seamlessly.
By thoughtfully considering these factors, you can select a location that optimizes the appeal and functionality of your lean-to pergola, setting the stage for an inviting and harmonious outdoor retreat.
Read more: How To Build Lean To Off A Shed
Gathering Materials
Embarking on the construction of a lean-to pergola requires a thoughtful and comprehensive approach to sourcing the necessary materials. By meticulously gathering the essential components, you can ensure a smooth and efficient building process. Here’s a guide to help you compile the materials needed for your project:
Lumber and Structural Components
The primary structural elements of your lean-to pergola will be crafted from sturdy, weather-resistant lumber. Select high-quality pressure-treated or cedar lumber for durability and longevity. The specific dimensions and quantities of lumber will depend on the size and design of your pergola, as outlined in your initial plans.
Fasteners and Hardware
Invest in corrosion-resistant fasteners and hardware to secure the structural components of the pergola. This includes galvanized screws, bolts, and brackets designed for outdoor use. Additionally, consider decorative hardware elements to add a touch of elegance to your pergola, such as ornamental post caps and brackets.
Concrete and Footing Materials
To ensure the stability and structural integrity of your lean-to pergola, you’ll need concrete for setting the footings. The exact quantity of concrete will depend on the size and number of footings required to support the pergola’s posts. Additionally, you may need sonotubes or other forms to create the footing molds.
Read more: How To Build A Lean To Roof On A Shed
Roofing Materials
If your design includes a roof for the lean-to pergola, gather the necessary roofing materials such as corrugated polycarbonate panels, metal roofing sheets, or traditional shingles. Ensure that the selected roofing materials align with the aesthetic and functional requirements of your design, providing adequate protection from the elements.
Finishing Touches and Accessories
Consider any finishing touches and accessories that will enhance the visual appeal and comfort of your pergola. This may include exterior wood stain or paint to protect and customize the appearance of the lumber, as well as outdoor lighting fixtures, decorative climbing vines, or retractable shades to personalize the space according to your preferences.
Safety Equipment and Tools
Don’t overlook the importance of safety equipment and the necessary tools for construction. Ensure that you have protective gear such as goggles, gloves, and a dust mask. As for tools, a circular saw, drill, level, measuring tape, and post hole digger are among the essential items needed to bring your lean-to pergola to fruition.
By methodically gathering these materials and accessories, you’ll be well-prepared to commence the construction of your lean-to pergola, ensuring that every component is in place to bring your vision to life.
Tools Required
Equipping yourself with the right tools is instrumental in ensuring a seamless and efficient construction process for your lean-to pergola. From precise measurements to secure fastenings, the following tools are essential for bringing your pergola project to fruition:
Read more: How To Build A Pergola Swing
Measuring and Layout Tools
Accurate measurements are the foundation of a well-constructed pergola. Essential measuring tools include a tape measure, carpenter’s square, and chalk line for laying out the dimensions and ensuring precise alignment of the structural components.
Cutting and Shaping Tools
To cut and shape the lumber for your pergola, a circular saw or miter saw is indispensable for achieving clean and accurate cuts. A jigsaw may be needed for intricate or curved cuts, especially if your design incorporates decorative details.
Drilling and Fastening Tools
A reliable cordless drill with a set of drill bits is essential for boring holes and driving screws into the lumber. Additionally, a screwdriver set or impact driver will expedite the fastening process, ensuring secure connections between the structural elements of the pergola.
Leveling and Alignment Tools
Keeping the components of your pergola level and plumb is crucial for structural integrity. A spirit level, also known as a bubble level, will help ensure that posts and beams are perfectly aligned. Additionally, a plumb bob can aid in verifying vertical alignment for precise construction.
Read more: How To Build A Pergola On A Patio
Excavation and Concrete Tools
If your pergola requires footings set in concrete, a post hole digger or auger will facilitate the excavation process, allowing you to dig the necessary holes for the footings. A mixing tub, shovel, and trowel are essential for preparing and pouring the concrete for the footings.
Personal Protective Equipment (PPE)
Ensuring safety during construction is paramount. Personal protective equipment such as safety goggles, gloves, and a dust mask will help safeguard against potential hazards, especially when cutting, drilling, and working with concrete and lumber.
Additional Tools and Accessories
Depending on the specific design and features of your lean-to pergola, additional tools and accessories may be required. These could include a ladder for elevated work, a post level for aligning vertical posts, and clamps for securing lumber during assembly.
By having these essential tools at your disposal, you’ll be well-equipped to tackle the construction of your lean-to pergola with precision, efficiency, and confidence, ensuring that every component is assembled with meticulous attention to detail.
Building the Pergola
With meticulous planning, the right materials, and essential tools at your disposal, you’re ready to embark on the exciting journey of constructing your lean-to pergola. Follow these step-by-step guidelines to bring your vision to life:
Read more: How To Build A Patio Pergola
1. Setting the Footings
Begin by marking and excavating the locations for the footings according to your design’s specifications. Use a post hole digger or auger to create the holes, ensuring they are deep enough to accommodate the required depth for stability. Once the holes are prepared, mix and pour concrete into the footings, inserting post anchors or brackets to support the vertical posts. Ensure the footings are level and aligned before allowing the concrete to cure.
2. Installing the Vertical Posts
With the footings set, it’s time to install the vertical posts. Secure the posts in the anchors or brackets, ensuring they are plumb and aligned with the layout of your design. Use a level to verify the vertical orientation of each post, making any necessary adjustments before proceeding to the next step.
3. Attaching the Beams and Rafters
Once the vertical posts are in place, attach the horizontal beams to create the framework of your lean-to pergola. Depending on your design, these beams may be attached directly to the house or supported by the vertical posts. Subsequently, install the rafters perpendicular to the beams, ensuring they are evenly spaced and securely fastened to complete the framework of the pergola.
4. Adding Decorative Details
If your design incorporates decorative details such as notched rafters or ornamental post caps, this is the stage to add these personalized touches. Carefully execute any decorative cuts or embellishments, ensuring that they seamlessly integrate with the overall aesthetic of your lean-to pergola.
Read more: How To Build A Freestanding Pergola
5. Applying Protective Finish
Before proceeding to the roof installation, consider applying a protective finish to the lumber to enhance its durability and visual appeal. Select a high-quality exterior wood stain or paint that complements your outdoor space, ensuring that it provides adequate protection against the elements while accentuating the natural beauty of the wood.
6. Verifying Structural Integrity
Once the framework is assembled, thoroughly inspect the structural integrity of the pergola. Verify that all connections are secure, and the entire structure is stable and level. This step is crucial for ensuring the long-term resilience and safety of your lean-to pergola.
By following these sequential steps with precision and care, you’ll witness your lean-to pergola taking shape, evolving from a vision to a tangible and captivating outdoor structure that will enrich your living space for years to come.
Installing the Roof
With the framework of your lean-to pergola in place, the next crucial step is installing the roof to provide shelter and enhance the functionality of the structure. Whether you opt for a solid or open-roof design, the roof installation process requires attention to detail and precision. Here’s a comprehensive guide to help you navigate this pivotal phase of your pergola construction:
1. Selecting Roofing Materials
When choosing the roofing materials for your lean-to pergola, consider factors such as durability, aesthetic appeal, and compatibility with your overall design. Common options include corrugated polycarbonate panels, metal roofing sheets, or traditional shingles. Select materials that align with your desired level of sunlight filtration, weather resistance, and visual cohesion with the existing outdoor environment.
Read more: How To Build A Steel Pergola
2. Measuring and Cutting the Roofing Materials
Precise measurements are essential for accurately cutting the roofing materials to fit the dimensions of your pergola. Use a measuring tape and a marker to mark the cutting lines, ensuring that the panels or shingles will align seamlessly with the framework. Employ a circular saw or tin snips, depending on the material, to make clean and accurate cuts.
3. Securing the Roofing Materials
Begin by affixing the roofing materials to the framework of the pergola, starting from one end and working systematically to the other. Use appropriate fasteners such as roofing screws or nails, ensuring that they penetrate the underlying structure securely. Maintain consistent alignment and overlap between the roofing panels or shingles to create a watertight and visually cohesive roof surface.
4. Sealing and Waterproofing
After the roofing materials are installed, it’s essential to address potential points of water ingress. Apply a high-quality roofing sealant or waterproofing membrane along the seams and edges of the roofing panels or shingles to create a barrier against moisture infiltration. This step is crucial for safeguarding the underlying structure and ensuring the longevity of your lean-to pergola.
5. Verifying Structural Integration
Once the roof is in place, thoroughly inspect the structural integration of the roofing materials with the framework. Verify that the roof is securely fastened, level, and free from any potential areas of vulnerability. This meticulous verification process is essential for ensuring the resilience and protective functionality of the installed roof.
By meticulously executing the installation of the roof, you’ll transform your lean-to pergola into a sheltered and inviting outdoor retreat, ready to provide respite from the elements while enhancing the aesthetic and functional appeal of your outdoor living space.
Read more: How To Build A Pergola On Concrete
Finishing Touches
As you near the completion of your lean-to pergola construction, it’s time to infuse the structure with personalized touches and additional elements that will elevate its visual allure and functional appeal. The finishing touches contribute to the overall ambiance and usability of your outdoor retreat. Here’s a guide to adding those final details that will truly make your pergola a captivating and inviting space:
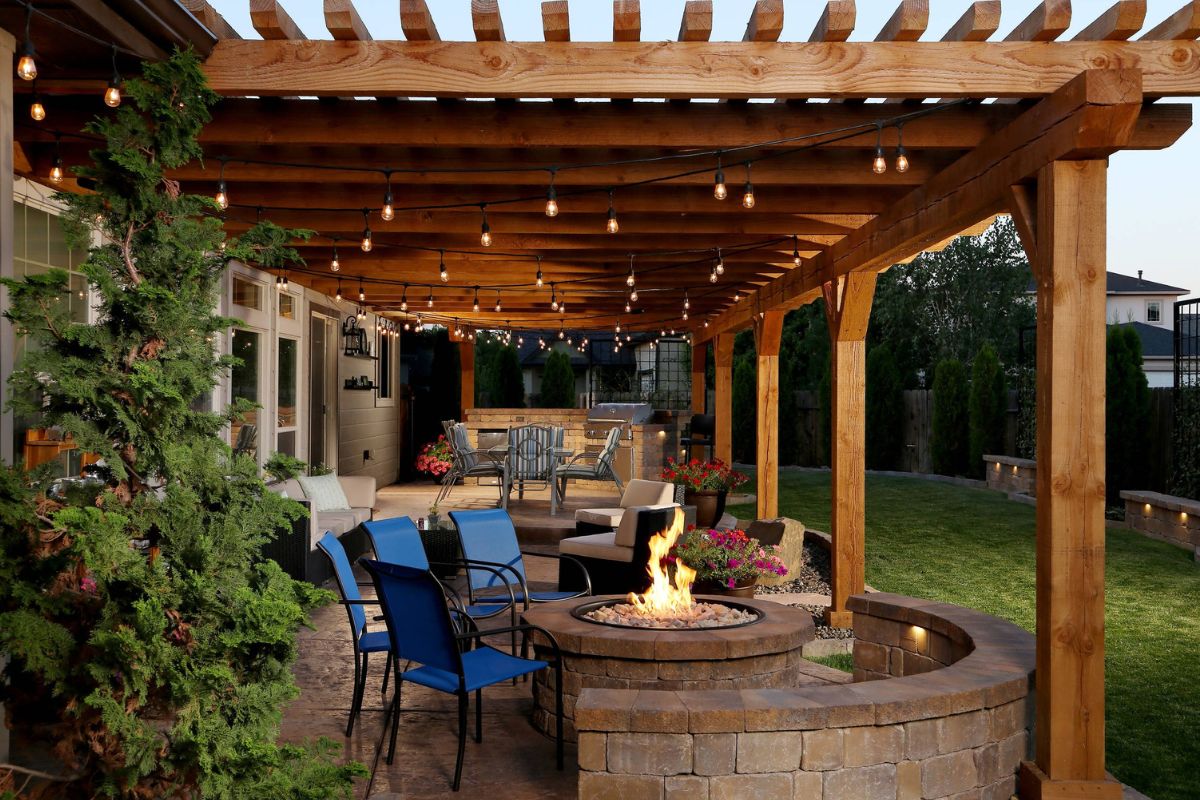
1. Exterior Lighting
Enhance the ambiance of your pergola by incorporating exterior lighting elements. Consider string lights, lanterns, or wall-mounted fixtures to create a warm and inviting atmosphere during evening gatherings or quiet nights spent under the stars. Solar-powered lighting options offer eco-friendly illumination without the need for electrical wiring.
2. Climbing Vines and Greenery
Add a touch of natural beauty to your pergola by introducing climbing vines or potted plants. Wisteria, jasmine, or climbing roses can be trained to ascend the pergola’s vertical posts and intertwine with the framework, creating a lush and picturesque canopy. Potted plants and hanging baskets can also infuse the space with color and vitality.
3. Comfortable Furnishings
Furnish your pergola with comfortable seating options such as weather-resistant chairs, benches, or a cozy outdoor sofa. Consider adding cushions, throw pillows, and outdoor rugs to create an inviting and comfortable seating area. A strategically placed outdoor dining set can transform the pergola into an alfresco dining retreat for memorable meals with family and friends.
Read more: How To Build A Pitched Roof Pergola
4. Retractable Shades or Curtains
For added versatility and sun protection, consider installing retractable shades or curtains that can be drawn to provide shade during particularly sunny days or draped for a touch of privacy. These functional additions offer flexibility in controlling sunlight and creating a cozy, intimate atmosphere within the pergola.
5. Personalized Decor and Accents
Add a personalized touch to your pergola with decorative accents such as outdoor artwork, wind chimes, or hanging planters. Consider incorporating a focal point, such as a decorative fire pit or a water feature, to create a captivating and inviting space that reflects your unique style and personality.
6. Regular Maintenance and Care
Ensure the longevity and pristine appearance of your lean-to pergola by establishing a routine maintenance schedule. Regularly inspect the structure for signs of wear, clean the surfaces as needed, and address any maintenance requirements for the roofing materials and decorative elements. This proactive approach will preserve the beauty and functionality of your pergola for years to come.
By incorporating these finishing touches, you’ll transform your lean-to pergola into a captivating and inviting outdoor sanctuary, ready to enrich your lifestyle and provide a cherished space for relaxation, socializing, and enjoying the beauty of the outdoors.
Conclusion
Congratulations on completing the construction of your lean-to pergola – a stunning addition to your outdoor space that promises years of enjoyment and relaxation. Throughout this rewarding journey, you’ve transformed a vision into a tangible structure that not only enhances the aesthetic appeal of your backyard but also elevates its functionality as a versatile and inviting retreat.
By meticulously planning and preparing, selecting the ideal location, gathering the necessary materials, and wielding essential tools, you’ve brought your vision to life with precision and care. The process of building and installing the pergola’s framework and roof has been a testament to your dedication and craftsmanship, resulting in a sturdy and visually captivating structure that harmonizes with your outdoor environment.
As you add the finishing touches – from ambient lighting and lush greenery to comfortable furnishings and personalized decor – your lean-to pergola becomes a personalized haven, ready to host memorable gatherings, quiet moments of solitude, and everything in between. The thoughtful integration of these details infuses the space with warmth, charm, and a reflection of your unique style and preferences.
Moving forward, regular maintenance and care will ensure that your pergola remains a cherished feature of your outdoor living space, standing the test of time and weathering the seasons with grace. By tending to its upkeep, you’ll continue to enjoy the beauty, comfort, and functionality that your lean-to pergola offers for years to come.
As you step back and admire the fruits of your labor, take pride in the creation of a space that beckons you to unwind, entertain, and savor the simple pleasures of outdoor living. Your lean-to pergola stands as a testament to your creativity, craftsmanship, and the joy of transforming a vision into a beloved reality.
So, raise a toast to your new outdoor sanctuary, and may it be a source of countless cherished moments, laughter, and tranquility in the embrace of nature’s beauty.
Frequently Asked Questions about How To Build A Lean-To Pergola
Was this page helpful?
At Storables.com, we guarantee accurate and reliable information. Our content, validated by Expert Board Contributors, is crafted following stringent Editorial Policies. We're committed to providing you with well-researched, expert-backed insights for all your informational needs.

0 thoughts on “How To Build A Lean-To Pergola”