Home>Gardening & Outdoor>Outdoor Structures>How To Build A Freestanding Pergola
Outdoor Structures
How To Build A Freestanding Pergola
Modified: October 28, 2024
Learn how to build a sturdy and stylish freestanding pergola for your outdoor space with our step-by-step guide. Enhance your outdoor living area with this DIY project. Ideal for creating a comfortable and inviting atmosphere.
(Many of the links in this article redirect to a specific reviewed product. Your purchase of these products through affiliate links helps to generate commission for Storables.com, at no extra cost. Learn more)
Introduction
Welcome to the world of outdoor living! Building a freestanding pergola is an exciting and rewarding project that can transform your backyard into a charming and functional space. Whether you envision it as a cozy retreat for relaxation, a stylish entertainment area, or a picturesque garden feature, a well-crafted pergola adds beauty and value to your property.
In this comprehensive guide, we will walk you through the process of creating your own freestanding pergola. From planning and designing to selecting materials, constructing the frame, and adding the finishing touches, we will cover each step in detail. By the end of this journey, you will have the knowledge and confidence to embark on this fulfilling DIY endeavor.
So, roll up your sleeves, gather your tools, and let’s dive into the world of pergola construction. Whether you’re a seasoned DIY enthusiast or a novice looking to expand your skills, this guide is designed to equip you with the essential know-how to build a stunning freestanding pergola that will be the envy of your neighborhood.
Key Takeaways:
- Planning and designing your pergola is crucial for creating a structure that meets your needs and harmonizes with your outdoor space. Consider style, local regulations, and layout to ensure a successful project.
- Choosing the right location and materials, along with using the correct tools and equipment, are essential for building a sturdy and visually appealing freestanding pergola. Pay attention to foundation, frame, roof, and finishing touches for a complete outdoor sanctuary.
Read more: How To Build A Freestanding Divider Wall
Planning and Designing Your Pergola
Before picking up a hammer or saw, it’s crucial to invest time in thoughtful planning and meticulous design. This initial phase sets the foundation for a successful pergola project and ensures that the end result aligns with your vision.
Assess Your Needs: Start by determining how you intend to use the pergola. Will it serve as a dining area, a lounging space, or a shelter for your outdoor spa? Understanding its primary function will guide the dimensions, layout, and features that best suit your requirements.
Choose a Style: Pergolas come in various styles, from classic and traditional to modern and minimalist. Consider the architectural design of your home and the overall aesthetic you wish to achieve in your outdoor space. Whether you prefer a rustic timber structure or a sleek aluminum framework, the style should harmonize with your existing landscape and complement your personal taste.
Sketch the Layout: With your needs and style in mind, sketch a rough layout of your proposed pergola. Determine its size, shape, and position in relation to your house and other outdoor elements. This visual representation will help you assess the flow and functionality of the structure within your yard.
Check Local Regulations: Before finalizing your design, familiarize yourself with any local building codes or regulations that may apply to outdoor structures. Some areas have specific guidelines regarding height, setbacks, and permits for constructing pergolas. Ensure compliance with these regulations to avoid potential issues in the future.
By dedicating time to the planning and design phase, you lay the groundwork for a pergola that not only meets your practical needs but also harmonizes with your outdoor environment. With a clear vision and well-defined parameters, you are ready to move on to the next steps of bringing your freestanding pergola to life.
Choosing the Right Location
The location of your freestanding pergola plays a pivotal role in its functionality and visual impact. Selecting the perfect spot within your outdoor space requires careful consideration of several factors to ensure an optimal and harmonious placement.
Assess Sun and Shade: Observe the patterns of sunlight and shade in your yard throughout the day. Depending on your preference, you may want to position the pergola to either maximize or minimize sun exposure. Consider how the orientation of the structure will affect the comfort and usability of the space, especially during peak hours of sunlight.
Enhance Views and Privacy: Take advantage of scenic vistas or create secluded retreats by strategically placing the pergola to frame desirable views or screen less appealing aspects of your surroundings. Whether it’s overlooking a lush garden, a serene pond, or a distant horizon, the location should capitalize on the natural beauty of your outdoor environment.
Consider Proximity to the House: Evaluate the proximity of the pergola to your home, taking into account factors such as convenient access, visual continuity with the architecture, and seamless integration with existing outdoor living areas. A well-positioned pergola can extend the living space from your house into the outdoors, creating a cohesive and inviting transition.
Examine Ground Conditions: Survey the ground where you plan to install the pergola. Ensure that the area is level and free of any underground utilities or obstacles that could impede the construction process. Additionally, consider the type of foundation required based on the soil composition and drainage in the chosen location.
Factor in Landscaping and Hardscaping: Integrate the pergola harmoniously with your landscaping and hardscaping elements. Whether it’s nestled amidst lush foliage, adjacent to a water feature, or integrated with paved pathways, the location should complement and enhance the overall outdoor design scheme.
By carefully evaluating these considerations, you can identify the optimal location for your freestanding pergola, ensuring that it not only serves its intended purpose but also becomes a captivating focal point within your outdoor sanctuary.
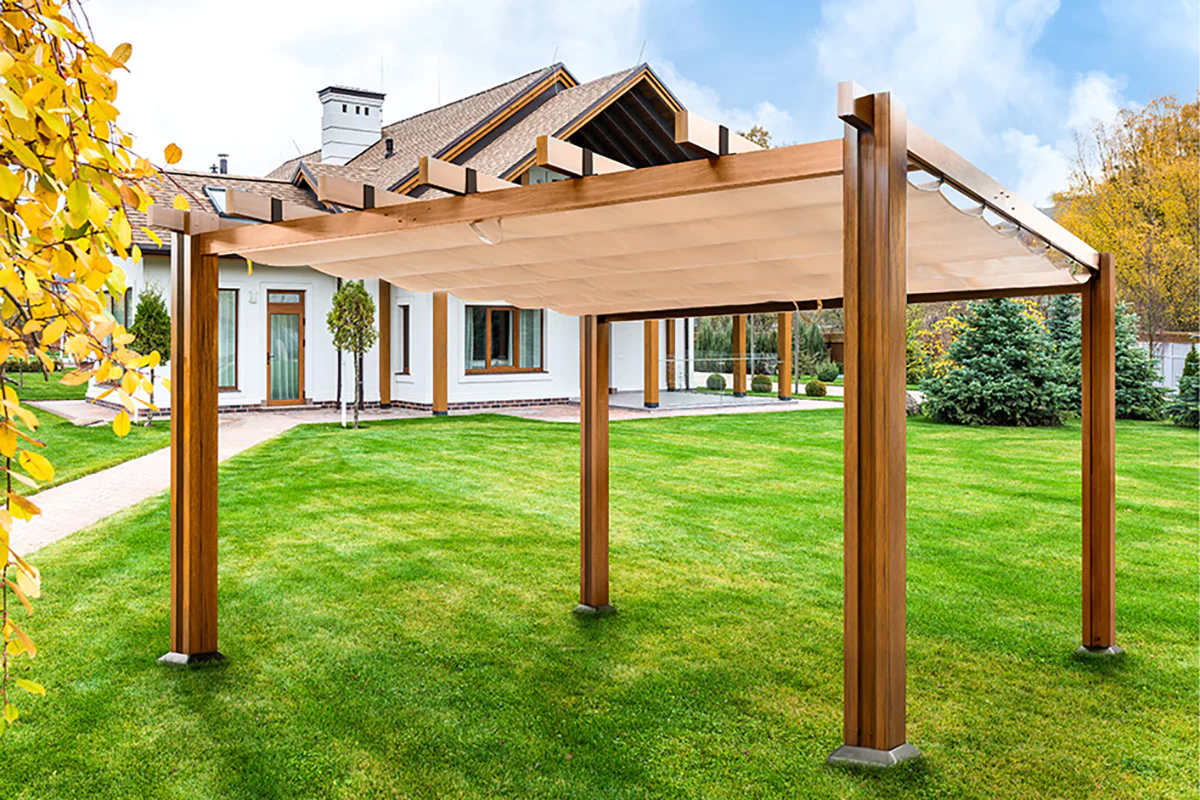
Selecting the Materials
Choosing the right materials for your freestanding pergola is a crucial decision that influences the structure’s durability, aesthetics, and maintenance requirements. From natural wood to modern composites, a wide array of options is available, each with its unique characteristics and considerations.
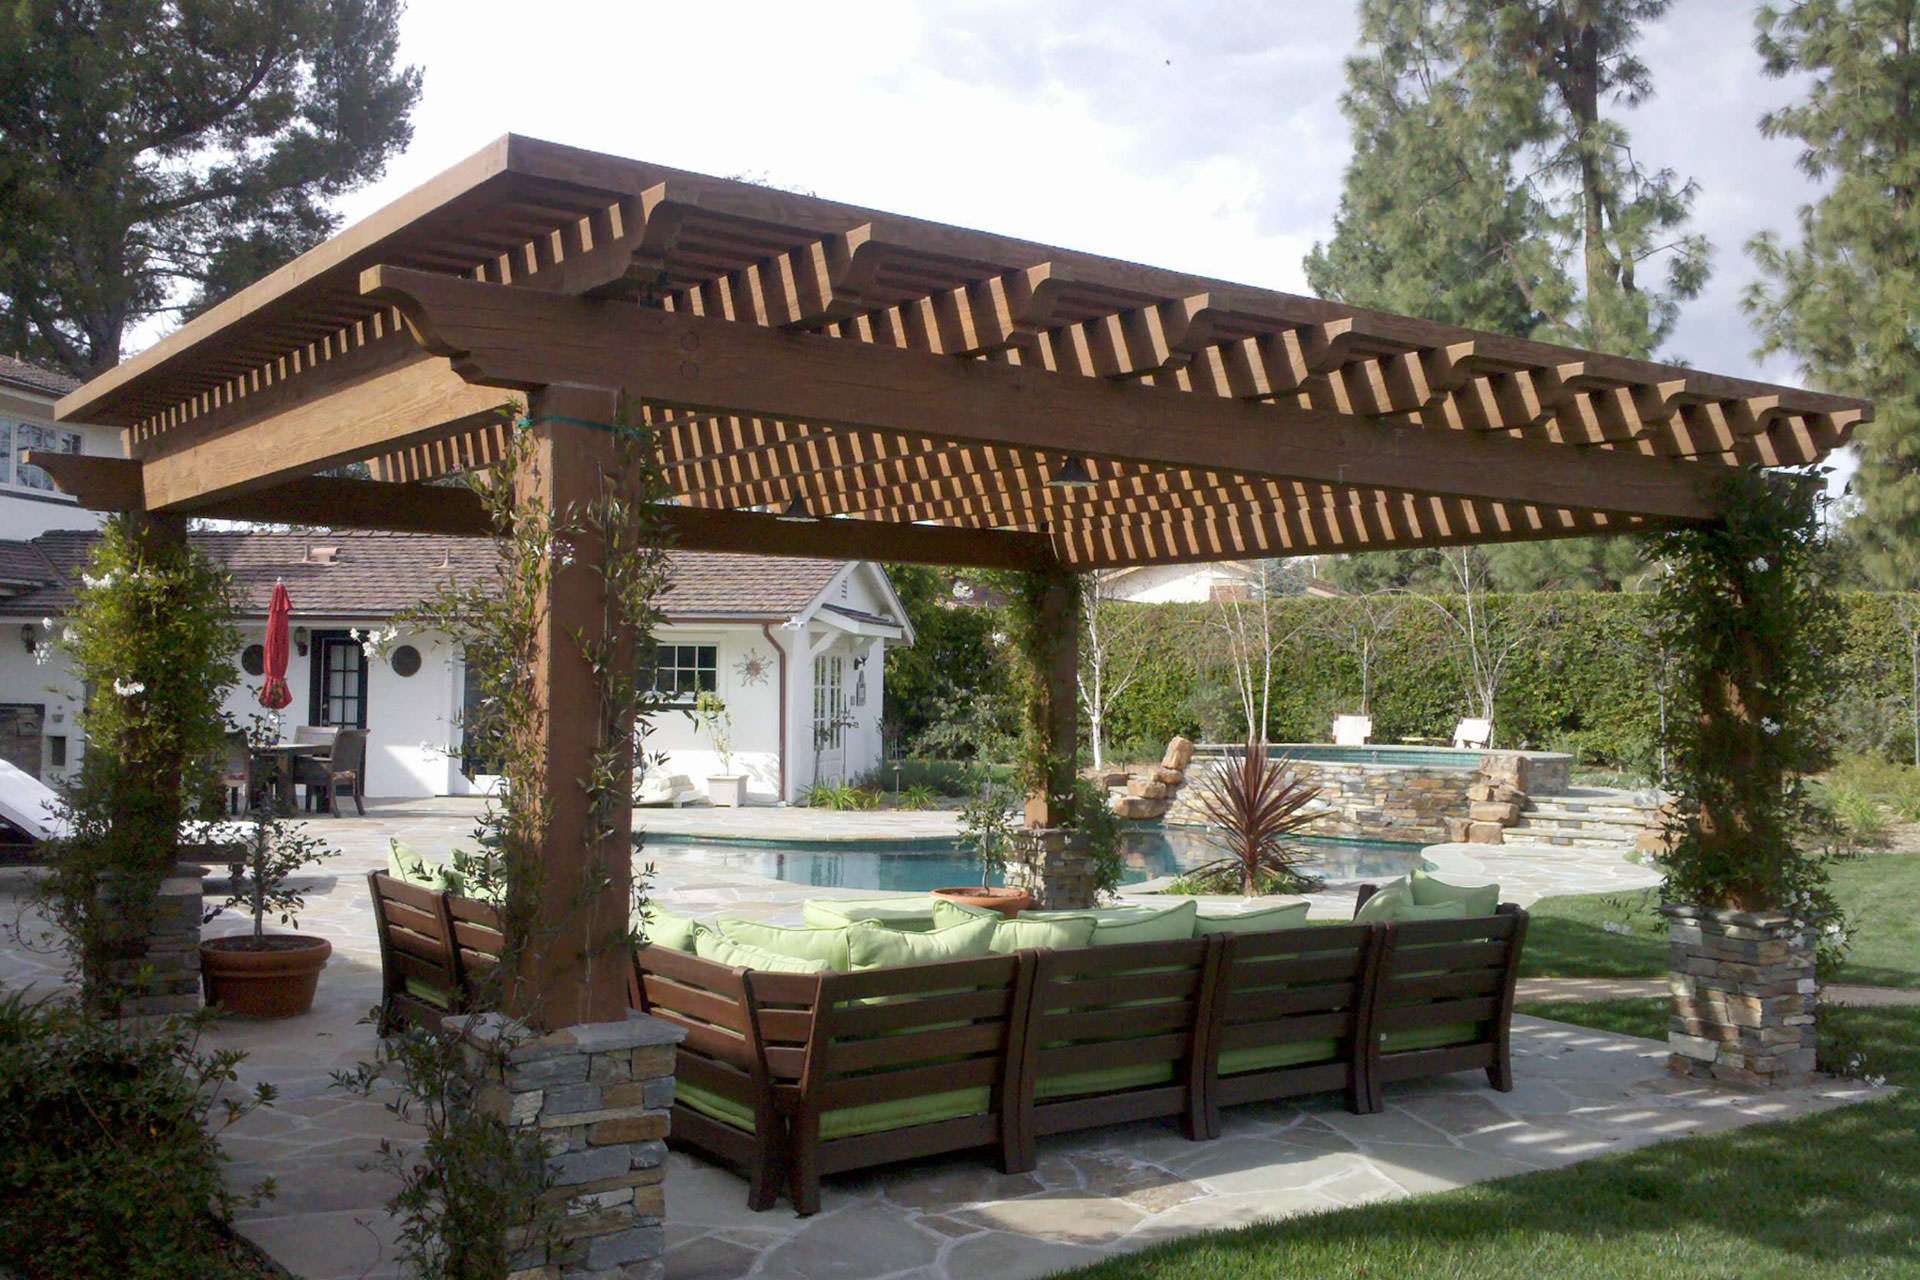
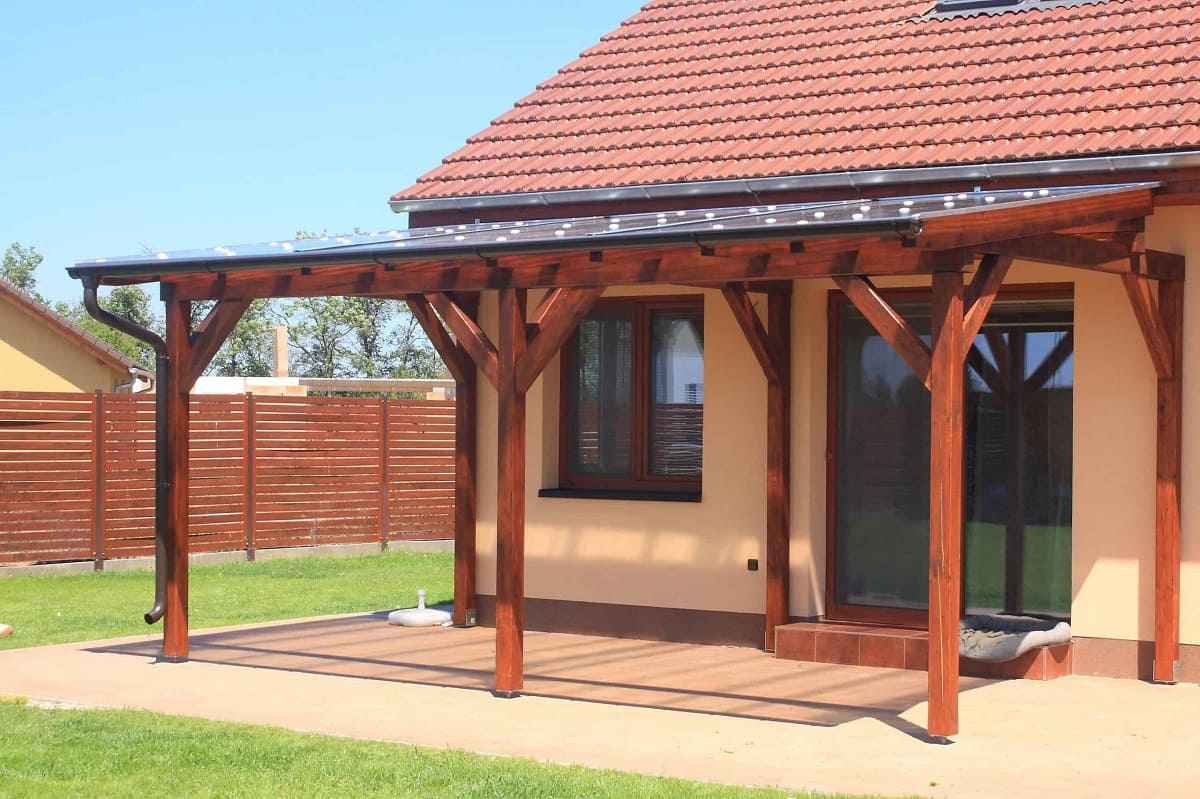
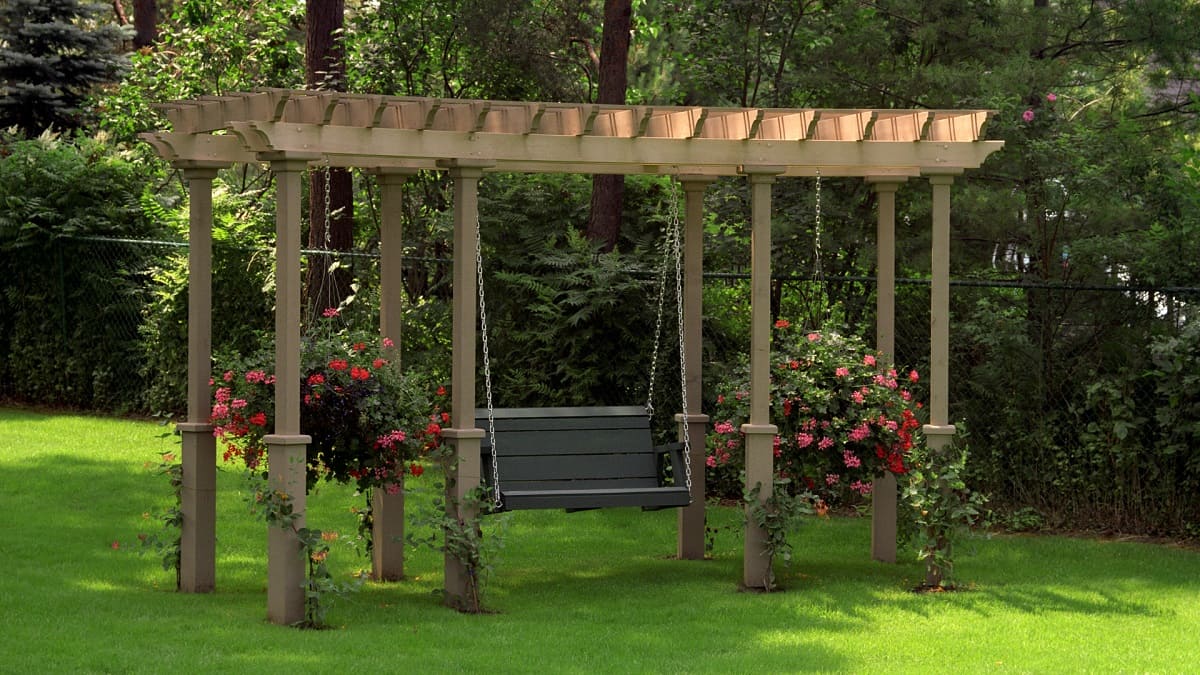
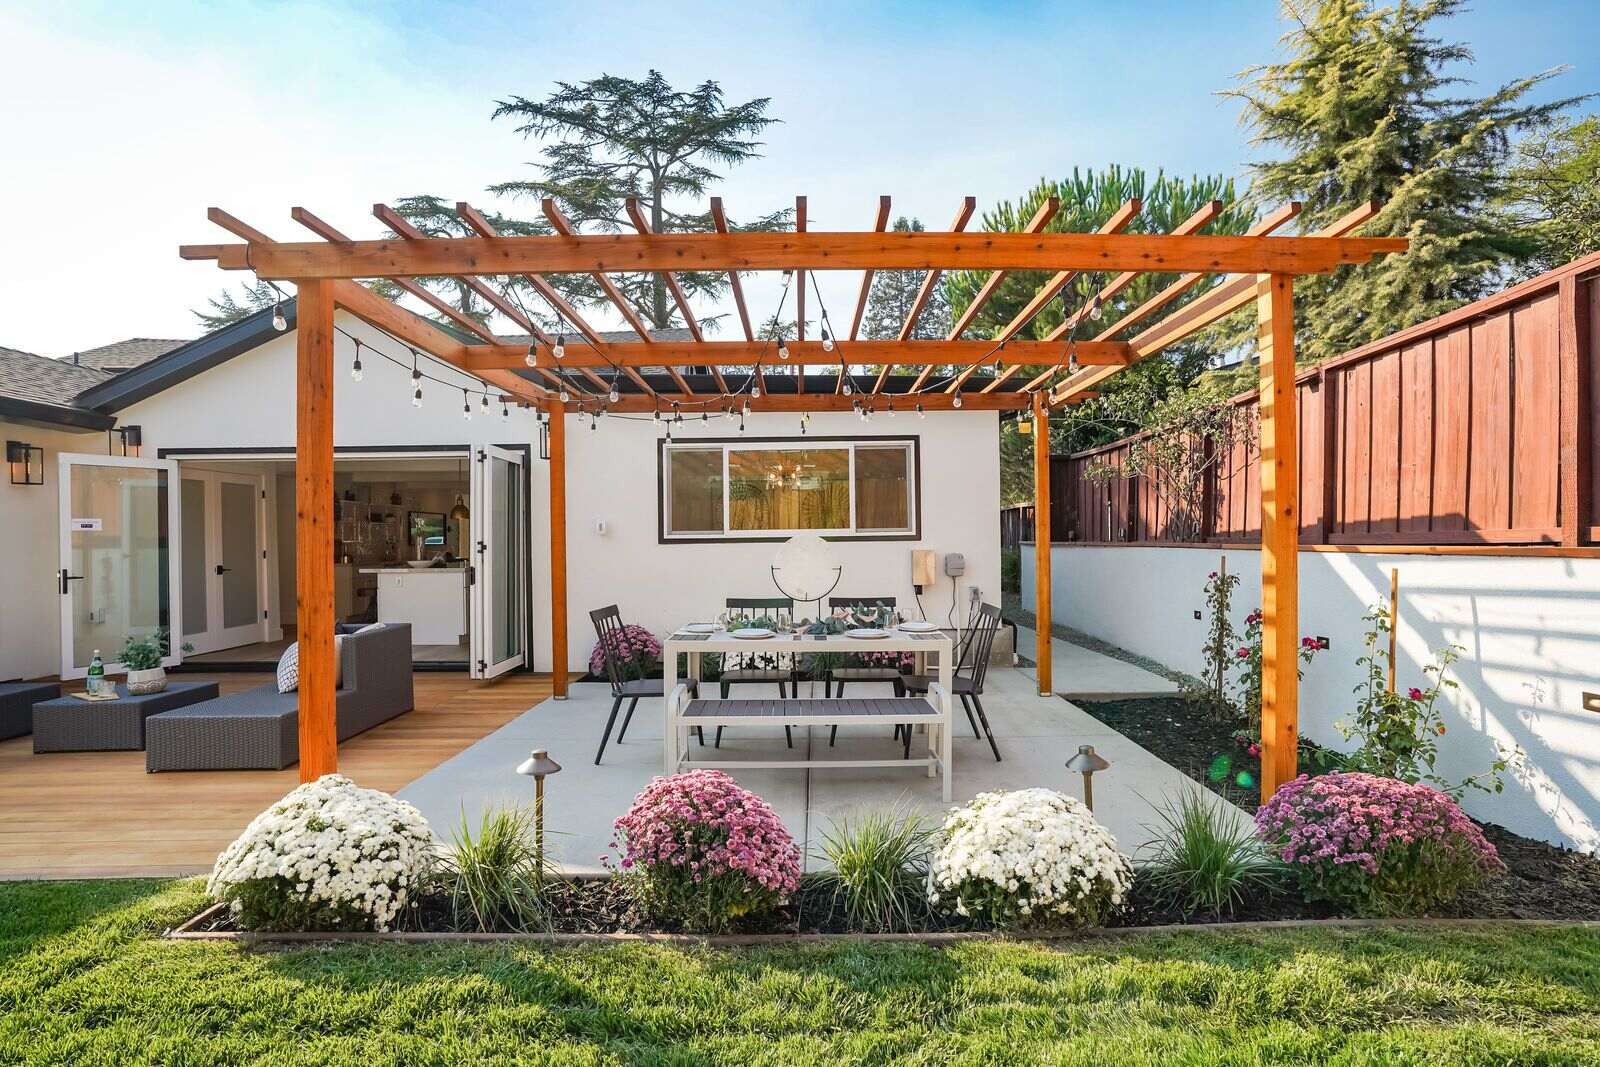
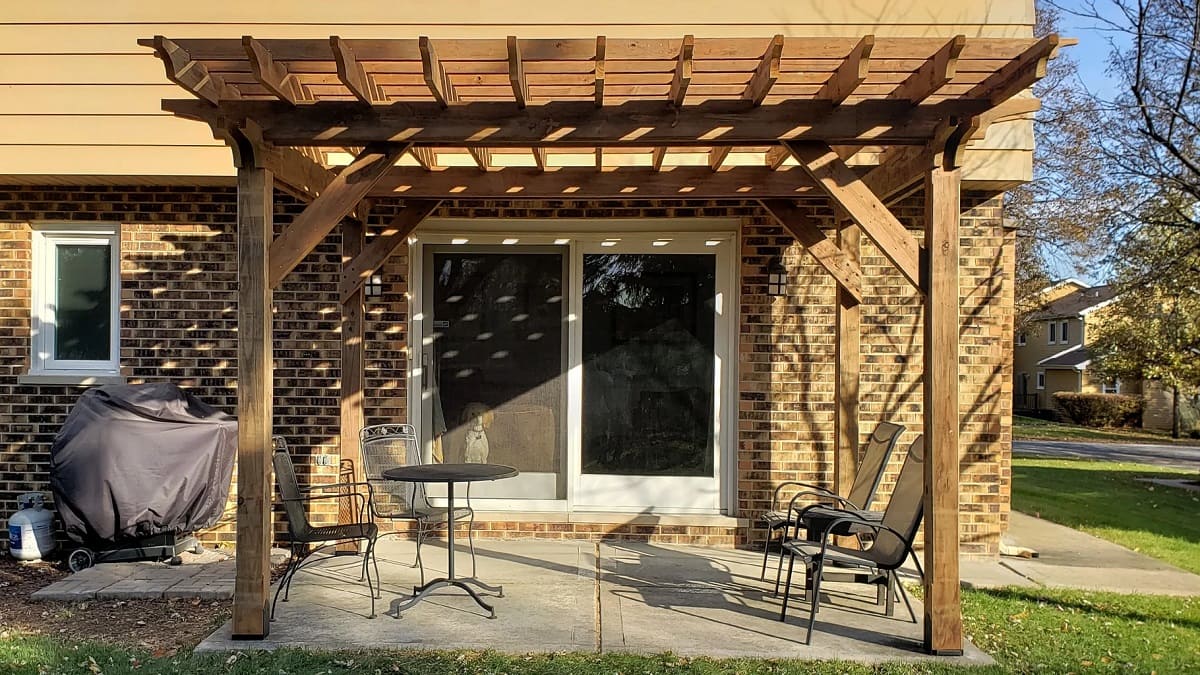
Wood: A classic and timeless choice, wood lends a warm, rustic charm to pergolas. Cedar, redwood, and pressure-treated pine are popular options known for their natural resistance to decay and insects. Each type of wood offers distinct grain patterns and color variations, allowing you to select a material that complements your outdoor environment.
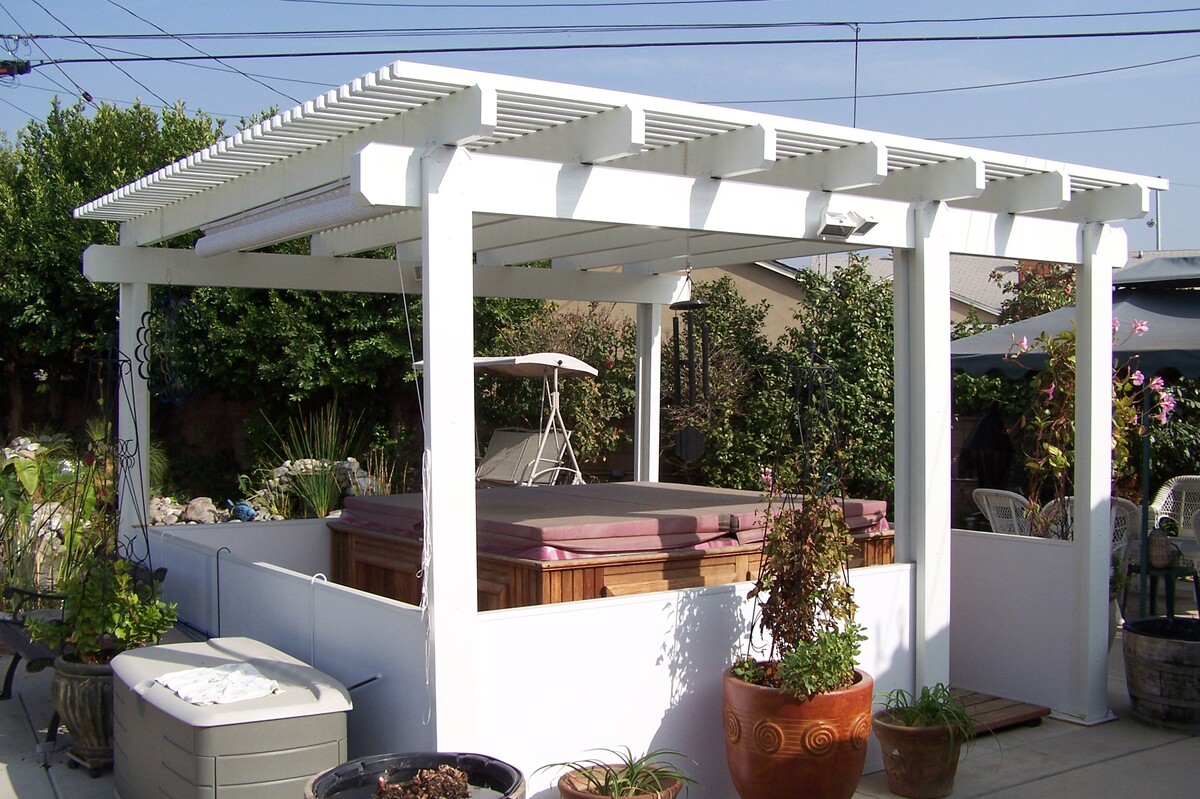
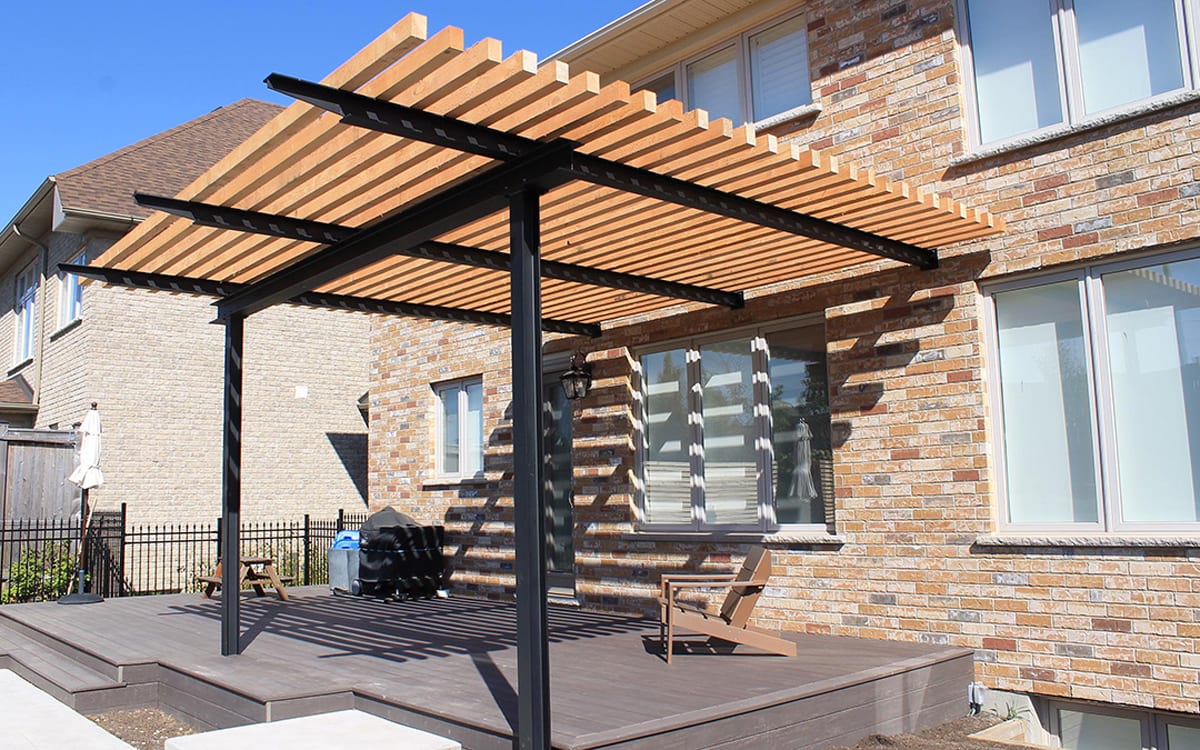
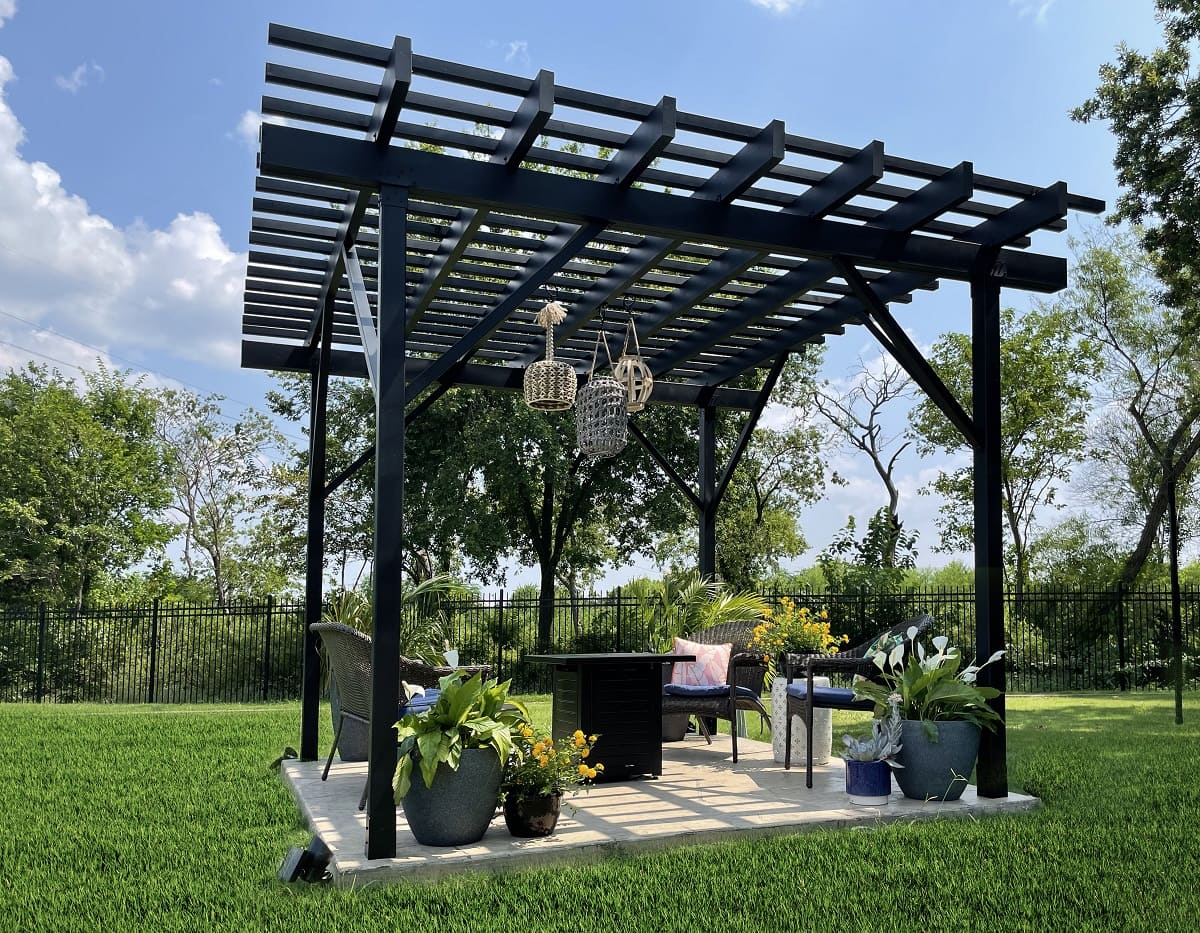
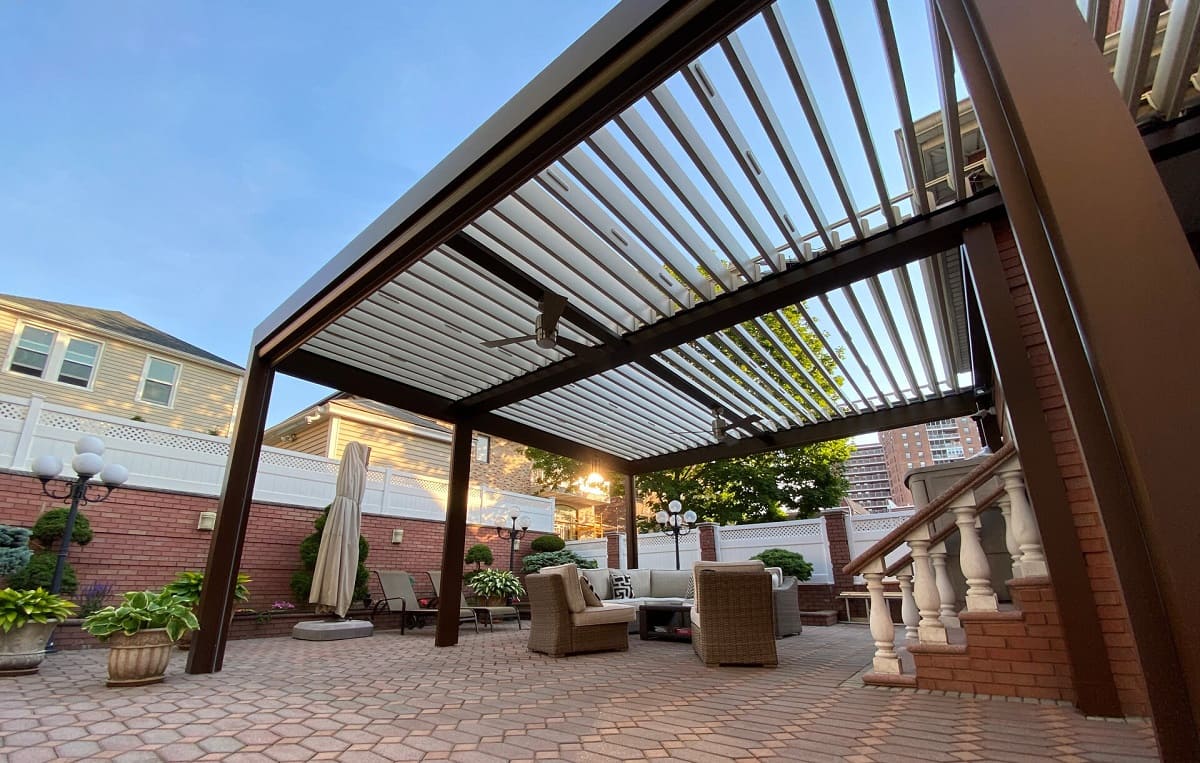
Metal: For a contemporary and low-maintenance alternative, metal pergolas, such as those crafted from aluminum or steel, provide durability and sleek aesthetics. These materials are resistant to rot, pests, and weathering, making them ideal for long-term outdoor use. Additionally, metal pergolas offer design flexibility and can be customized to achieve modern or industrial-inspired looks.
Vinyl and PVC: Engineered for exceptional durability and minimal upkeep, vinyl and PVC pergolas offer the appeal of wood without the need for regular staining or sealing. These materials are moisture-resistant, fade-resistant, and impervious to rot, making them an attractive choice for homeowners seeking a hassle-free outdoor structure.
Composite Materials: Blending the benefits of wood and plastic, composite materials offer the natural appearance of wood with enhanced durability and resistance to decay. Composite pergolas are available in a range of finishes and colors, providing versatility and longevity for outdoor applications.
Fabric Canopies: In addition to solid materials, fabric canopies are a popular option for creating shaded areas within pergolas. These canopies, often made from durable outdoor fabrics, provide flexible shade solutions and add a soft, inviting ambiance to the structure.
When selecting materials for your pergola, consider factors such as climate, maintenance preferences, architectural style, and budget. By choosing the right materials, you can create a freestanding pergola that not only enhances your outdoor space but also withstands the test of time with enduring beauty and functionality.
Tools and Equipment Needed
Embarking on the construction of a freestanding pergola requires a set of essential tools and equipment to ensure precision, efficiency, and safety throughout the building process. From foundational groundwork to final assembly, having the right tools at your disposal is fundamental to the successful realization of your pergola project.
Measuring and Layout Tools: Accurate measurements are paramount in constructing a well-proportioned and symmetrical pergola. Essential tools in this category include a tape measure, carpenter’s square, and chalk line for marking layout points and ensuring straight lines and right angles.
Cutting Tools: A combination of hand and power cutting tools is necessary for shaping and trimming materials. These may include a circular saw, miter saw, handsaw, and jigsaw, depending on the materials used and the complexity of the design.
Drilling and Fastening Tools: To secure components and joinery, a cordless drill with a set of drill bits and screwdriver attachments is indispensable. Additionally, a hammer, nails, screws, and a nail gun or brad nailer may be required for fastening various elements of the pergola.
Leveling and Alignment Tools: Achieving a level and plumb structure is vital for the stability and visual appeal of the pergola. A spirit level, plumb bob, and string line aid in ensuring that posts, beams, and rafters are correctly aligned and positioned during assembly.
Digging and Excavation Tools: If your pergola requires a concrete foundation, tools such as a post hole digger, shovel, and wheelbarrow will be essential for excavating and mixing concrete to create sturdy footings for the structure.
Personal Protective Equipment (PPE): Safety should always be a priority when working with tools and construction materials. PPE including safety glasses, hearing protection, work gloves, and sturdy footwear are essential for safeguarding against potential hazards on the job site.
By assembling a comprehensive array of tools and equipment, you can streamline the construction process and ensure that each phase of building your freestanding pergola is executed with precision and efficiency. With the right tools in hand, you are well-equipped to turn your pergola vision into a tangible and enduring outdoor masterpiece.
When building a freestanding pergola, make sure to use sturdy materials like pressure-treated wood or metal to ensure stability and durability. Properly anchor the posts into the ground to prevent shifting or leaning over time.
Read more: How To Build A Freestanding Carport
Building the Foundation
The foundation of a freestanding pergola is crucial for providing stability and longevity to the structure. Depending on the local climate, soil conditions, and the size of the pergola, different foundation options may be suitable. Whether you opt for concrete footings, precast pavers, or adjustable post bases, the foundation serves as the anchor that supports the entire framework of your pergola.
Concrete Footings: For larger or more permanent pergolas, concrete footings are often the preferred choice. This method involves digging post holes, pouring concrete into the excavated areas, and setting post anchors or embedded post bases in the wet concrete. This creates a solid and durable foundation that resists settling and uplift forces, ensuring the structural integrity of the pergola.
Precast Pavers or Blocks: An alternative to traditional concrete footings, precast pavers or blocks can be used to create a stable base for the pergola posts. These interlocking pavers or blocks are arranged on a level surface, providing a convenient and cost-effective foundation solution, particularly for smaller pergolas or temporary installations.
Adjustable Post Bases: Designed for ease of installation and flexibility, adjustable post bases allow for precise post placement and adjustment. These bases are typically anchored to an existing concrete slab or footing, providing a secure connection point for the pergola posts while allowing for minor adjustments to achieve optimal alignment and leveling.
Installation Considerations: When building the foundation, it’s essential to ensure that the footings or support bases are level, plumb, and accurately spaced according to the layout of the pergola. Proper alignment and spacing lay the groundwork for a structurally sound and visually appealing framework.
Local Regulations and Codes: Before proceeding with the foundation construction, verify that your chosen method complies with local building codes and regulations. Certain areas may have specific requirements regarding footing depth, size, and reinforcement, so it’s essential to adhere to these guidelines to ensure a safe and compliant installation.
By establishing a solid and well-executed foundation, you create a reliable base for the construction of your freestanding pergola, setting the stage for the subsequent phases of assembling the frame, installing the roof, and adding the finishing touches that will bring your outdoor oasis to life.
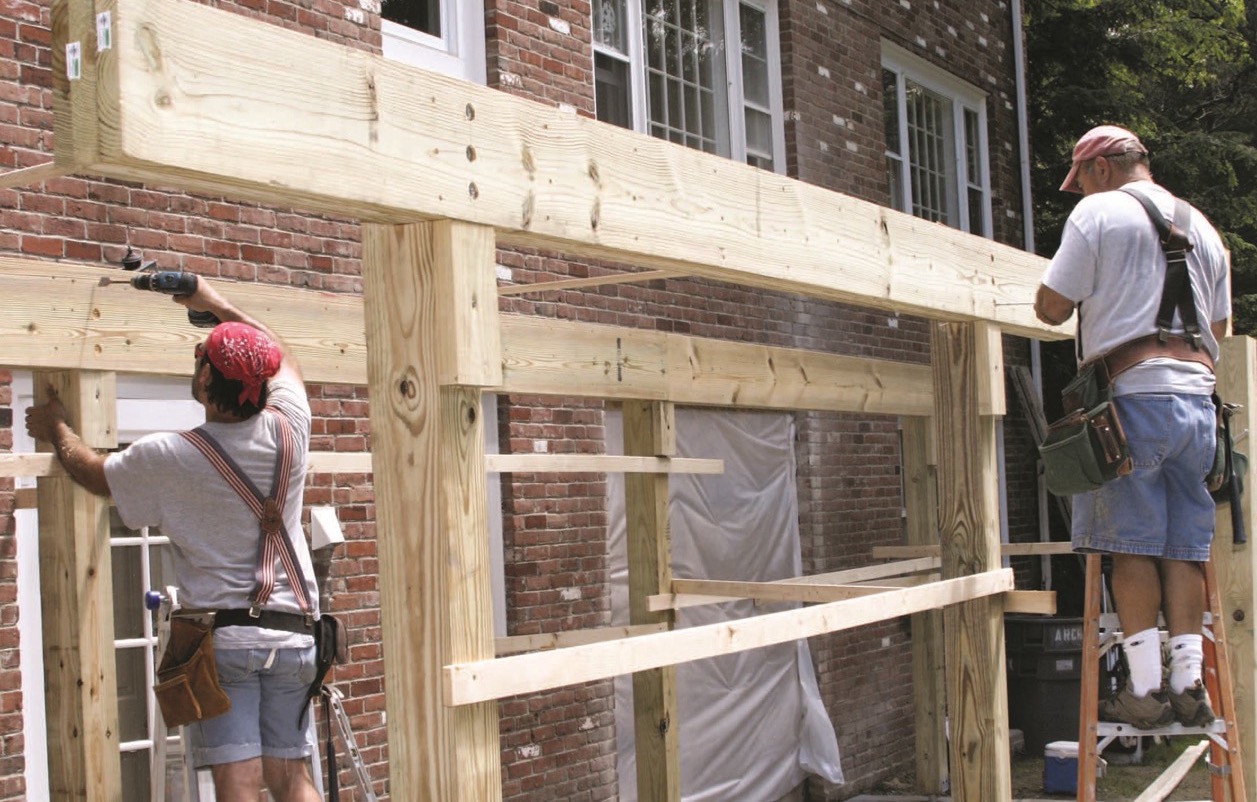
Constructing the Pergola Frame
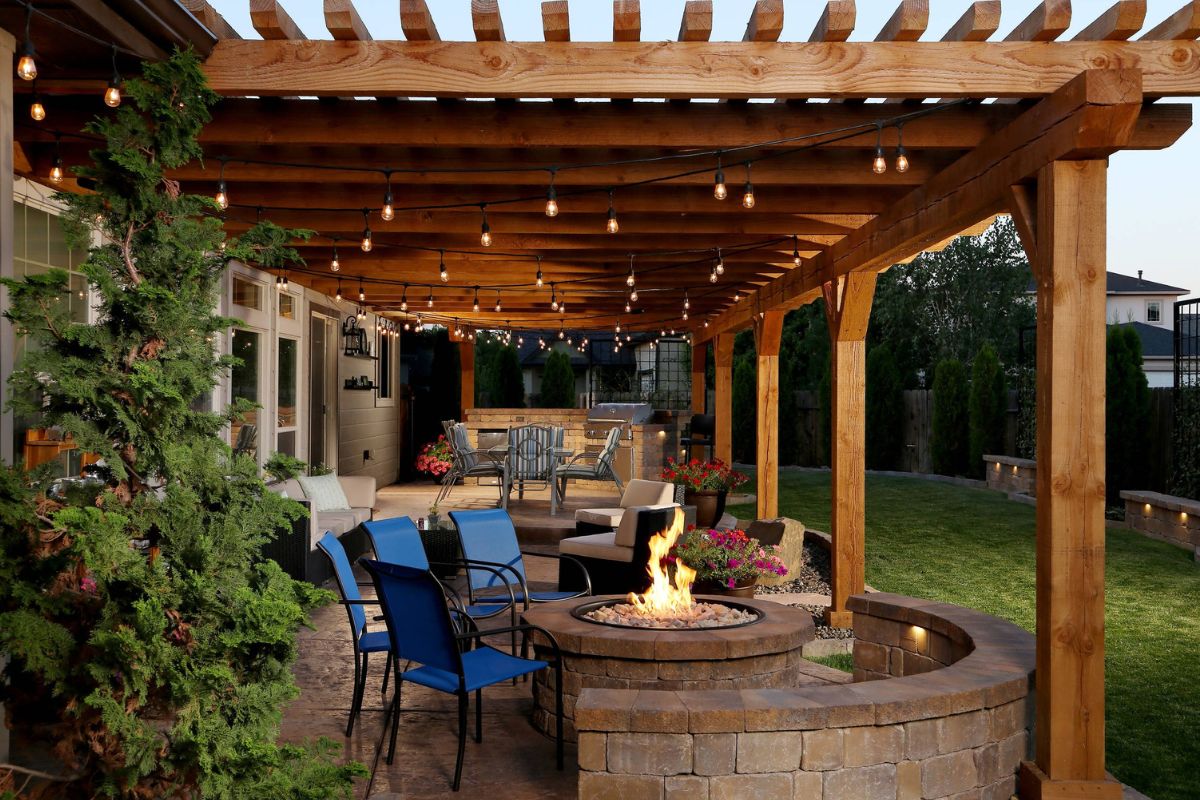
With the foundation in place, it’s time to embark on the exciting phase of constructing the frame of your freestanding pergola. This stage involves assembling the posts, beams, and rafters to form the skeletal framework that defines the structure’s shape and character. Whether you’re working with wood, metal, or composite materials, precision and attention to detail are essential for ensuring a sturdy and visually appealing frame.
Setting the Posts: Begin by positioning and securing the pergola posts in the designated locations. Whether anchored in concrete footings, attached to precast pavers, or affixed to adjustable post bases, ensure that the posts are plumb, level, and adequately spaced according to the layout of the pergola.
Attaching the Beams: Once the posts are in place, attach the horizontal beams to the tops of the posts, creating the primary framework of the pergola. Depending on the design, these beams may be attached with hardware such as bolts, screws, or specialized connectors, ensuring a secure and stable connection between the posts and beams.
Installing the Rafters: With the beams in position, it’s time to install the rafters that span the width of the pergola. These rafters are typically attached perpendicular to the beams, creating the lattice-like roof structure that provides partial shade and visual interest. Careful measurement and spacing of the rafters are essential to achieving a balanced and aesthetically pleasing arrangement.
Considerations for Joinery and Hardware: Depending on the materials used and the design complexity, various joinery techniques and hardware may be employed to ensure the structural integrity of the frame. This may include traditional mortise and tenon joints for wooden pergolas, concealed fasteners for metal structures, or specialized connectors for composite materials.
Adhering to Design Specifications: Throughout the construction process, refer to your original design plans and layout sketches to ensure that the frame aligns with your intended vision. Attention to detail in terms of proportions, spacing, and symmetry is vital for creating a well-crafted and visually appealing pergola frame.
As the frame takes shape, you’ll witness the transformation of your outdoor space, as the pergola begins to define the ambiance and functionality of the area. With the frame in place, the next steps of installing the roof and adding finishing touches will bring your freestanding pergola one step closer to completion.
Installing the Roof
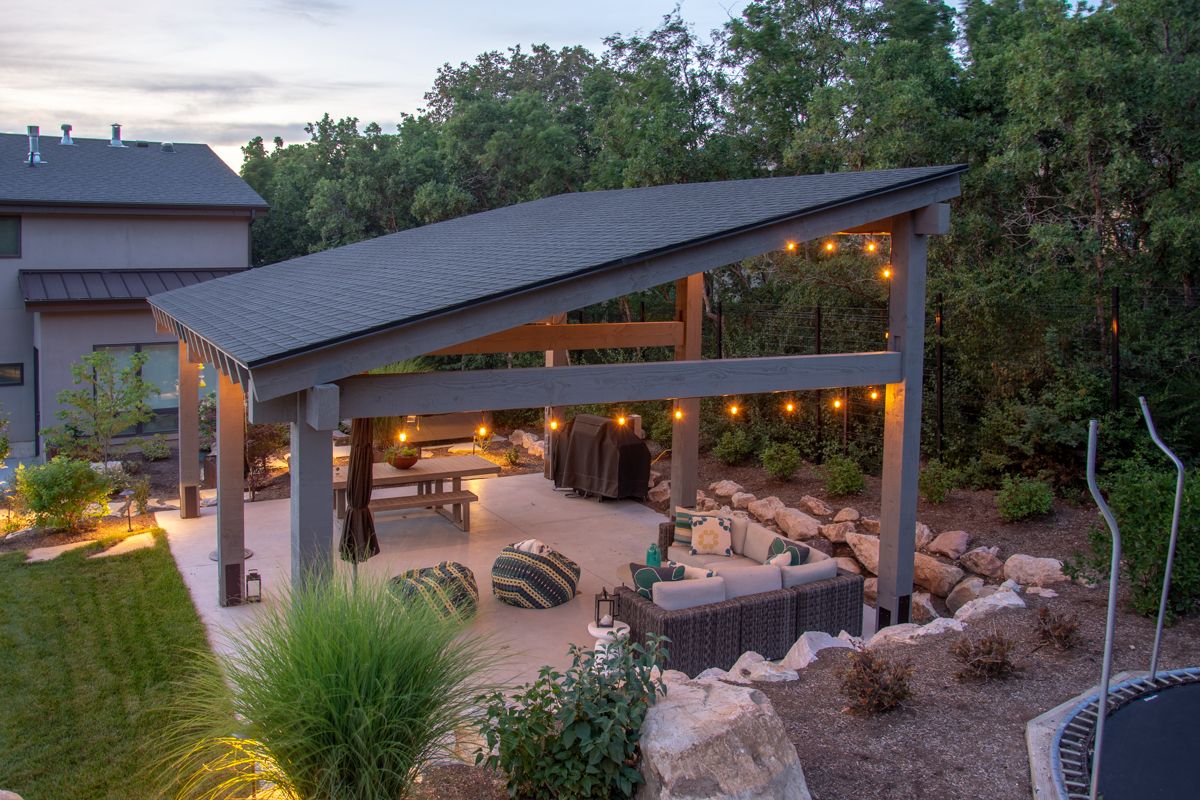
As the frame of your freestanding pergola stands proudly in your outdoor space, the next crucial step is to install the roof, which not only enhances the structure’s functionality but also adds a defining aesthetic element. The choice of roofing material and design significantly impacts the pergola’s character, providing shade, shelter, and visual appeal to the space below.
Traditional Roofing Materials: For a classic and timeless look, traditional roofing materials such as wooden lattice, bamboo, or thatch can be installed to create a natural, dappled shade effect. These materials infuse the pergola with a rustic and organic ambiance, blending seamlessly with the surrounding landscape.
Fabric Canopies and Shade Sails: Fabric canopies and shade sails offer a versatile and customizable roofing solution for pergolas. These canopies, available in a variety of colors and patterns, provide effective sun protection and can be easily adjusted or removed to accommodate changing weather conditions or seasonal preferences.
Polycarbonate or Acrylic Panels: Clear or tinted polycarbonate and acrylic panels are popular choices for modern pergola roofs, offering durability, light transmission, and UV protection. These translucent panels create a sheltered yet airy environment, allowing natural light to filter through while shielding against harsh sunlight and inclement weather.
Living Roof and Greenery: For a striking and eco-friendly roofing option, consider incorporating a living roof or greenery into your pergola design. By cultivating climbing plants, vines, or greenery atop the pergola structure, you can create a lush and verdant canopy that provides shade, natural insulation, and a captivating botanical display.
Considerations for Roof Installation: When installing the chosen roofing material, ensure that it is securely and evenly affixed to the pergola frame, providing adequate coverage and protection. Attention to proper tensioning, fastening, and weatherproofing is essential to ensure the longevity and performance of the roof in various conditions.
With the roof in place, your freestanding pergola takes on its final form, providing a shaded and inviting space for relaxation, dining, or socializing. The roof not only enhances the functionality of the pergola but also contributes to its visual allure, creating an enchanting outdoor retreat within your own backyard.
Adding Finishing Touches
As the construction of your freestanding pergola nears completion, it’s time to infuse the structure with personal touches and embellishments that elevate its charm and functionality. From decorative elements to practical accessories, these finishing touches add character, comfort, and versatility to your outdoor sanctuary, transforming it into a captivating and inviting space.
Decorative Accents: Enhance the visual appeal of your pergola with decorative accents such as carved finials, ornamental brackets, lattice screens, or intricate fretwork. These embellishments add a touch of elegance and individuality to the structure, creating a captivating focal point within your outdoor environment.
Lighting Solutions: Extend the usefulness of your pergola into the evening hours by incorporating lighting solutions. String lights, lanterns, sconces, or integrated LED fixtures can illuminate the space, creating a warm and inviting ambiance for nighttime gatherings or quiet relaxation under the stars.
Shade and Privacy Options: Enhance the comfort and versatility of your pergola with shade and privacy options. Install retractable awnings, curtains, or bamboo blinds to provide adjustable shade and create intimate enclosures within the pergola, offering flexibility for different weather conditions and desired levels of seclusion.
Furnishings and Accessories: Complete the pergola with comfortable and stylish furnishings, such as outdoor seating, dining sets, or lounge chairs. Add soft cushions, throw pillows, and outdoor rugs to create a cozy and inviting atmosphere, making the pergola a welcoming extension of your indoor living space.
Functional Additions: Consider incorporating functional elements such as built-in planters, storage benches, or outdoor kitchen features into your pergola design. These additions not only maximize the utility of the space but also contribute to its seamless integration with your outdoor lifestyle.
Personal Touches: Infuse the pergola with elements that reflect your personal style and interests. Whether it’s hanging potted plants, artful sculptures, or a cascading water feature, these personal touches impart a sense of individuality and make the pergola a true reflection of your tastes and passions.
By adding these finishing touches, you transform your freestanding pergola into a captivating and multifunctional outdoor haven, where you can unwind, entertain, and create cherished memories with family and friends. With attention to detail and thoughtful enhancements, your pergola becomes a cherished retreat that enriches your outdoor living experience.
Read more: How To Build Freestanding Stairs
Conclusion
Congratulations on completing the journey of building your freestanding pergola! From the initial envisioning and planning stages to the meticulous construction and thoughtful finishing touches, you have transformed your outdoor space into a captivating and functional retreat. As you step back and admire the pergola standing proudly in your yard, it’s evident that this structure has become a centerpiece of beauty and relaxation, enriching your outdoor lifestyle in countless ways.
A Personal Oasis: Your freestanding pergola is more than just an architectural feature; it’s a personal oasis that beckons you to unwind, socialize, and connect with nature. Whether it’s savoring a cup of coffee in the morning light, hosting alfresco dinners with loved ones, or simply finding solace in the tranquility of your garden, the pergola offers a versatile and enchanting space for a myriad of experiences.
A Testament to Craftsmanship: The construction of your pergola stands as a testament to your craftsmanship and dedication. From setting the foundation to assembling the frame and installing the roof, every step of the process reflects your commitment to creating a structure that is not only visually appealing but also sturdy, reliable, and enduring.
An Ever-Evolving Canvas: As you bask in the beauty of your pergola, remember that it is an ever-evolving canvas, ready to be adorned with seasonal blooms, artistic accents, and evolving design elements. Your pergola invites you to unleash your creativity and adapt it to your changing preferences, ensuring that it remains a dynamic and captivating feature of your outdoor environment.
A Gathering Place: Above all, your freestanding pergola is a gathering place that fosters connection, relaxation, and joy. It’s a space where laughter mingles with the rustling of leaves, where cherished memories are woven into the fabric of its design, and where the simple pleasures of outdoor living unfold in harmony with the natural world.
As you continue to enjoy the fruits of your labor, may your freestanding pergola serve as a source of inspiration, rejuvenation, and countless moments of bliss in the embrace of the great outdoors. Whether it’s a sunny afternoon, a starlit evening, or a gentle rain, may your pergola be a sanctuary that enriches your life and beckons you to savor the beauty of each passing season.
Frequently Asked Questions about How To Build A Freestanding Pergola
Was this page helpful?
At Storables.com, we guarantee accurate and reliable information. Our content, validated by Expert Board Contributors, is crafted following stringent Editorial Policies. We're committed to providing you with well-researched, expert-backed insights for all your informational needs.

0 thoughts on “How To Build A Freestanding Pergola”