Home>Gardening & Outdoor>Outdoor Structures>How To Build A Lean Tool Shed
Outdoor Structures
How To Build A Lean Tool Shed
Modified: August 27, 2024
Learn how to build a sturdy and practical lean tool shed for your outdoor space with our step-by-step guide. Perfect for storing garden tools and outdoor equipment.
(Many of the links in this article redirect to a specific reviewed product. Your purchase of these products through affiliate links helps to generate commission for Storables.com, at no extra cost. Learn more)
Introduction
Welcome to the world of outdoor DIY projects! Building a lean tool shed can be a rewarding and practical endeavor for anyone with a green thumb or a penchant for crafting. Whether you're a seasoned DIY enthusiast or a novice looking to embark on your first construction project, this guide will walk you through the process of creating a functional and aesthetically pleasing lean tool shed.
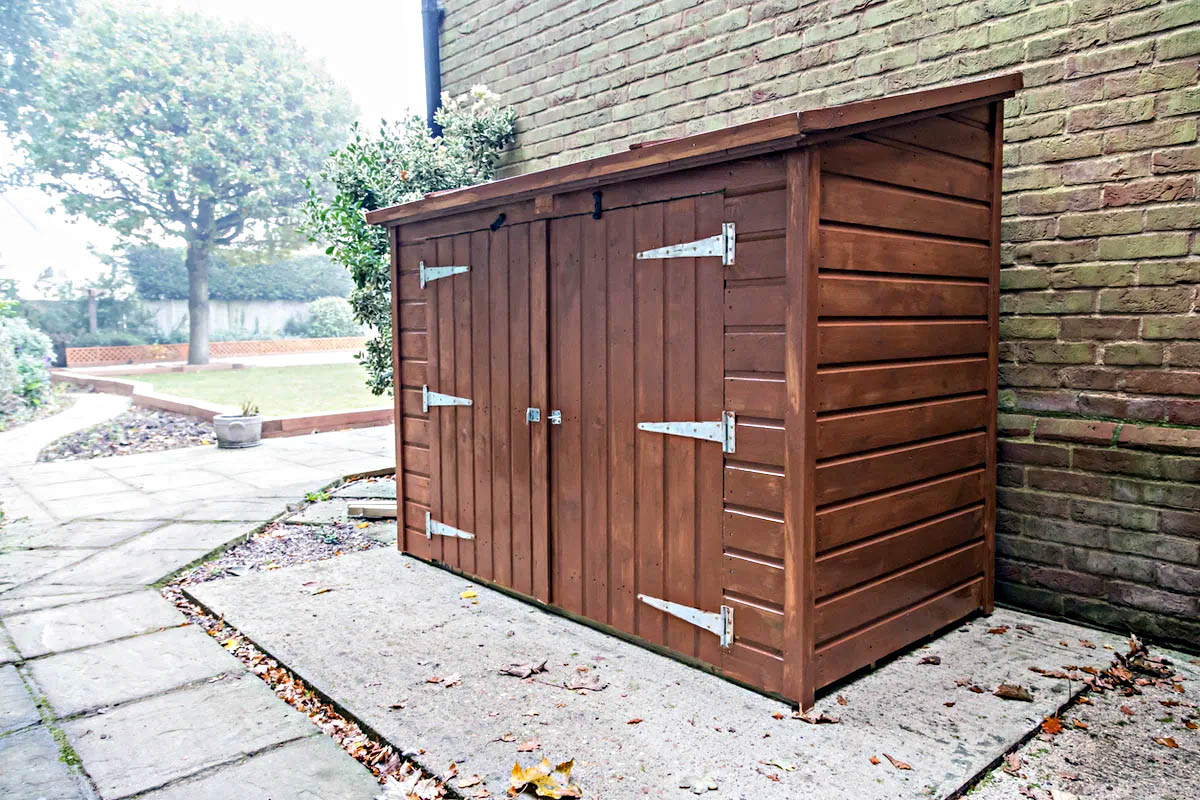
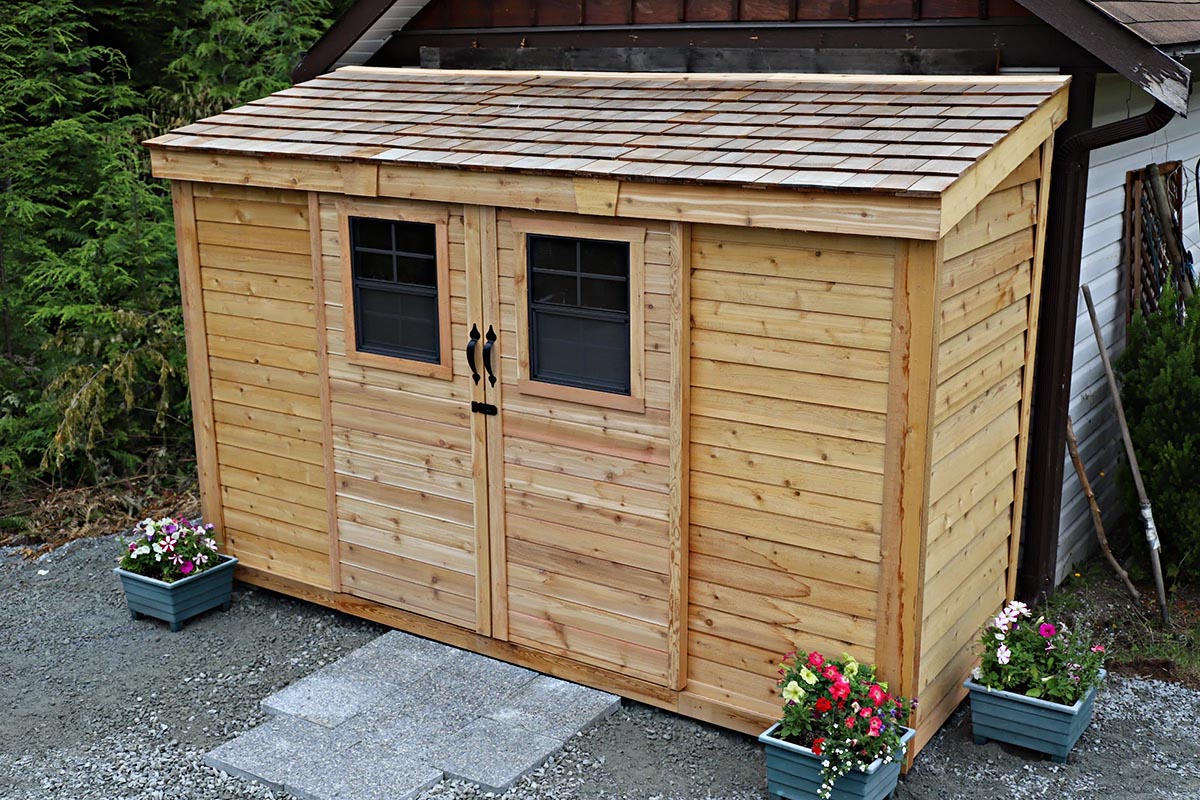
A lean tool shed, also known as a lean-to shed, is a simple and space-efficient outdoor structure that provides ample storage for gardening tools, equipment, and supplies. Its design allows it to be built against an existing structure, such as a house, fence, or garage, making it an ideal choice for homeowners with limited yard space.
In this comprehensive guide, we will delve into the essential steps and considerations involved in building a lean tool shed. From initial planning and site selection to the final touches that give your shed character, each stage of the construction process will be thoroughly explored. Additionally, we will discuss the materials and tools you'll need, along with tips for optimizing the shed's design and functionality.
By the end of this journey, you'll be equipped with the knowledge and confidence to tackle this DIY project with enthusiasm. So, roll up your sleeves, gather your tools, and let's embark on this fulfilling endeavor to create a practical and stylish lean tool shed that complements your outdoor space.
Key Takeaways:
- Planning and preparation are crucial for building a lean tool shed. Visualize the shed’s purpose, obtain permits, and select quality materials and tools to ensure a successful construction process.
- Choosing the right location and adding finishing touches are essential for a functional and visually appealing lean tool shed. Consider accessibility, natural light, and landscaping to optimize the shed’s integration with your outdoor space.
Read more: How To Build Lean To Off A Shed
Planning and Preparation
Before diving into the construction of your lean tool shed, meticulous planning and thorough preparation are crucial for a successful outcome. Start by visualizing the purpose of your shed and the specific items you intend to store within it. This will help determine the shed’s ideal size, layout, and location.
Consider obtaining any necessary permits or checking with local authorities to ensure compliance with building codes and zoning regulations. This initial step will help you avoid potential legal issues and ensure that your shed is constructed in a suitable location.
Next, create a detailed plan or blueprint for your lean tool shed. This plan should include precise measurements, a list of materials, and a clear outline of the shed’s design. Taking the time to draft a comprehensive plan will streamline the construction process and minimize the likelihood of errors or setbacks.
When selecting materials for your shed, prioritize quality and durability. Opt for weather-resistant lumber, such as cedar or pressure-treated wood, to ensure the longevity of your structure. Additionally, gather the necessary tools and equipment, including a saw, hammer, level, drill, and measuring tape, to facilitate the construction process.
Prepare the construction site by clearing any debris, vegetation, or obstacles that may impede the building process. Ensure that the ground is level and stable, as this will form the foundation for your lean tool shed. If necessary, consider laying a bed of gravel or compacting the soil to create a stable base for the shed.
Lastly, allocate sufficient time for the construction of your lean tool shed. While the project’s duration will vary based on the shed’s size and complexity, it’s essential to set aside uninterrupted time to focus on the construction process. By adequately planning and preparing for the project, you’ll lay a solid foundation for the successful realization of your lean tool shed.
Choosing the Right Location
When it comes to building a lean tool shed, selecting the ideal location is pivotal to the shed’s functionality and visual appeal. Take the time to assess your outdoor space and identify a location that seamlessly integrates with your existing landscape while fulfilling the shed’s practical requirements.
One of the primary considerations when choosing a location for your lean tool shed is accessibility. Ensure that the shed is conveniently situated near the areas where you frequently engage in gardening or outdoor activities. This proximity will minimize the effort required to retrieve and store tools and equipment, enhancing the shed’s utility.
Additionally, consider the shed’s orientation in relation to the sun’s path throughout the day. Placing the shed in a location that receives ample natural light can create a conducive environment for tending to plants, organizing tools, and conducting various tasks within the shed.
Furthermore, evaluate the surrounding landscape and topography to identify a level and stable area for the shed’s construction. A flat and well-drained location will facilitate the installation of the shed’s foundation and ensure that the structure remains structurally sound over time.
Another crucial factor to consider is the shed’s proximity to your home or other structures. A lean tool shed is designed to be built against an existing structure, such as a house or garage, offering a seamless extension of storage space. Ensure that the chosen location allows for easy integration with the adjacent structure while maintaining a visually appealing and harmonious appearance.
Lastly, consider the aesthetic impact of the shed’s placement on your outdoor space. Strive to position the shed in a manner that complements your landscaping and contributes to the overall visual appeal of your property. By carefully selecting the right location for your lean tool shed, you can optimize its functionality, longevity, and visual integration within your outdoor environment.
Designing the Shed
Embarking on the design phase of your lean tool shed presents an opportunity to infuse creativity and functionality into the structure. The design of your shed should align with your practical storage needs while harmonizing with the aesthetic elements of your outdoor space.
Begin by determining the dimensions of your lean tool shed, considering the available space and the items you intend to store. While lean tool sheds are typically compact, it’s essential to optimize the layout to accommodate your tools and equipment effectively. Incorporate shelves, hooks, and storage solutions to maximize the shed’s organizational capacity.
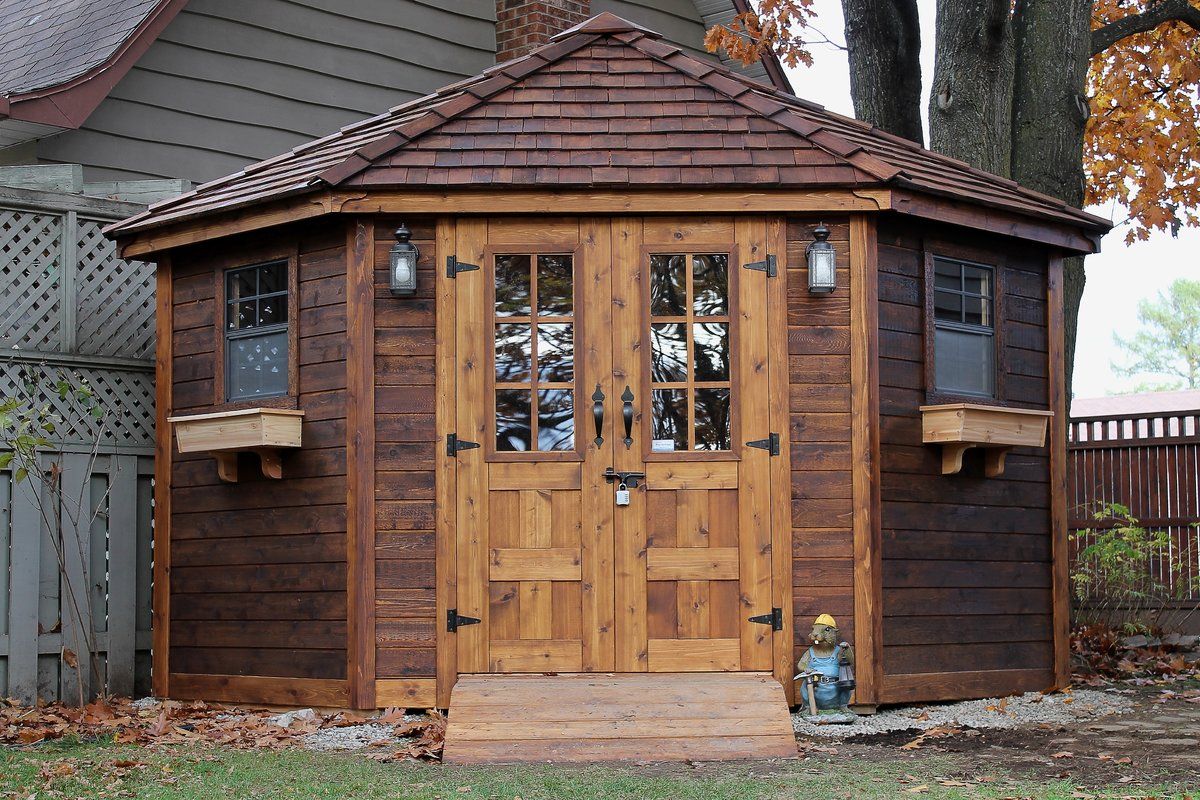
Consider the architectural style of your home and existing outdoor structures when conceptualizing the shed’s design. Strive for a cohesive and complementary aesthetic that seamlessly integrates the shed into your property’s overall visual appeal. Whether you opt for a traditional, rustic, or modern design, ensure that the shed harmonizes with its surroundings.
Furthermore, contemplate the shed’s roof design and materials. A sloped roof is characteristic of lean tool sheds, effectively channeling rainwater away from the structure. Select durable roofing materials, such as asphalt shingles or metal panels, that provide adequate protection from the elements while enhancing the shed’s durability.
As you finalize the design, consider incorporating windows or skylights to introduce natural light into the shed. Ample natural light can create an inviting and functional workspace within the shed, making it easier to locate and organize tools and supplies.
Additionally, contemplate the exterior finishes and colors that will complement your property’s aesthetic. Whether you opt for natural wood finishes, vibrant paint colors, or siding materials, ensure that the shed’s exterior enhances the visual appeal of your outdoor space.
Ultimately, the design phase of your lean tool shed presents an opportunity to infuse your personality and style into the structure. By carefully considering the shed’s dimensions, architectural style, roofing, natural light, and exterior finishes, you can create a functional and visually appealing outdoor storage solution that seamlessly integrates with your property.
Gathering Materials and Tools
As you prepare to embark on the construction of your lean tool shed, assembling the necessary materials and tools is a critical initial step. By ensuring that you have all the essential components and equipment at your disposal, you can streamline the construction process and minimize interruptions.
When it comes to materials, prioritize the selection of high-quality lumber for the shed’s frame and exterior components. Pressure-treated or cedar lumber is an excellent choice, offering durability and resistance to decay, moisture, and pests. Additionally, gather the necessary hardware, including screws, nails, and anchors, to secure the shed’s components effectively.
For the shed’s roofing, select durable and weather-resistant materials such as asphalt shingles, metal panels, or corrugated roofing. Ensure that the chosen roofing materials provide adequate protection from the elements and complement the shed’s design and aesthetic.
Furthermore, consider the siding materials for the shed’s exterior. Options such as wood siding, vinyl panels, or composite materials offer varying degrees of durability and visual appeal. Select siding materials that align with your desired aesthetic and provide long-lasting protection for the shed.
In addition to materials, assembling the necessary tools and equipment is crucial for a smooth construction process. Essential tools include a circular saw, hammer, level, drill, measuring tape, and a framing square. Depending on the shed’s design, you may also require a ladder, roofing nailer, and other specialized tools to facilitate specific construction tasks.
Personal protective equipment, such as safety goggles, gloves, and hearing protection, should also be readily available to ensure a safe and comfortable construction environment. Prioritize the acquisition of high-quality tools and safety gear to enhance the efficiency and safety of the construction process.
By meticulously gathering the required materials and tools, you can set the stage for a successful and efficient construction endeavor. Prioritize the quality and suitability of the materials, ensuring that they align with the shed’s design and functional requirements. Additionally, equip yourself with the necessary tools and safety gear to embark on this fulfilling DIY project with confidence and preparedness.
Read more: How To Build A Lean To Roof On A Shed
Building the Foundation
The foundation serves as the fundamental support system for your lean tool shed, ensuring its stability and longevity. Before commencing the construction of the shed’s frame, it’s essential to dedicate attention to the precise and robust installation of the foundation.
Begin by marking the perimeter of the shed’s foundation on the ground, using stakes and string to outline the precise dimensions. Ensure that the marked area is level and square, as this will form the basis for a structurally sound foundation.
Depending on your preference and local building codes, there are several options for constructing the shed’s foundation. A popular choice is a concrete slab foundation, which provides a durable and level base for the shed. Alternatively, you may opt for concrete piers or pressure-treated skids placed on a bed of gravel, offering flexibility and stability for the shed’s structure.
If you choose to build a concrete slab foundation, the next steps involve excavating the marked area to a suitable depth, compacting the soil, and constructing a form to contain the concrete. Reinforce the form with rebar or wire mesh to enhance the slab’s strength and durability.
Once the form is in place, pour and level the concrete to create a smooth and uniform foundation for the shed. Allow the concrete to cure according to the manufacturer’s recommendations, ensuring that it attains the necessary strength before proceeding with the construction of the shed.
If you opt for concrete piers or skids, carefully position and anchor them to the ground, ensuring that they are level and securely in place. This approach offers versatility in accommodating uneven terrain while providing a stable base for the shed’s frame.
Regardless of the foundation type chosen, meticulous attention to detail and precision is paramount to ensure the stability and longevity of the shed. By dedicating time and effort to the construction of a robust foundation, you’ll establish a solid groundwork for the subsequent stages of building your lean tool shed.
When building a lean tool shed, make sure to plan out the layout and organization of your tools beforehand to maximize space and efficiency. Use vertical storage solutions and consider adding shelves or pegboards to keep everything organized and easily accessible.
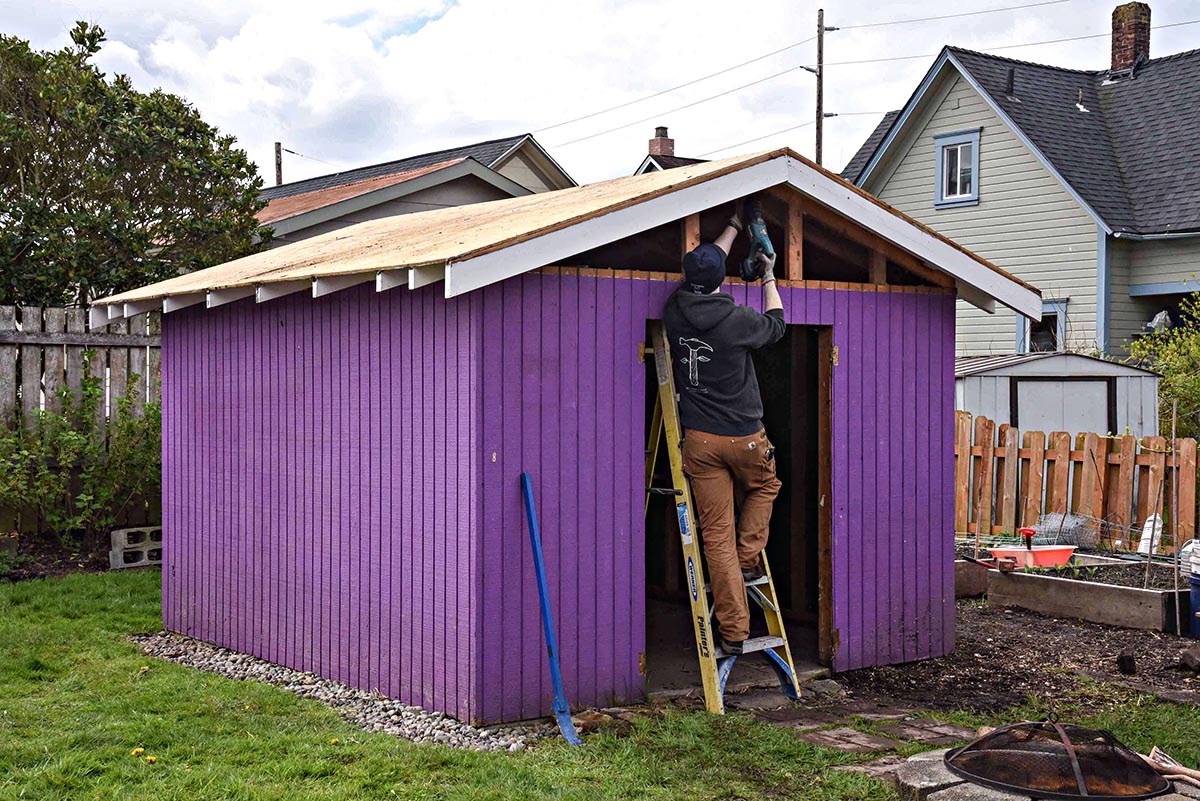
Constructing the Frame
With the foundation in place, the construction of the frame marks a pivotal phase in bringing your lean tool shed to life. The frame serves as the structural skeleton of the shed, providing support for the walls, roof, and overall stability of the structure.
Begin by assembling the lumber for the shed’s frame, ensuring that each component is cut to the precise dimensions outlined in your shed’s design plan. Utilize a framing square to ensure that the corners are perfectly square, promoting the structural integrity of the frame.
When constructing the frame, it’s essential to consider the placement of openings for doors, windows, and vents. Carefully measure and frame these openings, ensuring that they align with the shed’s design and functional requirements. Additionally, incorporate headers and support beams to reinforce these openings and distribute the load effectively.
Assemble the wall sections of the frame on a level surface, ensuring that the studs are uniformly spaced and securely fastened. Prioritize the use of pressure-treated or rot-resistant lumber for the bottom plates and any components that may come into contact with the ground, safeguarding the frame against moisture and decay.
Once the wall sections are assembled, erect them on the foundation, ensuring that they are plumb and aligned according to the shed’s design plan. Secure the walls to the foundation and to each other, reinforcing the connections to enhance the structural stability of the frame.
Subsequently, construct the roof trusses or rafters according to the shed’s design specifications, ensuring that they are accurately sized and aligned with the shed’s dimensions. Install the trusses or rafters atop the walls, securing them in place and ensuring that they are uniformly spaced to support the shed’s roofing materials.
As the frame takes shape, take the time to verify that all components are securely fastened and aligned, promoting the structural integrity and durability of the shed. By meticulously constructing the frame according to the shed’s design plan, you’ll establish a solid and reliable framework for the subsequent stages of building your lean tool shed.
Adding the Roof
With the frame of your lean tool shed in place, the addition of the roof is a significant step that not only provides protection from the elements but also contributes to the shed’s overall aesthetic appeal. The roof serves as a vital component, safeguarding the shed’s interior and contents while enhancing its structural integrity.
Before commencing the installation of the roofing materials, it’s essential to determine the appropriate roof pitch and overhang dimensions based on your shed’s design. The roof pitch influences the shed’s drainage capabilities, ensuring that rainwater is efficiently directed away from the structure.
If you opt for asphalt shingles, begin by installing a layer of roofing felt or synthetic underlayment over the roof sheathing to provide an additional barrier against moisture. Subsequently, align and secure the shingles according to the manufacturer’s guidelines, ensuring that they overlap and interlock to create a weather-resistant and visually appealing roof surface.
For metal roofing panels, carefully position and fasten the panels to the roof sheathing, ensuring that they are securely anchored and aligned to facilitate efficient water runoff. Metal roofing offers durability and low maintenance, providing long-lasting protection for your lean tool shed.
Alternatively, if you opt for a traditional or rustic aesthetic, consider cedar shingles or shakes as roofing materials. Install these materials in overlapping rows, securing them to the roof sheathing to create a charming and weather-resistant roof surface.
As the roofing materials are installed, pay meticulous attention to the flashing details around roof penetrations, such as vents and chimneys, to prevent water infiltration and ensure a watertight seal. Properly installed flashing enhances the shed’s resilience against moisture and contributes to the longevity of the roof.
Throughout the roof installation process, prioritize the use of high-quality materials and meticulous craftsmanship to ensure that the shed’s roof provides reliable protection and visual appeal. By dedicating attention to the precise installation of the roofing materials, you’ll enhance the functionality and aesthetic charm of your lean tool shed.
Installing Siding and Doors
As your lean tool shed nears completion, the installation of siding and doors plays a pivotal role in enhancing the shed’s visual appeal, weather resistance, and functionality. The selection and installation of suitable siding materials and doors are essential for creating a durable and aesthetically pleasing outdoor structure.
When it comes to siding options, consider materials such as wood, vinyl, composite panels, or metal cladding, each offering unique benefits in terms of durability, maintenance, and visual appeal. Select siding materials that align with your shed’s design and complement the overall aesthetic of your outdoor space.
Prior to installing the siding, ensure that the shed’s exterior is prepared with a weather-resistant barrier, such as house wrap or building paper, to provide an additional layer of protection against moisture infiltration. This barrier serves to safeguard the shed’s structure and contents from the elements, enhancing its longevity.
Once the weather-resistant barrier is in place, meticulously install the selected siding materials according to the manufacturer’s guidelines, ensuring that they are securely fastened and aligned to create a visually cohesive and weather-resistant exterior for the shed.
Simultaneously, the installation of doors is a critical aspect of completing your lean tool shed. Whether you opt for a single or double door configuration, prioritize the selection of doors that provide secure access to the shed while harmonizing with its design and dimensions.
When installing the doors, ensure that they are precisely aligned, level, and equipped with secure hardware to promote smooth operation and reliable security. Consider incorporating weather-stripping and threshold seals to enhance the doors’ weather resistance, safeguarding the shed’s interior from drafts and moisture.
Additionally, contemplate the inclusion of windows or vents within the shed’s design to introduce natural light and ventilation. Strategically positioned windows and vents contribute to a comfortable and well-lit interior space, enhancing the shed’s functionality and usability.
By meticulously installing siding materials and doors, you’ll create a visually appealing, weather-resistant, and functional lean tool shed that seamlessly integrates with your outdoor environment. The careful selection and installation of these components are essential for completing your outdoor structure with durability and style.
Read more: How To Build Shelves For A Tool Shed
Finishing Touches
As the construction of your lean tool shed reaches its final stages, attention to detail and thoughtful finishing touches will elevate the shed’s functionality, aesthetics, and overall appeal. From interior organization to exterior embellishments, these final touches will add character and practicality to your outdoor structure.
Begin by organizing the shed’s interior space to optimize storage and accessibility. Implement shelving, hooks, and storage solutions to accommodate tools, gardening equipment, and supplies. By maximizing the shed’s organizational capacity, you’ll create a tidy and efficient workspace for your outdoor endeavors.
Consider incorporating a workbench or potting area within the shed to facilitate gardening tasks and DIY projects. A dedicated workspace enhances the shed’s functionality, providing a designated area for potting plants, assembling projects, and maintaining gardening equipment.
To enhance the shed’s visual appeal and integration with your outdoor space, consider landscaping around the shed with plantings, pathways, or decorative elements. Thoughtful landscaping can create a harmonious and inviting environment, seamlessly blending the shed into your property’s landscape.
Furthermore, prioritize the application of a protective finish to the shed’s exterior surfaces, such as paint, stain, or sealant. A durable and weather-resistant finish will safeguard the shed against the elements, preserving its structural integrity and enhancing its visual charm for years to come.
As a final touch, consider installing exterior lighting to illuminate the shed’s surroundings and provide enhanced visibility during evening hours. Strategically positioned lights contribute to the shed’s security and usability, creating a welcoming and safe outdoor space.
Additionally, personalize the shed with decorative elements, such as hanging baskets, outdoor artwork, or signage, to infuse your personality and style into the outdoor structure. These decorative touches add character and charm to the shed, transforming it into a distinctive and inviting feature of your outdoor environment.
By attending to these finishing touches, you’ll transform your lean tool shed into a functional, visually appealing, and personalized space that enriches your outdoor lifestyle. The thoughtful integration of practical and decorative elements will culminate in a shed that not only meets your storage needs but also enhances the overall ambiance of your outdoor space.
Conclusion
Congratulations on completing the construction of your lean tool shed! This transformative journey has empowered you to create a practical, stylish, and personalized outdoor structure that enhances your gardening endeavors and outdoor lifestyle. As you reflect on the accomplishment of building your shed, consider the valuable lessons learned and the fulfillment derived from bringing your vision to life.
Throughout the construction process, you’ve embraced the meticulous planning and preparation required to lay a solid foundation for your shed. From selecting the ideal location to gathering materials and tools, each step has contributed to the successful realization of your outdoor structure.
The design and construction of the shed’s frame and roof have provided an opportunity to showcase your craftsmanship and attention to detail. By meticulously constructing the frame and adding the roof, you’ve established a durable and visually appealing structure that harmonizes with your outdoor environment.
Furthermore, the installation of siding, doors, and finishing touches has elevated the shed’s functionality and aesthetic charm. The thoughtful organization of the shed’s interior, the application of protective finishes, and the incorporation of decorative elements have transformed the shed into a welcoming and practical extension of your outdoor space.
As you admire the completed lean tool shed, take pride in the creativity, perseverance, and dedication that have culminated in this remarkable achievement. Your shed stands as a testament to your passion for DIY projects and your commitment to enhancing your outdoor lifestyle.
Moving forward, your lean tool shed will serve as a versatile and invaluable asset, providing storage, workspace, and inspiration for your gardening and outdoor activities. Embrace the opportunities that your shed presents, whether it’s nurturing plants, organizing tools, or embarking on new projects within this functional and inviting space.
As you bask in the satisfaction of completing your lean tool shed, remember the moments of learning, creativity, and fulfillment that have enriched this journey. Your shed stands as a testament to your ingenuity and dedication, embodying the spirit of craftsmanship and the joy of transforming ideas into reality.
May your lean tool shed continue to inspire and support your outdoor pursuits, creating lasting memories and fostering a deeper connection with your outdoor environment. Embrace the possibilities that unfold within this cherished space, knowing that your creativity and craftsmanship have left an indelible mark on your outdoor landscape.
Frequently Asked Questions about How To Build A Lean Tool Shed
Was this page helpful?
At Storables.com, we guarantee accurate and reliable information. Our content, validated by Expert Board Contributors, is crafted following stringent Editorial Policies. We're committed to providing you with well-researched, expert-backed insights for all your informational needs.


0 thoughts on “How To Build A Lean Tool Shed”