Articles
How To Build A Lean To Carport
Modified: September 2, 2024
(Many of the links in this article redirect to a specific reviewed product. Your purchase of these products through affiliate links helps to generate commission for Storables.com, at no extra cost. Learn more)
Introduction
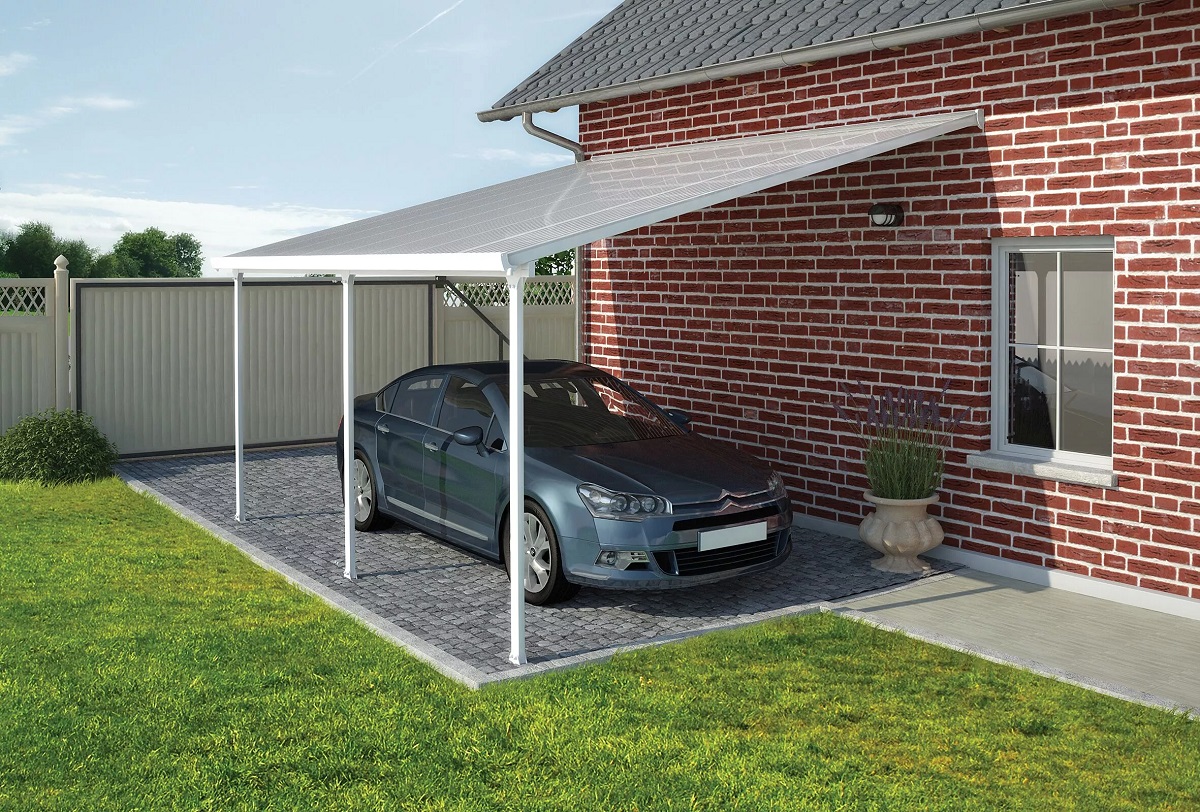
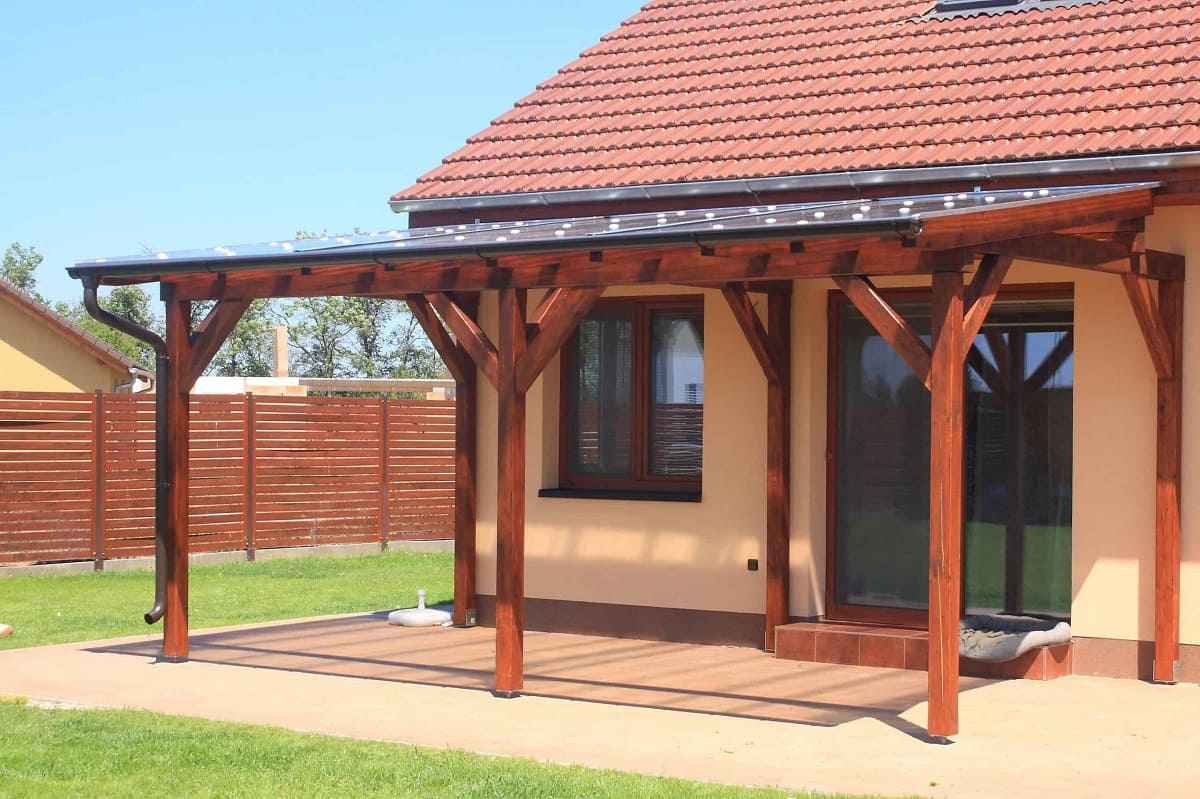
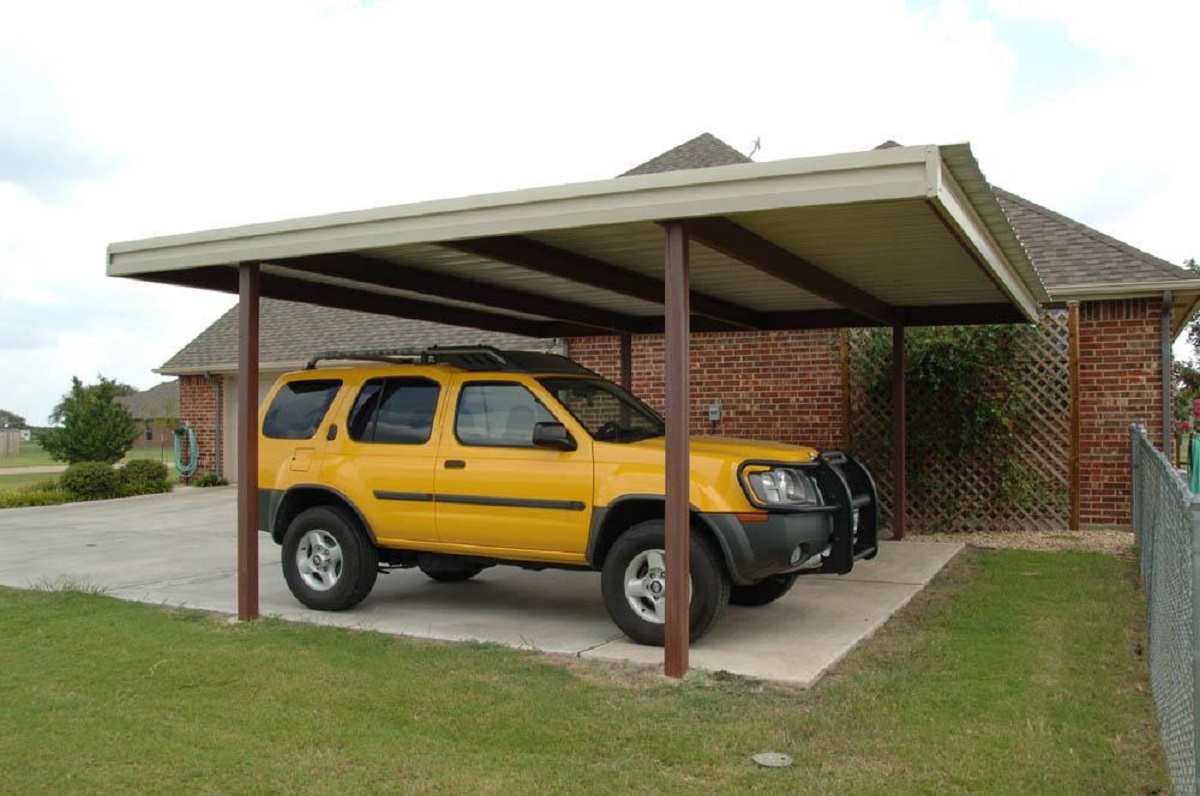
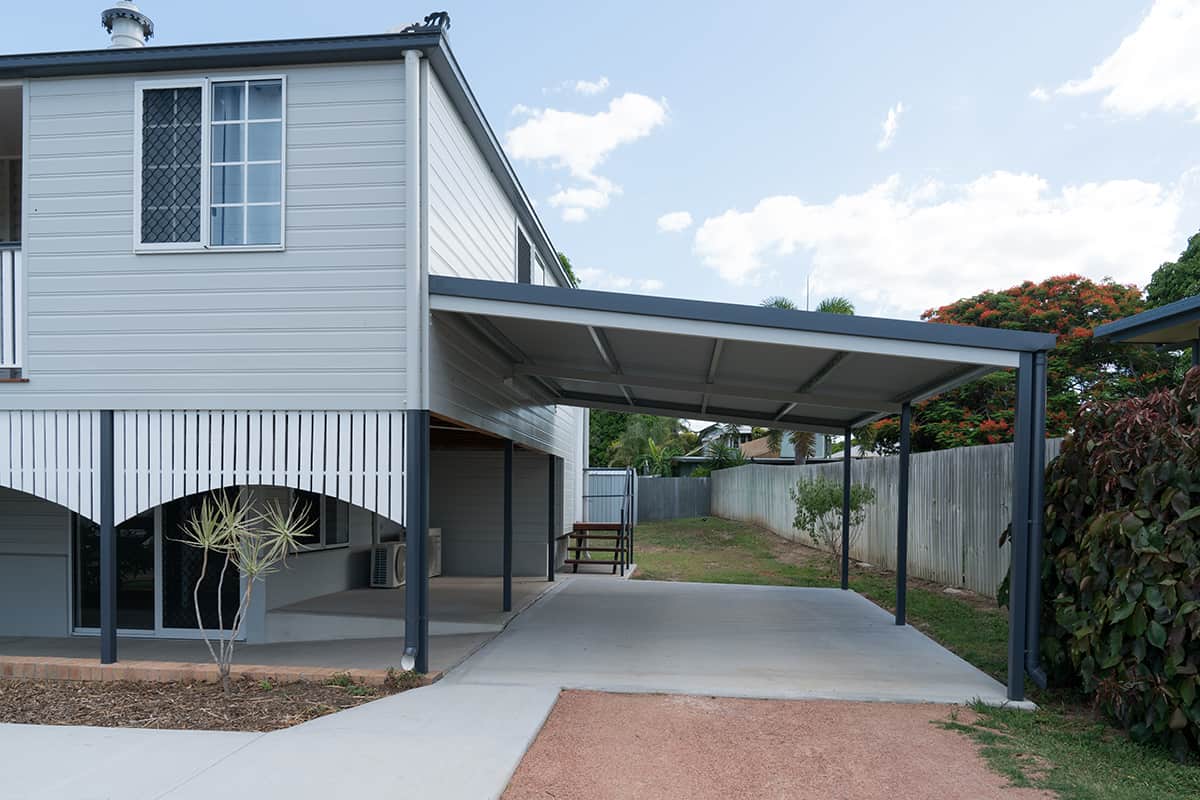
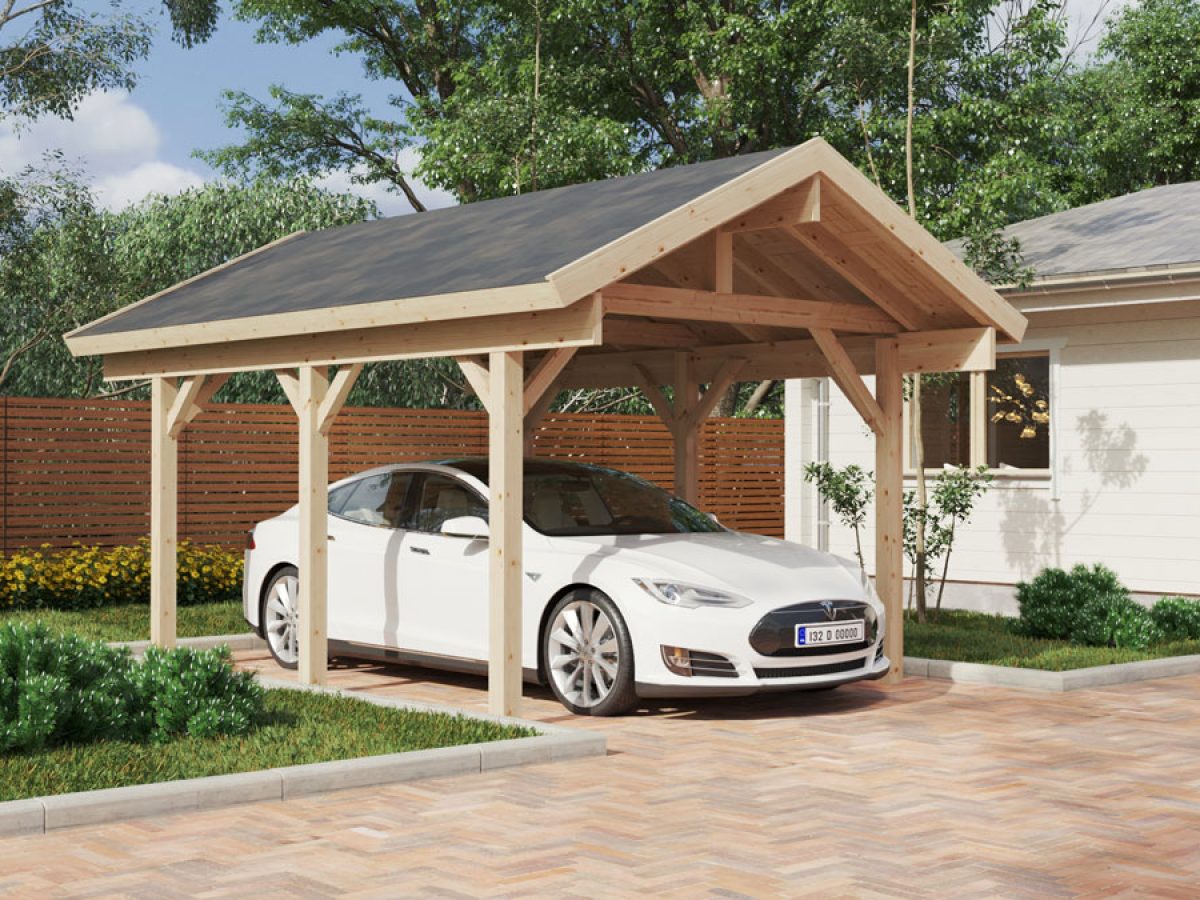
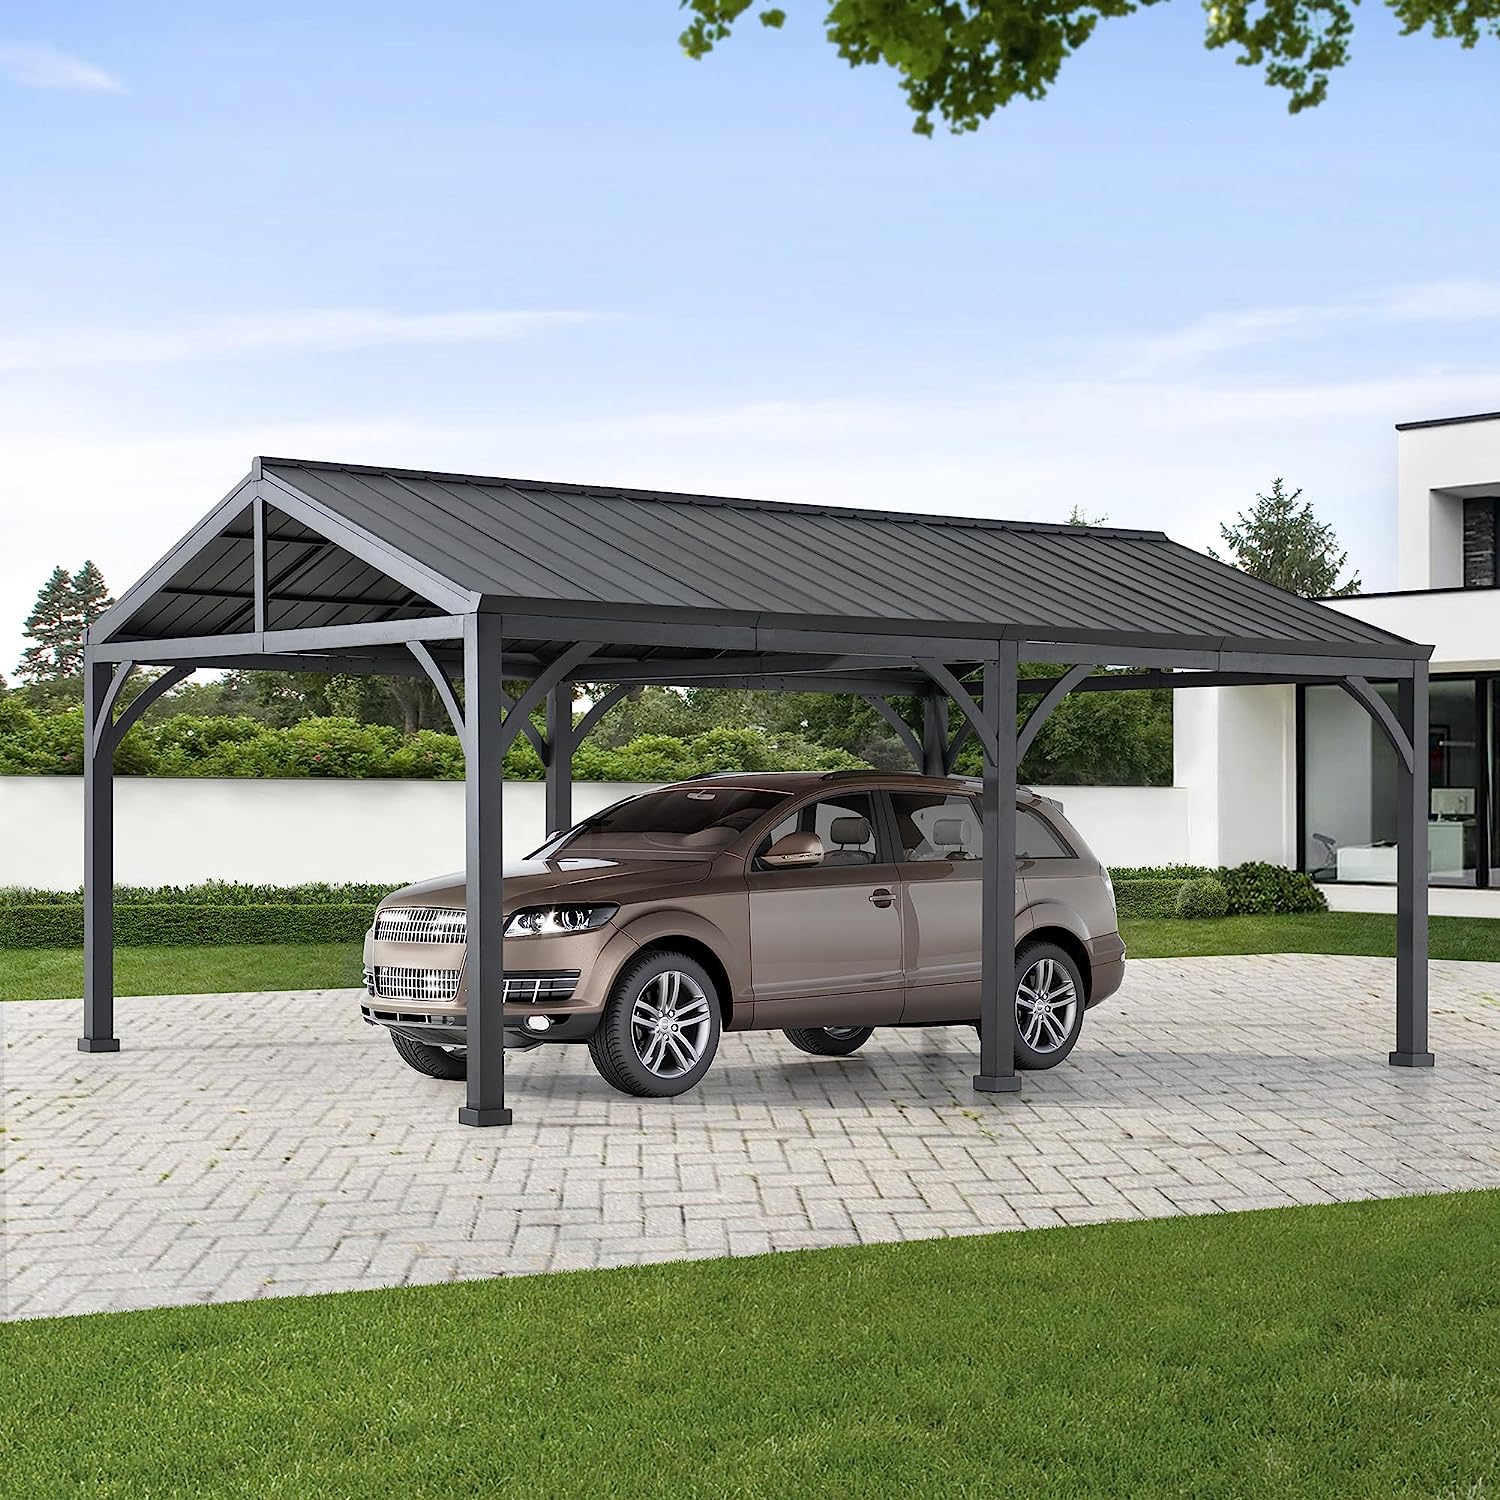
A carport is a practical and cost-effective solution for protecting your vehicle from the elements. It provides a covered space where you can park your car, keeping it sheltered from rain, snow, and sun damage. Building a lean-to carport is a popular option if you have limited space or want to attach it to an existing structure, such as your house or garage.
In this guide, we will take you through the step-by-step process of building a lean-to carport. Whether you’re an experienced DIY enthusiast or a beginner, this article will provide you with all the information you need to tackle this project successfully. So let’s get started!
Before embarking on any construction project, it’s important to check with your local authorities to determine if you need any permits or approvals. Building codes and regulations may vary, so make sure you comply with them to avoid any legal issues or fines.
Additionally, always prioritize safety when working on any construction project. Wear appropriate protective gear, such as gloves and safety goggles, and follow the manufacturer’s instructions for any power tools or equipment you use. If you’re unsure about any aspect of the project, consult with a professional.
Now that you have taken the necessary precautions, let’s delve into the step-by-step process of building a lean-to carport.
Key Takeaways:
- Building a lean-to carport involves careful planning, from choosing the location and gathering materials to setting the posts and adding the finishing touches. Prioritize safety, compliance with regulations, and regular maintenance for a successful outcome.
- The step-by-step process of constructing a lean-to carport requires attention to detail, precision in measurements, and proper installation of roofing sheets and side panels. Completing the finishing touches enhances both functionality and aesthetics.
Read more: How To Build A Wood Carport
Step 1: Choosing the Location
The first step in building a lean-to carport is to determine the best location for it. Consider factors such as proximity to your home, ease of access, and the available space. Here are some things to keep in mind when choosing the location:
- Proximity to your home: Ideally, the lean-to carport should be close to your house or garage for easy access. This will make it more convenient to park and retrieve your vehicle.
- Property lines: Make sure you are aware of your property lines and any zoning restrictions. Ensure that the carport will not encroach on your neighbor’s property or violate any local regulations.
- Sun exposure: Consider the sun’s path throughout the day and how it will affect the carport. If possible, choose a location that provides shade during the hottest parts of the day to protect your vehicle from sun damage.
- Drainage: Take into account the natural drainage patterns of your property. It’s important to select a location that won’t cause water to accumulate near your carport. This will help prevent water damage and ensure the longevity of the structure.
- Size and shape: Determine the dimensions and shape of the carport that will best suit your needs and available space. Consider the size of your vehicle and any additional space you may require for storage or other purposes.
- Existing structures: If you plan to attach the lean-to carport to an existing structure, such as your house or garage, ensure that the location you choose is structurally suitable for this type of configuration.
Once you have considered these factors, mark out the location on the ground using stakes or spray paint. Take accurate measurements to ensure that the carport will fit properly in the designated area. This will serve as a guide for the next steps of the construction process.
With the location chosen and marked, you’re ready to move on to the next step: gathering the necessary materials and tools.
Step 2: Gathering Materials and Tools
Before you can start building your lean-to carport, you’ll need to gather all the necessary materials and tools. Having everything on hand will make the construction process smoother and more efficient. Here’s a list of the common materials and tools you’ll need:
Materials:
- Pressure-treated lumber or metal beams for the posts and frame
- Roofing sheets (metal or polycarbonate)
- Fasteners such as screws or nails
- Concrete mix for securing the posts (if needed)
- Side panels (optional)
- Sealant or paint for weatherproofing (optional)
Tools:
- Tape measure
- Level
- Saw (depending on the type of material you’re using)
- Drill or screwdriver
- Hammer
- Wrench or pliers
- Shovel (if you need to clear the area or dig post holes)
- Mixing bucket or wheelbarrow for concrete (if needed)
- Safety equipment, such as gloves and safety goggles
It’s important to ensure that the materials you choose are of good quality and suitable for your specific climate and weather conditions. This will help ensure the durability and longevity of your carport.
Before purchasing the materials, take accurate measurements of the area and plan out the dimensions of your lean-to carport. This will help you determine the quantity of each material you’ll need.
Once you have gathered all the necessary materials and tools, you can move on to the next step: clearing and leveling the area.
Step 3: Clearing and Leveling the Area
Now that you have chosen the location and gathered all the necessary materials and tools, it’s time to clear and level the area where your lean-to carport will be constructed. This step is crucial to ensure a stable and solid foundation for your structure. Follow these steps:
- Remove any obstacles: Clear the area of any debris, vegetation, rocks, or other objects that may interfere with the construction process. This will provide a clean and clear space to work with.
- Measure and mark: Use a tape measure to mark the boundaries of your carport, ensuring that the dimensions are accurate. This will serve as a guide when excavating or leveling the ground.
- Excavate or level the ground: Depending on the existing condition of the area, you may need to dig out or fill in the ground to achieve a level surface. Use a shovel or a mechanical excavator to remove excess soil or add gravel as necessary. Ensure that the ground is level by using a level tool or a long straight board.
- Compact the ground: Once the area is level, use a hand tamp or a compacting machine to compress the soil or gravel. This will provide a stable base for the carport posts.
- Check for drainage: Ensure that the area has proper drainage to prevent water from pooling around your carport. If necessary, make slight adjustments to the ground to direct water away from the structure.
Clearing and leveling the area is an essential step to ensure the stability and longevity of your lean-to carport. Take your time to ensure that the ground is properly prepared before moving on to the next step: setting the posts.
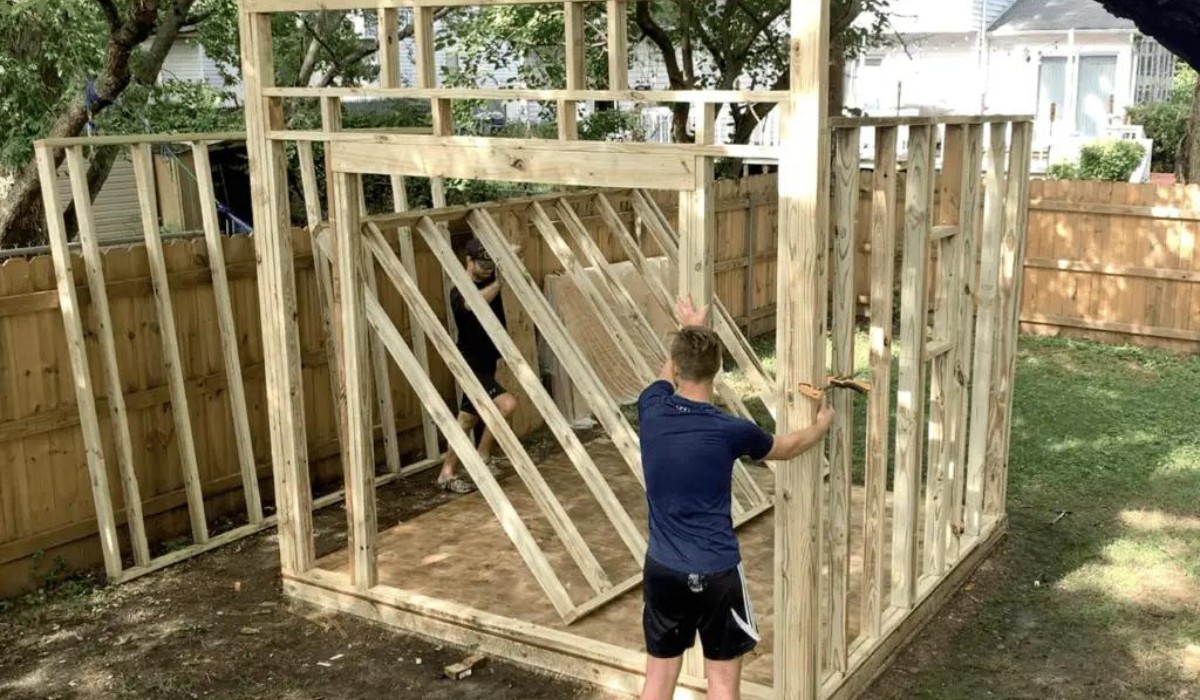
Step 4: Setting the Posts
With the area cleared and leveled, it’s time to set the posts for your lean-to carport. The posts will serve as the foundation and support for the entire structure. Follow these steps to set the posts securely:
- Measure and mark: Measure the height and placement of the posts according to your carport’s design and dimensions. Mark the spots where the posts will be installed using stakes or spray paint.
- Dig post holes: Use a post hole digger or an auger to dig holes at each marked spot. The depth of the holes should be determined by the frost line in your area and the height of the carport. Consult local building codes or a professional if you’re unsure about the depth requirements.
- Place the posts: Insert the posts into the holes, ensuring they are level and plumb. Use a level tool and bracing as necessary to keep the posts straight and aligned. If needed, add gravel or concrete mix around the posts to provide additional stability.
- Secure the posts: Once the posts are in position, secure them by backfilling the holes with soil or concrete mix. Tamp down the soil or compact the concrete to ensure a solid foundation.
- Check for level and alignment: Double-check that the posts are level, plumb, and properly aligned. This will ensure that your carport will be structurally sound.
Setting the posts correctly is crucial for the stability and durability of your lean-to carport. Take your time during this step to ensure that the posts are properly positioned and secured. With the posts in place, you can move on to the next step: installing the roof beams.
When building a lean-to carport, make sure to properly anchor the structure to the ground to ensure stability and use durable materials that can withstand the elements.
Read more: How Much To Build A Carport
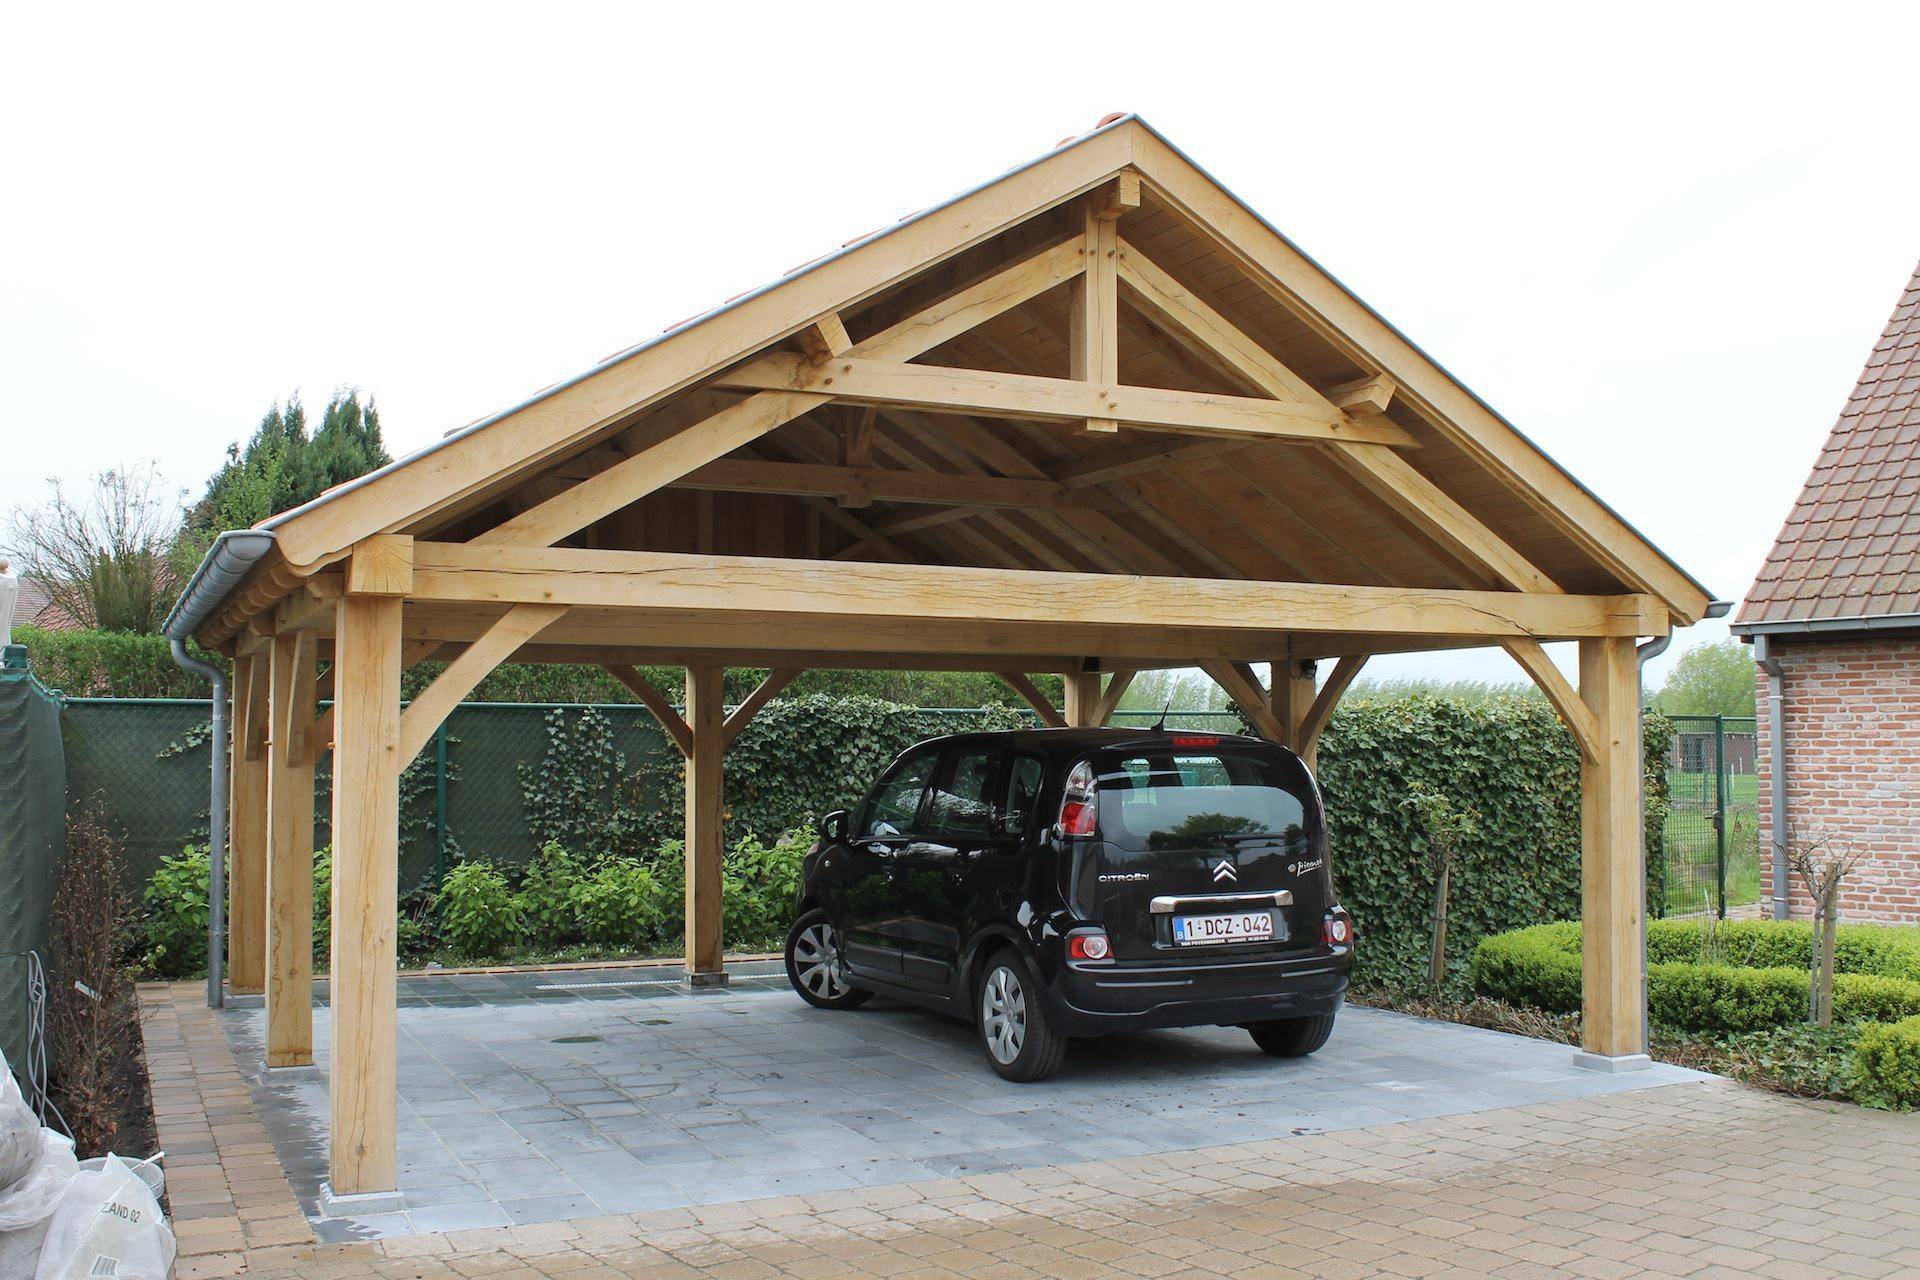
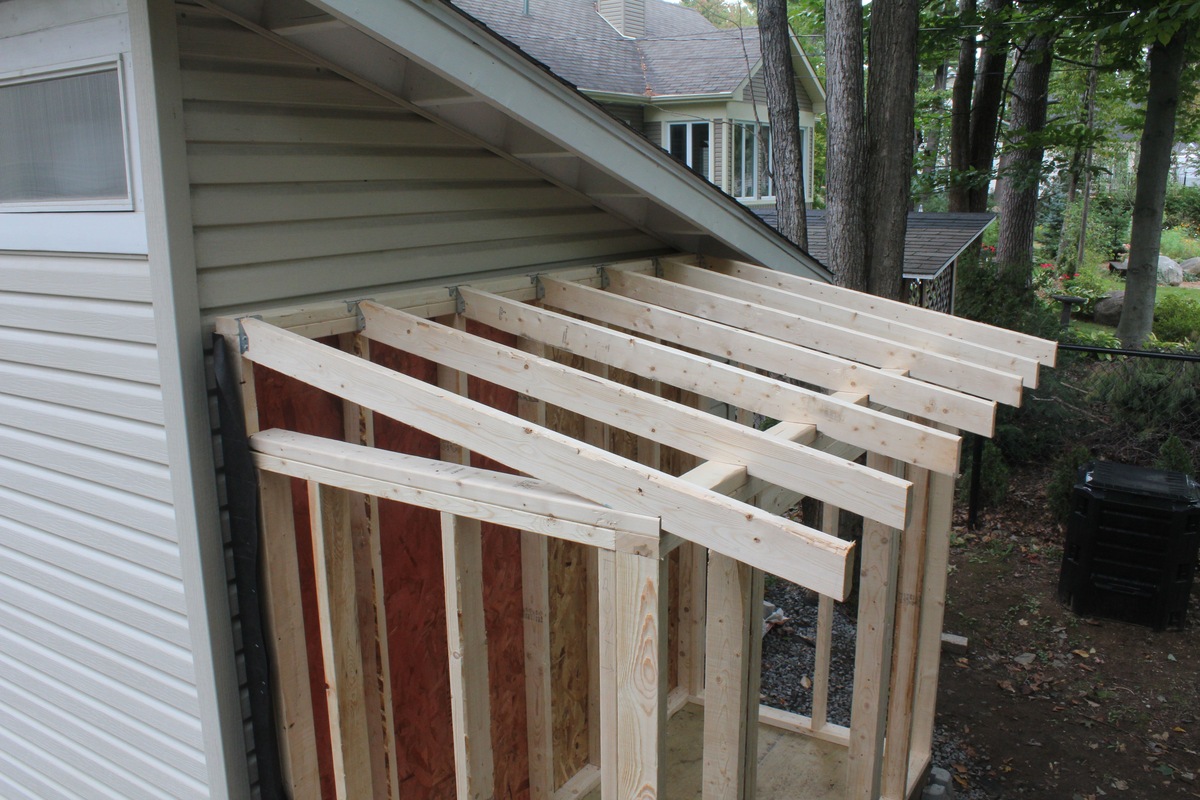
Step 5: Installing the Roof Beams
With the posts securely set, it’s time to proceed with installing the roof beams for your lean-to carport. The roof beams will provide support for the roofing sheets and ensure the structural integrity of the carport. Follow these steps to install the roof beams:
- Measure and cut the beams: Measure the width and length of your carport’s roof and cut the beams accordingly. Use a saw or a suitable cutting tool to achieve clean and accurate cuts.
- Attach the beams to the posts: Position the beams on top of the posts, ensuring they are aligned and level. Use brackets, screws, or nails to secure the beams to the posts. Make sure the beams are securely fastened to provide sturdy support for the roof.
- Space the beams: Determine the spacing between the beams according to your carport’s design and the recommended guidelines. Typically, the beams are spaced evenly across the width of the structure to evenly distribute the weight of the roofing sheets.
- Secure additional supports: Depending on the size and design of your carport, you may need to install additional supports or cross beams for added stability. Follow the manufacturer’s instructions or consult a professional if necessary.
- Check for level and alignment: Double-check that the roof beams are level, aligned, and properly secured to the posts. This will ensure that the roof structure is stable and capable of supporting the roofing sheets.
Installing the roof beams is a critical step in the construction process. Take care to ensure that the beams are properly measured, cut, and secured to provide a strong foundation for the roofing sheets. With the roof beams in place, you can progress to the next step: adding the roofing sheets.
Step 6: Adding the Roofing Sheets
With the roof beams in place, it’s time to add the roofing sheets to your lean-to carport. The roofing sheets will provide protection from the elements and complete the roof structure. Follow these steps to add the roofing sheets:
- Select the roofing sheets: Choose roofing sheets that are suitable for your climate and provide the desired level of durability and protection. Metal sheets and polycarbonate sheets are common options for carport roofs.
- Measure and cut the sheets: Measure the dimensions of your carport’s roof and cut the sheets accordingly. Use a saw or a cutting tool that is appropriate for the type of roofing material you are using.
- Position the first sheet: Start at one end of the carport and position the first roofing sheet, making sure it aligns with the roof beams. Leave an overhang of a few inches to ensure proper water drainage.
- Secure the sheet: Use screws, nails, or suitable fasteners to secure the first sheet to the roof beams. Follow the manufacturer’s instructions for proper installation and spacing of fasteners.
- Add additional sheets: Continue adding the remaining roofing sheets, overlapping them slightly to prevent water from seeping through the gaps. Connect the sheets securely to the roof beams and to each other as per the manufacturer’s guidelines.
- Seal the joints: Apply sealant or caulk to the joints and overlapping areas of the roofing sheets to further enhance weatherproofing and prevent leaks.
During the installation process, ensure that the roofing sheets are properly aligned and secured to the roof beams. Double-check the measurements and make adjustments as necessary to achieve a tight and watertight fit. With the roofing sheets added, you can move on to the next step: attaching the side panels.
Step 7: Attaching the Side Panels
Adding side panels to your lean-to carport can provide additional protection and privacy. It will help shield your vehicle from wind, rain, and other elements. Follow these steps to attach the side panels:
- Select the side panel material: Choose a material for the side panels that suits your needs and preferences. Common options include wood, metal, or PVC panels.
- Measure and cut the panels: Measure the height and length of the sides of your carport and cut the panels accordingly. Ensure that the panels fit securely within the framework of your carport.
- Position the first panel: Start at one end of the carport and position the first side panel against the upright posts or beams. Ensure that it is level and aligned with the ground.
- Secure the panel: Use appropriate fasteners, such as screws or nails, to secure the first panel to the framework. Make sure the panel is tightly secured to provide stability and durability.
- Add additional panels: Continue adding the remaining side panels, overlapping them slightly to create a seamless and uniform appearance. Connect the panels securely to the framework and to each other, following the manufacturer’s instructions or best practices.
- Finish the edges: If desired, add trim or moldings to the edges of the side panels for a polished and finished look. This will also help protect the edges of the panels from damage.
- Paint or seal the panels: Depending on the material used for the side panels, consider applying a protective coat of paint or sealant to enhance their longevity and resistance to weathering.
Take your time during the installation process to ensure that the side panels are properly aligned and securely attached. Double-check the measurements and make any necessary adjustments to achieve a professional and finished appearance.
With the side panels in place, your lean-to carport is almost complete. You can proceed to the final step: adding the finishing touches.
Step 8: Finishing Touches
Adding the finishing touches to your lean-to carport will not only enhance its appearance but also improve its functionality and durability. Follow these steps to complete the construction process:
- Trim and seal: Inspect the carport for any rough edges, sharp corners, or exposed fasteners. Use trim or molding to cover these areas and create a more polished look. Additionally, apply sealant or weatherproofing treatment to protect the wood or other materials from moisture and prolong their lifespan.
- Paint or stain: Consider painting or staining the carport to match your home’s exterior or personal aesthetic. This will not only enhance its visual appeal but also provide an extra layer of protection against the elements. Choose paint or stain suitable for outdoor use and follow the manufacturer’s instructions for best results.
- Install lighting: For added convenience and safety, consider installing lighting inside the carport. This will make it easier to park or retrieve your vehicle, especially during nighttime. Choose lighting fixtures that are rated for outdoor use and hire a licensed electrician if necessary.
- Add storage options: Depending on the size and design of your lean-to carport, you can incorporate storage solutions such as shelves, hooks, or cabinets. This will allow you to keep your carport organized and create additional space for storing tools, equipment, or other items.
- Landscaping: Enhance the curb appeal of your carport by incorporating landscaping elements around it. Planting flowers, shrubs, or grass can soften the look of the structure and integrate it seamlessly into your outdoor space.
- Maintenance: Regularly inspect your lean-to carport for any signs of damage or wear and tear. Perform routine maintenance tasks such as cleaning the roofing sheets, checking for leaks, and repairing any loose or damaged components. This will help ensure the longevity and functionality of your carport.
By adding these finishing touches, you can transform your lean-to carport into an aesthetically pleasing and functional asset for your property. Remember to always prioritize safety when working on any construction or maintenance tasks, and consult with professionals if needed.
Congratulations! You have successfully completed the construction of your lean-to carport. Enjoy the convenience and protection it provides for your vehicle and other outdoor storage needs.
Note: Prior to starting any construction project, it’s important to check with local authorities and obtain any necessary permits or approvals. Building codes and regulations may vary, so ensure compliance to avoid any legal issues or fines.
Read more: How To Build A Cheap Carport
Conclusion
Building a lean-to carport is a practical and cost-effective solution for protecting your vehicle from the elements. By following the step-by-step guide outlined in this article, you can successfully construct a sturdy and functional carport that meets your needs. From choosing the location and gathering materials to setting the posts, installing the roof beams, adding the roofing sheets, attaching the side panels, and adding the finishing touches, each step plays a crucial role in the construction process.
Throughout the construction process, it’s important to prioritize safety and ensure compliance with local building codes and regulations. Taking the necessary precautions, such as wearing protective gear and consulting professionals when needed, will help create a safe working environment and ensure a successful outcome.
Once your lean-to carport is complete, it will provide shelter for your vehicle, protecting it from rain, snow, sunlight, and other environmental factors. Additionally, it can serve as a versatile space for additional storage or other outdoor activities. Regular maintenance and care will help prolong the lifespan of your carport and keep it in optimal condition.
Remember to check with your local authorities before starting any construction project, as permits and approvals may be required. Additionally, consider reaching out to professionals for guidance or assistance to ensure the best possible results.
By following this comprehensive guide, you can confidently embark on building your own lean-to carport and enjoy the convenience and protection it provides. So gather your materials, put on your DIY hat, and get ready to create a valuable addition to your home!
Once you've mastered building a lean-to carport, why stop there? Dive into our detailed guide on how to build a carport out of wood, designed specifically for woodworking enthusiasts looking to elevate their skills with durable wooden structures. Additionally, if your interest extends beyond carports to other creative outdoor enhancements, our comprehensive overview on distinctive outdoor structures offers insightful tips and innovative ideas to transform your exterior space. Both articles are packed with practical advice and step-by-step instructions to assist you in your next building project.
Frequently Asked Questions about How To Build A Lean To Carport
Was this page helpful?
At Storables.com, we guarantee accurate and reliable information. Our content, validated by Expert Board Contributors, is crafted following stringent Editorial Policies. We're committed to providing you with well-researched, expert-backed insights for all your informational needs.


0 thoughts on “How To Build A Lean To Carport”