Articles
How To Build Stone Porch Steps
Modified: October 18, 2024
Learn step-by-step articles on how to build beautiful stone porch steps, including materials, tools, and techniques. Enhance your home's curb appeal with our comprehensive guides.
(Many of the links in this article redirect to a specific reviewed product. Your purchase of these products through affiliate links helps to generate commission for Storables.com, at no extra cost. Learn more)
Introduction
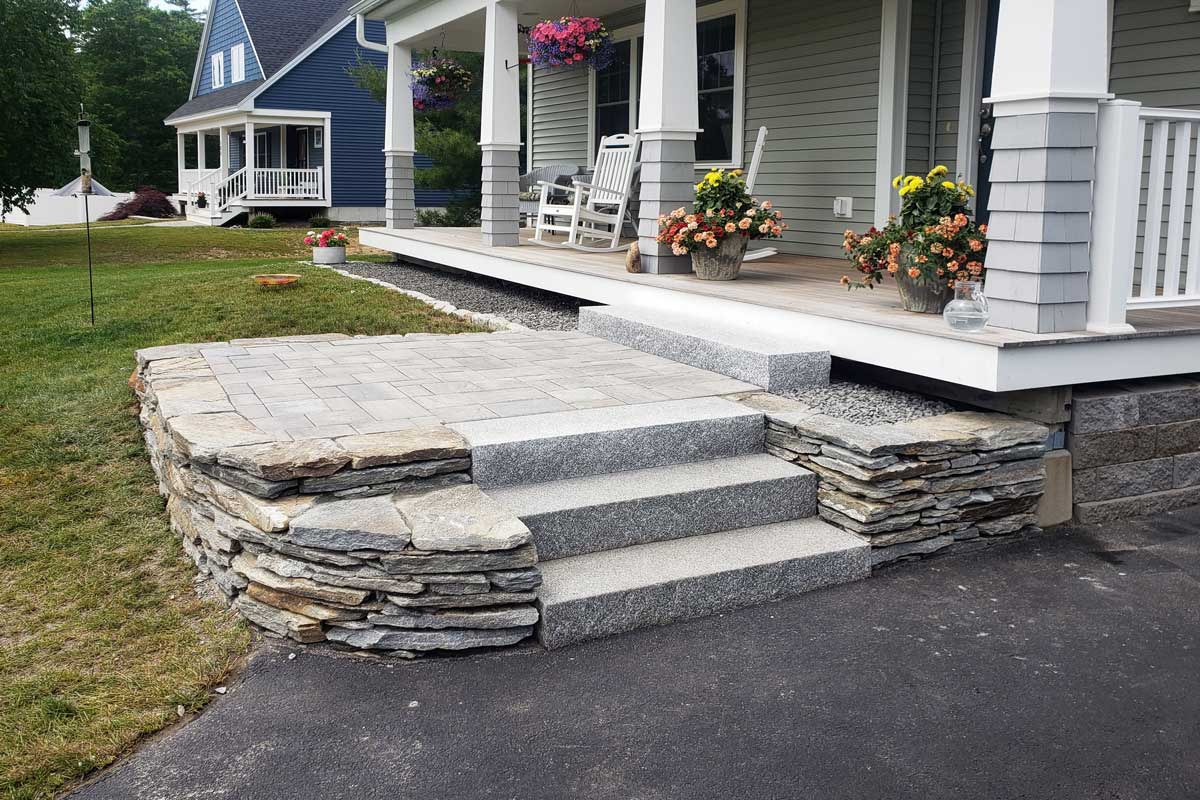
Welcome to our guide on how to build stone porch steps. Adding stone steps to your porch not only enhances the curb appeal of your home but also provides a durable and elegant entrance. While the process may seem daunting, with the right materials, tools, and a little bit of patience, you can create a stunning set of stone steps that will last for years to come.
Before diving into the steps, it’s important to understand the benefits of using stone for porch steps. Stone is a natural and versatile material that offers durability, strength, and beauty. It can withstand varying weather conditions and requires minimal maintenance. Additionally, stone steps can be customized to suit your style and can be built in a variety of designs and patterns.
In this guide, we will take you through the step-by-step process of building stone porch steps. We will cover everything from gathering materials and tools to finishing touches. Whether you’re a seasoned DIY enthusiast or a beginner, this guide will provide you with the knowledge and confidence to tackle your project.
But before we get started, it’s important to mention that safety should always be your top priority. Make sure to follow proper safety protocols, wear protective gear, and consult with a professional if you’re unsure about any step of the process.
Now, let’s gather our materials and tools and get ready to build your beautiful stone porch steps!
Key Takeaways:
- Building stone porch steps requires careful planning, proper preparation, and attention to detail. From measuring and laying the base stones to filling gaps and adding finishing touches, each step contributes to the durability and aesthetic appeal of the steps.
- Safety, maintenance, and personalization are key factors in creating stunning stone porch steps. Following safety protocols, performing regular maintenance, and adding personal touches such as handrails and landscaping can elevate the overall appearance and functionality of the steps.
Read more: How To Build A Walkway With Stepping Stones
Step 1: Gather Materials and Tools
Before you begin building your stone porch steps, you’ll need to gather all the necessary materials and tools. Here’s a list of what you’ll need:
Materials:
- Stone: Choose a type of stone that suits your preferences and matches the aesthetic of your home. You can opt for natural stone, such as flagstone or slate, or go for manufactured stone for a more consistent look.
- Sand: Use sand to create a level base and fill in gaps between stones.
- Gravel: Gravel will be used to create a stable foundation for your steps.
- Landscape fabric: This will help prevent weed growth under the steps.
- Concrete mix: You might need concrete mix if you’re building a concrete foundation for your steps.
- Edge restraints: These will help keep the stones in place and provide support.
- Step riser blocks (optional): If you prefer a more uniform look or want to create a more gradual step, you can use step riser blocks.
Tools:
- Tape measure: You’ll need a tape measure to accurately measure the area and plan your steps.
- Shovel: Get a sturdy shovel to dig and level the ground.
- Wheelbarrow: Use a wheelbarrow to transport materials, such as sand and gravel.
- Mason’s hammer and chisel: These tools will come in handy when cutting or shaping stones.
- Trowel: The trowel will be used to apply mortar or other adhesives.
- Level: A level will help you ensure that the steps are even and properly aligned.
- Broom: You’ll need a broom to sweep away excess mortar or debris.
- Protective gear: Don’t forget to wear safety goggles, gloves, and a dust mask to protect yourself while working.
It’s important to gather all the materials and tools before starting the project to ensure a smooth workflow. If needed, make a trip to your local home improvement store to purchase any missing items.
With all the materials and tools in hand, you’re now ready to move on to the next step: measuring and planning your stone porch steps.
Step 2: Measure and Plan
Now that you have all your materials and tools ready, it’s time to measure and plan your stone porch steps. Taking accurate measurements and planning the layout will ensure that your steps fit perfectly and are aesthetically pleasing. Here’s how you can proceed:
Read more: How To Build A Concrete Porch With Steps
1. Measure the area:
Start by measuring the width and depth of your porch. This will determine the size and number of steps you’ll need. Consider the height of each step as well, keeping in mind that a standard rise is around 6 to 7 inches. Measure the overall width of the steps, including any additional space for handrails if desired.
2. Plan the step layout:
Based on your measurements, sketch out a rough plan of how you want your steps to look. Consider the shape, size, and arrangement of the stones. You can opt for straight steps or incorporate curves and angles to add visual interest.
3. Determine the number of stones:
Depending on the size of your steps, calculate the number of stones you’ll need. Keep in mind that it’s always good to have a few extra stones on hand in case of breakage or irregular shapes.
4. Consider drainage:
Take into account the slope of your porch and ensure that your steps allow for proper water drainage. You may need to incorporate a slight slope in the stone base or include drainage channels to prevent water pooling under your steps.
5. Check local regulations:
Before proceeding, check with your local building codes or homeowner’s association to ensure that your planned steps comply with any regulations or restrictions.
Once you have completed the measurement and planning process, you’ll have a clear vision of your stone porch steps and can move on to the next step: preparing the area.
Step 3: Prepare the Area
Now that you have measured and planned your stone porch steps, it’s time to prepare the area for construction. Proper preparation is essential for ensuring a stable and long-lasting foundation. Here’s how you can proceed:
1. Clear the area:
Start by removing any obstacles, plants, or debris from the area where the steps will be installed. This includes weeds, rocks, and old materials. Clearing the area will provide a clean slate for your construction project.
2. Mark the layout:
Using stakes and string, mark the outline of your planned steps on the ground. This will serve as a visual guide during the construction process and help you stay on track.
Read more: How To Fix Porch Steps
3. Excavate the ground:
Use a shovel to dig out the area where the steps will be placed. The depth of the excavation will depend on the height of the steps and the type of foundation you are building. Typically, you’ll need to dig down at least 6-8 inches to create a sturdy base.
4. Level the ground:
Once the area is excavated, use a level and a tamper or hand compactor to ensure that the ground is level and compacted. This will provide a solid base for your steps and prevent any shifting or sinking in the future.
5. Install landscape fabric:
Before adding any gravel or stone, lay down a layer of landscape fabric over the excavated area. This will help prevent weed growth and minimize soil erosion under the steps.
6. Add gravel:
Pour a layer of gravel over the landscape fabric to create a stable base for your steps. Use a rake or a shovel to evenly distribute the gravel and ensure it is compacted.
Read more: How To Put Stepping Stones On Grass
7. Compact the gravel:
Use a hand compactor or a tamper to compact the gravel layer. This will further ensure stability and provide a solid foundation for your stone steps.
With the area properly prepared, you’re now ready to move on to the next step: building the foundation for your stone porch steps.
Step 4: Build the Foundation
Building a solid foundation is crucial to the stability and longevity of your stone porch steps. The foundation provides support for the steps and helps distribute the weight evenly. Here’s how you can build a sturdy foundation:
1. Determine the type of foundation:
Depending on the height and design of your steps, you can choose between a concrete foundation or a dry stone foundation. A concrete foundation is recommended for taller steps or when dealing with unstable soil conditions, while a dry stone foundation is suitable for shorter steps.
2. Concrete foundation:
If you’ve opted for a concrete foundation, mix the concrete according to the manufacturer’s instructions. Pour the concrete into the excavated area, making sure it is level and fills the entire space. Smooth the surface using a trowel or a float.
Read more: How To Make Outdoor Stone Steps
3. Dry stone foundation:
If you’re building a dry stone foundation, start by placing larger stones or concrete blocks at the base of the excavated area. Ensure that they are level and tightly fitted together to form a stable foundation. Add additional layers of stones, compacting them as you go, until you reach the desired height.
4. Check for level:
Use a level to ensure that the foundation is even and properly aligned. Adjust the stones or blocks as needed to achieve a level base. This is crucial to maintain the stability of the entire structure.
5. Allow proper curing time:
If you’ve used a concrete foundation, allow the concrete to cure according to the manufacturer’s instructions. This usually takes around 24 to 48 hours. Avoid placing any weight or pressure on the foundation during this time to prevent damage.
6. Optional: Add edge restraints:
To provide additional support and prevent shifting of the stones, you can install edge restraints along the sides of the foundation. These can be made of plastic, metal, or concrete and should be secured tightly along the edges of the steps.
Once the foundation is in place and properly cured, you’re ready to proceed to the next step: laying the base stones for your porch steps.
Read more: How To Lay A Stepping Stone Patio
Step 5: Lay the Base Stones
With the foundation prepared, it’s time to start laying the base stones for your stone porch steps. This step will form the structure and shape of the steps, providing a sturdy and level surface to walk on. Here’s how you can lay the base stones:
1. Choose your stones:
Select the stones for the base layer. These stones should be larger and more flat in shape, as they will form the main surface of each step. Consider the size, thickness, and color of the stones to create an aesthetically pleasing design.
2. Apply mortar (optional):
If you prefer a more permanent and solid structure, you can choose to apply mortar between the stones. Mix the mortar according to the manufacturer’s instructions and use a trowel to spread a thin layer on the foundation. Press the stones into the mortar, ensuring they are level and evenly spaced.
3. Dry stone installation:
If you prefer a more natural and flexible installation, you can dry-fit the stones without using mortar. Start by placing the stones on the foundation, ensuring they are properly aligned and spaced. Use a level to check for evenness, adjusting the stones as needed.
Read more: How To Make A Stepping Stone Path
4. Fill gaps:
As you lay the base stones, you may encounter gaps between the stones. Fill these gaps with sand or small stones to create a more uniform surface. Ensure that the filling material is tightly packed to prevent shifting.
5. Continue the process:
Continue laying the base stones in the desired pattern and shape, following your initial plan. Take your time to ensure that each stone is level, secure, and properly aligned with the others. Use a rubber mallet or a wooden block to gently tap the stones into place if needed.
6. Check for level:
Regularly use a level to verify that the base stones are even and level. Adjust and reposition the stones as necessary to ensure a uniform surface and proper alignment.
7. Step riser blocks (optional):
If you’ve chosen to include step riser blocks in your design, install them between the base stones. These blocks will create a more gradual step and add a finished look to the structure. Ensure that they are securely placed and aligned with the base stones.
Once you have laid the base stones and ensured that they are level and secure, you can proceed to the next step: installing the steps for your stone porch.
Read more: How To Make Tile-Topped Stepping Stones
Step 6: Install the Steps
Now that the base stones are in place, it’s time to install the steps for your stone porch. This step will involve placing the top layer of stones that will act as the actual stepping surface. Here’s how you can install the steps:
1. Choose your step stones:
Select the stones for the top layer, keeping in mind their size, shape, and color. These stones should be relatively flat and consistent in thickness to ensure a smooth and safe walking surface. Consider using stones that complement the base stones and the overall aesthetic of your porch.
2. Lay the step stones:
Begin by placing the first step stone at the bottom of the staircase, ensuring it is securely positioned on the base stones. Use a level to verify that the stone is even and adjust if necessary. Continue placing the step stones one by one, aligning them with the edge of the base stones and the previous step.
3. Check for level and stability:
Regularly use a level to ensure that each step stone is level and evenly spaced. Adjust the stones as needed to achieve a consistent and even surface. Press down firmly on each stone to check for stability. If any stones feel loose, remove them and readjust the base stones or add additional mortar or adhesive for support.
Read more: How To Build Stone Stairs
4. Consider the step depth and rise:
As you install the steps, pay attention to the depth and rise of each step. The depth refers to the horizontal distance between the front and back of each step, while the rise is the vertical height from one step to the next. Aim for consistent dimensions to provide a comfortable and safe staircase.
5. Fill gaps:
Fill any gaps between the step stones with sand or small stones, ensuring they are tightly packed to prevent shifting or instability. Use a broom to sweep away any excess filling material and create a clean and finished look.
6. Secure the steps (optional):
If desired, you can secure the step stones to the base stones using mortar or adhesive. This will provide additional stability and ensure that the steps remain in place over time. Follow the instructions provided by the manufacturer for the best results.
With the steps installed, you’re one step closer to completing your stone porch. However, there are a few more essential steps to take before finishing the project. Let’s move on to Step 7: filling the gaps between stones.
Step 7: Fill the Gaps
After installing the steps for your stone porch, it’s time to fill the gaps between the stones. Filling the gaps will not only enhance the overall appearance but also provide additional stability and prevent weed growth. Here’s how you can fill the gaps:
Read more: How To Build Brick Steps
1. Select the filling material:
Choose a filling material that suits your preferences and the aesthetics of your porch. Common options include sand, gravel, or a specialized polymeric sand mixture. Consider the color and texture of the filling material to ensure it complements the stones and overall design.
2. Prepare the gaps:
Use a small brush or broom to clean out any debris or loose particles from the gaps between the stones. This will ensure that the filling material adheres properly and creates a solid bond.
3. Fill the gaps:
Pour your chosen filling material into the gaps between the step stones. Use a broom or a trowel to help distribute the material evenly and push it into the gaps. Ensure that the gaps are completely filled but not overflowing.
4. Compact the filling material:
Gently tap the filling material with a rubber mallet or the handle of a tool to compact it and remove any air pockets. This will create a more solid and stable surface. Repeat this process until the gaps are fully compacted.
Read more: How To Build An Angled Deck Step-by-Step
5. Sweep away excess material:
Use a broom or a brush to sweep away any excess filling material from the surface of the steps. This will create a clean and polished appearance, leaving only the filled gaps visible.
6. Mist with water (for polymeric sand):
If you’ve used a polymeric sand mixture, follow the manufacturer’s instructions and mist the filled gaps with water. This will activate the binding agents in the sand and help it set properly. Allow the sand to dry completely before using the steps.
7. Perform touch-ups:
Take a final look at the filled gaps and make any necessary touch-ups. If you notice any low areas or gaps that need more material, carefully add and compact additional filling material as needed.
With the gaps filled, you’re almost done with the construction of your stone porch steps. There’s just one more step remaining: adding the finishing touches.
Step 8: Finishing Touches
Congratulations on reaching the final step of building your stone porch steps! In this step, you’ll add the finishing touches that will enhance the overall appearance and functionality of your steps. Here are some key finishing touches to consider:
Read more: How To Build A Stone Fireplace
1. Clean the stones:
Use a brush or a broom to remove any dirt, dust, or debris from the surface of the stones. This will give your steps a clean and polished look.
2. Seal the stones (optional):
If you want to protect the stones and enhance their longevity, you can choose to apply a stone sealer. Follow the instructions provided by the manufacturer to correctly apply the sealer and ensure proper drying time.
3. Add handrails (if desired):
If you’d like to add an extra safety measure and decorative element, consider installing handrails. Select handrails that match the style of your porch and ensure they are securely attached to the porch structure.
4. Enhance with lighting:
To create an inviting ambiance and improve visibility at night, consider installing outdoor lighting around your stone porch steps. This can include overhead lights, wall sconces, or step lighting for added safety and aesthetics.
5. Include landscaping:
Enhance the overall look of your stone porch steps by incorporating landscaping elements. Plant flowers, shrubs, or other greenery around the steps to add color and texture. Be sure to select plants that can withstand the local climate and require minimal maintenance.
6. Add personal touches:
To make your stone porch steps unique and reflect your personal style, consider adding personal touches. This could include decorative stones, mosaic patterns, or even personalized plaques or signs.
7. Regular maintenance:
To keep your steps looking their best, perform regular maintenance. This may include sweeping away debris, applying additional filling material if needed, and inspecting for any damage. Address any issues promptly to prevent further damage and ensure the long-term durability of your steps.
By focusing on these finishing touches, you’ll elevate the overall appearance and functionality of your stone porch steps, creating a beautiful and inviting entrance to your home.
Congratulations on completing the construction of your stone porch steps! Now, sit back, relax, and enjoy your new elegant entrance.
Conclusion
Building stone porch steps can significantly enhance the curb appeal and functionality of your home. By following the step-by-step process outlined in this guide, you have gained the knowledge and confidence to embark on this DIY project. Whether you’re an experienced DIY enthusiast or a beginner, with the right materials, tools, and careful planning, you can create stunning stone porch steps that will stand the test of time.
Throughout this guide, we have covered essential steps, from gathering materials and tools to finishing touches. We discussed the importance of measuring and planning, preparing the area, building a solid foundation, laying the base stones, installing the steps, filling the gaps, and adding the finishing touches. Each step contributes to the overall stability, safety, and aesthetic appeal of your stone porch steps.
Remember, safety should always be the top priority. Follow proper safety precautions, wear protective gear, and consult with professionals if needed. Adhering to local building codes and regulations is also crucial to ensure the success of your project.
As you complete each step, take pride in your work and pay attention to detail. The result will be a beautiful set of stone porch steps that will welcome guests and add value to your home for years to come.
Regular maintenance and care will help preserve the beauty and functionality of your stone porch steps. Periodically inspect the steps for any damage, perform necessary repairs, and keep them clean from dirt and debris.
Now that you have the knowledge and guidance, it’s time to get started! Gather your materials and tools, measure and plan, prepare the area, and embark on the rewarding journey of building your own stone porch steps. Enjoy the satisfaction of creating a stunning entrance that will make a lasting impression on visitors and provide a warm welcome to your home.
Best of luck with your stone porch step construction project!
Ready to enhance your home even further? Dive into our collection of inspiring ideas. Whether you're looking to upgrade your home's exterior with stone steps, tackle DIY home improvement projects on your own, or refresh your garden with creative landscaping designs, we have all the resources you need. Each guide offers practical tips and creative solutions to beautify your space. Start transforming your home and garden today!
Frequently Asked Questions about How To Build Stone Porch Steps
Was this page helpful?
At Storables.com, we guarantee accurate and reliable information. Our content, validated by Expert Board Contributors, is crafted following stringent Editorial Policies. We're committed to providing you with well-researched, expert-backed insights for all your informational needs.
0 thoughts on “How To Build Stone Porch Steps”