Articles
How To Build A Sun Porch
Modified: October 31, 2024
Learn how to build a beautiful and functional sun porch with our informative articles. Transform your outdoor space into a relaxing oasis.
(Many of the links in this article redirect to a specific reviewed product. Your purchase of these products through affiliate links helps to generate commission for Storables.com, at no extra cost. Learn more)
Overview
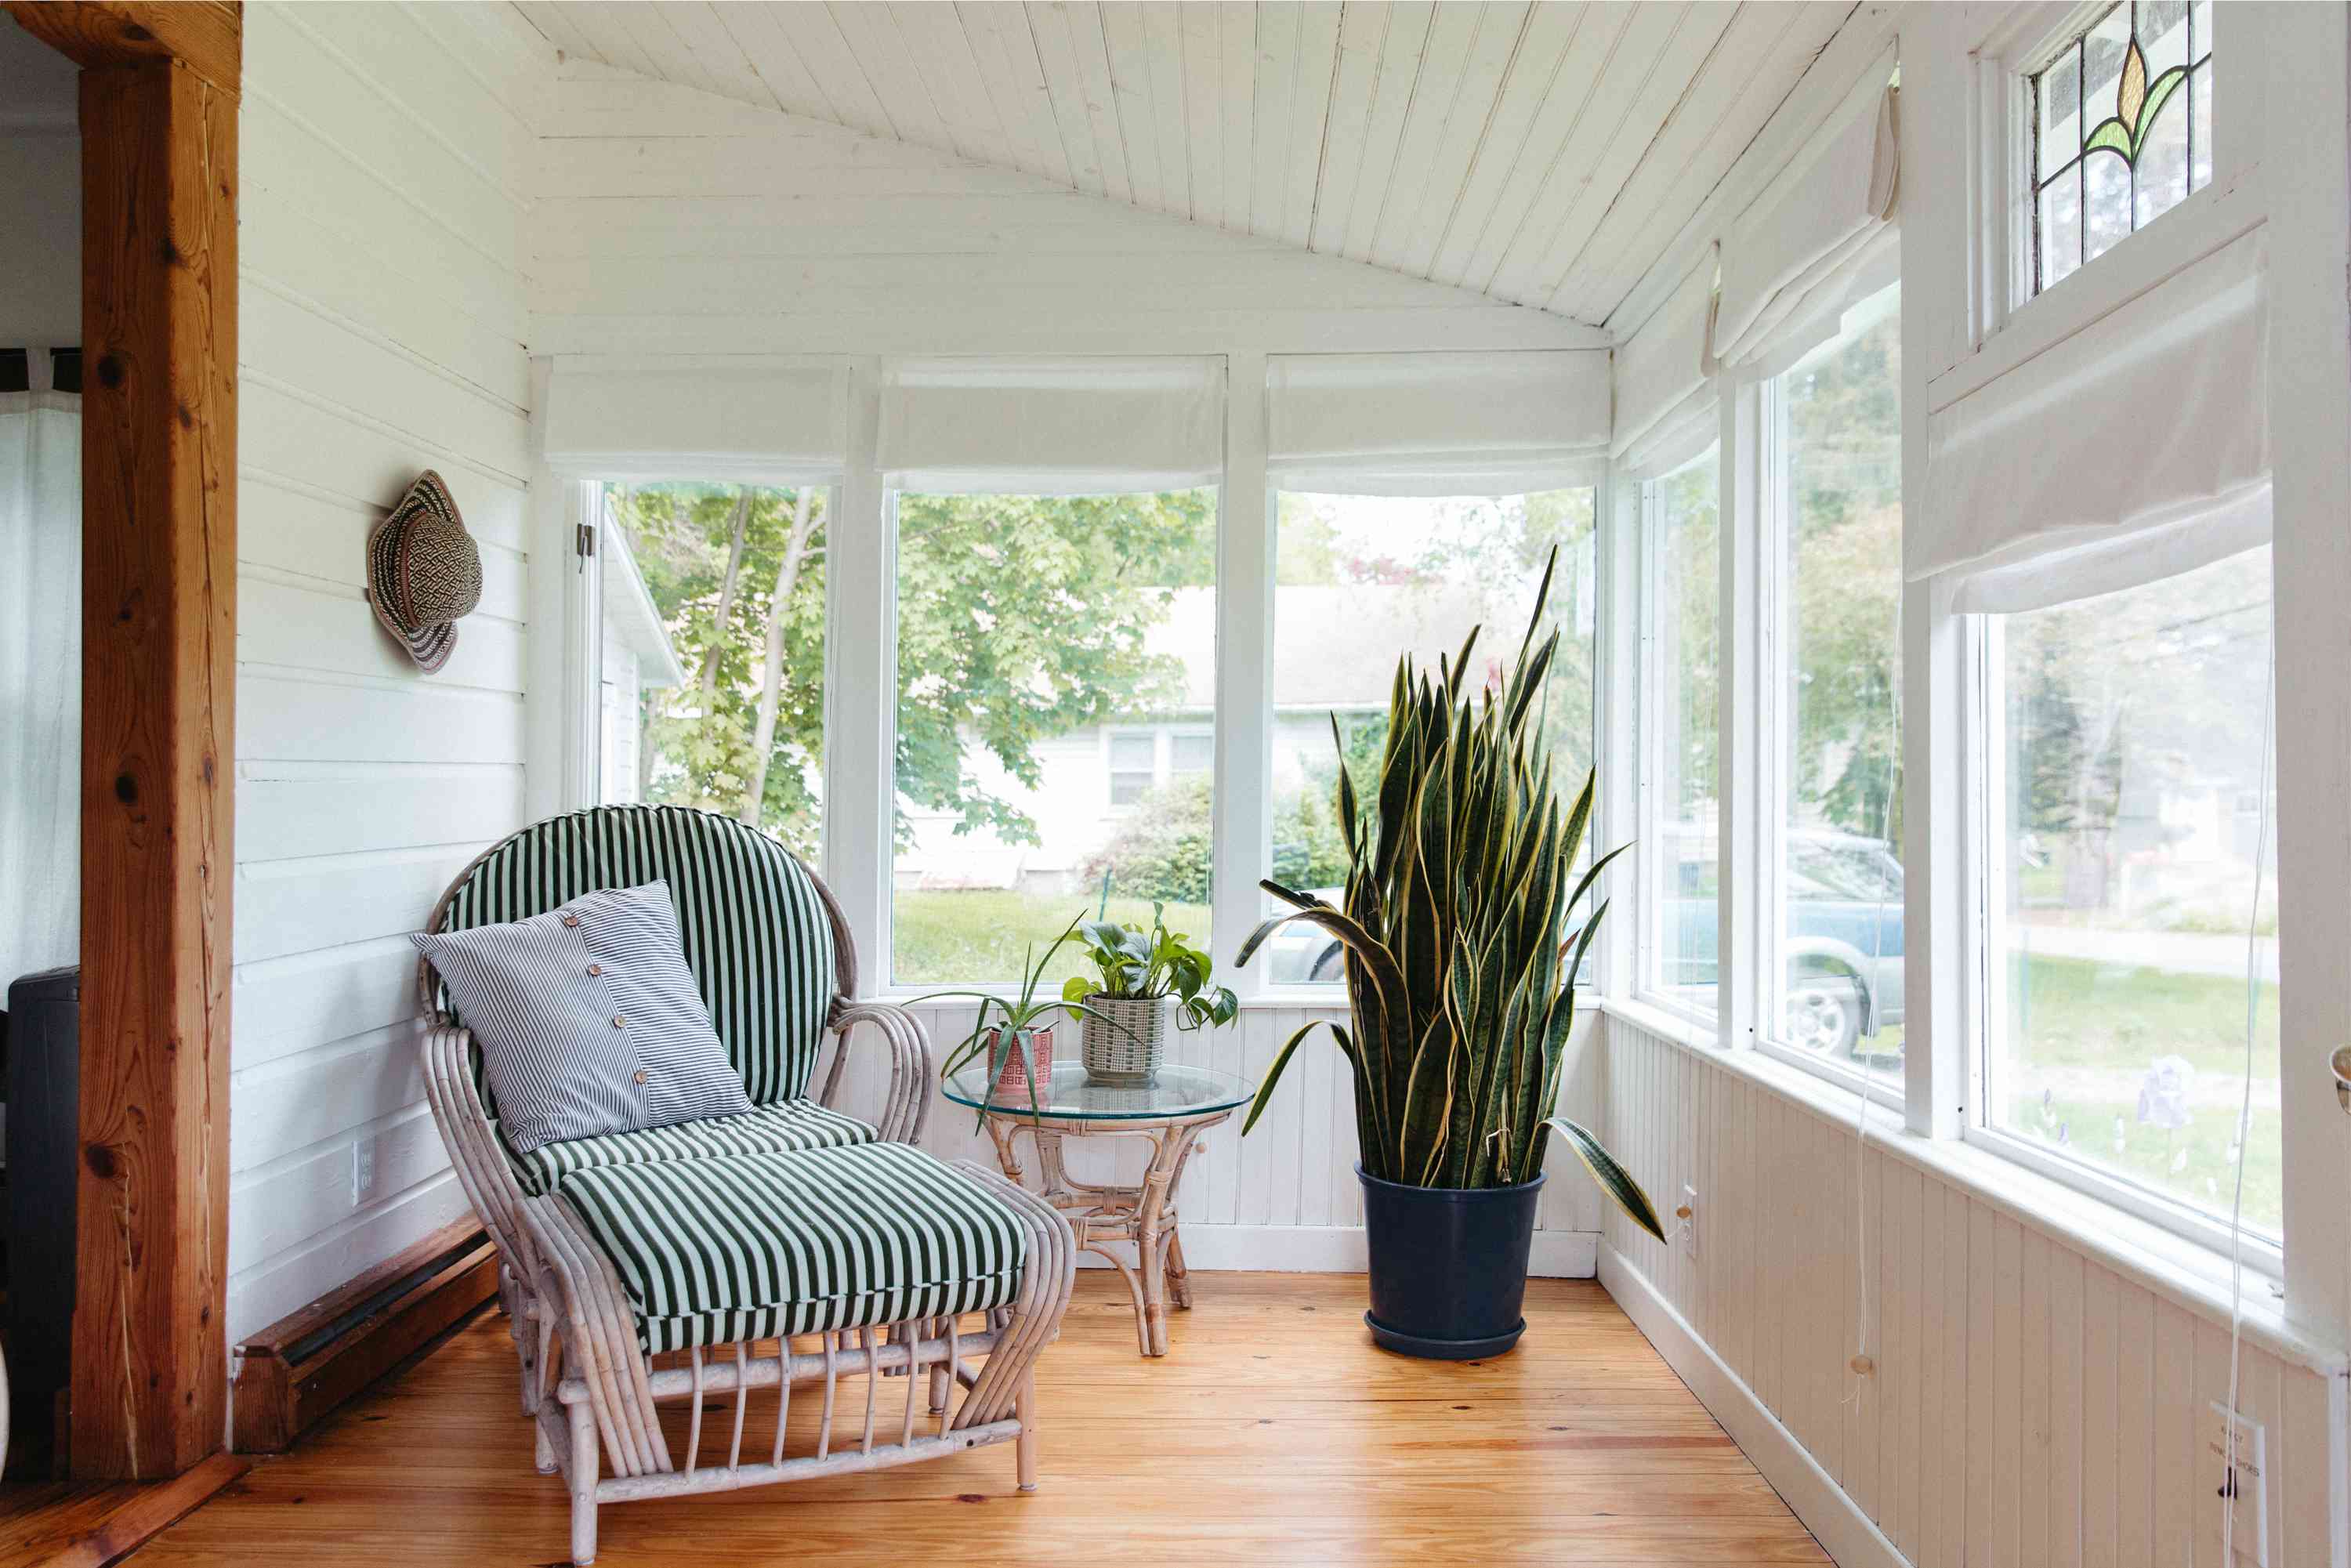
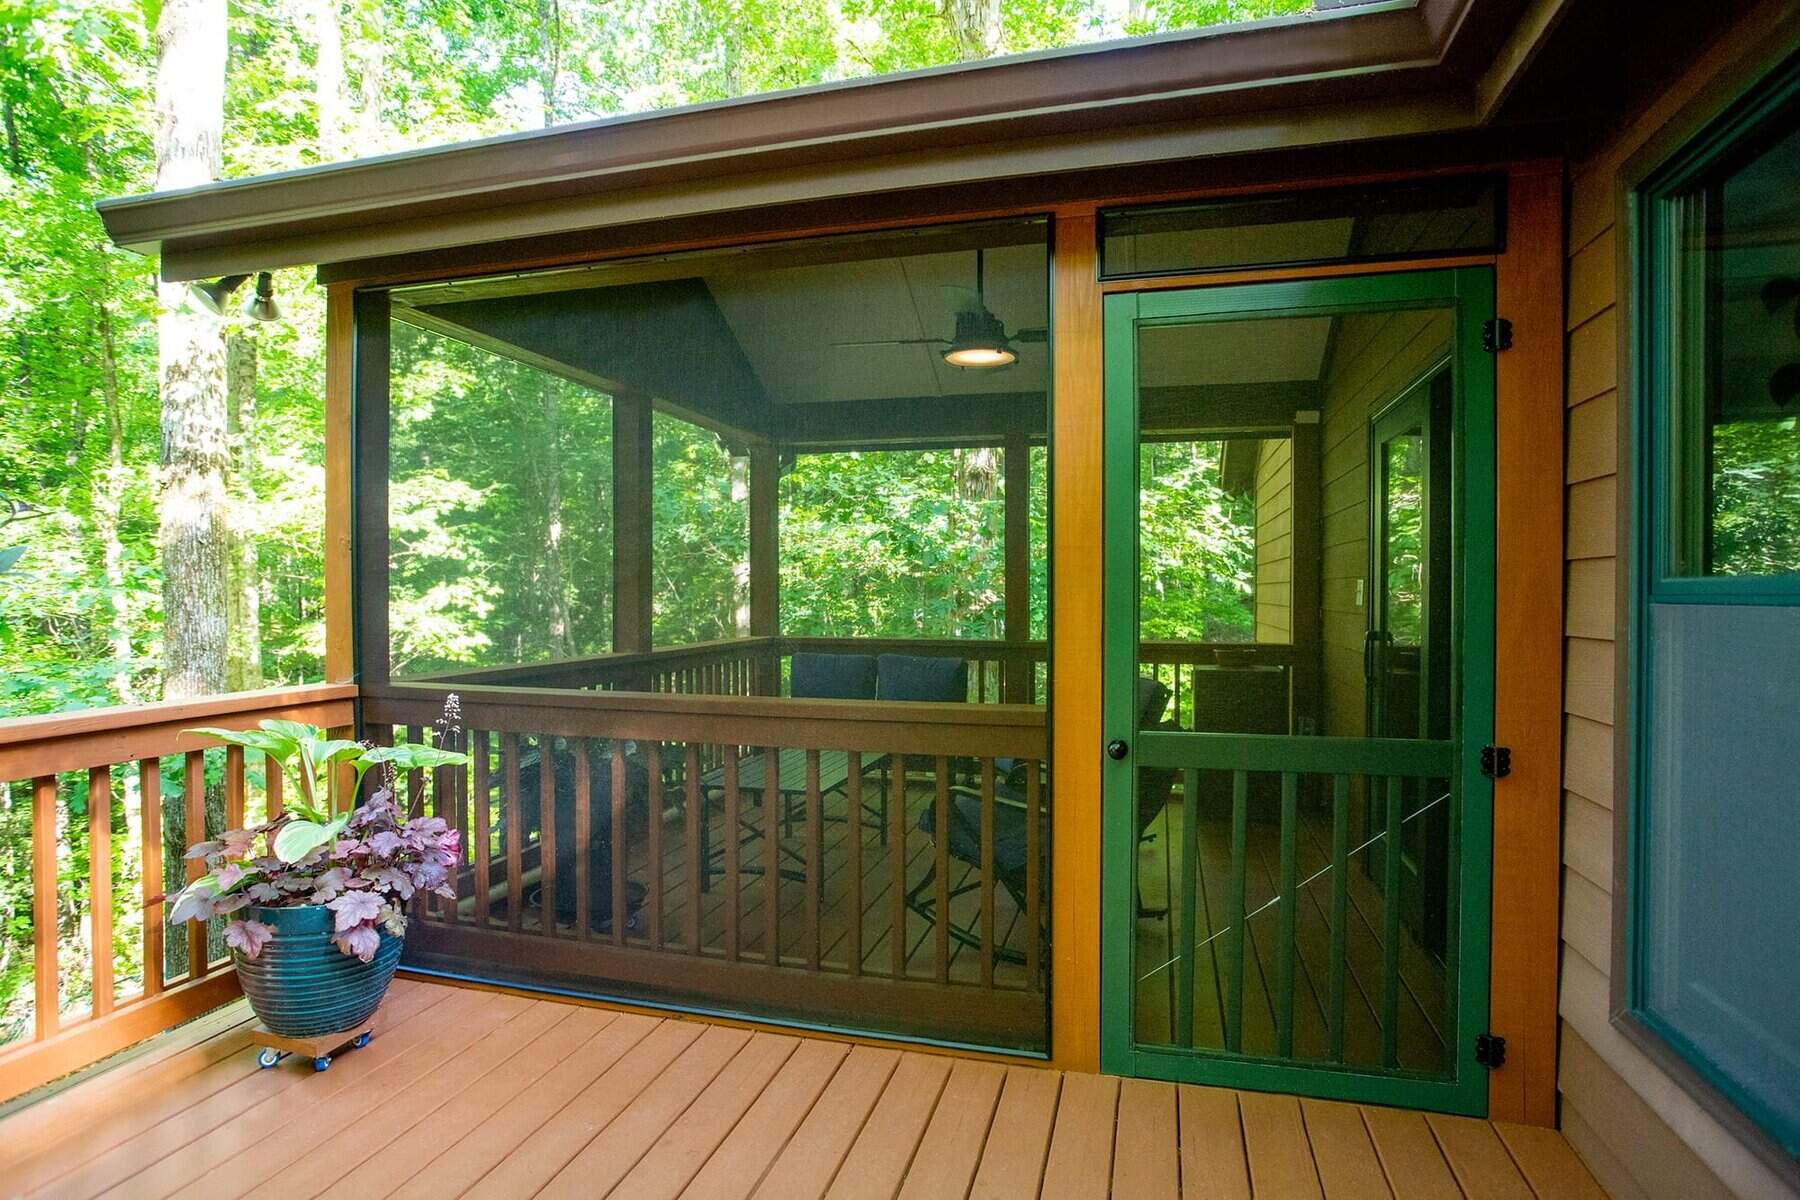
Building a sun porch is a great way to add extra living space to your home while enjoying the natural beauty of the outdoors. A sun porch, also known as a sunroom or screened-in porch, provides a tranquil and comfortable space where you can relax, entertain, or simply unwind.
Before embarking on your sun porch construction journey, it’s important to have a clear understanding of the process involved. From choosing the right location to final inspections, each step requires careful planning and attention to detail.
In this article, we’ll walk you through the essential steps to build a sun porch that not only complements your home but also meets your functional and aesthetic needs. Whether you’re a seasoned DIY enthusiast or hiring professionals, this guide will provide valuable insights to help you create a sun porch that you’ll love for years to come.
Over the course of the article, we’ll cover topics such as choosing the right location, design and planning, obtaining permits and permissions, site preparation, foundation construction, framing and wall installation, roofing and ceiling installation, flooring and finishing touches, installing doors and windows, adding lighting and electrical connections, furnishing and decorating, and final inspections and maintenance.
By following these steps and applying careful consideration to each phase of the process, you’ll be well-equipped to successfully create a sun porch that harmonizes with your home’s architecture and enhances its overall appeal. So, let’s dive in and discover how to transform your dream of a sun porch into a reality.
Key Takeaways:
- Create a sun porch that harmonizes with your home’s architecture and enhances its overall appeal by carefully considering factors such as sun exposure, views, accessibility, privacy, and existing structures.
- Ensure the longevity and safety of your sun porch by scheduling final inspections, maintaining waterproofing and sealants, developing a regular cleaning routine, and preparing for seasonal changes.
Read more: How To Build A Deck Porch
Choosing the Right Location
When deciding where to build your sun porch, it’s important to consider several factors that will influence its functionality and enjoyment. Here are some key considerations to keep in mind:
1. Sun Exposure: Choose a location that receives ample sunlight throughout the day. This will maximize the natural light in the sun porch, making it a bright and inviting space. Consider the sun’s path throughout the seasons to ensure the area will receive enough sunlight year-round.
2. Views: Take advantage of any scenic views your property may offer. Whether it’s a lush garden, a serene pond, or a magnificent cityscape, positioning your sun porch to capture these vistas will enhance your overall experience and create a peaceful retreat.
3. Accessibility: Consider the accessibility of the sun porch from your main living areas. Choose a location that allows for easy access and flow between indoor and outdoor spaces. This will ensure that your sun porch feels like a seamless extension of your home.
4. Privacy: Think about how much privacy you desire in your sun porch. Consider the proximity of neighboring properties and any potential sightlines. You may want to position the sun porch away from prying eyes or utilize privacy screens or landscaping features to create a secluded and intimate space.
5. Existing Structures: Take into account any existing structures on your property, such as trees, bushes, or outbuildings. These elements can impact the placement and orientation of your sun porch. Carefully evaluate how they may provide shade or block views before finalizing the location.
6. Building Codes and Restrictions: Check with your local building department to ensure that you comply with any codes or restrictions regarding setback requirements, height limitations, or other regulations. It’s crucial to obtain the necessary permits and permissions before starting construction.
Considering these factors will help you select the ideal location for your sun porch. It’s important to strike a balance between maximizing the benefits of sunlight and views, ensuring accessibility and privacy, and adhering to any local regulations. With the right location, your sun porch will become a cherished space where you can enjoy the beauty of nature in the comfort of your home.
Design and Planning
Designing and planning your sun porch is an exciting step in the construction process. It allows you to envision how you want your space to look and function. Here are some key considerations for designing and planning your sun porch:
1. Purpose and Functionality: Determine the primary purpose of your sun porch. Will it be a relaxing space for reading and unwinding, a dining area for entertaining guests, or a versatile room that serves multiple functions? Clarifying the purpose will help guide the design decisions.
2. Size and Layout: Consider the size and layout of your sun porch based on your intended use and available space. If you plan to host gatherings or have large furniture, ensure that there is ample room to accommodate your needs without feeling cramped. Take measurements and create a floor plan to visualize the layout.
3. Structural Materials: Choose the right materials for the construction of your sun porch. Common options include wood, vinyl, aluminum, or a combination of materials. Consider factors such as durability, maintenance requirements, and aesthetic appeal when selecting the materials.
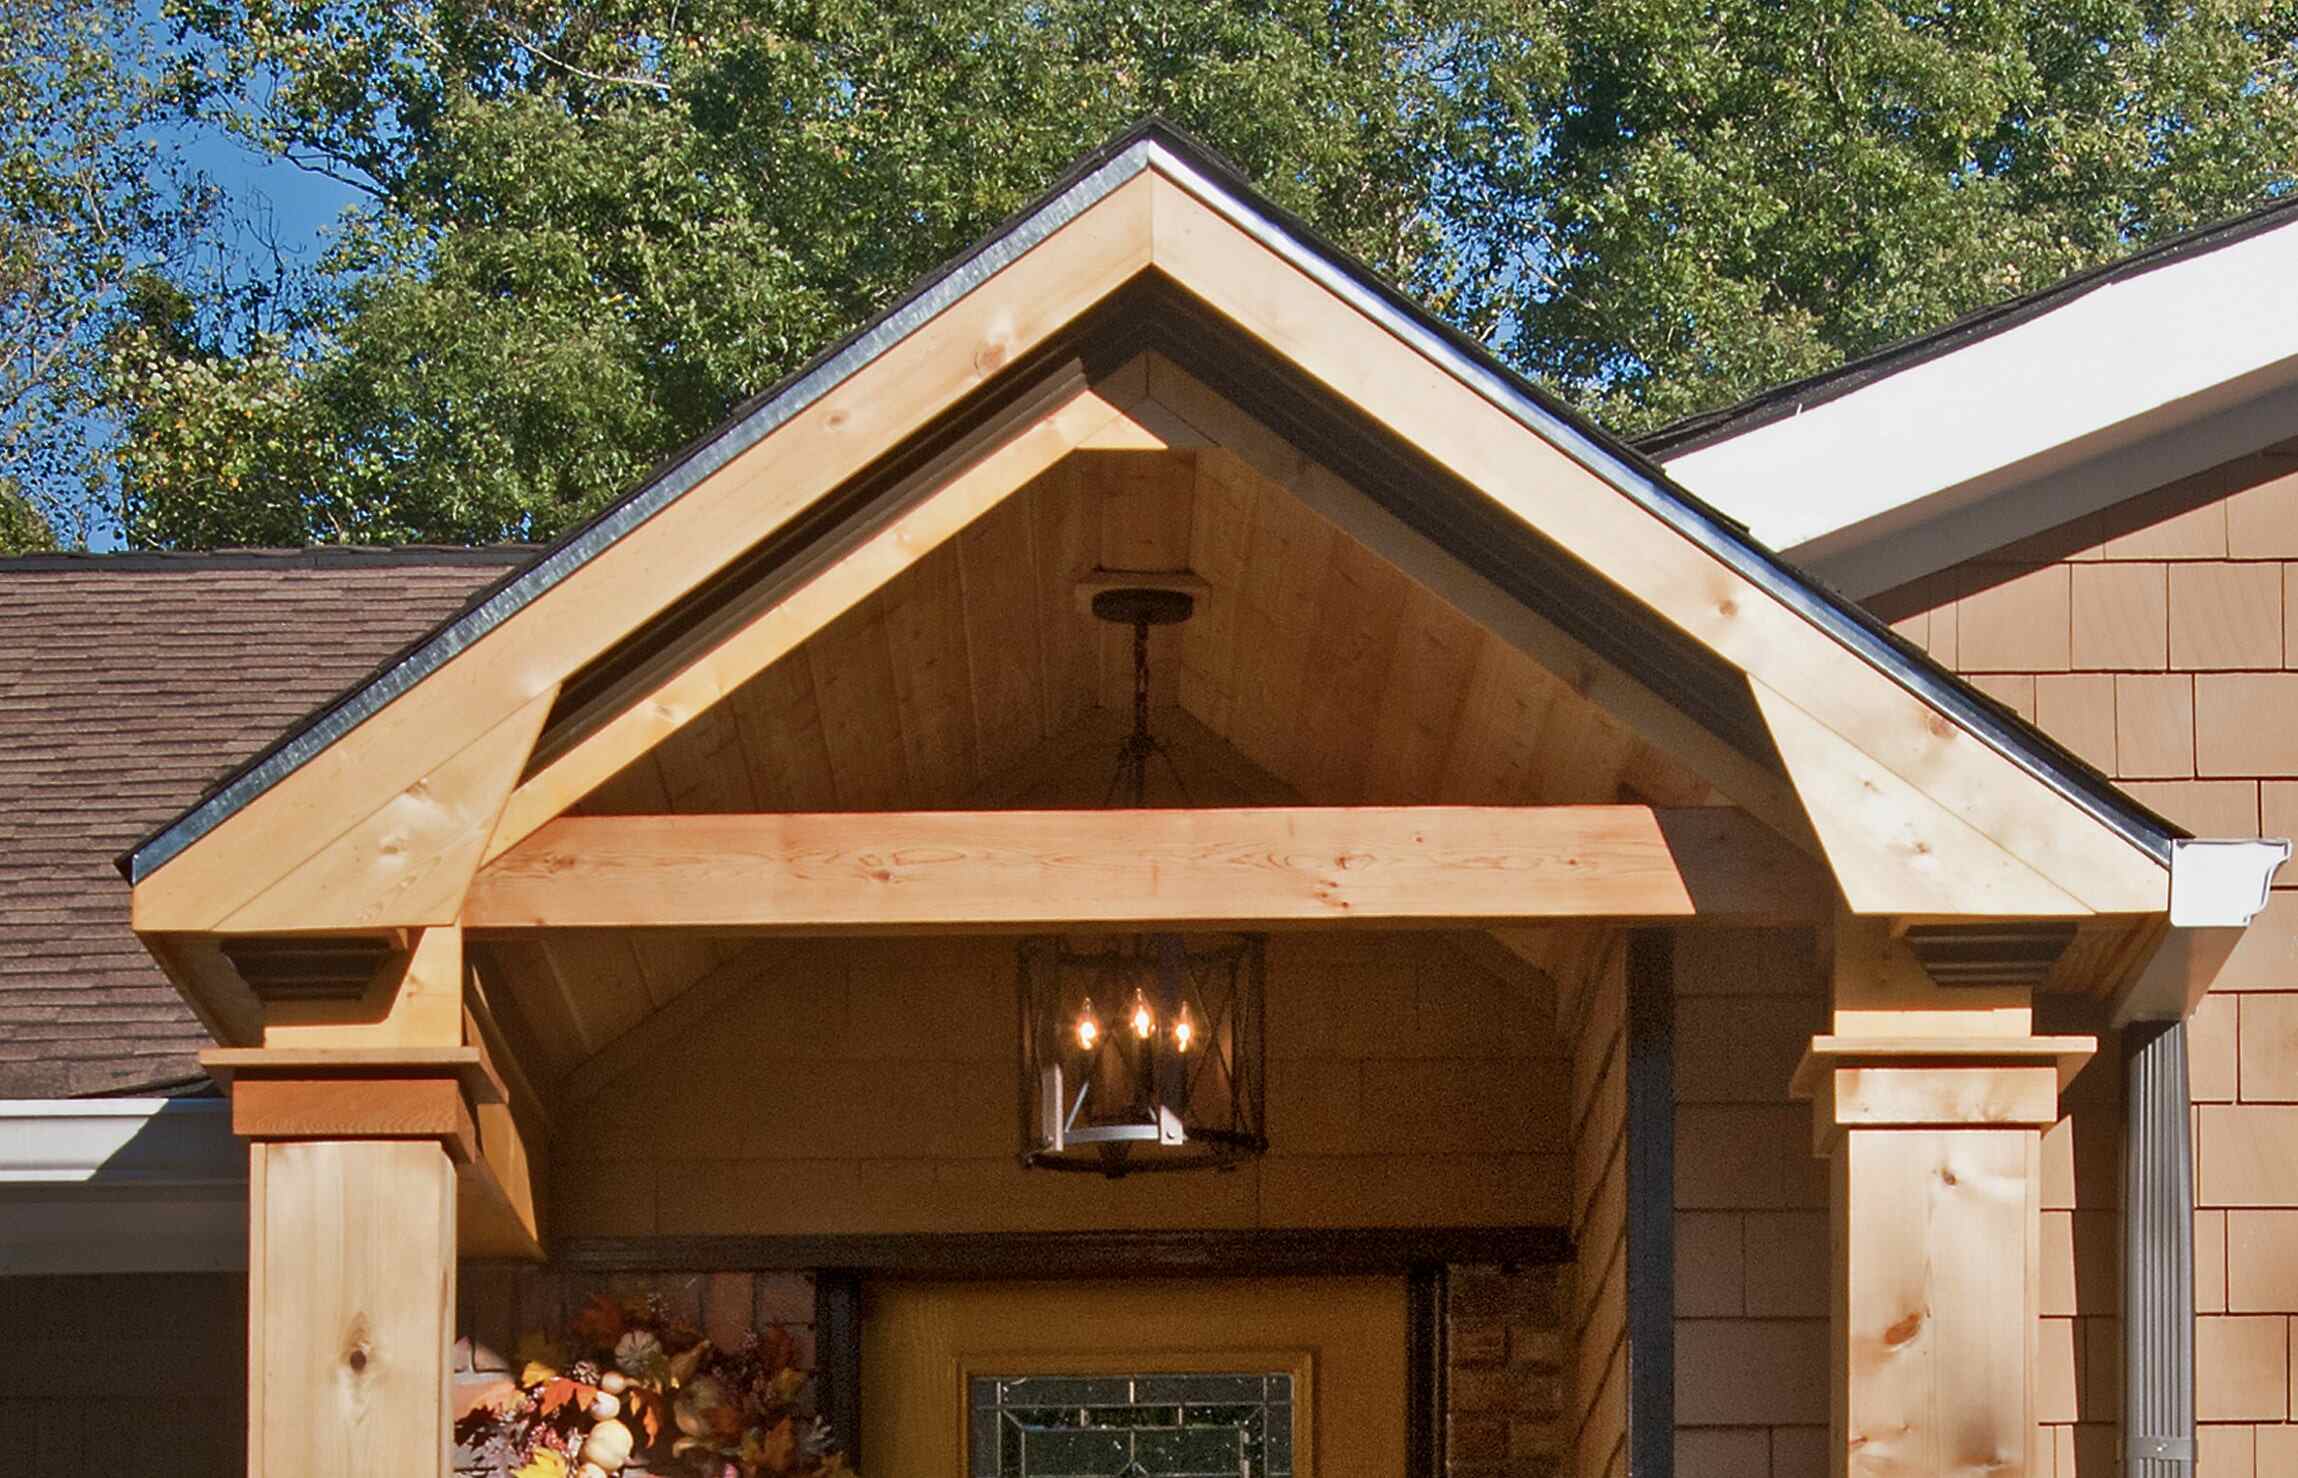
4. Roof Design: Decide on the roof design for your sun porch. Options range from a traditional gable or hip roof to a more contemporary flat or shed roof. Consider factors such as the architectural style of your home, climate conditions, and the desired aesthetic when choosing the roof design.
5. Ventilation and Insulation: Consider how you will provide ventilation in your sun porch. Options include operable windows, ceiling fans, or even skylights. Additionally, think about insulation to ensure comfortable temperatures throughout the year. Insulated glass and properly sealed walls will help regulate the temperature and reduce energy costs.
6. Style and Aesthetics: Determine the style and aesthetic of your sun porch to create a cohesive look with your home. Choose colors, patterns, and finishes that complement your existing architecture. Consider elements such as flooring, wall treatments, and furniture to tie the space together.
7. Lighting and Electrical: Plan for adequate lighting and electrical connections in your sun porch. Consider both natural lighting sources, such as strategically placed windows, and artificial lighting options, such as recessed lights or decorative fixtures. Also, ensure that electrical outlets are conveniently located for your needs.
By carefully considering these design and planning elements, you’ll create a sun porch that not only reflects your personal style but also functions seamlessly with the rest of your home. Remember to prioritize your needs, budget, and any specific design preferences to achieve a space that brings joy and enhances your overall living experience.
Obtaining Permits and Permissions
Before you begin building your sun porch, it’s crucial to determine if you need to obtain any permits or permissions from your local authorities. Compliance with building codes and regulations is essential to ensure the safety and legality of your project. Here’s a step-by-step guide on obtaining permits and permissions for your sun porch construction:
1. Research Local Regulations: Start by researching the specific building codes and regulations in your area. Contact your local building department or visit their website to familiarize yourself with the requirements. Every jurisdiction may have different rules regarding setbacks, structure size, electrical work, and overall construction guidelines.
2. Submit Permit Application: Once you have a good understanding of the building regulations, submit a permit application to the appropriate department. This typically involves providing detailed construction plans, specifications, and a fee payment. You may also need to include information on the materials you’ll be using and any contractors involved.
3. Development Review Process: Your permit application will go through a development review process. This may involve different departments reviewing your plans, such as zoning, building, and electrical. They will ensure that your sun porch construction complies with all the necessary regulations and meets safety standards.
4. Modifications and Corrections: During the review process, it’s possible that you’ll receive feedback or requests for modifications or corrections. This could be related to the design, structural calculations, or other aspects of the project. Work closely with the building department to address any concerns and make the necessary revisions to your plans.
5. Permit Approval: Once your plans are reviewed and deemed compliant with the regulations, you will receive permit approval. This will come in the form of an approved set of plans or a permit card. Keep a copy of this approval documentation on-site during the construction process.
6. Inspections: As you proceed with the construction of your sun porch, you will need to schedule inspections at specific points in the process. These inspections ensure that the work is being done correctly and in accordance with the approved plans. Common inspection stages include foundation, framing, electrical, and final inspection.
7. Certificate of Occupancy: Once the construction and inspections are complete, you may need to apply for a Certificate of Occupancy (CO) or a final inspection approval. This is a document that officially declares the sun porch as meeting all building code requirements and is safe for occupancy.
It’s important to note that the permit process may vary depending on your location. Some areas may require additional permits for things like plumbing or HVAC installations. It’s recommended to consult with professionals or your local building department to ensure you are following the correct procedures and obtaining all the necessary permits and permissions for your sun porch construction.
Site Preparation
Site preparation is a critical step in the construction of your sun porch. Proper preparation ensures that the area is ready for the construction process and sets the foundation for a successful project. Here are some essential steps to take when preparing the site for your sun porch:
1. Clear the Area: Begin by clearing the area where the sun porch will be built. Remove any vegetation, debris, or obstacles that may interfere with the construction process. This includes shrubs, trees, rocks, or any other items in the way. Ensure that the site is completely cleared to make way for the construction process.
2. Level the Ground: Next, it’s important to ensure that the ground is level and even. Use a level and a measuring tool to determine if there are any uneven areas that need to be addressed. You may need to remove excess soil or add fill dirt to achieve a level surface. This step is crucial for the stability and proper installation of the sun porch.
3. Mark the Perimeter: Once the ground is level, mark the perimeter of the sun porch using stakes and string. This will help you visualize the exact dimensions and shape of the structure. Double-check the dimensions to ensure accuracy before proceeding to the next steps.
4. Consider Drainage: Assess the site’s drainage requirements to prevent water from pooling or causing damage to your sun porch. If necessary, grade the ground to ensure proper water runoff. You may also need to install drainage systems, such as French drains, to divert excess water away from the structure.
5. Determine Utility Connections: If your sun porch requires electrical or plumbing connections, plan for their installation during the site preparation phase. Consult with professionals to determine the best routes for utility lines and ensure they meet code requirements. This ensures that the necessary connections are in place before proceeding with construction.
6. Secure Necessary Permits: Before starting the construction process, ensure that you have obtained all the necessary permits and permissions for the site preparation phase. These may include permits for clearing the area, grading the land, or installing utility connections. Adhere to local regulations and guidelines to avoid any delays or issues during construction.
7. Temporary Structures: If needed, consider setting up temporary structures on-site to store construction materials or protect them from the elements. This includes temporary fencing, tarps, or portable storage units. These measures will help keep the site organized and protect materials from damage.
By properly preparing the site for your sun porch, you lay the groundwork for a smooth and successful construction process. Taking the time to clear the area, level the ground, mark the perimeter, address drainage concerns, and secure the necessary permits will ensure that your sun porch project starts off on the right foot. With a well-prepared site, you can move forward with confidence as you embark on the exciting journey of building your sun porch.
Read more: How To Build Porch Rails
Foundation Construction
The foundation is a crucial element of your sun porch construction, providing stability and support for the structure. Building a solid foundation ensures that your sun porch will withstand the test of time and remain structurally sound. Here are the key steps involved in foundation construction for your sun porch:
1. Choose the Foundation Type: There are various types of foundations to consider, depending on the size and design of your sun porch. Common options include concrete slab foundations, crawl space foundations, or full basement foundations. Each type has its own advantages and considerations, so choose the one that best suits your needs and site conditions.
2. Excavation: Begin by excavating the area where the foundation will be located. Excavation involves digging a trench or hole to the required depth and dimensions for the foundation. This can be done manually or with the assistance of excavation equipment. Follow the measurements and layout determined during the design and planning phase.
3. Install Footings: Once the excavation is complete, the next step is to install footings. Footings are horizontal concrete pads that provide a stable base for the foundation walls. The size and depth of the footings will depend on the local building codes and the load-bearing requirements of the sun porch. Reinforcement such as rebar may be added to enhance the footing’s strength.
4. Form Foundation Walls: After the footings have cured, it’s time to form the foundation walls. The walls can be constructed using various materials, including poured concrete, concrete blocks, or treated lumber. Follow the predetermined dimensions and design specified in your plans. Ensure that the walls are level, plumb, and properly reinforced to provide the necessary structural integrity.
5. Reinforce and Waterproof: To enhance the strength and durability of the foundation, reinforcement should be added. This can include steel rebar or wire mesh embedded within the concrete. Additionally, consider applying a waterproofing membrane or coating to protect the foundation from moisture penetration. This will help prevent future water damage and ensure the longevity of your sun porch.
6. Allow for Curing: Once the foundation walls are in place, allow sufficient time for the concrete to cure. Follow the manufacturer’s guidelines for the recommended curing period. During this time, it’s important to protect the foundation from extreme temperatures and moisture to ensure proper curing and avoid any cracks or other issues.
7. Backfill and Compaction: After the foundation walls have cured, backfill the excavated area around the foundation. Use suitable backfill material, such as gravel or crushed stone, to provide proper drainage and prevent settlement. Compact the backfill material in layers to ensure stability and to prevent future shifting or settling of the foundation.
Building a solid foundation sets the stage for a sturdy and long-lasting sun porch. By carefully following the steps of foundation construction, you’ll create a strong base that can support the weight of the sun porch and provide stability in various weather conditions. Ensure that all local building codes and regulations are met, and consider consulting with professionals to ensure proper construction techniques for your specific foundation type.
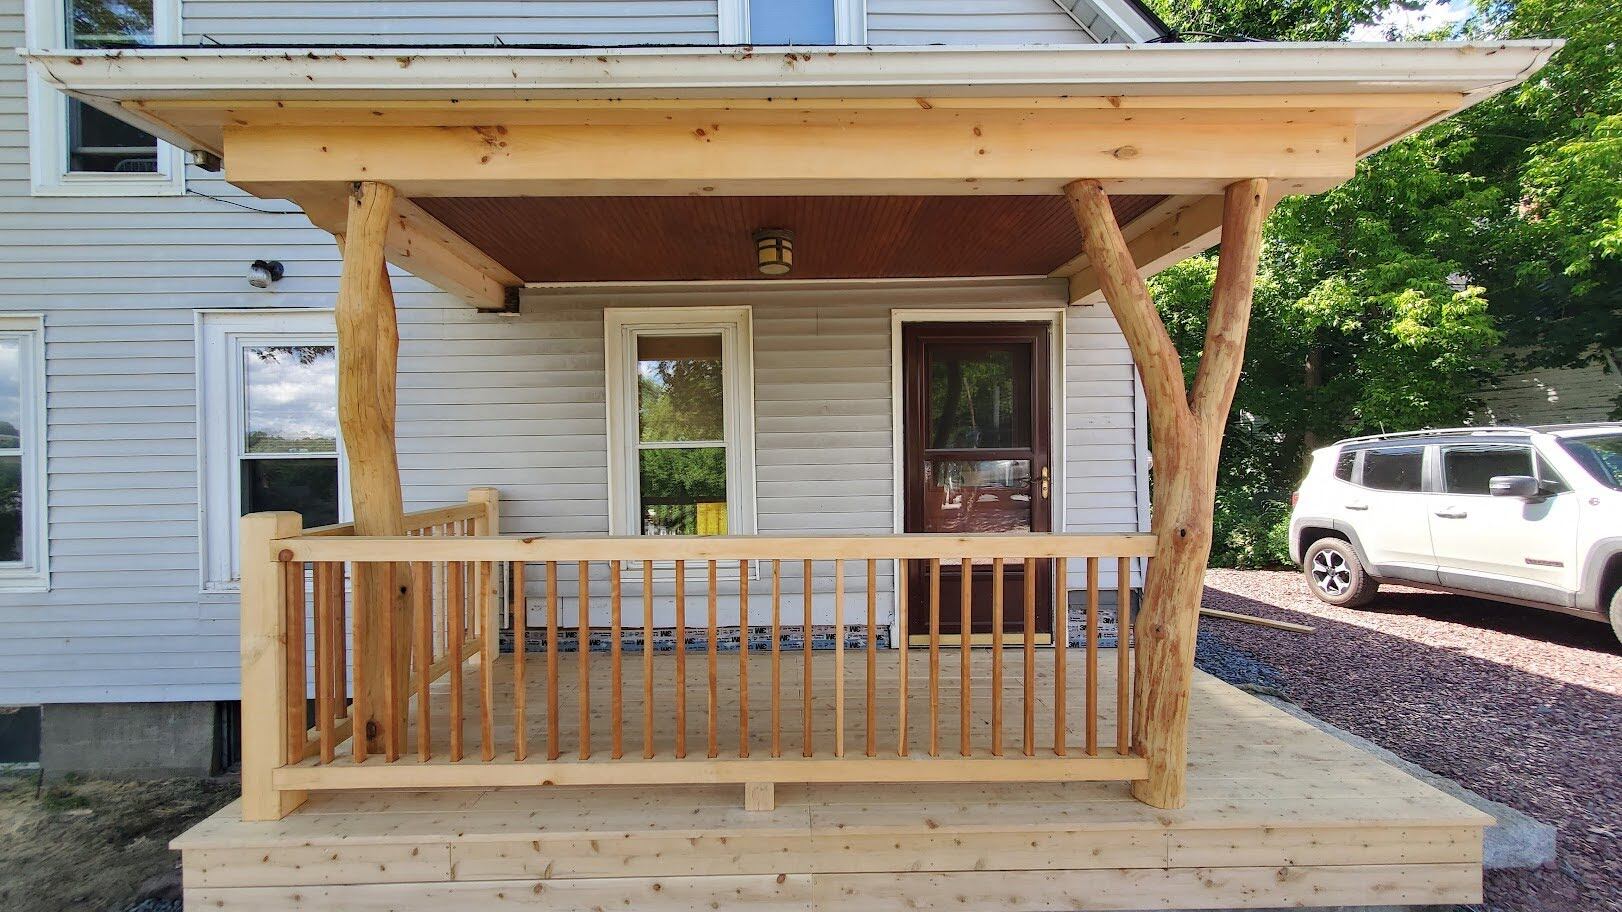
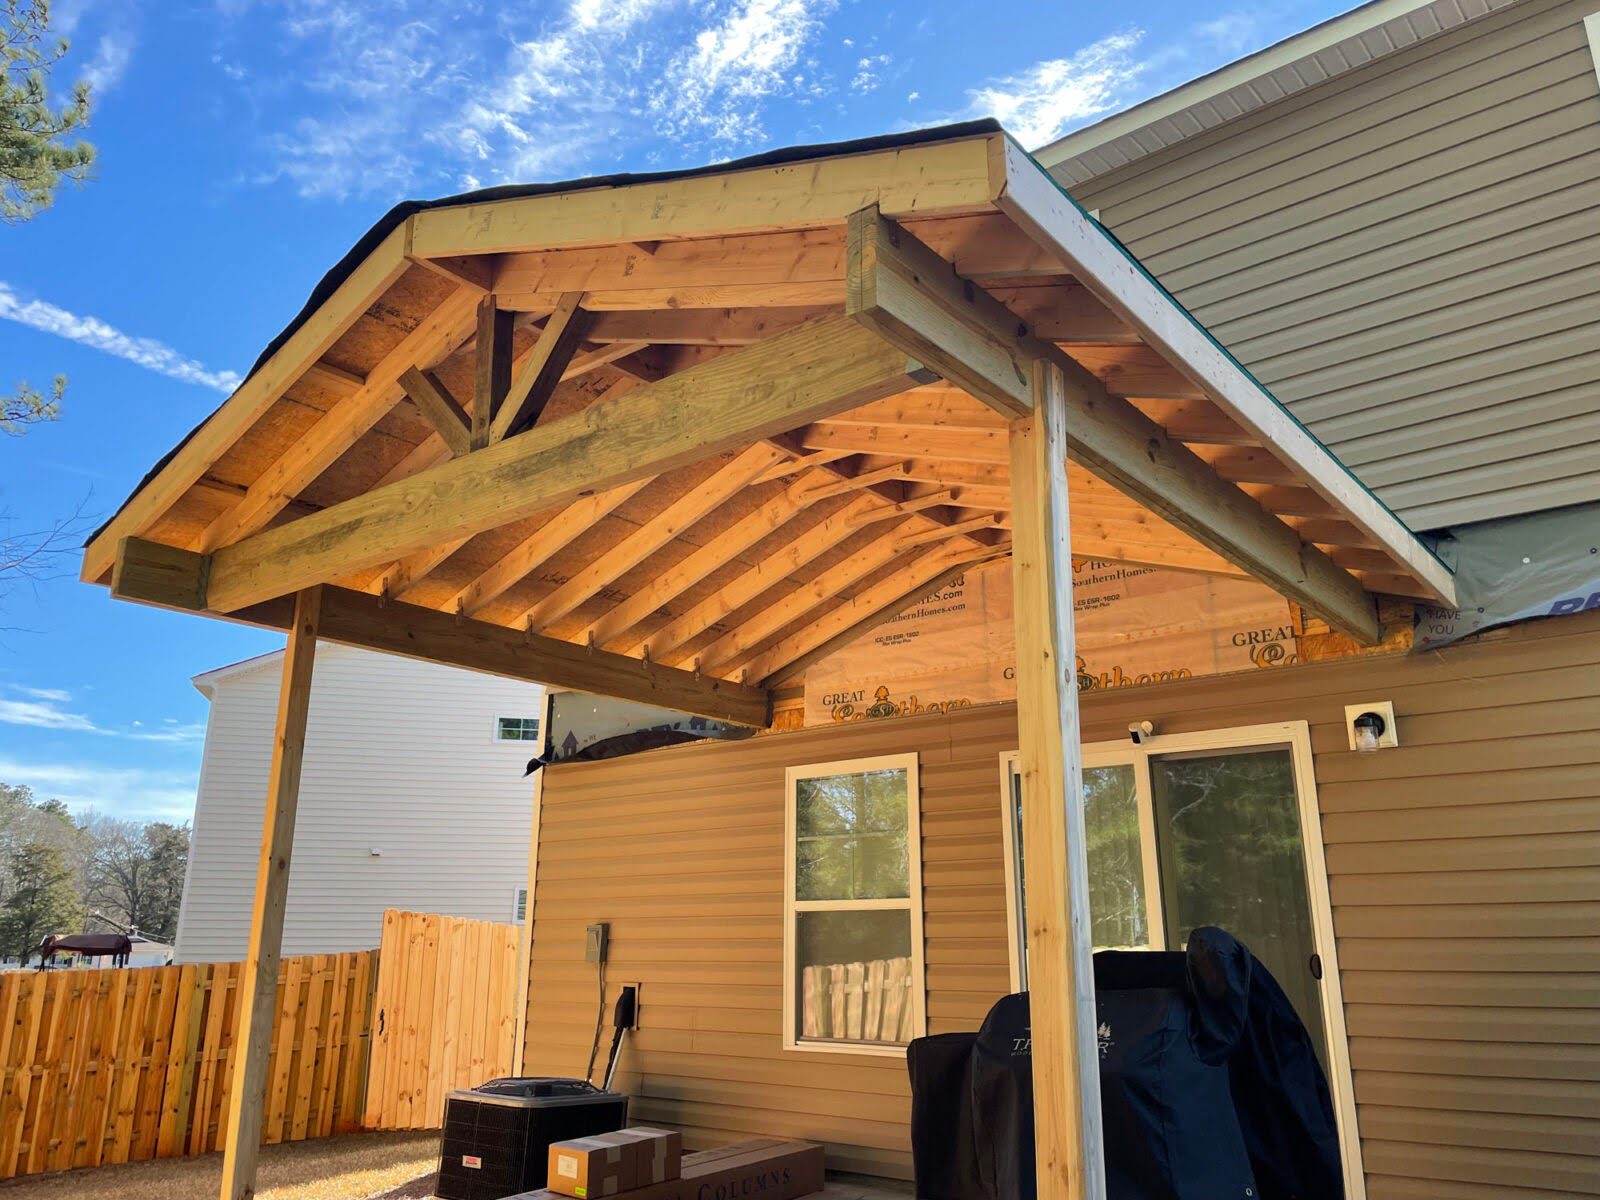
Framing and Wall Installation
Once the foundation is in place, the next crucial step in building your sun porch is framing and wall installation. This step brings your sun porch to life, creating the framework for the structure and enclosing the space. Here’s a breakdown of the key steps involved in framing and wall installation:
1. Create a Framing Plan: Begin by creating a detailed framing plan for your sun porch. This plan will outline the layout and dimensions of the walls, roof, and openings such as doors and windows. Ensure that your plan adheres to local building codes and regulations and meets the structural requirements of the sun porch.
2. Lay Out the Wall Plates: Start by laying out the bottom wall plates on the foundation. These are horizontal boards that serve as the base for the wall framing. Use a level to ensure that the plates are straight and in the correct position according to your framing plan. Secure them to the foundation using anchor bolts or other suitable fasteners.
3. Erect Wall Framing: With the wall plates in place, it’s time to erect the wall framing. This involves installing vertical studs and horizontal plates to create the framework of the walls. Use appropriate framing techniques and materials, such as dimensional lumber or metal studs, based on your design and local building requirements. Ensure that the framing is plumb, level, and properly aligned with your framing plan.
4. Install Wall Sheathing: Once the wall framing is complete, install wall sheathing to provide structural stability and rigidity to the walls. Common types of sheathing include plywood or oriented strand board (OSB). Attach the sheathing to the framing using appropriate fasteners, ensuring that they are evenly spaced and secure. This will create a solid backing for the exterior finishes of your sun porch.
5. Frame Openings: Frame the openings for doors and windows according to your framing plan. Use headers and cripple studs to support the weight above the openings and ensure structural integrity. Proper framing of openings is critical for proper installation and operation of doors and windows, and for maintaining the overall strength of the walls.
6. Install Wall Insulation: Consider adding insulation to the walls for energy efficiency and to ensure comfortable temperatures in your sun porch. Insulate the walls based on the recommended R-value for your climate. Use insulation material such as fiberglass batts or spray foam. Proper insulation will help reduce energy costs and make your sun porch more comfortable throughout the year.
7. Apply Exterior Finishes: Once the framing and wall insulation are complete, it’s time to apply the exterior finishes to the walls. This can include options such as siding, brick veneer, or stucco. Choose materials that are appropriate for your design, climate, and local building codes. Follow the manufacturer’s instructions for proper installation and consider hiring professionals if needed.
Proper framing and wall installation are essential in creating a solid, durable, and visually appealing sun porch. Adhering to your framing plan, installing wall sheathing, framing openings correctly, and insulating the walls will contribute to the structural integrity and overall comfort of your sun porch. Be sure to follow local building codes and regulations, and consult with professionals if you have any doubts or questions throughout the process.
Consider using insulated glass for the windows to regulate temperature and reduce energy costs. This will make your sun porch comfortable year-round.
Roofing and Ceiling Installation
Roofing and ceiling installation are crucial steps in the construction of your sun porch. These steps not only protect your space from the elements but also enhance its aesthetic appeal and provide a comfortable environment. Here’s a breakdown of the key steps involved in roofing and ceiling installation for your sun porch:
1. Roofing Material Selection: Begin by selecting the roofing material that best suits your design, climate, and budget. Common options include asphalt shingles, metal roofing, or a flat roof membrane. Consider factors such as durability, energy efficiency, and the overall look you want to achieve for your sun porch.
2. Prepare the Roofing Surface: Ensure that the roof surface is properly prepared before installing the roofing material. This may involve installing a layer of underlayment to provide an added moisture barrier. Additionally, ensure that any roof penetrations, such as vents or chimneys, are properly sealed to prevent water leaks.
3. Install the Roofing Material: Follow the manufacturer’s instructions for installing the chosen roofing material. This may involve laying down asphalt shingles, fastening metal roofing panels, or applying a flat roof membrane. Pay attention to proper overlapping and sealing techniques to ensure a watertight barrier. Follow all safety protocols when working at heights and consider hiring professionals if needed.
4. Install Roof Flashing: Install roof flashing around areas that require additional protection from water infiltration, such as chimneys, skylights, or vent pipes. Flashing helps direct water away from these vulnerable areas, preventing leaks and potential water damage. Properly installed flashing is crucial to maintaining the integrity of the sun porch roof.
5. Insulate the Ceiling: Insulating the ceiling of your sun porch helps maintain comfortable temperatures and reduces energy costs. Consider installing insulation material such as fiberglass batts or blown-in insulation. Ensure that the insulation is properly installed and meets the recommended R-value for your climate. Follow all safety precautions when handling insulation materials.
6. Install Ceiling Finishes: Once the ceiling is insulated, it’s time to install the desired finishes. This may involve installing drywall, tongue and groove paneling, or a ceiling cladding material. Choose finishes that complement the overall design of your sun porch and enhance the visual appeal of the space. Consider hiring professionals for the installation if necessary.
7. Consider Ceiling Fans or Lighting Fixtures: To enhance the functionality and comfort of your sun porch, consider installing ceiling fans or lighting fixtures. Ceiling fans can help circulate air and provide a cooling breeze on warm days. Lighting fixtures can add ambiance and functionality to the space, allowing you to enjoy your sun porch day and night.
Proper roofing and ceiling installation are essential components of your sun porch construction. Ensuring a well-installed roof with appropriate materials and proper insulation will protect your space from the elements and maintain a comfortable interior environment. Installing attractive ceiling finishes and considering additional fixtures will enhance the overall aesthetic and functionality of your sun porch. Follow manufacturer’s instructions, local building codes, and safety guidelines throughout the process to ensure a successful roofing and ceiling installation.
Flooring and Finishing Touches
Choosing the right flooring and adding finishing touches are crucial steps in completing the construction of your sun porch. These elements contribute to the overall aesthetics and functionality of the space, creating a comfortable and inviting environment. Here’s a breakdown of the key steps involved in flooring and finishing touches for your sun porch:
1. Select the Flooring Material: Consider the functionality, style, and maintenance requirements when selecting the flooring material for your sun porch. Common options include hardwood, laminate, tile, or outdoor-rated carpet. Choose a flooring material that complements the design of your sun porch and suits your desired level of durability and comfort.
2. Prepare the Subfloor: Ensure that the subfloor is properly prepared before installing the flooring material. This may involve leveling the subfloor, repairing any damaged areas, and applying a moisture barrier if needed. Follow the manufacturer’s instructions to ensure proper subfloor preparation for your chosen flooring material.
3. Install the Flooring: Follow the manufacturer’s instructions for installing the chosen flooring material. This may involve gluing, nailing, or clicking the flooring into place, depending on the type of material. Take measurements and plan the layout to ensure a smooth and seamless installation process. Allow the flooring material to acclimate to the room’s temperature and humidity levels prior to installation.
4. Consider Decorative Borders or Patterns: Enhance the visual appeal of your sun porch flooring by incorporating decorative borders or patterns. This can be achieved using different colors or materials to create an eye-catching design. Consider using tiles, contrasting wood patterns, or even stencil designs to add a unique touch to your sun porch flooring.
5. Install Baseboards or Trim: After the flooring is installed, the next step is to install baseboards or trim along the edges of the floor. This provides a finished look and covers any gaps between the flooring and the walls. Choose baseboards or trim that complements the style of your sun porch, ensuring a cohesive and polished appearance.
6. Add Window Treatments: Consider adding window treatments to enhance privacy, control light levels, and add a decorative touch to your sun porch. Options include curtains, blinds, shades, or even decorative window film. Choose materials and colors that coordinate with the overall design of your sun porch.
7. Consider Furnishings and Decor: Complete the finishing touches of your sun porch by selecting furnishings and décor items that create a warm and inviting atmosphere. Choose furniture that is functional, comfortable, and suited to the intended use of the space. Add soft furnishings like cushions and throws for added comfort. Personalize the space with decorative items such as plants, artwork, rugs, and lighting fixtures to create a cozy and inviting ambiance.
By carefully selecting the flooring material, adding decorative borders or patterns, installing baseboards or trim, and incorporating window treatments, furnishings, and décor, you will create a finished sun porch that reflects your personal style and enhances the overall appeal of the space. Pay attention to quality and ensure that all finishing touches are installed correctly to achieve a polished and inviting sun porch that you can enjoy for years to come.
Read more: How To Build A Porch Ramp
Installing Doors and Windows
The installation of doors and windows is a crucial step in completing your sun porch. These elements not only provide access and ventilation but also enhance the aesthetics and functionality of the space. Here’s a breakdown of the key steps involved in installing doors and windows for your sun porch:
1. Measure and Order: Begin by carefully measuring the openings for the doors and windows. Take accurate measurements of the height, width, and depth to ensure proper fit. Once the measurements are taken, order the doors and windows from a reputable supplier or manufacturer.
2. Prepare the Openings: Before installing the doors and windows, ensure that the openings are properly prepared. This may involve removing any existing framing or trim, checking for level and plumb, and repairing any damaged areas. Ensure that the openings are clean and free from any debris or obstructions.
3. Install Door and Window Frames: Begin by installing the door and window frames according to the manufacturer’s instructions. Ensure that the frames are properly leveled and anchored. Use shims as necessary to make adjustments and ensure a tight fit. Secure the frames using screws or nails through the provided pre-drilled holes.
4. Add Insulation and Flashing: Apply insulation material around the frames to prevent drafts and improve energy efficiency. Use weather-stripping or foam insulation strips to seal any gaps between the frames and the walls. Additionally, install flashing around the frames to provide protection against water infiltration.
5. Install Doors: Carefully install the doors into the prepared door frame. Ensure that the door is properly aligned and hinges are securely attached. Adjust the door as needed to ensure smooth operation and a proper fit. Install the door handle, lockset, and any other hardware according to the manufacturer’s instructions.
6. Install Windows: Install the windows into the prepared window frames. Make sure that the windows fit securely and are properly leveled. Use shims to adjust the alignment if necessary. Install any hardware, such as window locks or handles, according to the manufacturer’s instructions.
7. Test and Adjust: After installation, test the doors and windows to ensure that they open and close smoothly and securely. Check for any drafts or air leaks around the frames and make any necessary adjustments. Confirm that the locking mechanisms function properly and provide adequate security.
Proper installation of doors and windows is crucial for the functionality and security of your sun porch. Careful measurement, preparation of openings, and proper installation techniques are essential for a successful installation. Take the time to apply insulation and flashing to enhance energy efficiency and protect against water infiltration. By following these steps, you’ll create an inviting sun porch space with doors and windows that provide both beauty and functionality.
Adding Lighting and Electrical Connections
Adding lighting and electrical connections to your sun porch is an important step in creating a functional and inviting space. Proper lighting enhances the ambiance and allows you to enjoy your sun porch day or night. Here are the key steps involved in adding lighting and electrical connections to your sun porch:
1. Plan the Electrical Layout: Create a plan for the electrical layout of your sun porch. Determine the locations of outlets, switches, and lighting fixtures based on your needs and the intended use of the space. Consider the placement of furniture and any specific lighting requirements, such as accent lighting or task lighting.
2. Hire a Qualified Electrician: Unless you have experience working with electrical systems, it is recommended to hire a qualified electrician to handle the electrical installation in your sun porch. A licensed electrician will ensure that the electrical work is done safely and in compliance with building codes and regulations.
3. Install Electrical Outlets and Switches: Working with your electrician, install electrical outlets and switches in the designated locations on your sun porch. Place outlets strategically to accommodate your electrical needs, considering the placement of appliances, electronics, and decorative lighting. Install dimmer switches for adjustable lighting options.
4. Install Lighting Fixtures: Choose lighting fixtures that align with the style and functionality of your sun porch. Consider a mix of ambient lighting, such as overhead fixtures or recessed lights, and task lighting, such as reading lamps or pendant lights. Install lighting fixtures at appropriate heights and positions to provide adequate illumination throughout the space.
5. Consider Natural Lighting: Maximize the natural lighting in your sun porch by strategically placing windows and skylights. This will not only provide ample natural light during the day but also reduce the reliance on artificial lighting. Consider energy-efficient solutions, such as solar tubes or energy-efficient windows, to minimize heat gain or loss.
6. Ensure Proper Wiring and Safety: When adding lighting and electrical connections, it is crucial to ensure proper wiring and safety measures. All electrical work should be done by a licensed professional, following local electrical codes and regulations. This includes correctly sizing wiring, using appropriate junction boxes, and installing ground fault circuit interrupters (GFCIs) for outdoor outlets.
7. Automate and Control Lighting: Consider automating and controlling your sun porch lighting to enhance convenience. Install programmable timers, motion sensors, or smart lighting systems that allow you to remotely control the lighting from your smartphone or other devices. This gives you the flexibility to adjust the lighting according to your preferences and save energy when the sun porch is not in use.
By following these steps and working with a qualified electrician, you can ensure that your sun porch has proper lighting and electrical connections. A well-designed and properly installed electrical system will enhance the functionality and ambiance of your sun porch, allowing you to create the perfect lighting atmosphere for any occasion.
Furnishing and Decorating
The final step in creating your dream sun porch is furnishing and decorating the space. Furnishing and decor choices will enhance its comfort and style, transforming it into a true oasis. Here are some key tips for furnishing and decorating your sun porch:
1. Consider Comfort: Choose furniture that is both comfortable and suitable for outdoor or semi-outdoor use. Look for materials that are weather-resistant, easy to clean, and durable. Consider plush cushions, cozy seating options, and ergonomic designs that encourage relaxation and enjoyment of the space.
2. Create Zones: Divide your sun porch into functional zones to make the most of the space. Designate areas for lounging, dining, and even specific activities like reading or working. Use furniture placement and area rugs to define each zone and create a sense of purpose and flow within the space.
3. Add Greenery: Incorporate plants and greenery to bring life and freshness to your sun porch. Consider both potted plants and hanging planters to add depth and visual interest. Choose plants that thrive in the available light conditions and can withstand fluctuations in temperature and humidity.
4. Choose Appropriate Lighting: Install a variety of lighting options to create different moods and enhance the overall ambiance of your sun porch. Consider string lights, lanterns, sconces, or even a chandelier for a touch of elegance. Adjustable lighting dimmers allow you to control the intensity and create a warm and inviting atmosphere.
5. Personalize with Accessories: Add personal touches to your sun porch with carefully chosen accessories. Display artwork, decorative pillows, throw blankets, and other small decor items that align with your personal style and complement the overall design of the sun porch. Choose colors and patterns that create a cohesive and inviting space.
6. Utilize Functional Storage: Make use of functional storage solutions to keep your sun porch organized and clutter-free. Incorporate storage benches, side tables with hidden compartments, or outdoor cabinets to store items such as throw blankets, cushions, books, and entertainment accessories. This will keep your sun porch tidy and maximize the available space.
7. Embrace Natural Elements: Emphasize the natural beauty of your surroundings by incorporating natural elements into your sun porch decor. Use materials such as wood, rattan, or wicker for furniture and accents. Accessorize with natural fiber rugs, woven baskets, or driftwood decor. These elements create a seamless connection between your sun porch and the outdoors.
By carefully selecting comfortable and weather-resistant furniture, defining functional zones, incorporating plants, and adding personalized accessories, you can create a welcoming and inviting space for relaxation and enjoyment. Pay attention to details and invest in high-quality pieces to ensure their longevity. With thoughtful furnishing and decorating, your sun porch will become a sanctuary that reflects your style and provides a peaceful retreat right at home.
Final Inspections and Maintenance
As your sun porch construction nears completion, it’s essential to consider the final inspections and maintenance required to ensure the longevity and safety of your new space. Here are the key steps to take for final inspections and ongoing maintenance:
1. Final Inspections: Schedule a final inspection with your local building department to ensure that your sun porch meets all the necessary building codes and regulations. A building inspector will examine the structural integrity, electrical connections, and overall compliance of your sun porch. Address any noted deficiencies or recommendations to ensure that your sun porch is safe and up to code.
2. Waterproofing and Sealant Checks: Regularly inspect and maintain the waterproofing and sealants on your sun porch. Check for any cracks, gaps, or areas of deterioration in caulk or weatherstripping. Address any issues promptly by replacing or resealing these areas to prevent water infiltration and potential damage.
3. Cleaning and Maintenance: Develop a regular maintenance routine to keep your sun porch clean and well-maintained. Sweep away debris, such as leaves and dirt, on a regular basis. Clean windows, screens, and outdoor furniture regularly. Follow manufacturer guidelines for cleaning and maintenance of flooring, lighting fixtures, and other sun porch elements.
4. Inspect and Maintain Doors and Windows: Periodically inspect and maintain your sun porch doors and windows. Check for any signs of damage, such as cracks, leaks, or broken seals. Lubricate hinges and locks as needed. Make necessary repairs or replacements to ensure that doors and windows function properly and provide effective insulation.
5. HVAC Considerations: If your sun porch is equipped with heating or cooling systems, schedule routine inspections and maintenance for optimal performance. Clean or replace air filters regularly and have professional HVAC technicians service the system. Observe proper temperature and humidity controls to ensure a comfortable and efficient indoor climate.
6. Seasonal Preparations: Prepare your sun porch for seasonal changes. Consider adding weather-resistant furniture covers or storing cushions and pillows during inclement weather. If your sun porch is not insulated, take measures to keep the space comfortable during extreme temperatures, such as using portable heaters or fans.
7. Regular Inspections: Conduct regular inspections of your sun porch to identify potential issues and address them promptly. Look for signs of water damage, pest infestations, or structural wear. Schedule professional inspections if you notice any concerning issues that require expertise and evaluation.
By completing final inspections, performing regular maintenance, and addressing any issues promptly, you can ensure the long-term durability and enjoyment of your sun porch. Regular upkeep will prevent small problems from turning into major repairs and allow you to continue enjoying your sun porch for years to come. With proper inspections and maintenance, your sun porch will remain a cherished space of relaxation and enjoyment.
Frequently Asked Questions about How To Build A Sun Porch
Was this page helpful?
At Storables.com, we guarantee accurate and reliable information. Our content, validated by Expert Board Contributors, is crafted following stringent Editorial Policies. We're committed to providing you with well-researched, expert-backed insights for all your informational needs.


0 thoughts on “How To Build A Sun Porch”