Articles
How To Build A Porch Ramp
Modified: October 20, 2024
Learn how to build a porch ramp with our informative articles. Discover step-by-step guides and expert tips for constructing a safe and accessible entrance to your home.
(Many of the links in this article redirect to a specific reviewed product. Your purchase of these products through affiliate links helps to generate commission for Storables.com, at no extra cost. Learn more)
Introduction
Welcome to our comprehensive guide on how to build a porch ramp. Whether you are looking to improve accessibility for individuals with mobility challenges or simply want to make it easier to transport heavy items in and out of your porch, building a ramp can be a rewarding and practical project.
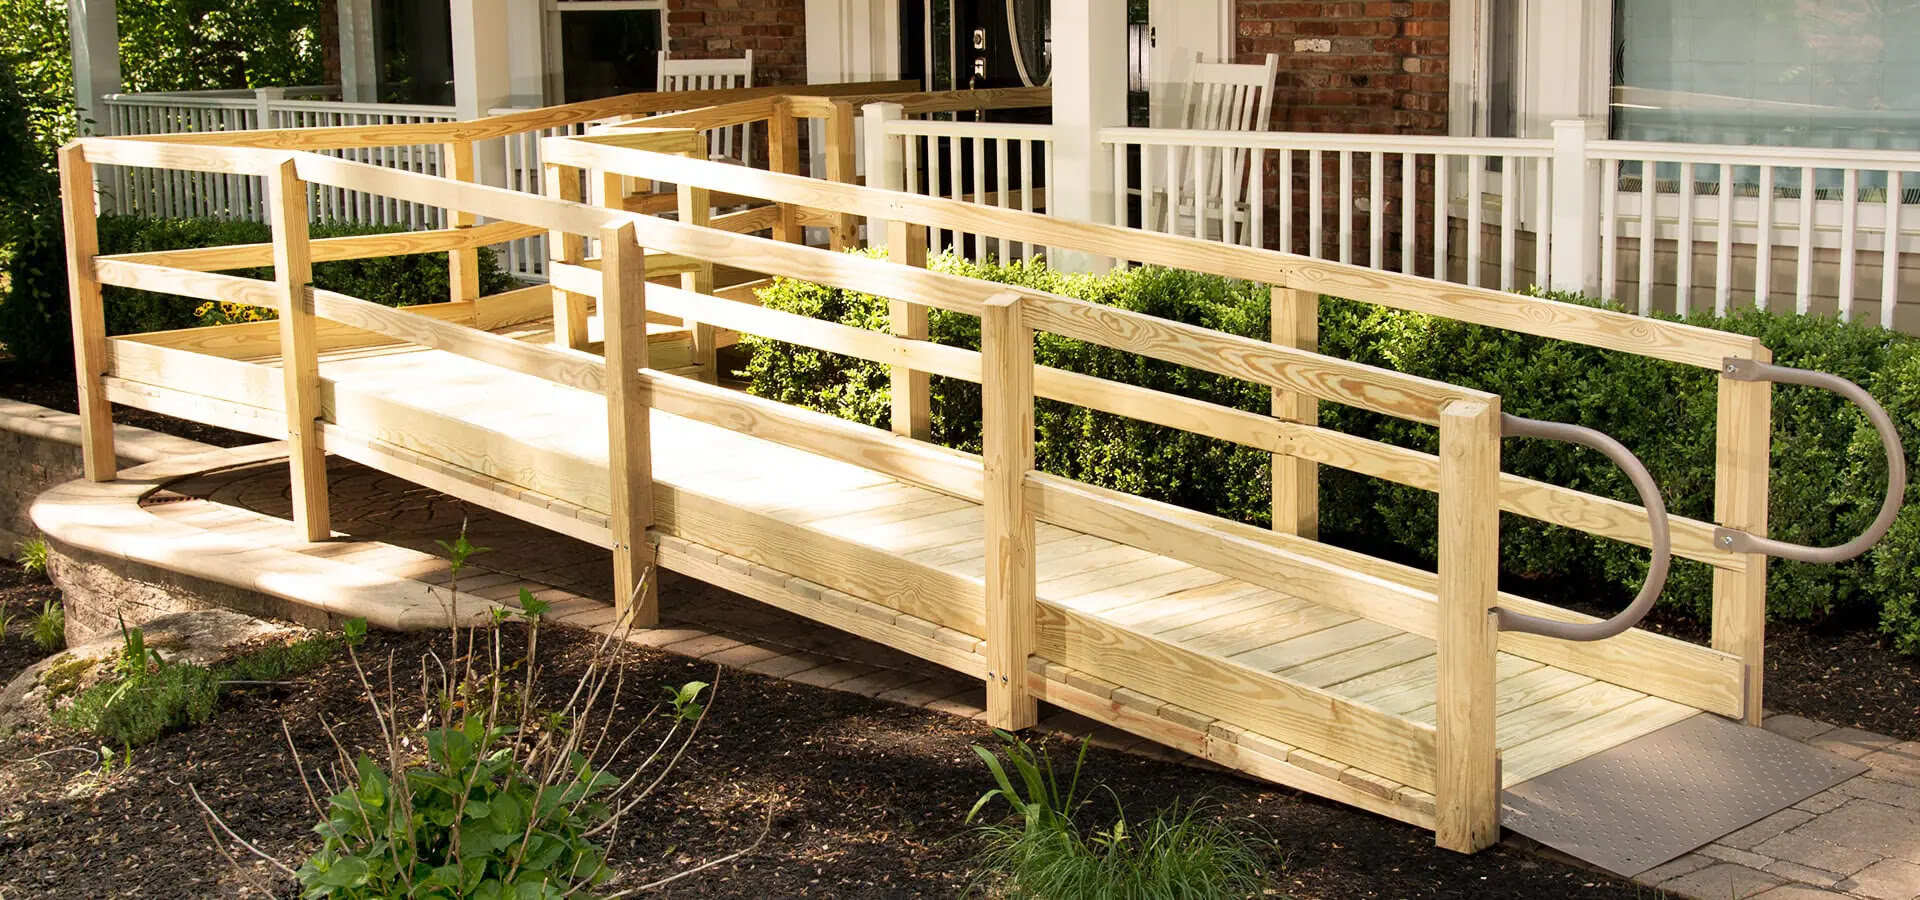
A porch ramp provides a smooth and gradual incline, allowing for easy access and movement without the need for stairs. It offers convenience and safety for individuals with wheelchairs, walkers, or other mobility aids, as well as for those pushing strollers or carrying heavy loads.
In this step-by-step guide, we will walk you through the process of designing and constructing a porch ramp. From determining the specifications to finishing touches and safety features, we will cover all the necessary steps to ensure you have a well-built and functional ramp.
Before we dive into the details, it’s important to note that building codes and regulations may vary depending on your location. It is essential to check with your local authorities or building department to ensure compliance with all applicable regulations and obtain any necessary permits before starting construction.
Now, let’s get started on the journey to building a porch ramp that will provide accessibility and convenience for years to come.
Key Takeaways:
- Building a porch ramp involves determining specifications, gathering materials, preparing the site, constructing the frame, installing decking and handrails, adding finishing touches, and testing for safety. It’s a comprehensive process that prioritizes accessibility and safety.
- Attention to detail is crucial when building a porch ramp. From ensuring proper slope ratios and width to adding non-slip surfaces and adequate lighting, every step contributes to creating a safe and functional ramp for individuals with mobility challenges.
Read more: How To Build A Ramp For A Deck
Step 1: Determine the Required Specifications
The first step in building a porch ramp is to determine the specifications that will best suit your needs and the space available. Consider the following factors:
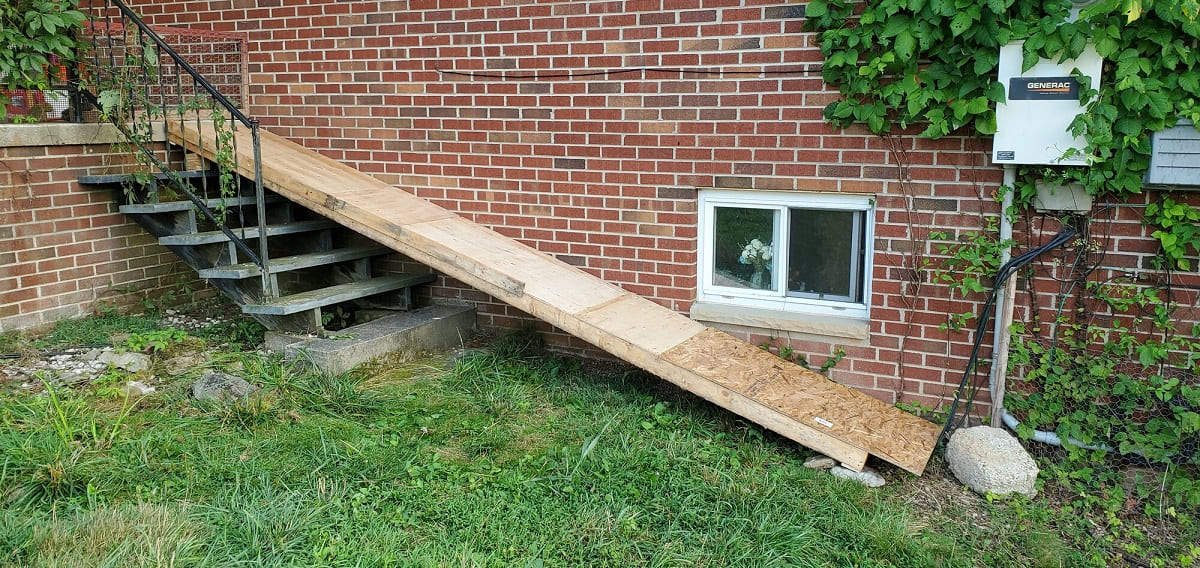
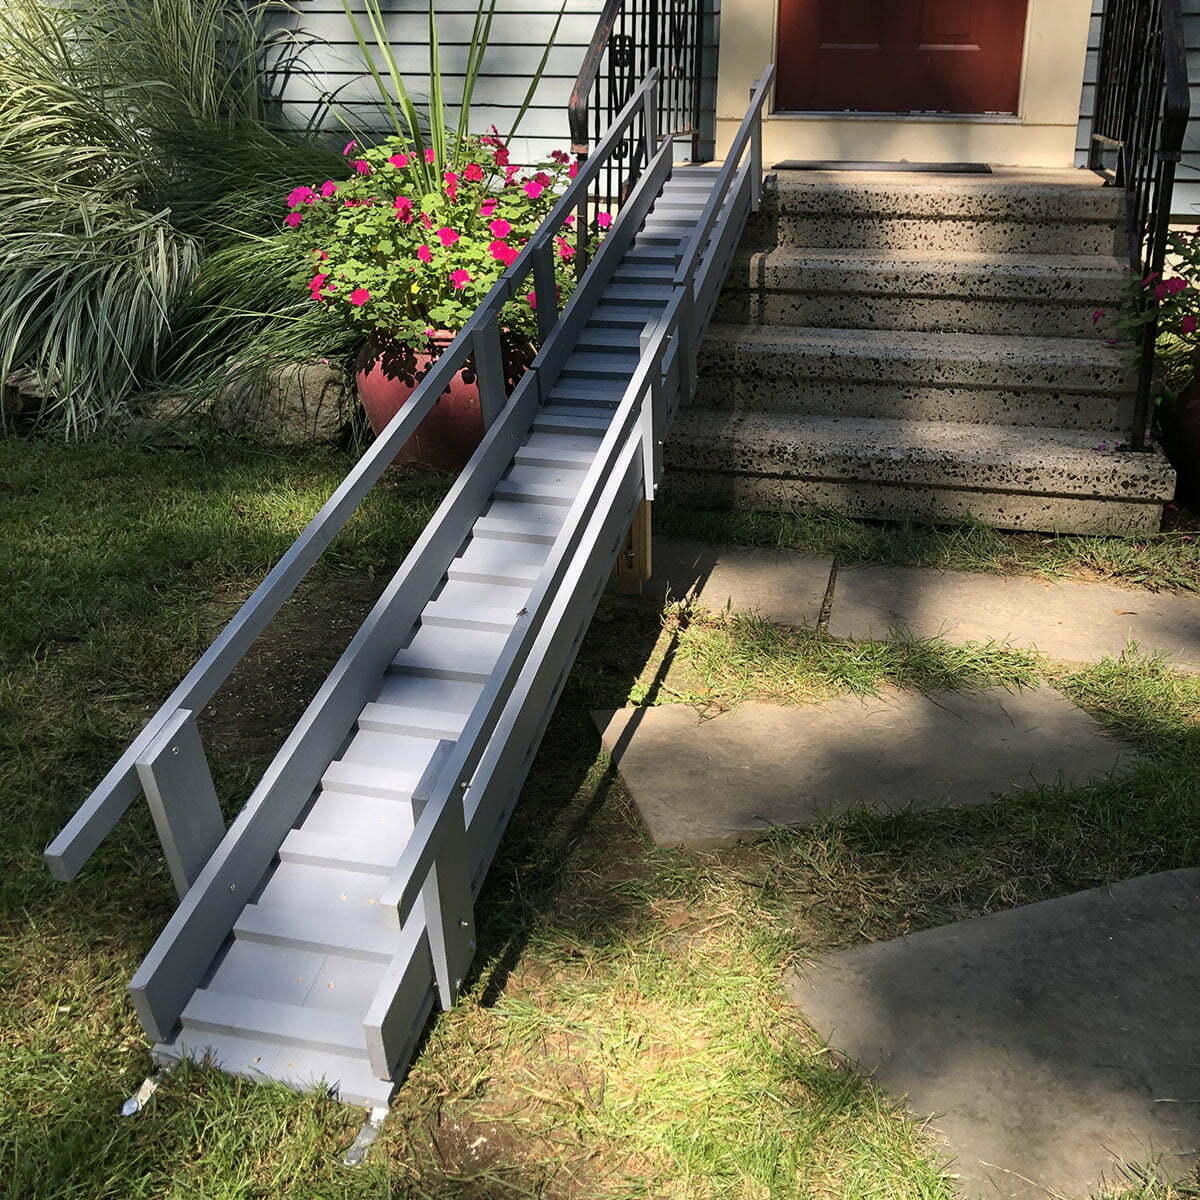
- Ramp Length: Measure the distance from the porch to the ground to determine the required length of the ramp. The slope should not be too steep, as it may make it difficult for individuals to traverse. A general rule of thumb is to have a 1:12 slope ratio (for every inch of rise, there should be 12 inches of ramp length).
- Ramp Width: Determine the width of the ramp, keeping in mind that it should be wide enough for individuals using mobility aids to navigate comfortably. The minimum recommended width is 36 inches, but you may want to consider a wider ramp if space allows.
- Materials: Consider the materials you will use for the ramp. Pressure-treated wood is a popular and durable choice, but there are also options like composite decking or metal ramps available. Choose materials that are weather-resistant and will provide a sturdy surface for easy navigation.
- Handrails: Decide if you want to include handrails along the ramp for added safety. Handrails are highly recommended, especially for ramps that have a height above a certain threshold. Check your local building codes for specific requirements regarding handrail height and spacing.
- Landing: Plan for a landing at the porch entrance and at the bottom of the ramp. The landing should be level and wide enough to accommodate a wheelchair, allowing for easy maneuvering and a smooth transition.
Once you have determined the required specifications, it’s time to gather the necessary materials and tools to start the construction process.
Step 2: Gather the Necessary Materials and Tools
Before you begin building your porch ramp, it’s essential to gather all the materials and tools you will need. This ensures a smooth construction process and prevents interruptions due to missing items. Here’s a comprehensive list of the materials and tools you will require:
Materials:
- Pressure-treated lumber for framing and decking
- Concrete footings (if required by local building codes)
- Galvanized screws or nails
- Post anchors and brackets
- Ramp surface material (pressure-treated decking boards, composite decking, or metal ramps)
- Handrail posts and balusters (if adding handrails)
- Handrail brackets and connectors
- Concrete or asphalt sealer (if using concrete footings)
Tools:
- Tape measure
- Level
- Circular saw
- Chalk line
- Hammer
- Drill
- Screwdriver
- Socket set
- Post hole digger or auger
- Shovel
- Mixing tub and trowel (if using concrete footings)
- Safety equipment (gloves, safety glasses, ear protection, etc.)
Having all the necessary materials and tools at hand will save you time and ensure a more efficient construction process. It’s always a good idea to check your inventory against the list before starting, so you don’t run into any unexpected delays or additional trips to the hardware store.
Once you have everything ready, you can proceed to the next step: preparing the site for construction.
Step 3: Prepare the Site for Construction
Before you start building your porch ramp, it’s essential to prepare the site properly. This will ensure a stable and durable foundation for your ramp. Follow these steps to prepare the site:
- Clear the Area: Remove any obstacles, debris, or vegetation from the area where the ramp will be built. This ensures a clean and level surface for construction.
- Mark the Ramp Layout: Use a chalk line or string to mark the outline of the ramp on the ground. This will give you a visual guide for the layout and help you ensure accurate measurements.
- Excavate the Ground: If required by local building codes, dig holes for the footings at the designated locations. Use a post hole digger or auger to dig the holes to the specified depth and diameter. Make sure the holes are deep enough to provide stability and support for the ramp.
- Install Footings: If your ramp requires footings, pour concrete into the holes to create a stable base. Follow the manufacturer’s instructions for mixing and pouring the concrete, and use a trowel to smooth the surface. Allow the concrete to cure according to the recommended time before proceeding.
- Level the Ground: Ensure that the ground where the ramp will be built is level. Use a level to check the surface and make any necessary adjustments by adding or removing soil. A level surface is crucial to prevent uneven slopes and ensure the safety and stability of the ramp.
- Add Gravel Base: If recommended by local building codes or for additional stability, add a layer of gravel on the leveled ground. This will provide a solid base for the ramp structure and help with drainage.
By properly preparing the site, you set a solid foundation for the construction of your porch ramp. Taking the time to clear the area, mark the layout, and ensure level ground will make the subsequent steps of the construction process much smoother.
Once the site is prepared, you can move on to designing and constructing the ramp frame in the next step.
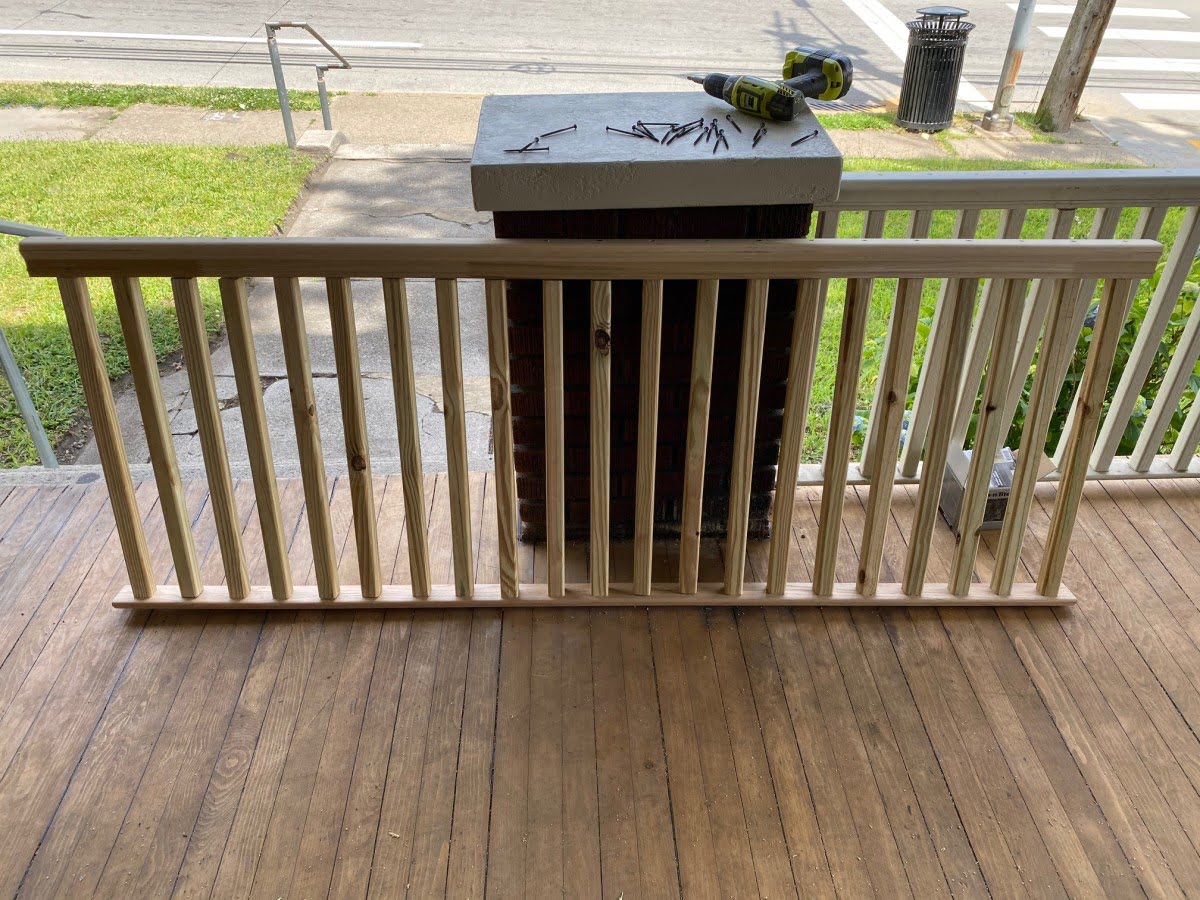
Step 4: Design and Construct the Ramp Frame
Designing and constructing the ramp frame is a crucial step in building a porch ramp. The frame provides the structure and support for the ramp, ensuring its stability and durability. Here’s how you can design and construct the ramp frame:
- Measure and Cut the Frame Material: Measure the length and width of the ramp according to your specifications. Using pressure-treated lumber, cut the frame pieces to the appropriate size. This will include the joists, headers, and ledger board. Remember to follow the manufacturer’s instructions for cutting and shaping the lumber.
- Attach the Ledger Board: Secure the ledger board to the porch using galvanized lag screws or brackets. This board will serve as the anchor point for the ramp frame. Ensure that it is level and securely fastened to the porch structure.
- Build the Ramp Frame: Start by attaching the headers to the ledger board and the outer edge of the ramp. These headers will provide additional support and rigidity to the ramp. Then, position the joists between the headers, spacing them evenly apart. Secure the joists to the headers using galvanized screws or nails.
- Add Supports and Bracing: Depending on the length and width of the ramp, additional supports may be required for structural integrity. Install diagonal braces between the posts and the ramp frame to prevent lateral movement and increase stability.
- Check for Levelness and Squareness: Use a level to ensure that the ramp frame is level and the corners are square. Making any necessary adjustments at this stage will help guarantee a well-aligned and balanced ramp.
- Secure the Frame: Once you are satisfied with the levelness and squareness, secure the frame by driving in galvanized screws or nails. Ensure that all connections are tight and secure.
By following these steps, you will have a well-constructed ramp frame that forms the backbone of your porch ramp. The frame provides the necessary support and stability for the ramp structure, making it safe and functional for users. With the ramp frame in place, you can now move on to installing the decking and handrails in the next step.
When building a porch ramp, make sure to carefully measure the slope and dimensions to ensure it meets ADA guidelines for accessibility.
Read more: How To Build A Wood Ramp For A Shed
Step 5: Install the Decking and Handrails
Once you have constructed the ramp frame, it’s time to install the decking and handrails. These elements provide the surface and safety features necessary for a functional and accessible porch ramp. Follow these steps to install the decking and handrails:
- Measure and Cut the Decking Material: Measure the length and width of the ramp to determine the size of the decking boards. Using pressure-treated lumber or other suitable ramp surface material, cut the decking boards to the appropriate size. Ensure that the boards are straight and free from any defects.
- Attach the Decking Boards: Starting from the top of the ramp, begin attaching the decking boards to the ramp frame. Align each board evenly and secure it to the joists using galvanized screws or nails. Leave a small gap between each board to allow for expansion due to changes in temperature and humidity.
- Trim the Excess Decking: Once all the decking boards are installed, trim the excess material at the edges of the ramp. Use a saw or a router to cut the boards to the desired length, ensuring a clean and finished look.
- Add Handrails: If you have decided to include handrails in your porch ramp, it’s time to install them. Attach the handrail posts to the ramp frame using post anchors or brackets. Make sure the posts are securely fastened and plumb. Then, attach the handrail brackets and connectors to the posts, ensuring that they are properly aligned and level.
- Install the Handrail Balusters: Attach the handrail balusters between the handrail brackets to provide support and safety. Ensure that the balusters are spaced appropriately according to local building codes and regulations. Use screws or nails to secure the balusters in place.
- Finishing Touches: Once the decking and handrails are installed, inspect the ramp for any loose or protruding screws or nails. Use a screwdriver or hammer to secure any loose connections. Sand any rough edges or splinters on the decking boards to create a smooth surface.
By following these steps, you will have successfully installed the decking and handrails, which are integral to the functionality and safety of your porch ramp. Take the time to make sure all connections are secure and the surface is smooth and level.
Now that the structural components are in place, it’s time to add finishing touches and safety features in the next step.
Step 6: Add Finishing Touches and Safety Features
After installing the decking and handrails, it’s important to add finishing touches and safety features to your porch ramp. These final touches not only enhance the overall appearance but also ensure the ramp is safe and accessible for everyone. Follow these steps to complete this crucial step:
- Apply a Protective Finish: Depending on the material used for the decking, it may be necessary to apply a protective finish. This will help protect the wood from the elements and extend its lifespan. Choose a finish suitable for outdoor applications and follow the manufacturer’s instructions for application.
- Add Non-Slip Surfaces: To increase traction and prevent slips and falls, consider adding non-slip surfaces to the ramp. This can be achieved by applying non-slip paint, adhesive strips, or rubber mats to the decking boards. Ensure that the non-slip surfaces are securely attached and evenly distributed.
- Install Edge Guards: Installing edge guards along the sides of the ramp can provide additional safety. These guards will help prevent the wheels of mobility aids, such as wheelchairs or walkers, from accidentally rolling off the edge. Carefully attach the edge guards to the sides of the ramp using screws or nails.
- Ensure Proper Lighting: Proper lighting along the ramp is essential for safety, especially during nighttime or low-light conditions. Install outdoor lighting fixtures that illuminate the entire ramp, including the top and bottom landings. Ensure that the lighting is bright enough and well-positioned to provide sufficient visibility.
- Consider Handrail Enhancements: Depending on the specific needs of the individuals using the ramp, you may want to consider enhancements to the handrails. This can include adding grip tape, foam padding, or additional handrail extensions for better support and comfort.
- Inspect for Safety and Stability: Once you have completed the finishing touches, thoroughly inspect the ramp for any potential safety hazards or structural issues. Check that all connections are secure, handrails are sturdy, and there are no loose or protruding objects. Make any necessary adjustments or repairs to ensure the ramp is safe and stable.
By adding these finishing touches and safety features, you are not only enhancing the aesthetics but also prioritizing the well-being of those using the ramp. These extra steps contribute to a functional, accessible, and secure porch ramp.
Now, it’s time to move on to the final step: testing and inspecting the ramp before it is ready for use.
Step 7: Test and Inspect the Ramp
The final step in building a porch ramp is to thoroughly test and inspect the ramp before it is ready for use. This step is crucial to ensure that the ramp is safe, functional, and meets all the necessary requirements. Follow these steps to test and inspect your porch ramp:
- Test Accessibility: Begin by testing the ramp’s accessibility. Ensure that individuals using mobility aids, such as wheelchairs or walkers, can easily navigate the ramp without any difficulties or obstructions. Check for smooth transitions at the top and bottom landings, as well as along the entire length of the ramp.
- Check for Stability: Walk along the ramp and check for any signs of instability. Pay attention to any excessive movement or flexing of the ramp frame. Ensure that all connections are secure and there are no loose or wobbly components. Stability is essential for the safety of users.
- Inspect Handrails: Carefully inspect the handrails to ensure they are secure and sturdy. Apply gentle pressure to test the strength and stability. Ensure that the handrails are at the appropriate height, and there are no gaps or loose components along the railing.
- Test Non-Slip Surfaces: If you have applied non-slip surfaces to the decking boards, test their effectiveness. Walk on the ramp wearing different types of footwear to see if they provide adequate traction. Make sure the surfaces are securely attached and evenly distributed.
- Check Lighting: Test the lighting along the ramp to ensure proper functionality. Turn on all the lights and observe whether they adequately illuminate the entire ramp, including the top and bottom landings. Make any necessary adjustments to improve visibility if needed.
- Inspect Overall Safety: Do a final inspection of the ramp to check for any potential safety issues. Look for any sharp edges, protruding nails or screws, or other hazards that could cause injuries. Make sure the ramp complies with local building codes and regulations.
By thoroughly testing and inspecting the ramp, you can identify and address any potential issues before allowing regular use. This step is essential to ensure the safety and functionality of the porch ramp.
Once you are satisfied with the test and inspection results, your porch ramp is now complete and ready to provide easy accessibility to your porch for individuals with mobility challenges or the need to transport heavy items.
Congratulations on successfully building your porch ramp, and enjoy the benefits of improved accessibility and convenience!
Conclusion
Building a porch ramp is a rewarding project that enhances accessibility and convenience for your home. By following the steps outlined in this comprehensive guide, you can construct a well-designed and functional ramp that accommodates individuals with mobility challenges and facilitates the movement of heavy items.
Throughout the process, it’s important to consider the required specifications, gather the necessary materials and tools, prepare the site, design and construct the ramp frame, install the decking and handrails, add finishing touches and safety features, and test and inspect the ramp. These steps ensure that your ramp is built to high standards, meets safety regulations, and provides a reliable pathway for years to come.
Remember to consult your local building codes and regulations to ensure compliance with all applicable requirements and obtain any necessary permits before beginning the construction. Safety should always be a priority, so take the time to properly secure all connections, provide non-slip surfaces, and install adequate lighting.
By providing accessibility to your porch, you are creating an inclusive and welcoming environment for everyone. Whether it’s for individuals with mobility aids or those carrying heavy loads, your porch ramp will make their lives easier and more enjoyable.
As you complete each step and celebrate the successful completion of your porch ramp, take a moment to appreciate the impact it will have on the lives of those who benefit from the enhanced accessibility it provides. Your effort and dedication to this project will undoubtedly make a difference.
Now that you have all the necessary knowledge and guidance, it’s time to roll up your sleeves and get started on building your porch ramp. Enjoy the process, stay safe, and reap the rewards of your hard work as you create a more accessible home.
After mastering how to construct a porch ramp, why not dive deeper into more hands-on activities? Every homeowner can benefit from tackling DIY projects, which not only empower but also provide immense satisfaction upon completion. Learn why taking on such ventures is rewarding and how it can save you money, enhance your skills, and personalize your living space in ways only DIY allows.
Frequently Asked Questions about How To Build A Porch Ramp
Was this page helpful?
At Storables.com, we guarantee accurate and reliable information. Our content, validated by Expert Board Contributors, is crafted following stringent Editorial Policies. We're committed to providing you with well-researched, expert-backed insights for all your informational needs.


0 thoughts on “How To Build A Porch Ramp”