Articles
How To Build A Porch Deck With Roof
Modified: October 20, 2024
Learn how to build a porch deck with a roof through our informative articles. Transform your outdoor space with our step-by-step guides and expert tips.
(Many of the links in this article redirect to a specific reviewed product. Your purchase of these products through affiliate links helps to generate commission for Storables.com, at no extra cost. Learn more)
Introduction
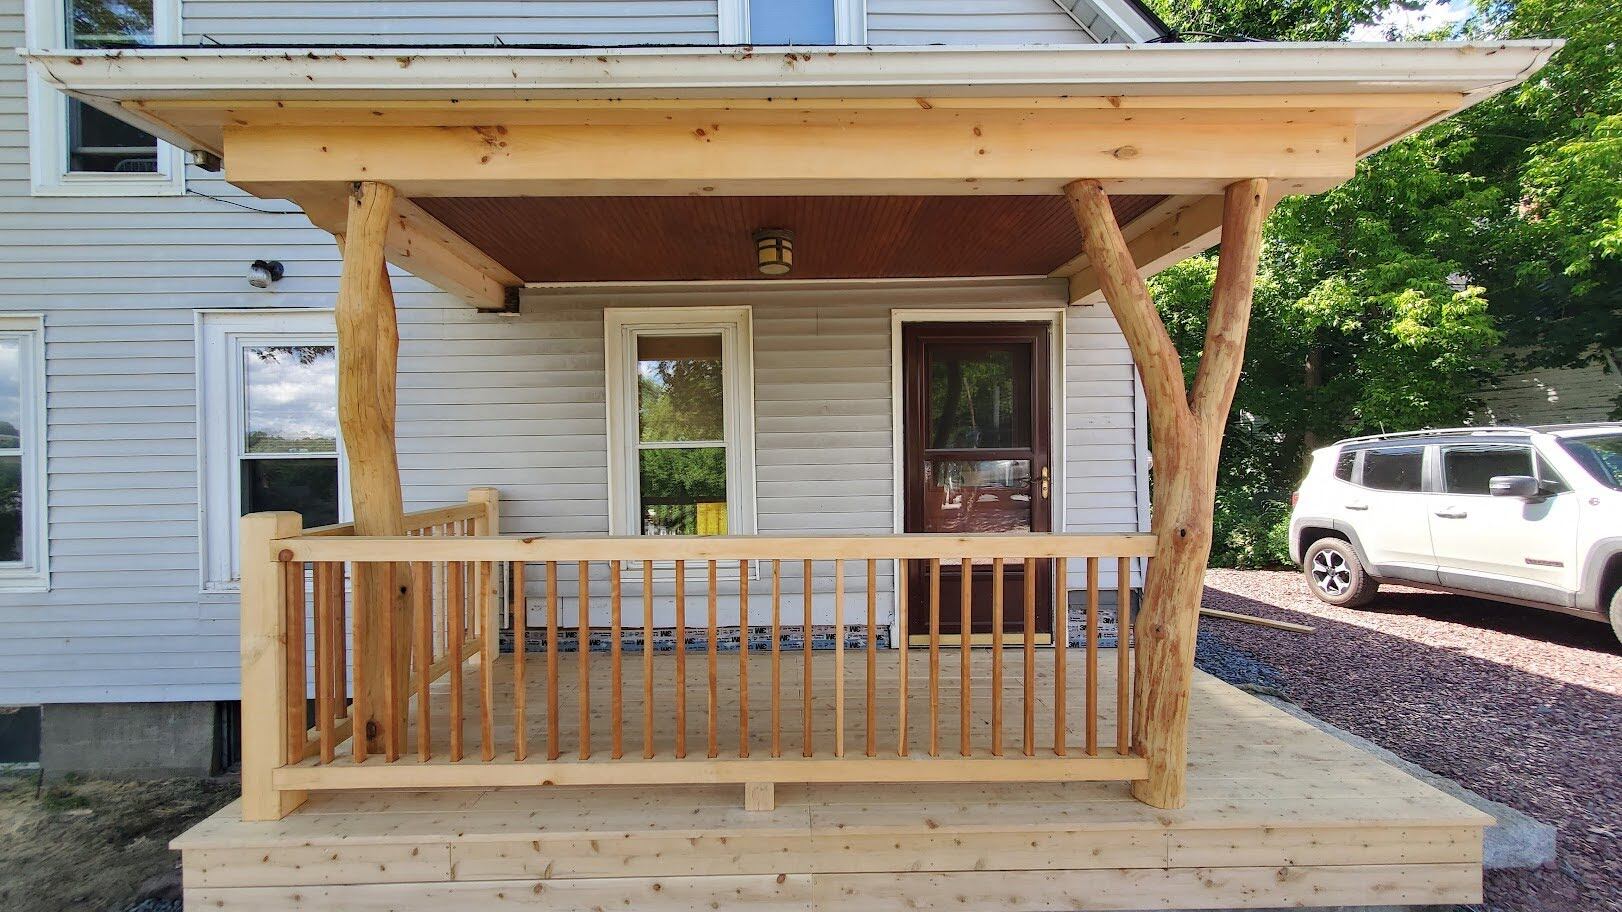
Welcome to our comprehensive guide on how to build a porch deck with a roof. A porch deck is a perfect addition to any home, providing an outdoor space for relaxation and entertainment. Adding a roof to your porch deck not only provides protection from the elements but also adds a stylish and functional touch to your outdoor living area.
Building a porch deck with a roof may seem like a daunting task, but with the right planning, materials, and tools, it is a project that can be successfully accomplished by homeowners with some DIY experience. In this guide, we will take you through a step-by-step process to help you build a porch deck with a roof that will not only enhance the beauty of your home but also provide a comfortable space for you and your family to enjoy.
Before getting started, it is important to check with your local building codes and obtain any necessary permits. This will ensure that your porch deck with a roof is structurally sound and compliant with regulations.
Are you ready to embark on this exciting project? Let’s dive into the step-by-step process of building a porch deck with a roof!
Key Takeaways:
- Building a porch deck with a roof requires careful planning, quality materials, and attention to detail. From designing the layout to installing the roofing material, each step contributes to creating a functional and visually appealing outdoor space.
- Adding finishing touches such as lighting, furniture, and landscaping can transform a porch deck into a versatile and inviting area for relaxation and entertainment. Personalized elements and thoughtful design choices enhance the overall appeal of the space.
Read more: How To Build A Deck Porch
Step 1: Planning and Designing
Before you begin building your porch deck with a roof, it’s crucial to invest time and effort into the planning and designing phase. This will ensure that you have a clear vision of what you want to achieve and allow you to make informed decisions.
The first step is to determine the size and shape of your porch deck. Consider the available space and how you intend to use the area. Take into account factors such as furniture placement, traffic flow, and any specific features you want to include. Sketch out a rough plan to visualize the layout.
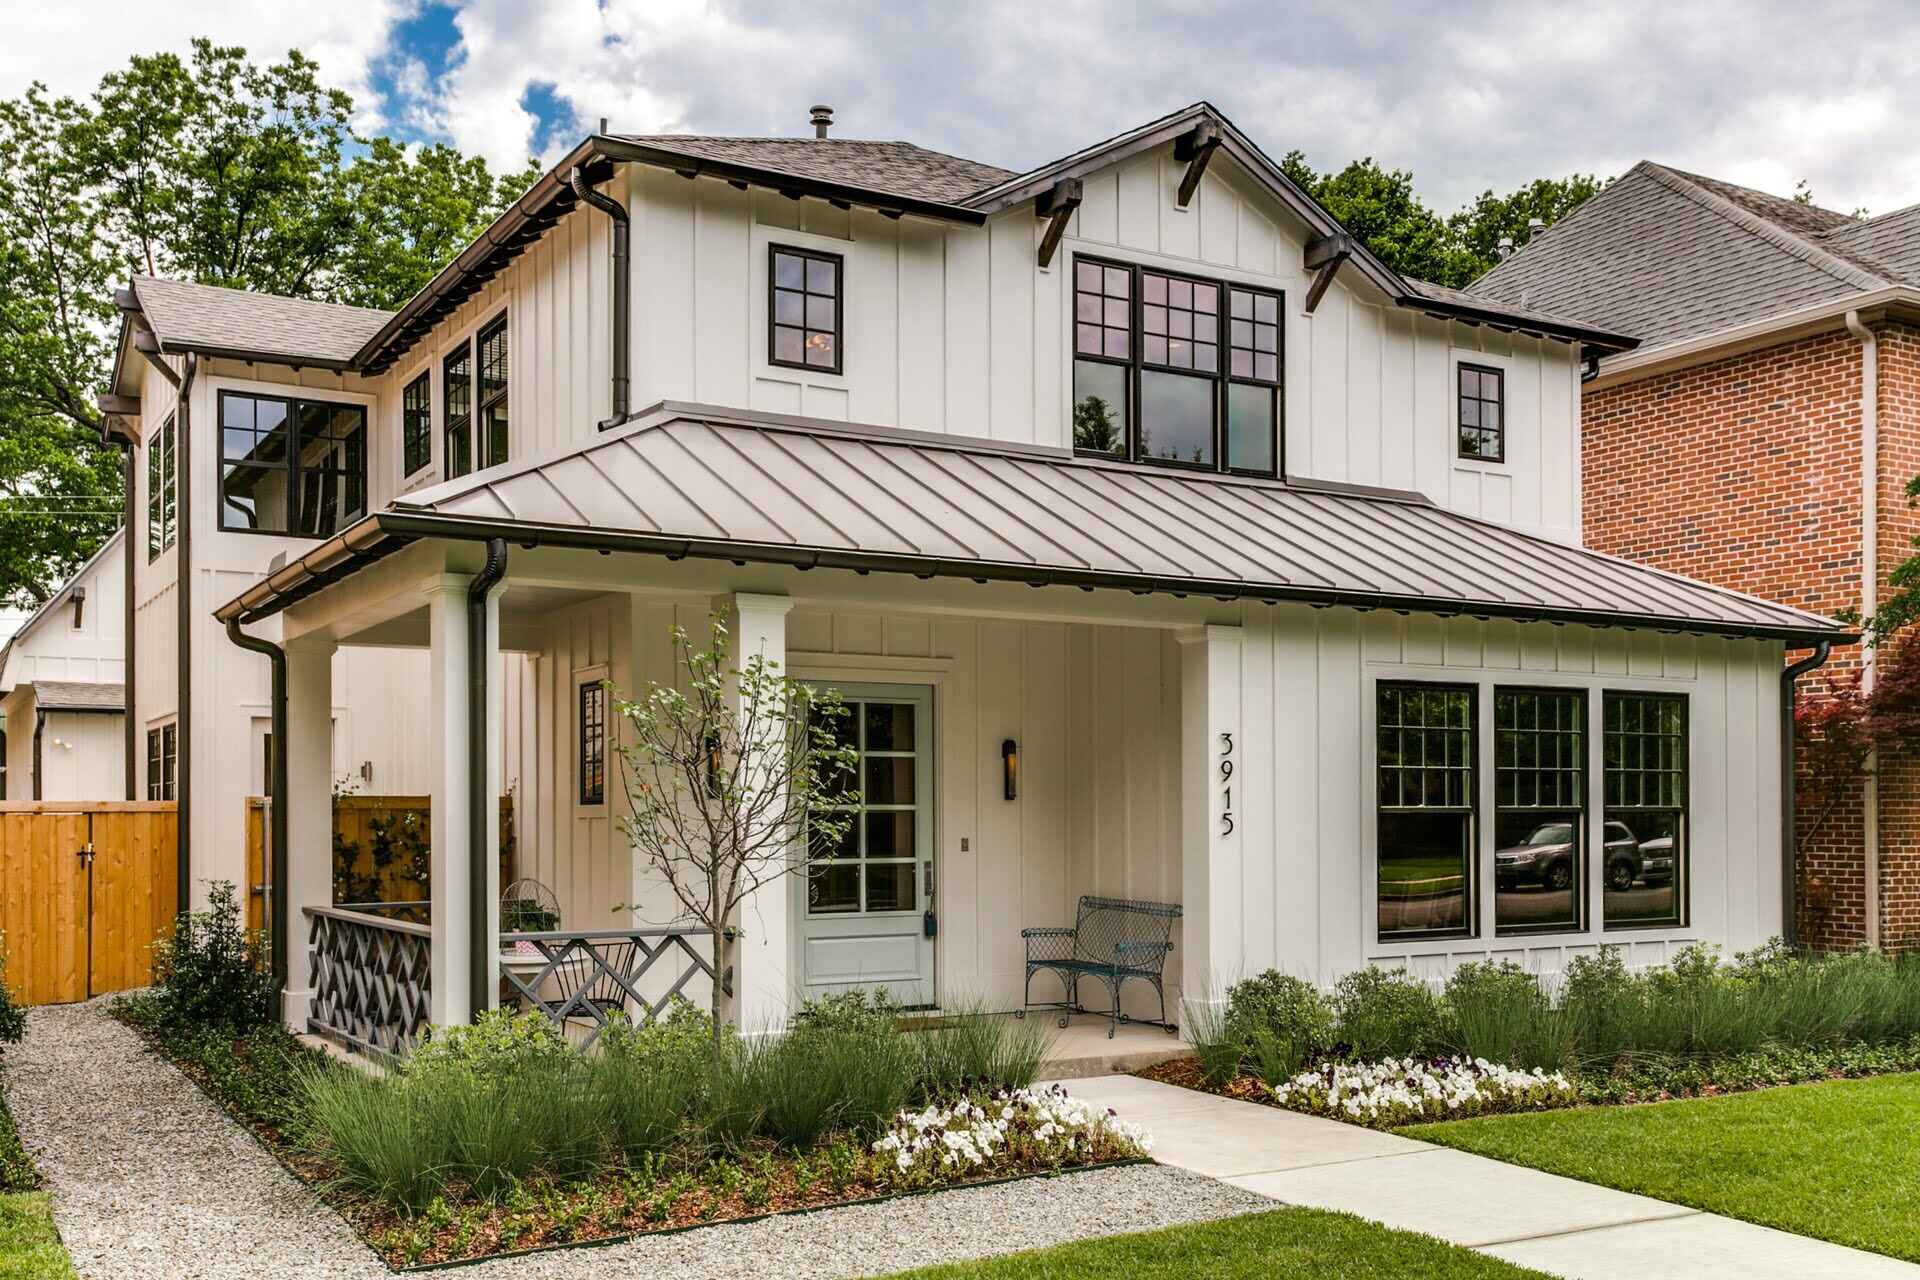
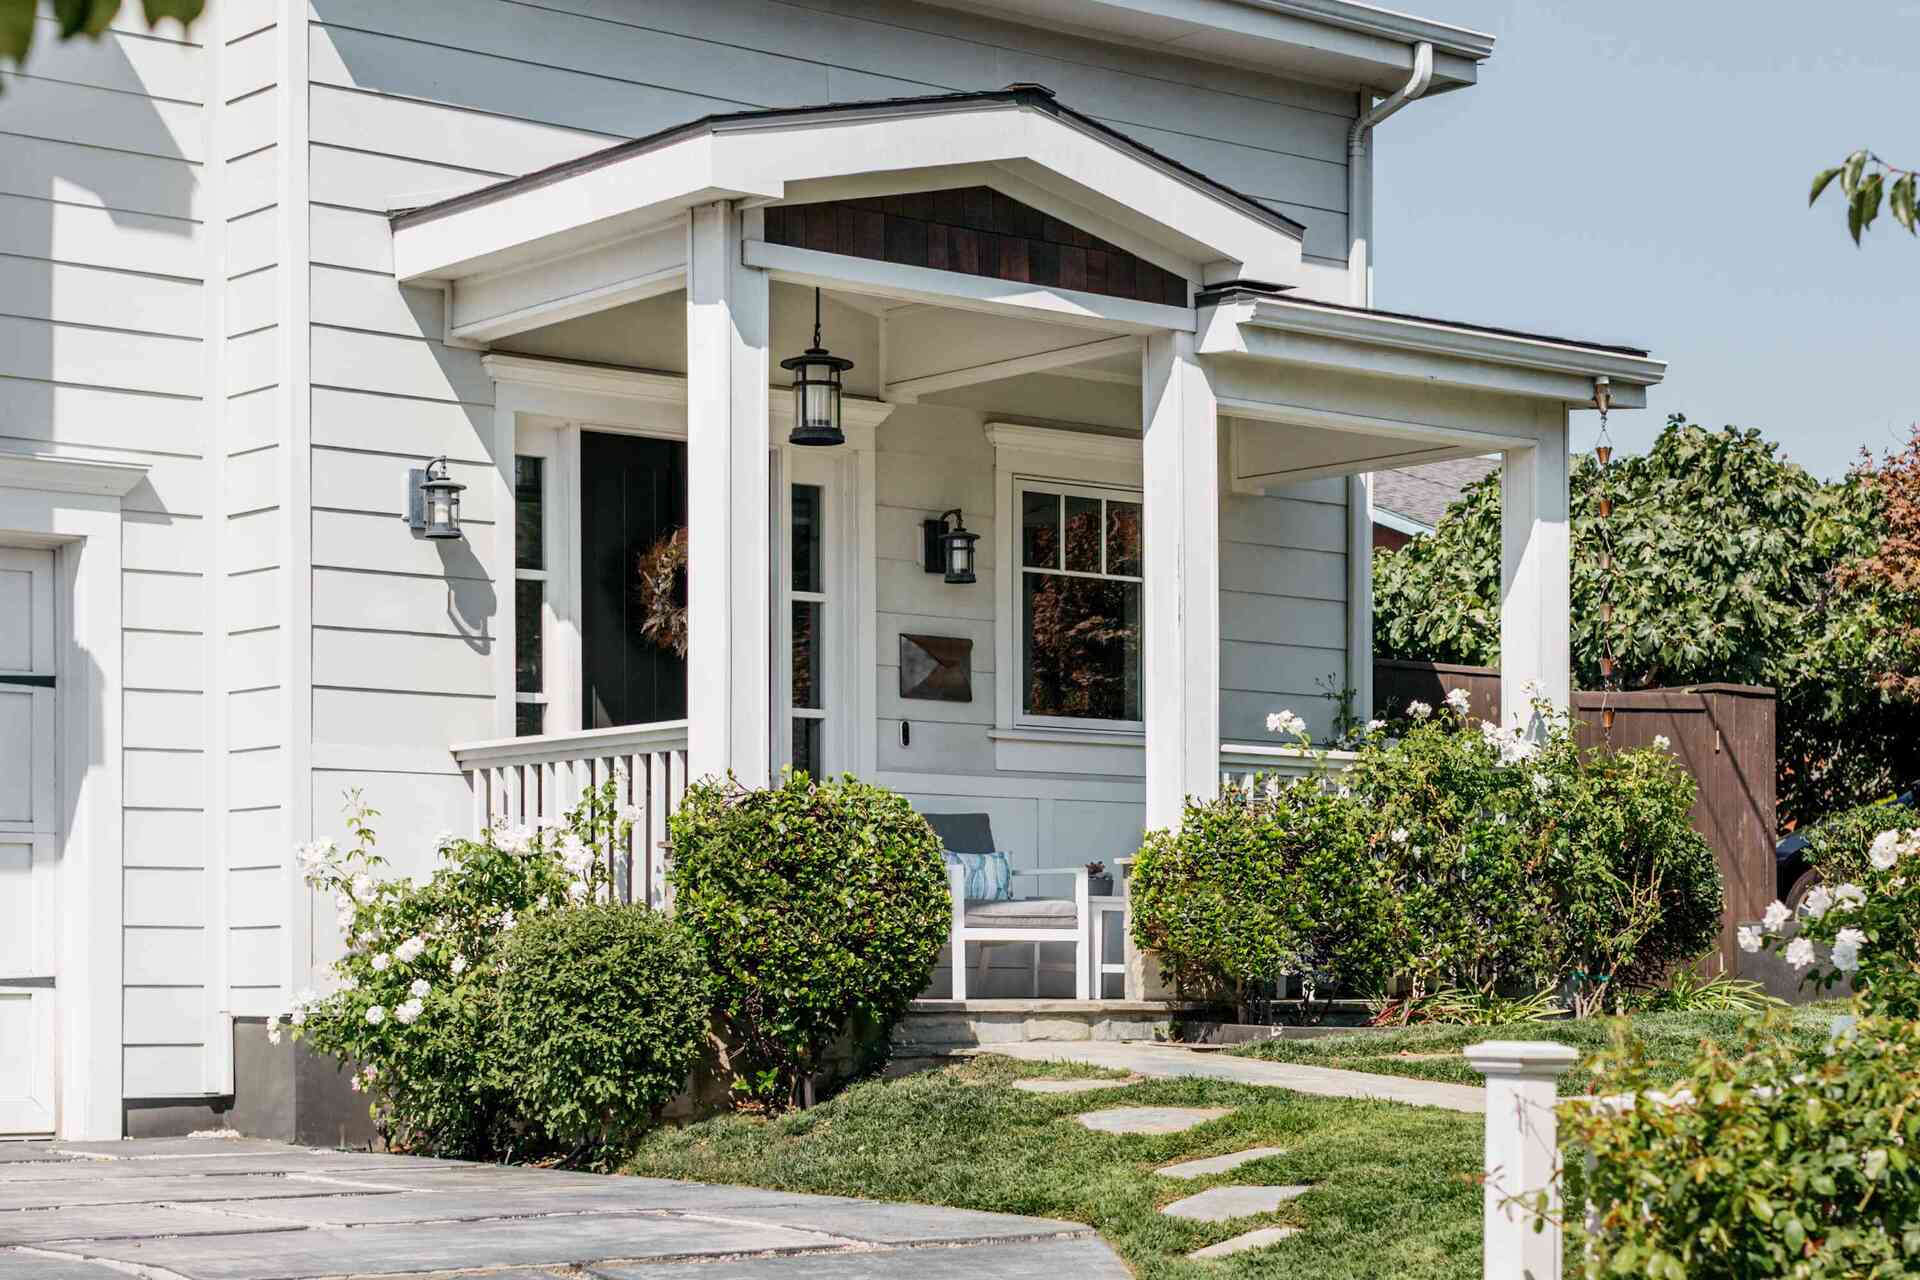
Next, think about the style and aesthetics you want to achieve. Research various porch deck designs and gather inspiration from magazines, websites, and even neighboring houses. Consider factors such as architectural style, color schemes, and materials that complement your home’s exterior.
Once you have a clear idea of the design and style, it’s time to think about the functionality of your porch deck. Will you be using it primarily for relaxation, entertaining guests, or as an outdoor dining area? This will help determine the size of the deck and the types of features you may want, such as built-in seating or a barbecue area.
Additionally, consider any structural requirements for your porch deck with a roof. Take into account factors such as load-bearing capacity, support posts, and the type of roofing material you plan to use. It’s important to consult with a structural engineer or a professional builder if you’re unsure about any structural aspects.
Finally, create a budget for your project. Research the cost of materials, tools, and any professional services you may require. Having a budget in place will help guide your decision-making process and ensure that you stay within your financial means.
Remember, the planning and designing phase is crucial as it sets the foundation for a successful porch deck with a roof project. Take the time to carefully consider all aspects and make any necessary adjustments before moving on to the next step.
Step 2: Gathering Materials and Tools
Once you have finalized the design and layout of your porch deck with a roof, it’s time to gather the necessary materials and tools for your project. Having all the required items at hand before you begin construction will streamline the process and ensure that you have everything you need to complete the project successfully.
The materials you will need for building a porch deck with a roof may include:
- Pressure-treated lumber or composite decking boards
- Support posts and beams
- Concrete for the foundation
- Hardware such as screws, nails, and brackets
- Flashing and waterproofing materials
- Roofing materials such as shingles or metal panels
- Deck railings and balusters
- Paint or stain for finishing
When selecting materials, consider durability, weather resistance, and compatibility with your home’s architecture. It’s important to choose high-quality materials that can withstand the elements and provide long-lasting performance.
In addition to materials, you will also need a variety of tools to complete the construction process. Some essential tools for building a porch deck with a roof include:
- Tape measure
- Level
- Square
- Hammer
- Power drill
- Circular saw
- String line
- Chalk line
- Shovel
Depending on the complexity of your project, you may need additional tools such as a miter saw, jigsaw, or post hole digger. It’s important to have a well-equipped toolbox to make the construction process smooth and efficient.
Before starting the project, double-check that you have all the necessary materials and tools on hand. It’s also a good idea to organize and set up a designated workspace to keep everything accessible and ensure better workflow.
By gathering all the materials and tools beforehand, you’ll be ready to move on to the next step with confidence and convenience.
Step 3: Preparing the Site
Before you can start building your porch deck with a roof, it’s essential to properly prepare the site. Site preparation involves clearing the area, making necessary adjustments to the terrain, and ensuring a solid and level foundation for your construction.
The first step in site preparation is to clear the area of any vegetation, rocks, or debris. Remove any grass, weeds, and roots to create a clean and level surface. This will help prevent future growth and ensure a smoother construction process.
Next, assess the terrain and make any necessary adjustments to ensure a level foundation. This may involve grading the area or using a leveling tool to identify any high or low spots. It’s important to create a flat and even surface to ensure the stability and longevity of your porch deck.
Once the site is cleared and leveled, you can mark the outline of your porch deck using stakes and string. This will help guide the construction process and ensure accurate measurements and layout.
Before proceeding, it’s a good idea to consult with a professional or local authorities to determine any specific requirements for deck construction in your area. They can provide guidance on setback requirements, height restrictions, and any necessary permits.
At this stage, you should also consider utilities such as water, electricity, and gas lines. Ensure that no utilities are running under the area where you plan to build your porch deck. If there are any utilities present, it’s essential to contact the appropriate authorities or utility companies to identify and mark their locations.
After clearing and marking the site, it’s time to dig holes for the support posts. The depth and diameter of the holes will depend on the specific requirements for your porch deck. It’s important to follow industry standards and local building codes to ensure the structural integrity of your deck.
Before proceeding with construction, it’s crucial to check the levelness and stability of the site. Use a level and a string line to confirm that the surface is even and ensure that the support post holes are aligned correctly.
Once you have prepared the site, cleared the area, and marked the layout, you are now ready to move on to the next step of building your porch deck with a roof.
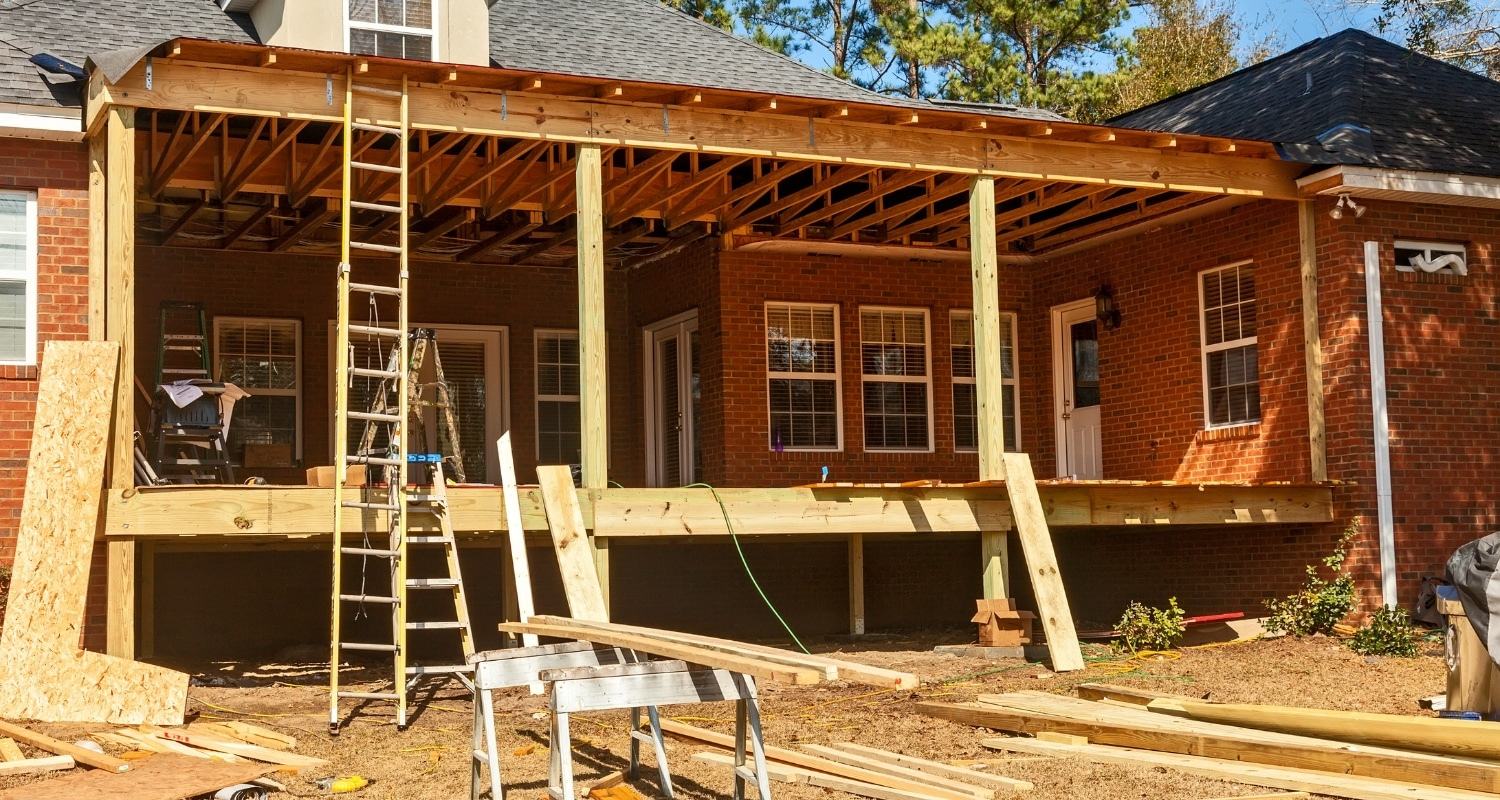
Step 4: Building the Foundation
With the site prepared and the layout marked, it’s time to start building the foundation for your porch deck with a roof. The foundation is a critical component of the structure, providing stability and support for the entire deck.
The first step in building the foundation is installing the support posts. These posts will serve as the main vertical support for your deck. The number of support posts required will depend on the size and layout of your deck. Typically, support posts are placed at regular intervals along the perimeter of the deck.
To install the support posts, dig holes in the marked locations that are deep enough to reach below the frost line. This will help prevent the deck from heaving during freeze-thaw cycles. The depth of the holes may vary depending on local building codes and soil conditions.
Place the support posts into the holes and ensure they are vertical and level. Use a post level to check both the plumb and level of each post. Once the posts are properly aligned, fill the holes with concrete and allow it to set according to the manufacturer’s instructions.
While the concrete is setting, you can start building the beams that will support the deck joists. The beams run perpendicular to the support posts and provide additional structural support. The size and spacing of the beams will depend on the load requirements and span of your porch deck.
To construct the beams, attach joist hangers to the top of each support post. Make sure the joist hangers are level and aligned. Then, place the beams into the joist hangers and secure them with appropriate fasteners.
Once the support posts and beams are in place, you can start installing the deck joists. The joists run parallel to the beams and form the framework of the deck. The spacing and size of the joists will depend on the load requirements and the type of decking material you’re using.
Attach the joists to the beams using joist hangers or by directly screwing them in place. Make sure the joists are level and evenly spaced. Use a level and a string line to ensure accuracy and consistency.
With the foundation complete, you have established a solid and stable base for your porch deck with a roof. The foundation provides the necessary support for the entire structure, ensuring its durability and longevity. Now you can proceed to the next step of installing the decking material.
When building a porch deck with a roof, make sure to use pressure-treated lumber for the frame to prevent rot and decay. Additionally, consider using metal roofing for durability and longevity.
Read more: How To Build A Front Porch Roof
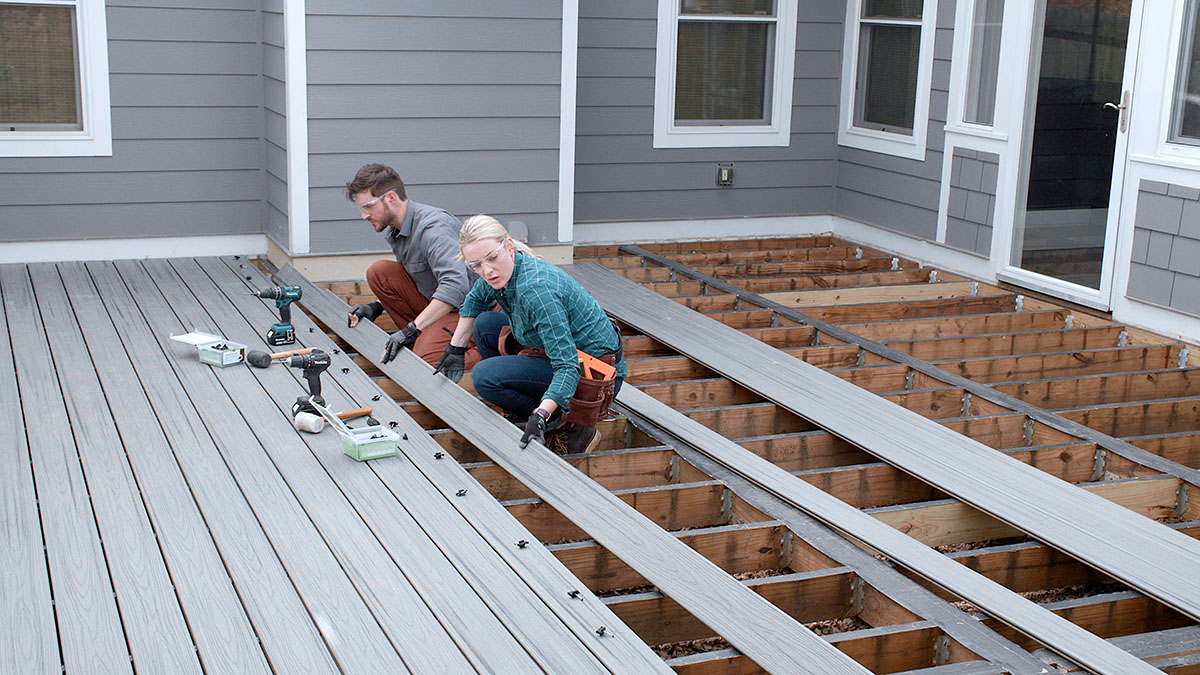
Step 5: Installing the Decking
With the foundation in place, it’s time to move on to the next step of building your porch deck with a roof – installing the decking material. The decking is the surface of your deck that you will walk and relax on, so it’s important to choose a sturdy and aesthetically pleasing option.
Before you begin installing the decking, it’s crucial to ensure that the substrate is clean, dry, and level. Remove any debris or dirt that may have accumulated on the surface. This will provide a smooth and even base for the decking material.
There are several options for decking material, including pressure-treated lumber, composite decking, and hardwood. Each material has its own advantages and considerations, such as durability, maintenance requirements, and cost. Choose the material that best fits your preferences and budget.
If you are using pressure-treated lumber or composite decking boards, start by laying the boards perpendicular to the joists. Leave a small gap between each board to allow for expansion and drainage. Secure the boards in place using appropriate fasteners, such as screws or nails.
If you are using hardwood decking, you may need to predrill holes before fastening the boards to the joists. This will help prevent splitting and ensure a secure attachment.
As you install each board, use a level to ensure that the decking is even and level. This will provide a smooth surface and enhance the visual appeal of your porch deck.
Continue installing the decking material until you have covered the entire deck area. Trim the boards as needed to fit around obstacles and edges. Use a circular saw or a jigsaw for cutting the boards to size.
Once the decking is installed, give it a thorough cleaning to remove any construction debris or marks. This will help prepare the surface for any finishing touches or treatments.
Remember to follow the manufacturer’s instructions for any specific maintenance or care required for your chosen decking material. Regular cleaning and maintenance will ensure the longevity and beauty of your porch deck.
With the decking installed, your porch deck with a roof is taking shape. The next step is to build the roof structure to provide shade and protection from the elements. Keep reading to learn how to build the roof for your porch deck.
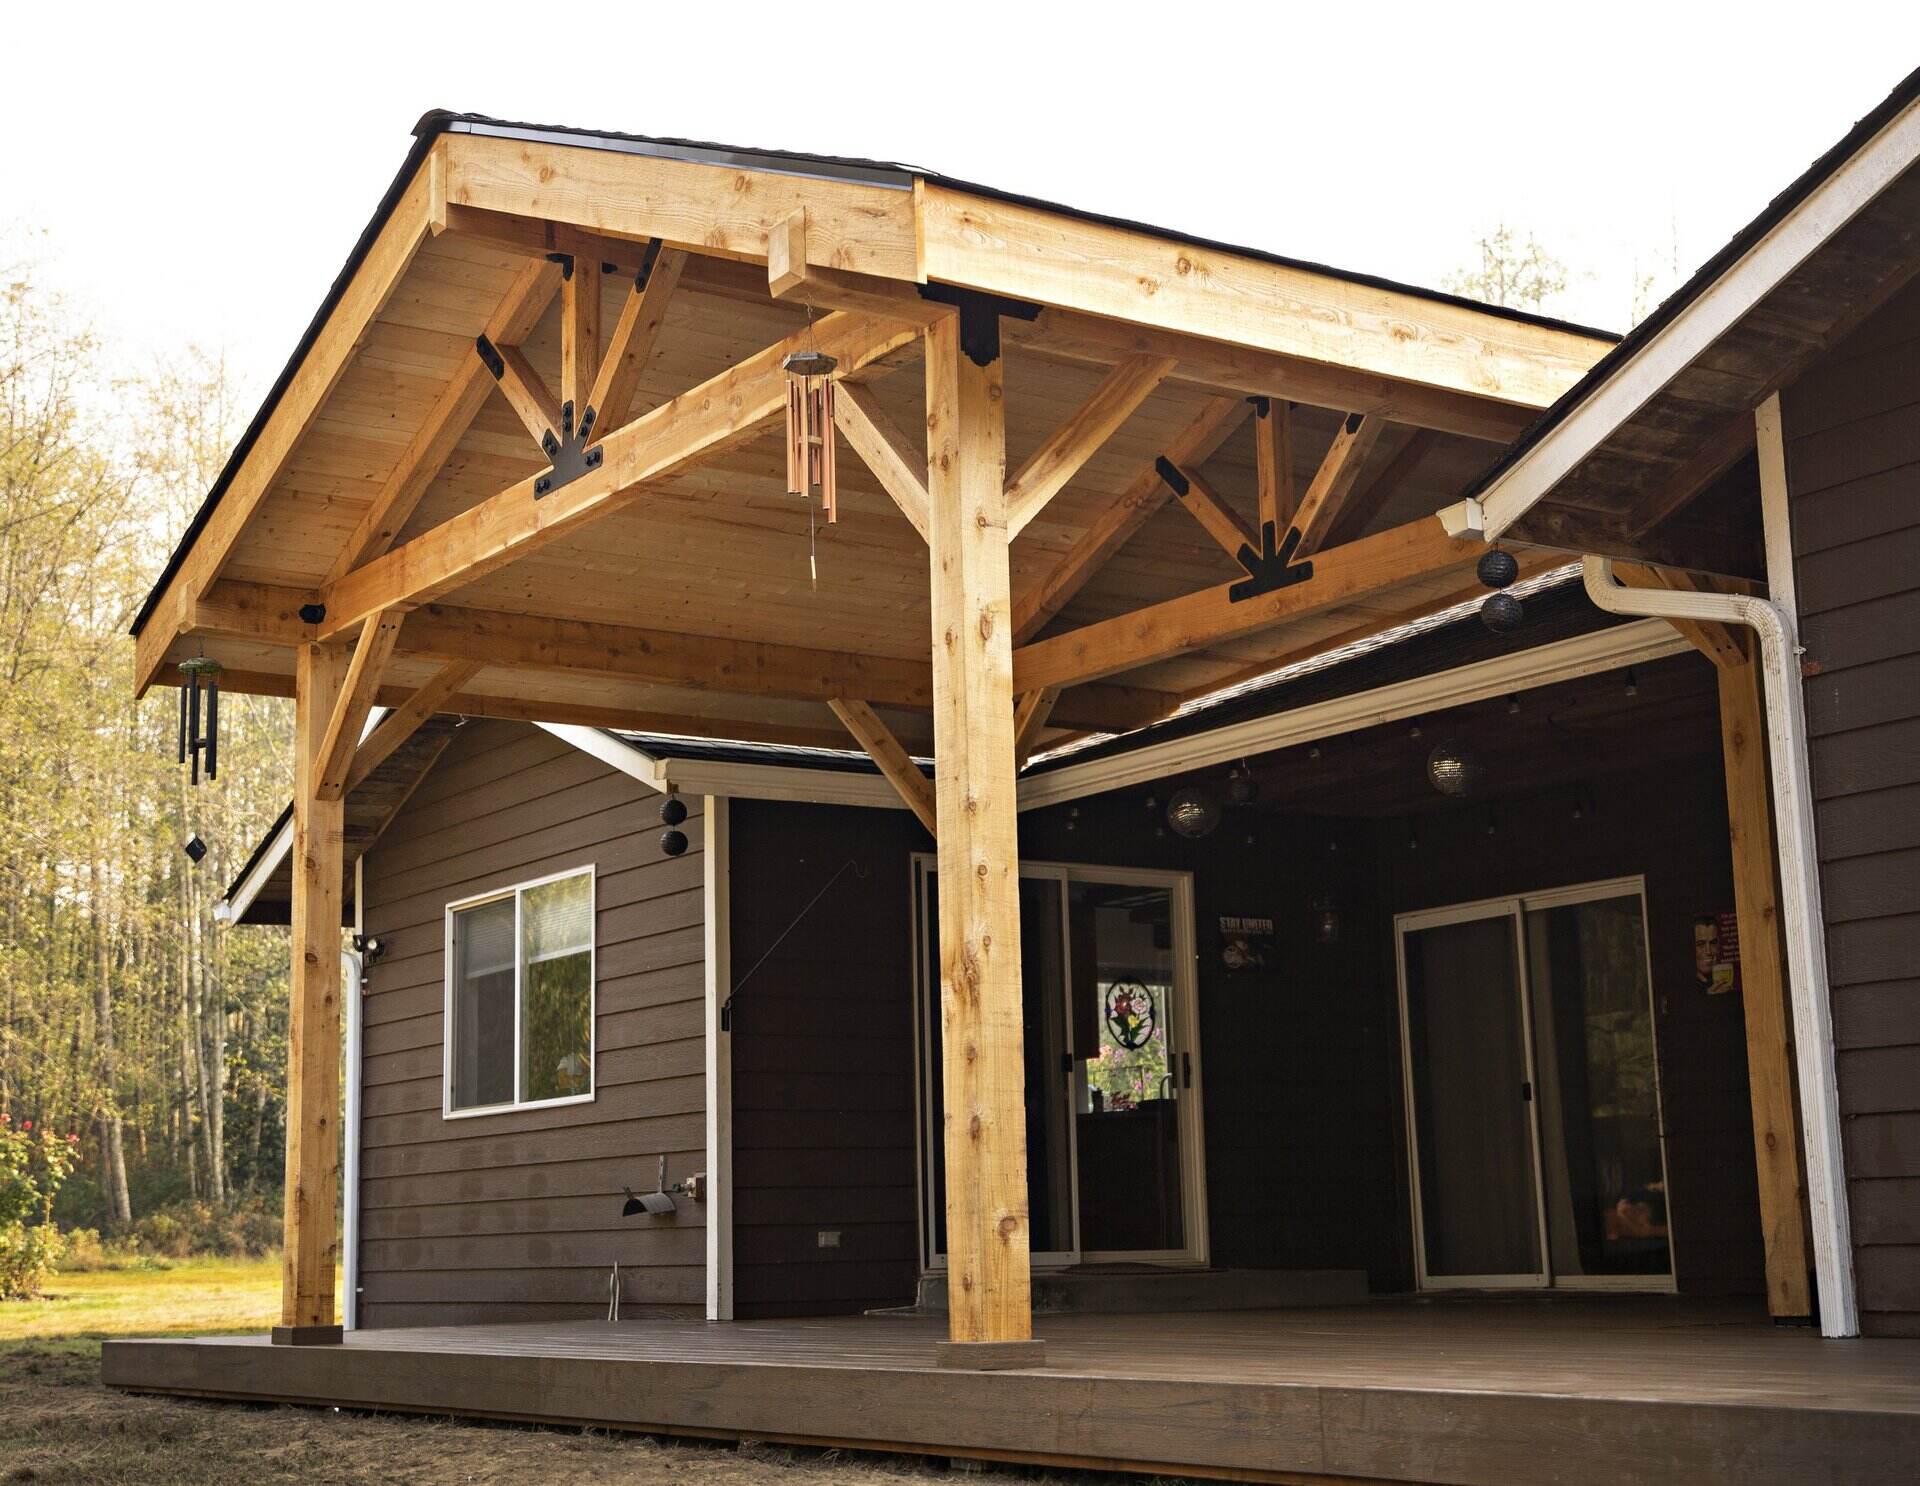
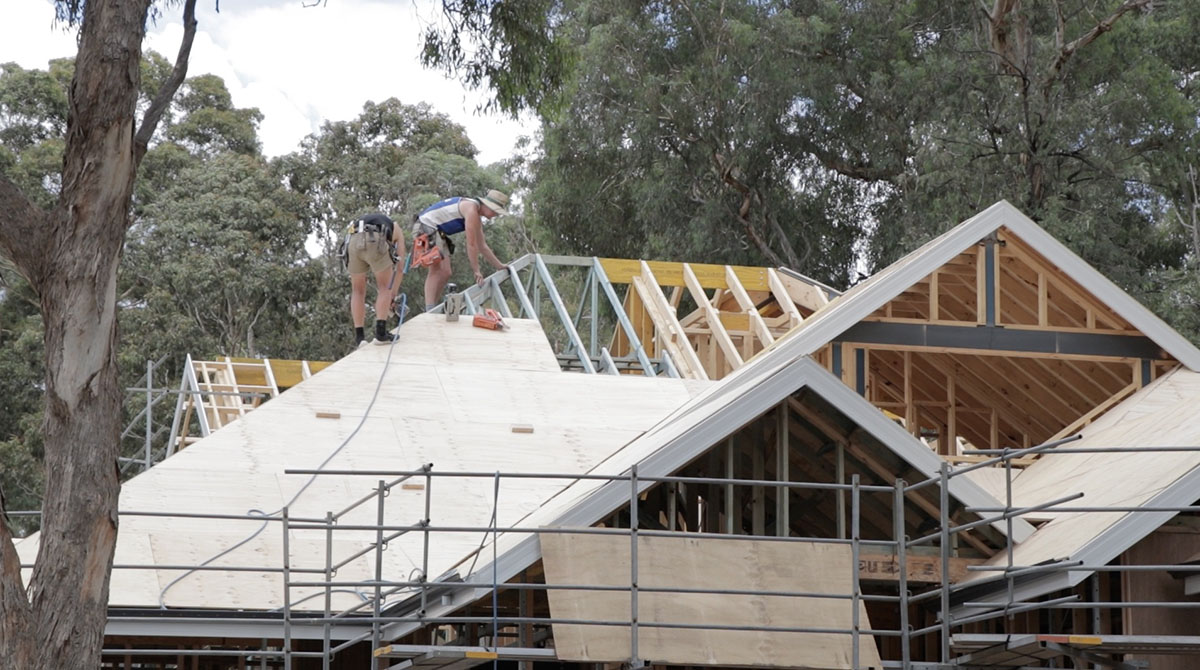
Step 6: Building the Roof Structure
Building the roof structure is a crucial step in completing your porch deck with a roof. The roof provides shade, protection from the elements, and adds an architectural element to your outdoor space. Here’s a step-by-step guide to help you build the roof structure:
1. Determine the pitch and style: The pitch, or slope, of the roof will depend on personal preference and local building codes. Consider the architectural style of your home and choose a roof pitch that complements it. Some common roof styles include gable, hip, and shed roofs.
2. Install ridge beam: The ridge beam runs horizontally at the peak of the roof. It provides structural support and forms the apex of the roof. Attach the ridge beam securely to the top of the support posts or beams using appropriate hardware.
3. Install rafters: Rafters are the sloping beams that extend from the ridge beam to the outer edges of the deck. The number and spacing of the rafters will depend on the size and pitch of the roof. Secure the rafters in place by attaching them to the ridge beam and the outer support posts or beams.
4. Add collar ties or ceiling joists: Collar ties or ceiling joists are horizontal beams that connect the rafters and provide additional support. They help to prevent the roof from sagging and add stability to the structure. Install collar ties or ceiling joists at regular intervals across the length of the rafters.
5. Install fascia and soffit: The fascia is the horizontal board that covers the ends of the rafters, giving the roof a finished look. The soffit is the underside of the roof overhang. Install fascia boards and soffit panels to complete the roof structure, ensuring a clean and polished appearance.
6. Apply sheathing: Sheathing refers to the panels or boards that cover the roof structure and provide a solid base for the roofing material. Use plywood or oriented strand board (OSB) to cover the roof, ensuring that the sheathing is securely attached to the rafters.
7. Install roofing underlayment: The roofing underlayment is a layer of material that goes between the sheathing and the roofing material. It provides an extra layer of protection against water infiltration. Roll out and secure the roofing underlayment according to manufacturer’s instructions.
With the roof structure complete, you’re now ready to move on to the next step of installing the roofing material. Stay tuned for the next step, where we will guide you through the process of selecting and installing the perfect roofing material for your porch deck with a roof.
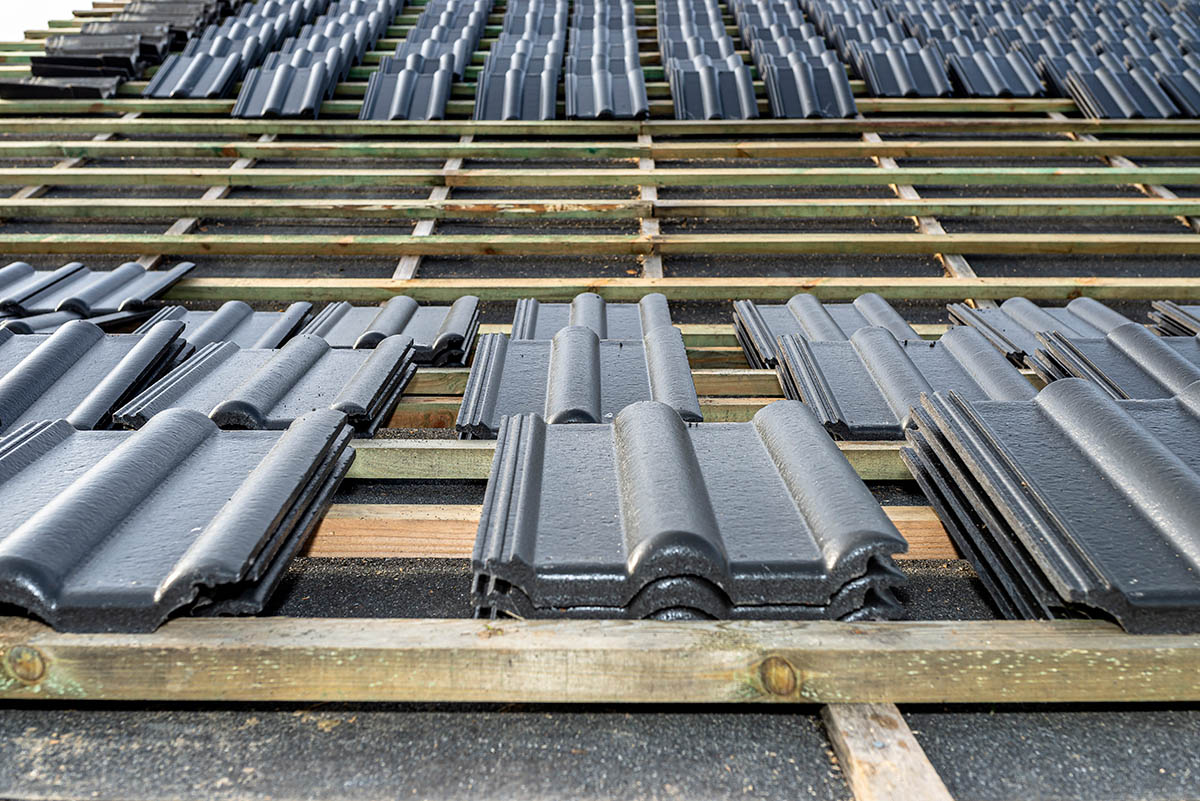
Step 7: Installing the Roofing Material
Now that you have built the roof structure for your porch deck, it’s time to move on to the next step—installing the roofing material. The choice of roofing material will depend on your personal preference, climate conditions, and the overall aesthetic of your home. Here’s a step-by-step guide to help you install the roofing material:
1. Choose the roofing material: Common roofing materials for residential purposes include asphalt shingles, metal panels, clay or concrete tiles, and wood shakes. Consider factors such as durability, cost, maintenance requirements, and the style of your home when making your selection.
2. Prepare the roof surface: Before installing the roofing material, ensure that the roof surface is clean, dry, and free of any debris. Remove any loose nails or shingles, and repair any damaged areas. Inspect the sheathing to make sure it is secure and in good condition.
3. Install the starter strip: The starter strip is a row of shingles or roofing material that provides a secure base for the rest of the roofing material. Begin by installing the starter strip along the bottom edge of the roof, following the manufacturer’s instructions.
4. Lay the roofing material: Start at one corner of the roof and lay the roofing material according to the manufacturer’s instructions. Whether you’re using shingles, metal panels, or tiles, ensure that each piece overlaps the one below it for proper water drainage. Use roofing nails or screws to secure the material in place.
5. Work your way up: Continue laying the roofing material row by row, working your way up the roof. Take care to align the material correctly and maintain uniform spacing. Use a carpenter’s square or a chalk line to ensure that the rows are straight.
6. Install flashing: Flashing is crucial for sealing vulnerable areas and preventing water from entering the roof. Install flashing around chimneys, vents, skylights, and any other penetrations on the roof. Follow the manufacturer’s instructions to ensure proper installation.
7. Complete the ridge: Once you have installed the roofing material across the entire roof, it’s time to finish the ridge. Install ridge caps or ventilation products, depending on the type of roofing material you’re using. This will provide a finished and protective cover for the ridge line of your roof.
8. Inspect and clean: After completing the installation, take the time to inspect the roof and make sure everything is in place. Remove any debris or excess material and clean the roof to enhance its appearance.
Installing the roofing material is a critical step in completing your porch deck with a roof. It not only adds protection but also enhances the overall visual appeal of your outdoor space. Take your time during this step to ensure a quality installation that will withstand the test of time.
In the next step, we’ll cover the finishing touches that will add that extra flair to your porch deck with a roof. Read on to learn about the final step!
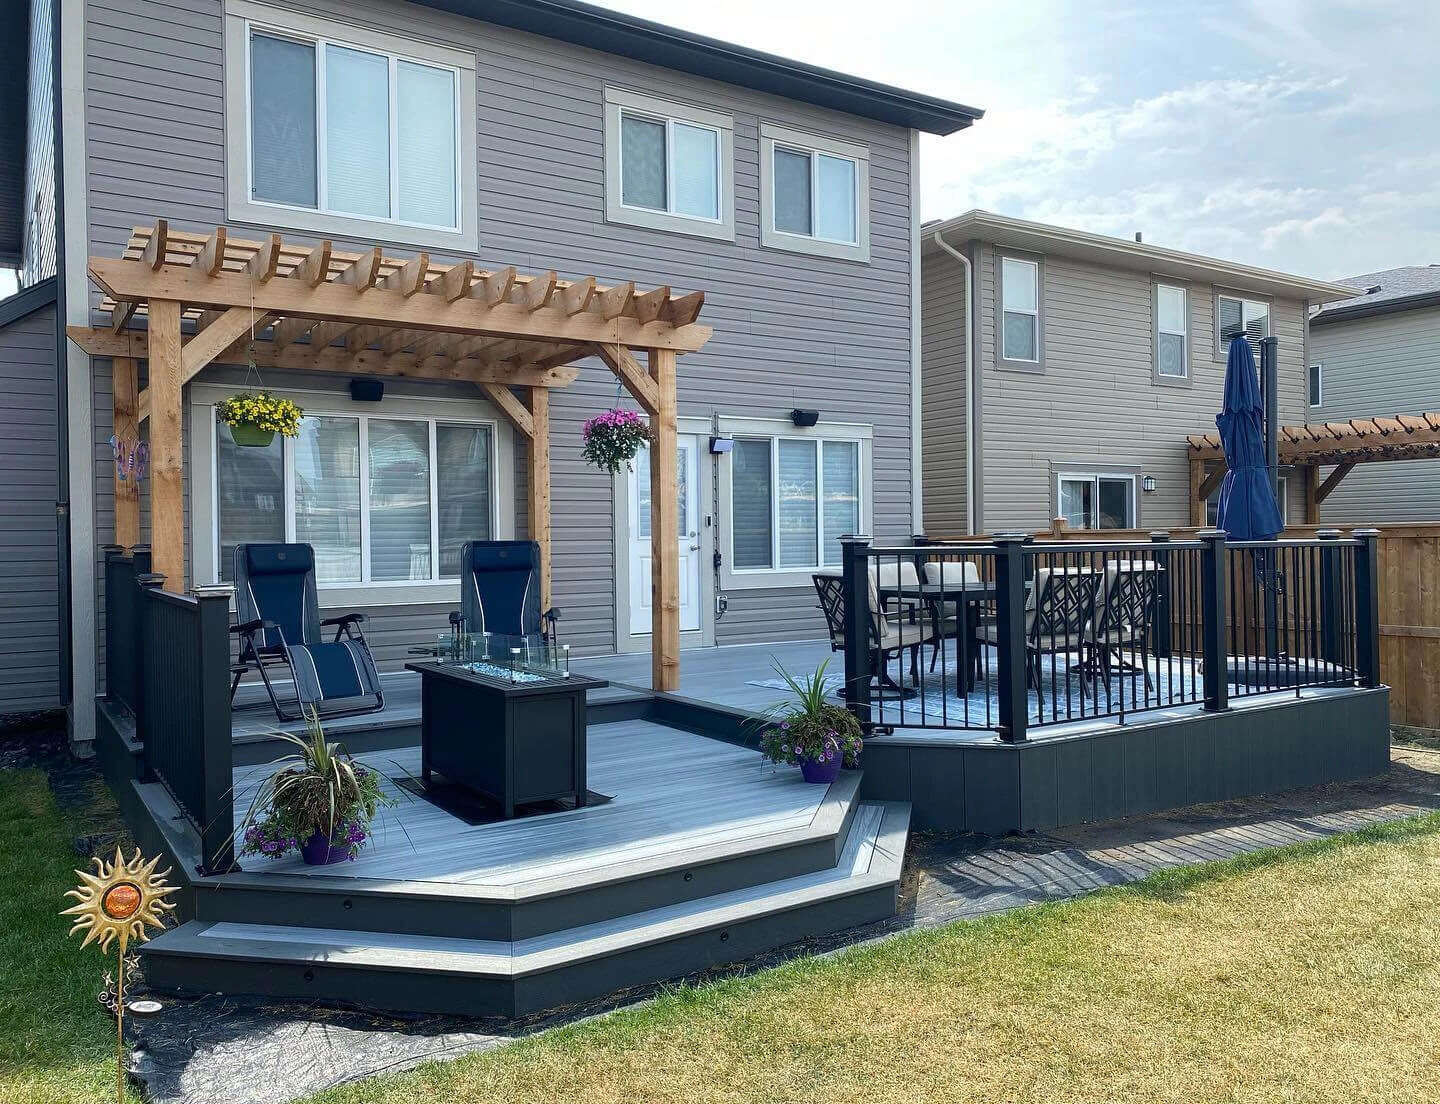
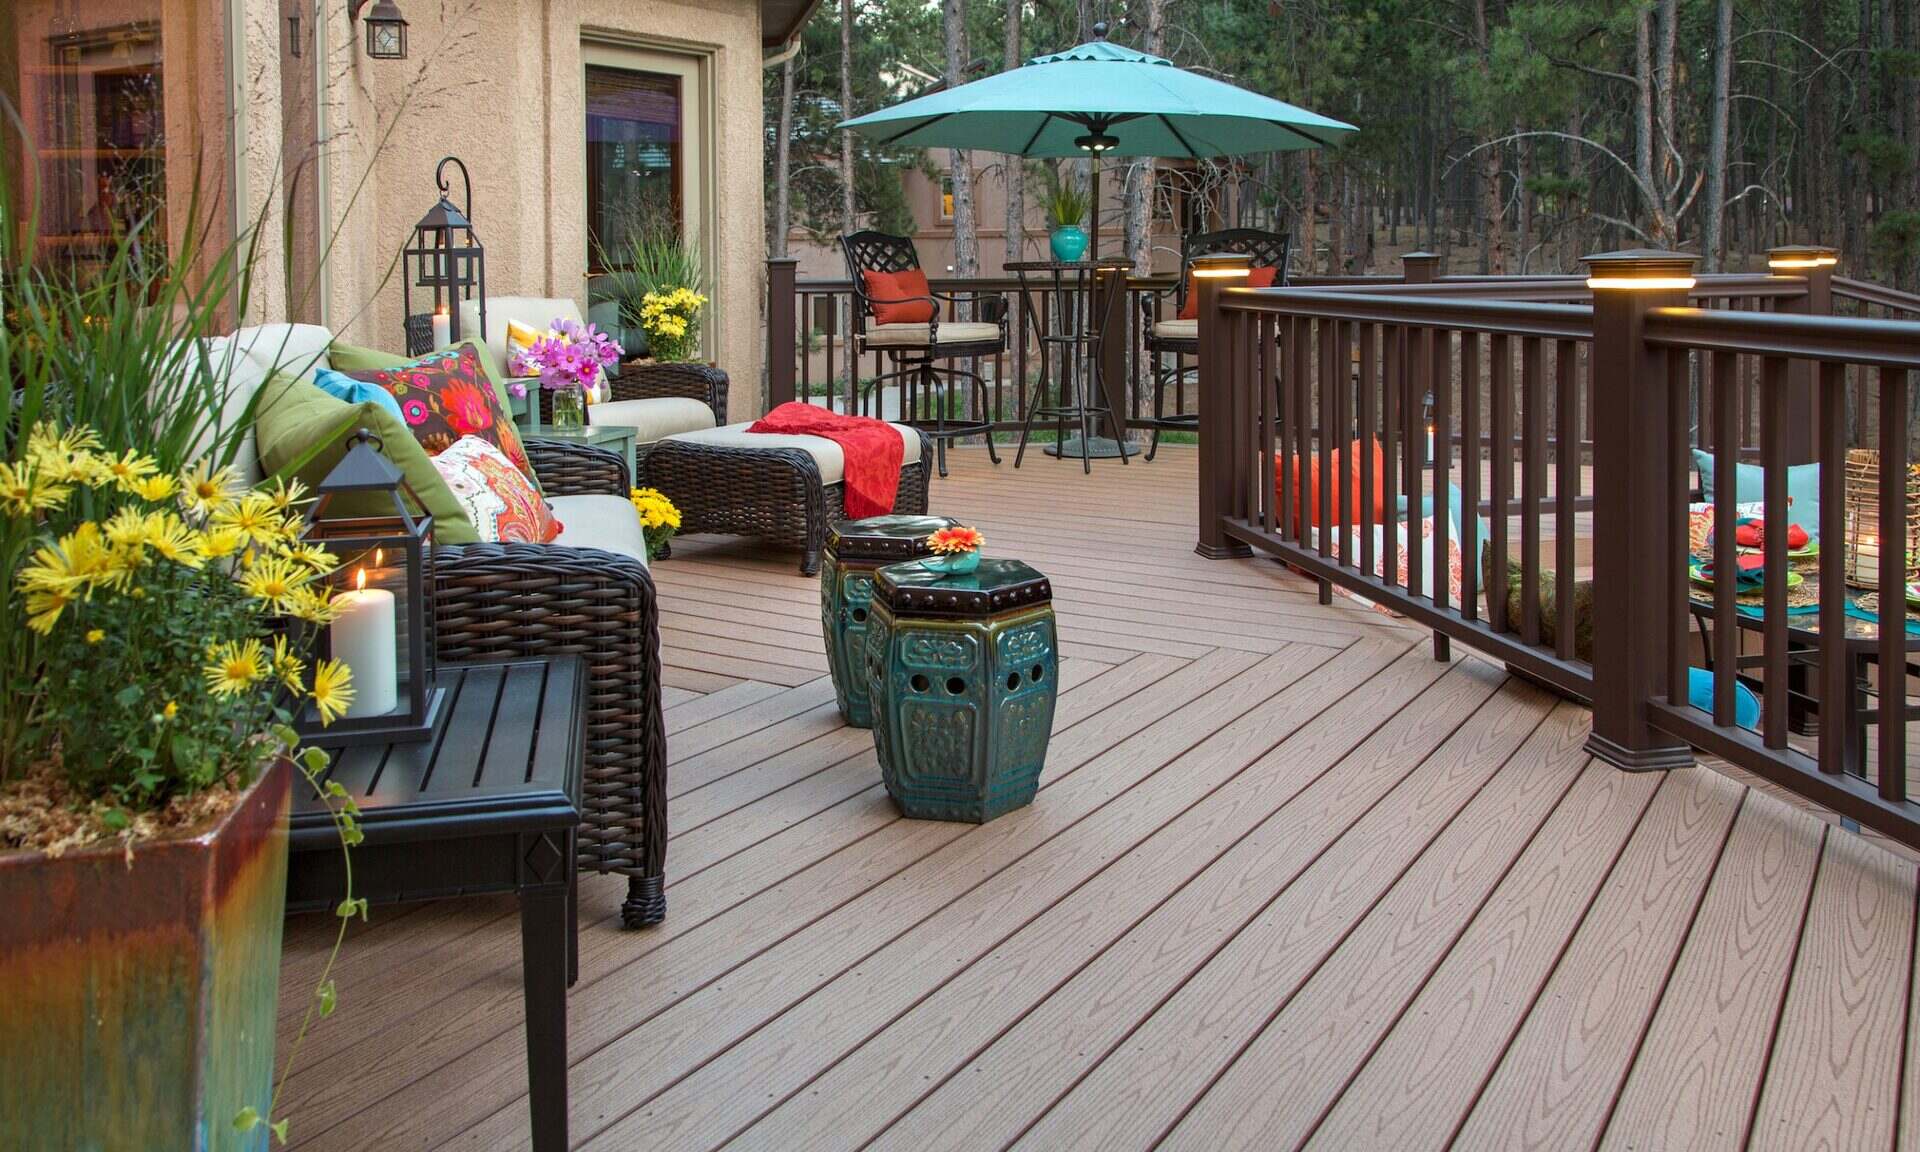
Step 8: Adding Finishing Touches
Congratulations! You’re in the final step of building your porch deck with a roof. Now it’s time to add those finishing touches that will complete the project and make your outdoor space comfortable and visually appealing.
Here are some ideas for adding those final touches:
1. Deck Railings: Install deck railings to enhance safety and add a decorative element to your porch deck. Choose from various materials such as wood, metal, or composite and select a style that complements the overall design of your home.
2. Stairs: If your porch deck is elevated, consider adding stairs for easy access. Ensure that the stairs are securely built and meet local building codes and safety standards. Use materials that match or complement the deck and railing design.
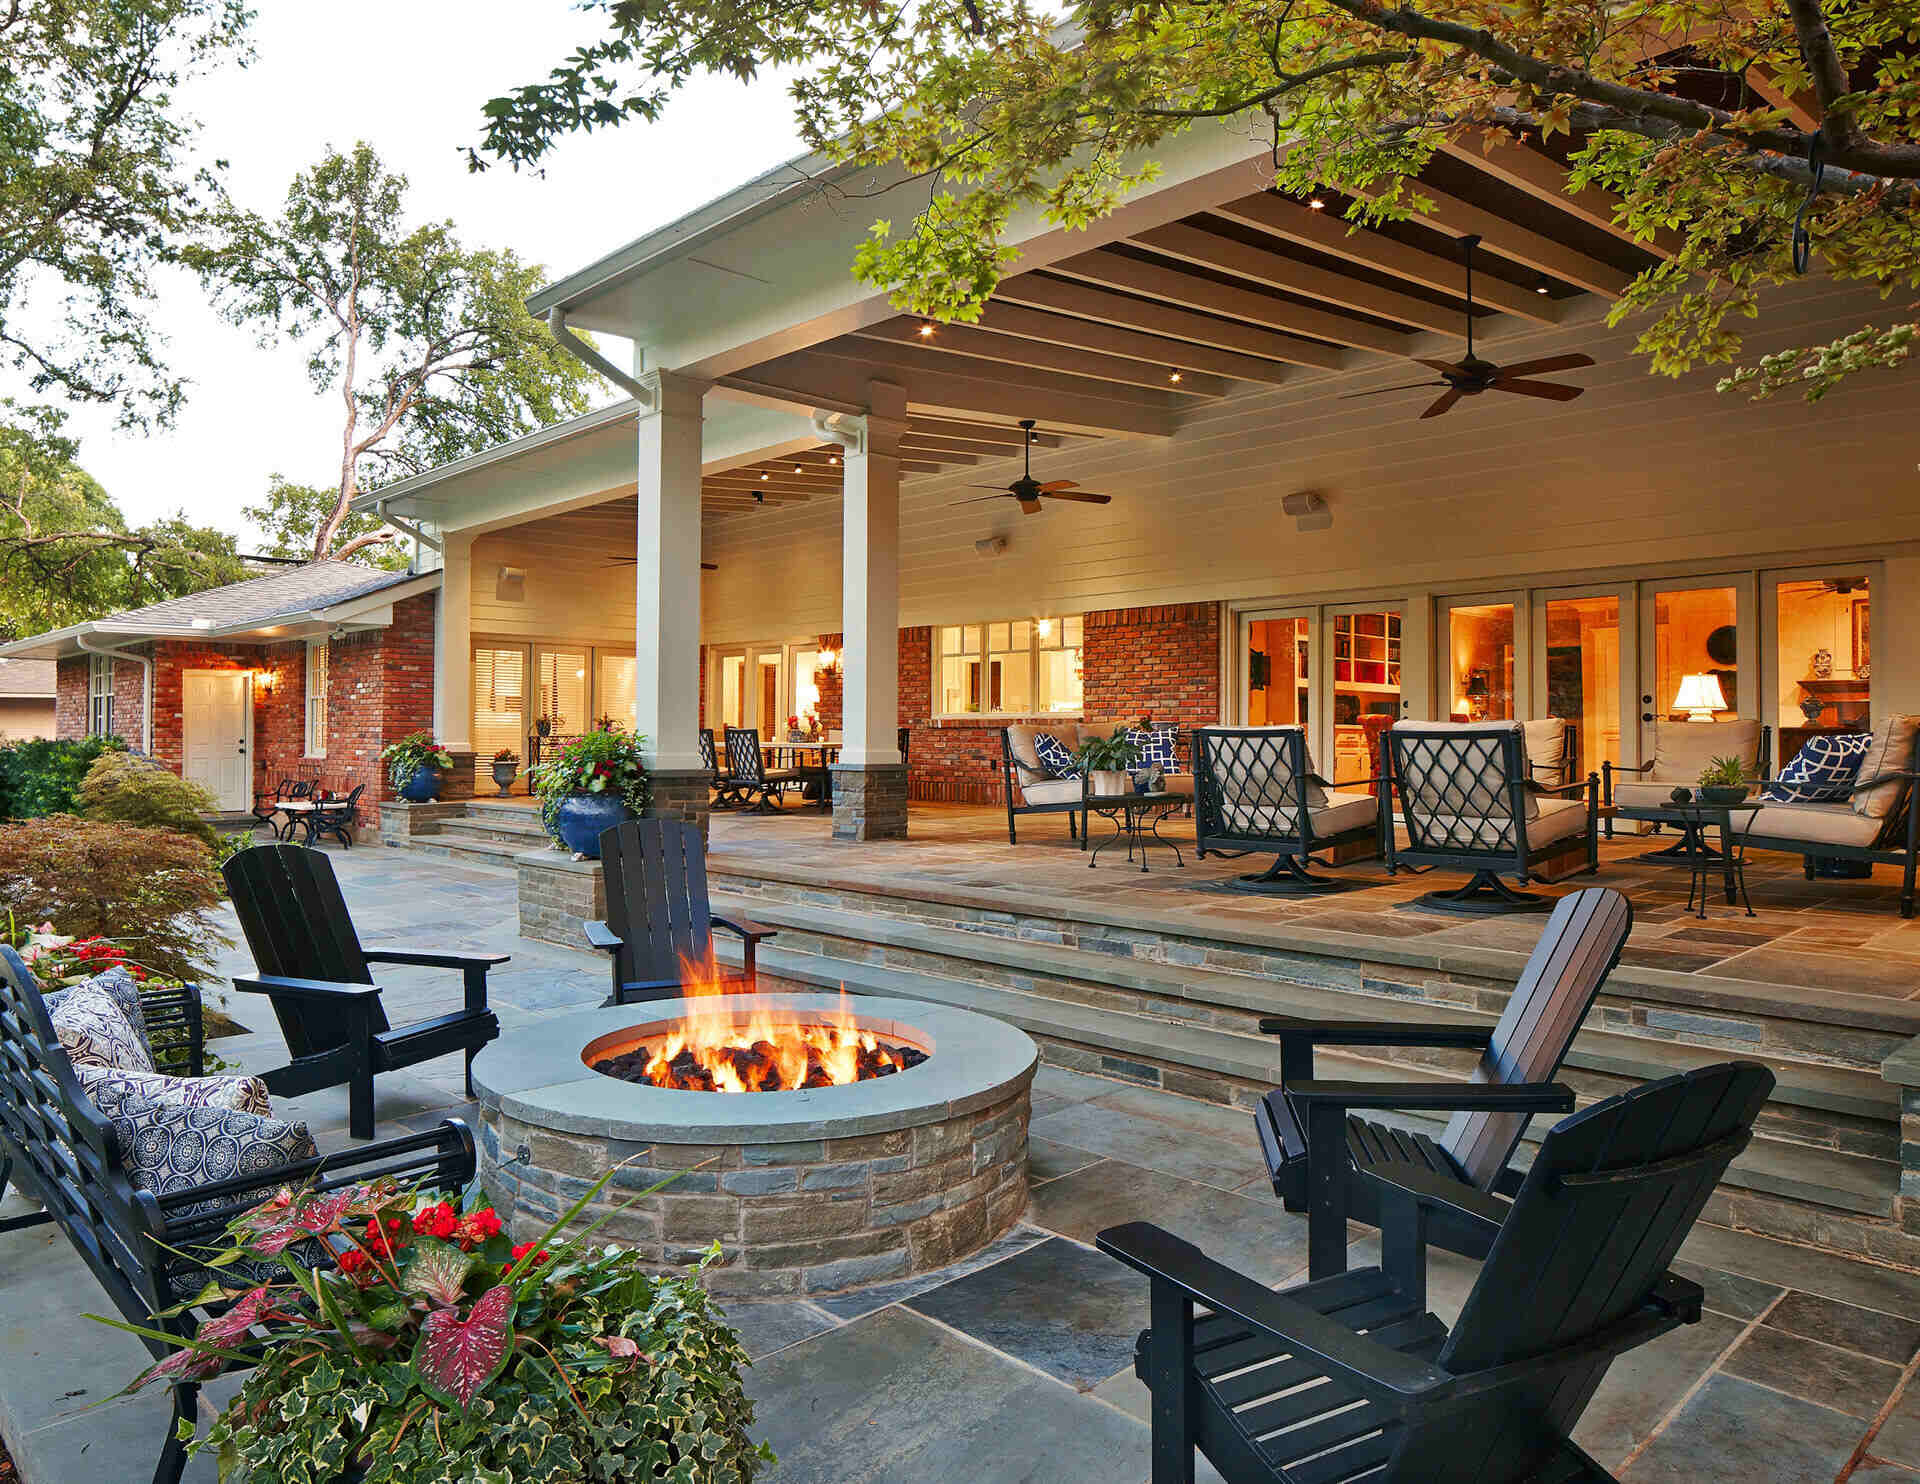
3. Lighting: Install outdoor lighting fixtures to illuminate your porch deck and enhance its ambiance at night. Consider options such as string lights, wall sconces, or post lights. Lighting not only adds functionality but also creates a warm and inviting atmosphere.
4. Seating and Furniture: Choose comfortable and weather-resistant furniture for your porch deck. From lounge chairs to outdoor sofas and dining sets, select pieces that fit your style and provide ample seating for entertaining guests or relaxing with your family.
5. Outdoor Decor: Add personalized touches to your porch deck with decorative elements such as potted plants, outdoor rugs, pillows, and outdoor artwork. These accents can bring character and make your outdoor space feel more inviting.
6. Finishing Treatments: Apply a finishing treatment to your porch deck to protect and enhance its appearance. For wood decks, consider staining or sealing the wood to prevent weathering and extend its lifespan. If you have a composite deck, follow the manufacturer’s recommendations for maintenance and cleaning.
7. Landscaping: Use landscaping elements to accentuate your porch deck area. Plant flowers, shrubs, or trees around the deck to create a beautiful backdrop and add privacy if desired. Consider incorporating a garden or planter boxes for additional greenery.
8. Outdoor Accessories: Complete your porch deck by adding outdoor accessories such as a fire pit, outdoor grill, or a hammock. These features can make your porch deck a versatile and enjoyable space for various activities throughout the year.
Remember, the finishing touches are what truly make your porch deck with a roof feel like an extension of your home. Take the time to consider your personal style and preferences as you select and arrange these final elements.
Once you’ve added the finishing touches, step back and admire the beautiful porch deck with a roof that you’ve created. It’s now a functional, stylish, and inviting space where you can enjoy outdoor living throughout the seasons!
With this final step complete, your porch deck with a roof is ready to be enjoyed. We hope this comprehensive guide has been helpful in guiding you through the process of building your porch deck. Enjoy spending time on your new porch deck and creating lasting memories with friends and family.
Read more: How To Build A Gable Porch Roof
Conclusion
Building a porch deck with a roof is a fulfilling and rewarding project that can enhance the beauty and functionality of your outdoor space. It provides a versatile area for relaxation, entertainment, and enjoying the great outdoors. By following the steps outlined in this guide, you can successfully construct a porch deck with a roof that meets your needs and exceeds your expectations.
From the initial planning and design phase to the final finishing touches, each step is crucial in creating a porch deck that is both structurally sound and visually appealing. Taking the time to carefully plan, gather materials, prepare the site, build a solid foundation, install the decking and roof structure, and add those finishing touches will result in a porch deck that you can enjoy for years to come.
Throughout the process, remember to prioritize safety and follow local building codes and regulations. It’s always a good idea to consult with professionals or experts when needed, especially if you are unsure about any aspect of the project.
Maintaining your porch deck with a roof is also important to ensure its longevity. Regular cleaning, inspections, and maintenance will help preserve its beauty and structural integrity. Consider resealing, staining, or repainting the deck as needed, and address any repairs promptly to prevent further damage.
We hope this comprehensive guide has provided you with valuable insights and guidance on how to build a porch deck with a roof. May your porch deck become a gathering place for cherished moments, a retreat for relaxation, and an extension of your home that adds value and enjoyment to your life.
Now, it’s time to roll up your sleeves, gather your materials, and bring your vision to life. Happy building!
Now that you've mastered building a porch deck with a roof, why not spruce up your new space for more enjoyment? Our guide on adding colorful decor and simple enhancements will turn any deck into a haven for outdoor living. For those who relish creating with their own hands, our insights into DIY projects will reveal why taking on such tasks can be so rewarding. Both articles provide practical tips and creative ideas to further your home improvement journey.
Frequently Asked Questions about How To Build A Porch Deck With Roof
Was this page helpful?
At Storables.com, we guarantee accurate and reliable information. Our content, validated by Expert Board Contributors, is crafted following stringent Editorial Policies. We're committed to providing you with well-researched, expert-backed insights for all your informational needs.


0 thoughts on “How To Build A Porch Deck With Roof”