Home>Home Appliances>Cleaning Appliances>How To Reset IRobot Mop
Cleaning Appliances
How To Reset IRobot Mop
Modified: January 4, 2024
Learn how to reset your iRobot mop with our step-by-step guide. Keep your cleaning appliances running smoothly with our expert tips.
(Many of the links in this article redirect to a specific reviewed product. Your purchase of these products through affiliate links helps to generate commission for Storables.com, at no extra cost. Learn more)
Introduction
Welcome to the world of iRobot mops, where cleaning your floors becomes an effortless task. However, there are times when your iRobot mop may require a reset to ensure optimal performance. Whether you’re encountering connectivity issues or simply want to refresh its settings, knowing how to reset your iRobot mop can be invaluable. In this comprehensive guide, we’ll walk you through the steps to reset your iRobot mop and get it back to its pristine cleaning state. So, let’s dive in and explore the simple yet effective process of resetting your iRobot mop.
Key Takeaways:
- Easily reset your iRobot mop by preparing it, accessing the iRobot Home app, and power cycling it. Ensure optimal performance by testing the mop’s settings, cleaning cycle, and connectivity.
- Keep your iRobot mop in top shape by maintaining a clean environment, addressing issues promptly, and seeking support from iRobot’s customer service when needed. Enjoy effortless floor cleaning with your rejuvenated iRobot mop!
Read also: 10 Amazing Irobot Mop For 2025
Step 1: Prepare the iRobot Mop
Before initiating the reset process, it’s important to ensure that your iRobot mop is adequately prepared. This involves a few essential steps to set the stage for a successful reset. Here’s what you need to do:
- Charge the Battery: Start by placing your iRobot mop on the charging dock to ensure that the battery is sufficiently charged. A fully charged battery is crucial for the reset process and subsequent operations.
- Clean the Mop: Take a moment to inspect and clean the mop’s sensors, brushes, and any accumulated debris. Ensuring that the mop is free from obstructions can contribute to a seamless reset and optimal performance.
- Establish a Stable Connection: Ensure that your smartphone or device is connected to a stable Wi-Fi network. A stable internet connection is essential for the reset process and for seamless communication with your iRobot mop.
By diligently preparing your iRobot mop and its surrounding environment, you set the stage for a successful reset process, paving the way for efficient and effective cleaning operations. With these preparatory steps completed, you’re now ready to proceed with the reset process.
Step 2: Reset the iRobot Mop
Resetting your iRobot mop involves a series of simple yet precise steps to restore it to its default settings. Follow these instructions to effectively reset your iRobot mop:
- Access the iRobot Home App: Begin by opening the iRobot Home app on your smartphone or device. Ensure that you are logged in to your account and have access to the connected iRobot mop.
- Select the Mop: Within the app, navigate to the section that allows you to control your iRobot mop. Locate the option to reset or reboot the device. This may be found in the settings or device management section of the app.
- Initiate the Reset: Once you’ve accessed the reset option, follow the on-screen prompts to confirm the reset process. This may involve confirming your intention to reset the device and acknowledging any potential data loss associated with the reset.
- Wait for Confirmation: After initiating the reset, allow the iRobot mop to complete the process. This may involve a series of status lights or indicators on the device itself. Wait for the reset to be confirmed before proceeding to the next step.
- Power Cycle the Mop: To ensure that the reset is fully effective, consider power cycling the iRobot mop. This involves turning it off and then back on after a brief interval. This step can help solidify the reset and ensure that the device is ready for use.
By following these steps diligently, you can effectively reset your iRobot mop and prepare it for seamless cleaning operations. Once the reset process is complete, you’re ready to move on to the next crucial step: testing the iRobot mop to ensure that it’s functioning as expected.
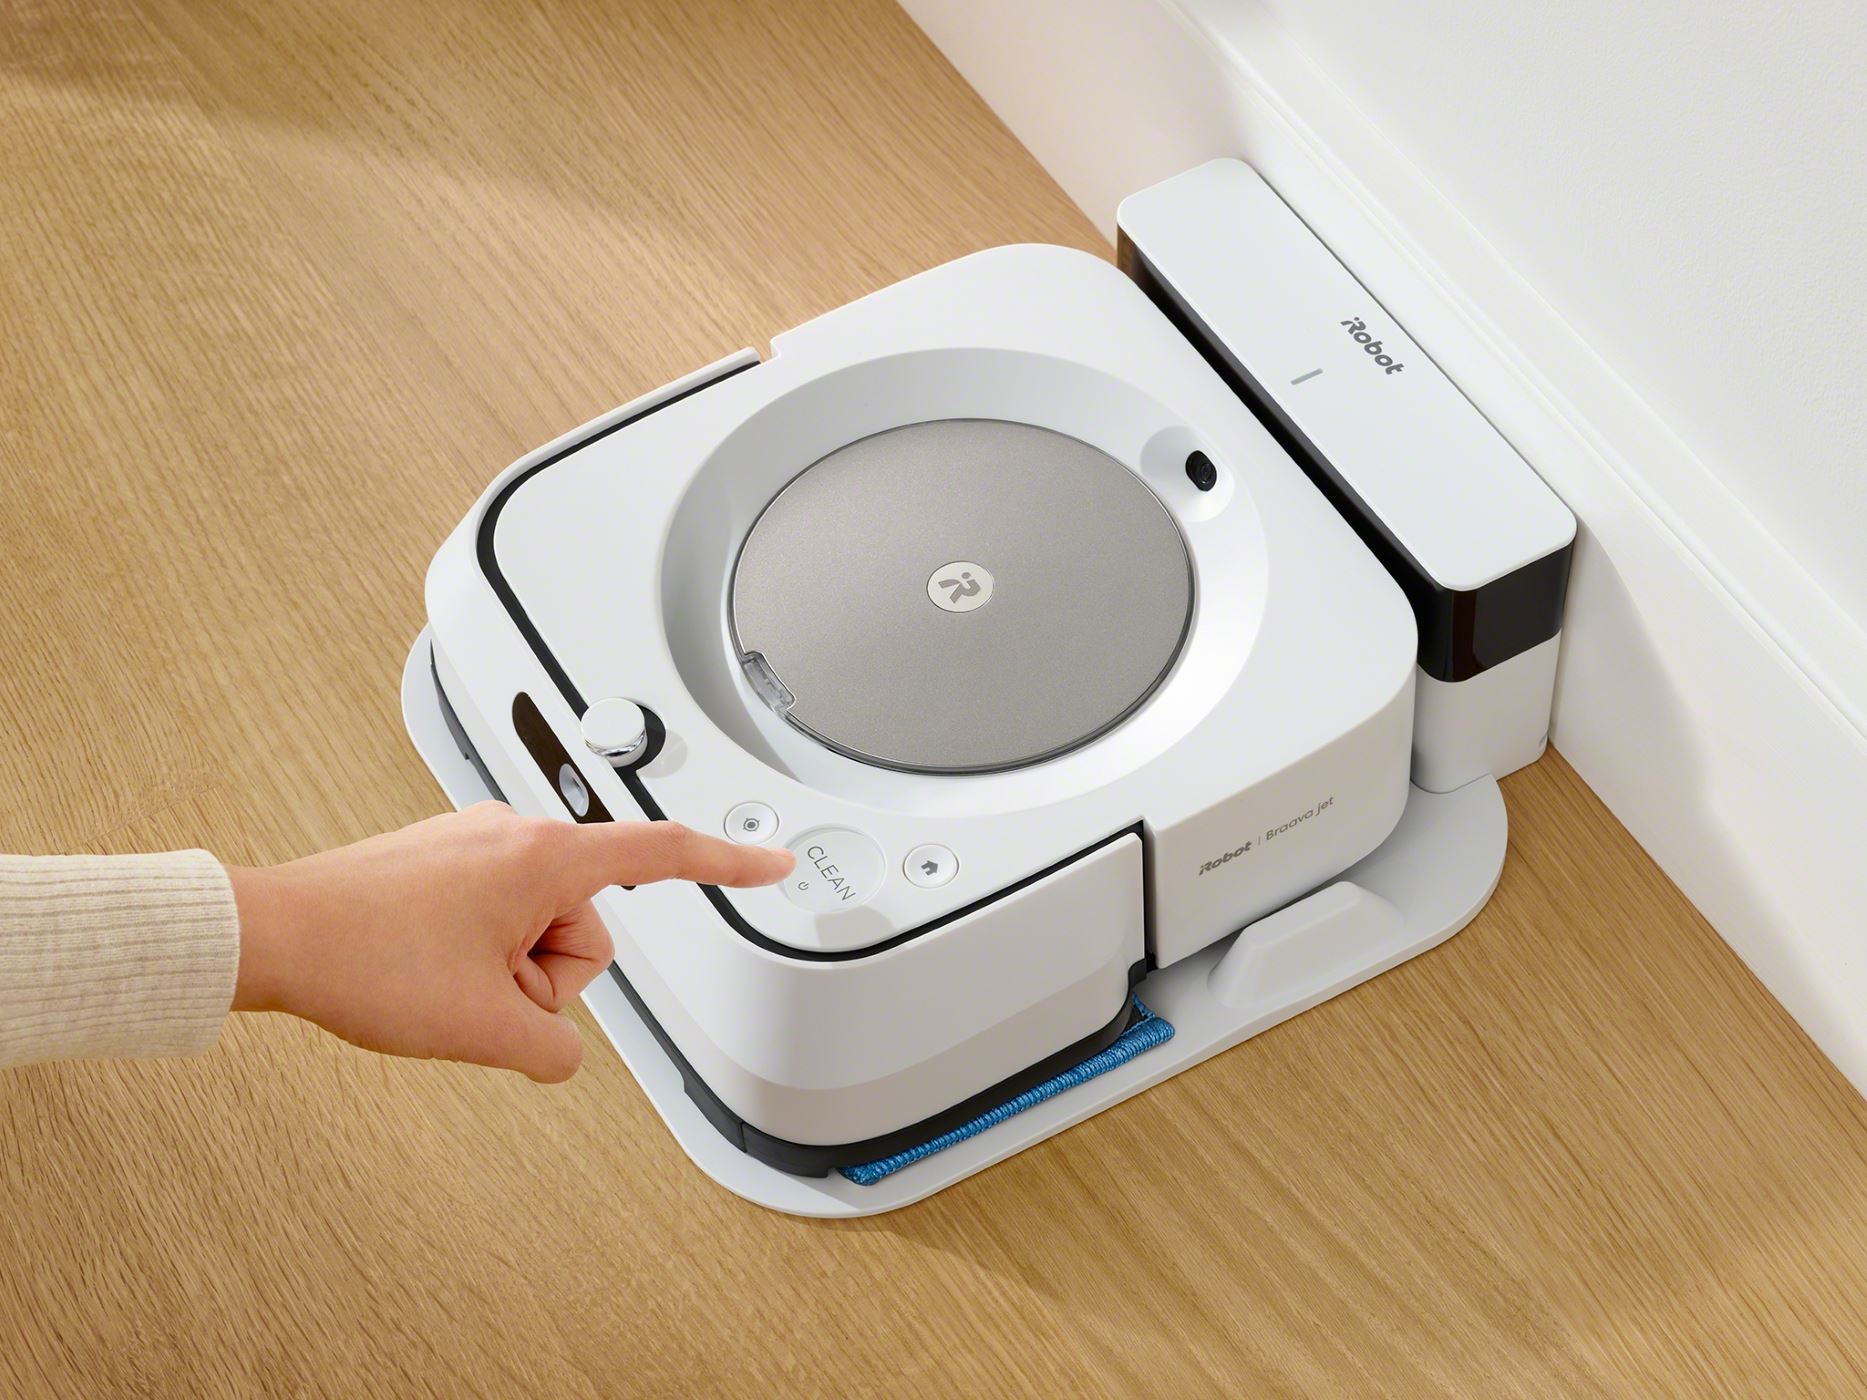
To reset your iRobot mop, press and hold the “Clean” button for 20 seconds until you hear a tone. Then release the button and wait for the robot to restart.
Step 3: Test the iRobot Mop
After successfully resetting your iRobot mop, it’s essential to conduct a thorough test to ensure that it’s functioning optimally. Follow these steps to test the iRobot mop and verify that it’s ready to resume its cleaning duties:
- Inspect the Settings: Open the iRobot Home app and review the settings for your mop. Ensure that the reset has restored the default settings and configurations. Take note of any specific preferences or schedules that need to be reconfigured.
- Initiate a Cleaning Cycle: Use the app to start a cleaning cycle for your iRobot mop. Observe its movements and functionality as it navigates your floors. Pay attention to any irregularities or issues that may arise during the cleaning process.
- Monitor Connectivity: Throughout the cleaning cycle, monitor the connectivity between the app and the iRobot mop. Ensure that commands are being executed properly and that the mop responds to prompts from the app without any delays or disruptions.
- Check for Obstructions: As the iRobot mop operates, keep an eye out for any potential obstructions or challenges it may encounter. Verify that it maneuvers around furniture and obstacles effectively, demonstrating its ability to navigate and clean your floors with precision.
- Assess Cleaning Performance: Once the cleaning cycle is complete, assess the overall cleaning performance of the iRobot mop. Inspect the cleanliness of the floors and evaluate the thoroughness of the cleaning process to ensure that it meets your expectations.
By meticulously testing your iRobot mop after the reset, you can gain confidence in its restored functionality and ensure that it’s ready to tackle your cleaning needs with efficiency and precision. If any issues or concerns arise during the testing phase, consider revisiting the reset process or seeking support from iRobot’s customer service to address any lingering issues.
Conclusion
Congratulations! You’ve successfully navigated the process of resetting your iRobot mop, equipping it to deliver pristine cleaning performance once again. By following the steps outlined in this guide, you’ve taken the necessary measures to restore your iRobot mop to its default settings and prepare it for seamless operation.
As you reset and test your iRobot mop, remember that regular maintenance and care can contribute to its longevity and sustained performance. Keep an eye on its cleaning patterns, address any issues promptly, and maintain a clean and clutter-free environment to optimize its cleaning efficiency.
Should you encounter persistent challenges with your iRobot mop, don’t hesitate to explore additional resources provided by iRobot or seek assistance from their customer support team. With their expertise and guidance, you can overcome any obstacles and continue to enjoy the convenience and effectiveness of your iRobot mop.
Now that your iRobot mop is reset and ready to go, sit back, relax, and revel in the effortless floor cleaning that it offers. With its advanced technology and reliable performance, your iRobot mop is poised to elevate your home maintenance experience, leaving your floors sparkling clean with every pass.
Thank you for entrusting us with the guidance to reset your iRobot mop. Here’s to a future filled with effortless and efficient floor cleaning, courtesy of your rejuvenated iRobot mop!
Frequently Asked Questions about How To Reset IRobot Mop
Was this page helpful?
At Storables.com, we guarantee accurate and reliable information. Our content, validated by Expert Board Contributors, is crafted following stringent Editorial Policies. We're committed to providing you with well-researched, expert-backed insights for all your informational needs.

0 thoughts on “How To Reset IRobot Mop”